
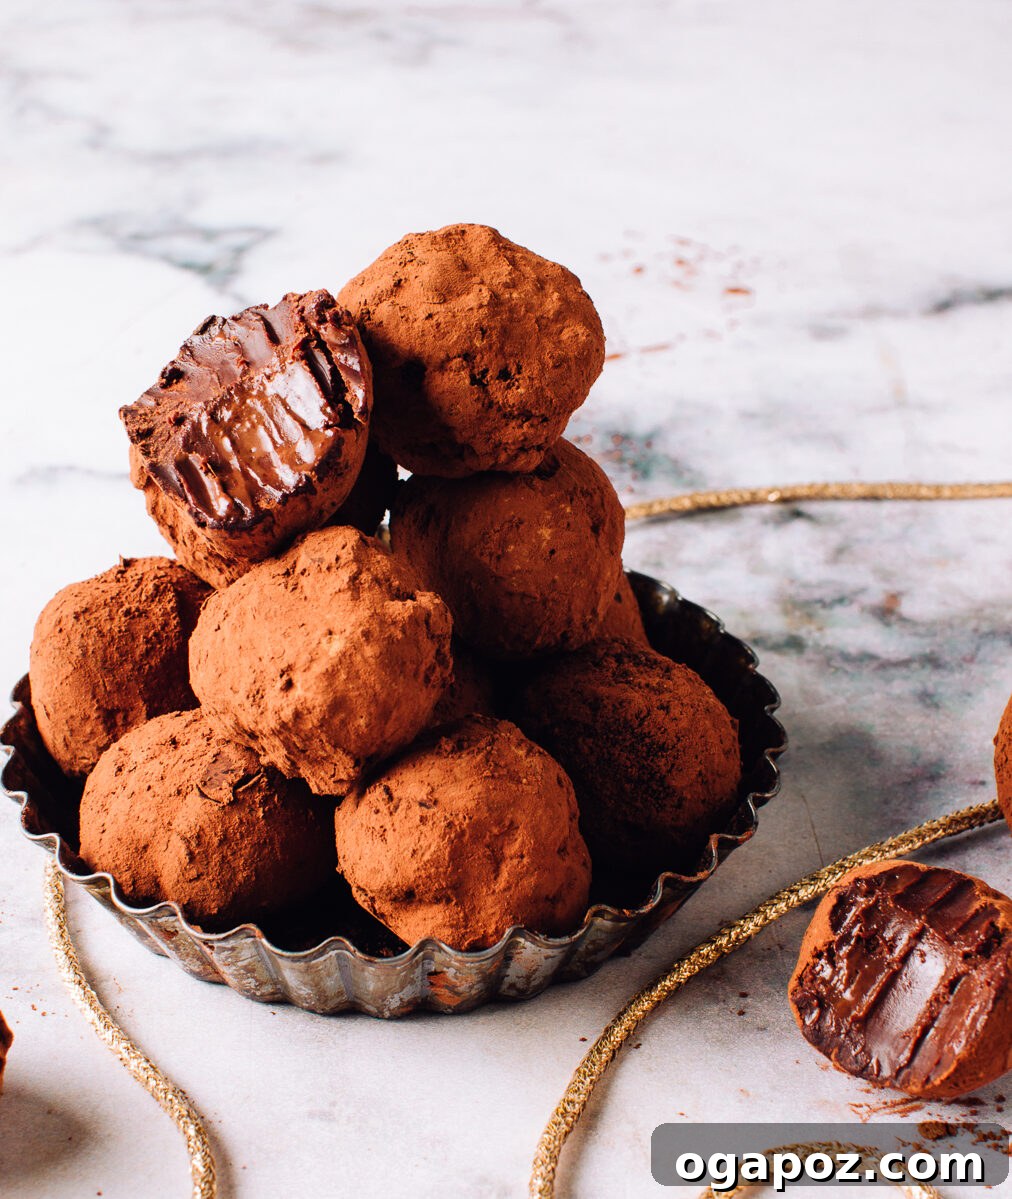
As a Food Scientist, I’ve dedicated my career to understanding the intricacies of taste, texture, and culinary perfection. Today, I’m thrilled to share my absolute BEST Chocolate Truffles Recipe – a remarkably simple yet utterly decadent treat that requires just three core ingredients. Prepare to steal my secrets, master a foolproof method, and create velvety smooth truffles that will impress even the most discerning palates. This guide will walk you through every step, ensuring your homemade truffles are nothing short of spectacular, from their firm exterior to their melty, blissful core.
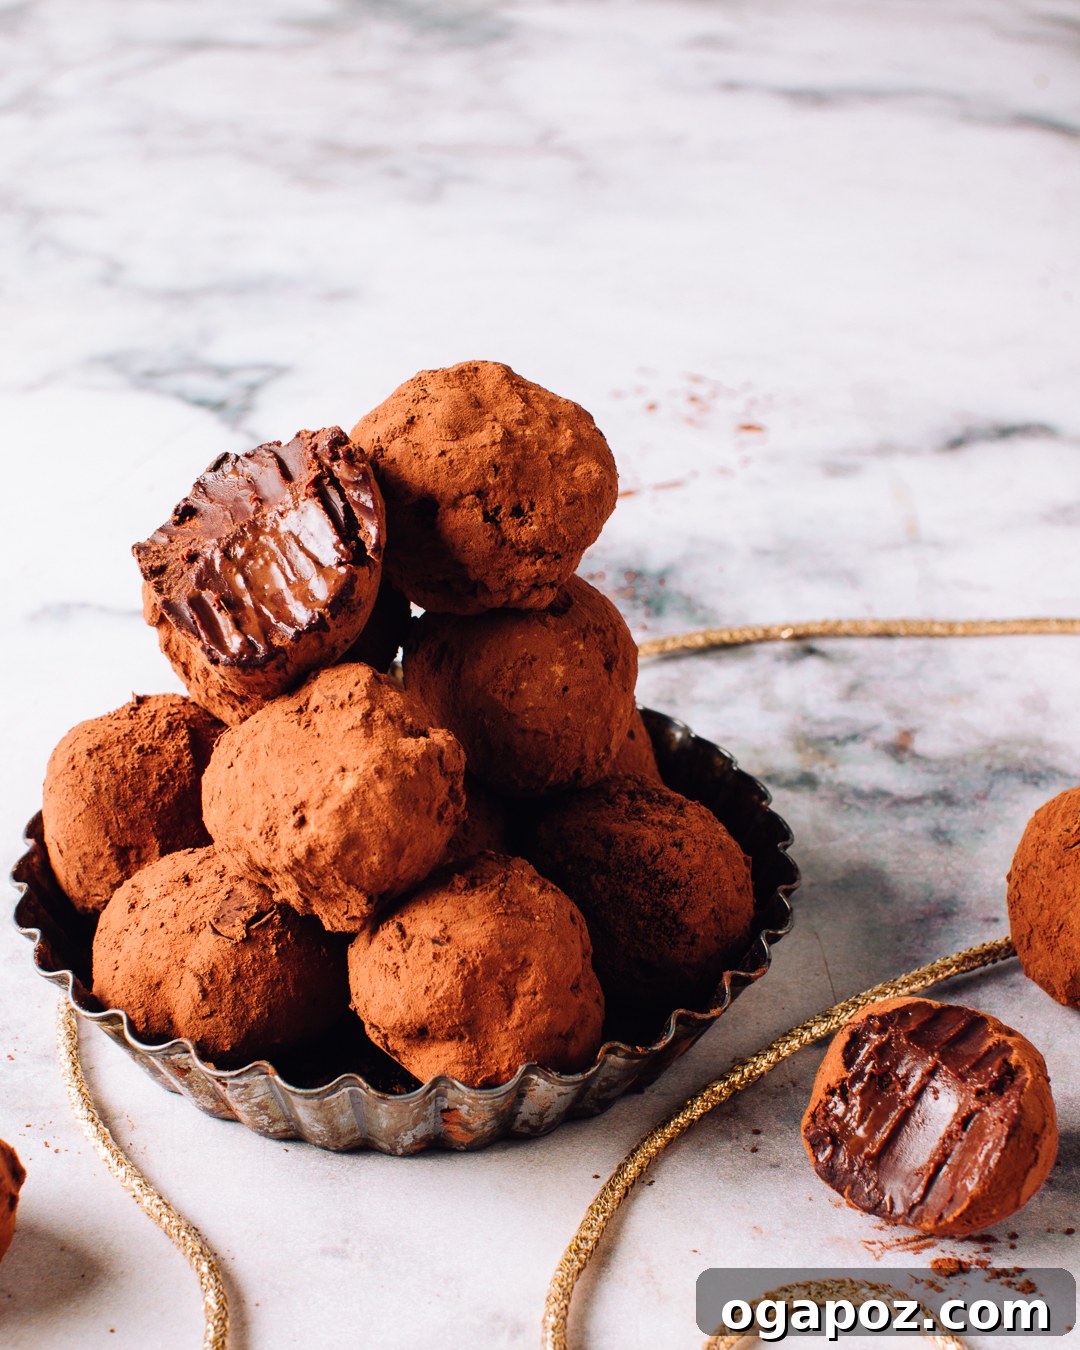
Unlocking the Secret of Perfect Chocolate Truffles: A Food Scientist’s Approach
There’s an undeniable magic to a perfectly crafted chocolate truffle. That initial cool, firm bite giving way to an intensely silky, melt-in-your-mouth experience is pure culinary bliss. My obsession with this easy chocolate truffles recipe stems from its elegant simplicity, delivering gourmet results with minimal effort. But beyond just mixing ingredients, there’s a science to achieving that signature texture and depth of flavor. In this comprehensive guide, I’ll share not only the precise recipe but also invaluable pro tips and common pitfalls to sidestep, ensuring your homemade truffles are consistently flawless.
Many home bakers might shy away from chocolate confectionery, fearing finicky processes. However, truffles, at their core, are quite forgiving when you understand a few key principles. This recipe harnesses the power of high-quality ingredients and gentle technique to create a ganache base that is both stable and incredibly luxurious. Whether you’re a novice or an experienced dessert maker, you’ll find this method surprisingly straightforward, making these elegant treats accessible to everyone. We’ll delve into the role each ingredient plays and the science behind achieving that irresistible texture.
The Foundation: Essential Chocolate Truffle Recipe Ingredients
When your recipe calls for so few ingredients, the quality of each component becomes paramount. Think of it like a symphony where every instrument must be in perfect tune. Choosing premium chocolate, rich cream, and good butter isn’t just a suggestion; it’s the critical step towards achieving groan-worthy, smooth, and creamy truffles that truly shine.
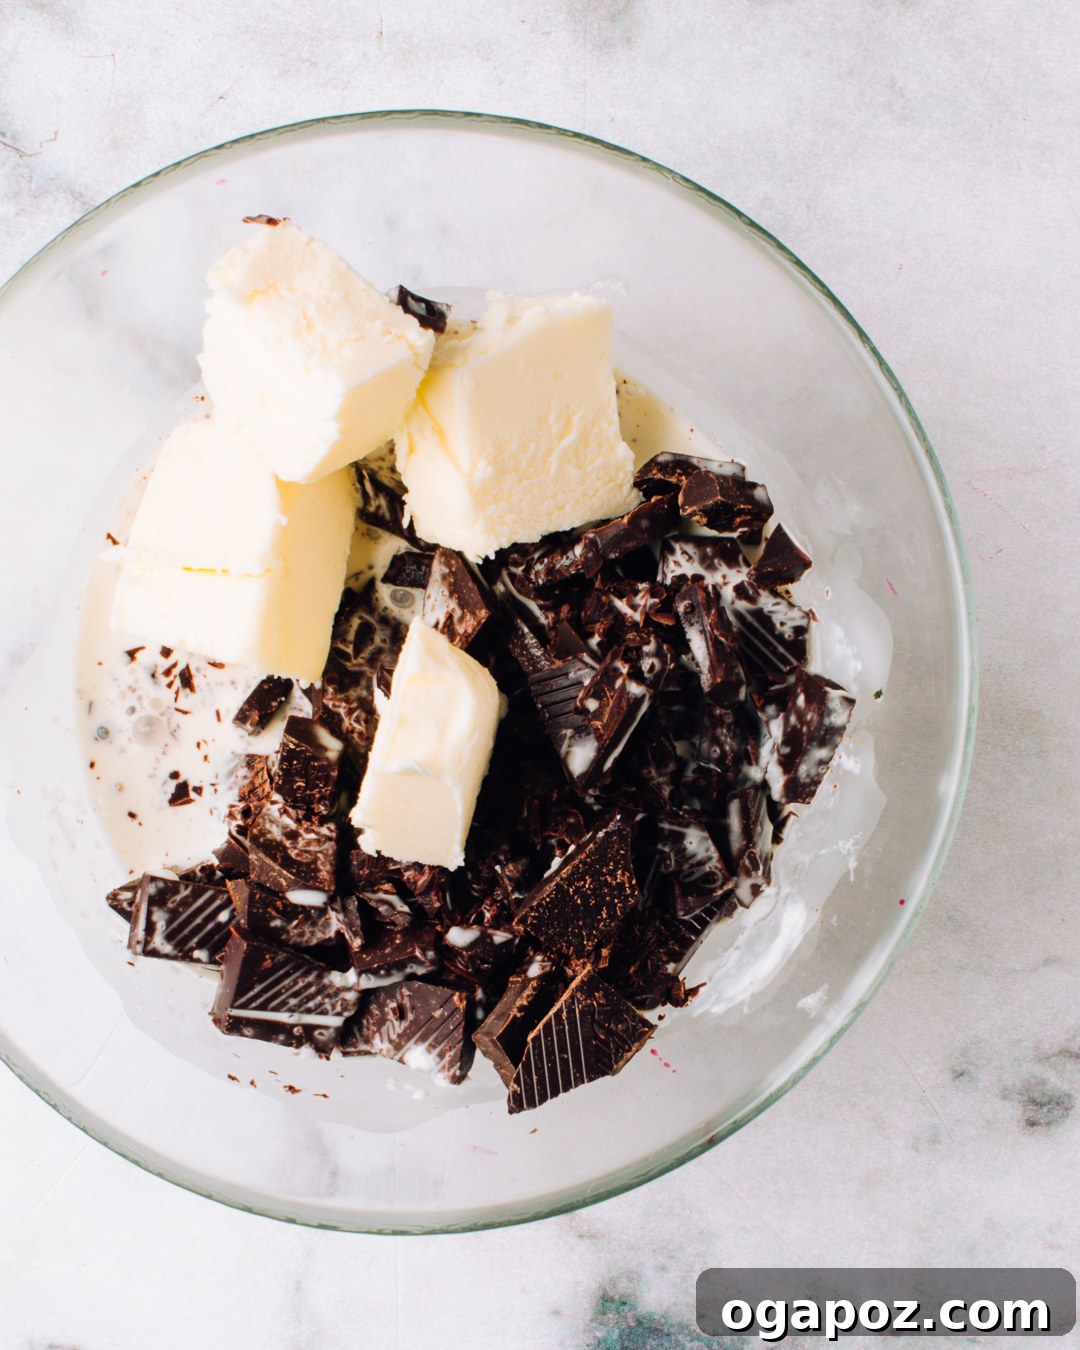
- Premium Chopped Chocolate: This is the star of the show. Invest in really high-quality dark or bittersweet chocolate that you genuinely enjoy eating on its own. Look for chocolate with a cocoa percentage between 60-75% for a balanced flavor profile. Avoid chocolate chips; they contain stabilizers that prevent them from melting smoothly, which is crucial for a silken ganache. Opt for baking bars or couverture chocolate, which are designed for superior melting and texture. The better the chocolate, the richer and more complex your truffles will taste.
- Heavy Cream: Often labeled as heavy whipping cream or 35% milkfat cream. This ingredient provides the lush richness and velvety texture that defines a truffle. The high fat content emulsifies beautifully with the chocolate, creating a stable ganache that sets perfectly. Do not substitute with lighter creams or milk, as they lack the necessary fat for proper texture and structure.
- Unsalted Butter: Absolutely use unsalted butter in your truffle mixture. Butter adds a touch of extra richness and contributes to the smooth, luxurious mouthfeel, helping the ganache achieve its ideal consistency. Using unsalted butter gives you complete control over the flavor profile, especially if you plan to add a pinch of salt later for enhanced chocolate notes.
These three ingredients, when combined correctly, form the magical base known as ganache – the heart and soul of any exquisite chocolate truffle. Understanding their individual roles will empower you to create culinary masterpieces in your own kitchen.
Crafting Culinary Bliss: How to Make The Best Chocolate Truffles
While some chocolate work can be intimidating, making truffles is wonderfully straightforward. The process relies on gentle heat and careful stirring to create a perfectly emulsified ganache. Forget the fear of tempering; this recipe simplifies everything, allowing you to focus on the pure joy of creating these delectable treats.
- Gentle Warming: The process begins by gently bringing the heavy cream and butter to a simmer in a heatproof bowl. You want it hot enough to melt the chocolate but not boiling aggressively.
- Adding Chocolate: Once the cream mixture is warm, add your finely chopped chocolate. The smaller the pieces, the faster and more evenly they will melt.
- The Art of Melting: Stop heating when the chocolate is approximately 80% melted. This might seem counterintuitive, but the residual heat from the cream and bowl, combined with continuous stirring, will finish the melting process beautifully. This gentle approach prevents the chocolate from seizing or burning, which are common pitfalls.
- Emulsification: Simply stirring for a few minutes will melt everything together into a luscious, homogenous ganache. You’ll notice it transform from a slightly grainy mixture to a smooth, glossy, irresistible liquid. This is the magic of emulsification happening before your eyes.
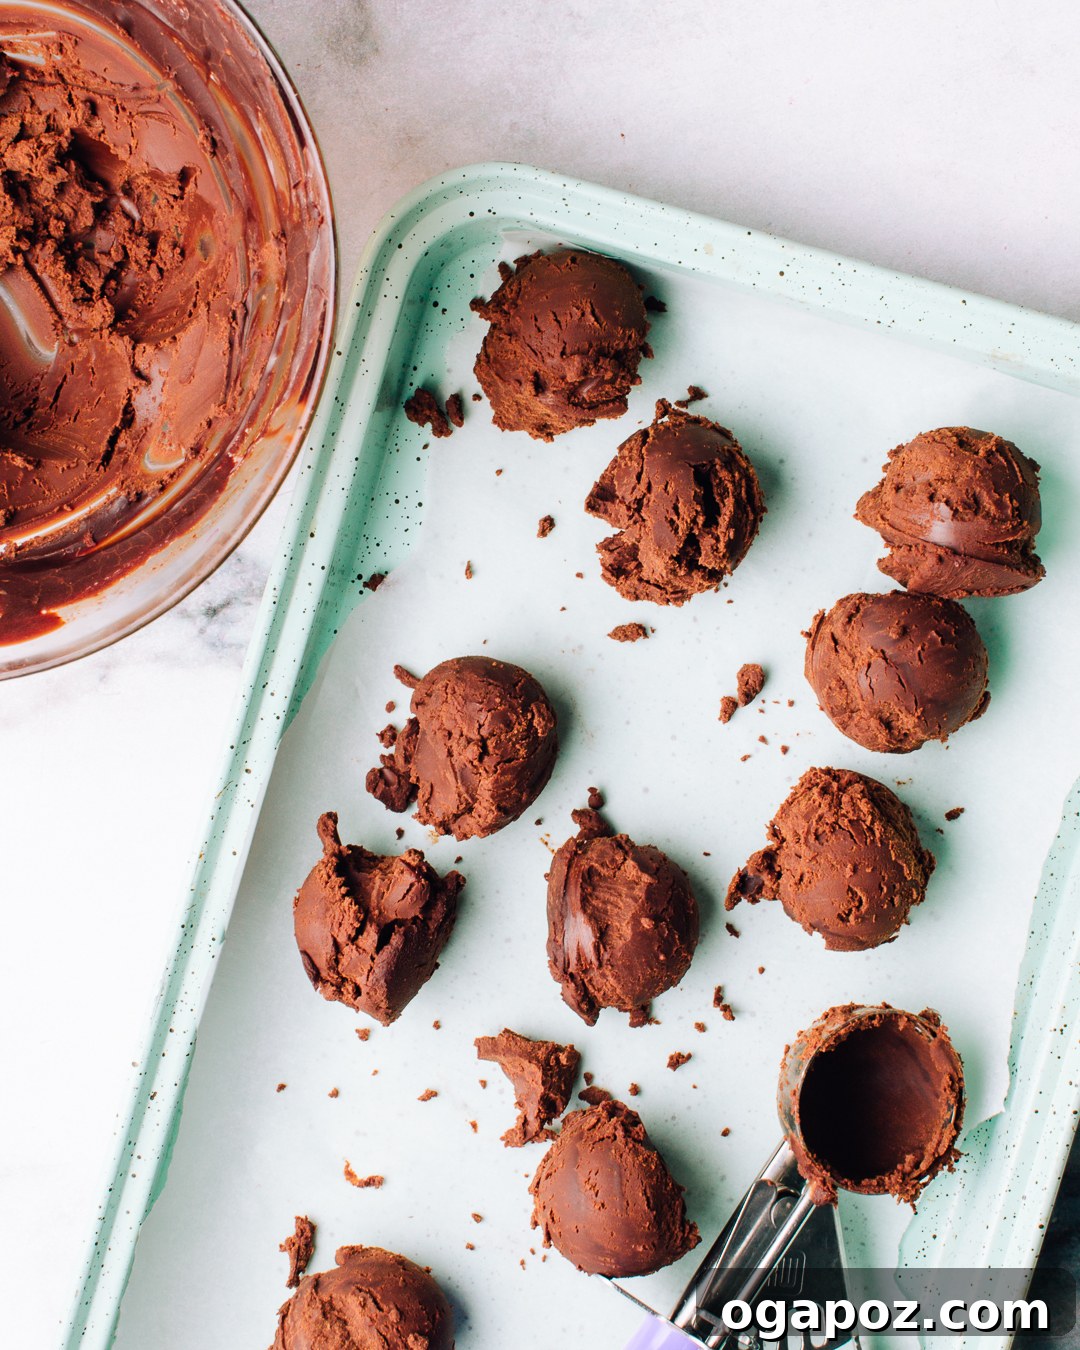
- The Crucial Chill: Once smooth, the ganache needs time to chill and firm up. After a couple of hours in the refrigerator, it will reach the perfect consistency – firm enough to scoop and roll, yet still yielding.
You have two primary methods for the melting stage: a classic double boiler or the convenience of a microwave. For the double boiler, place a heatproof bowl over a saucepan of simmering water, ensuring the bottom of the bowl does not touch the water. Stir constantly. If using a microwave, employ short bursts (30-60 seconds) at 50% power (low heat). Stir thoroughly after each interval. Low heat is paramount to prevent the chocolate from seizing, a common issue where chocolate becomes thick and grainy due to overheating or exposure to moisture.
Patience during the melting and chilling phases is key to achieving that signature smooth, decadent texture. Rushing these steps can lead to suboptimal results, but with a little attention, you’ll master this technique in no time.
Avoiding Pitfalls: 3 Most Common Mistakes when Making a Chocolate Truffles Recipe
Even with a simple recipe, minor missteps can impact the final outcome. As a food scientist, I’ve seen these common errors repeatedly. Understanding and avoiding them will elevate your truffle-making skills from good to exceptional, ensuring every batch is as perfect as the last.
- Overheating the Chocolate: This is perhaps the most frequent mistake. Chocolate is delicate and sensitive to high heat. If it overheats, the cocoa solids can separate from the cocoa butter, leading to a clumpy, grainy, or “seized” texture that is very difficult, if not impossible, to fully recover. To prevent this, always melt chocolate gently. Whether using a double boiler or microwave, remove it from the heat source while small chunks of chocolate still remain. The residual heat will continue to melt these pieces as you stir, resulting in a perfectly smooth, glossy ganache. Slow and steady wins the race when it comes to melting chocolate.
- Skipping the Initial Cooling Step: Once your ganache is beautifully smooth, it needs to cool down gradually. Directly transferring the hot chocolate mixture into the refrigerator or freezer can cause what’s known as “fat bloom” or “sugar bloom” on the surface. This appears as unsightly white streaks or a grayish film. While completely safe to eat and purely an aesthetic issue, it diminishes the visual appeal of your truffles. The rapid temperature change causes the cocoa butter or sugar crystals to migrate to the surface and recrystallize. To avoid this, allow the ganache to cool to room temperature, uncovered, for about an hour before refrigerating. This gradual cooling promotes proper crystallization and a beautiful, unblemished surface.
- Serving Truffles Too Cold: A truffle’s magic lies in its melt-in-your-mouth texture, which is best experienced at the right temperature. Truffles served straight from the fridge or freezer will be too firm, making them hard to bite into and muting their complex flavors. The cocoa butter won’t be soft enough to dissolve quickly on the tongue, and the aromas will be suppressed. For the ideal creamy and smooth texture, let your truffles sit at room temperature for approximately 20-30 minutes before serving. This allows the ganache to soften slightly, releasing its full aroma and ensuring that delightful, velvety collapse on your tongue.
Elevate Your Truffles: Flavor Variations for Homemade Chocolate Truffles
While the classic 3-ingredient chocolate truffle is a masterpiece in itself, the beauty of this recipe lies in its versatility. This is where you can unleash your creativity, transforming a simple ganache base into a dazzling array of unique flavors and textures. Experimenting with different extracts, infusions, and coatings allows you to personalize each batch, making them perfect for gifting or a special indulgence.
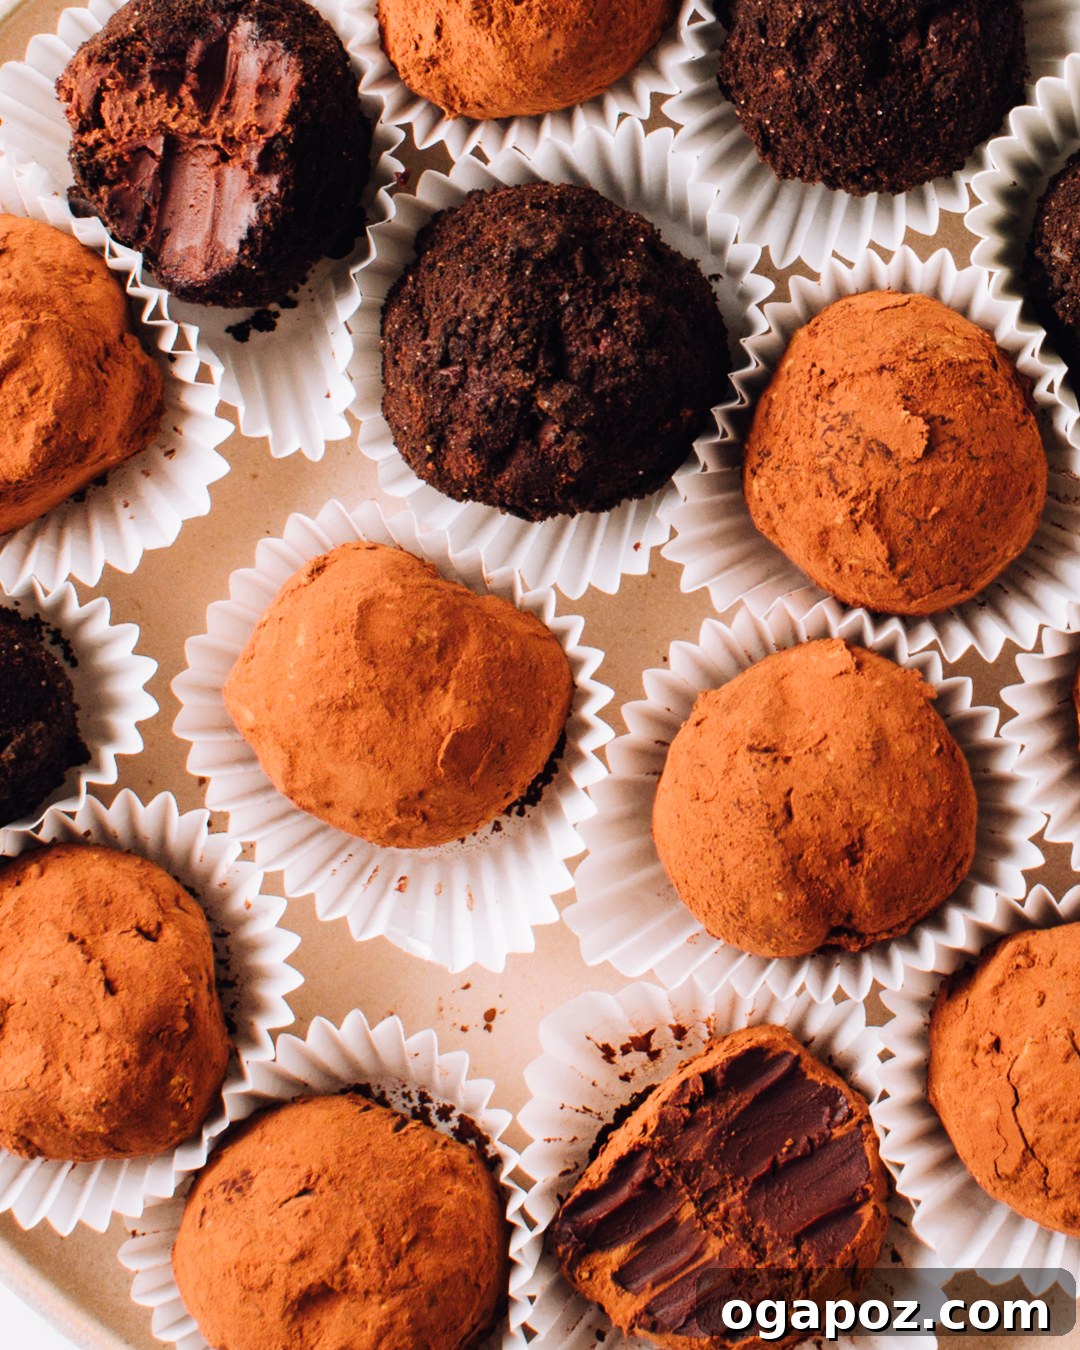
When preparing truffles as gifts, I always like to include a few different textures and flavors to create a delightful assortment.
Classic Add-Ins for the Ganache
Once your ganache is smooth and slightly cooled (but still liquid), stir in these additions:
- Vanilla Elegance: Add 1 teaspoon of pure vanilla extract for a timeless, aromatic boost that complements the chocolate beautifully.
- Nutty Nuance: For a subtle, sophisticated twist, incorporate ¼ teaspoon of almond extract. This pairs wonderfully with dark chocolate.
- Boozy Kick: Introduce a grown-up flair with 1 tablespoon of rum, brandy, Kahlua, or Grand Marnier. Adjust to your taste, adding a little at a time.
- Espresso Boost: A teaspoon of instant espresso powder or coffee liqueur can intensify the chocolate flavor without making it taste distinctly like coffee.
Infuse the Hot Cream for Subtle Depth
For a more delicate, nuanced flavor, infuse your cream before adding it to the chocolate. This technique allows the flavors to meld deeply without overpowering the chocolate:
- Citrus Brightness: Heat your cream with 1 teaspoon of fresh orange zest.
- Cool Mint: Infuse the cream with 10-12 fresh mint leaves.
- Warm Spice: Add 1 teaspoon of chai spices (like cinnamon, cardamom, ginger, cloves) or a star anise pod.
As soon as the cream is steaming hot and fragrant, turn off the heat and let it steep until it reaches room temperature. This allows the flavors to fully develop. Before proceeding with the recipe, pour the cooled, infused cream through a fine-mesh strainer to remove any solid bits. Then, start the recipe from the beginning, using this beautifully flavored cream.
A Spicy Kick
For those who appreciate a gentle warmth, spices can elevate dark chocolate to new heights:
- Subtle Heat: Stir in ⅛ teaspoon of cayenne pepper into the ganache for a barely-there warmth that blossoms on the tongue.
- Cozy Spice: Add ¼ teaspoon of cinnamon powder to the ganache. It’s a classic pairing that brings a comforting, warm spice note.
Irresistible Coating Options
The exterior of your truffles is an opportunity for both visual appeal and textural contrast. Roll your freshly shaped truffles in:
- Classic Cocoa: ½ cup of unsweetened cocoa powder for a sophisticated, slightly bitter finish.
- Nutty Crunch: Finely chopped nuts like pecans, hazelnuts, pistachios, or walnuts add a delightful crunch and earthy flavor. Toast them lightly for enhanced aroma.
- Tropical Touch: Shredded coconut (sweetened or unsweetened) offers a chewy, tropical twist.
- Fun & Festive: Colorful sprinkles or finely crushed candies (like peppermint candies for the holidays) add a playful touch.
- Elegant Shell: For an extra layer of decadence and a professional look, dip your truffles in 1 cup of melted tempered chocolate. Use a fork to submerge each truffle, letting any excess drip off before placing them on a baking sheet lined with parchment paper to set. This creates a glossy, firm shell.
- Powdered Sugar: A dusting of powdered sugar offers a soft, sweet contrast, especially appealing for darker chocolate truffles.
Remember, coatings adhere best when the truffles are just rolled and slightly warm from your hands. Have your chosen coatings ready before you begin shaping.
RELATED: If you love easy holiday recipes like this, you MUST check out my 15+ Delicious No-Bake Christmas Treats. They offer more delightful, stress-free options for festive occasions!
Essential Gear: Tools You Grab Before You Start
Having the right tools at hand makes the truffle-making process smoother and more enjoyable. These aren’t fancy gadgets, but rather simple kitchen essentials that ensure precision and ease.
- Double Boiler or Microwave-Safe Bowl: For the gentle melting of your chocolate and cream into ganache. A double boiler offers precise, indirect heat, while a sturdy microwave-safe bowl with frequent stirring is a faster alternative.
- Heavy-Bottomed Saucepan: (If using a double boiler setup) to hold the simmering water.
- Heatproof Spatula or Whisk: Essential for continuous stirring during the melting process to ensure a smooth, lump-free ganache. A rubber spatula is ideal for scraping down the sides of the bowl.
- Parchment Paper: Crucial for lining baking sheets or your work surface. It prevents the ganache from sticking, makes for easy cleanup, and allows for clean setting of the truffles.
- Small Cookie Scoop (1-inch/2.5cm diameter) or Two Spoons: To portion the truffles evenly and quickly. A scoop ensures consistent size, which is important for even chilling and presentation. If you don’t have a scoop, two spoons can be used to scoop and gently shape the ganache into rough balls before rolling.
- Airtight Container: For proper storage of your finished truffles, ensuring they remain fresh and delicious.
- Gloves (Optional but Recommended): Food-safe gloves can prevent the chocolate from melting too much from the warmth of your hands during rolling and keep your hands clean.
Master the Art: Final Pro Tips for Perfect Chocolate Truffles
Beyond the basic steps, these professional insights will help you achieve truffle perfection every single time. They address the nuances of chocolate work, ensuring your efforts result in truly magnificent treats.
- Melt Gently, Always: As emphasized earlier, overheating chocolate is the enemy of smooth ganache. Remove the mixture from heat when a few small chunks of chocolate remain. Continue stirring off the heat; the residual warmth will melt the rest, preventing seizing and ensuring a perfectly emulsified, glossy texture.
- Patience in Chilling Before Shaping: Resist the urge to rush the cooling process. Refrigerate the ganache until it’s firm enough to handle, but still scoopable – typically 1 to 2 hours. If it’s too soft, it will be messy; if too hard, it will be difficult to form. The ideal consistency is like soft play-doh.
- Work Quickly and Keep Cool: When rolling your truffles, work efficiently. The warmth from your hands can quickly soften the ganache. If the mixture becomes too soft to handle, simply pop it back into the fridge for 10-15 minutes to firm up again. Working in batches can also help.
- Cool Gradually to Prevent Bloom: Do not skip the initial cooling step (allowing the ganache to reach room temperature for about an hour) before refrigerating. This prevents the formation of unsightly white fat or sugar bloom on the surface, ensuring your truffles look as appealing as they taste.
- Serve at Room Temperature for Best Flavor and Texture: For that signature melt-in-your-mouth experience and to allow the full depth of chocolate flavor to emerge, let your truffles sit out at room temperature for 20-30 minutes before serving.
- Use Gloves for Cleanliness and Control: Wearing food-safe gloves while shaping truffles is a game-changer. It keeps your hands clean, prevents excess melting from body heat, and allows for a more controlled shaping process.
- Store Properly: Keep finished truffles in an airtight container in the refrigerator for up to a week, or freeze them for up to three months. Always bring them to room temperature before serving.
- Taste and Adjust: Before chilling the ganache, taste a small spoonful. If desired, you can add a tiny pinch of fine sea salt to enhance the chocolate flavor, or a bit more extract for an intensified aroma.
Explore More: Other Favorite Chocolate Recipes to Try
If your love for chocolate has been reignited by these delightful truffles, then you’re in for a treat! Here are some of my other go-to chocolate recipes that promise indulgence and satisfaction:
- The Most Moist Chocolate Cake You’ll Ever Make
- Best Chewy Chocolate Brownies: Fudgy Perfection
- Easy Chocolate Chip Cookies: A Classic Favorite
- Chocolate Snowball Cookies: Delightfully Powdery and Rich
Easy Chocolate Truffles Recipe (3 Ingredients!)
Jennifer Pallian BSc, RD
These easy chocolate truffles are a dream come true, requiring just 3 simple ingredients. With one bite, their cool, firm exterior gives way to a silky, melty ganache that’s pure bliss. A must-try recipe for chocolate lovers!
15 minutes
5 minutes
20 minutes
24 truffles
Ingredients
- ⅔ cup heavy whipping cream (35% milkfat)
- 4 tbsp unsalted butter
- 8 oz (about 1 ⅓ cups) chopped good quality dark or bittersweet chocolate (60-75% cocoa solids)
- Toppings as desired (about ½ cup crushed candy or nuts, or ⅓ cup unsweetened cocoa powder)
Instructions
-
Add the chopped chocolate, heavy cream, and unsalted butter to a microwave-safe bowl. Microwave on 50% power for 2 minutes. Stir well with a heatproof spatula. Repeat microwaving in 1-minute intervals (or 30-second intervals for smaller microwaves), stirring after each, until the chocolate is about 80% melted. Do not fully melt in the microwave.
-
Remove from the microwave and continue stirring vigorously for several minutes until the chocolate is completely melted and the mixture is smooth and glossy. This forms your ganache. Let the ganache cool uncovered to room temperature for about 1 hour. This crucial step prevents “bloom.” After cooling to room temp, refrigerate the ganache until it’s firm enough to handle and scoop, approximately 1 hour more.
-
Once firm, use a small cookie scoop or two spoons to portion the chocolate mixture by tablespoonfuls. Quickly roll each portion between your palms to form round balls. Don’t worry if they’re not perfectly smooth; a rustic, homemade charm is part of their appeal. Immediately roll the shaped truffles in your desired toppings (cocoa powder, chopped nuts, sprinkles, etc.). The slight warmth from your hands will make the surface sticky enough for toppings to adhere. (Keep a wet cloth nearby for easy hand wiping, as this step can be messy!)
-
Layer the finished truffles between sheets of parchment or waxed paper in an airtight container. Store in the refrigerator for up to one week, or freeze for up to 3 months. Before serving, remember to bring truffles to room temperature (about 20-30 minutes) to enjoy their optimal creamy texture and full flavor.
Notes
- Avoid placing the hot chocolate mixture directly into the fridge or freezer. This can cause a streaky white “bloom” on the surface (harmless but not visually appealing). Always cool to room temperature first.
- For the best taste and texture, serve truffles at room temperature. Place them on a serving plate at least 20-30 minutes before you plan to enjoy them.
- Experiment with flavor variations by adding extracts or infusing the cream before combining with chocolate.
- For a truly elegant presentation, dip truffles in melted tempered chocolate for a smooth, glossy shell.
Nutrition
Nutrition information is an approximation based on the ingredients listed and does not include optional toppings or flavor variations. It should only be used as a guide.
- Calories: 94 kcal
- Carbohydrates: 5g
- Protein: 1g
- Fat: 8g
- Saturated Fat: 5g
- Polyunsaturated Fat: 0.3g
- Monounsaturated Fat: 2g
- Trans Fat: 0.1g
- Cholesterol: 13mg
- Sodium: 3mg
- Potassium: 61mg
- Fiber: 1g
- Sugar: 4g
- Vitamin A: 162 IU
- Vitamin C: 0.04mg
- Calcium: 11mg
- Iron: 1mg
Nutrition information is automatically calculated and should only be used as an approximation.