
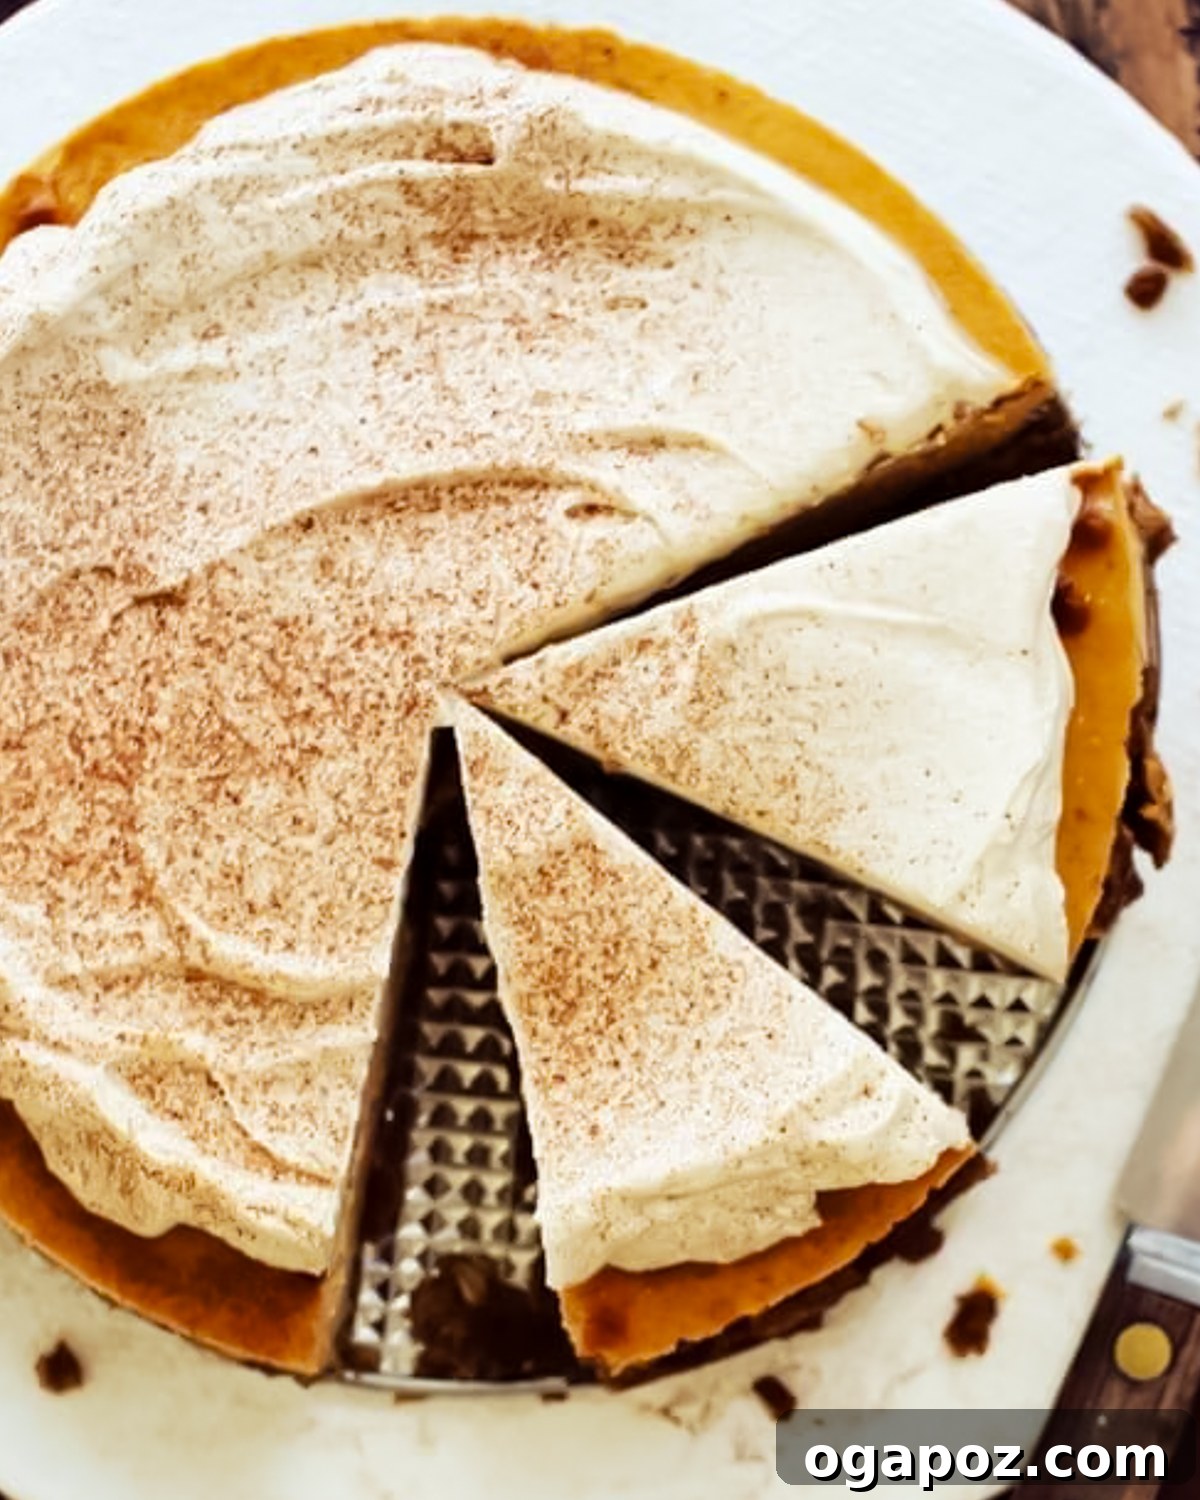
Indulge in the irresistible charm of this creamy Sweet Potato Cheesecake, a truly spectacular dessert that perfectly captures the essence of autumn and holiday cheer. Featuring a rich, smooth sweet potato filling infused with warm, inviting spices and nestled atop a delightfully nutty pecan crust, this cheesecake is surprisingly easy to prepare. Its elegant presentation and profound flavor make it the ultimate showstopper for any festive occasion or a comforting treat on a crisp fall evening.
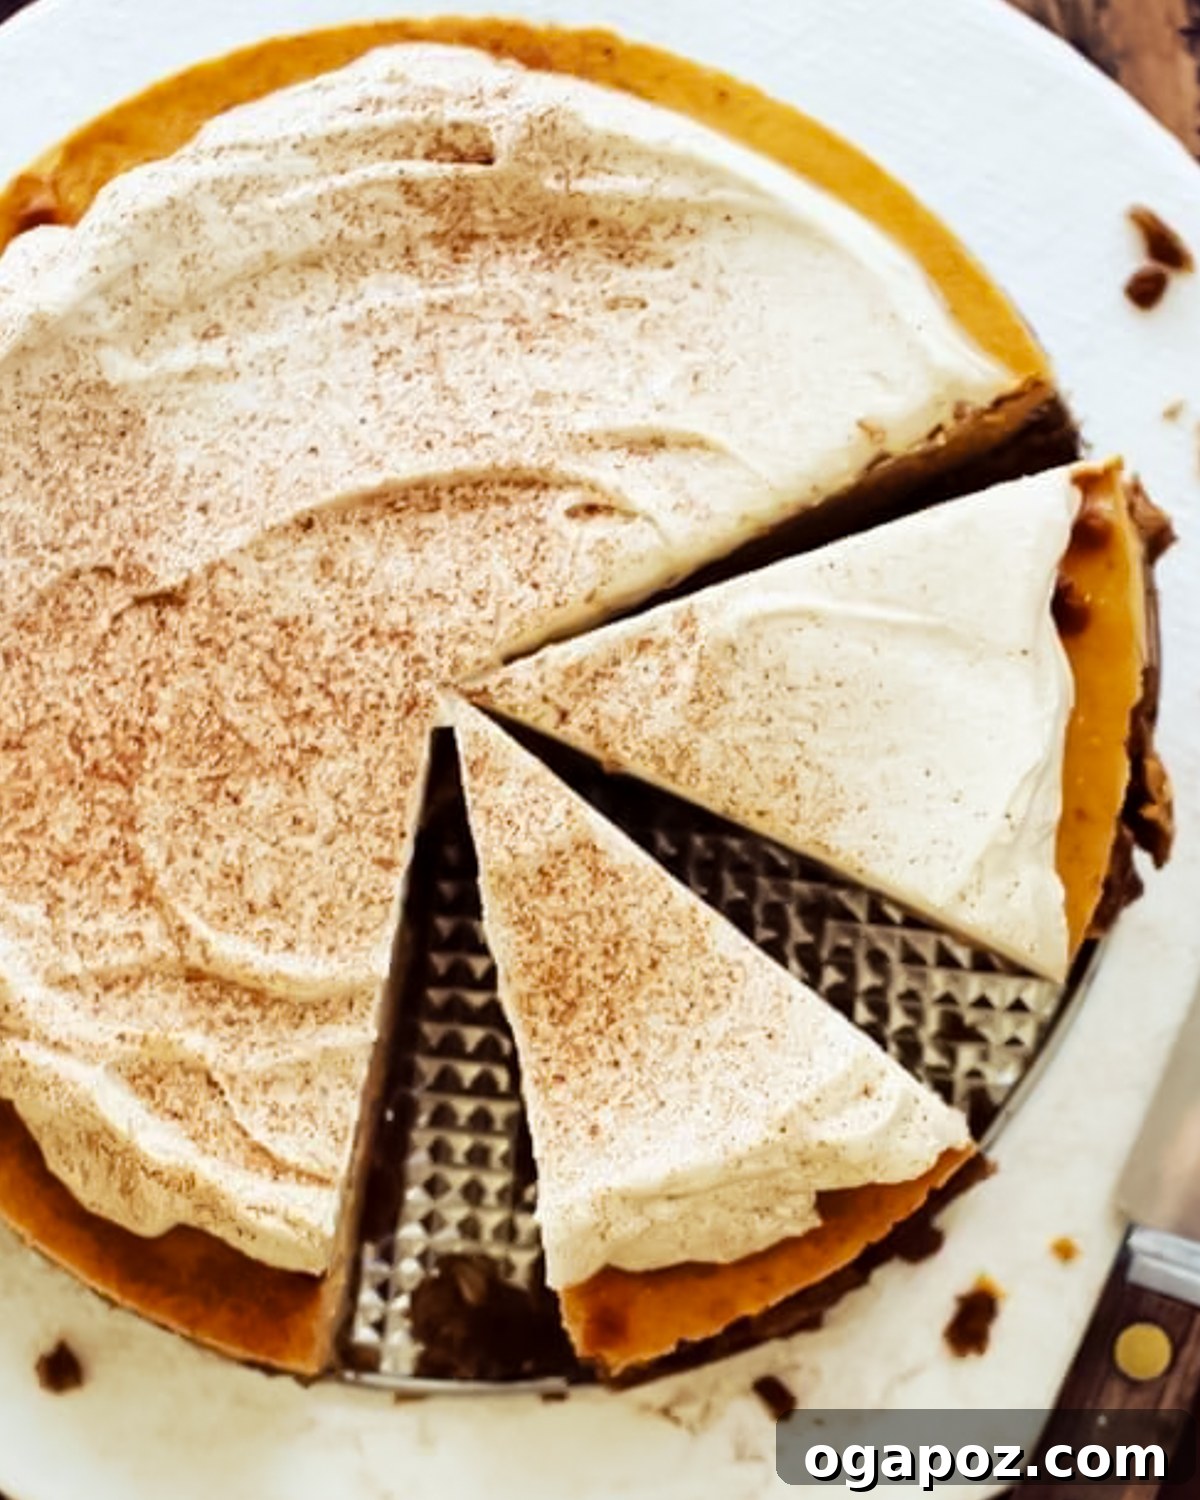
While often compared to pumpkin pie, the sweet potato offers a distinctly mellow, earthy sweetness that transforms into an unparalleled creamy texture within a cheesecake. Its subtle flavor profile provides a deeper, more nuanced taste that beautifully complements the tang of cream cheese and the warm notes of cinnamon, ginger, and cloves, setting it apart as a truly unique and memorable dessert experience. This isn’t just a cheesecake; it’s a celebration of seasonal flavors meticulously crafted for your enjoyment.
Essential Sweet Potato Cheesecake Ingredients
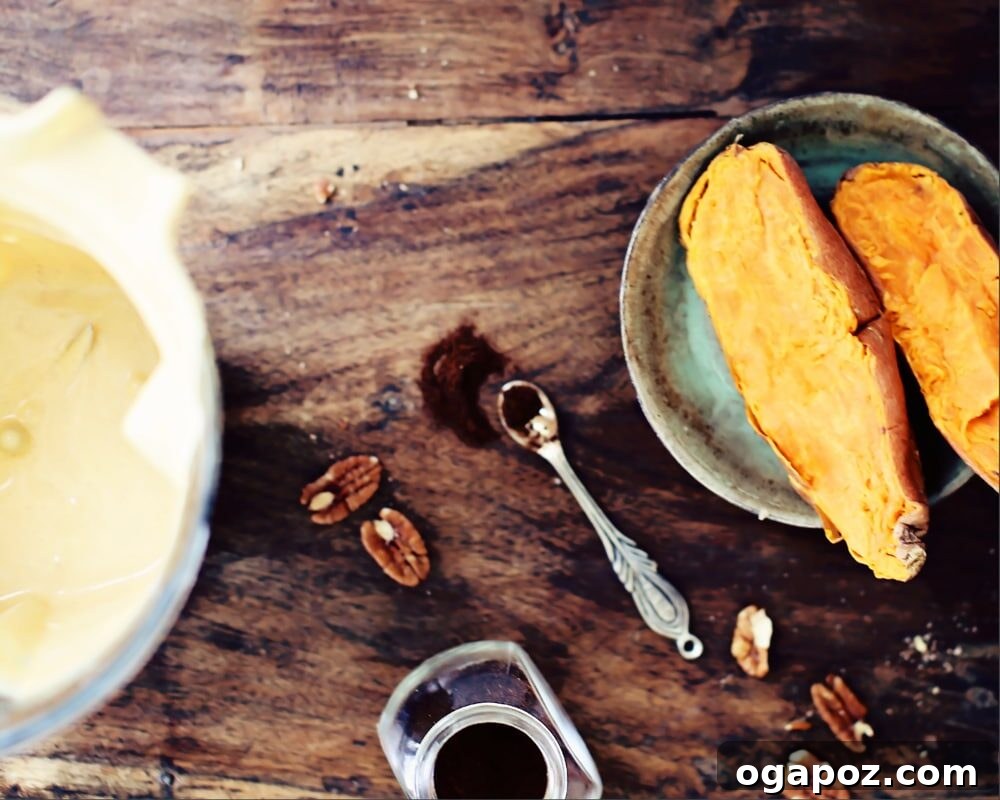
Crafting the perfect Sweet Potato Cheesecake begins with selecting high-quality ingredients. Each component plays a vital role in achieving that rich flavor and dreamy texture. Here’s a detailed look at what you’ll need for each layer of this magnificent dessert:
The Signature Oat Pecan Crust
This buttery, nutty crust, with its hint of cinnamon, offers a delightful departure from traditional graham cracker bases. It provides a robust and flavorful foundation that complements the creamy filling without overpowering it. This versatile crust can also elevate many other cheesecake recipes, though it shines brightest with fall-inspired flavors.
- Pecans: Finely ground, pecans are the star here, infusing the crust with a deep, buttery richness and an irresistible toasted aroma. They contribute significantly to the overall nutty profile.
- Large Flake Oats: These provide essential texture and structure, creating a hearty base that holds up beautifully. For a naturally gluten-free cheesecake, simply opt for certified gluten-free oats.
- Brown Sugar: Not only does brown sugar lend its characteristic sweetness, but its moist texture also helps bind the crust ingredients together, ensuring a firm yet crumbly base.
- All-Purpose Flour: A small amount of flour adds crucial stability to the crust, preventing it from crumbling too easily when sliced.
- Ground Cinnamon: This warm spice is essential for tying the crust’s flavors to the spiced sweet potato filling, enhancing the autumnal theme.
- Salt: A pinch of salt is vital for balancing the sweetness and enhancing the nutty flavors of the pecans and oats.
- Melted Butter: The binding agent that brings everything together, melted butter ensures the crust is rich, holds its shape, and bakes to a perfectly crisp, golden finish.
The Silky Cheesecake Filling
This is where the magic happens – a velvety smooth filling that combines the tang of cream cheese with the earthiness of sweet potato and a medley of spices.
- Sour Cream: A secret weapon for cheesecake, sour cream introduces a delightful tanginess and contributes to a softer, incredibly balanced, and supremely creamy texture. It prevents the cheesecake from being overly rich.
- Large Eggs: Eggs are crucial for structure, acting as a binder that helps the filling set smoothly and firm up during baking. They contribute to the classic rich consistency.
- Cooked Sweet Potato: The star ingredient! Ensure your sweet potato is thoroughly cooked and cooled. For quick preparation, consider using an Instant Pot sweet potato recipe, which yields soft, mashable results in a fraction of the time. Alternatively, roasting whole sweet potatoes at 400ºF (200ºC) until fork-tender concentrates their natural sugars, enhancing their flavor.
- Full-Fat Cream Cheese: This is non-negotiable for an authentic, rich, and dense cheesecake texture. Always use bricks of regular, full-fat cream cheese, preferably at room temperature. Avoid spreadable or whipped varieties, as their higher water content and stabilizers can lead to a less stable and less creamy result. For more insights, refer to our Classic Philadelphia Cheesecake recipe.
- Brown Sugar: Beyond sweetness, brown sugar lends deep caramel notes that beautifully complement the sweet potato and warm spices, giving the cheesecake a richer, more complex flavor than white sugar alone.
- Ground Cinnamon, Cloves, and Ginger: This trio of warm spices creates the iconic flavor profile of fall desserts. Cinnamon provides a comforting warmth, cloves add a pungent, sweet aroma, and ginger contributes a subtle, peppery zing that elevates the sweet potato flavor.
- Pure Vanilla Extract: A splash of vanilla adds depth and a subtle, toasty aroma, harmonizing all the flavors in the filling.
Luscious Brown Sugar Whipped Cream Topping
A light and airy topping that perfectly balances the richness of the cheesecake.
- Cold Whipping Cream: Essential for achieving a light, fluffy, and stable whipped cream. Ensure it’s very cold for optimal whipping.
- Brown Sugar: Instead of white sugar, brown sugar is used to sweeten the whipped cream, adding a delicate caramel flavor that beautifully ties into the cheesecake’s profile.
- Pure Vanilla Extract: Enhances the sweetness and brings all the flavors of the whipped cream together.
- Ground Cinnamon: Optional, but highly recommended for a beautiful dusting that adds an extra layer of warmth and visual appeal just before serving.
You’ll find precise measurements and step-by-step instructions in the comprehensive recipe card further down this page.
Creative Variations and Simple Substitutions
While this sweet potato cheesecake recipe is perfect as written, feel free to get creative with these simple modifications to suit your taste or ingredients on hand:
- Pumpkin Swap: Easily substitute the cooked sweet potato with an equal amount of canned pumpkin puree for a more classic pumpkin cheesecake flavor. The texture will be very similar, offering a familiar taste with a slight difference in earthiness. You might also love our Pumpkin Cheesecake Bars.
- Enhanced Spices: If you prefer a bolder, more aromatic spice profile, consider adding a pinch of ground cardamom or freshly grated nutmeg to the cheesecake filling. These spices pair wonderfully with sweet potato and the existing spice blend.
- Nut-Free Crust Option: For those with nut allergies or simply preferring an alternative, replace the pecans with an additional quantity of large flake oats or finely crushed graham crackers. Adjust the melted butter as needed to achieve the desired crumbly consistency.
- Decadent Marshmallow Topping: For an extra layer of sweetness and a fun textural contrast, swap the whipped cream for a fluffy marshmallow frosting. You can find an excellent recipe in our Sweet Potato Cupcakes with Marshmallow Frosting. For an impressive finish, lightly torch the marshmallow topping with a kitchen torch just before serving to create a beautiful caramelized crust.
Essential Tools for Cheesecake Success
Having the right kitchen tools can significantly streamline the cheesecake-making process and ensure a perfectly baked, beautifully presented dessert. These items are highly recommended for the best results:
- Blender or Food Processor: Indispensable for creating both the perfectly crumbly crust and the incredibly smooth, silky cheesecake filling. A blender ensures no lumps, giving your cheesecake that professional, velvety texture.
- 9-Inch Springform Pan: This specialized pan is crucial for easy unmolding. Its removable sides allow you to effortlessly release the delicate cheesecake without damaging its pristine edges, ensuring a flawless presentation.
- Large Roasting or Baking Dish: Used for the water bath, this larger dish accommodates your springform pan and helps create a moist baking environment, preventing cracks and ensuring even cooking.
- Kettle (or Saucepan): For quickly heating water to a boil, which is then added to the larger baking dish for the water bath. Efficiency is key when dealing with hot water for baking.
- Fine Mesh Sieve: Perfect for dusting the finished cheesecake with a delicate, even layer of cinnamon or cocoa powder, adding a touch of elegance and enhancing the aroma.
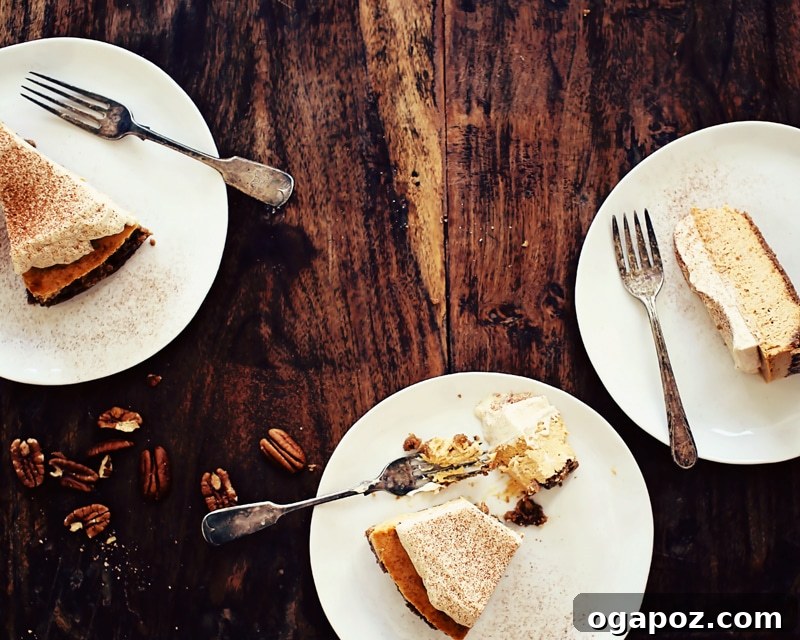
How to Make Sweet Potato Cheesecake: An Easy Step-by-Step Guide
Creating this spectacular sweet potato cheesecake is simpler than you might imagine, especially with the help of a blender for an unbelievably smooth filling. The secret to its crack-free, evenly baked perfection lies in the water bath, a step that is well worth the minimal extra effort. Follow these clear instructions for a truly remarkable dessert.
1. Prepare and Bake the Crust
Begin by preheating your oven to 350ºF (175ºC). In your blender or food processor, combine the pecans, large flake oats, brown sugar, all-purpose flour, ground cinnamon, and salt. Pulse the mixture for about 5 seconds until the ingredients are finely ground and resemble coarse crumbs. Next, with the blender running (or pulsing), slowly pour in the melted butter through the lid opening and pulse a few more times until the mixture just comes together and is evenly moistened. Transfer this crumb mixture to a 9-inch springform pan, pressing it firmly and evenly into the bottom and about 1 inch up the sides. Bake the crust for 12 minutes, just until it’s lightly set and fragrant. Remove from the oven and place the pan on a wire rack to cool completely while you prepare the filling. This creates a sturdy, flavorful base.
2. Blend the Velvety Filling
This step is incredibly straightforward, thanks to the blender! In the container of your blender or food processor, combine the sour cream, large eggs, cooled cooked sweet potato, room temperature cream cheese, brown sugar, ground cinnamon, pure vanilla extract, ground ginger, and ground cloves. Secure the lid and blend on high for about 10-15 seconds, or until the mixture is perfectly smooth and lump-free. It’s crucial not to overmix, as incorporating too much air can lead to cracks during baking. Briefly pause to scrape down the sides of the container with a spatula if needed, ensuring all ingredients are fully incorporated and the filling achieves a silky, uniform texture.
3. Bake with a Water Bath for Perfection
To prevent your cheesecake from cracking and to ensure it bakes evenly with a super creamy texture, a water bath is essential. Position your springform pan (with the cooled crust and filling) inside a larger roasting or baking dish. Carefully pour the blended cheesecake filling into the prepared crust. Meanwhile, bring about two quarts of water to a boil in a kettle or on the stovetop. Once boiling, carefully pour the hot water into the larger outer baking dish, ensuring it reaches approximately 1 inch up the sides of the springform pan. This creates a moist, gentle baking environment. Carefully transfer the baking dish with the cheesecake and water bath to your preheated oven. Bake for 50-60 minutes. The cheesecake is done when the edges are set and appear slightly firm, but the very center still has a slight, delicate wobble when gently shaken. It will continue to set as it cools.
4. Chill Completely for Clean Slices
Once baked, carefully remove the springform pan from the water bath (discarding the hot water) and place it on a wire rack to cool at room temperature for at least 1 hour. This slow cooling helps prevent cracks. After an hour, transfer the cheesecake, still in its pan, to the refrigerator to chill completely for a minimum of 4 hours, or ideally, overnight. This prolonged chilling period is absolutely vital for the cheesecake to fully set, allowing for perfectly clean and beautiful slices. Before serving, run a thin, sharp knife around the inside edge of the springform pan to gently release the cheesecake, then carefully remove the pan sides.
5. Prepare the Brown Sugar Whipped Cream Topping
Just before you are ready to serve, prepare the luscious whipped cream topping. In a large mixing bowl (or using your blender, being extra cautious not to over-process), combine the very cold whipping cream, packed brown sugar, and pure vanilla extract. Whip with an electric mixer on medium-high speed (or blend on high for about 8 seconds in a blender) until soft, fluffy peaks form. Be diligent not to over-whip, which can turn it grainy. Generously spread or pipe the brown sugar whipped cream over the completely cooled and chilled cheesecake. For a final flourish, and if desired, use a fine-mesh sieve to dust a light layer of ground cinnamon over the top, enhancing its seasonal appeal.
5 Common Mistakes to Avoid When Making Sweet Potato Cheesecake
Achieving a perfect, crack-free, and sumptuously creamy cheesecake is entirely within reach. By being aware of these common pitfalls, you can confidently create a flawless dessert every time:
- Overblending the Filling: This is one of the most frequent causes of cheesecake cracks. Excessive blending incorporates too much air into the batter, which expands during baking and then collapses as it cools, leading to unsightly cracks. Blend just until the ingredients are smooth and combined, then stop.
- Skipping the Water Bath: While it might seem like an extra step, the water bath is a crucial component for success. It provides a moist, even heat environment, preventing the edges from baking too quickly and cracking, and ensuring a consistently creamy texture throughout. Don’t skip it!
- Using Hot Sweet Potato: Adding warm or hot sweet potato puree to your cream cheese mixture can cause the cream cheese to soften excessively and potentially curdle, leading to a lumpy or uneven filling. Always ensure your cooked sweet potato is completely cooled to room temperature (or even slightly chilled) before blending.
- Baking Until Completely Firm: An overbaked cheesecake will be dry, crumbly, and prone to cracking. The center of your cheesecake should still have a slight, delicate jiggle or wobble when gently nudged. It will continue to set as it cools in the residual heat. For absolute precision, aim for an internal temperature of 145ºF (63ºC).
- Not Chilling Long Enough: Impatience is the enemy of a perfectly sliced cheesecake. Attempting to slice the cheesecake before it has fully chilled will result in a messy, uneven presentation. Plan for several hours, ideally overnight, of refrigeration to allow the cheesecake to firm up completely for clean, elegant slices.
Make Ahead and Storage Solutions
One of the many advantages of cheesecake is its make-ahead potential, making it an ideal dessert for busy holiday seasons or entertaining. Proper storage ensures your cheesecake remains fresh and delicious.
Storing Leftovers
- Refrigerator: To maintain its optimal texture and flavor, keep the sweet potato cheesecake covered tightly with plastic wrap or in an airtight container in the refrigerator for up to four days.
- Topping Note: For the best aesthetic and texture, it’s always recommended to add fresh whipped cream (or any other delicate topping) just before serving each slice. If the entire cheesecake is topped, the whipped cream may deflate slightly over time.
Freezing for Extended Enjoyment
- Freeze Slices or Whole Cheesecake: This cheesecake freezes beautifully! For best results, freeze individual slices (without the whipped cream topping) by wrapping each tightly in plastic wrap, then in aluminum foil. Alternatively, wrap the entire cooled cheesecake (again, without topping) in several layers of plastic wrap and then foil. It can be stored in the freezer for up to two months.
- Thawing: For the smoothest and creamiest texture, thaw frozen cheesecake slices or a whole cheesecake overnight in the refrigerator. Avoid thawing at room temperature, which can affect the consistency. Add fresh whipped cream or desired garnishes once thawed.
Reheating Sweet Potato Cheesecake?
- No Reheating Needed: Cheesecakes, including this sweet potato version, are traditionally and best served cold directly from the refrigerator. Reheating is not recommended as it can alter the delicate texture and cause it to separate.
- Warm Topping Option: If you enjoy a contrasting temperature, consider serving individual slices with a warm drizzle of caramel sauce or maple syrup. This creates a delightful balance of warm and cold, similar to our Caramel Apple Cheesecake.
How to Serve This Sweet Potato Cheesecake Recipe
Once your sweet potato cheesecake has achieved its perfect chill, it’s ready for its grand debut! The classic way to serve this delightful dessert is crowned with a generous cloud of fluffy brown sugar whipped cream. The airy texture and subtle caramel notes of the topping provide a beautiful contrast to the dense, rich cheesecake filling.
To truly highlight those inviting warm, fall flavors, finish each slice or the entire cheesecake with a delicate dusting of ground cinnamon using a fine-mesh sieve. This simple garnish not only adds a touch of elegance but also enhances the aromatic spices within the cheesecake, much like the finishing touch on our beloved Pumpkin Dump Cake recipe. For an extra festive touch, you could also sprinkle a few candied pecans or a light drizzle of maple syrup.
Unlock the Best Sweet Potato Cheesecake: Final Notes & Expert Secrets
Elevate your sweet potato cheesecake from simply good to absolutely unforgettable with these essential tips and secrets from experienced bakers. Mastering these details will ensure a stunning and delicious outcome every single time.
- Start with Room Temperature Cream Cheese: This is a golden rule for any cheesecake. Cold cream cheese will result in a lumpy batter, no matter how much you blend. Allow your cream cheese to sit at room temperature for at least 30-60 minutes before mixing to achieve an effortlessly smooth and homogenous filling.
- Cool the Sweet Potato Completely: As mentioned, adding warm sweet potato can negatively impact the cream cheese texture. Plan ahead and ensure your cooked sweet potato puree is thoroughly cooled before incorporating it into the blender with the other filling ingredients.
- The Water Bath is Non-Negotiable: Do not be tempted to skip this step! The water bath is your best friend for preventing cracks, ensuring an incredibly creamy, custardy texture, and promoting even baking. It’s a small effort for a significant reward.
- Chill Overnight for Impeccable Slices: While 4 hours of chilling is the minimum, an overnight stay in the refrigerator allows the cheesecake to fully set and firm up. This patience will be rewarded with perfectly clean, precise slices that hold their shape beautifully, impressing your guests and making serving a breeze.
- Add Whipped Cream Just Before Serving: To keep your brown sugar whipped cream topping light, airy, and pillowy, always add it at the last possible moment. Whipped cream tends to deflate over time, especially when refrigerated, so fresh application ensures the best visual and textural appeal.
Frequently Asked Questions About Sweet Potato Cheesecake
Can I use pumpkin instead of sweet potato?
Absolutely! You can easily substitute the cooked sweet potato with an equal amount of pumpkin puree. This swap will yield a cheesecake with a very similar creamy texture, but with the distinct, slightly brighter flavor profile of pumpkin, bringing it closer to a traditional pumpkin pie cheesecake. It’s a fantastic alternative if you have pumpkin on hand or simply prefer that classic fall taste.
Why did my cheesecake crack?
Cheesecake cracks are typically caused by one of two main issues: overmixing the filling or skipping the water bath. Overmixing incorporates too much air into the batter, which expands during baking and then contracts too rapidly as it cools. The water bath provides a moist, gentle baking environment, ensuring the cheesecake bakes slowly and evenly. Additionally, rapid temperature changes (e.g., removing the cheesecake directly from a hot oven into a cold room) can also contribute to cracking. Always cool your cheesecake gradually.
Do I have to use a water bath?
While technically you *can* bake cheesecake without a water bath, it is highly recommended for optimal results. A water bath creates a steamy, humid environment in the oven, which helps the cheesecake bake slowly and evenly, preventing it from drying out, cracking, and achieving that signature smooth, creamy texture. If you skip it, your cheesecake will likely have a firmer texture and a higher chance of developing cracks on the surface.
Can I freeze sweet potato cheesecake?
Yes, sweet potato cheesecake freezes exceptionally well! For best results, freeze it *before* adding the whipped cream topping. You can freeze the entire cheesecake or individual slices. Wrap the cheesecake tightly in several layers of plastic wrap, followed by a layer of aluminum foil, to prevent freezer burn. It can be stored in the freezer for up to two months. To thaw, simply transfer it to the refrigerator overnight. Add fresh whipped cream just before serving for the best possible texture and appearance.
How do I know when my cheesecake is done?
The key to a perfectly baked cheesecake is to remove it from the oven when it’s just set. The edges should appear firm and slightly puffed, while the very center (about a 2-3 inch circle) should still have a slight jiggle or wobble when the pan is gently nudged. It will continue to cook and set as it cools. For absolute precision, use an instant-read thermometer: the cheesecake is done when its internal temperature reaches 145ºF (63ºC) in the center. Avoid baking until it’s completely firm, as this will result in a dry, cracked cheesecake. Remember, extended chilling time in the fridge helps it firm up completely for easy slicing.
Can I make this without a blender?
While a blender or food processor is recommended for achieving the smoothest, silkiest filling and a perfectly uniform crust, you can certainly make this cheesecake using a handheld electric mixer or a stand mixer. For the crust, you’ll need to finely chop the pecans and ensure all ingredients are well combined. For the filling, beat the cream cheese until very smooth before adding other ingredients, and mix just until everything is incorporated, avoiding over-whipping that can introduce too much air. The texture might be slightly less uniform than with a blender, but it will still be delicious.
What type of cream cheese works best?
For the best possible sweet potato cheesecake, always opt for full-fat, block-style cream cheese. Reduced-fat varieties contain more water and stabilizers, which can lead to a less rich, softer, or less stable filling that may also be prone to cracking. Avoid spreadable or whipped cream cheese tubs entirely, as their consistency and additional ingredients are not suitable for baking cheesecakes.
Can I add extra spices?
Yes, if you desire a stronger, more complex spice flavor, you can certainly increase the amount of cinnamon slightly or add additional warm spices such as ground nutmeg or cardamom. Start with small additions, perhaps an extra 1/4 teaspoon of cinnamon or 1/8 teaspoon of nutmeg, and adjust to your preference. Be cautious not to overdo it, as too many spices can make the filling taste dense or overpower the delicate sweet potato and cream cheese flavors. It’s always best to taste the raw filling (before adding eggs) if you’re experimenting with spice levels.

Sweet Potato Cheesecake with Pecan Crust
Jennifer Pallian BSc, RD
20
1
4
1
20
16
Ingredients
OAT-PECAN CRUST
- ⅔ cup whole pecans
- ⅓ cup large flake oats
- ⅓ cup brown sugar packed
- ¼ cup all-purpose flour
- ½ tsp. ground cinnamon
- ¼ tsp. salt
- ⅓ cup butter melted
CHEESECAKE FILLING
- ½ cup sour cream
- 3 large eggs
- 1 cup cooked cooled sweet potato puree
- 1 ½ lbs. full-fat cream cheese room temperature
- 1 cup brown sugar packed
- 1 tsp. ground cinnamon
- 1 tsp. pure vanilla extract
- ½ tsp. ground ginger
- ¼ tsp. ground cloves
BROWN SUGAR WHIPPED CREAM
- 2 cups cold whipping cream
- 2 Tbsp. brown sugar packed
- 1 tsp. pure vanilla extract
- cinnamon for dusting (optional)
Instructions
For the Crust:
-
1. Preheat oven to 350ºF (175ºC). In a blender or food processor, combine pecans, oats, brown sugar, flour, cinnamon, and salt. Blend for about 5 seconds until the mixture resembles coarse crumbs. While pulsing, slowly pour in the melted butter through the lid opening and pulse a few more times until the mixture is well combined and moist.
-
2. Transfer the crust mixture to a 9-inch springform pan. Press it evenly and firmly into the bottom and about 1 inch up the sides of the pan. Bake for 12 minutes, then remove and place the pan on a wire rack to cool completely.
For the Cheesecake Filling:
-
1. Combine all cheesecake filling ingredients (sour cream, eggs, cooled sweet potato puree, room temperature cream cheese, brown sugar, cinnamon, vanilla, ginger, and cloves) in the blender or food processor container in the order listed. Secure the lid and blend for 10-15 seconds until the mixture is perfectly smooth. Pause and scrape down the sides as needed to ensure everything is fully incorporated without overmixing.
-
2. Bring two quarts of water to a boil in a kettle or on the stovetop. Position the springform pan (with the cooled crust and filling) inside a larger roasting or baking dish. Carefully pour the cheesecake filling into the crust. Create a water bath by pouring boiling water into the outer baking dish until it reaches approximately 1 inch up the side of the springform pan.
-
3. Carefully transfer the cheesecake in its water bath to the preheated oven. Bake for 50-60 minutes, or until the edges are set and the center still has a slight wobble. Remove the springform pan from the water bath and place it on a wire rack to cool at room temperature for 1 hour. Then, transfer the cheesecake to the refrigerator to cool completely for at least 4 hours, or ideally, overnight. Before serving, run a thin knife around the inside of the pan to release the cake, then carefully remove the pan sides.
MAKE AHEAD: This cheesecake can be prepared 1 day in advance. Cover and keep chilled in the refrigerator. It can also be frozen airtight (without whipped cream) for up to 2 months.
For the Brown Sugar Whipped Cream:
-
1. Just before serving, whip the cold whipping cream, brown sugar, and vanilla extract in a large bowl with an electric mixer until soft peaks form. (If using a blender, blend on high for about 8 seconds, being very careful not to over-process to avoid turning it into butter). Pile the fluffy whipped cream onto the completely cooled cheesecake. If desired, use a fine-mesh sieve to dust a light layer of ground cinnamon over the top for an elegant finish.
Nutrition
Calories:
445
kcal
|
Carbohydrates:
27
g
|
Protein:
7
g
|
Fat:
35
g
|
Saturated Fat:
19
g
|
Polyunsaturated Fat:
2
g
|
Monounsaturated Fat:
10
g
|
Trans Fat:
0.2
g
|
Cholesterol:
128
mg
|
Sodium:
305
mg
|
Potassium:
181
mg
|
Fiber:
1
g
|
Sugar:
23
g
|
Vitamin A:
1228
IU
|
Vitamin C:
2
mg
|
Calcium:
102
mg
|
Iron:
1
mg
Nutrition information is automatically calculated and should be used as an approximation.
Tried this recipe? Share your thoughts in the comments below!