
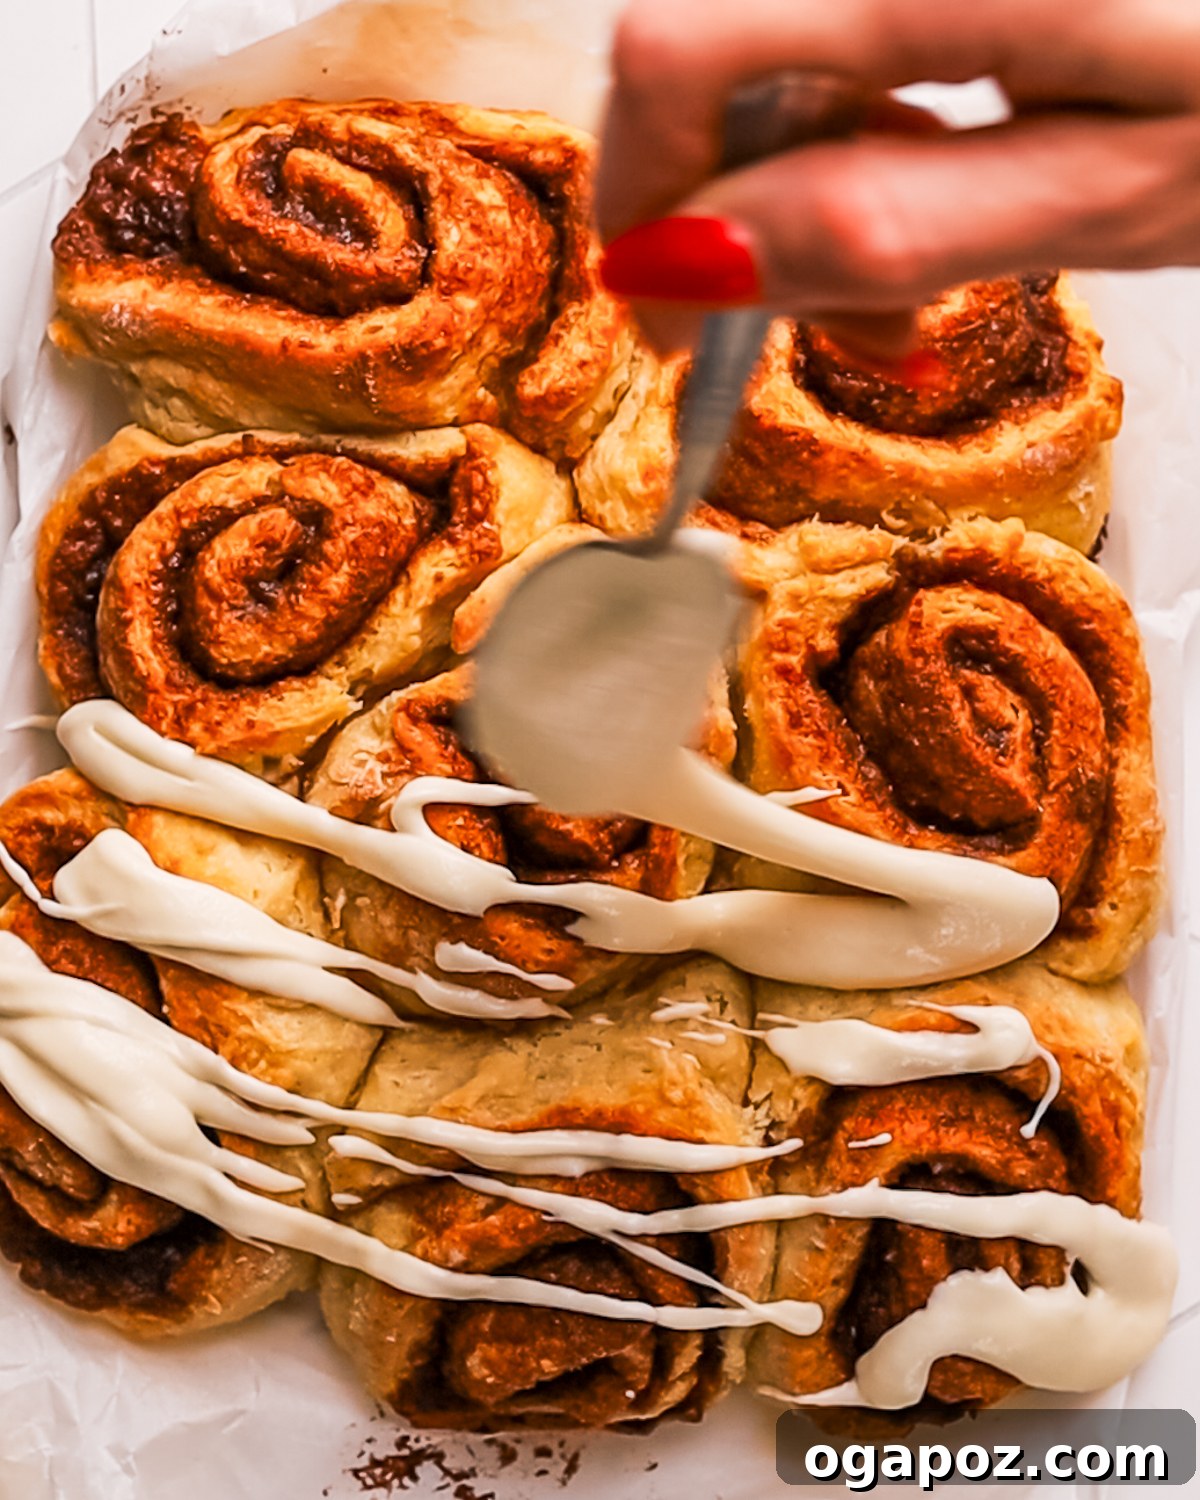
Biscuit cinnamon rolls, also affectionately known as “no yeast cinnamon rolls,” are a baking revelation. Imagine sinking your teeth into a roll that’s wonderfully fluffy, incredibly soft, and boasts delicate, flaky layers, all centered around a luscious, gooey cinnamon-sugar filling. The best part? These irresistible treats come together remarkably fast, demanding no lengthy rise time, making them the ultimate quick and easy shortcut for satisfying your cinnamon roll cravings.
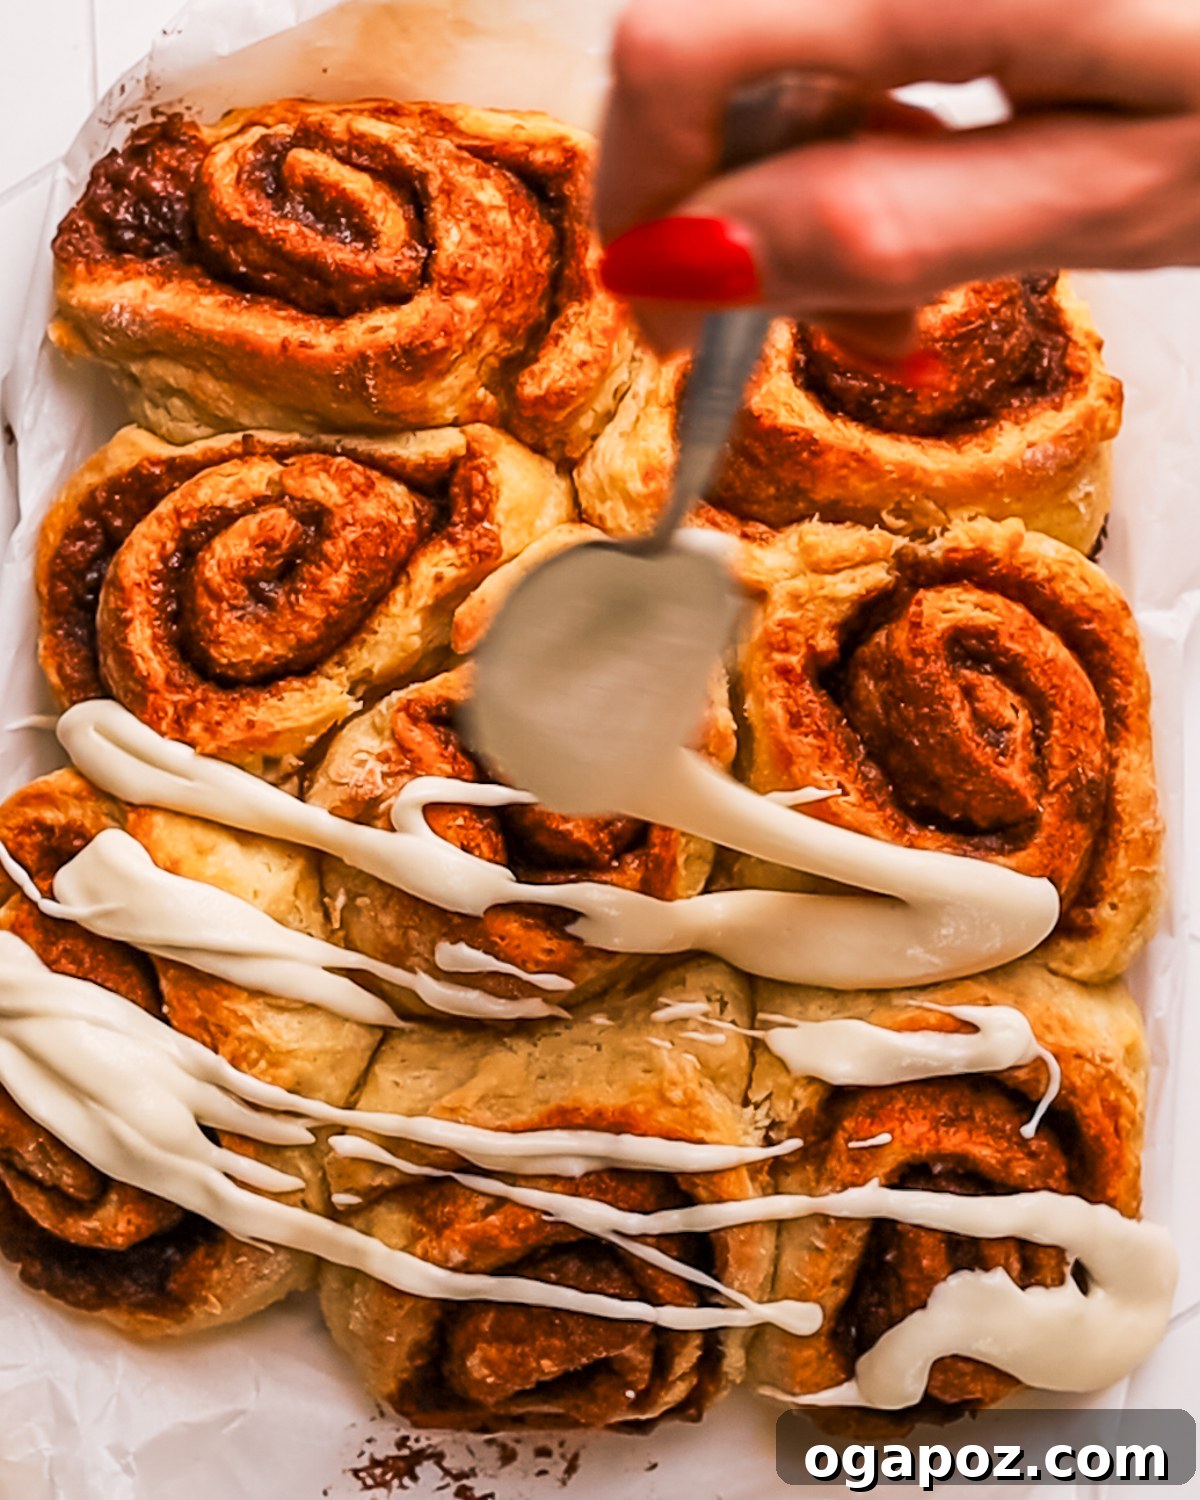
For many, especially on the East Coast where I grew up, Biscuit Cinnamon Rolls topped with a decadent cream cheese icing are a cherished culinary tradition. They evoke memories of cozy weekend mornings and comforting homemade treats.
While I truly adore the slow, patient process of nurturing a yeasted dough for my famously soft cinnamon roll recipe, I can’t deny the sheer brilliance of using biscuit dough for cinnamon rolls. It’s an amazing shortcut that delivers big on flavor and texture without requiring an ounce of patience. If you’re looking for instant gratification in the world of baking, this recipe is your new best friend.
And here’s a little secret: the versatility of biscuit dough extends far beyond sweet treats! We even use biscuit dough for quick pizzas. It’s a fantastic method for saving time in the kitchen and opening up a world of culinary possibilities!
Essential Ingredients for Perfect Biscuit Cinnamon Rolls
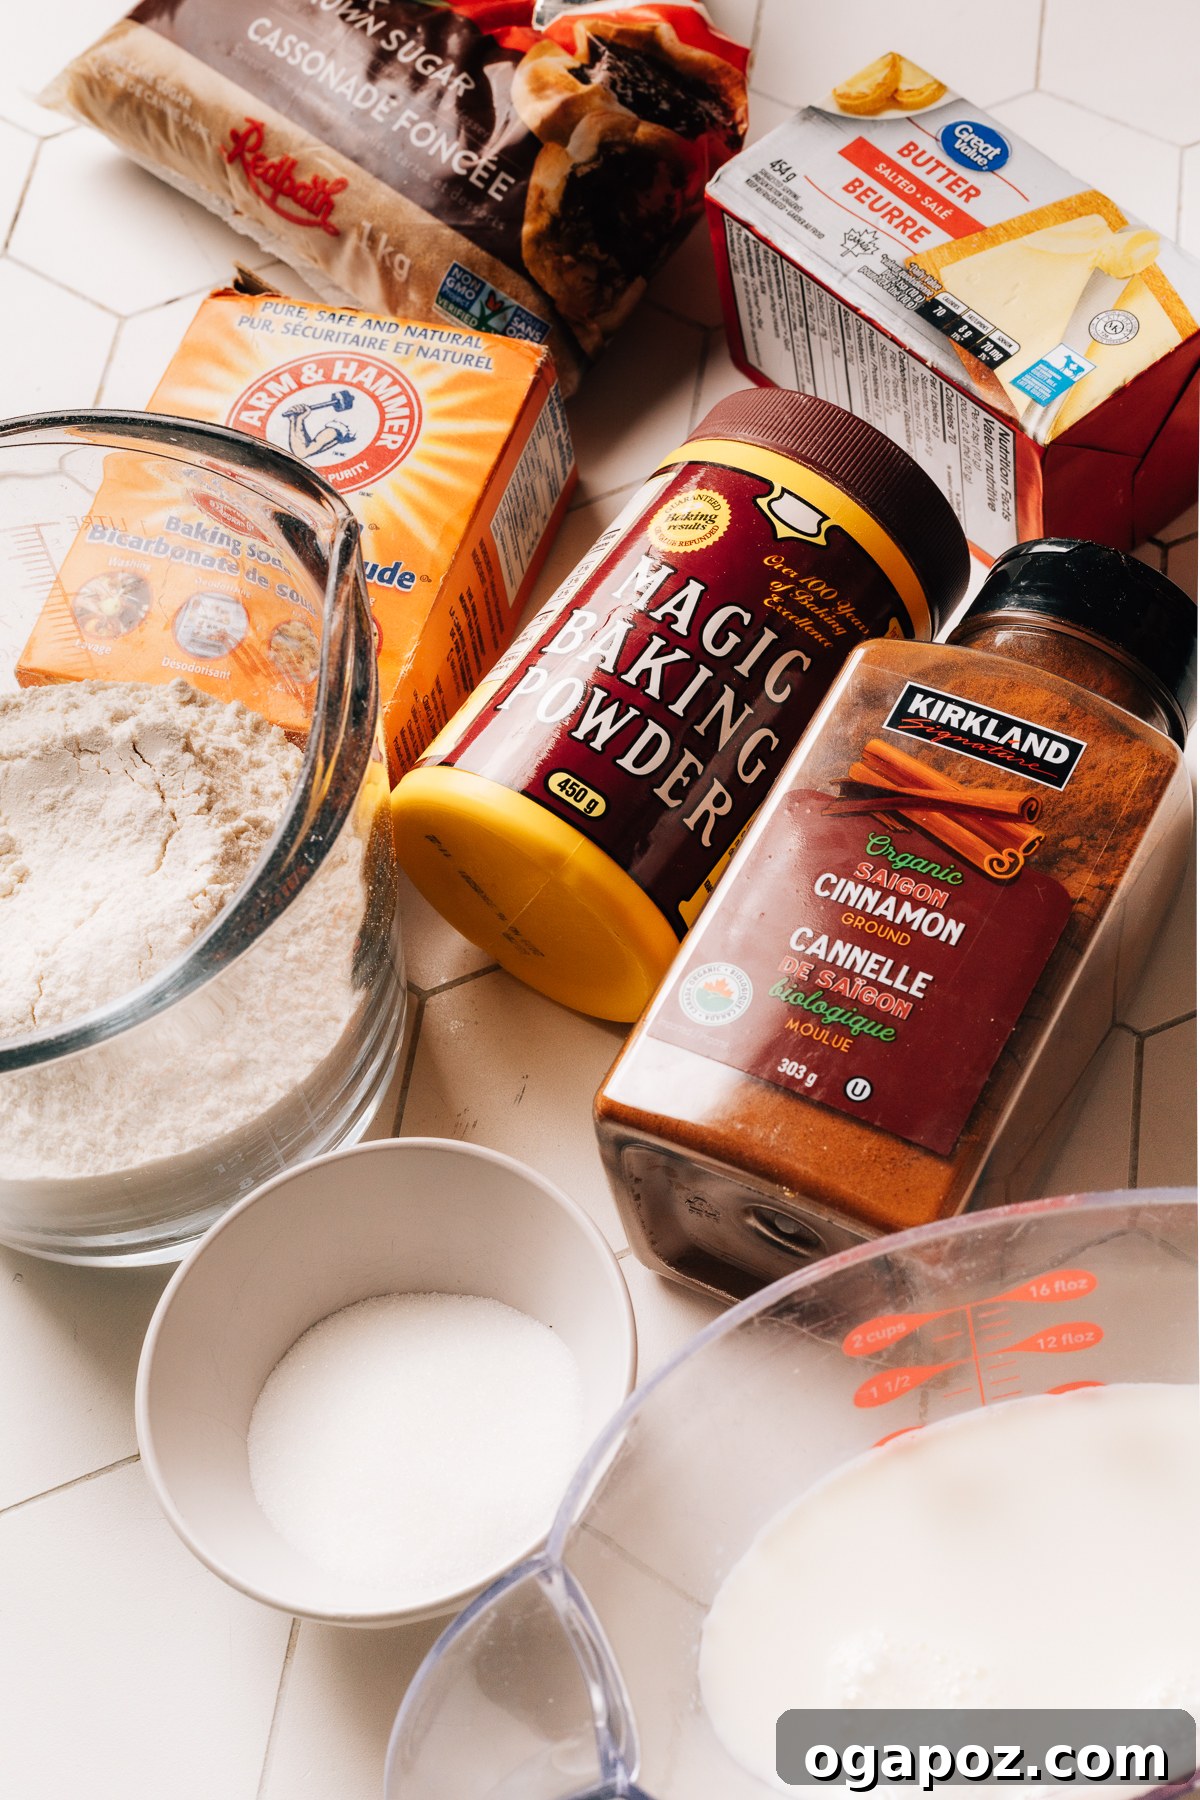
Crafting these delectable no-rise cinnamon buns begins with a few simple, high-quality ingredients. Made with a rich, buttery biscuit dough, you’ll be amazed at the depth of flavor and tender texture achievable without yeast.
Understanding the Components: Dough, Filling, and Glaze
This recipe is divided into three harmonious parts: the fluffy biscuit dough, the irresistible cinnamon-sugar filling, and the optional (but highly recommended) cream cheese glaze. Here’s a detailed look at what you’ll need for each section:
For the Homemade Buttermilk Biscuit Dough
- All-purpose flour: The foundation of our dough, providing structure and chewiness to the rolls. Ensure it’s fresh for the best results.
- Granulated sugar: Adds a subtle sweetness to the dough, balancing the richness of the butter and tang of the buttermilk.
- Baking soda and baking powder: This powerful duo of leavening agents is crucial for biscuit dough. Baking soda reacts with the buttermilk’s acidity, while baking powder provides additional lift, ensuring an incredibly light and fluffy result with those signature flaky layers.
- Salt: Essential for enhancing all the other flavors in the dough, preventing it from tasting flat.
- Salted butter (fridge cold, but not frozen): Cold butter is the cornerstone of flaky biscuits. As it melts in the hot oven, it releases steam, creating pockets of air and separating the dough into distinct, tender layers. Using salted butter also contributes to the overall flavor.
- Buttermilk: Provides both tenderness and a delightful tang to the biscuit dough. Its acidity also activates the baking soda, contributing to the rise. If you don’t have buttermilk on hand, a simple buttermilk substitute can be easily made at home.
For the Gooey Cinnamon Bun Filling
- Salted butter (melted and cooled): This acts as the sticky base for our cinnamon-sugar mixture. Cooling the butter slightly before spreading helps it adhere evenly to the dough without being absorbed too quickly, ensuring a perfectly gooey center.
- Dark brown sugar: While light brown sugar can be used, dark brown sugar is highly recommended for its richer molasses flavor and deeper caramel notes, which significantly enhance the filling.
- Ground cinnamon: The star spice of our cinnamon rolls! Use a good quality, fresh ground cinnamon for the most aromatic and comforting flavor.
Exact ingredient quantities for all components are provided in the comprehensive recipe card located at the bottom of this article.
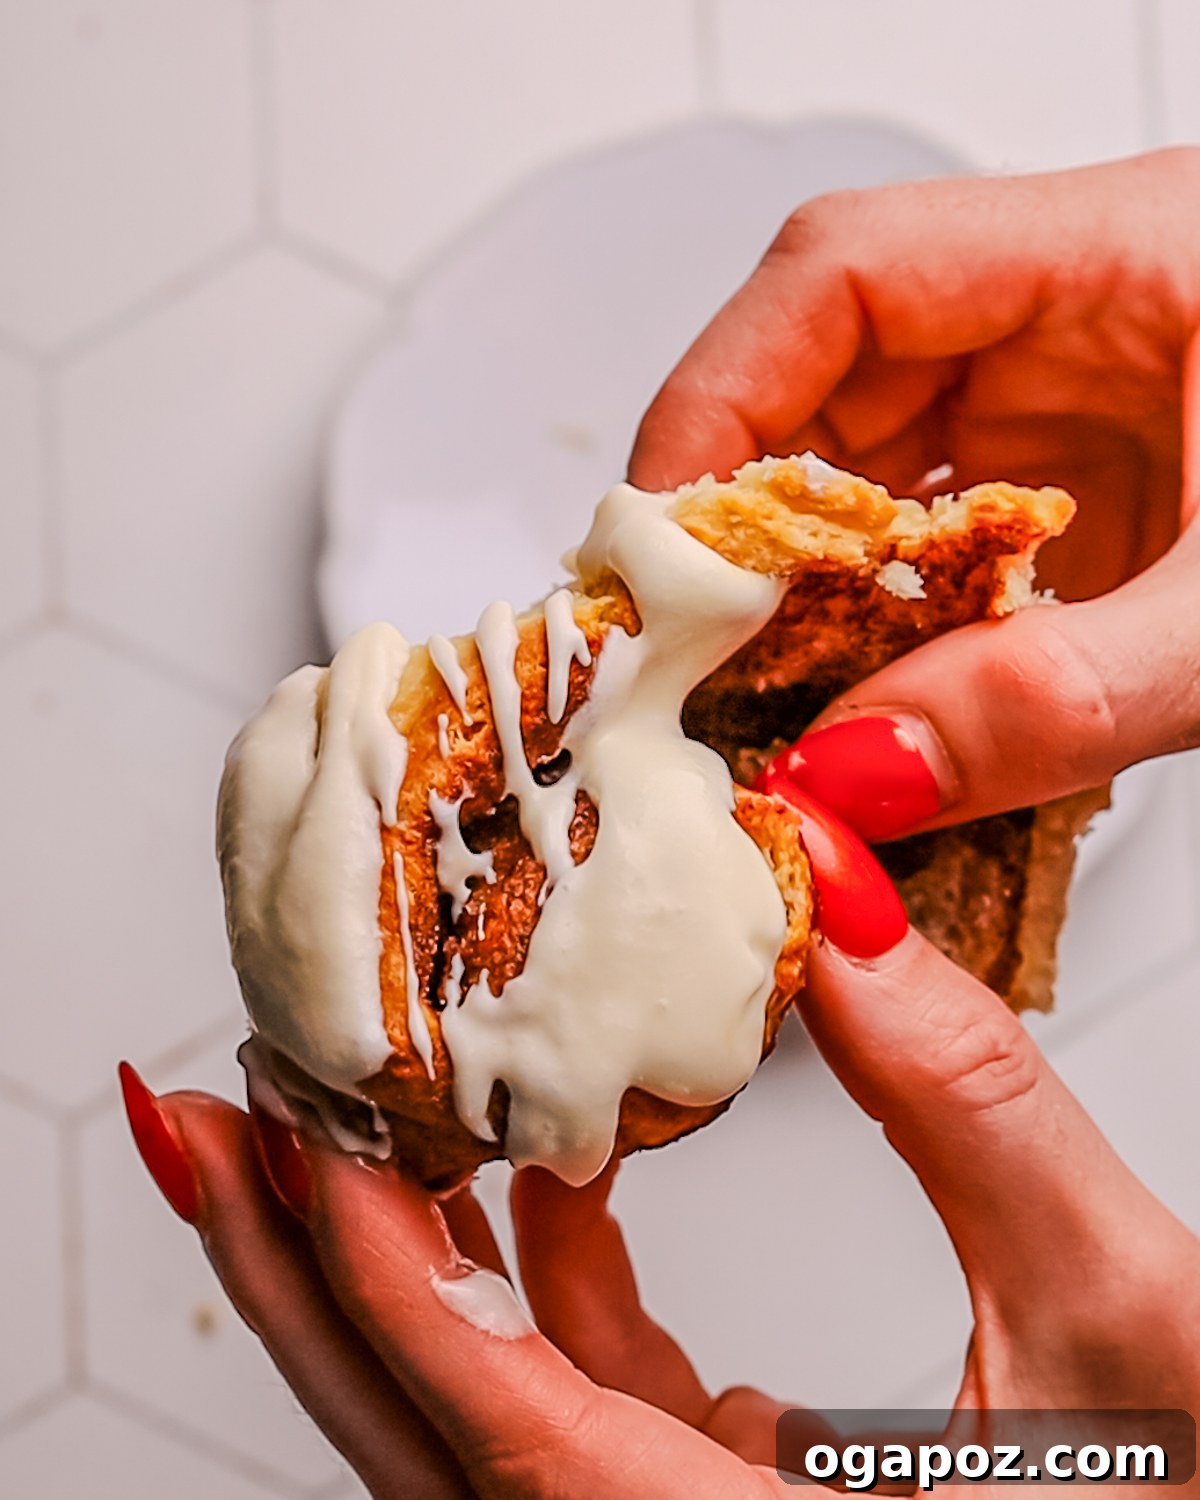
Pro Tips and Science-Backed Secrets for Biscuit Success
As a food scientist, I believe in sharing the “why” behind the “how.” These tips, hacks, and foodie secrets are designed to ensure your biscuit cinnamon rolls turn out perfectly every single time:
- Embrace the Chill: Use Cold Ingredients for Fluffiest Texture: This is arguably the most critical tip for exceptional biscuits. Cold butter and buttermilk are essential. When these cold ingredients encounter the heat of a preheated oven, the water within them rapidly converts to steam. This steam then forces apart the layers of dough, creating those distinctive, tender, and incredibly flaky biscuit layers. For maximum lift and flakiness, keep your butter and buttermilk as cold as possible right up until you mix the dough, and handle the dough minimally to prevent warming it.
- Gentle Hands: Don’t Overwork the Dough: Unlike yeast breads that require extensive kneading to develop gluten, biscuit dough thrives on minimal handling. Overworking the dough will develop too much gluten, resulting in tough, dense, and chewy rolls rather than light and tender ones. Mix just enough to bring the ingredients together, and when folding or rolling, be as gentle as possible.
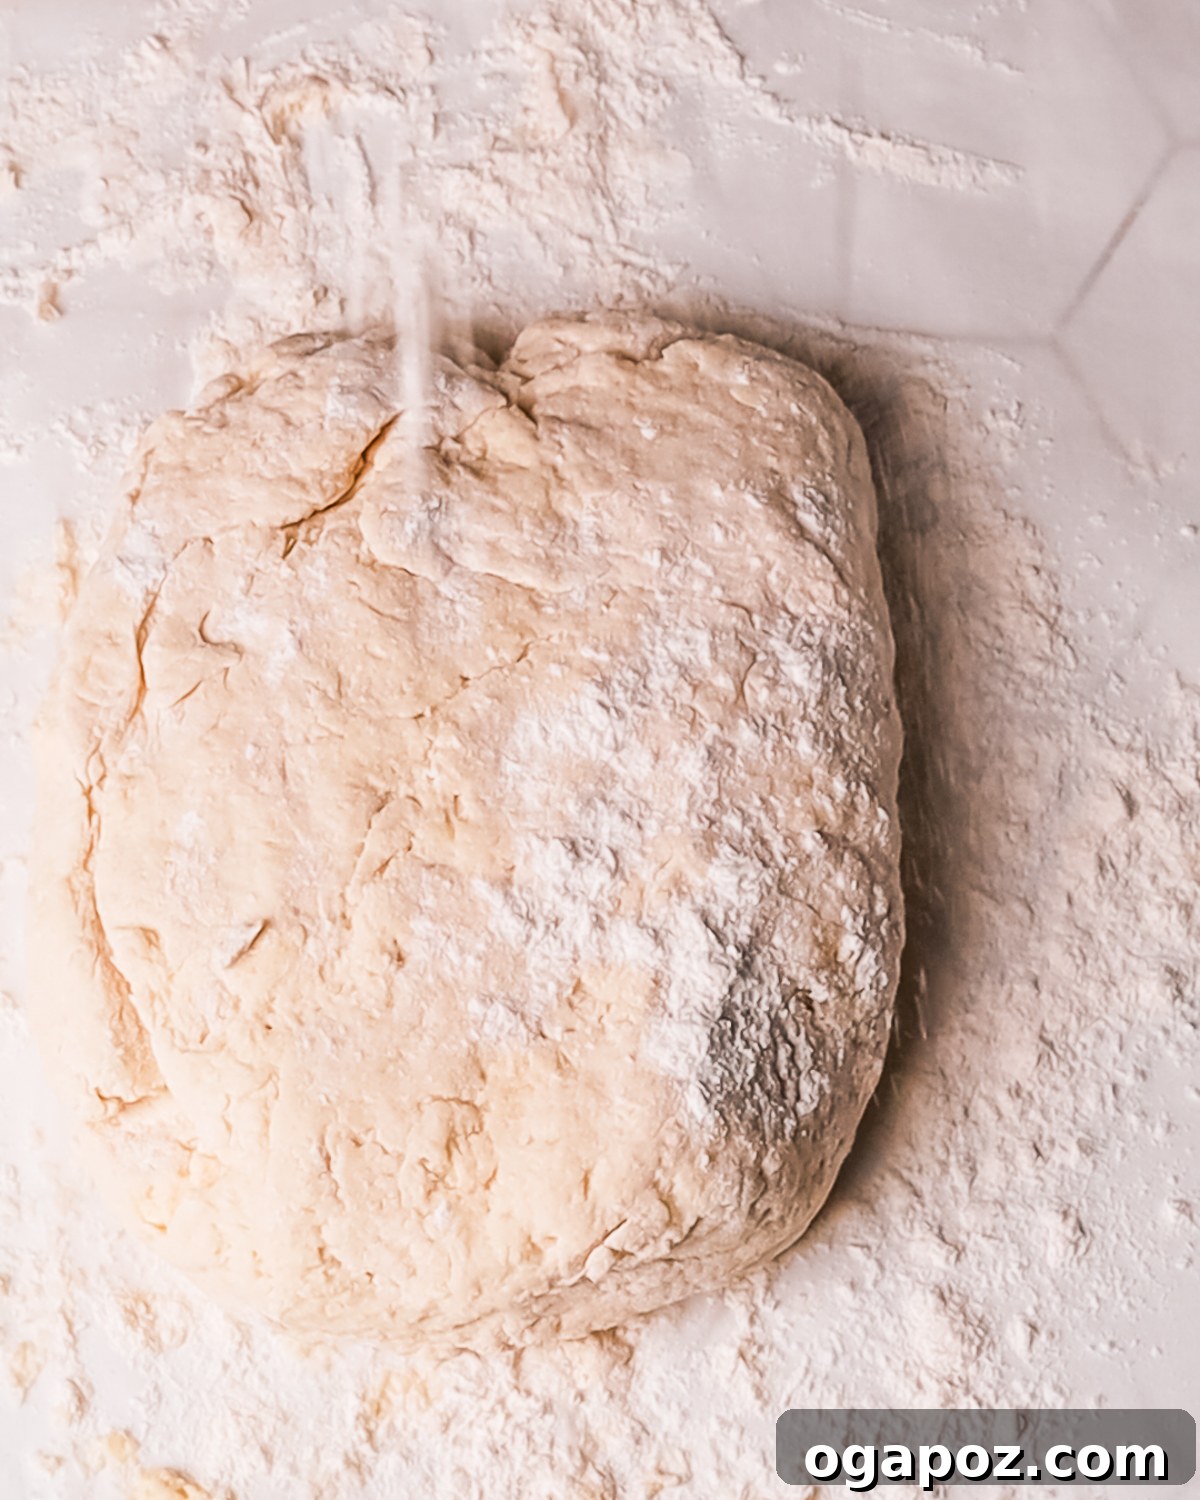
- Tame the Stickiness: Parchment Paper is Your Friend: Biscuit dough can indeed be quite sticky, which is a sign of good hydration. To manage this without adding excessive flour (which can dry out the dough), I highly recommend using parchment paper. Lightly flour your parchment paper before turning out the dough. The parchment allows you to lift and roll the dough easily, and if needed, a lightly floured metal spatula or knife can help you separate the dough from the paper. This method ensures clean handling and beautiful rolls.
- Precision Baking: My Foolproof Method for Doneness: While golden brown appearance is a good indicator, it’s not always foolproof, especially for the center of thicker rolls. My preferred, no-guess way of checking for perfect doneness is by using an instant-read thermometer. Insert it into the center of a roll; it should register 190°F (88°C). This method is far more accurate than visual cues alone and guarantees your rolls are fully baked through without being dry.
Creative Substitutions and Delicious Variations
Feel free to customize this recipe to suit your dietary needs or flavor preferences. These swaps allow you to tweak the recipe slightly to make it uniquely your own!
- Flour Alternatives: If you need a gluten-free option, use a high-quality gluten-free 1:1 baking flour blend. It’s designed to substitute traditional all-purpose flour in most recipes. However, avoid using almond or coconut flour, as their different protein and fat contents mean they don’t behave the same way in biscuit dough and will significantly alter the texture.
- Exciting Add-ins for the Filling: Elevate your cinnamon rolls by incorporating additional textures and flavors into the filling. Sprinkle in finely chopped pecans or walnuts for a nutty crunch. Alternatively, add raisins, similar to my popular cinnamon raisin rolls. For a fruitier twist, you can even incorporate a small amount of pre-made apple pie filling for a delightful apple cinnamon roll experience!
- Maple Glaze Alternative: If cream cheese icing isn’t your preference, or you’re looking for a simpler option, swap it out for a quick and easy maple icing. This can be made by whisking together powdered sugar, a splash of milk (or cream), and pure maple syrup for a warm, sweet finish.
- Miniature Rolls for Brunch Spreads: For a charming presentation perfect for brunch or a party, roll the dough into a slightly thinner, longer log. Then, cut it into 12–16 smaller rolls instead of 8. These “cinnamon roll bites” are equally delicious and ideal for sharing.
Essential Tools to Grab
Gathering your tools beforehand makes the baking process smooth and enjoyable:
- For preparing the dough, you’ll need a large mixing bowl, a whisk to combine dry ingredients, and a cheese grater or pastry cutter for incorporating the cold butter.
- For assembly, have a rolling pin to shape the dough, an 8×8-inch baking pan (lined with parchment paper) for baking, and a sharp knife (or unflavored dental floss for ultra-clean cuts) for slicing the rolls.
- An instant-read thermometer is highly recommended for accurately checking the internal temperature of the rolls, ensuring they are perfectly cooked through, especially if you are unsure based on appearance.
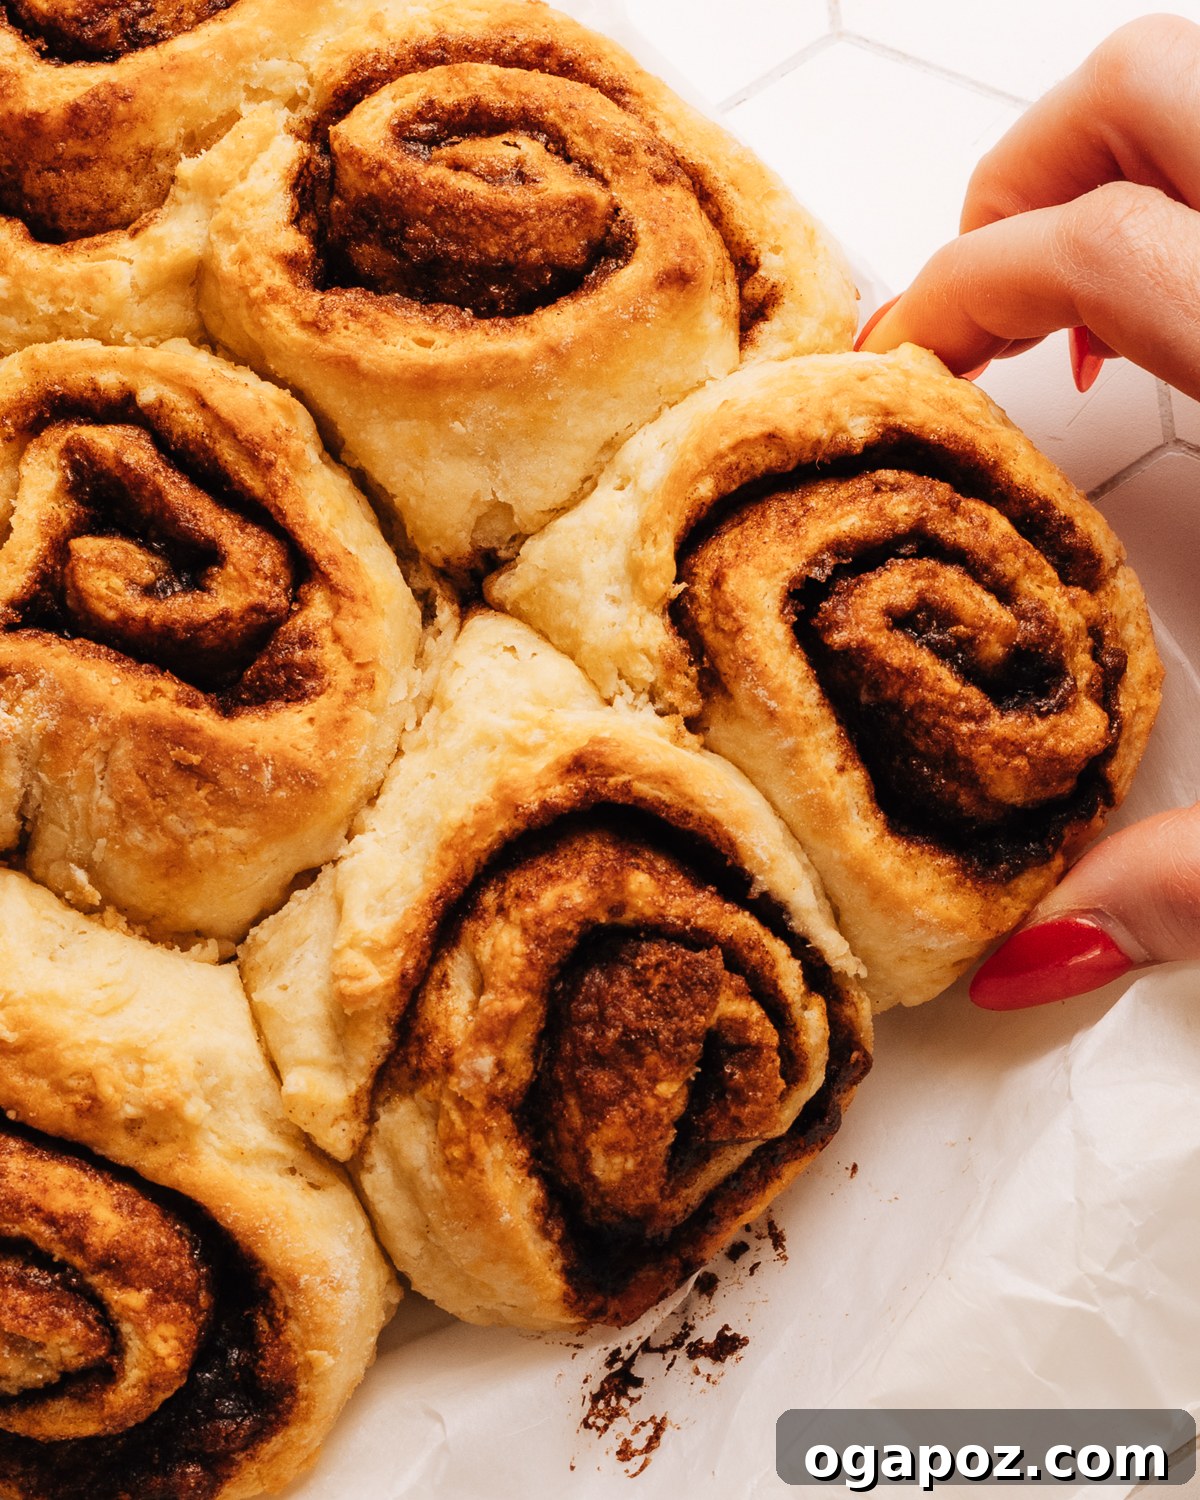
How to Make Biscuit Cinnamon Rolls: A Simple Step-by-Step Guide
Follow these straightforward steps to create your own batch of easy, fluffy biscuit cinnamon rolls:
1. Prepare the Dry Mixture
- In a large mixing bowl, thoroughly whisk together the all-purpose flour, granulated sugar, baking soda, baking powder, and salt. This ensures all the leavening agents and flavorings are evenly distributed throughout the dry ingredients.
2. Incorporate the Cold Butter
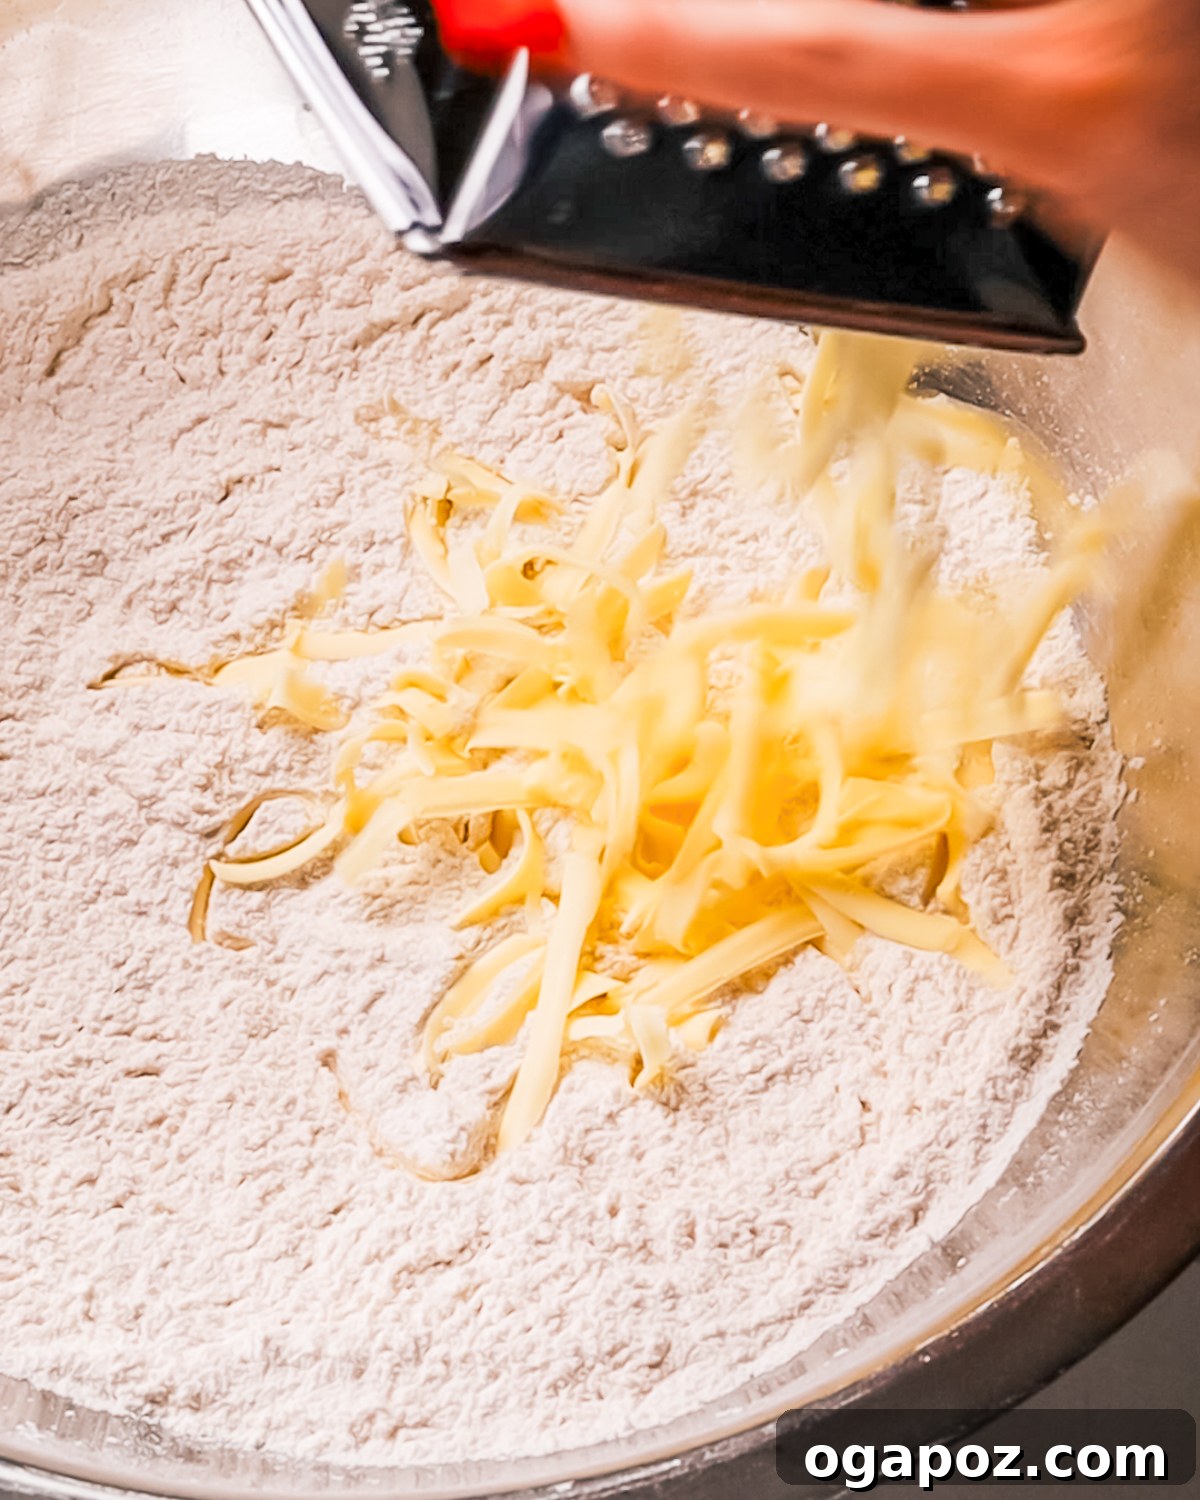
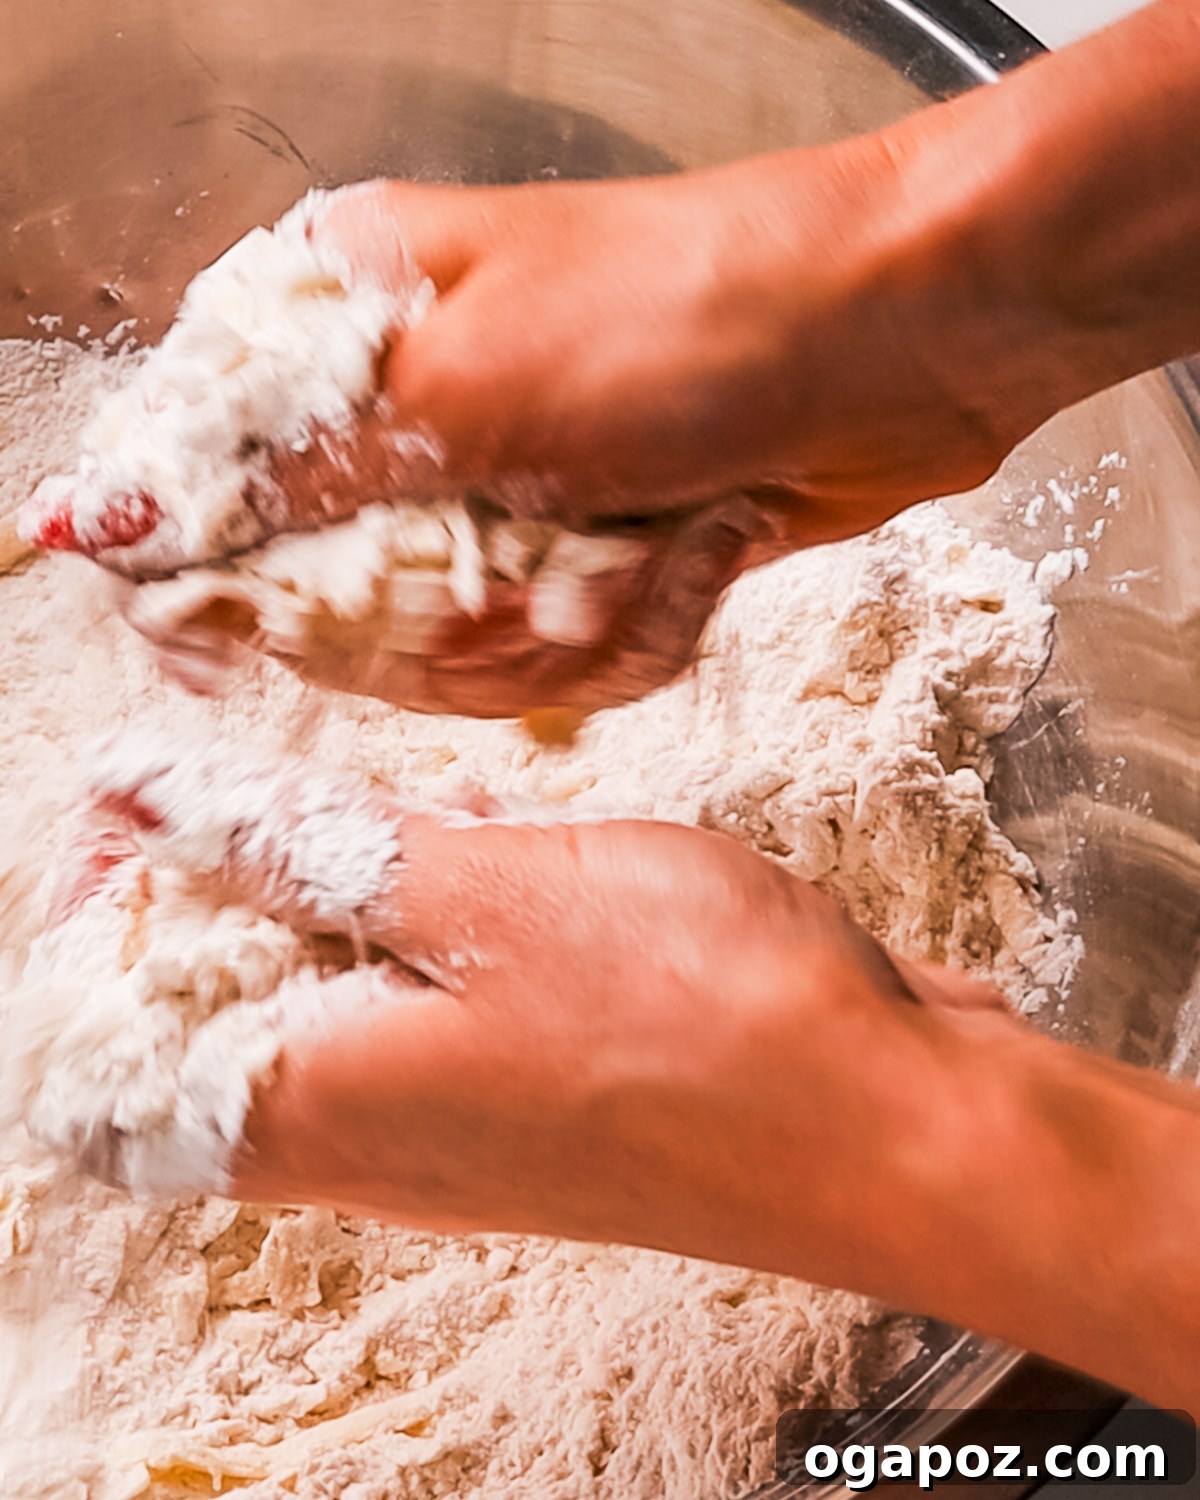
- Grate the very cold butter directly into the dry mixture, or dice it into small cubes. Using a pastry cutter or your fingertips, quickly work the butter into the flour mixture until it resembles coarse crumbs. You should still see small, pea-sized bits of butter distributed throughout – these pockets of butter are what create the flaky layers. Avoid overmixing.
3. Add the Buttermilk
- Pour the cold buttermilk into the butter-flour mixture. Using a spoon or spatula, gently stir until a shaggy dough begins to form. It’s okay if there are still some dry patches; do not overmix. If the dough appears too dry to come together, add an additional splash of buttermilk, about 1 to 2 tablespoons, until it just forms a cohesive mass.
4. Shape and Fill the Dough
- Turn the dough out onto a lightly floured surface, preferably floured parchment paper. Gently press or roll the dough into a rectangle approximately 15 x 12 inches.
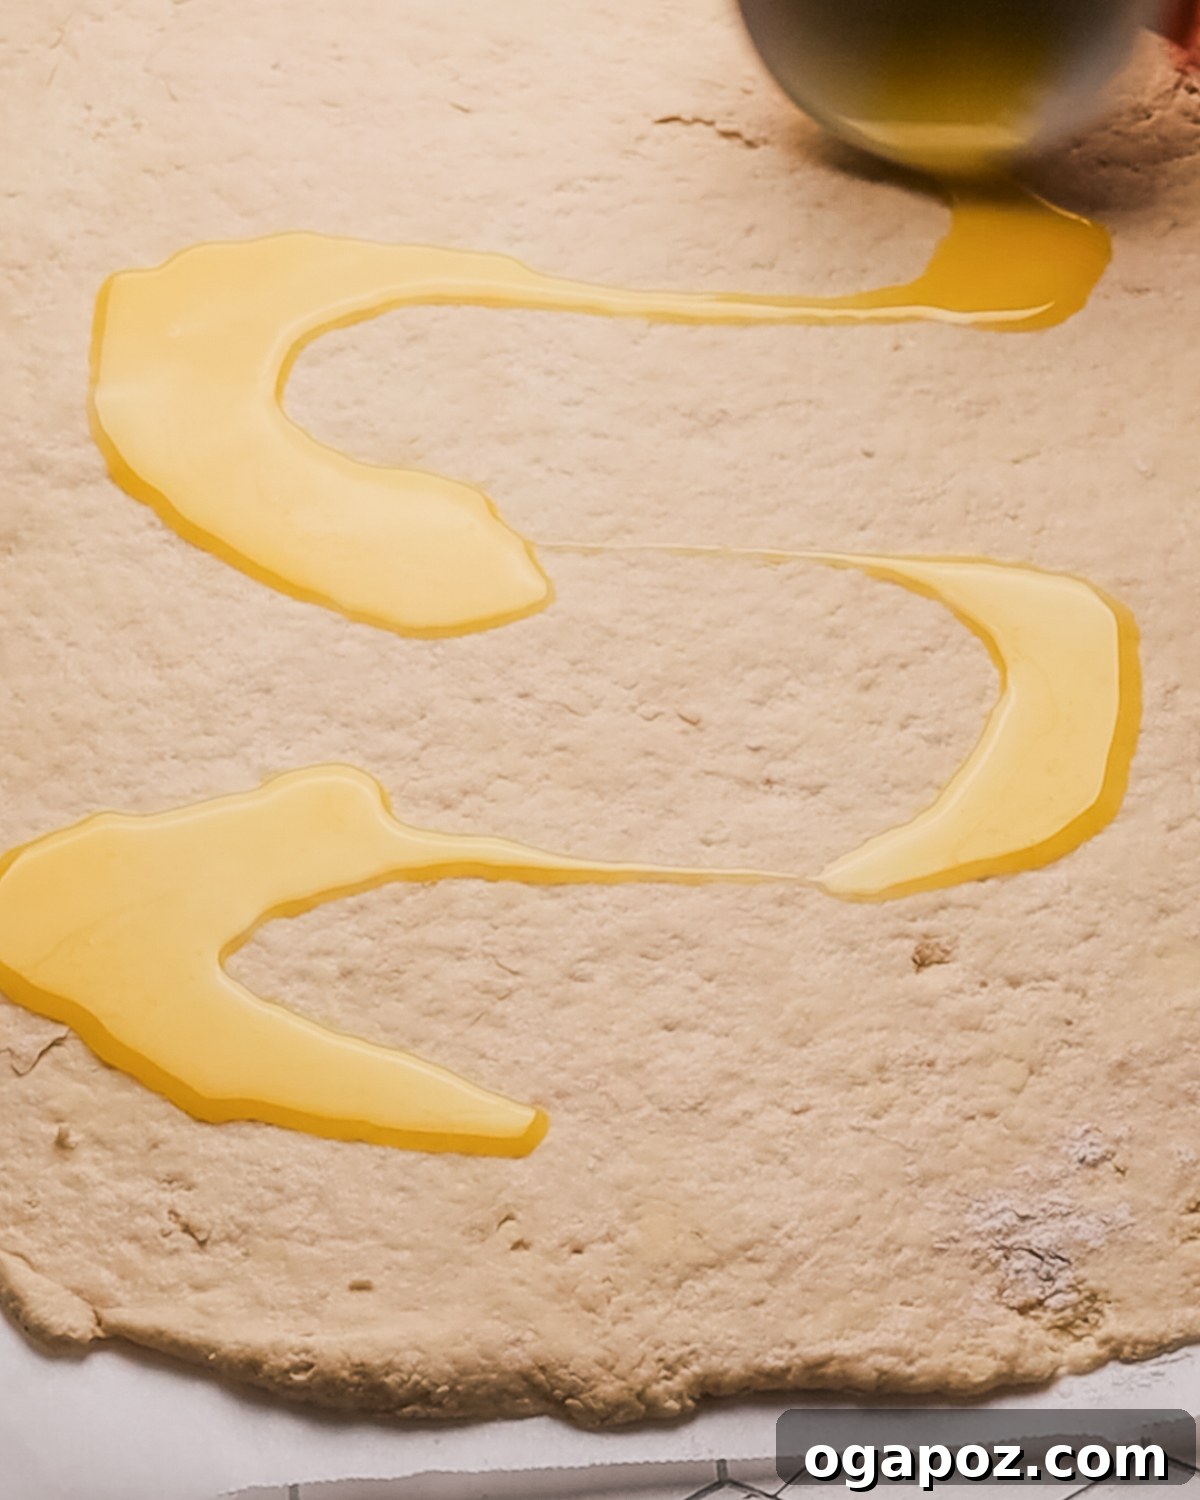
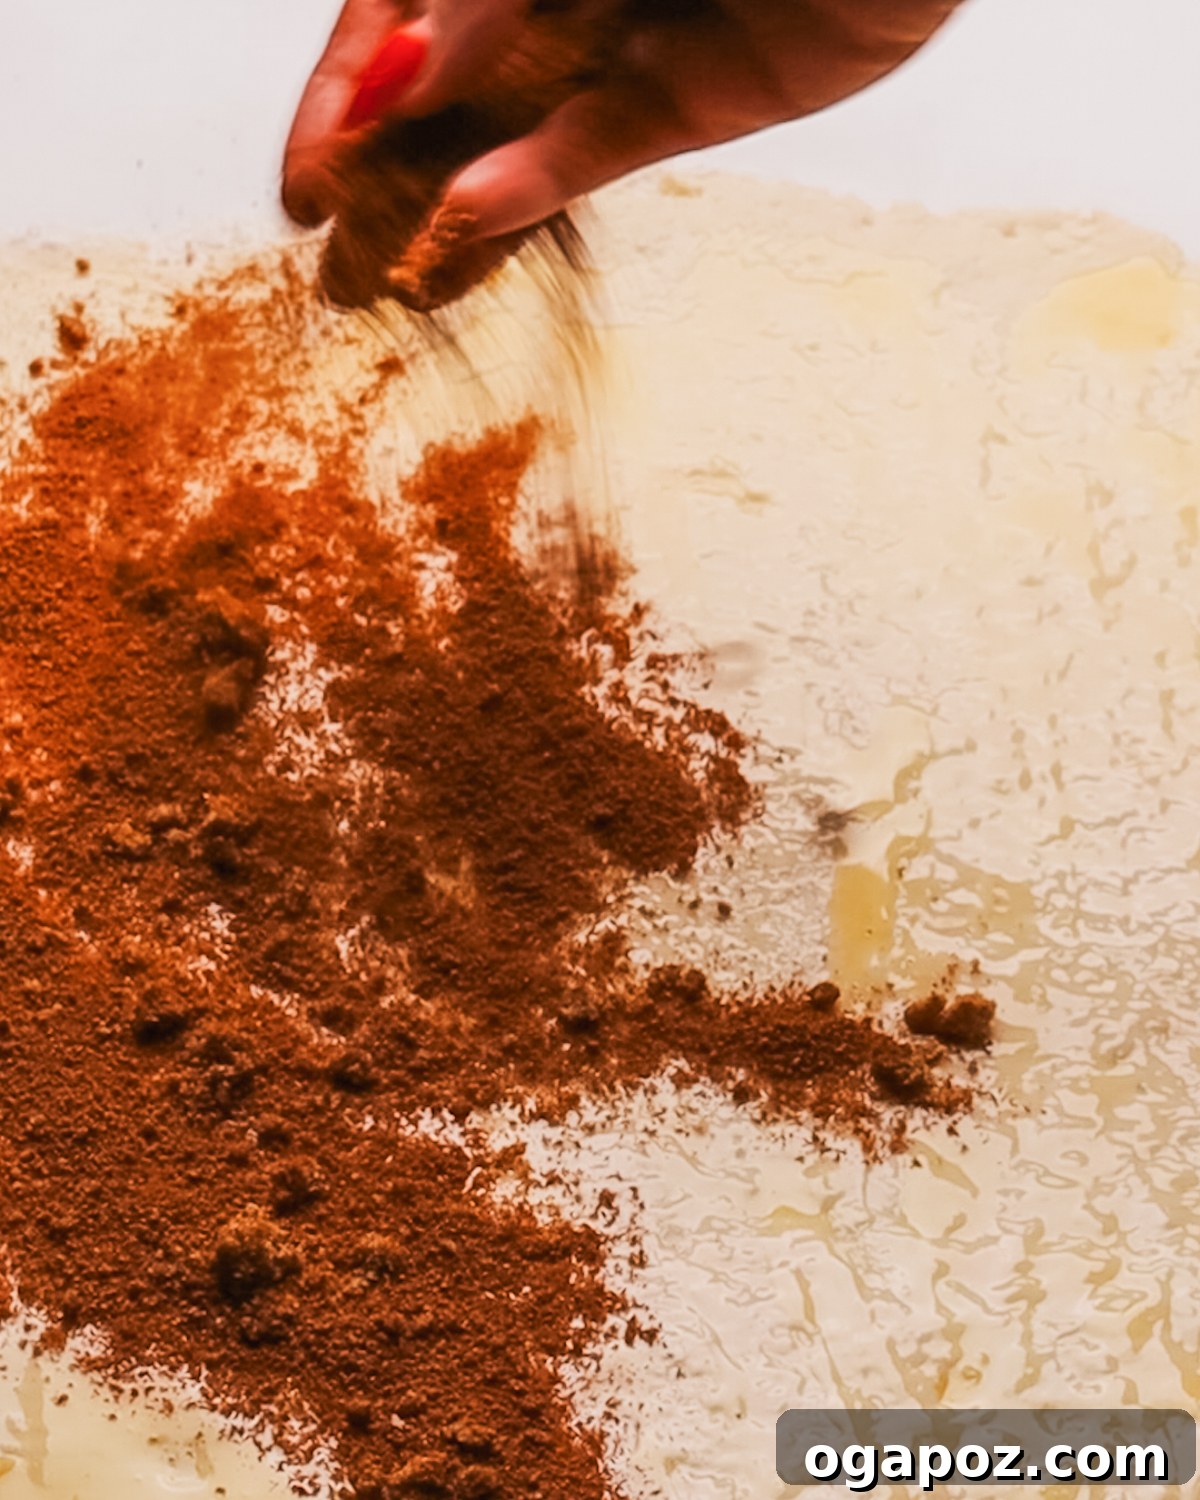
- Brush the entire surface of the dough evenly with the cooled melted butter, ensuring it reaches all the edges. Then, generously sprinkle the dark brown sugar and ground cinnamon evenly over the butter.
5. Roll and Slice into Buns
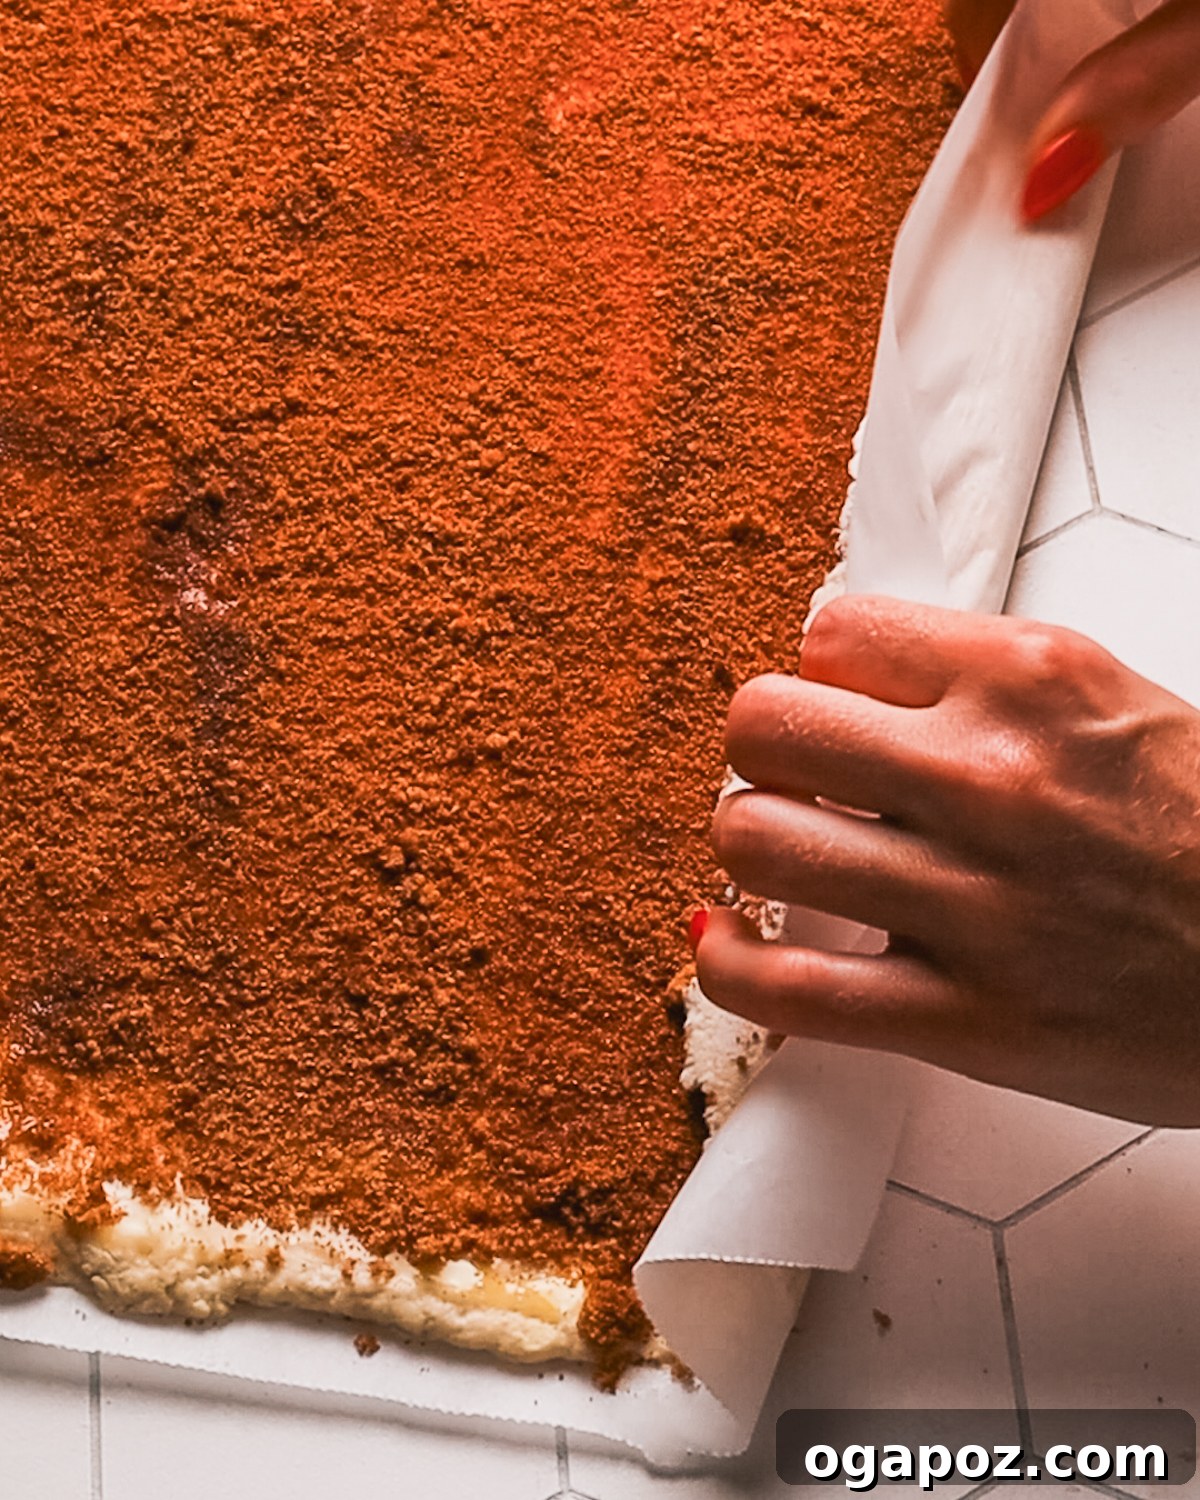
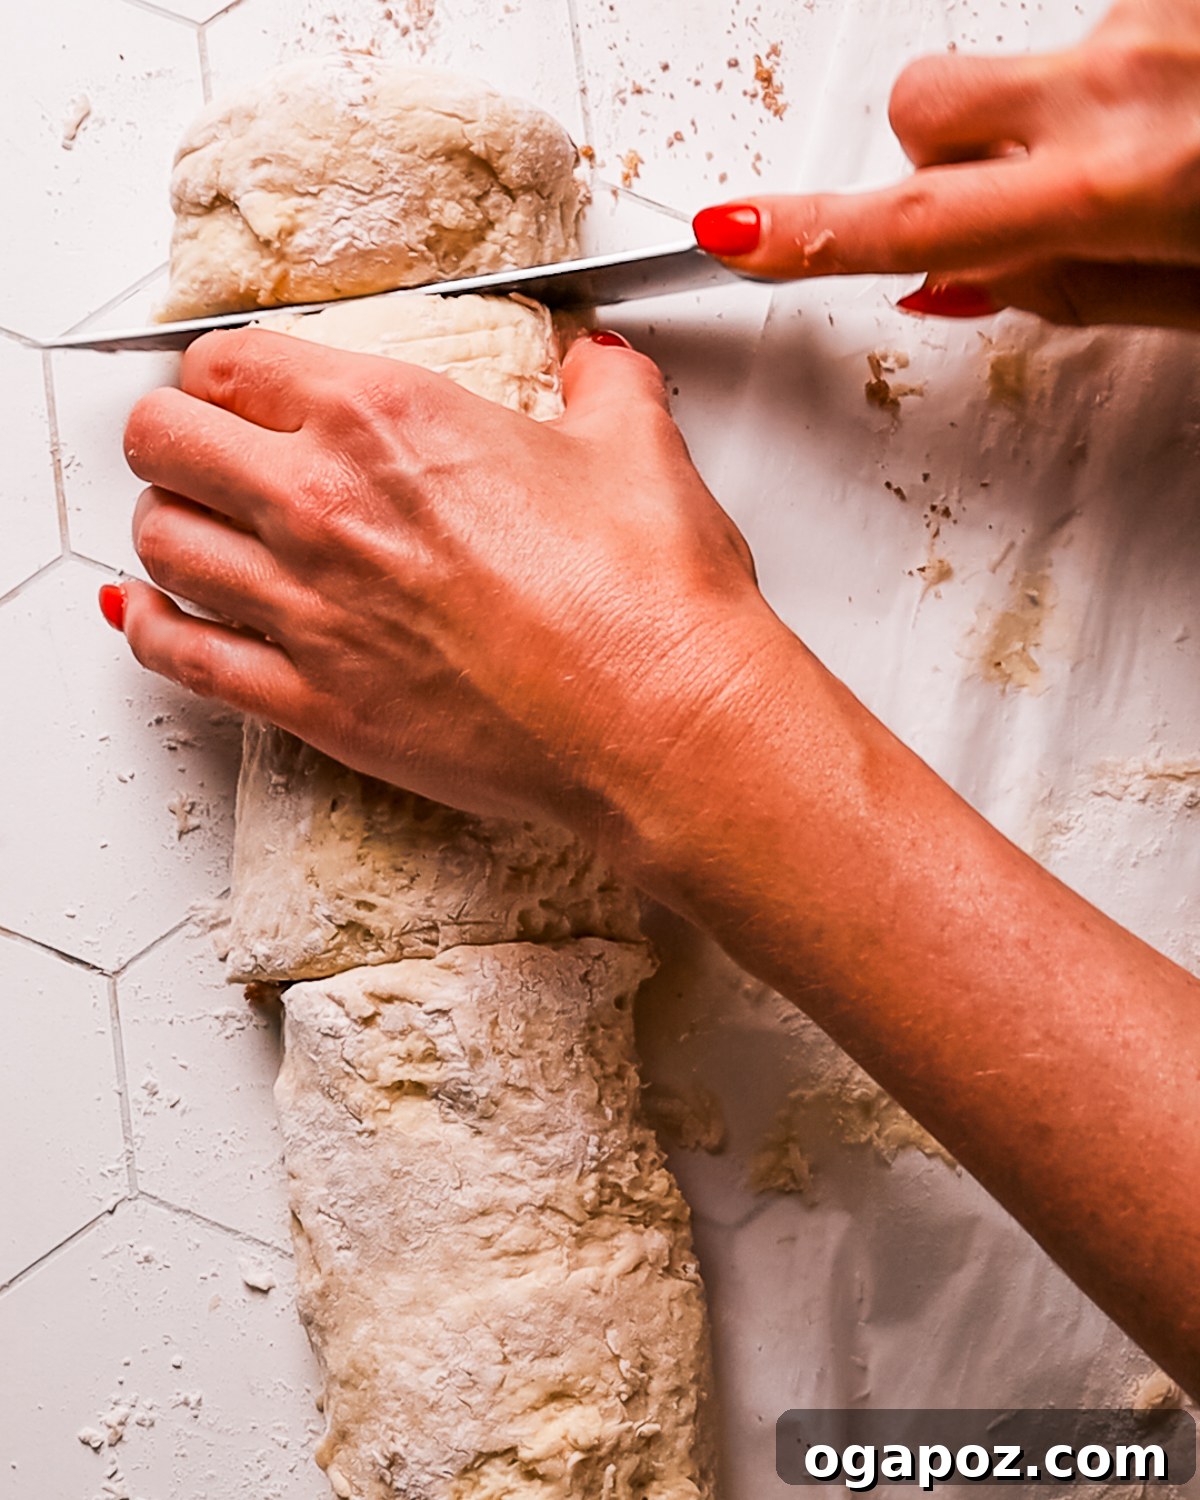
- Starting from one of the long sides, carefully roll the dough up tightly into a log. Use the parchment paper to assist in lifting and rolling if the dough is sticky. Once rolled, use a sharp knife or unflavored dental floss (for perfectly clean cuts) to slice the log into 8 equal rolls.
6. Arrange and Bake to Golden Perfection
- Carefully arrange the sliced rolls close together in your prepared 8×8-inch baking dish. They should be snug but not overly crowded.
- Bake in a preheated 400°F (200°C) oven for 22–26 minutes, or until the tops are beautifully golden brown and the centers are fully baked through. To confirm doneness, an instant-read thermometer inserted into the center of a roll should register 190ºF (88°C).
- Once baked, transfer the pan to a cooling rack. Allow the rolls to cool slightly before serving. If you plan to add a glaze, wait approximately 10 minutes for the rolls to cool slightly so the glaze doesn’t melt completely, but still melts enough to spread beautifully.
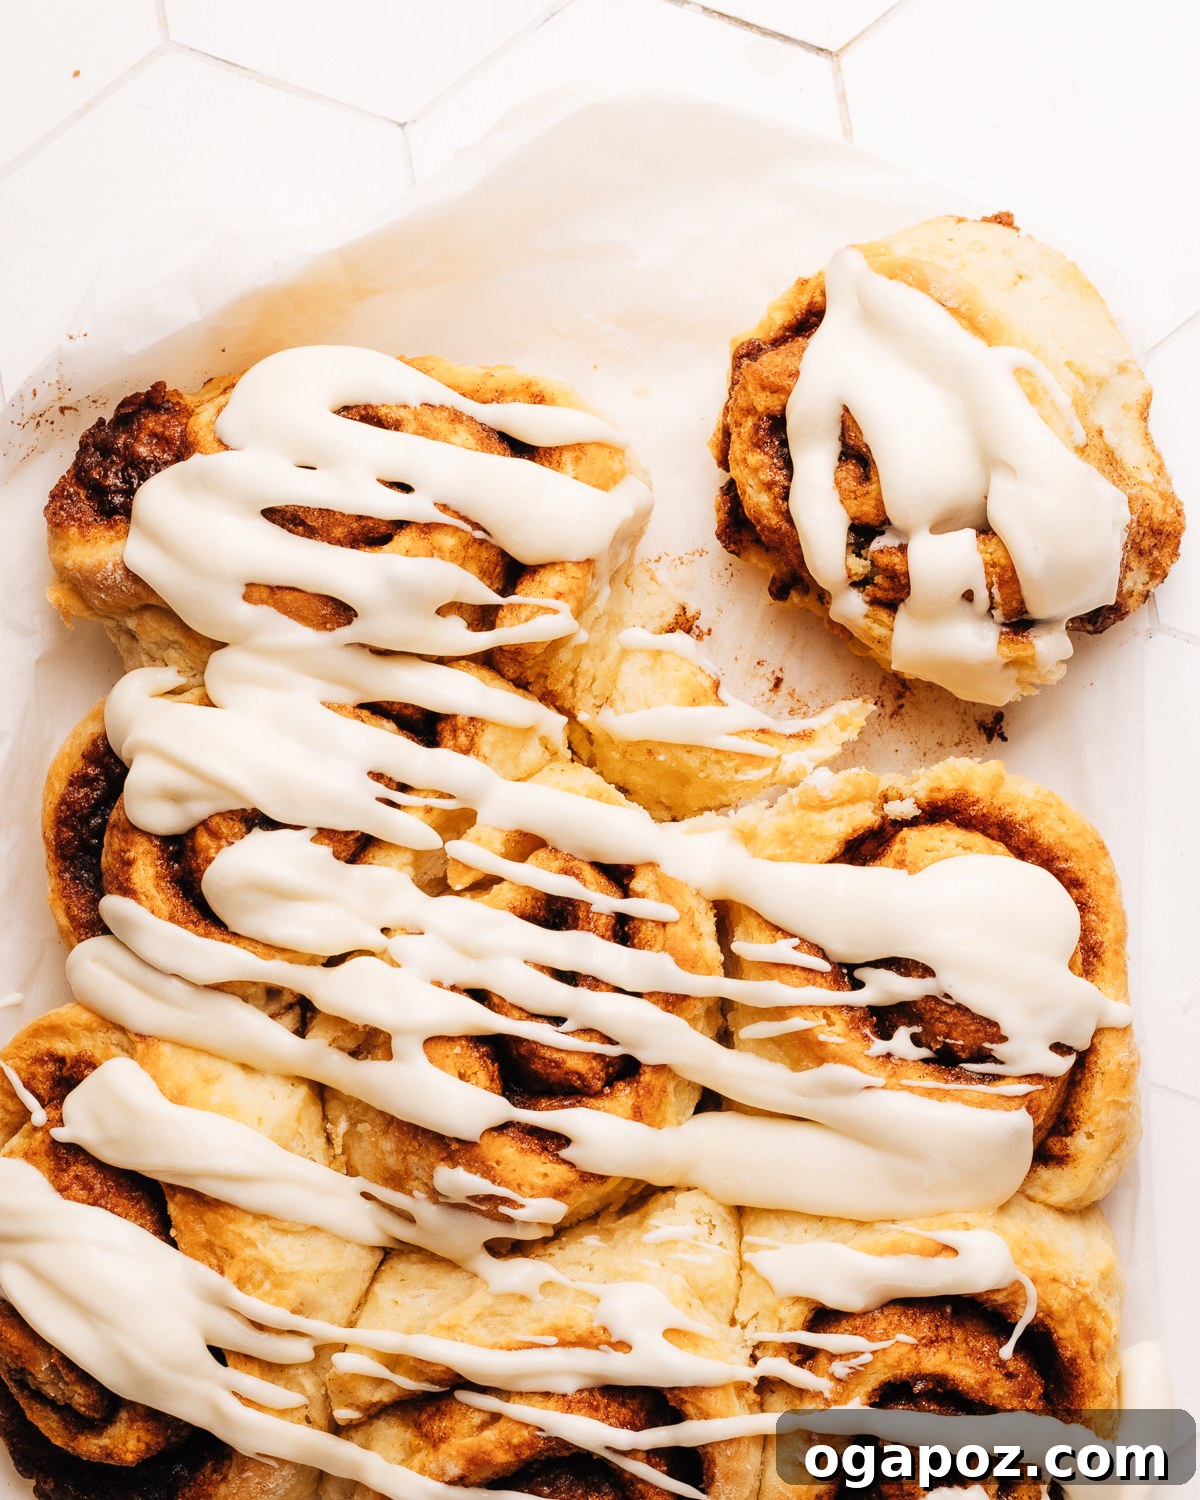
Avoiding Common Pitfalls: 3 Mistakes to Steer Clear Of
Even with a simple recipe, minor errors can impact the final outcome. Be aware of these common issues that can arise when baking biscuit cinnamon rolls and learn how to avoid them for perfect results:
- 1. Using Warm or Soft Butter: This is the most frequent culprit behind flat or dense biscuits. Biscuit dough fundamentally relies on very cold butter to create those sought-after flaky layers. If your butter is soft or warm, it will melt into the flour too quickly and evenly, losing its ability to create steam pockets in the oven. The result will be a less tender, less flaky roll. Always keep your butter in the refrigerator (or even briefly in the freezer) until the very last moment before you cut it into the flour mixture. Grating frozen butter is an excellent technique for ensuring even distribution and keeping it cold.
- 2. Overmixing the Dough: Remember, biscuit dough is not bread dough. The goal is not to develop gluten, but to keep it tender. Overworking the dough activates and develops the gluten proteins in the flour, which will lead to a tough, rubbery texture rather than the desired soft and tender crumb. Stir just enough until the dough barely comes together, and it looks a bit shaggy or uneven. When folding the dough, use gentle motions; you are essentially bringing the dough together, not kneading it.
- 3. Skipping the Floured Parchment Paper: Biscuit dough, especially when properly hydrated for tenderness, can be quite sticky. Attempting to roll it directly on a floured countertop can lead to frustration, torn dough, and the temptation to add too much extra flour, which can dry out your rolls. Flouring your parchment paper well provides a non-stick surface that allows you to roll the dough out smoothly and facilitates easy handling when rolling it into a log. This also ensures the bottom of your rolls bakes up with a crisp, golden finish, rather than sticking to the pan.
Make-Ahead Options and Storage Solutions
While biscuit cinnamon rolls are truly at their best when baked fresh and enjoyed warm, there are convenient ways to prepare components in advance or store leftovers. These methods ensure you can enjoy fresh-tbaked goodness even on busy mornings.
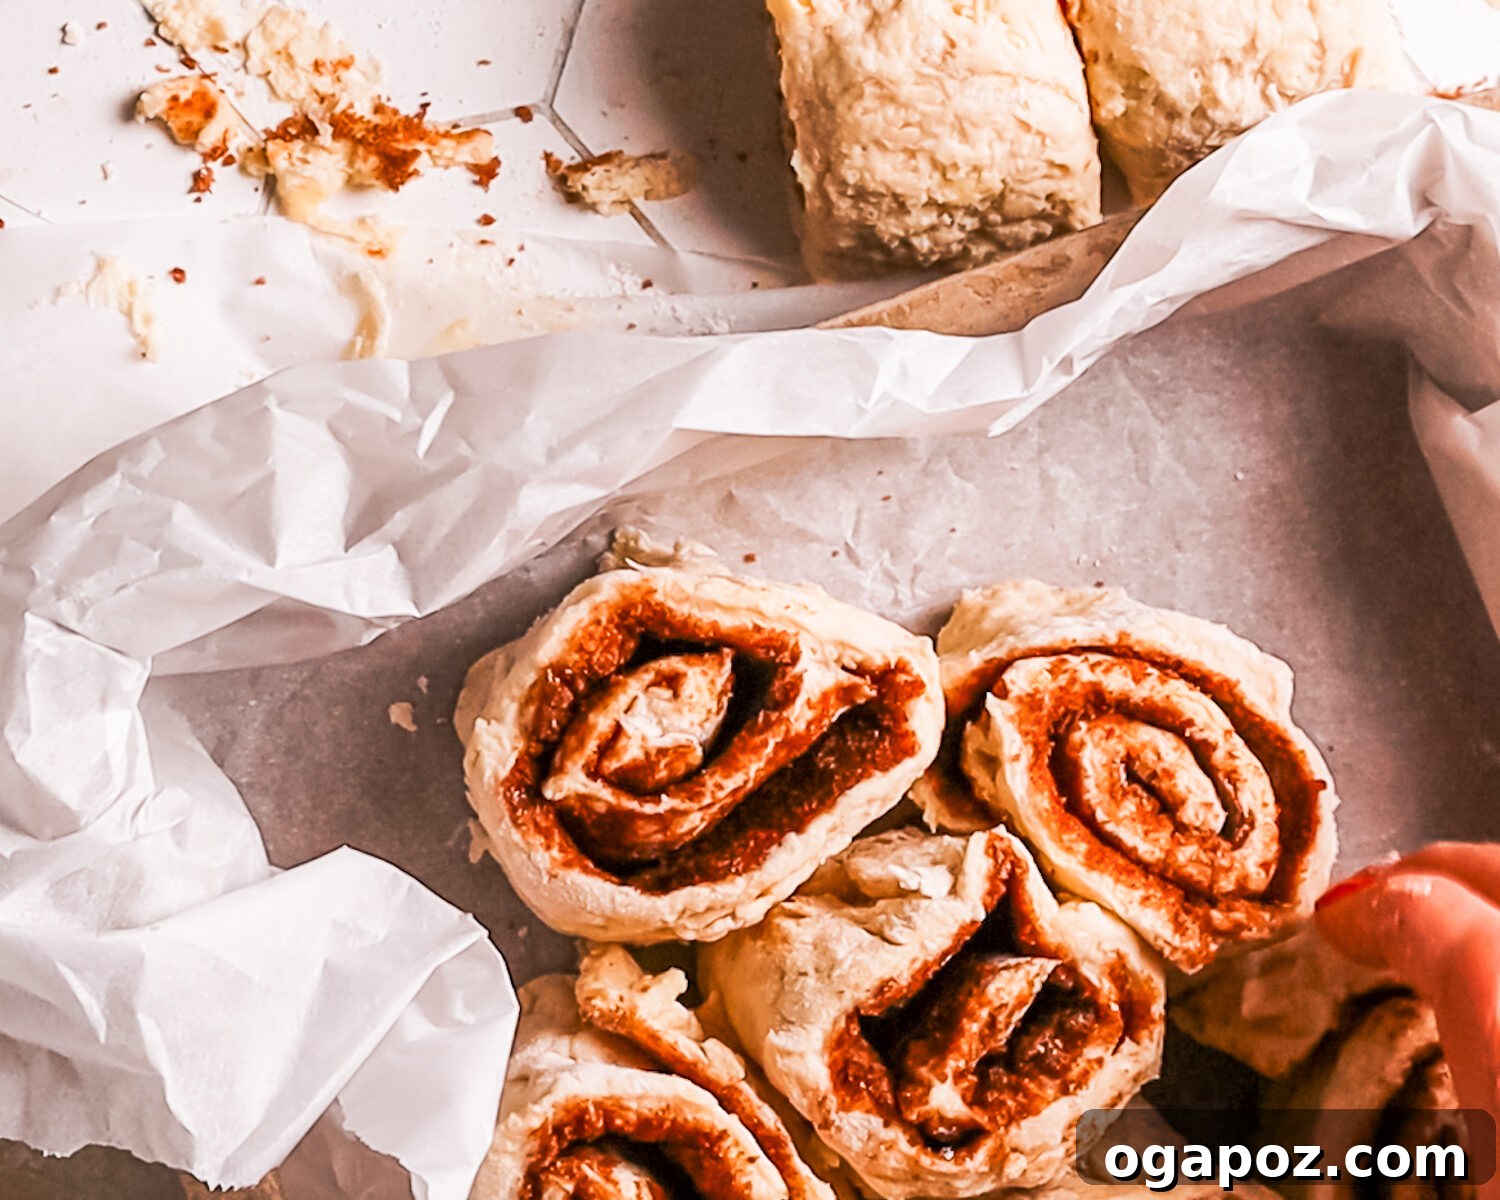
To Prepare in Advance (Unbaked Rolls)
- You can easily prepare and shape the cinnamon rolls the night before. Once shaped, arrange them in your baking dish, then cover the dish tightly with plastic wrap. Store the unbaked rolls in the refrigerator overnight. The next morning, simply remove the plastic wrap and bake them straight from the refrigerator. You may need to add an extra 2-5 minutes to the baking time to account for the cold dough.
Freezing Unbaked Rolls for Later
- To freeze unbaked rolls, arrange them on a baking tray (lined with parchment paper if preferred) and place them in the freezer until they are completely solid, typically a few hours. Once frozen solid, transfer the rolls to a freezer-safe airtight bag or container. They can be stored in the freezer for up to 1 month.
- Important: Do not thaw frozen unbaked rolls on the kitchen counter at room temperature. This will cause the butter in the dough to warm up too much and melt out fully before the dough has a chance to set in the oven, resulting in flat, greasy rolls.
Baking Frozen Rolls Directly
- From the Refrigerator (Thawed Overnight): To bake after thawing, transfer the frozen rolls to the refrigerator overnight. The next morning, bake them cold from the fridge, adding 2–5 minutes to the standard bake time.
- From Frozen (Direct Bake): For a truly quick option, you can bake the rolls directly from frozen. Preheat your oven to 375ºF (190°C). Cover the baking dish tightly with aluminum foil to prevent the tops from browning too quickly. Bake for 35–45 minutes, then remove the foil for the last 10-15 minutes of baking to allow them to brown to a beautiful golden finish.
Storing Leftover Biscuit Cinnamon Rolls
- Any leftover baked cinnamon rolls can be stored in an airtight container at room temperature for up to 2 days. For longer storage, you can freeze them for up to 3 months.
- Do not refrigerate baked cinnamon rolls, as the cool, dry air of the refrigerator will quickly make them stale and hard.
- To reheat individual rolls, warm them in the microwave for 20–30 seconds until heated through. Alternatively, bake covered in a 300ºF (150°C) oven for 10–12 minutes. If the rolls are already glazed, reheat them covered with foil to prevent the glaze from burning or melting excessively. It’s often best to add fresh glaze after reheating for the optimal experience.
Frequently Asked Questions About Biscuit Cinnamon Rolls
Just skimming through? Here are quick answers to some common questions about making these delightful biscuit cinnamon rolls:
Absolutely! If you don’t have buttermilk, you can easily create a substitute. Simply mix 1 cup of regular milk (dairy or non-dairy) with one tablespoon of lemon juice or white vinegar. Let it sit for 5–10 minutes until it slightly curdles, then use it as directed in the recipe.
If the butter or the dough itself gets too warm before baking, the rolls are more likely to spread out rather than rise upwards. To help them maintain their beautiful shape, try chilling the shaped rolls in the refrigerator for 15–20 minutes just before placing them in the oven.
Not at all! The cream cheese glaze is a delicious classic, but it’s entirely optional. You can enjoy the rolls plain, dust them with powdered sugar, or drizzle them with a simple icing made from powdered sugar and milk. Maple syrup or honey also make wonderful, quick glazes.
More Reader-Favorite Baked Treats from Our Kitchen
- The Best Chewy Brownie Recipe
- Incredibly Moist Chocolate Cake Recipe (paired with our Easy 5-Minute Fluffy Vanilla Frosting)
- Delicious Oatmeal Cookies with Dried Fruit
- Classic Philadelphia Cheesecake Recipe
- The Best Ever Moist Banana Bread Recipe

Fluffy Biscuit Cinnamon Rolls (Quick, No-Yeast Recipe!)
By: Jennifer Pallian BSc, RD
Easy, buttery biscuit cinnamon rolls that come together quickly for a delightful treat. No yeast or long waiting required!
20 minutes
25 minutes
8
Ingredients
Biscuit Dough
- 2 ½ cups all-purpose flour
- 3 tbsp granulated sugar
- ½ tsp baking soda
- 1 ½ tbsp baking powder
- ¼ tsp salt
- 7 tbsp very cold salted butter
- 1 cup buttermilk
Filling
- 3 tbsp salted butter melted and cooled
- 6 tbsp light brown sugar
- 1 tbsp ground cinnamon
Instructions
- Preheat the oven to 400ºF (200°C). Line an 8×8-inch baking dish with floured parchment paper.
- Mix the dry ingredients: In a large bowl, whisk together the flour, sugar, baking soda, baking powder, and salt.
- Cut in the butter: Grate or cube the very cold butter. Use a pastry cutter or your fingers to quickly work it into the flour mixture until it resembles coarse crumbs with pea-sized bits of butter throughout.
- Add the buttermilk: Pour in the buttermilk and stir gently just until the dough comes together. It will be shaggy with some dry patches – avoid overmixing.
- Fold the dough: Transfer the dough onto the floured parchment paper. Pat it out into a rectangle, then fold it into thirds (like a letter) and press it down gently again. Repeat this folding process twice more. TIP: Be very gentle with this movement; you are not kneading.
- Roll and fill: Roll the dough out into a rectangle about 15 x 12 inches. Brush the surface evenly with the cooled melted butter, then generously sprinkle with the brown sugar and cinnamon mixture.
- Roll up and slice: Starting from one of the long edges, tightly roll the dough up into a log. Use a sharp knife or unflavored dental floss to slice the log into 8 even pieces.
- Arrange and bake: Place the rolls snugly into the prepared baking pan. Bake for 22–26 minutes, until they are golden brown and fully baked in the center. The internal temperature should be 190ºF (88°C) on a cooking thermometer.
- Cool slightly before serving. If you are using a glaze, wait about 10 minutes for the rolls to cool slightly before drizzling it over the warm rolls.
Notes
- Use cold butter and buttermilk for the flakiest layers. Keeping the dough cold until it goes into the oven is key.
- Mix gently to avoid tough rolls. Biscuit dough requires minimal handling to remain tender.
- The dough can be sticky. Utilize the parchment paper to help you roll it up, or slide a floured spatula underneath the dough if needed to prevent sticking.
Nutrition
Calories: 326kcal | Carbohydrates: 44g | Protein: 5g | Fat: 17g | Saturated Fat: 10g | Polyunsaturated Fat: 1g | Monounsaturated Fat: 4g | Trans Fat: 1g | Cholesterol: 41mg | Sodium: 527mg | Potassium: 62mg | Fiber: 4g | Sugar: 16g | Vitamin A: 490IU | Vitamin C: 0.04mg | Calcium: 214mg | Iron: 2mg
Nutrition information is automatically calculated and should only be used as an approximation.
Tried this recipe? Share your thoughts!
Leave a comment below to let us know how your biscuit cinnamon rolls turned out!