
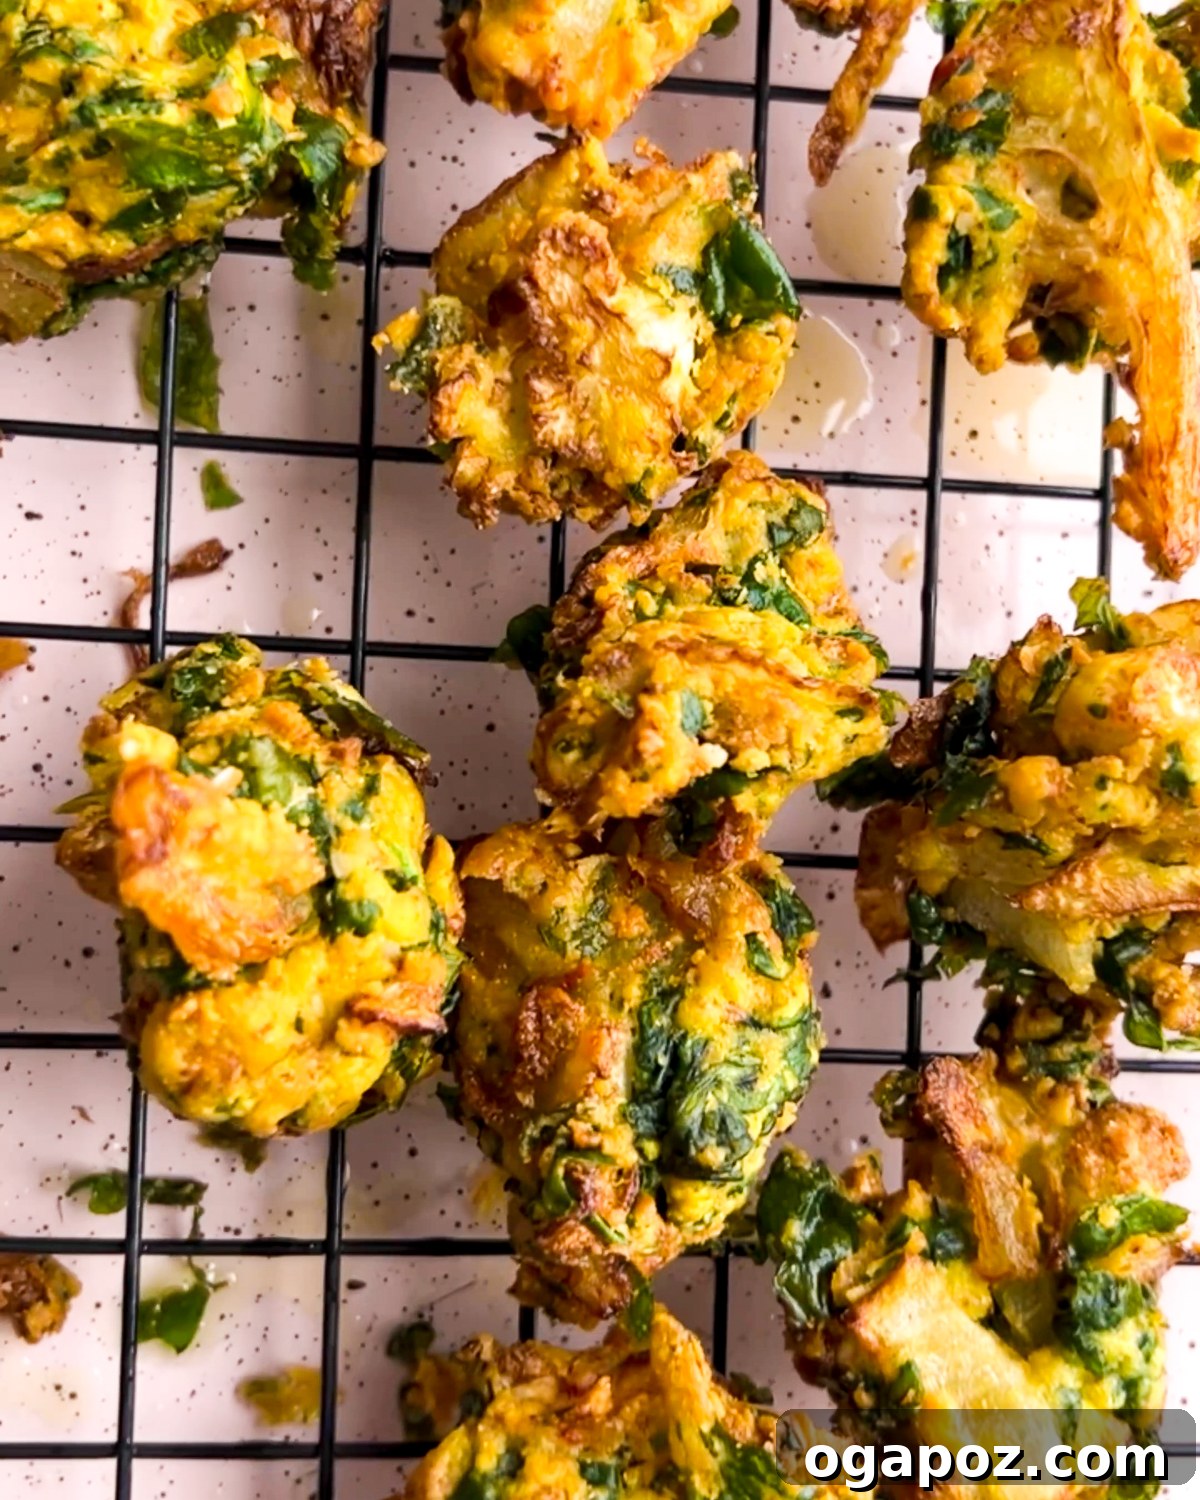
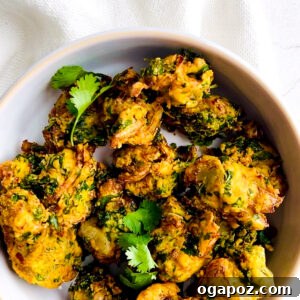
Welcome to the ultimate guide for making truly amazing, restaurant-quality Pakora right in your own kitchen! These beloved Indian vegetable fritters are a symphony of textures and flavors, boasting a gloriously crisp, golden exterior that gives way to a soft, fluffy, and wonderfully spiced interior. It’s a culinary experience that promises love at first bite, and once you try this recipe, you’ll understand why it’s a staple in Indian households and a favorite around the world.
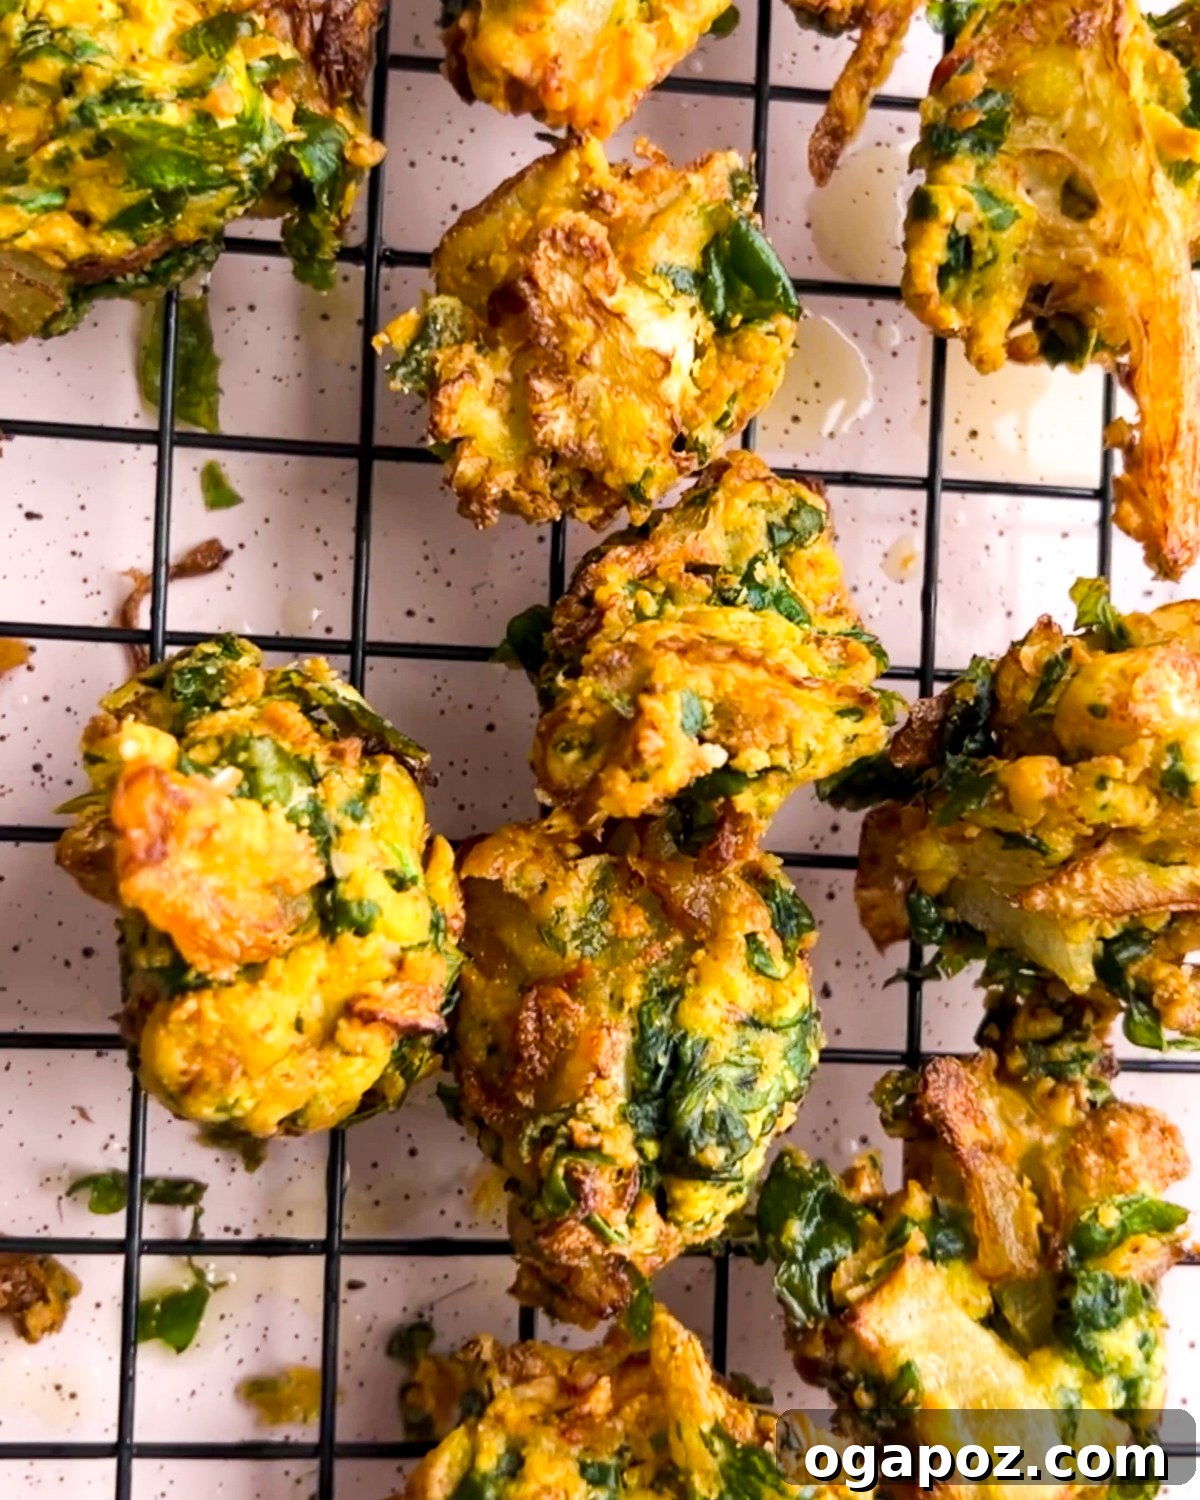
There’s nothing quite like the irresistible crunch of freshly fried pakora, especially when enjoyed piping hot, straight from the oil. Each bite delivers a delightful contrast between the perfectly seasoned vegetables and the light, airy chickpea flour batter. They are incredibly versatile, making them ideal as a savory snack, a delightful appetizer, or a comforting accompaniment to your evening tea. My Indian husband, for example, absolutely adores them, often enjoying them with a dollop of classic tomato ketchup – a simple pleasure that proves how widely loved these fritters are!
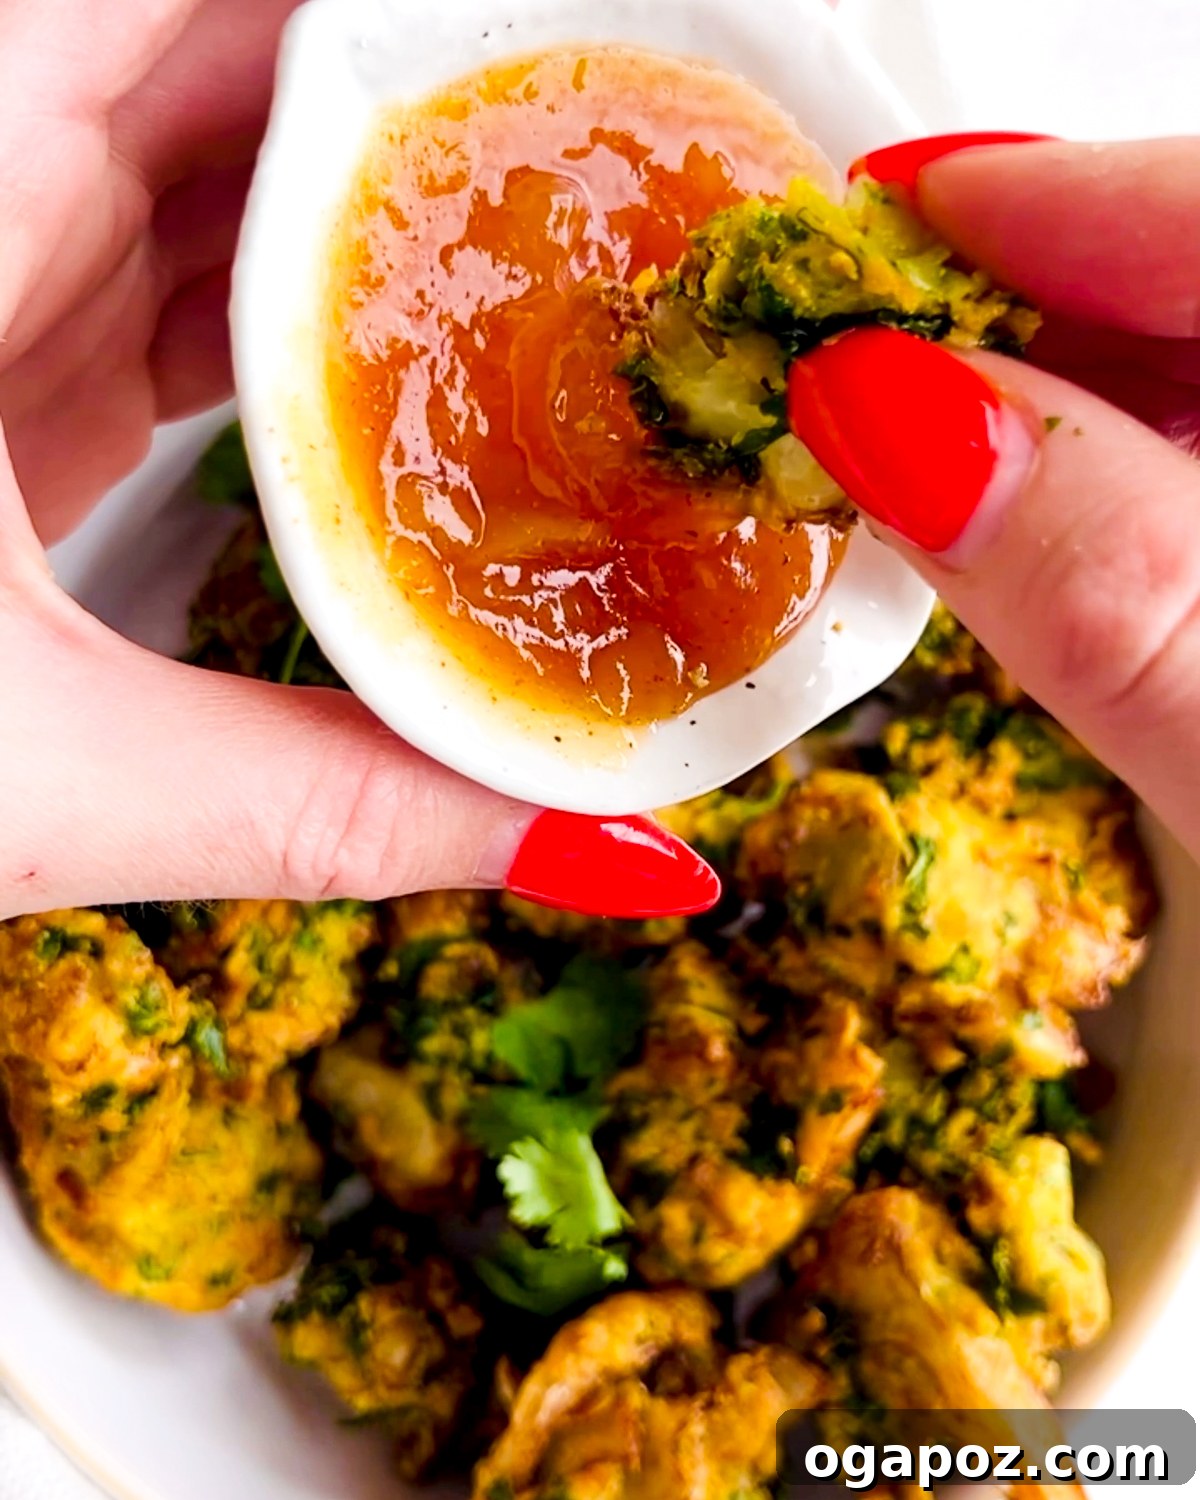
To elevate your pakora experience, I highly recommend pairing these savory bites with traditional Indian-style sauces. A cooling Indian yogurt sauce (raita), sweet and tangy mango chutney, or a vibrant mint chutney all offer fantastic complementary flavors. And for the ultimate authentic indulgence, serve them alongside a steaming cup of aromatic masala chai. Of course, they are equally enchanting on their own, a testament to their inherent deliciousness.
If you’re a connoisseur of crispy, crunchy Indian snacks, then you’re in for a treat! Beyond pakora, you simply must explore other incredible recipes like my chicken samosas, which offer a hearty and flavorful bite, or the equally delightful potato samosas for a wonderful vegetarian alternative. These recipes share the same spirit of satisfying crunch and robust Indian spices that make pakora so irresistible.
Gather Your Essentials: Ingredients and Tools for Perfect Pakora
Crafting the perfect batch of pakora begins with assembling the right ingredients and having the necessary tools at hand. Don’t worry, nothing here is overly exotic or hard to find. With a little preparation, you’ll be well on your way to frying up these crispy delights.
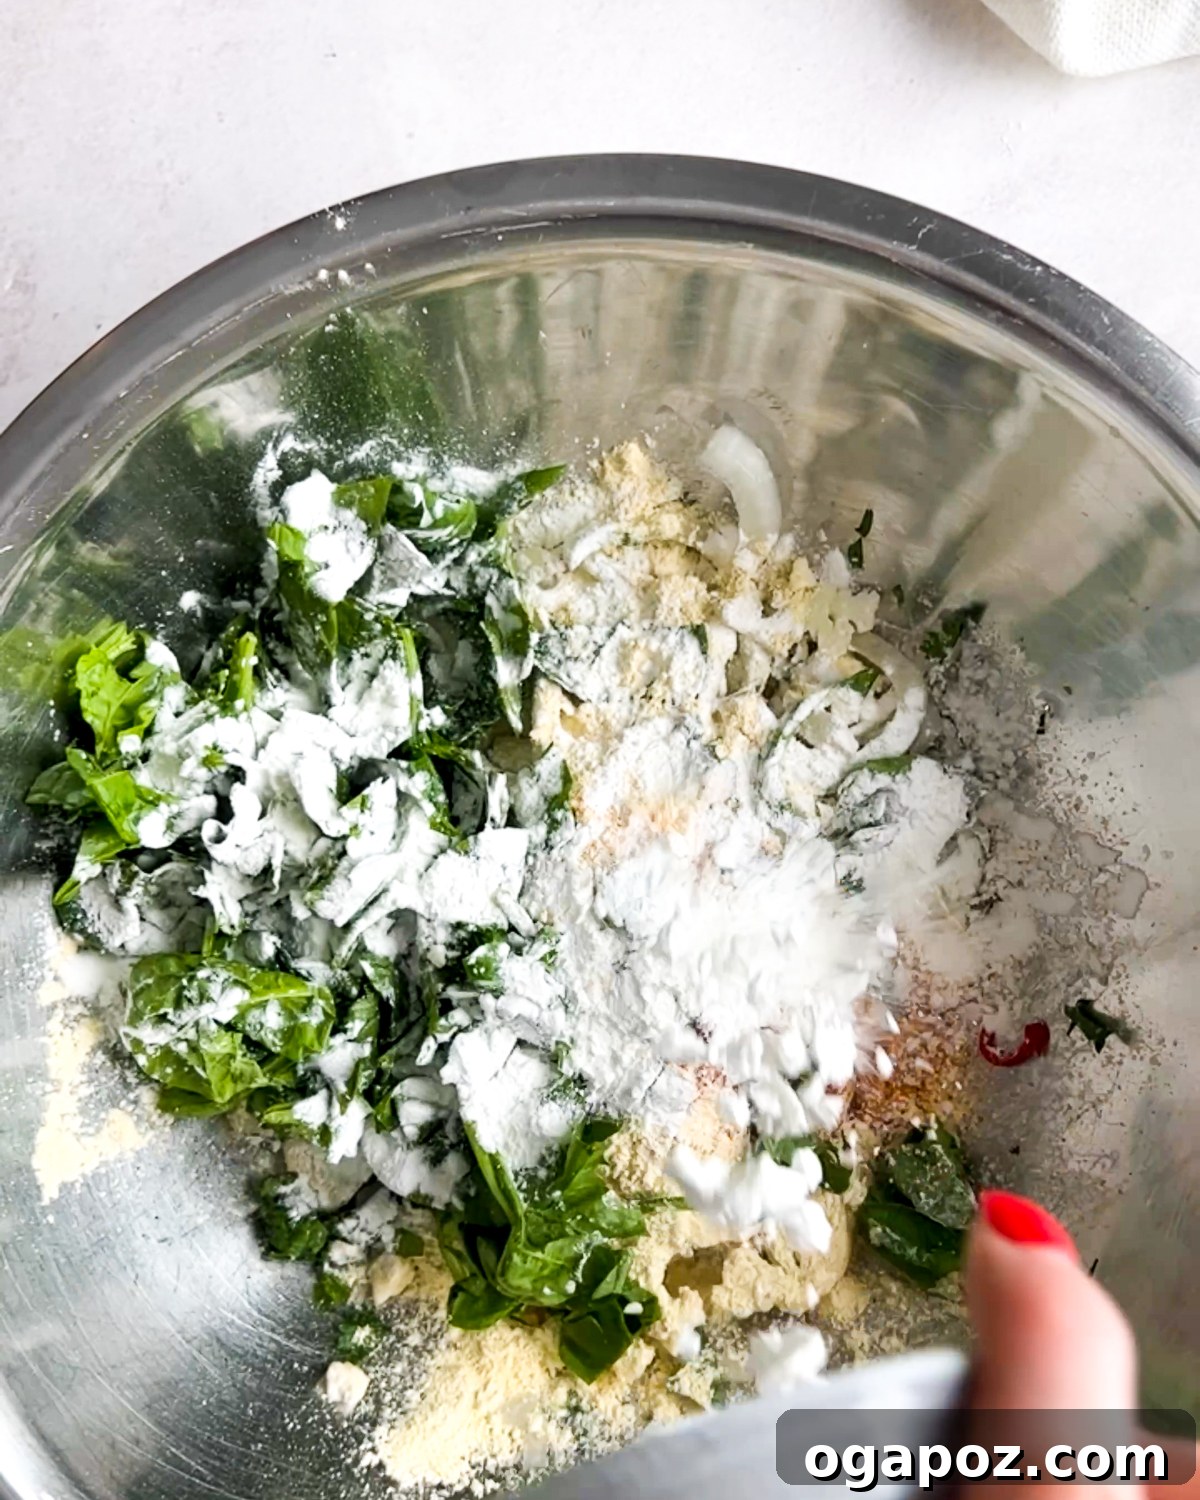
Essential Ingredients for Irresistible Pakora
The beauty of pakora lies in its simple yet powerful combination of fresh vegetables and aromatic spices, all bound together by a crisp, flavorful batter. Here’s a breakdown of what you’ll need for this classic pakora recipe:
For the Vegetables: The Heart of Your Fritters
- Thinly-sliced Medium Onion: Onions are a quintessential pakora ingredient, adding a delightful sweetness and a crucial crisp texture when fried. Slicing them thinly ensures they cook through evenly and integrate beautifully into the fritter.
- Thinly-sliced Cauliflower Florets: These contribute a mild, slightly nutty flavor and a satisfyingly hearty texture to your pakoras. When sliced thin, they become tender inside while maintaining a pleasant bite.
- Baby Spinach, Coarsely Chopped: Spinach offers a touch of vibrant green, a hint of earthy freshness, and helps balance the richness of the fried fritters. Its subtle flavor complements the other vegetables perfectly.
- Green Chili (like Serrano Pepper or Thai Chilies), Minced: For those who appreciate a kick, minced green chilies provide a wonderful burst of heat. Feel free to adjust the amount or omit entirely based on your spice preference.
- Coarsely Chopped Cilantro (Coriander) Leaves: This fresh herb is non-negotiable for authentic Indian flavor. Cilantro infuses the pakoras with a bright, citrusy, and herbaceous aroma that is truly distinctive.
- Kosher Salt: Essential for seasoning the vegetables and drawing out excess moisture, which is crucial for achieving a crispy pakora. It also enhances all the other flavors within the fritter.
For the Batter: The Golden, Crispy Coating
- Chickpea Flour (Gram Flour or Besan): This is the foundation of any authentic pakora batter. Chickpea flour provides a distinct nutty flavor, acts as an excellent binder, and is key to achieving that signature crispy, light texture. It’s also naturally gluten-free!
- Cornstarch (or Rice Flour): Adding a touch of cornstarch or rice flour to the batter is a secret weapon for extra crispiness. It helps create a lighter, airier coating that shatters beautifully with every bite.
- Red Chili Powder or Cayenne Pepper: This adds a lovely warmth and an additional layer of mild to moderate heat to the batter. You can easily adjust the quantity to match your preferred spice level.
- Turmeric Powder: Beyond its warm, earthy flavor, turmeric gives pakoras their characteristic beautiful golden hue. It also boasts anti-inflammatory properties, adding a healthy boost.
- Water: The binding agent for your batter. The amount of water is critical – you’ll need just enough to create a thick, cohesive mixture that coats the vegetables without being too runny. Adjust as needed to reach the desired consistency.
- Baking Powder (Optional, but Recommended): A small amount of baking powder can contribute to an even lighter and puffier pakora, enhancing the airy texture.
Unleash Your Creativity: Pakora Substitutions and Delicious Variations
One of the most wonderful aspects of pakora is its incredible adaptability. While our core recipe delivers a fantastic traditional experience, there are countless ways to customize these Indian fritters to suit your taste or what you have on hand. Don’t be afraid to experiment and discover your new favorite combination!
- Chickpea Flour Alternatives: If chickpea flour (besan) isn’t readily available, you can substitute with a good quality all-purpose flour or a gluten-free flour blend. Keep in mind that the flavor and texture will be slightly different, as besan offers a unique nutty depth and unparalleled crispiness.
- Cornstarch Swaps for Extra Crispness: For that desirable light and crispy texture, rice flour is an excellent 1:1 substitute for cornstarch. Potato starch is another viable alternative that will help achieve a similar result.
- Mixed Vegetable Pakora Extravaganza: Embrace the bounty of your garden or local market! Combine a medley of thinly sliced or finely chopped vegetables such as medium potatoes, broccoli florets, shredded cabbage, julienned carrots, diced bell peppers, or even eggplant slices. This not only creates a colorful and diverse batch of pakoras but also ensures they are completely vegan and packed with nutrients.
- Luxurious Paneer Pakora: For a truly indulgent treat, swap out the vegetables for cubes of fresh paneer (Indian cottage cheese). The paneer becomes wonderfully soft and creamy inside its crispy batter, offering a rich and satisfying variation that’s perfect for special occasions.
- Flavorful Chicken Pakora: Elevate your fritters with protein by marinating small pieces of boneless chicken in a blend of ginger-garlic paste and your favorite spices before coating them in the chickpea batter and frying. These are incredibly delicious, especially with a squeeze of fresh lemon juice!
- Classic Spinach and Onion Pakora: Sometimes, simplicity is key. A humble combination of finely sliced onions and fresh spinach leaves creates a deeply satisfying pakora, highlighting the natural sweetness of the onions and the freshness of the greens. Serve these with a selection of your favorite chutneys for an authentic experience.
- Elevate with Extra Herbs and Spices: Take your flavor profile up a notch by incorporating additional fresh herbs like finely chopped mint, dill, or parsley into the batter. For an extra layer of earthy aroma and a subtle crunch, lightly toast cumin seeds and mix them into the batter.
- Cheesy Indulgence: Cheesey Pakora: For a unique and comforting twist, add grated cheese (such as cheddar or mozzarella) and a pinch of crushed carom seeds (ajwain) to your batter. The cheese will melt into a gooey center, creating a delightful surprise in each pakora.
- Sweet Surrender: Dessert Pakora: Don’t limit pakora to savory! For a surprising and delightful dessert, dip slices of banana or apple wedges into a slightly sweetened version of the batter (perhaps with a pinch of cinnamon). Fry until golden, then serve with a dusting of powdered sugar or a drizzle of honey for a truly unique treat.
Essential Tools for Pakora Success
Having the right kitchen tools makes the pakora-making process smooth and enjoyable. Here’s what you’ll need to grab before you start frying:
- Large Bowl: Essential for comfortably mixing your vegetables and ensuring they are thoroughly coated with salt and then the batter. A spacious bowl prevents spills and makes tossing easier.
- Dutch Oven or Heavy-Bottomed Pot: Ideal for deep-frying because its heavy construction maintains a consistent oil temperature. This uniformity is crucial for evenly cooked and consistently crispy pakoras.
- Slotted Spoon or Spider Skimmer: This tool is perfect for safely transferring the pakoras into and out of the hot oil, allowing excess oil to drain away before they hit the cooling rack.
- Wire Rack: Crucial for draining freshly fried pakoras. Placing them on a wire rack allows air to circulate, preventing them from becoming soggy on the bottom, which can happen if they sit on paper towels for too long.
- Deep-Fry Thermometer (Recommended): While not strictly mandatory, a thermometer is highly recommended to accurately monitor and maintain the oil temperature, which is a key factor in achieving perfectly crispy pakoras.
Mastering Pakora: A Step-by-Step Guide to Crispy Perfection
Making delicious, crispy pakora is a rewarding culinary journey that’s surprisingly straightforward. Follow these detailed steps to achieve those irresistible little pops of goodness every time. Precision and patience are your best friends here!
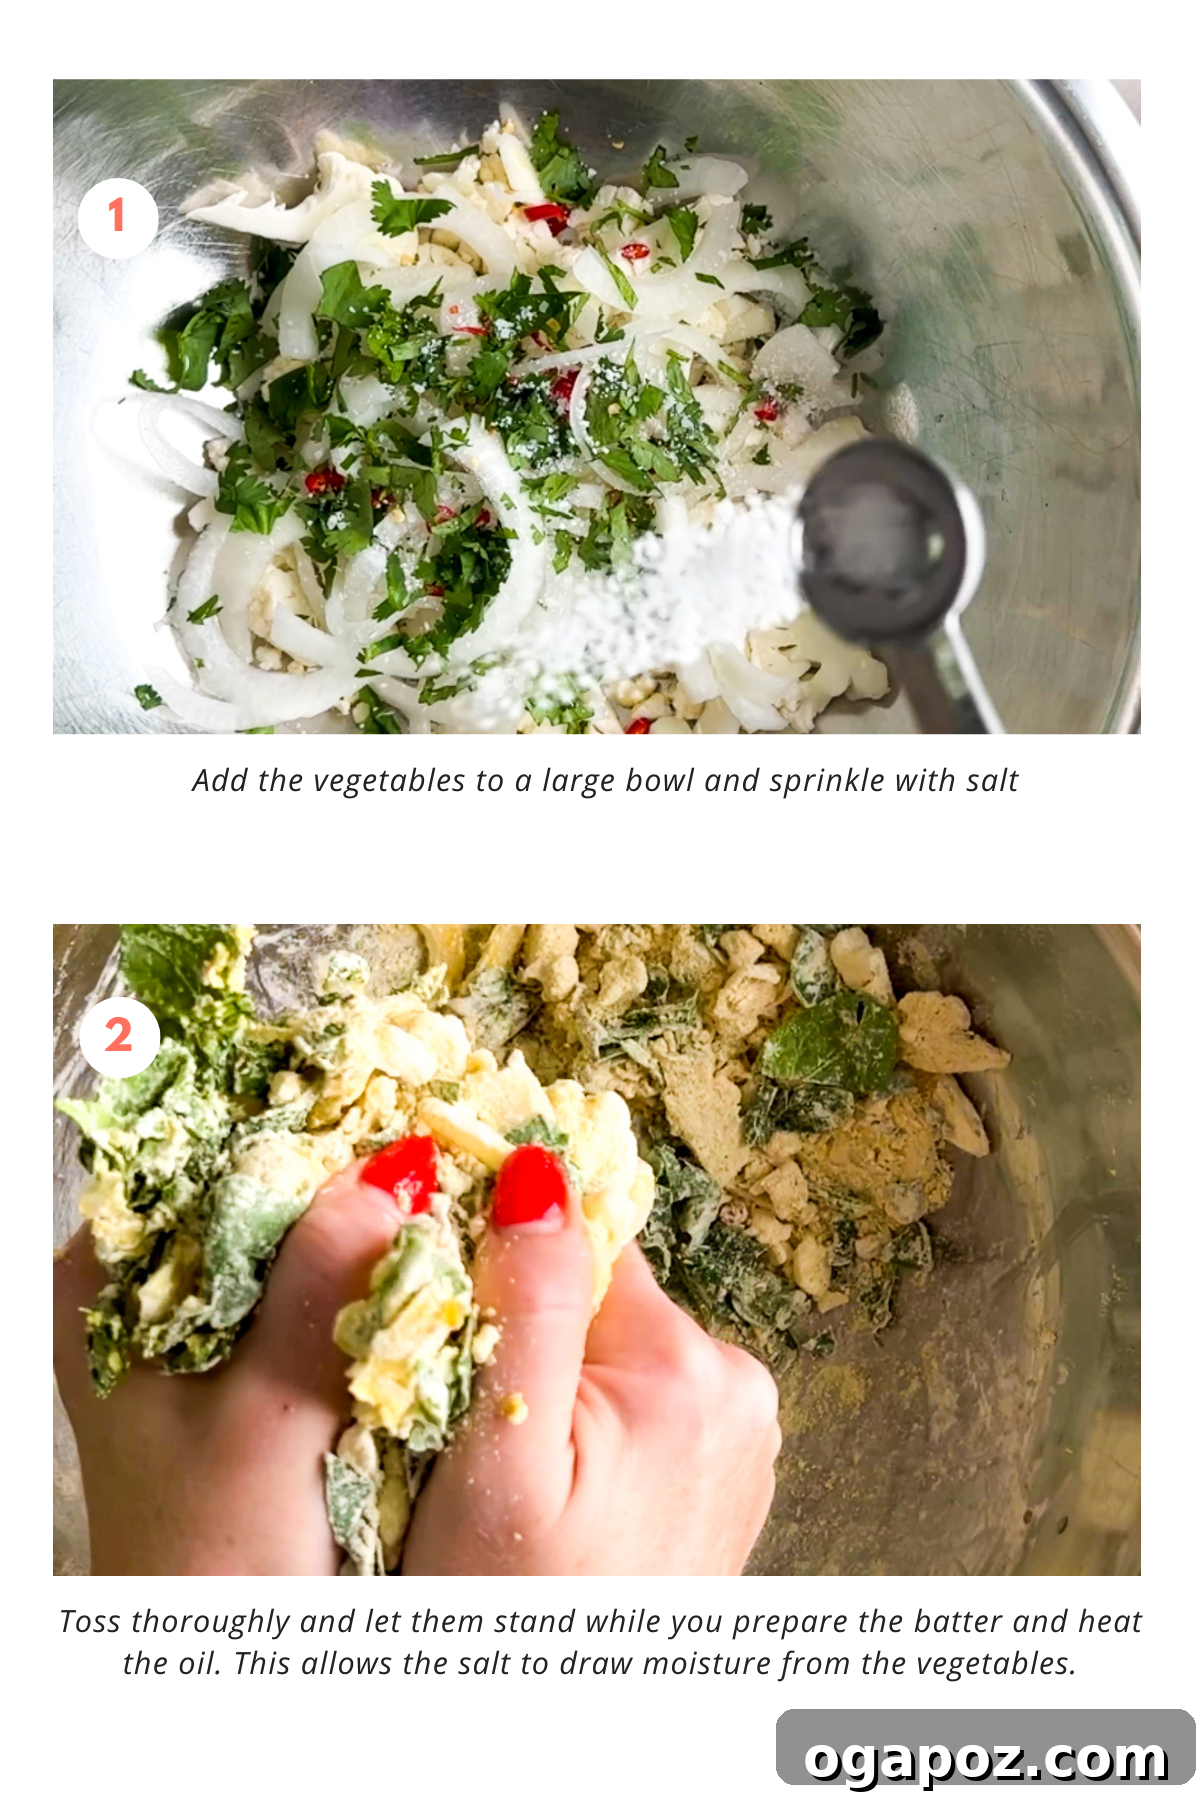
Step 1: Preparing the Vegetables and Releasing Moisture
Begin by adding all your thinly sliced and chopped vegetables – onions, cauliflower, spinach, chilies (if using), and cilantro – into a large mixing bowl. Generously sprinkle them with kosher salt. Now, with clean hands, toss and massage the vegetables thoroughly. The salt will work its magic, drawing out excess moisture from the vegetables. Let them stand for about 10-15 minutes while you move on to the next steps. This crucial resting period prevents soggy pakoras and helps the batter adhere better, resulting in a crispier fritter.
Step 2: Heating the Frying Oil to the Perfect Temperature
In a large Dutch oven or heavy-bottomed pot, pour 2-3 inches of your preferred frying oil (vegetable, canola, or peanut oil work well). Place the pot over medium heat. It’s absolutely vital to ensure the sides of your pot are at least twice the depth of the oil to prevent any overflow or splattering during frying. Gradually heat the oil until it reaches a consistent temperature of 375ºF (190ºC). If you have a deep-fry thermometer, this is the time to use it – precise temperature control is key to golden, non-greasy pakoras.
Step 3: Crafting the Flavorful Batter
While your oil is heating and vegetables are resting, prepare the dry batter mixture. In a separate medium bowl, whisk together the chickpea flour, cornstarch (or rice flour), baking powder (if using), red chili powder (or cayenne), and turmeric. Whisk thoroughly until all the dry ingredients are well combined and there are no clumps. This ensures an even distribution of flavor and leavening throughout your pakoras.
Step 4: Combining Ingredients for the Pakora Mixture
Now, it’s time to bring everything together. Sprinkle the prepared dry chickpea flour mixture evenly over the salted vegetables in the large bowl. Add just 1 tablespoon of water. Using your hands, gently but firmly toss and press the mixture together. Initially, it will seem quite dry, and that’s perfectly normal. The moisture released from the salted vegetables, combined with the small amount of added water, will gradually hydrate the flour. Continue pressing and mixing until all the flour appears moistened and clings to the vegetables, forming a cohesive, somewhat shaggy mass. Let this mixture rest for another 5 minutes; this allows the flour to fully hydrate and the flavors to meld.
Step 5: Forming and Gently Frying Your Pakora
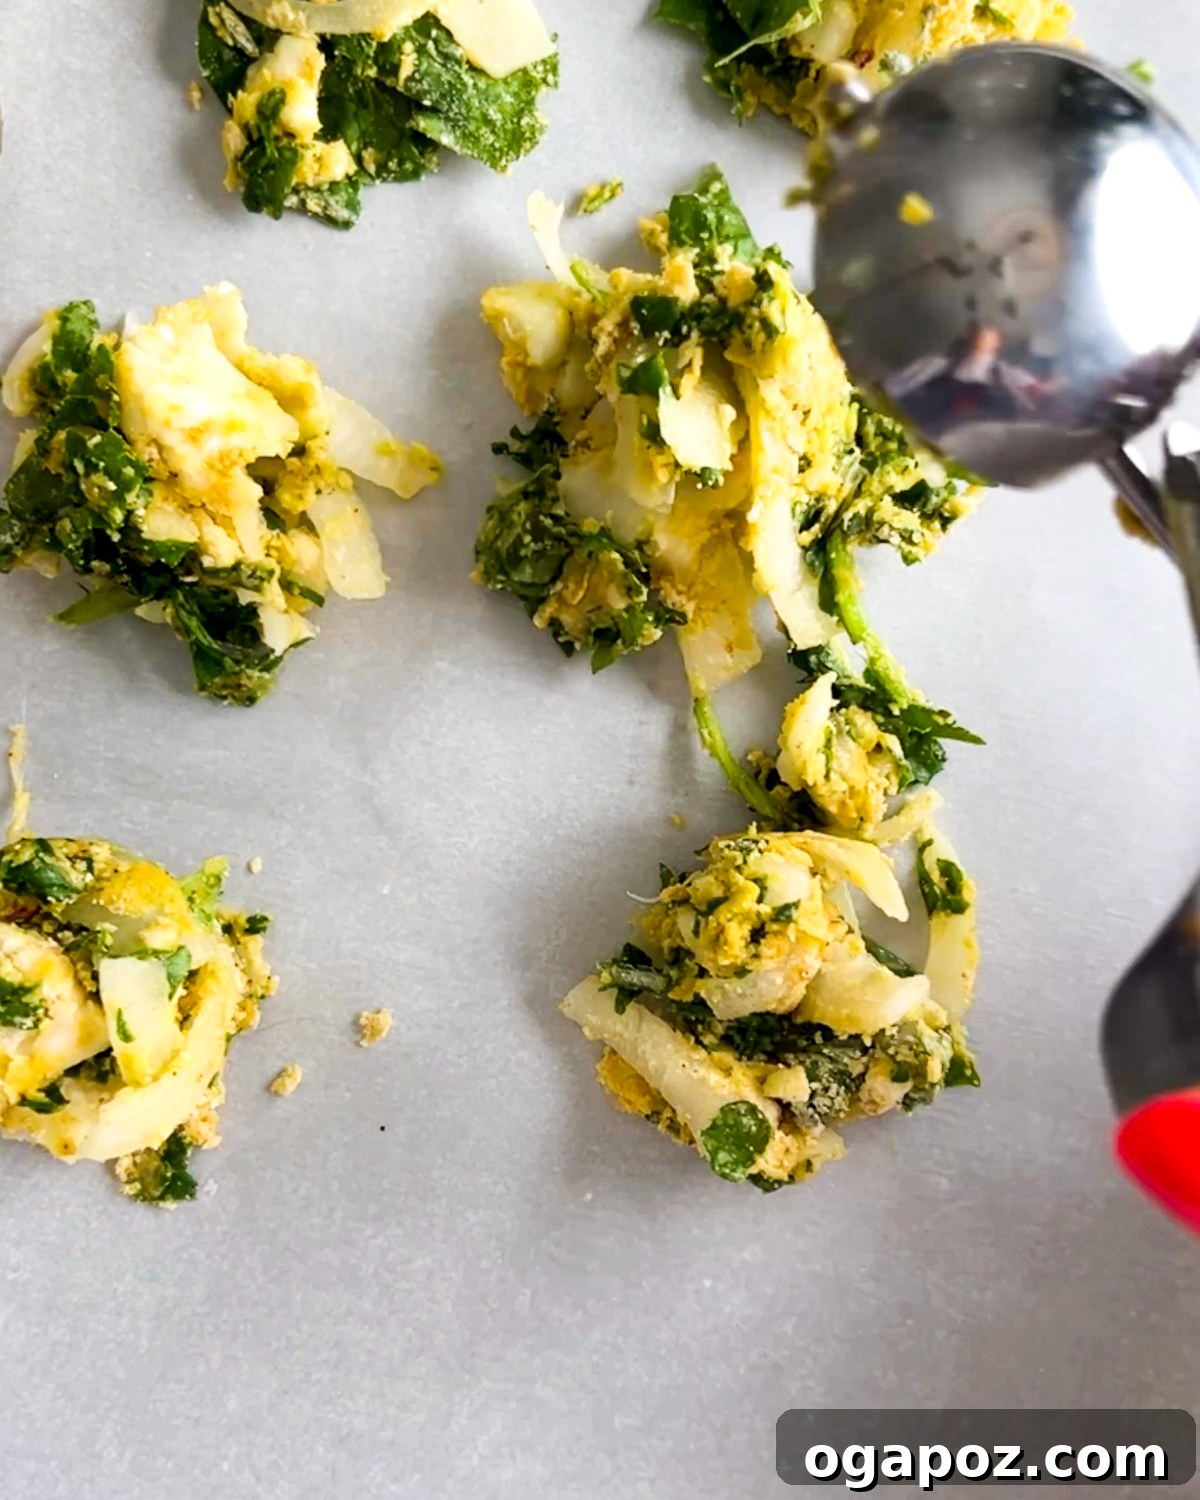
Lightly dampen your hands – this prevents the sticky mixture from clinging to them. Take about 1 ½ tablespoon-sized portions of the pakora mixture and gently squeeze them to form rustic, somewhat irregular balls or patties. Don’t press too hard; a loose structure helps create an airy interior. Carefully, using tongs or a slotted spoon, slide 6-8 pakoras into the hot oil, one at a time. Avoid overcrowding the pot, as this will drop the oil temperature and lead to greasy, less crispy pakoras.
Step 6: Frying to Golden Perfection
Fry the pakoras for approximately 3-4 minutes, turning them over once halfway through the cooking process. You’re looking for a deep, rich golden-brown color on all sides. They should be consistently colored and emit a tempting aroma. The goal is to ensure they are cooked through and wonderfully crispy, not just browned on the outside.
Step 7: Draining and Serving Hot
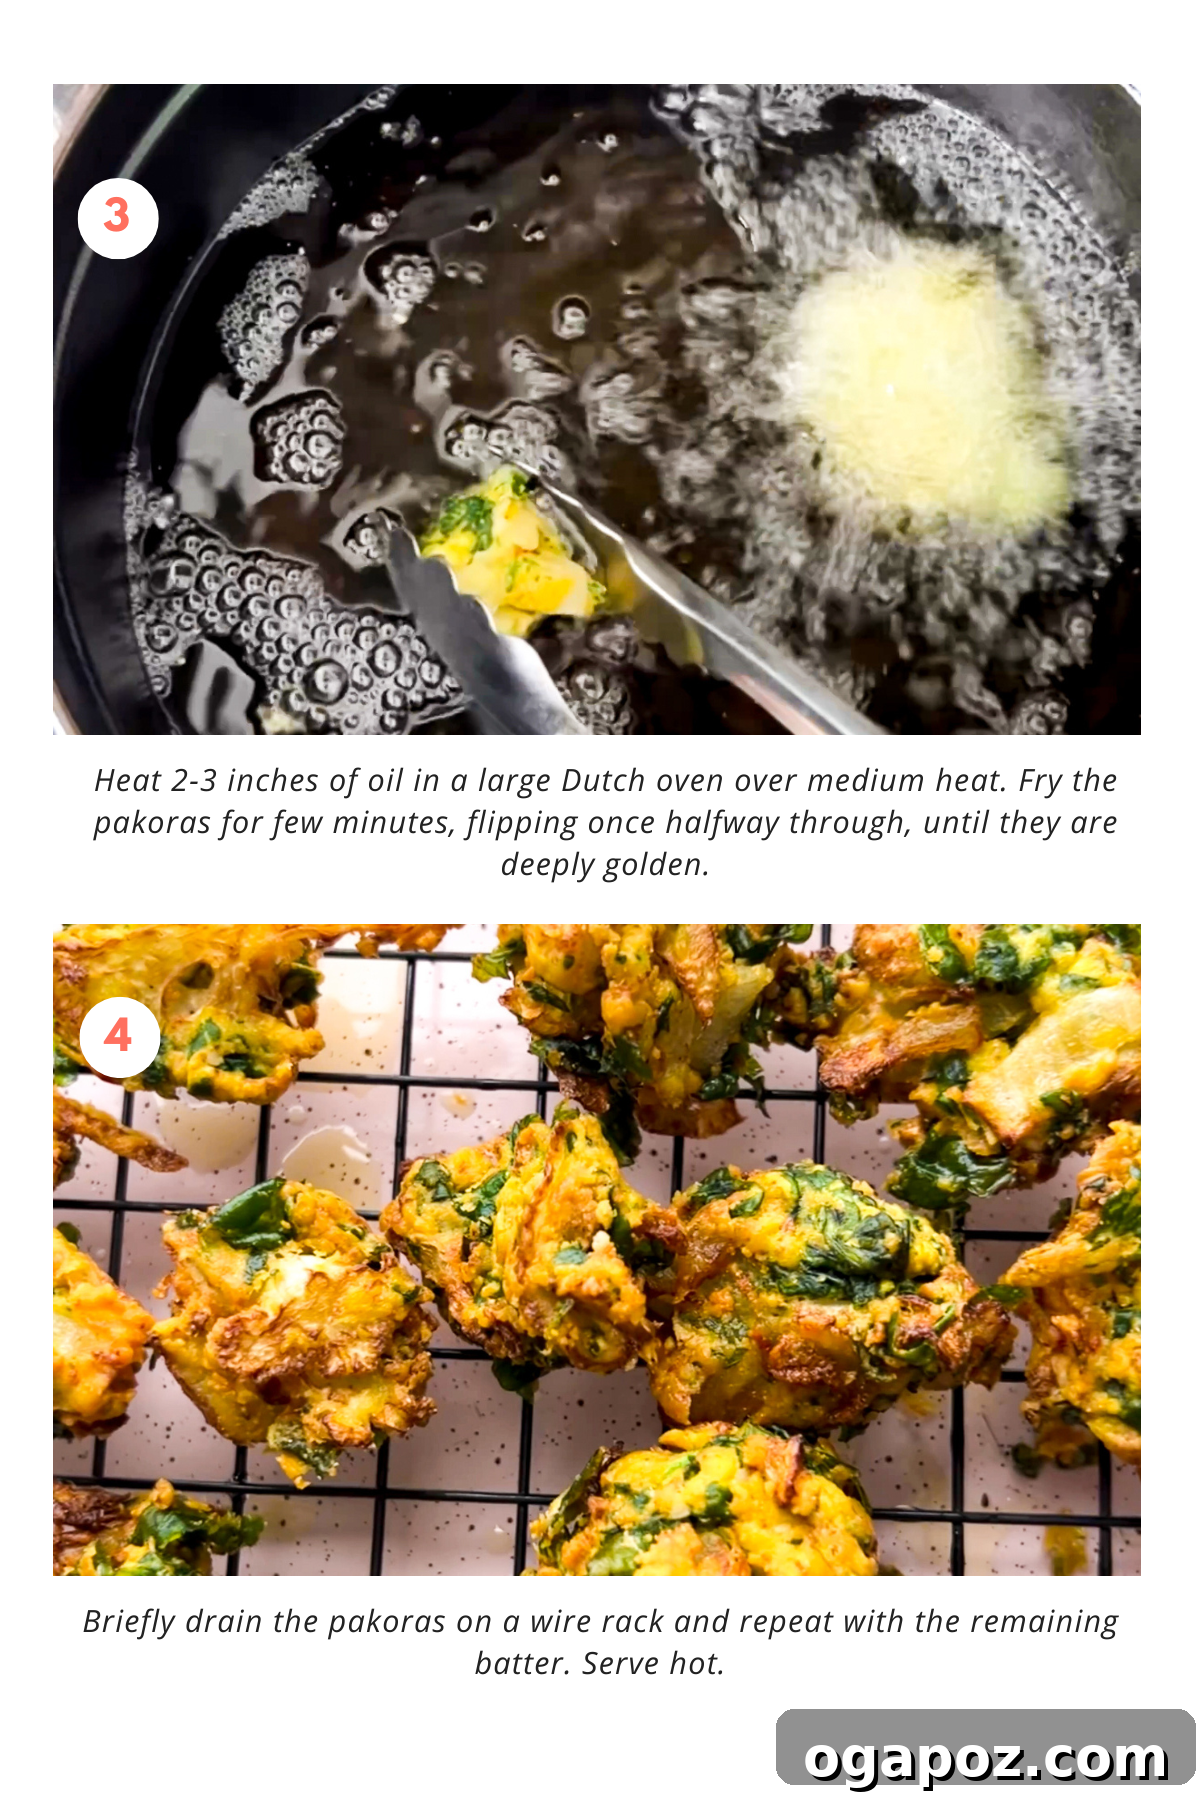
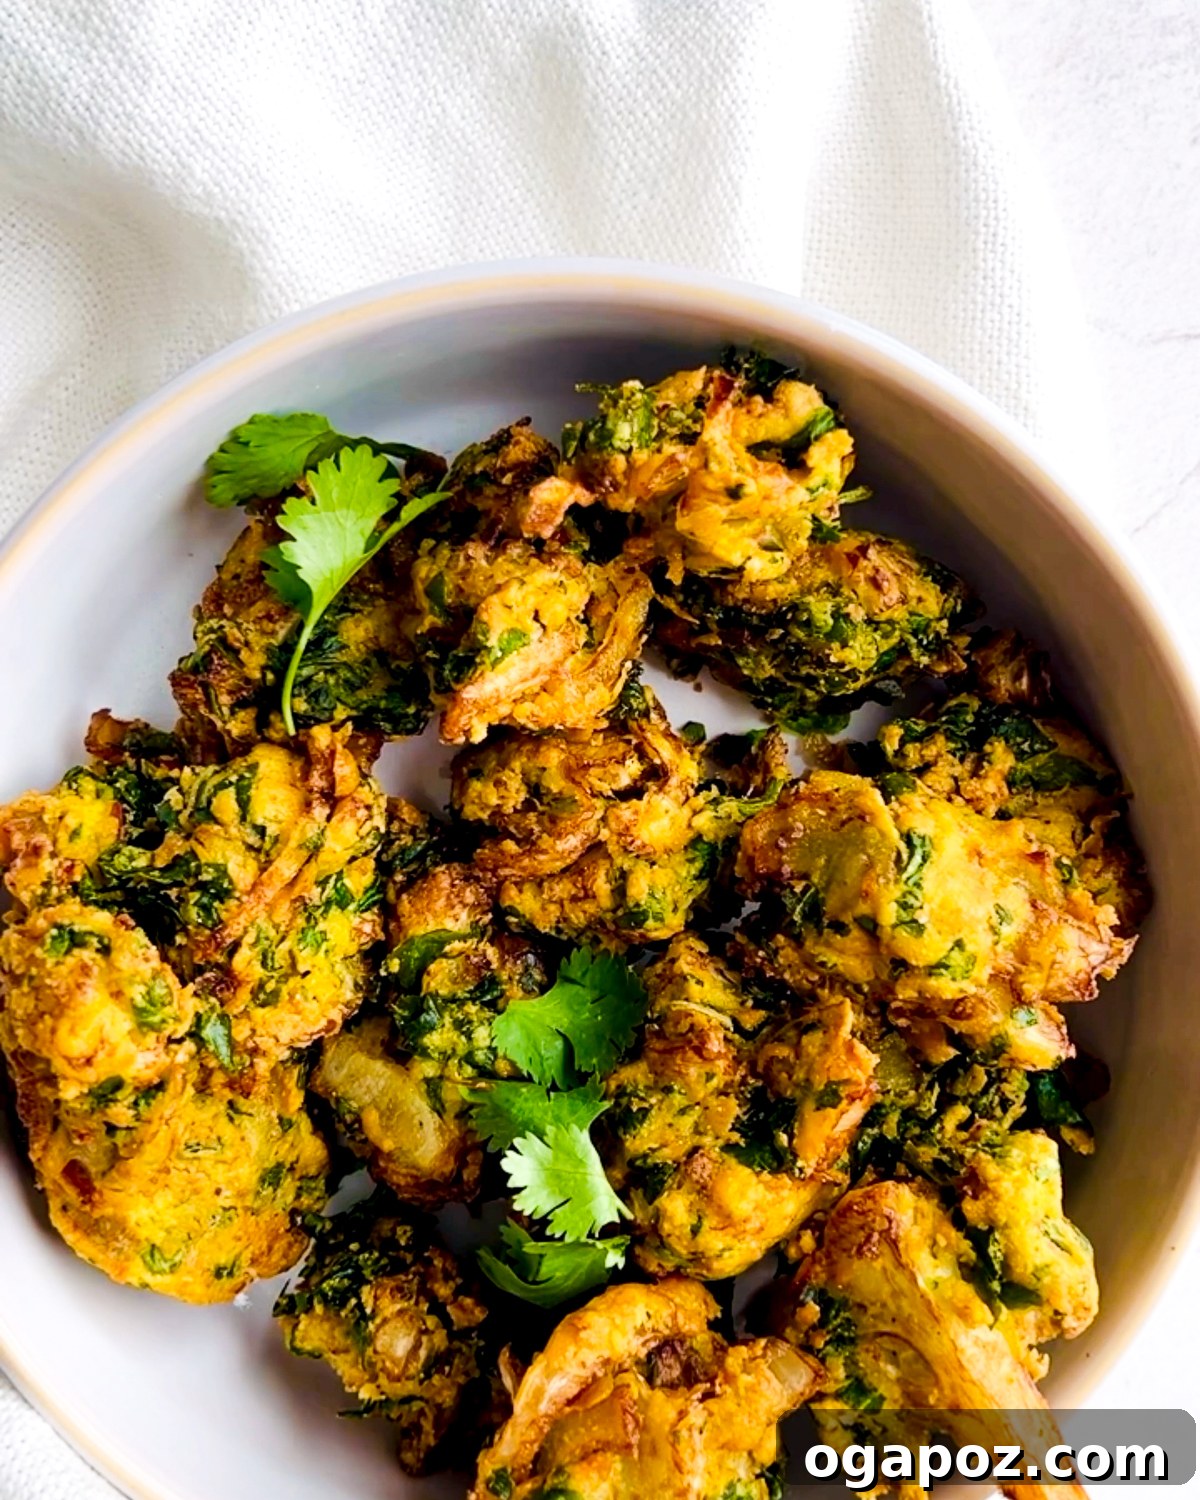
Once your pakoras have reached that perfect golden crispness, use your slotted spoon to carefully remove them from the hot oil. Immediately transfer them to a wire rack placed over a baking sheet. This setup allows excess oil to drip away and ensures air circulates around the pakoras, keeping them delightfully crispy. Resist the urge to place them directly on paper towels for too long, as this can trap steam and make them soggy. Repeat the frying process with the remaining batter, working in small batches. Serve your pakoras immediately, while they are still wonderfully hot and crunchy, accompanied by your favorite chutneys or sauces.
Avoid These Pitfalls: 5 Common Mistakes When Making Pakora (and How to Fix Them!)
Even though pakoras are relatively simple to make, a few common errors can prevent them from reaching their full crispy potential. Being aware of these pitfalls will help you achieve perfect results every time.
- Not Squeezing Enough Moisture from Vegetables: This is perhaps the most frequent mistake. Vegetables naturally contain a lot of water. If this excess moisture isn’t removed, it will leach into your batter, making it runny and resulting in soggy, heavy pakoras that absorb too much oil.
Solution: After salting your vegetables, let them sit for at least 10-15 minutes. You’ll notice a pool of water at the bottom of the bowl. Before adding the batter, firmly squeeze handfuls of the vegetable mixture to release as much liquid as possible. This step is non-negotiable for crispy pakoras. - Using Too Much Water in the Batter: A common tendency is to add more water if the batter seems too dry. However, an overly wet batter won’t cling properly to the vegetables and will become thin and runny, leading to flat, greasy fritters.
Solution: Trust the process! Start with the minimal amount of water specified. Remember that the salted vegetables will continue to release moisture, which will help hydrate the chickpea flour. The batter should be thick and just moist enough to bind the vegetables loosely, not a thin liquid. - Incorrect Oil Temperature Issues: Frying in oil that is either too hot or not hot enough is a recipe for disaster. Oil that’s too hot will burn the outside of your pakoras quickly while leaving the inside raw. Conversely, oil that isn’t hot enough will cause the pakoras to soak up excessive oil, making them heavy, greasy, and soft.
Solution: Invest in a deep-fry thermometer and maintain the oil temperature consistently at around 375ºF (190ºC) for optimal results. If you don’t have a thermometer, test a small drop of batter: it should sizzle and float to the surface within a few seconds. - Overcrowding the Frying Pot: It’s tempting to try and fry all your pakoras at once to save time, but overcrowding the pot is detrimental. Adding too many cold pakora balls at once significantly drops the oil temperature, leading to uneven cooking and greasy fritters.
Solution: Always fry in small batches, allowing enough space for the pakoras to cook evenly and the oil temperature to recover between batches. Typically, 6-8 pakoras at a time is ideal for most home frying setups. - Skipping the Batter Rest Time: Many rush through the steps, but allowing the batter to rest after mixing is an often-overlooked secret to perfect pakoras. Without this rest, the chickpea flour may not fully hydrate, resulting in a drier, crumblier mixture that doesn’t hold together well.
Solution: After combining the dry batter mixture with the vegetables and water, let the mixture rest for at least 5 minutes. This allows the chickpea flour to absorb moisture, creating a more cohesive and pliable batter, and contributes to a lighter, crispier end product.
Convenience and Care: Make Ahead and Storage Tips for Pakora
While pakoras are undoubtedly best enjoyed fresh and hot, there are smart ways to prepare ahead and store leftovers to minimize fuss and maximize deliciousness. These tips ensure you can enjoy crispy pakoras even with a busy schedule.
Make Ahead: You can prepare the vegetable mixture (sliced vegetables with salt) and the dry batter ingredients (chickpea flour, spices, etc.) separately up to 24 hours in advance. Store the salted vegetables in an airtight container in the refrigerator to keep them fresh. Keep the dry batter mix in a sealed container at room temperature. When you’re ready to cook, simply combine the vegetables and dry ingredients, add the specified water, let it rest briefly, and then proceed with frying. This significantly cuts down on prep time just before serving.
Storage of Leftovers: Once cooked, pakoras are truly at their peak when served immediately. However, if you have any leftovers, allow them to cool completely before storing them in an airtight container in the refrigerator for up to 2 days. To prevent them from becoming soggy, you can place a paper towel at the bottom of the container to absorb any residual moisture.
Reheating for Crispiness: To revive the delicious crispiness of leftover pakoras, avoid the microwave at all costs – it will inevitably make them soggy and unappetizing. The best way to reheat is in a preheated oven or an air fryer. Place them in a single layer on a baking sheet or in the air fryer basket. Reheat in a preheated oven at 350ºF (175ºC) for 10-15 minutes, or air-fry at 375ºF (190ºC) for 5-8 minutes, flipping halfway through, until they are heated through and regain their desirable crisp texture.
Unlock Perfection: Pro Tips and Science-Backed Secrets for Flawless Pakora
As a passionate foodie and a lover of all things Indian, both sweet and savory, I’ve gathered my top tips and a few science-based secrets to help you achieve absolute pakora perfection every single time:
- Consistent Slicing for Even Cooking: This might seem minor, but ensuring your vegetables are thinly and uniformly sliced is crucial. Consistent sizing means all your vegetables will cook at the same rate, preventing some from being undercooked while others are perfectly tender.
- Understanding Dry Batter Consistency: Don’t be alarmed if the batter mixture initially appears quite dry after combining with the vegetables and minimal water. This is by design! The beauty of chickpea flour is its ability to slowly absorb moisture. After a brief rest, the residual liquid from the salted vegetables will fully hydrate the flour, creating that perfect sticky consistency.
- The Golden Rule: Maintain Oil Temperature: This is perhaps the single most important factor for crispy, non-greasy pakoras. Use a thermometer to accurately monitor and maintain the oil temperature at 375ºF (190ºC). Oil that’s too cool results in greasy pakoras, while oil that’s too hot burns the exterior before the interior cooks.
- Fry in Smart, Small Batches: Overcrowding the frying pot is a common mistake that drastically lowers the oil temperature. Frying pakoras in small batches, typically 6-8 at a time, allows the oil temperature to remain consistent, ensuring each fritter cooks evenly and achieves maximum crispiness.
- Optimal Draining for Lasting Crispness: After frying, resist the urge to pile your pakoras directly onto paper towels for too long. Instead, immediately transfer them to a wire rack placed over a baking sheet. This allows air to circulate freely around all sides, preventing steam buildup and ensuring they stay wonderfully crispy.
- The Science of Chickpea Flour (Besan): Chickpea flour, or besan, is a powerhouse ingredient. Its high protein and fiber content are what create that robust binding structure, giving pakoras their characteristic shape and texture. The proteins also contribute to the beautiful golden-brown color you achieve during frying through the Maillard reaction.
- The Role of Cornstarch/Rice Flour for Crispiness: These starches are added to the batter to achieve a remarkably lighter and crispier texture. They work by absorbing excess moisture during frying, which helps to create a delicate, shatteringly crisp crust rather than a dense, chewy one.
Frequently Asked Questions About Pakora (FAQs)
Just skimming through this incredible pakora recipe? Here are some key takeaways and answers to common questions:
The spiciness of pakoras is entirely customizable! It primarily depends on the amount and type of green chilies (like serrano or Thai chilies) and red chili powder or cayenne pepper used in the batter. If you prefer a milder taste, you can significantly reduce the chilies or omit them altogether. For those who love heat, feel free to add a little extra!
While pakoras are truly at their best when enjoyed fresh, you can certainly freeze them after they have been fried and cooled completely. To freeze, arrange them in a single layer on a baking sheet and flash freeze until solid, then transfer them to an airtight, freezer-safe bag or container. This prevents them from sticking together. When ready to enjoy, reheat them from frozen in a preheated oven at 375ºF (190ºC) for 15-20 minutes, or in an air fryer, until they are heated through and crispy again.
Yes, absolutely! Traditional pakoras are naturally gluten-free because they are made with chickpea flour (besan), which is derived from ground chickpeas and contains no wheat. However, if you have severe gluten sensitivities or celiac disease, always double-check that all other ingredients you use, such as baking powder or specific spice blends, are certified gluten-free to avoid any cross-contamination.
The beauty of pakoras lies in their versatility! Common and delicious choices include thinly sliced onions, cauliflower florets, baby spinach, potatoes (thinly sliced or grated), and eggplant. However, feel free to get creative and experiment with other vegetables like bell peppers, zucchini, finely chopped carrots, shredded cabbage, or even broccoli. The key is to ensure they are sliced or chopped finely enough to cook thoroughly and integrate well into the batter.
While deep-frying is what gives pakoras their iconic crispiness and texture, you can certainly opt for healthier cooking methods. You can bake pakoras in a preheated oven at 400ºF (200ºC) for 20-25 minutes, flipping them halfway through, until golden and cooked. Alternatively, an air fryer works wonderfully; air-fry at 375ºF (190ºC) for 15-20 minutes, flipping halfway. While these methods produce a slightly different texture, they still result in delicious and satisfying fritters.
Sogginess is a common issue that can usually be attributed to a few key factors. The primary culprit is often not squeezing enough excess moisture from the salted vegetables before adding the batter. Other reasons include overcrowding the frying pan (which drops the oil temperature), or frying at too low a temperature. To achieve perfectly crispy pakoras, ensure you thoroughly drain your vegetables, maintain the oil temperature accurately (ideally 375ºF), and fry in small, manageable batches.
More Indian Delights: Other Snacks You’ll Adore
If you’ve fallen in love with the flavors of pakora, you’re sure to enjoy these other fantastic Indian dishes, snacks, and treats. Expand your culinary repertoire with these beloved recipes:
- Indian Spiced Fish Cakes: Flavorful and aromatic, these fish cakes are a delightful blend of spices and tender fish.
- Butter Chicken Pizza: A creative fusion dish that combines the rich, creamy flavors of butter chicken with the universally loved pizza.
- Indian Chickpea Salad: A refreshing and protein-packed salad bursting with fresh Indian flavors and textures.
- Experience the diverse world of Indian bread: Cheese Naan, offering a gooey, cheesy delight; Keema Naan, stuffed with savory minced meat; and Aloo Naan, a comforting bread filled with spiced potatoes.
Pin
Pakora
Jennifer Pallian BSc, RD
15
11
26
20 pakora
Video Overview
For a visual guide on making pakora, consider searching for “How to Make Pakora” videos on your preferred video platform.
Ingredients
For vegetables:
- 1 cup thinly-sliced onion
- 1 cup thinly-sliced cauliflower florets
- 1 cup loosely-packed baby spinach coarsely-chopped
- 1 serrano pepper or 2 Thai red chilies, minced (adjust to taste)
- 2 tbsp coarsely chopped cilantro leaves
- 1 tsp kosher salt
For batter:
- ⅔ cup chickpea flour (besan)
- 3 tbsp cornstarch or rice flour
- ¼ tsp cayenne pepper or red chili powder
- ¼ tsp turmeric powder
- 1 tbsp water (add more if needed, cautiously)
- ½ tsp baking powder (optional, for extra lightness)
Instructions
-
Prepare Vegetables: Add all thinly sliced and chopped vegetables to a large bowl and sprinkle with 1 tsp kosher salt. Toss thoroughly, massaging gently, and let them stand for 10-15 minutes while you prepare the batter and heat the oil. This allows the salt to draw out excess moisture from the vegetables, which is crucial for crispy pakoras. Firmly squeeze out any accumulated liquid before mixing with batter.
-
Heat Oil: Heat 2-3 inches of frying oil in a large Dutch oven or heavy-bottomed pot over medium heat until it reaches 375ºF (190ºC). Ensure the sides of the pot are at least twice the depth of the oil to prevent overflow during frying. Maintain this temperature throughout the frying process.
-
Make Dry Batter: Meanwhile, in a medium bowl, whisk together the chickpea flour, cornstarch (or rice flour), baking powder (if using), cayenne pepper (or red chili powder), and turmeric until well combined.
-
Combine Ingredients: Sprinkle the dry chickpea flour mixture over the squeezed vegetables. Add 1 tbsp water. Use your hands to thoroughly toss and press the mixture together until all the flour is moistened and coats the vegetables. The mixture will seem quite dry and shaggy at first, but this is normal. Let it rest for 5 minutes to allow the flour to fully hydrate and the batter to come together.
-
Form and Fry Pakora: With slightly dampened hands, take about 1 ½ tablespoon-sized portions of the mixture and gently squeeze them into irregular ball or patty shapes. Carefully, using tongs or a slotted spoon, slide 6-8 pakoras into the hot oil, one at a time. Do not overcrowd the pot.
-
Cook to Golden: Fry the pakoras for 3-4 minutes, flipping them once halfway through, until they are deeply golden brown and crispy on all sides.
-
Drain and Serve: Using a slotted spoon, remove the fried pakoras from the oil and briefly drain them on a wire rack placed over a baking sheet. This allows excess oil to drip away and keeps them crispy. Repeat the frying process with the remaining batter, working in batches. Serve hot immediately with your favorite chutneys or sauces.
Nutrition Information (Per Pakora, Approximate)
Calories: 25kcal
|
Carbohydrates: 5g
|
Protein: 1g
|
Fat: 0.3g
|
Saturated Fat: 0.05g
|
Polyunsaturated Fat: 0.1g
|
Monounsaturated Fat: 0.1g
|
Sodium: 122mg
|
Potassium: 72mg
|
Fiber: 1g
|
Sugar: 1g
|
Vitamin A: 160IU
|
Vitamin C: 4mg
|
Calcium: 7mg
|
Iron: 0.3mg
Nutrition information is automatically calculated, so should only be used as an approximation and can vary based on ingredients and preparation methods.
Tried this recipe? Share your thoughts!
Leave a comment below and let us know how your pakoras turned out. Your feedback helps our community of food lovers!