
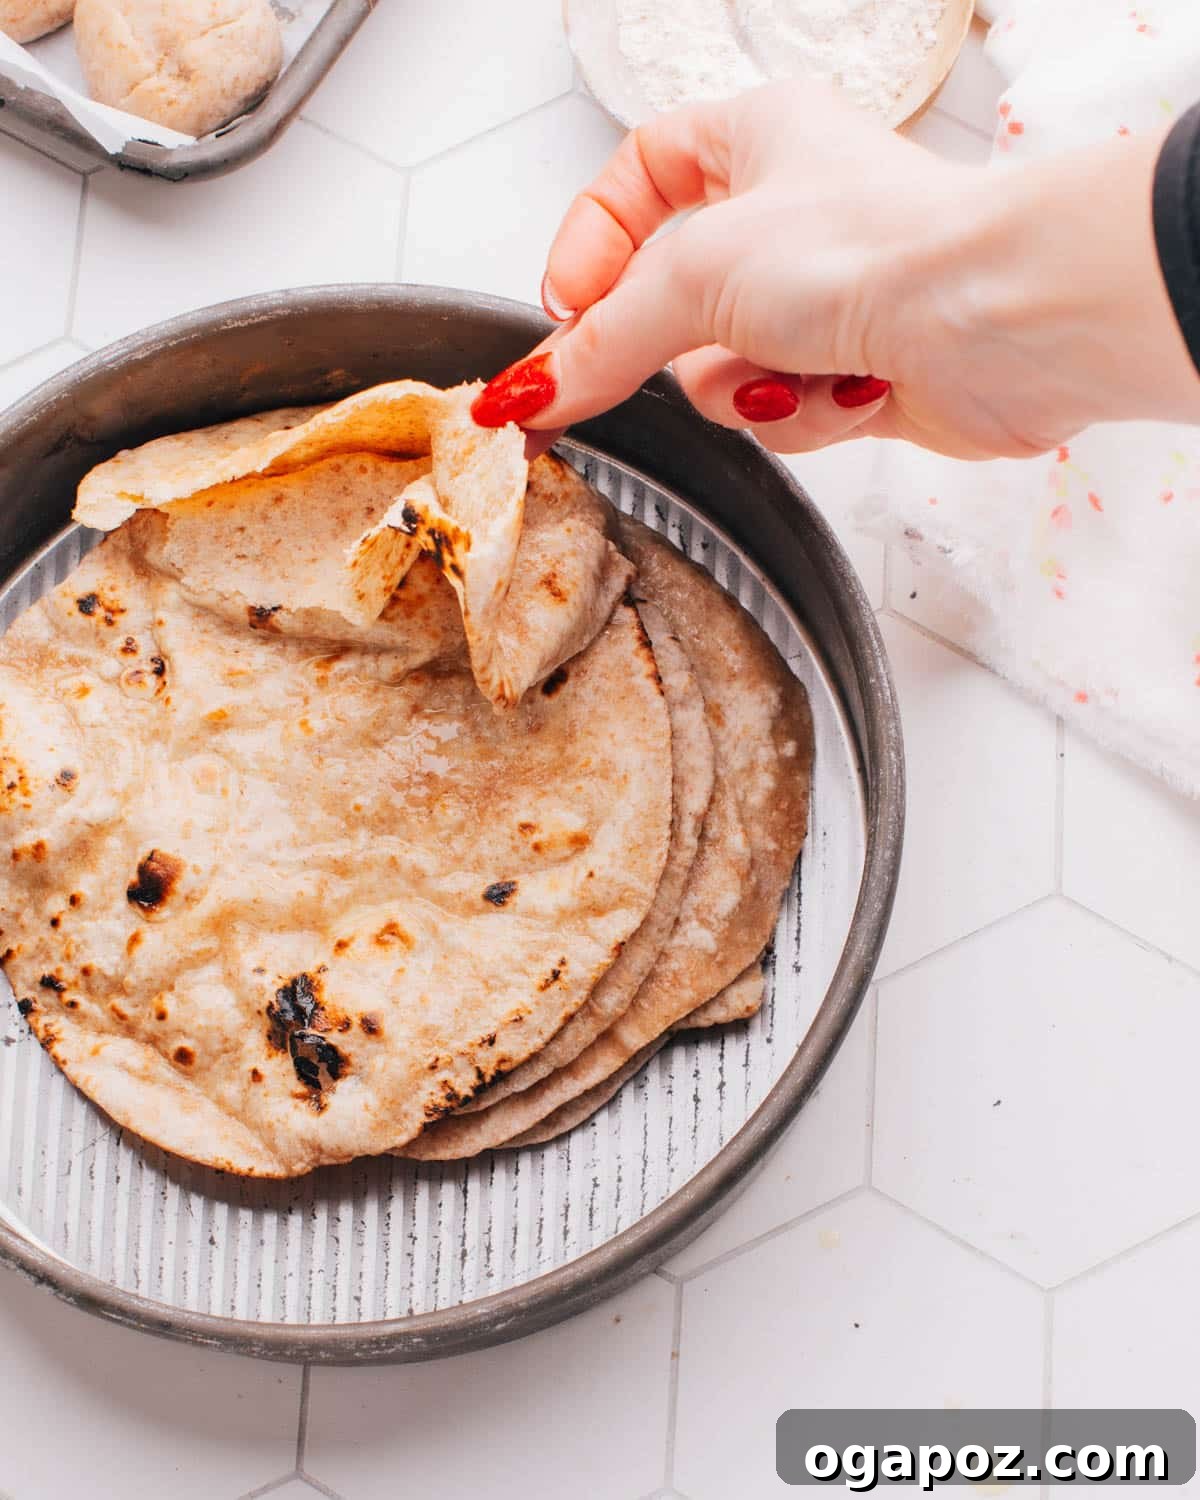
Embark on a culinary journey to create super soft roti, a beloved Indian flatbread perfected over countless family dinners with my Indian husband. This recipe is the culmination of obsessive dedication, refined through hundreds of batches to guarantee success in your kitchen.
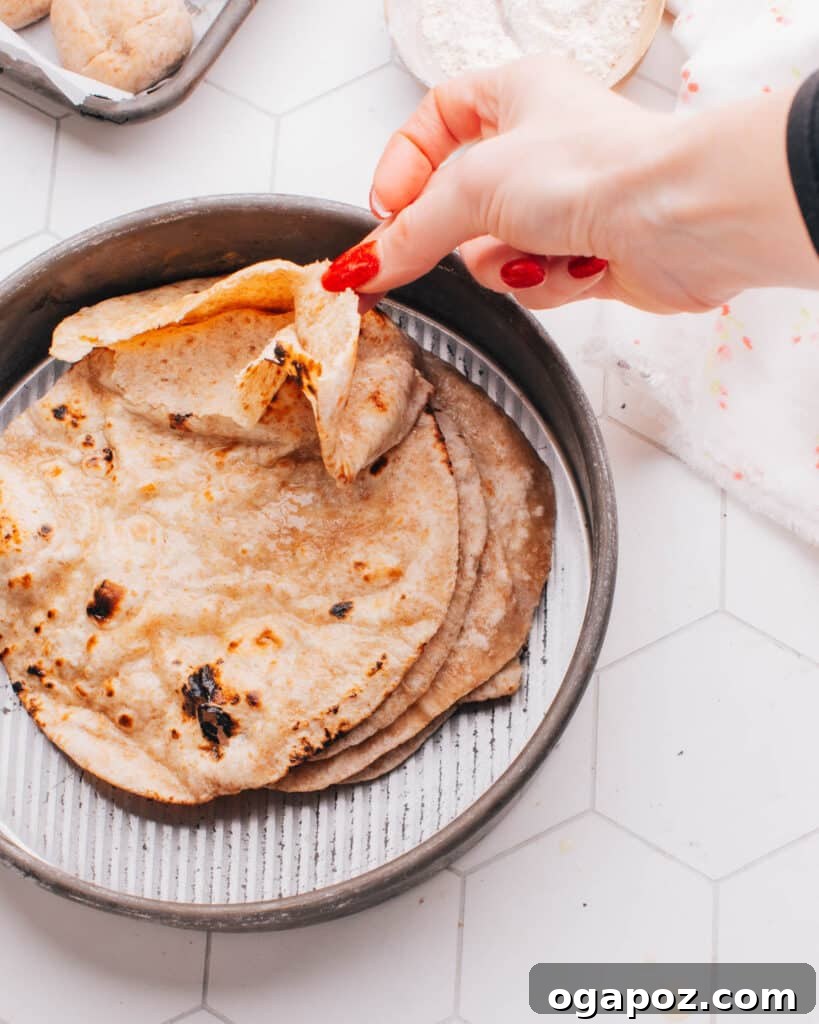
For over two decades, since meeting my Indian husband as a teenager, mastering various Indian flatbreads has been a passion. Among them, the Roti recipe holds a special place. My mother-in-law introduced me to the sheer delight of using warm, freshly made roti to scoop up her exquisite curries, transforming every meal into an enchanting experience that far surpasses using traditional utensils.
While naan enjoys global recognition as an Indian flatbread, roti is the everyday hero, a staple lovingly prepared in Indian homes on a regular basis. It’s the quintessential companion to hearty dishes like Amma’s flavorful dal recipe, offering comforting sustenance that defines daily Indian cuisine. For a deeper dive into their differences, explore: Roti Vs Naan.
This recipe isn’t just theory; it’s a tested tradition. I’ve been making roti at least once a week for my entire adult life. Our three boys, currently aged 4, 8, and 10, have grown up with this tradition and can confidently make and roll the dough. The older ones even assist with the cooking, a testament to its approachable nature.
Before sharing this recipe, my primary goal was to absolutely nail the precise ratio and technique for achieving super soft roti that consistently puff up on the stove. This puffing, often considered an indicator of a successful roti (and, humorously, a good wife!), means more than just a visual spectacle. For me, it signifies a light, airy, and thin bread – never dense – that boasts a delightful stretch, much like a fresh flour tortilla. The magical moment of watching them inflate is incredibly satisfying.
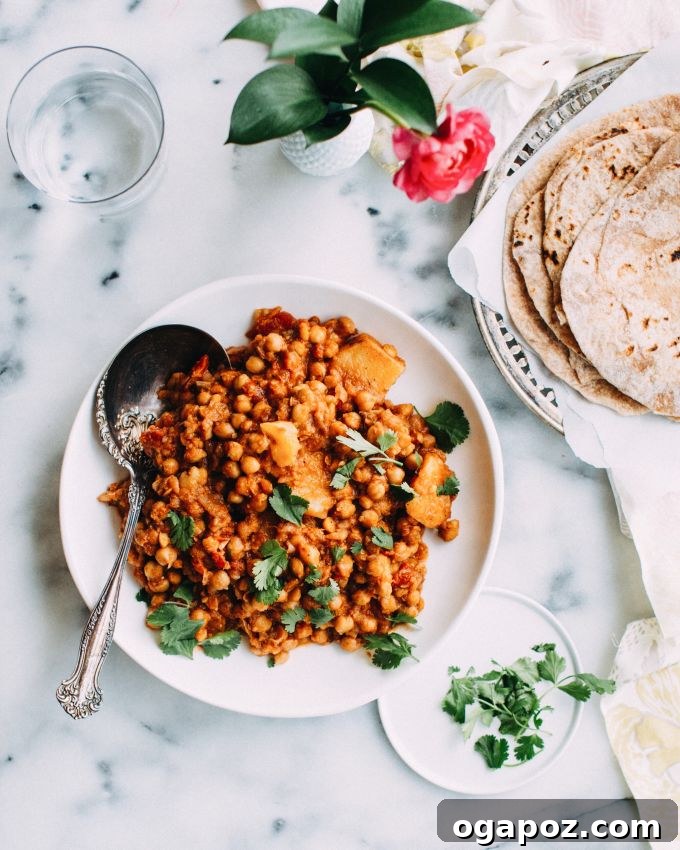
What is Roti? Understanding This Indian Staple
Roti is an essential Indian flatbread, a cornerstone of South Asian cuisine, traditionally crafted from whole wheat flour, known as atta flour in Hindi. It’s a daily culinary ritual in many households, serving as a wholesome accompaniment to rich dals and aromatic curries, often as a nutritious alternative to rice. Unlike some other Indian breads, roti is unleavened, relying solely on simple ingredients to achieve its unique texture and flavor.
These thin, circular flatbreads are rolled with precision and cooked on a dry tawa (a flat griddle or pan) without any oil. When prepared correctly, roti dramatically puffs up during cooking. This inflation is not merely for show; it creates a light, soft, and pliable bread with distinct layers, perfect for tearing, folding, and scooping up savory sauces and gravies, embodying the essence of communal dining.
Why You’ll Adore This Roti Recipe: The Ultimate Homemade Experience
If you’ve been searching for an authentic, soft, stretchy, and utterly delicious homemade roti recipe, your quest ends here. This guide will empower you to create a basic roti that consistently exceeds expectations. You’ll be astonished by how straightforward and immensely rewarding it is to make your own.
- The Perfect Texture Every Time: Each roti emerges from the pan incredibly soft, wonderfully light, and with that coveted perfect puff. This makes them an unparalleled companion for any Indian recipe, from vibrant curries to comforting lentil dishes. The ideal balance of tenderness and chewiness is what sets this recipe apart.
- Effortless Rolling & Cooking: The dough is a true pleasure to handle. Its pliable consistency makes rolling out thin, even circles a breeze, even for those new to flatbread making. The cooking process is equally intuitive, designed to be straightforward and rewarding, ensuring a stress-free culinary experience from start to finish.
- Unmatched Versatility: These rotis are far more than just a side dish. Their neutral yet wholesome flavor profile allows them to seamlessly integrate with a wide array of meals. Use them to scoop up traditional Indian curries, craft quick and healthy lunch wraps, or even as a unique base for breakfast fillings. They are a versatile choice that adapts beautifully to any mealtime need.
This simple Indian bread consistently puffs up using my extensively tested and perfected method, earning high praise even from my discerning Indian mother-in-law. It’s time to earn your own applause, friends. Follow this roti recipe and experience the joy of making perfect homemade roti!

Gather Your Essentials: Ingredients and Tools for Super Soft Roti
Crafting consistently super soft roti hinges on having the right ingredients and essential tools. Let’s delve into what you’ll need to begin your roti-making journey.
Super Soft Roti Ingredients: Simplicity at Its Best
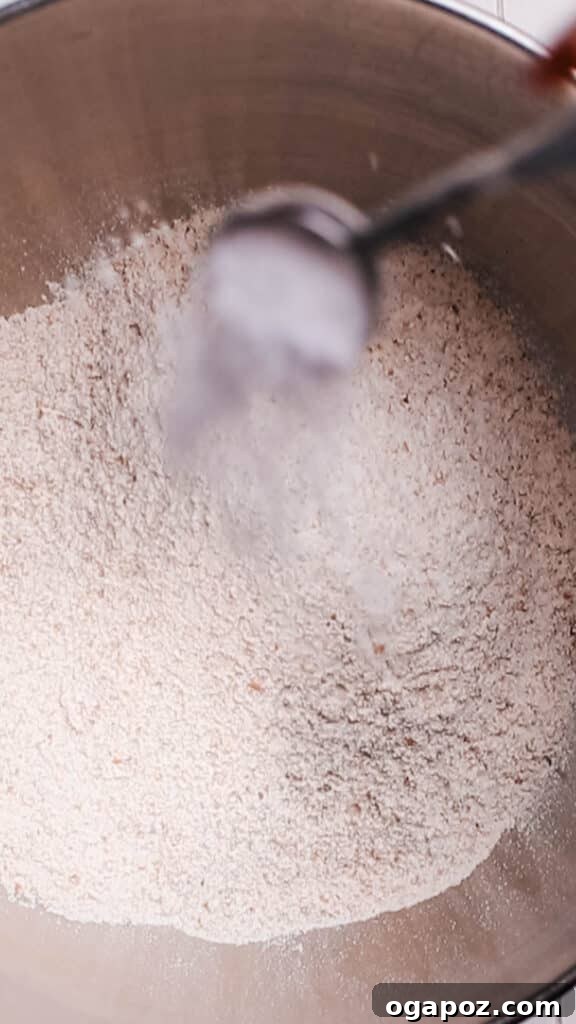
- Whole Wheat Flour (Atta): This is the soul of your roti. Atta, a finely milled whole wheat flour, provides the dough with its distinctive structure, earthy flavor, and characteristic texture. Using authentic atta is key to achieving that traditional Indian taste and elasticity.
- Kosher Salt: A fundamental flavor enhancer, kosher salt plays a crucial role in bringing out the natural taste of the whole wheat flour and balancing the overall flavor profile of the roti. It’s not just for seasoning; it strengthens the gluten structure slightly.
- Warm Water: The magic behind a pliable dough. Warm water is essential for hydrating the bran and germ in whole wheat flour effectively, promoting gluten development, and creating a soft, workable dough. It helps relax the flour, making it easier to knead and roll.
Variations and Substitutions: Customizing Your Roti
- Flour Options: While traditional roti calls for 100% whole wheat atta, you can experiment. For a slightly lighter texture, similar to my soft chapati recipe, consider using a blend of part all-purpose flour and part whole wheat flour. This can yield a softer, less dense result, though it will alter the traditional flavor.
- Spice It Up: For an aromatic twist, you can introduce a pinch of cumin powder or a few carom seeds (ajwain) directly into the dry flour mixture. These spices infuse the roti with subtle, delightful flavors that complement various curries beautifully.
- Vegetable Oil: Some recipes advocate for adding oil to the dough. However, through my extensive experience and numerous tests, I’ve found that adding oil tends to inhibit the coveted puffing action and results in a heavier, rather than light and airy, roti. In my opinion, it doesn’t contribute to a softer texture and is best omitted for this super soft, puffy roti recipe.
Essential Tools for Roti Making
- Stand Mixer or Mixing Bowl: Crucial for efficiently combining and kneading your dough. A stand mixer with a dough hook makes the process almost effortless, while a large mixing bowl is perfect for traditional hand-kneading.
- Rolling Pin (Belan): Indispensable for rolling out the dough into thin, uniform circles. A good quality rolling pin, often called a ‘belan’ in India, allows for even pressure and consistent thickness.
- Cast Iron or Nonstick Pan (Tawa): The cooking surface of choice. A heavy-bottomed cast iron skillet or a traditional Indian ‘tawa’ retains heat exceptionally well, ensuring even cooking. A good quality nonstick pan also works effectively.
- Tongs or Spatulas: Essential for safely flipping the roti on the pan and, if available, transferring it to a direct flame for the final puffing stage. Using these prevents burns and helps maintain the roti’s integrity.
With these carefully selected ingredients and the right tools, you are perfectly equipped to create truly delicious, homemade roti that will delight everyone at your table.
How to Make Super Soft Roti: A Simple Step-by-Step Guide
Making fresh roti at home is a surprisingly simple and deeply satisfying process. Follow this easy, detailed guide, and you’ll soon enjoy warm, soft rotis straight from your kitchen.
1. Mixing the Dry Ingredients
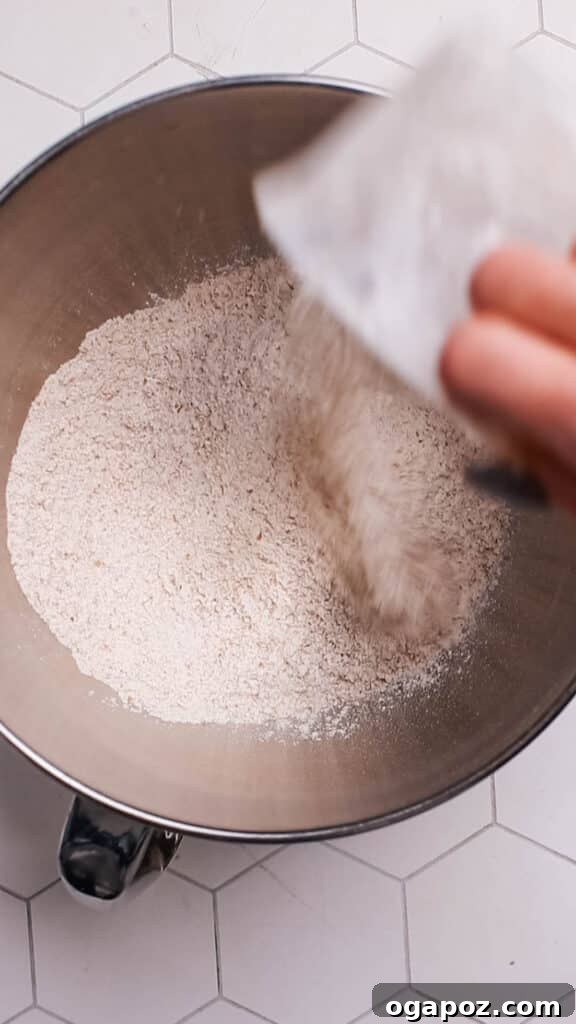
- Begin by thoroughly combining your whole wheat flour (atta) and kosher salt in the bowl of your stand mixer. If you’re kneading by hand, use a large, spacious mixing bowl.
2. Adding Water and Forming Dough
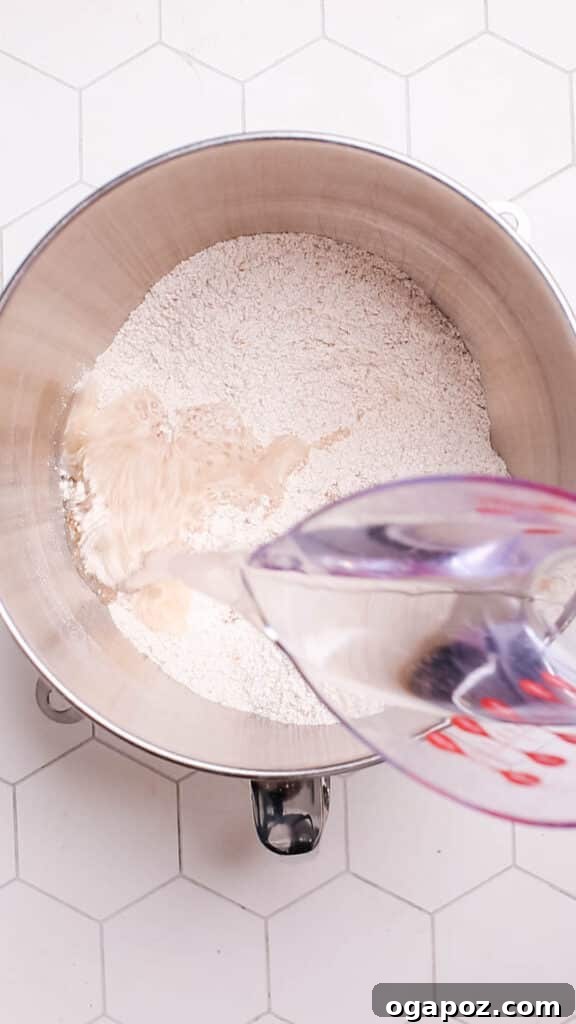
- Gradually pour the warm water into the dry flour and salt mixture. Start with about three-quarters of the water, then add more as needed.
- Mix with a sturdy wooden spoon or your hands until the ingredients come together and a shaggy dough begins to form. Ensure all the flour is incorporated.
3. Kneading the Dough to Perfection
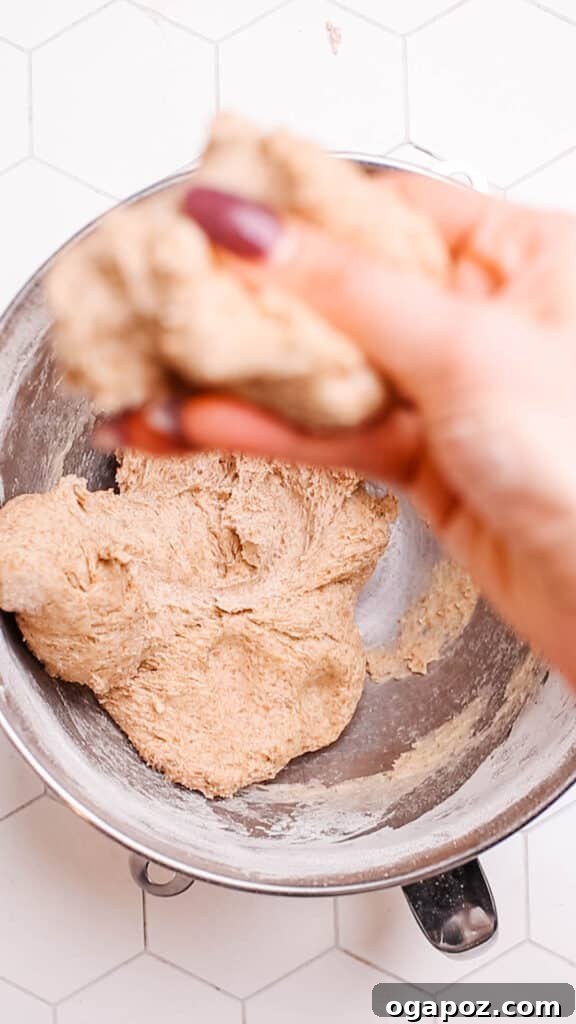
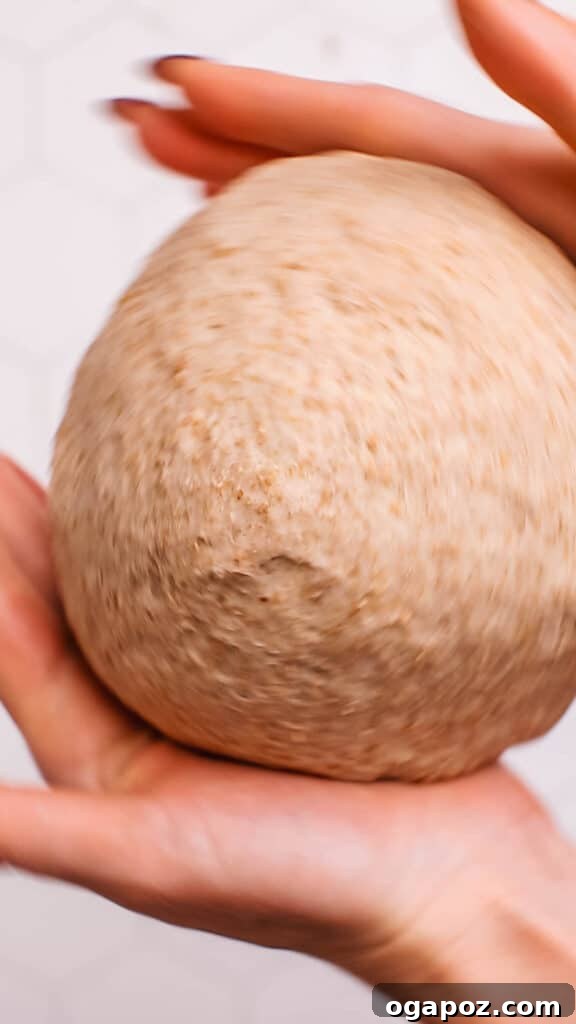
- If using a stand mixer, knead the dough on a medium-low setting (typically between speeds 2 and 4 on a 10-speed mixer) for approximately 2 minutes until it forms a smooth, elastic ball.
- For hand-kneading, transfer the shaggy dough to a lightly-floured surface. Knead vigorously for about 8 minutes. The dough should become supple, smooth, and cohesive.
- To check for readiness, gently press the dough with your finger. If it springs back quickly and resists the indentation, it’s a good sign that it has been kneaded sufficiently. If the indentation remains, continue kneading for a few more minutes.
4. Dividing and Resting the Dough
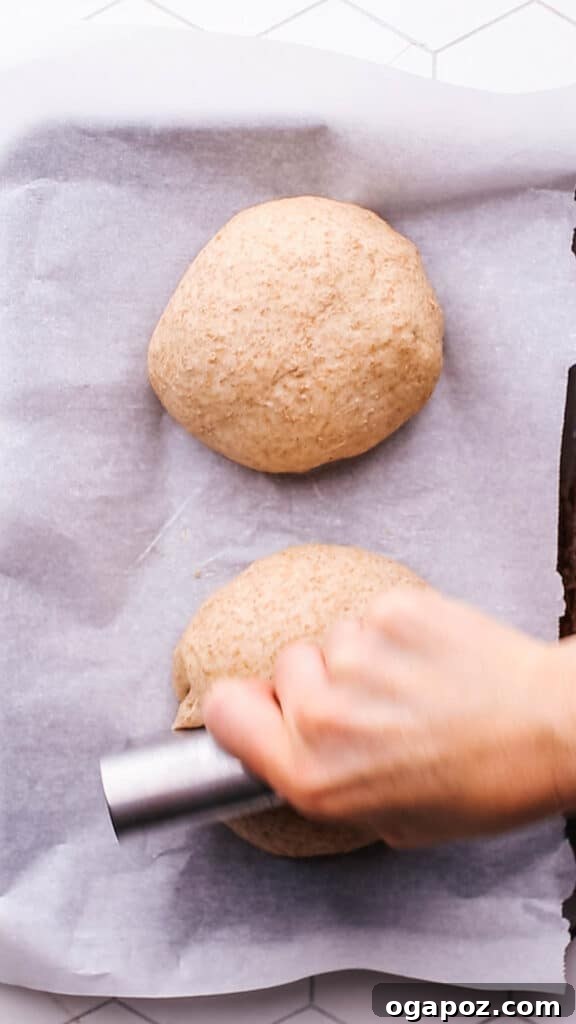
- First, divide the kneaded dough into two large, equal portions. Form each portion into a rough ball shape.
- Next, divide each of these large balls into 8 equal parts using a knife or bench scraper. This can be done by slicing down the middle, then into quarters, and finally into eighths, much like cutting a pizza. This method yields 16 consistently sized roti dough balls in total. (It’s often easier to work with two smaller dough balls than one large one for even division.)
- Roll each of these triangular or irregularly shaped portions into a smooth, tight ball between your palms.
- Crucially, allow the dough balls to rest. Place them under a damp paper towel or clean kitchen cloth at room temperature for 1-2 hours. This resting period is vital for gluten relaxation, which contributes significantly to the roti’s softness and ability to puff. Alternatively, they can be refrigerated for up to 4 days.

5. Rolling Out the Roti
- Take one dough ball and place it on a lightly floured surface. Lightly sprinkle a little flour over the dough ball itself to prevent sticking.
- Using your rolling pin, roll the dough out into a thin, even circle, aiming for approximately 6 inches in diameter. The key is consistent thinness across the entire circle to ensure even cooking and puffing. Gently shake off any excess flour before cooking.

6. Cooking the Roti on the Pan
- Preheat your cast iron skillet, nonstick pan, or tawa on medium-high heat for about 5 minutes until it’s properly hot. The right temperature is critical for successful puffing.
- Carefully place a rolled-out dough circle onto the hot pan. Cook the first side for approximately 10-20 seconds. You’ll know it’s ready to flip when small, subtle bubbles begin to appear on the surface. (If the underside develops charred spots quickly, your pan is too hot; reduce the heat.)
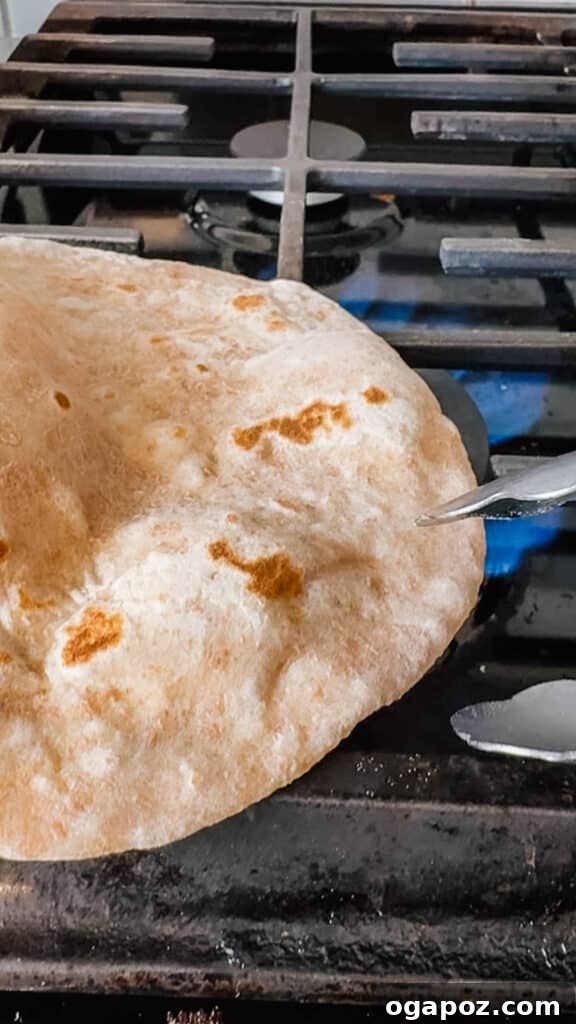
- Flip the roti over and cook the second side for another 10 seconds. Gently press down on it with the flat part of a spatula; this initial pressure helps to encourage the puffing process.
7. Puffing Up the Roti Over Direct Flame
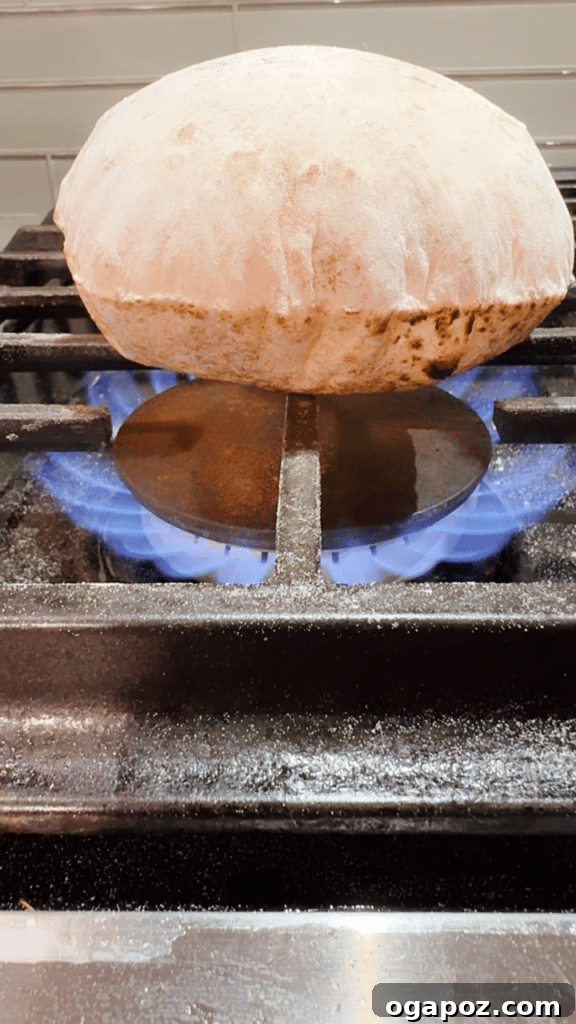
- Once both sides of the roti are lightly cooked and no longer appear shiny (they may have a few light golden spots), carefully transfer the semi-cooked roti to another burner with an open flame using tongs.
- Constantly turn the roti over the flame. It should begin to puff up dramatically within seconds as the steam trapped inside expands. Once a few large bubbles form, flip it to the other side. The roti should fully inflate after this flip.
NOTE: If you do not have a gas stove with an open flame, you can still achieve a good puff on the same pan. Simply continue flipping the roti 1-2 more times on the pan, pressing down gently but firmly with a spatula as it cooks. It might not puff as dramatically as over an open flame, but it will still develop pockets of air, resulting in a light texture. Keep pressing to encourage this effect.
8. Serving and Keeping Warm
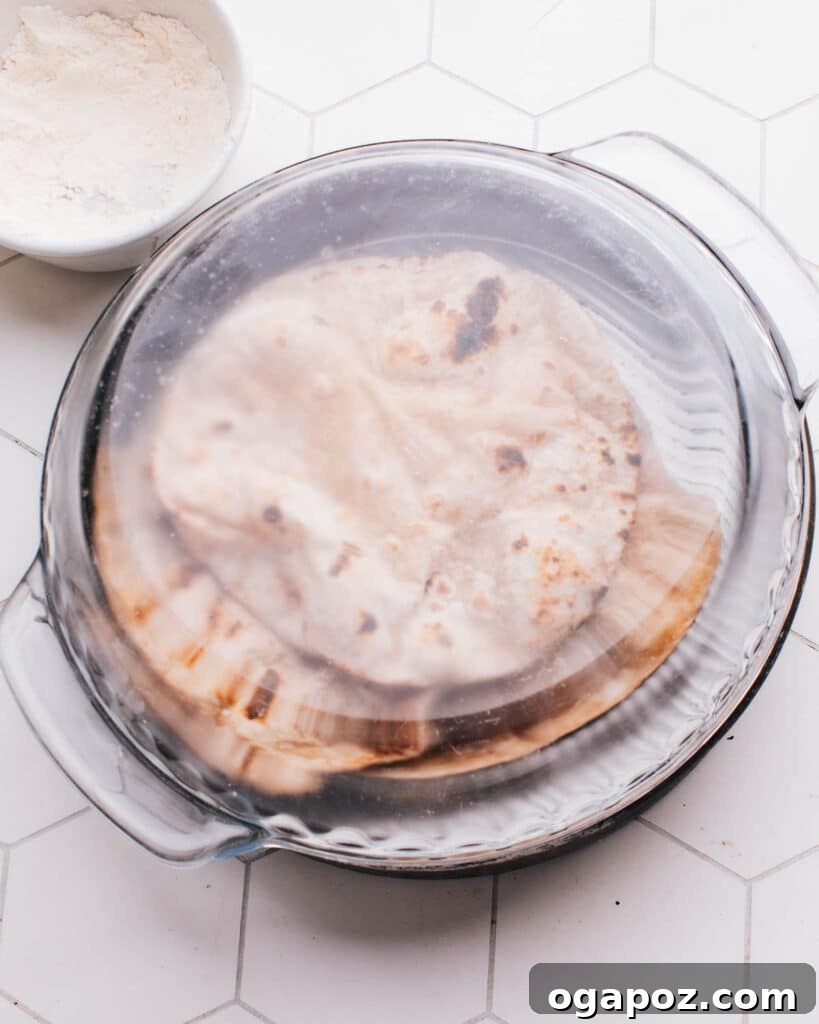
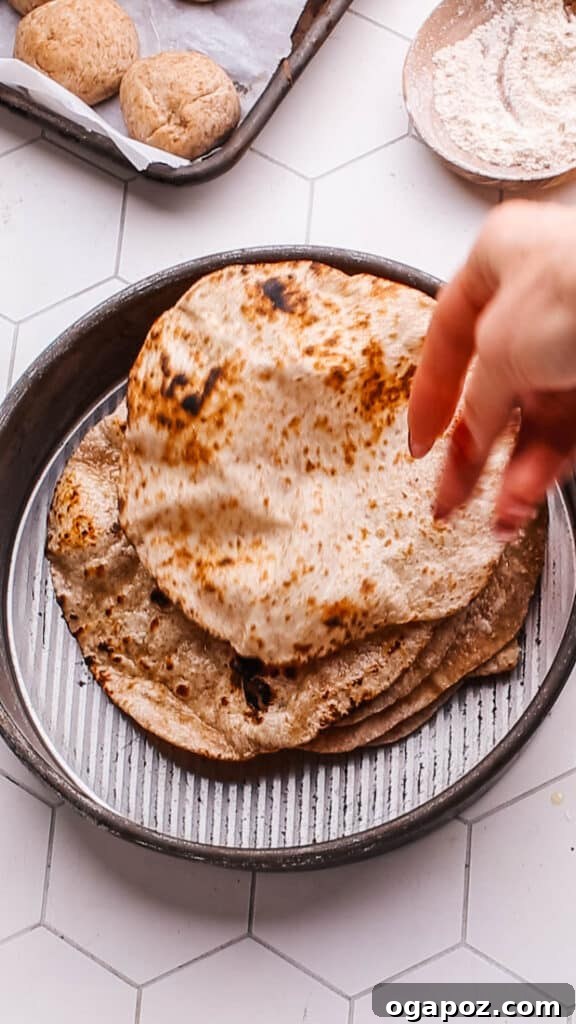
- As each roti finishes cooking, immediately transfer it to a bowl or baking dish and cover it tightly with a plate or pot lid. This traps the steam, ensuring the rotis remain incredibly soft and pliable until you’re ready to serve. Repeat this process with the remaining dough balls.
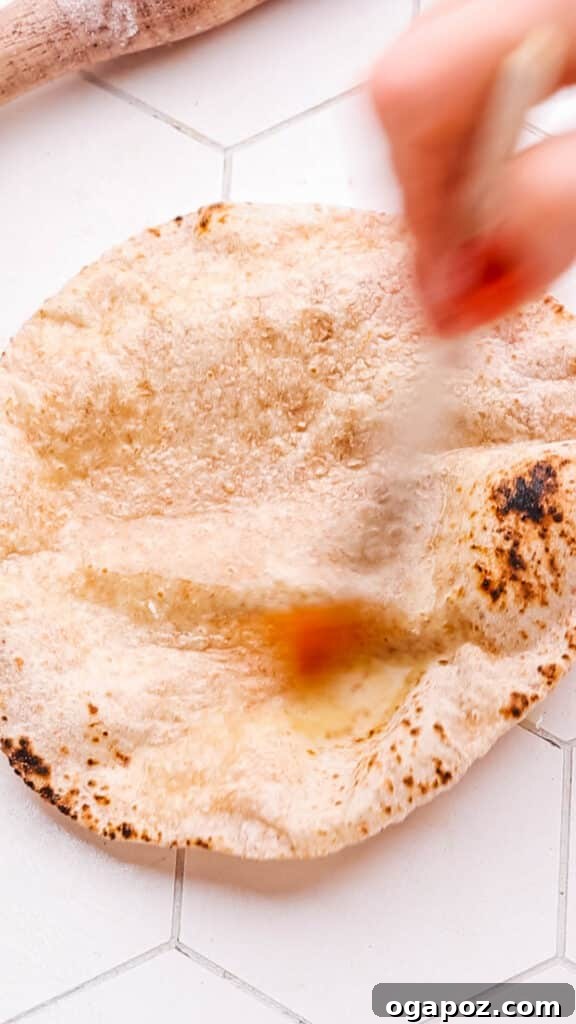
For an extra layer of flavor and softness, consider brushing your warm roti with a touch of ghee or melted butter right after it comes off the stove. This simple step elevates them to an even more delicious experience.
The Science of the Puff: How to Make Rotis Consistently Inflate
Achieving that beautiful, dramatic puff in your rotis is a hallmark of success and involves a precise combination of dough consistency, kneading technique, and heat management. Here are the key tips to ensure your rotis puff up beautifully every time:
- Optimal Dough Consistency: The foundation of a puffy roti is a dough that is soft and pliable, yet not excessively sticky. It should feel smooth and elastic. Resist the urge to add extra flour if the dough feels slightly sticky after kneading; a little stickiness is often a good sign of proper hydration, which aids in puffing.
- Adequate, Not Excessive, Kneading. While kneading develops gluten, which provides structure, over-kneading can make the dough tough, and under-kneading can leave it crumbly. My extensive testing has shown that just 2 minutes of kneading in a stand mixer (or around 8 minutes by hand) is ideal. This timeframe yields a smooth, elastic dough that is perfectly soft and pliable enough to expand without resistance when heated.
- Crucial Resting Period: After kneading, it is absolutely essential to allow the dough to rest for at least 30 minutes, and ideally 1-2 hours at room temperature. This resting period allows the gluten strands to relax, making the dough much easier to roll thinly and significantly increasing its likelihood of puffing. If you have more time, a longer rest (even up to 4 days in the refrigerator) can further improve the texture and puff.
- Uniform Rolling: Roll your rotis into consistently thin circles. Any unevenness in thickness will lead to inconsistent puffing, with some areas inflating more than others or not at all. Aim for a uniform thickness to ensure even steam distribution throughout the bread.
- Correct Cooking Surface Temperature: The tawa or griddle must be hot, but not smoking. A medium-high heat is generally ideal. If the pan is too hot, the roti’s exterior will cook too quickly, forming a rigid crust that prevents internal steam from expanding. Conversely, if the pan isn’t hot enough, insufficient steam will be generated inside the roti to cause it to puff.
- Timely Flipping: Cook the first side of the roti until you see barely visible bubbles forming on the surface (about 10-20 seconds). Then, flip it. Let it cook for only a few more seconds before flipping it again. This rapid heat exposure and flipping sequence are critical. Sometimes, gently pressing down on the roti with a clean kitchen towel or a flat spatula can help encourage even puffing by directing the steam.
Remember, perfecting the art of roti puffing is a skill that develops with practice. Don’t be discouraged by initial attempts; keep experimenting and adjusting your technique as needed, and you’ll soon be making perfectly puffed rotis consistently.
Make-Ahead and Storage Solutions for Roti
Efficiently planning and properly storing your rotis ensures they remain fresh and delicious for future enjoyment. Here are comprehensive tips for both dough and cooked roti storage:
- Make-Ahead Dough: The beauty of this roti dough is its flexibility. You can prepare the dough up to a day in advance. Simply ensure it’s tightly covered in an airtight container or wrapped in plastic wrap to prevent it from drying out, then store it in the refrigerator. This allows the gluten to relax even further, potentially resulting in even softer rotis.
- Refrigerating Dough Balls: Individual dough balls, once formed, can be refrigerated for up to 4 days. Place them in an airtight container, ensuring they are covered with a damp cloth or a piece of plastic wrap directly touching the dough to maintain moisture and prevent a crust from forming.
- Freezing Dough: For longer-term storage, freezing the dough balls is an excellent option. Arrange the formed dough balls on a tray and freeze them until solid. Once frozen, transfer them to a freezer-safe bag or airtight container. They will maintain their quality for up to 3 months. Thaw in the refrigerator overnight before rolling and cooking.
- Storing Cooked Rotis: Cooked rotis stay soft and fresh when stored correctly. Keep them in an airtight container at room temperature for up to 2 days. To ensure maximum softness, layer them between sheets of parchment paper or aluminum foil within the container.
- Freezing Cooked Rotis: To freeze cooked rotis, allow them to cool completely. Stack them with parchment paper in between each roti, then wrap the stack tightly in aluminum foil and place them in freezer bags. They can be stored in the freezer for up to 1 month.
- Reheating: Reheating refrigerated or thawed rotis is simple. You can warm them gently in a pan over medium heat for a minute or two per side until soft and warm, or quickly microwave them for 15-30 seconds until heated through. For best results, avoid over-reheating, which can make them tough.
Avoid These 5 Common Roti Making Mistakes
Even seasoned cooks can stumble when making roti. Being aware of these frequent mix-ups will help you achieve consistently perfect results:
- Using Too Much Flour: A common pitfall. Adding excessive flour, whether during kneading or while rolling, can drastically alter the dough’s hydration. This leads to dry, stiff dough that’s difficult to roll and ultimately results in rotis that are hard, brittle, and lack the desired softness and pliability.
- Inconsistent Thickness: One of the quickest ways to ruin a batch. Rolling rotis with uneven thickness means some parts will be thin and cook too quickly, becoming crisp or burnt, while thicker sections remain undercooked and doughy. Uniform thickness is essential for even cooking and a consistent texture.
- Overcooking: Patience is key. Cooking roti for too long on the tawa dries out the bread, making it tough and chewy rather than soft and pliant. Roti cooks quickly; aim for light golden spots and a soft texture, not a crisp, hard surface.
- Ignoring Rest Time: Skipping or shortening the dough’s resting period is a critical error. Without adequate rest, the gluten remains tight and resistant, making the dough difficult to roll thinly. This results in tough, inelastic rotis that are far less likely to puff up properly. Always allow the dough to relax.
- Cooking on Too High Heat: While a hot pan is necessary, excessive heat is detrimental. Cooking on too high a flame will cause the outside of the roti to char and harden almost instantly, trapping moisture unevenly and preventing the internal steam from expanding and puffing up the bread. This often leads to a burnt exterior and a raw interior.
Final Notes, Pro Tips & Science-Based Secrets for Perfect Roti
Elevate your roti-making to an art form with these essential takeaways, professional tips, and a touch of scientific understanding:
- Choose the Right Flour: Always opt for finely ground whole wheat flour, specifically ‘atta’, for an authentic taste and texture. Its unique gluten structure is crucial for soft, pliable rotis.
- Mind the Water Temperature: Using warm water (not hot, not cold) is a scientific secret. It helps hydrate the bran in the whole wheat flour more effectively, which makes the dough softer, more elastic, and ultimately contributes to softer, more pliable rotis.
- Kneading Properly is Paramount: A well-kneaded dough is the foundation of soft rotis. It should feel incredibly soft, smooth, and pliable, almost like an earlobe. Insufficient kneading will result in a tough roti, while over-kneading can also create issues.
- Prioritize Dough Resting: This is a non-negotiable step. Allow the dough to rest for at least 30 minutes, preferably longer. Resting relaxes the gluten, making the dough exceptionally easy to roll out thinly without shrinking back, and significantly improves the final texture and puff.
- Master Even Rolling: Consistency is key. Roll your rotis into uniformly thin circles. Uneven thickness leads to uneven cooking and inconsistent puffing, compromising the soft texture.
- Utilize Medium Heat: Cook the roti on a medium to medium-high flame. This temperature allows the roti to cook through without burning, while building up enough internal steam to encourage even and dramatic puffing. Too low, and it won’t puff; too high, and it will burn.
- Practice Makes Perfect: Making perfect roti is a skill that evolves with each batch. Don’t be disheartened by initial attempts that don’t puff perfectly. Each try teaches you more about the dough, your pan, and your technique. Embrace the learning process, and soon you’ll be a roti master!
Frequently Asked Questions About Roti
For those quickly seeking answers, here are some common questions about roti and its relationship with other Indian breads:
What kind of food is roti?
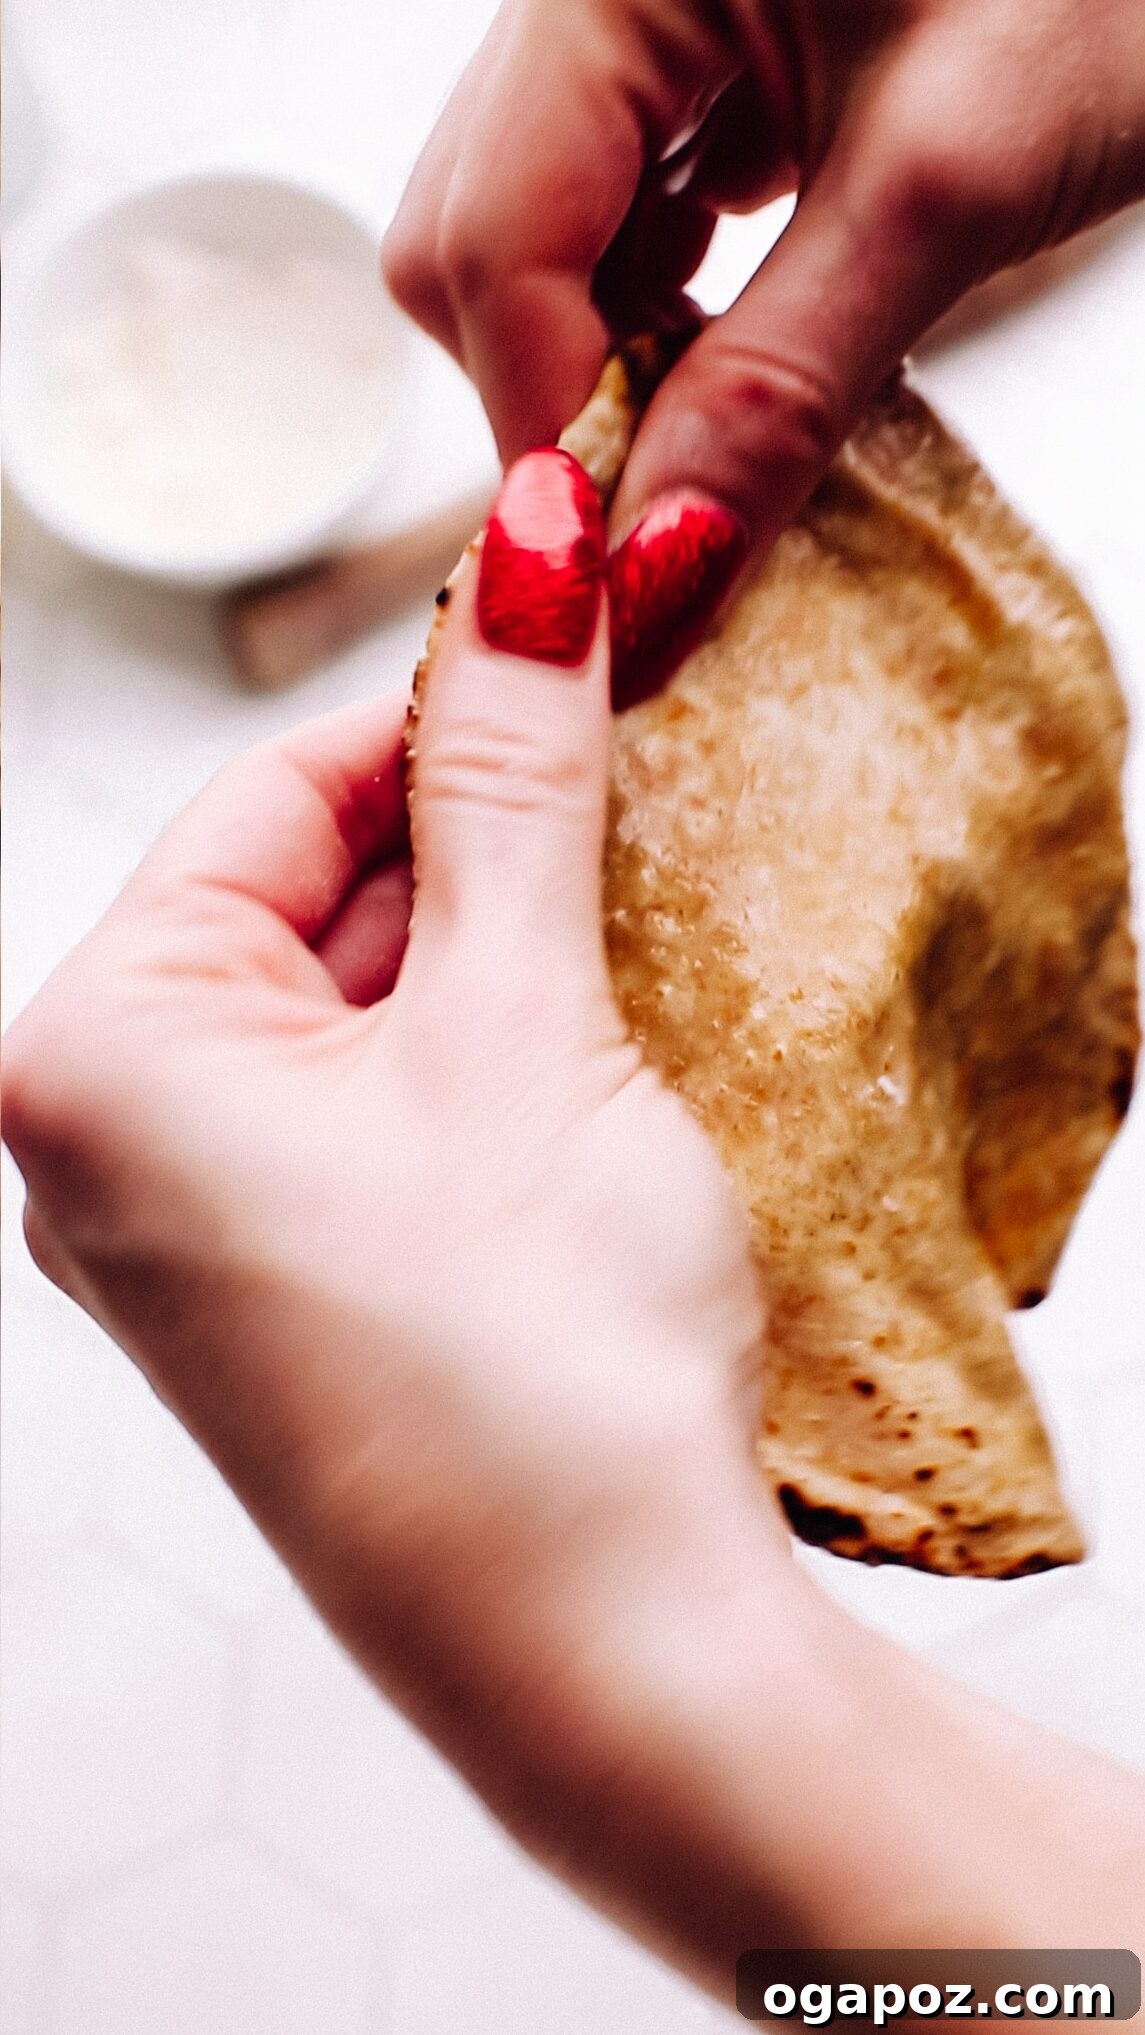
Roti is a simple yet fundamental type of unleavened flatbread, a daily staple in South Asian cuisine. Made from whole wheat flour, it’s typically served warm alongside a wide variety of curries, vegetable dishes, and meats, acting as a natural utensil to scoop up the delicious gravies.
What is roti from Trinidad?
Trinidadian roti, a delightful culinary evolution influenced by Indian immigrants, is distinct from its Indian counterpart. It’s typically a larger, softer, and often richer flatbread used as a wrap for generously filled curried meat (like chicken or goat) and vegetable fillings, resembling a flavorful, enclosed burrito.
What is the healthiest Indian bread?
Generally, the healthiest Indian bread is one made entirely with whole grains. Whole wheat roti or chapati stand out as excellent choices because they are made from whole wheat flour (atta), which provides significantly more fiber, essential nutrients, and complex carbohydrates compared to breads made with refined flours like maida.
Which is healthier, paratha or roti?
Roti is considerably healthier than paratha. Roti is an unleavened bread made with just whole wheat flour, salt, and water, cooked without oil. Paratha, on the other hand, is often layered with generous amounts of ghee or butter during its preparation and cooking, and can also be stuffed with various rich fillings, adding a substantial amount of calories and fat.
What is a healthier alternative to naan bread?
Whole wheat roti or chapati serve as much healthier alternatives to naan bread. Naan is typically made with refined all-purpose flour, is leavened, and often enriched with yogurt, milk, eggs, or butter. Roti, being made from whole grains and cooked without added fats, is thinner, lighter, and more nutrient-dense.
What is the difference between naan and roti?
The primary distinctions lie in their ingredients and preparation. Naan is a leavened bread, typically made with refined all-purpose flour (maida), often enriched with yogurt, milk, or eggs, giving it a soft, slightly chewy, and thicker texture. It’s usually cooked in a tandoor (clay oven). Roti, by contrast, is an unleavened bread made from whole wheat flour (atta), water, and salt, resulting in a thinner, lighter, and chewier texture, traditionally cooked on a tawa (griddle).

What is roti vs chapati?
The terms roti and chapati are often used interchangeably, particularly in South Indian cuisine, where my husband’s family originates. However, there’s a nuanced distinction:
Roti is a broader, more encompassing term that literally means “bread” and includes a wide variety of flatbreads, such as chapati, phulka, and even some regional varieties with different grains or added ingredients.
Chapati, on the other hand, refers specifically to a thinner, unleavened whole wheat flatbread, typically cooked on a tawa and often puffed over an open flame. It is a specific type of roti. In many regions, the term “roti” is more prevalent and can encompass a broader range of flatbreads, including those that are thicker, made with different grains, or contain additional ingredients like vegetables, spices, and herbs mixed into the dough.
The bottom line is: while all chapati is considered “roti,” not all roti is chapati. This recipe, focusing on a thin, unleavened whole wheat flatbread, could easily be called chapati as well.

Explore More Irresistible Indian Dishes
- Life-Changing Chicken Korma
- Paratha (South-Indian Flaky Flatbread)
- Butter Paneer Masala
- The Viral Butter Chicken Recipe
- Saag Paneer (Spinach Curry)
- Coconut Curry Chicken
Super Soft Roti Recipe
By: Jennifer Pallian BSc, RD
Learn how to make the best roti with this super soft roti recipe, tested over a hundred times. They puff up EVERY time, earning applause from even my Indian mother-in-law!
Cook Time: 20 minutes
Total Time: 40 minutes
Servings: 16 roti
Ingredients
- 4 ½ cups whole wheat flour (aka atta, available in Indian shops)
- 2 tsp kosher salt
- 1 ½ cups warm water
Instructions
- Mix Dry Ingredients: In a stand mixer bowl or large mixing bowl, combine the whole wheat flour with kosher salt.
- Add Water: Gradually add warm water to the flour mixture. Mix with a wooden spoon or your hands until a shaggy dough begins to form and all flour is incorporated.
- Knead: Knead the dough in a stand mixer on a medium-low setting (between speed 2 and 4 on a 10-speed mixer) for about 2 minutes until it comes together into a smooth, elastic ball. If kneading by hand, work the dough on a lightly-floured surface for approximately 8 minutes.
NOTE: To check if the dough is ready, press it gently with your finger. If it springs back quickly and the indentation disappears, it indicates sufficient kneading. If the indentation remains, continue kneading for a few more minutes.
- Make Dough Balls: Divide the kneaded dough into two large, equal pieces and form them into rough ball shapes using your hands.
- Divide each large ball into 8 pieces (using a knife or bench scraper) by slicing down the middle equally in half, then into quarters, and finally into eighths, similar to cutting a pizza. You will now have 16 total roti dough balls.
NOTE: I find it easier to form two initial dough balls and cut each into 8 slices than to attempt to cut one giant dough ball into 16 perfectly equal pieces.
- Roll each portion (which will likely be triangular, like 1/8th of a pizza slice) into a smooth, tight ball between your palms.
- Rest: Cover the newly formed dough balls with a damp cloth or paper towel and let them rest at room temperature for 1-2 hours. This rest is crucial for softness and puffing. Alternatively, you can refrigerate them for up to 4 days, ensuring they are covered tightly.
- Roll Out Roti: Place a dough ball on a lightly floured surface. Sprinkle a small amount of flour over the dough ball itself. Using a rolling pin, roll out each ball into a thin, even circle, aiming for about 6 inches in diameter. Ensure the thickness is consistent across the entire roti. Shake off any excess flour.
- Cook Roti: Preheat a cast iron skillet (tawa) or a good nonstick pan on medium-high heat for 5 minutes. Once hot, place the rolled-out dough onto the pan. Cook for approximately 10-20 seconds, or until small, subtle bubbles begin to appear on the surface.
NOTE: If the underside quickly develops charred spots, the stove is too hot. Reduce the heat slightly and continue cooking.
- Flip: Flip the roti over and cook the other side for an additional 10 seconds, gently pressing down on it with the flat part of a spatula. This gentle pressure helps initiate the puffing process.
- Puff Up Roti: Once both sides are lightly set (they should no longer look shiny and may have a few light golden spots), turn on another burner’s flame. Carefully use tongs to place the roti directly on the open flame. Move it around constantly. It should begin to puff up dramatically within seconds. Once a few large bubbles form, flip it to the other side. It should fully inflate after this flip.
NOTE: If you don’t have a gas stove, you can finish the roti on the same pan. Simply continue to flip it 1-2 more times while continuously pressing down on it with a spatula as it cooks. It will puff up in spots, though likely not as dramatically as over an open flame. Keep pressing to encourage puffing.
- Keep Warm: As each roti finishes cooking, immediately place it in a bowl or baking dish and cover it tightly with a plate or pot cover to trap the steam inside. This crucial step keeps them incredibly soft. Repeat this process with the remaining dough.
Notes
Utilize two burners if you have a gas stove. One burner for the pan (medium to medium-low heat) and another for cooking over direct flame. Turn the flame off on the direct burner between rotis so that the grate doesn’t become excessively hot. An overly hot grate can char the outside of the roti and create tiny holes, allowing steam to escape and preventing puffing.
Be careful not to puncture the roti with your tongs when transferring it to the flame. If you find it easier, use two wooden spoons or spatulas to gently handle and transfer it. Once the roti has a hole, the steam will escape, and it will not puff up.
You can also brush them with melted butter or ghee immediately after they come off the stove. This not only adds a delicious flavor but also helps to keep them even softer and more moist.
Nutrition
Nutrition information is automatically calculated and should only be used as an approximation.