
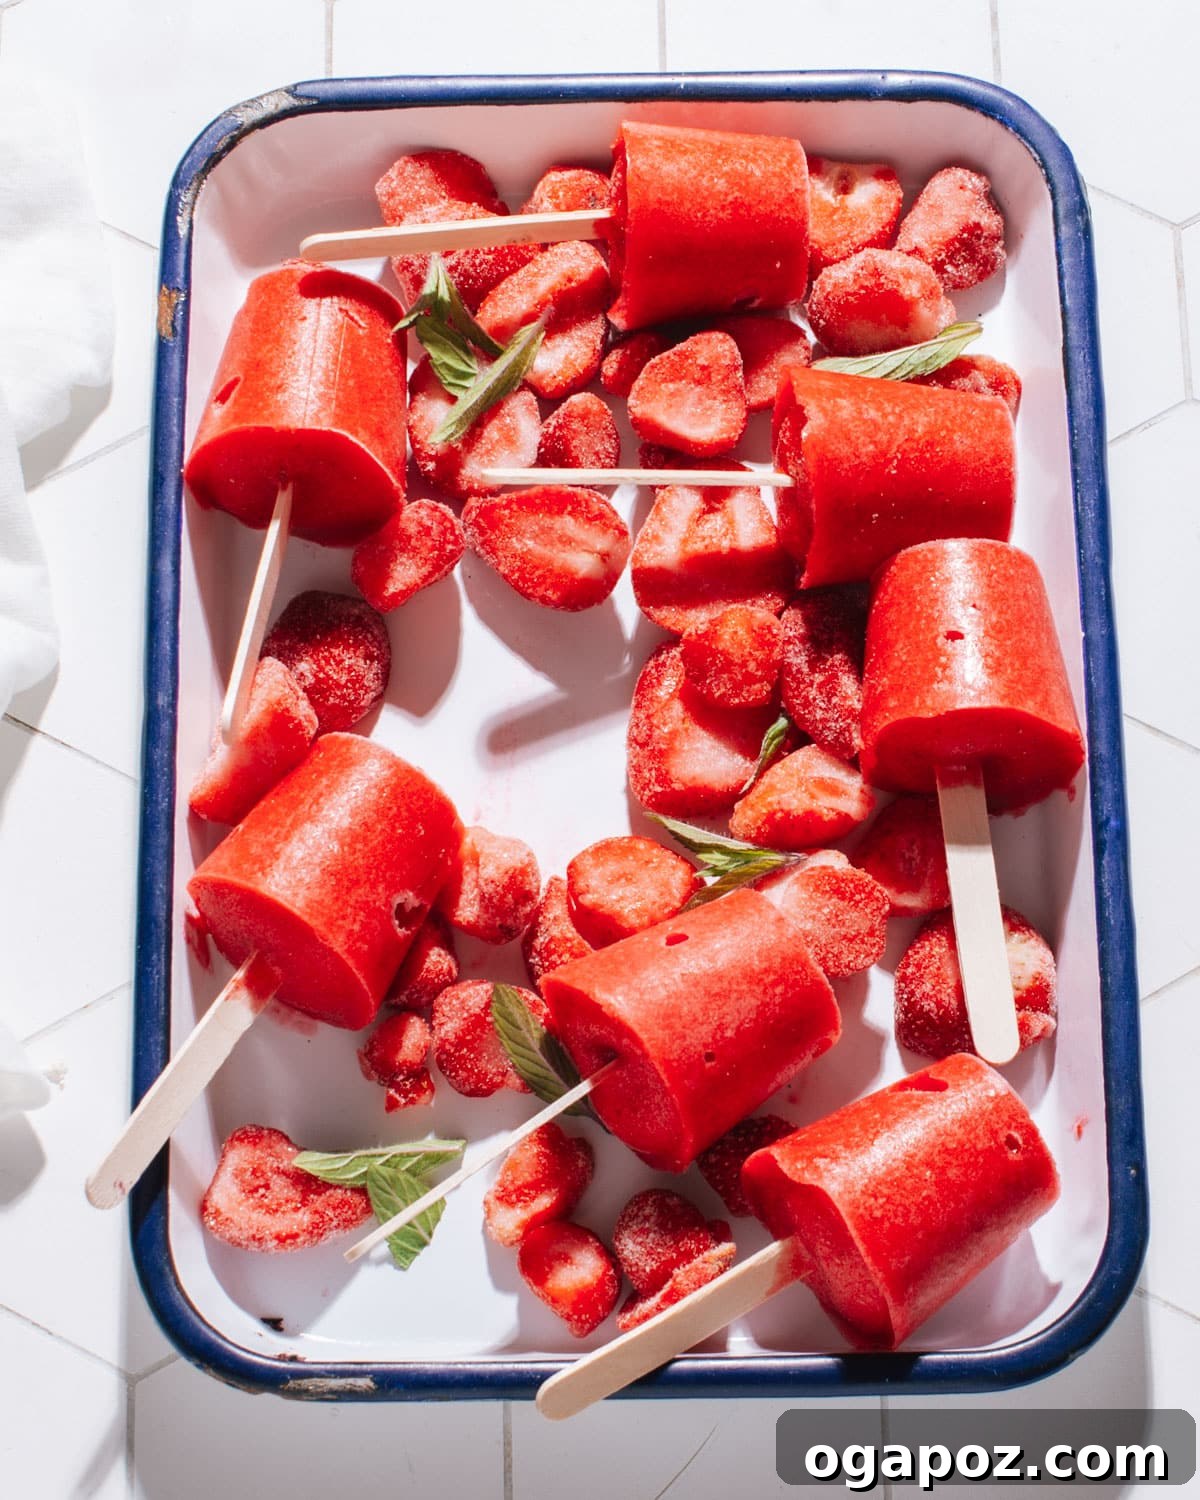
These Strawberry Popsicles are the epitome of summer refreshment, perfectly sweet and bursting with the vibrant flavor of fresh berries. My family, especially the little ones, is utterly obsessed with this incredibly easy homemade strawberry popsicle recipe – it’s so simple, even the kiddos can take the lead in making them!
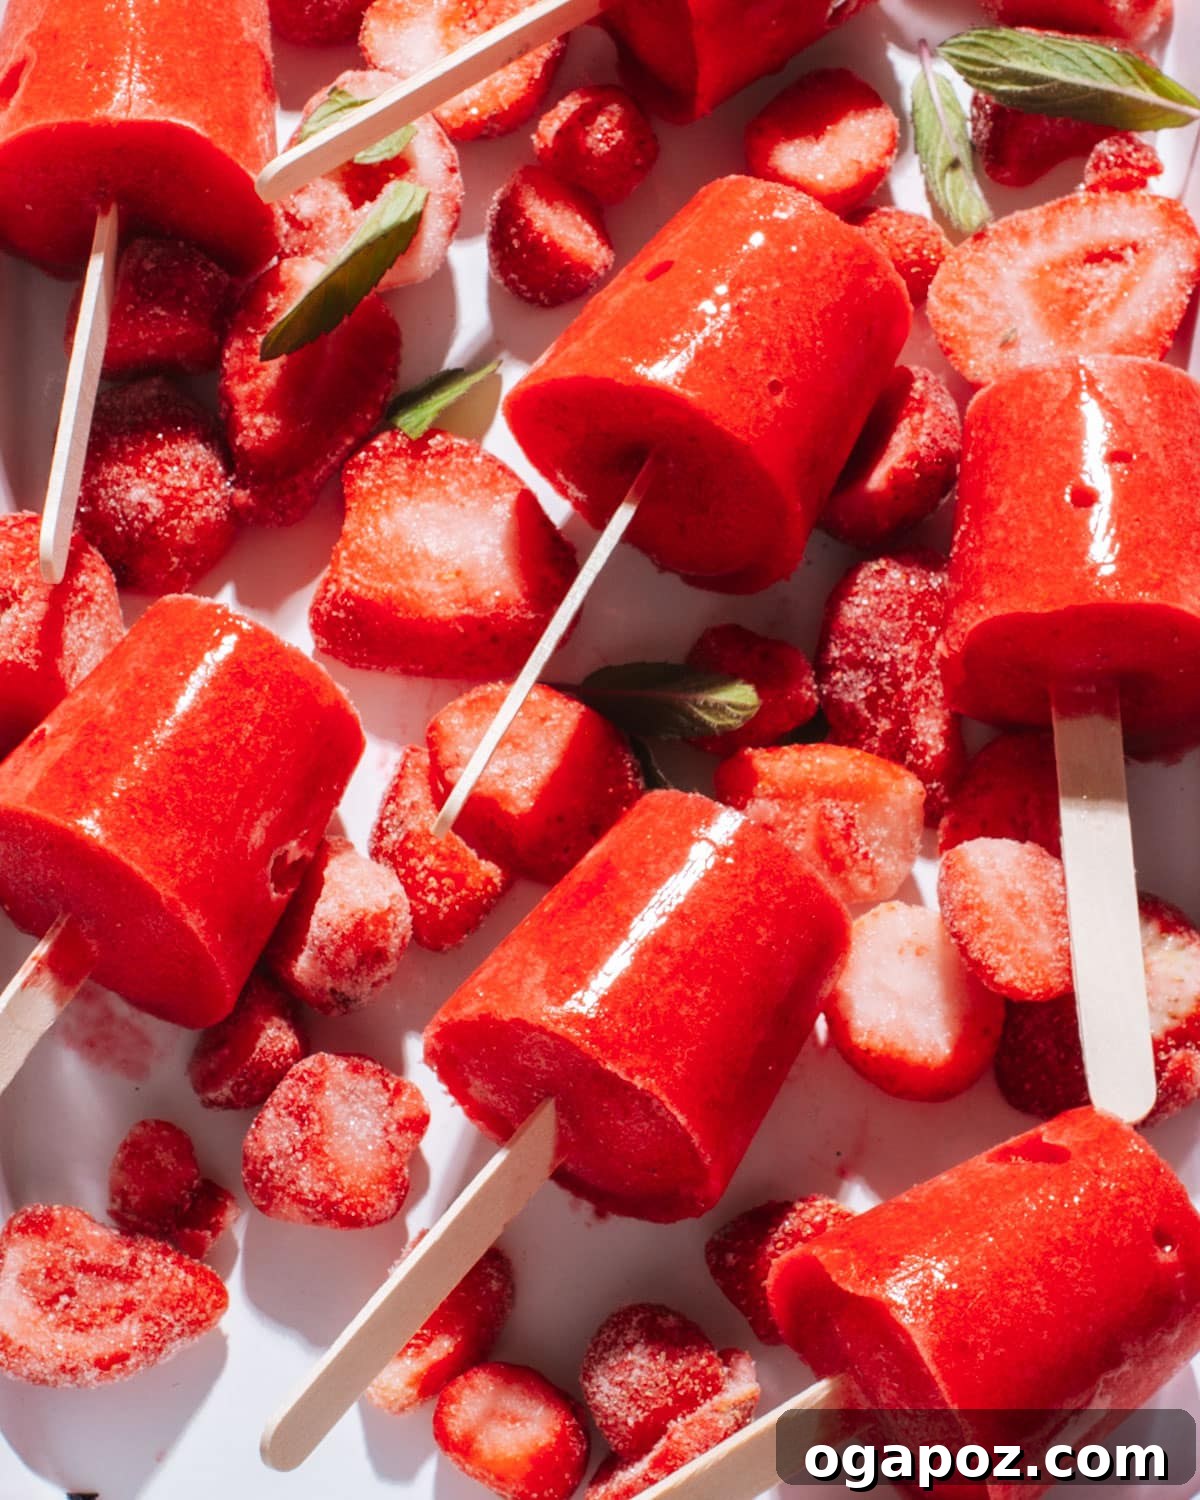
Whether you opt for ripe, juicy fresh strawberries or the convenience of frozen ones, these simple strawberry popsicles always turn out outrageously pretty with their captivating bright, rosy color. The pure taste of blended berries, naturally sweetened with a touch of wholesome honey or maple syrup, creates a delightful and guilt-free frozen treat that you’ll want to enjoy all season long.
Why You’ll Adore This Easy Strawberry Popsicle Recipe
Prepare to have this refreshing and delightful icy treat on your summer menu rotation, as it’s destined to become a household favorite. Here are just a few reasons why these homemade strawberry popsicles will quickly become your go-to:
- Unbeatably Refreshing and Delicious: Imagine biting into a frozen burst of natural sweetness on a scorching summer day. These popsicles are loaded with the authentic, vibrant flavor of real strawberries, offering the ideal way to cool down and re-energize. They provide a hydrating and incredibly satisfying experience that often surpasses the taste of many store-bought, artificial alternatives.
- Effortlessly Simple to Make: Forget complicated recipes that require extensive kitchen skills or exotic ingredients! These strawberry popsicles are a true “blend, pour, freeze, and enjoy” wonder. With minimal effort and preparation time – you can typically whip up a batch in under 10 minutes – they are perfect for spontaneous summer cravings or even last-minute party preparations. It’s a foolproof recipe, ideal for beginners and seasoned cooks alike.
- Customizable Sweetness for Every Palate: You are in complete control of the sweetness level, allowing you to tailor this treat precisely to your family’s preferences. Easily adjust the quantity of honey or maple syrup to create popsicles that are perfectly sweet for a dessert or subtly light for a healthier snack. This flexibility also makes them adaptable for various dietary needs, including options for less sugar.
- A Guaranteed Kid-Friendly Favorite: If you’re searching for a wholesome treat that will make your children cheer, look no further. Kids are naturally drawn to the vibrant color and irresistibly sweet taste of these strawberry popsicles. Beyond being a delicious snack, involving them in the simple blending and pouring steps can turn it into a fun, engaging activity and encourage them to enjoy fruit-based snacks. It’s a healthy indulgence everyone can agree on.
- Perfect for Any Summer Gathering: Whether you’re hosting a casual backyard barbecue, a lively pool party, a serene picnic, or just a simple family get-together, these popsicles are an absolute crowd-pleaser. Their attractive appearance and irresistible natural flavor make them an ideal dessert or refreshing snack for any occasion, offering a healthier and more personal alternative to many sugary options.
- Made with Wholesome, Natural Ingredients: Unlike many processed frozen treats that contain artificial flavors, colors, and excessive sugars, our strawberry popsicles are crafted from real fruit and natural sweeteners. This means you can indulge without guilt, knowing you’re providing a snack packed with essential vitamins, fiber, and antioxidants from fresh strawberries. They embody wholesome goodness.
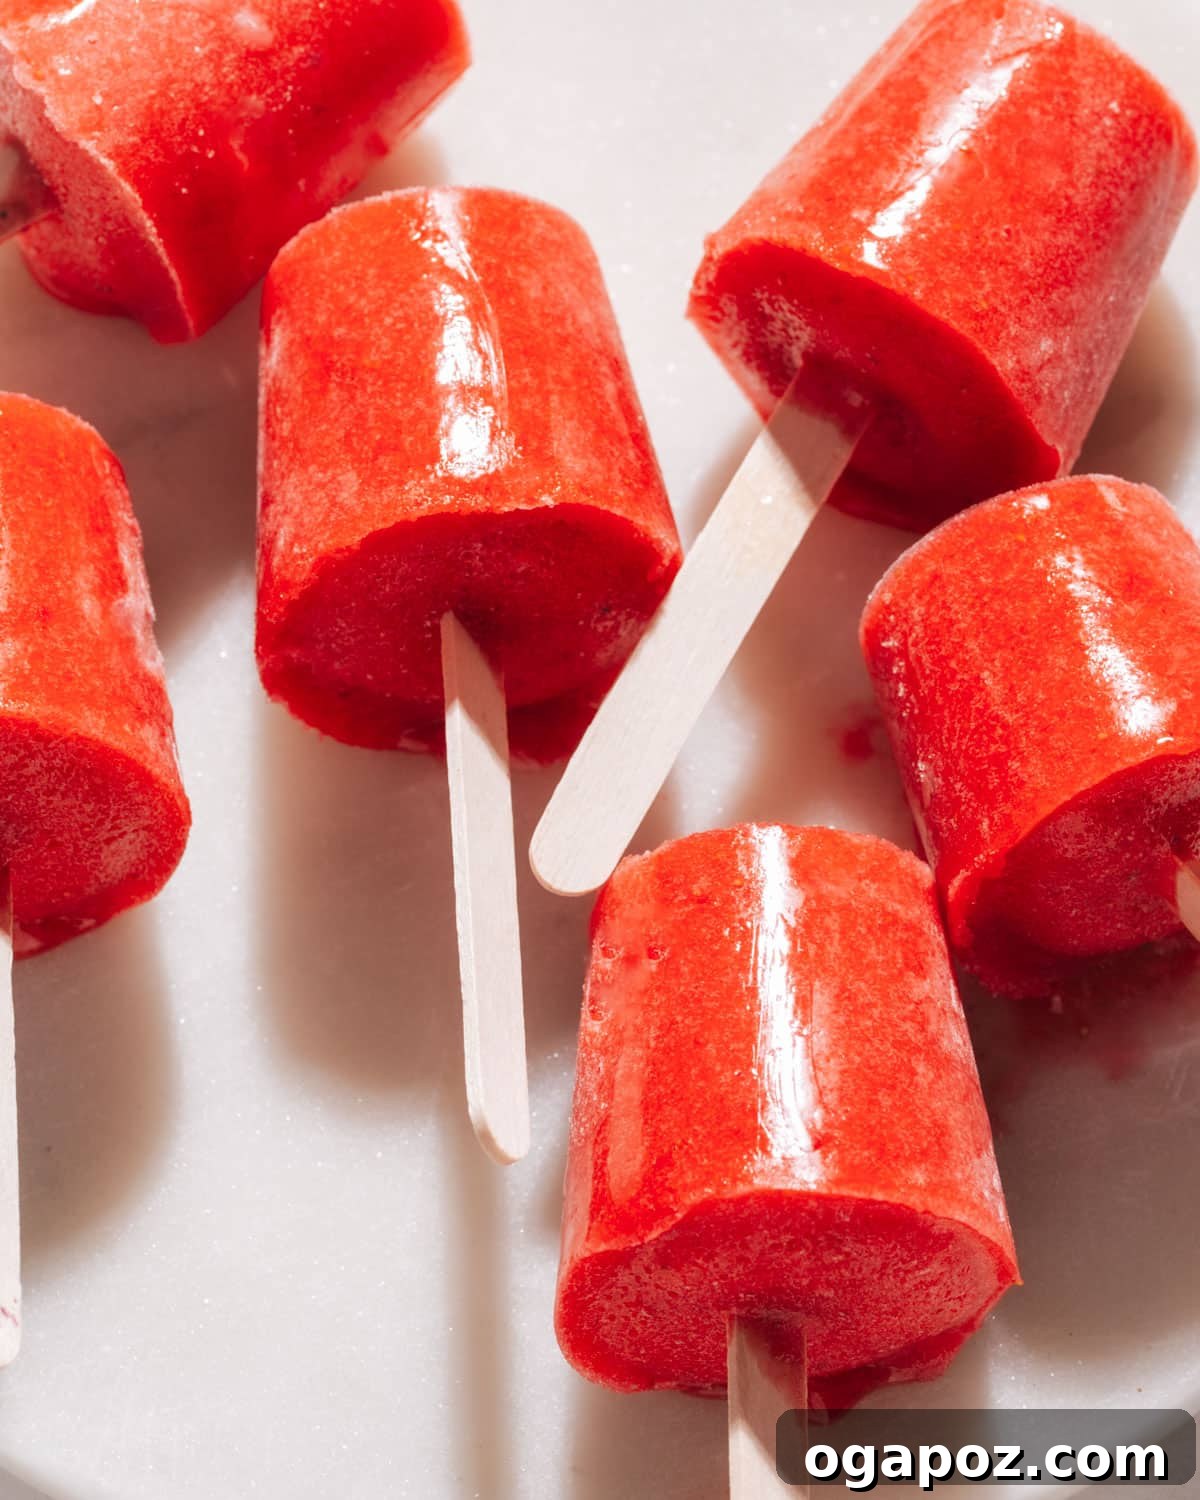
Essential Ingredients for Your Strawberry Popsicles
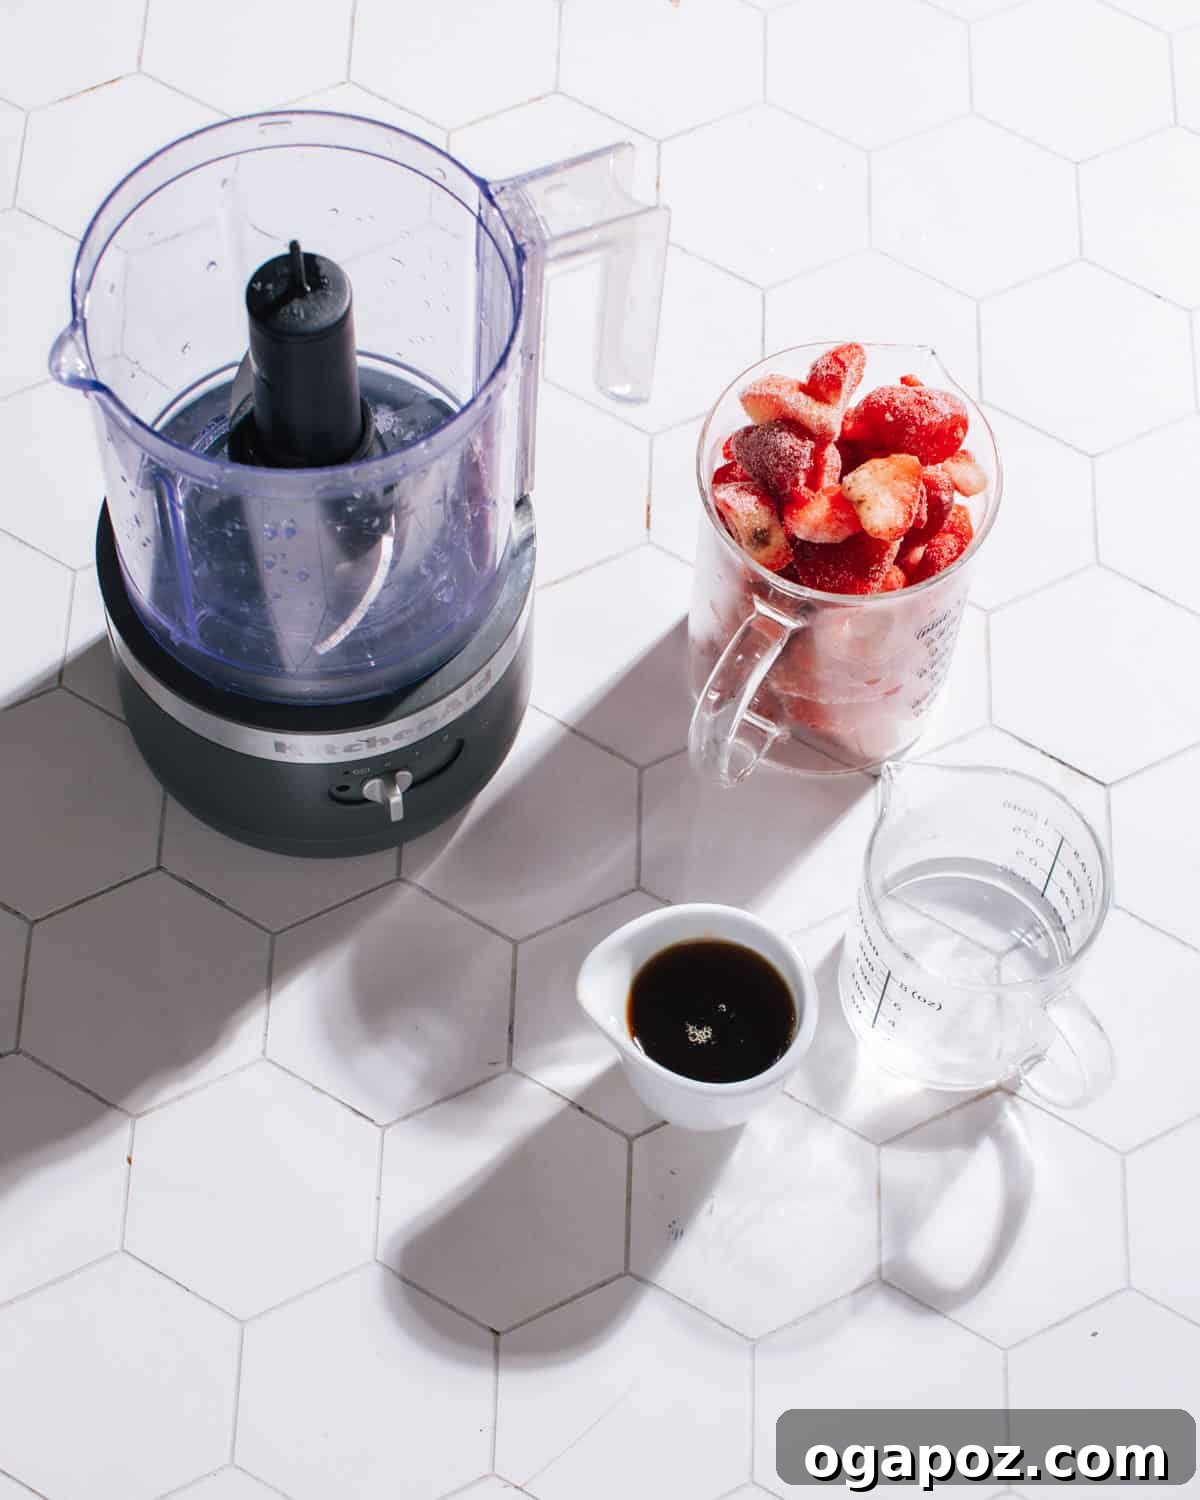
You’ll be delighted to find that this recipe truly lives up to its “simple” name, requiring just two core ingredients plus water. It’s a testament to how fantastic natural flavors can be when allowed to shine!
Key Ingredients: Simple, Fresh & Sweet
Gather these minimal yet mighty ingredients to create your refreshing and utterly delicious strawberry popsicles:
- Fresh or Frozen Strawberries (2 cups): The undisputed star of our show! You’ll need about two cups of either fresh or frozen sliced strawberries for this recipe. If you’re using fresh strawberries, make sure to hull them (remove the green leafy tops) and slice them into halves or quarters for easier blending. For the most intensely flavorful popsicles, select plump, ruby-red berries that are firm, fragrant, and in their peak season. If opting for frozen strawberries, there’s no need to thaw them beforehand; they’ll blend perfectly and create an even colder mixture, which helps with quick freezing.
- Honey or Maple Syrup (¼ cup, adjustable): This natural sweetener plays a crucial role in enhancing the strawberries’ inherent sweetness without overpowering their delicate flavor. Choose high-quality local honey for a unique floral note, or opt for pure maple syrup for a delightful vegan-friendly option that adds a slightly different, earthy sweetness. The amount is highly adjustable: start with a quarter cup and taste your blended mixture. Add more in small increments if you prefer a sweeter treat, remembering that freezing tends to mute flavors slightly.
- Water (¼ cup, adjustable): A small amount of water is essential to help achieve the perfect blendable consistency for your strawberries, ensuring a smooth and pourable purée. While plain water works perfectly, for an extra boost of flavor or a different nutritional profile, consider replacing it with coconut water or fruit juice, as detailed in our variations section below.
Creative Substitutions and Delicious Variations
This base recipe is incredibly versatile, inviting you to experiment and customize it to your heart’s content. Feel free to play around with these ideas to make these homemade fruit popsicles uniquely yours and perfectly suited to your taste buds:
- Explore Different Fruit Combinations: While strawberries are fantastic on their own, they also pair beautifully with a myriad of other fruits. Try combining them with an equal amount of blueberries, raspberries, or blackberries for a vibrant, antioxidant-rich mixed berry popsicle. For a delightful tropical twist, ripe mangoes or peaches make a wonderfully sweet and creamy swap, especially when blended well. Other excellent additions include sliced bananas for extra creaminess, pitted cherries, tangy kiwi, or even a few chunks of pineapple for an exotic flair.
- Vary Your Liquid Base: Instead of plain water, introduce new dimensions of flavor and nutrition. Coconut water is an excellent choice for a subtle tropical hint and an added boost of electrolytes, making these popsicles even more hydrating and perfect for post-workout refreshment. Orange juice or apple juice can replace water entirely for extra natural sweetness and a more complex fruit flavor, making your popsicles even more vibrant and appealing, particularly to children. For a truly rich and creamy treat, a splash of milk (dairy or non-dairy like almond or oat milk) can be used.
- Incorporate Creamy Add-Ins: To achieve a richer, creamier texture that mimics frozen yogurt or even ice cream, blend in a cup of plain Greek yogurt or a good quality dairy-free yogurt (such as coconut or almond-based yogurt). This addition not only makes the popsicles more decadent but also provides an extra boost of protein. For an even more luxurious experience, a swirl of full-fat canned coconut milk can add luscious creaminess and a subtle tropical note that perfectly complements the strawberries.
- Aromatic Enhancements: Elevate the flavor profile with fresh herbs or extracts. A small handful of fresh mint leaves blended directly into the mixture can add a wonderfully refreshing and invigorating twist, especially appealing on a hot day. Just a few drops of pure vanilla extract can deepen the overall sweetness and aroma, while a tiny hint of almond extract can beautifully complement the berry notes, adding a sophisticated touch.
- Zesty Citrus Kick: A squeeze of fresh lemon juice or lime juice can brighten the flavors considerably, adding a delightful, tangy contrast to the sweetness of the strawberries. Citrus not only enhances the fruitiness but also helps prevent browning if you plan to store them for a longer period. Start with a small amount (about a tablespoon) and adjust to your taste for that perfect zing.
- Play with Texture: If you enjoy a more rustic, “real fruit” experience, don’t blend the mixture completely smooth. Instead, leave some small, discernible chunks of strawberries in the mixture before pouring into molds. This provides a delightful textural contrast when you bite into the frozen treat, making each popsicle a unique experience. Alternatively, for an even fruitier bite, you can finely dice some extra strawberries and stir them into the puréed mixture just before freezing.
Essential Tools to Grab
You won’t need a professional kitchen setup for this recipe. Just gather these three basic kitchen items, and you’ll be well on your way to homemade strawberry popsicle bliss in no time:
- A Blender or Food Processor: This is the most crucial tool for achieving that silky-smooth strawberry purée, which is the foundation of these popsicles. A high-speed blender will make quick work of both fresh and frozen berries, ensuring a lump-free mixture that yields perfectly smooth popsicles. If you don’t have a dedicated blender, a good quality food processor will also do the trick; just make sure to process until thoroughly smooth, scraping down the sides as needed.
- Popsicle Molds: These are the vessels that will shape your delicious treats. Silicone popsicle molds are an excellent choice as they are flexible, making for incredibly easy release once the popsicles are frozen. Plastic molds are also a great and often more affordable option, widely available in various shapes and sizes. If you don’t have dedicated popsicle molds, don’t fret! Small paper cups (like Dixie cups or even small clean yogurt containers) work perfectly as temporary molds. You can simply tear the paper cup away once frozen, or easily pop out the treat from silicone muffin cups, which make smaller, bite-sized pops.
- Popsicle Sticks: Essential for holding and enjoying your frozen delights. Traditional wooden popsicle sticks are readily available at most dollar stores, craft stores, and online retailers in large packs. These are environmentally friendly and easy to dispose of. Alternatively, if you’re in a pinch, plastic or wooden spoons can also serve as sturdy makeshift handles, ensuring you have something to hold onto while savoring your chilly treat.
How to Make Strawberry Popsicles: A Simple 5-Step Guide
Creating these delightful strawberry popsicles is an incredibly straightforward process that anyone can master, regardless of their kitchen experience. Follow these five easy steps for a perfect batch of refreshing treats every single time:
Step 1: Blend the Ingredients to Perfection
Begin by combining your chosen strawberries (whether fresh, hulled, and sliced, or straight from the freezer), the honey or maple syrup, and the water in your blender or food processor. Secure the lid tightly and blend on high speed until the mixture is completely smooth and free of any large chunks. A well-blended mixture is crucial for a uniform texture and vibrant color in your finished popsicles, so take your time to ensure no berry pieces remain.
Step 2: Carefully Pour into Molds
Once your strawberry purée is ready and perfectly smooth, carefully pour it into your chosen popsicle molds. It’s important to leave a small amount of space at the top of each mold – specifically, about 1/4 inch (0.5 cm). This crucial step allows for natural expansion as the mixture freezes. Skipping this could lead to overflow and a messy freezer, so be mindful not to overfill, ensuring your popsicles maintain their neat and appealing shape.
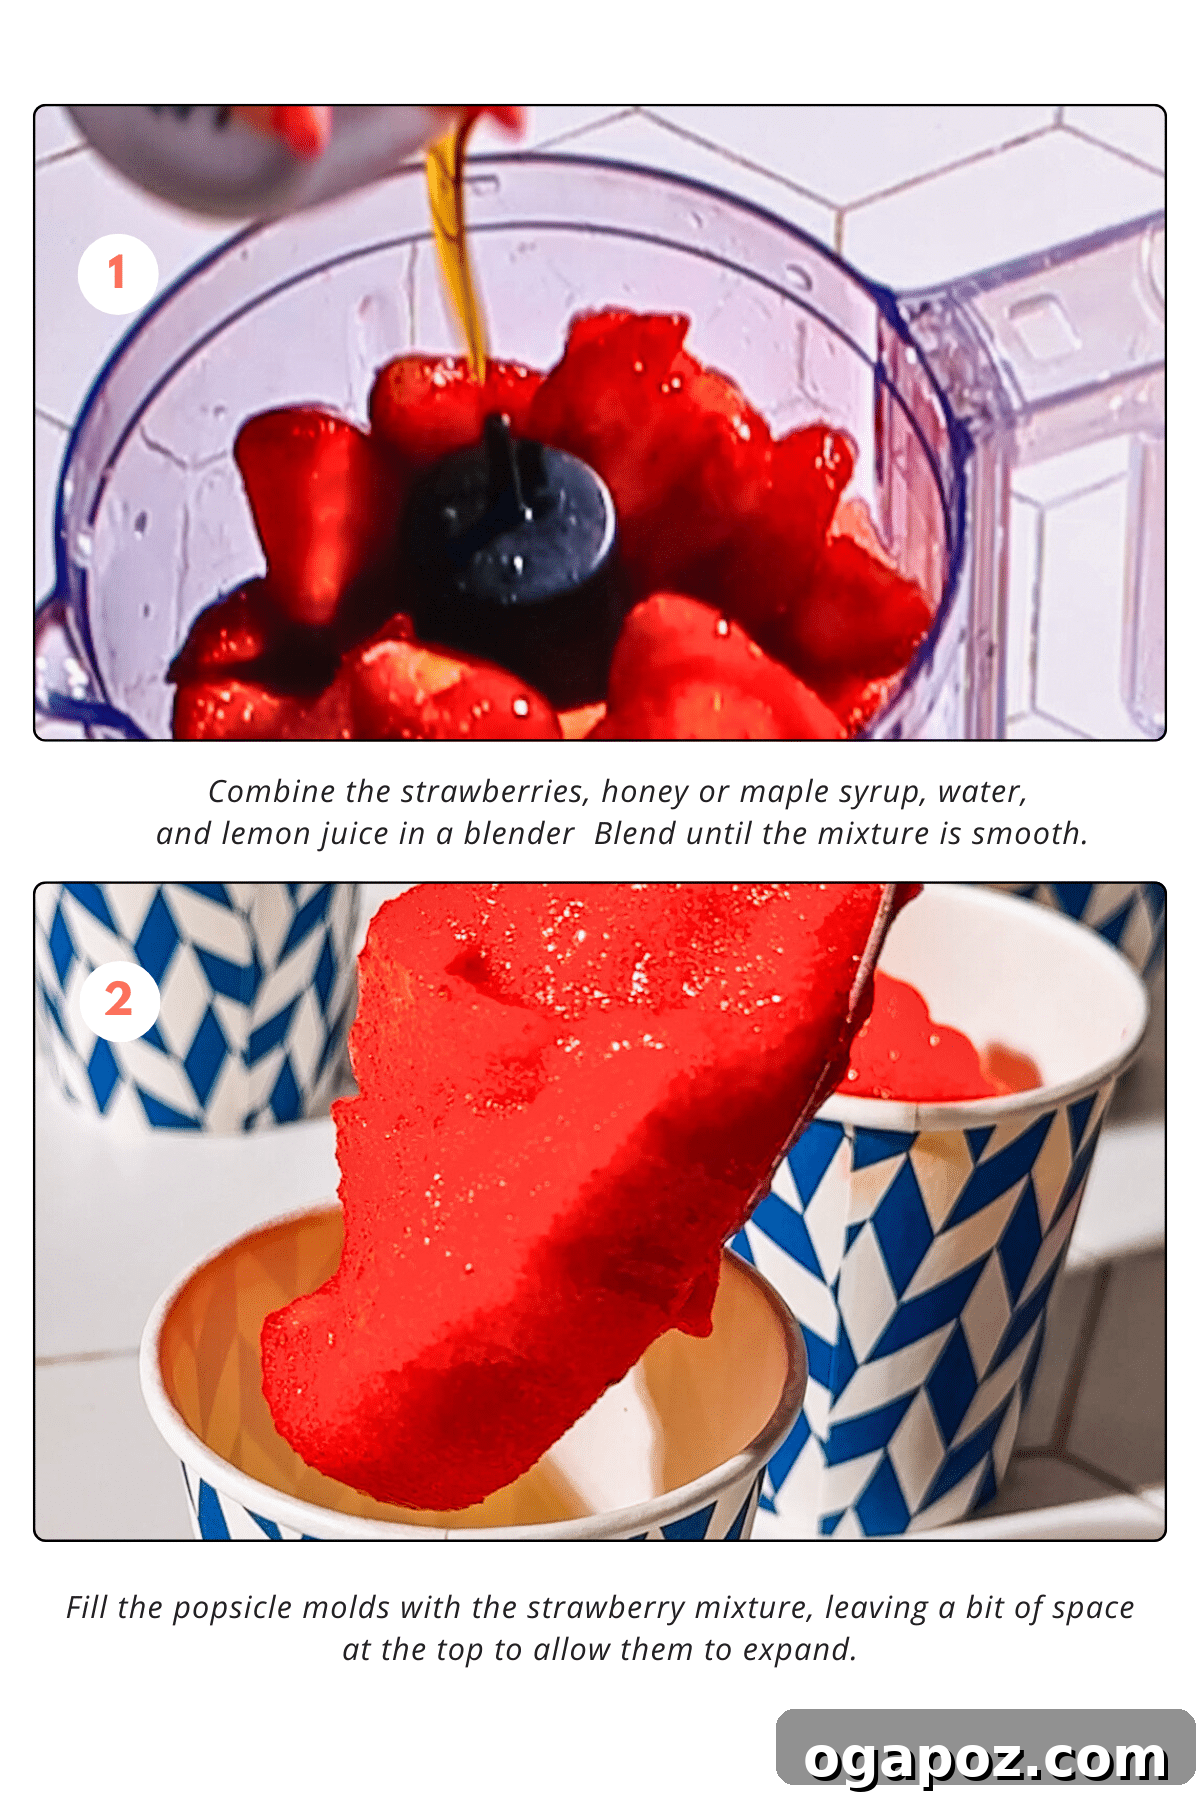
Step 3: Insert the Popsicle Sticks
Gently place a popsicle stick into the center of each filled mold. Ensure the stick is standing upright and centered for optimal handling once frozen. If you are using small paper cups as molds, a handy trick is to cover the top of each cup with aluminum foil and then carefully poke the popsicle stick through the center of the foil; this helps to stabilize the stick and keep it perfectly upright as the popsicles set. For silicone or plastic molds, they usually come with built-in lids or clever designs that effectively hold the sticks in place.
Step 4: Freeze Until Solid
Carefully transfer the filled molds to the freezer. It’s important to place them on a flat, stable surface to prevent any spills during the freezing process. Allow them to freeze undisturbed for at least 4-6 hours. For the best, most solid results that will hold their shape and resist quick melting, it is often ideal to prepare them ahead and freeze them overnight. This extended freezing time guarantees they are perfectly firm and easy to handle when it’s time to enjoy.
Step 5: Effortlessly Remove and Enjoy Your Popsicles
When your strawberry popsicles are completely frozen and firm, it’s time for the delicious grand reveal! To easily release them from their molds without any struggle or breakage, briefly run the outside of each mold under warm tap water for just a few seconds. This slight warming helps to loosen the edges, creating a thin film of water that allows the popsicle to slide out smoothly and effortlessly. Gently pull on the stick, and your perfect homemade strawberry popsicle is ready to be savored!
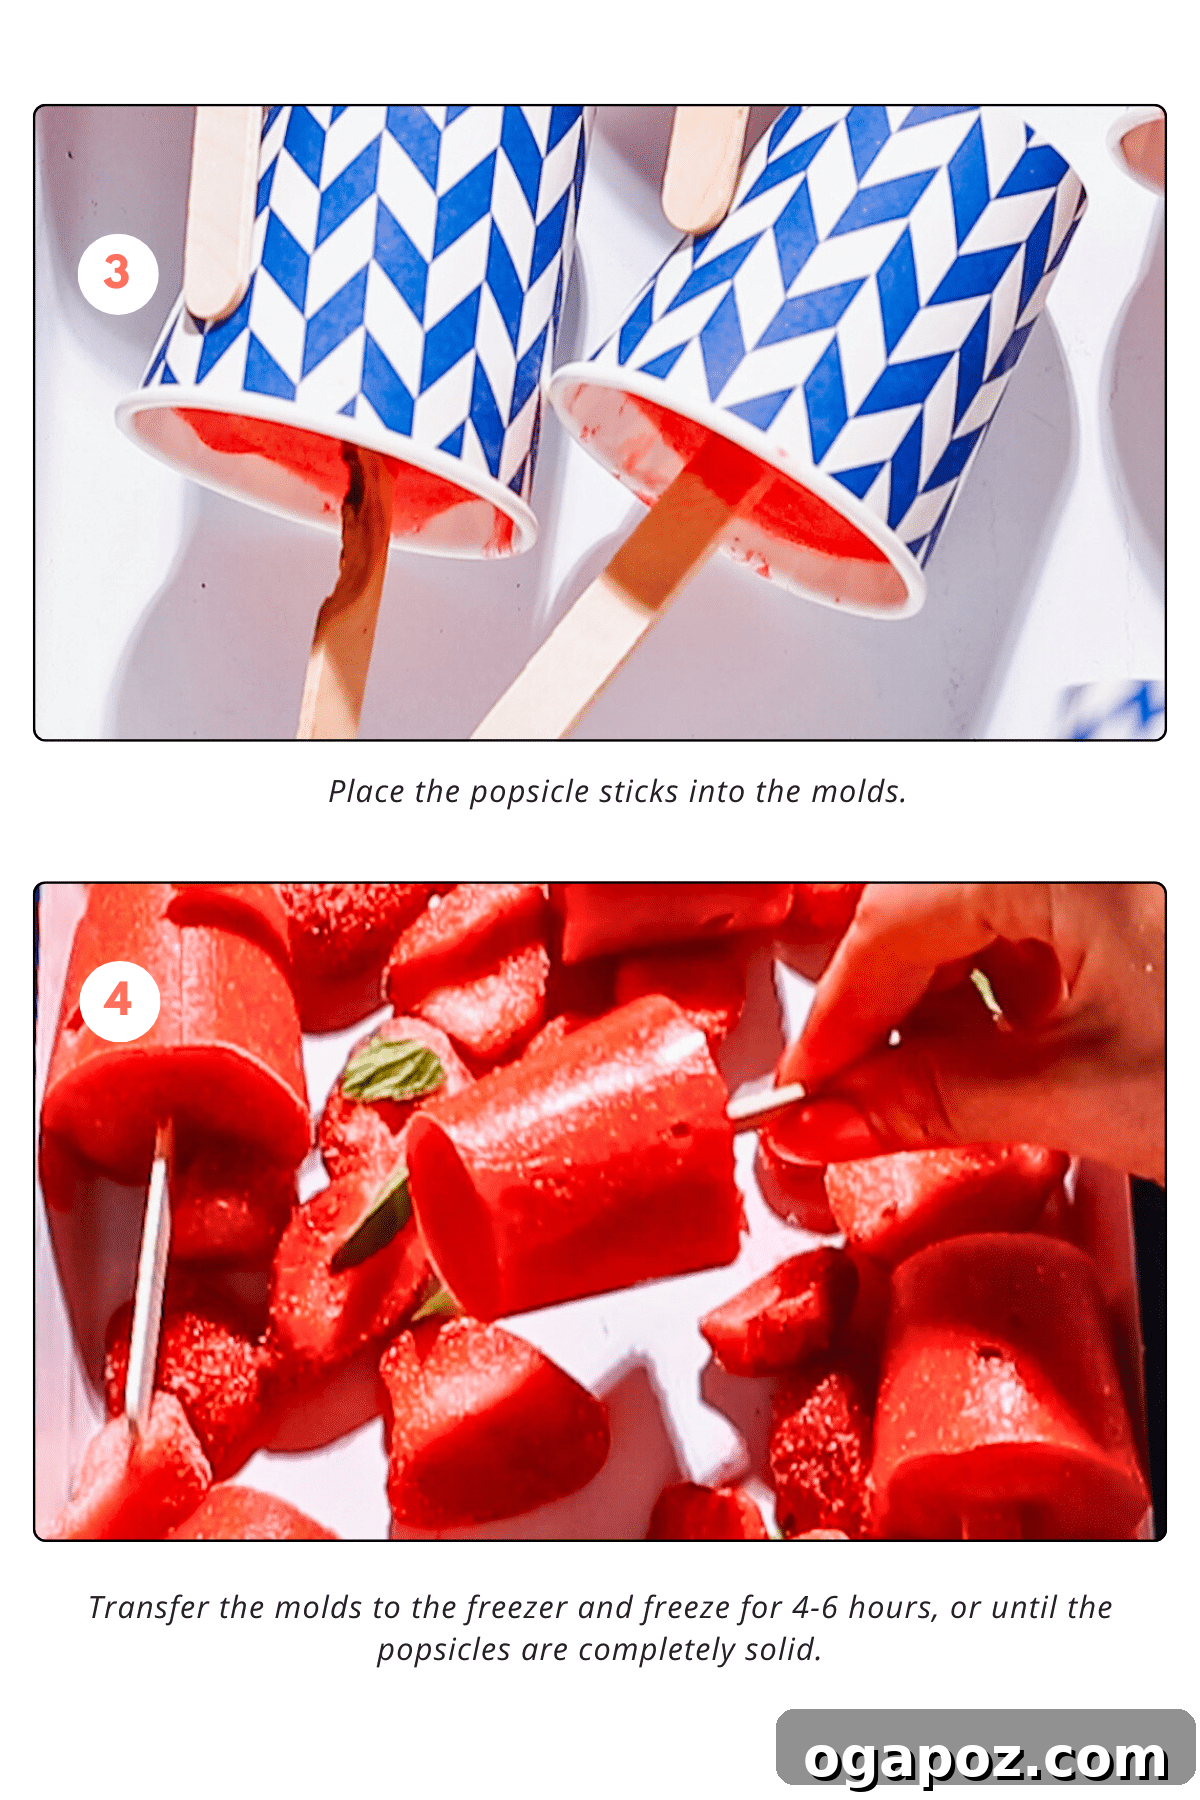
Make Ahead and Smart Storage for Your Popsicles
One of the many fantastic aspects of these homemade strawberry popsicles is how well they can be prepared in advance. This makes them an incredibly convenient and healthy option, whether you’re planning for a party, stocking up on guilt-free snacks for the week, or simply want a delicious treat ready at a moment’s notice.
You can easily make a large batch of these popsicles several days, or even weeks, before you intend to serve them. This eliminates stress on the day of an event and ensures you always have a refreshing, fruit-filled snack on hand. They are particularly ideal for busy parents looking for quick, wholesome options for their kids that don’t involve a lot of fuss.
For optimal freshness and to prevent them from absorbing any unwanted odors from the freezer, proper storage is key. Once your popsicles are completely frozen and firm (after the initial 4-6 hours or overnight freeze), you have a couple of excellent options:
- Store in Molds: If you have ample freezer space, you can simply keep the popsicles in their original molds. This is the simplest method if you’re consuming them within a few days.
- Transfer for Long-Term Storage: For longer storage or to free up your molds, carefully remove the frozen popsicles using the warm water trick (as described in the “Remove Popsicles” step). Once removed, transfer them to an airtight container or a heavy-duty freezer bag. If stacking multiple popsicles in a container or bag, it’s a great idea to separate each one with a small piece of parchment paper or plastic wrap. This simple trick prevents them from sticking together, making it effortless to grab just one when a craving strikes without having to wrestle them apart.
When stored correctly at a consistent freezer temperature (ideally 0°F / -18°C or colder), these delightful strawberry popsicles can maintain their quality, vibrant color, and fresh flavor for an impressive period – typically up to 2-3 months. This longevity means you can truly enjoy the taste of summer long after strawberry season has passed, or always have a healthy, homemade treat on standby for any unexpected guests or spontaneous sweet cravings.

Expert Tips & Science-Backed Secrets for Perfect Popsicles
As a food scientist and an avid lover of homemade sweet delights, I’ve gathered some insights to help you achieve popsicle perfection every single time. These pro tips will ensure your strawberry popsicles are not only delicious but also beautifully formed, easy to enjoy, and consistent in texture:
- The Golden Rule: Don’t Overfill Your Molds: This is a crucial step often overlooked by home cooks! When you fill popsicle molds right to the very top, you leave no room for the mixture to expand as it freezes. Water expands when it turns into ice (by about 9%), and without sufficient space, your popsicles will inevitably overflow, creating a sticky mess in your freezer. Always leave a small gap, about 1/4 inch (0.5 cm) from the rim of each mold, to accommodate this natural expansion.
- Preventing Popsicle Sticking for Batch Storage: If you plan to remove your frozen popsicles from their individual molds and store them together in a larger airtight container or a freezer bag, you’ll want to prevent them from freezing into an inseparable block. The simplest and most effective solution is to wrap each individual popsicle tightly in a small piece of parchment paper, waxed paper, or plastic wrap before placing them together. This creates a barrier, allowing you to easily grab one without struggling to pry apart a frozen cluster.
- The Quick Release Trick: Ever struggled to get a stubborn popsicle out of its mold, fearing it might break? The secret is surprisingly simple and relies on thermal dynamics: warm water. Before attempting to unmold, briefly run the outside of the popsicle mold under warm tap water for just a few seconds (typically 5-10 seconds is sufficient). The gentle warmth will slightly melt the outermost layer of ice, creating a thin film of water between the popsicle and the mold. This allows the popsicle to slide out smoothly and effortlessly without any breakage or distortion, preserving its perfect shape.
- Ensure Even Freezing for Best Texture: For uniform freezing and consistent texture throughout your popsicles, ensure your freezer is set to a sufficiently cold temperature, typically 0°F (-18°C) or colder. Also, try to place the molds in a part of the freezer where airflow is consistent and they are not packed too tightly with other items. Avoid placing them directly near the freezer door, as temperature fluctuations there can lead to less even freezing and potentially icier textures.
- The Role of Sweetener in Texture (Science Bite!): Beyond just taste, sweeteners like honey and maple syrup play a subtle but significant role in the final texture of your popsicles. Sugars are hygroscopic (they attract and retain water) and also lower the freezing point of water. This interference with the ice crystal formation process can result in a slightly less icy, more “chewy” or “smoother” texture compared to completely unsweetened fruit purées, which tend to be harder and more brittle. This subtle effect contributes to a more pleasant mouthfeel.
More Delicious & Healthy Frozen Treats You’ll Love
If you’ve fallen in love with making homemade frozen delights, then you’re in for a treat! Explore these other fantastic recipes to keep your freezer stocked with healthy, delicious, and easy-to-make options that are perfect for any time of year:
- Peanut Butter Frozen Yogurt Bites: A creamy, nutty, and cool treat that combines the irresistible flavors of peanut butter and yogurt, perfect for a quick snack or light dessert.
- Strawberry Frozen Yogurt Bites: Another viral sensation featuring the delightful flavor of strawberries blended with yogurt in convenient, bite-sized form – a refreshing hit for all ages.
- 3-Ingredient Banana Ice Cream: Discover the simplest way to make healthy, dairy-free “ice cream” with just frozen bananas and a blender. Customize with your favorite mix-ins!
- Chocolate Date Bark: A surprisingly decadent and wholesome treat that often draws comparisons to a healthier version of a Snickers bar, with dates, chocolate, and nuts.
- Frozen Yogurt Bark: A versatile and visually appealing snack. Spread yogurt on a sheet, top with fruits and nuts, freeze, and break into delicious shards for a customizable treat.
- Banana Bites (Peanut Butter and Chocolate): The classic irresistible combo of peanut butter and chocolate, frozen over sliced bananas for a quick, satisfying, and healthy sweet snack.
- Kiwi Frozen Yogurt: A refreshingly tart and sweet frozen treat featuring the unique and delightful flavor of golden kiwi, offering a vibrant twist.
- Healthy Homemade Fudgesicles: Indulge in a healthier version of the beloved classic chocolatey delight, made with just a few wholesome ingredients for guilt-free enjoyment.
- Yogurt Popsicles: Creamy and wonderfully versatile popsicles made with your favorite yogurt, offering endless possibilities for flavor combinations and mix-ins.
- Peanut Butter Frozen Yogurt Bark: Another delightful twist on the popular yogurt bark, combining creamy peanut butter with yogurt and chocolate for an irresistible frozen treat.
Frequently Asked Questions About Homemade Strawberry Popsicles
Got a quick question about making these delicious strawberry popsicles? Here are some common queries and their detailed answers to help you master these delightful frozen treats and ensure a perfect outcome every time:
For an exceptionally creamy texture that rivals ice cream, you have several excellent options. Incorporating about a cup of plain Greek yogurt, full-fat canned coconut milk, or even a ripe banana into your strawberry mixture will significantly enhance its richness and smoothness. These additions help to create smaller ice crystals during freezing, resulting in a velvety rather than brittle or icy popsicle. Also, ensuring your mixture is perfectly smooth from blending helps prevent larger ice crystal formation.
Absolutely! The amount of honey or maple syrup is entirely adjustable to your personal taste preferences and the natural sweetness of your strawberries. If your strawberries are exceptionally ripe and sweet, you might find you need very little or even no added sweetener at all. However, it’s a good practice to remember a key “science-based secret”: freezing tends to dull the sensation of sweetness. What tastes perfectly sweet as a liquid mixture will taste slightly less sweet once it’s frozen solid. So, taste your blended mixture before freezing and consider adding a touch more sweetener than you might initially think necessary if you prefer a noticeably sweet popsicle.
To ensure your popsicles are perfectly solid and ready for optimal enjoyment, they generally require 4-6 hours in a standard home freezer. The exact freezing time can vary slightly depending on several factors, including your freezer’s specific temperature setting, the size and material of your popsicle molds, and the initial temperature of your liquid mixture. For the best, most robustly frozen results that will hold their shape well and resist melting too quickly, I highly recommend planning ahead and freezing them overnight. This extended freezing time guarantees they are completely solid through and through.
No dedicated popsicle molds? No problem at all! You can easily improvise with common kitchen items you likely already have. Small paper cups, such as disposable drinking cups (like Dixie cups), or even clean, empty small yogurt containers, work wonderfully as temporary molds. Simply pour in your mixture, cover the top of each cup with a small piece of aluminum foil, and then gently poke your popsicle stick through the center of the foil – the foil cleverly helps to hold the stick upright and perfectly centered as the popsicles freeze. Alternatively, silicone muffin cups are also fantastic for making smaller, more bite-sized frozen treats, and they offer very easy release.
Achieving a smoother, less icy popsicle texture involves a few clever tricks rooted in food science. Firstly, ensuring your mixture is exceptionally well-blended is key; smaller particles create fewer large, brittle ice crystals. Secondly, incorporating a bit of sweetener, such as honey or maple syrup, helps significantly by lowering the freezing point of the mixture, which naturally leads to a softer, less brittle ice structure. Additionally, ingredients with higher natural sugar content (like very ripe fruit) or additions like Greek yogurt or a ripe banana can significantly contribute to a creamier, less icy final product by interfering with the formation of large ice crystals.
Absolutely! Strawberries are incredibly versatile and pair beautifully with many other fruits. For a delightful mixed berry popsicle, try combining them with blueberries, raspberries, and/or blackberries. For a tropical twist, mango or pineapple work wonderfully. Peaches also complement strawberries perfectly for a delightful summer flavor. Feel free to mix and match your favorite fruits to discover endless delicious combinations!
Yes, they are, with a slight adjustment! For toddlers and babies, you can easily omit the added sweetener (honey or maple syrup) entirely, especially if your strawberries are very ripe and naturally sweet. It’s crucial to ensure the mixture is blended exceptionally smooth to avoid any small chunks that could be a choking hazard. These fruit-only popsicles make a fantastic, natural, and soothing teething aid or a refreshing and healthy snack for little ones, providing essential nutrients without added sugars.
More Irresistible Strawberry Recipes You’ll Love
If you’re brimming with fresh strawberries from the market, or simply can’t get enough of their delightful flavor, here’s a bit of sweet treat inspiration for other amazing strawberry creations that are sure to become new favorites:
- Make my steamy strawberry cobbler and serve it warm with a gigantic scoop of vanilla bean ice cream for the ultimate comforting dessert experience.
- These strawberry brownies are a delightful twist on a classic, bringing a wonderful fruity dimension to rich, fudgy chocolate, creating a unique and irresistible treat.
- Another quintessential summer sensation, strawberry lemonade is bursting with zesty and sweet flavors, perfectly blended to quench thirst and refresh your palate on any warm day.
- Whip up a batch of this dreamy 6-ingredient strawberry icebox cake – it’s incredibly easy to make, requires absolutely no baking, and is utterly divine with its layers of creamy goodness and fresh berries!
- Here’s the viral strawberry frozen yogurt bites recipe to send your taste buds over the edge with their refreshing tang, creamy texture, and fun bite-sized format – a true social media sensation.
Print Recipe
Strawberry Popsicles (Quick, 3-Ingredient Recipe!)
Jennifer Pallian BSc, RD
10 minutes
0 minutes
10 minutes
6 popsicles
Recipe Video (Optional)
A short video demonstrating the blending and pouring steps for these strawberry popsicles can often be found on the original recipe page, offering a visual guide to the simple process.
Ingredients
For Delicious Strawberry Popsicles:
- 2 cups fresh or frozen strawberries, hulled and sliced
- ¼ cup honey or maple syrup (adjust to taste for desired sweetness)
- ¼ cup water (or substitute with coconut water, orange juice, or preferred liquid)
Instructions
- 1. Blend the Ingredients: In a high-speed blender or food processor, combine the prepared strawberries, honey or maple syrup, and water. Blend until the mixture is completely smooth and free of any lumps.
- 2. Pour into Molds: Carefully pour the strawberry mixture into your chosen popsicle molds, ensuring you leave about 1/4 inch (0.5 cm) of space at the top of each mold to allow for expansion during freezing.
- 3. Insert Sticks: Gently place a popsicle stick into the center of each filled mold. If using paper cups, you can cover them with aluminum foil and poke the sticks through to keep them upright.
- 4. Freeze Thoroughly: Transfer the filled molds to the freezer. Freeze for a minimum of 4-6 hours, or preferably overnight, until the popsicles are completely solid and firm.
- 5. Remove and Enjoy: To effortlessly release the frozen popsicles, run warm water over the outside of the molds for a few seconds. Gently pull the stick, and your refreshing homemade strawberry popsicle is ready to be savored!
Recipe Notes & Pro Tips
- For a Chunkier Texture: If you enjoy a bit of texture in your popsicles, blend half of the strawberries until smooth, then finely chop the remaining half. Stir the chopped strawberries into the puréed mixture before pouring into molds for an appealing chunky bite.
- Sweetness Adjustment: Always taste your blended mixture before freezing. Since freezing can dull the perception of sweetness, you might want to add a little extra honey or maple syrup if you prefer a sweeter popsicle once frozen.
- Creative Variations: Don’t hesitate to experiment with the substitution ideas mentioned earlier, such as adding Greek yogurt for creaminess, a squeeze of lemon juice for tang, or other berries for a mixed fruit flavor adventure.
- Easy Storage: Once fully frozen, you can remove popsicles from their molds and store them individually wrapped in parchment paper in an airtight container or freezer bag for up to 2-3 months. This keeps them fresh and prevents sticking.
Nutrition Information (Approximate Per Serving)
Calories: 59kcal
|
Carbohydrates: 16g
|
Protein: 0.4g
|
Fat: 0.1g
|
Saturated Fat: 0.01g
|
Polyunsaturated Fat: 0.1g
|
Monounsaturated Fat: 0.02g
|
Sodium: 2mg
|
Potassium: 82mg
|
Fiber: 1g
|
Sugar: 14g
|
Vitamin A: 6IU
|
Vitamin C: 29mg
|
Calcium: 9mg
|
Iron: 0.3mg
Please note: Nutrition information is automatically calculated and should be used as an approximation. Actual values may vary based on ingredients, brands used, and specific preparation methods.
Tried this recipe? Leave a comment!
We’d love to hear your thoughts and see your delicious creations. Your feedback helps others enjoy these recipes too!