

There are few snacks as universally loved and instantly satisfying as kettle corn. This delightful treat, with its signature balance of sweet and salty, captures the hearts of popcorn enthusiasts worldwide. Forget those store-bought bags; the magic of homemade kettle corn lies in its simplicity, freshness, and the sheer joy of creating a beloved snack from scratch. It’s not just food; it’s an experience – a symphony of flavor and crunch that delights the palate and brightens any occasion. Many people assume kettle corn is difficult to make, something reserved for fairgrounds and special vendors. The truth, however, is wonderfully different. With just a few basic ingredients and a sturdy pot, you can whip up a batch of perfect kettle corn in your own kitchen, surprising friends and family with your culinary prowess!
The Irresistible Allure of Kettle Corn: A Timeless Classic
Kettle corn isn’t just popcorn; it’s a specific type of popcorn that dates back centuries, often associated with colonial America and frontier cooking. Traditionally, it was made in cast iron kettles over an open fire, hence its evocative name. This method allowed for the sugar to caramelize onto the kernels as they popped, creating that distinct sweet glaze. The addition of salt then completed the iconic flavor profile, making it a staple at markets, fairs, and community gatherings. Today, while most of us don’t have open fires or cast iron kettles readily available, the essence of making kettle corn remains wonderfully accessible. It’s a snack that embodies comfort, nostalgia, and pure deliciousness, making it a fantastic choice for movie nights, parties, or simply a cozy evening at home.
What sets kettle corn apart from regular popcorn is that delicate, crunchy, sugary coating combined with a savory kick. Each bite offers a delightful contrast – a sweet initial taste followed by a salty finish that keeps you reaching for more. This perfect equilibrium is what makes it so incredibly addictive and satisfying. Beyond its incredible taste, making kettle corn at home offers several advantages. You control the quality of ingredients, adjust the sweetness and saltiness to your liking, and ensure it’s fresh and warm right off the stove. Plus, there’s an undeniable charm and satisfaction in making such a crowd-plepleasing treat yourself.
Essential Ingredients and Equipment for Perfect Kettle Corn
One of the most appealing aspects of homemade kettle corn is how few ingredients it requires. You likely already have everything you need in your pantry! The key is to use quality ingredients and the right equipment to ensure success. Here’s what you’ll need:
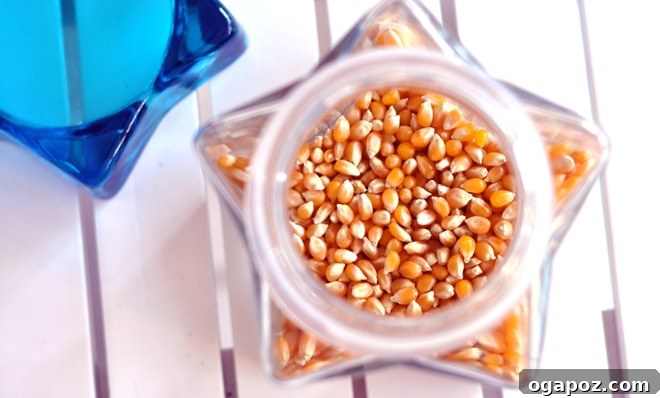
- Popping Corn Kernels: Use good quality, fresh kernels. Yellow or white varieties work equally well, though yellow kernels tend to produce larger, fluffier popcorn. Avoid old or stale kernels, as they won’t pop as efficiently.
- Canola Oil (or other high smoke point oil): Canola oil is a great choice due to its neutral flavor and high smoke point, which means it can withstand the heat without burning. Other suitable options include coconut oil (which adds a subtle richness) or vegetable oil. Olive oil is generally not recommended due to its lower smoke point and distinct flavor.
- Granulated Sugar: Regular white granulated sugar is all you need. The magic happens as it caramelizes and coats the popcorn.
- Salt: Fine-grained salt, such as fine sea salt or table salt, works best as it adheres more evenly to the popcorn. You’ll add this immediately after popping while the popcorn is still warm and sticky.
Beyond the ingredients, having the right tools is crucial for both safety and success:
- Large, Heavy-Bottomed Pot with a Lid: This is non-negotiable. A heavy-bottomed pot (like stainless steel or cast iron) distributes heat evenly and prevents the sugar from burning too quickly. The large size ensures there’s enough space for the kernels to pop and expand without overcrowding. A well-fitting lid is essential to contain the popping kernels and steam.
- Two Oven Mitts: Safety first! You’ll be handling a very hot pot, and shaking it vigorously. Oven mitts provide the necessary protection against heat and potential steam burns.
- Large Spoon or Spatula: For stirring and serving, especially after salting the hot popcorn.
Preparation is key. Have all your ingredients measured out and ready to go before you even turn on the stove. This ensures a smooth and stress-free popping process, especially since things move quickly once the kernels start to pop.
Mastering the Art of Homemade Kettle Corn: A Step-by-Step Guide
Making kettle corn is incredibly satisfying, but it does require attention and a bit of vigorous shaking! Follow these steps carefully to achieve that perfect sweet and salty crunch every time.
The Recipe: Homemade Kettle Corn
-
1/4 cup canola oil (or other high smoke point oil)
-
1/2 cup popping corn kernels
-
1/4 cup granulated sugar
-
Salt, to taste (fine sea salt recommended)
Instructions:
-
Prepare Your Pot and Test Kernels: Place your large, heavy-bottomed pot with a lid over medium-high heat. Add the 1/4 cup of canola oil to the pot. Drop just three kernels of popping corn into the oil. Cover the pot with the lid and wait. These test kernels serve a crucial purpose: they tell you when the oil is at the perfect temperature for popping. You’ll know it’s ready when you hear all three kernels pop. This usually takes a few minutes.
-
Add Remaining Kernels and Sugar: Once the test kernels have popped, immediately remove the pot from the heat for about 10-15 seconds. This brief cooling period helps regulate the temperature, ensuring that all subsequent kernels heat up evenly and pop simultaneously. Quickly add the remaining 1/2 cup of popping corn kernels to the pot, spreading them out as much as possible. Immediately sprinkle the 1/4 cup of granulated sugar evenly over the kernels. Cover the pot with the lid once again.
-
Shake, Shake, Shake! Return the pot to the medium-high heat. Now comes the most important part: the shaking! Immediately put on your oven mitts and begin shaking the pot vigorously back and forth across the burner. This continuous shaking is absolutely vital. It prevents the sugar from burning on the bottom of the pot, helps coat the kernels evenly, and ensures the heat is distributed throughout. Continue shaking almost non-stop. You’ll soon hear the kernels beginning to pop. Don’t stop shaking!
-
Listen and Finish Popping: Keep shaking the pot as the kernels pop. The popping will intensify and then start to slow down. Listen carefully. Once there are more than a few seconds between individual pops (typically 2-3 seconds), remove the pot from the heat immediately. Do not remove the lid yet! Leave the lid on and continue shaking gently for another 30 seconds or so. Residual heat will cause a few more kernels to pop, and the steam will finish cooking them.
-
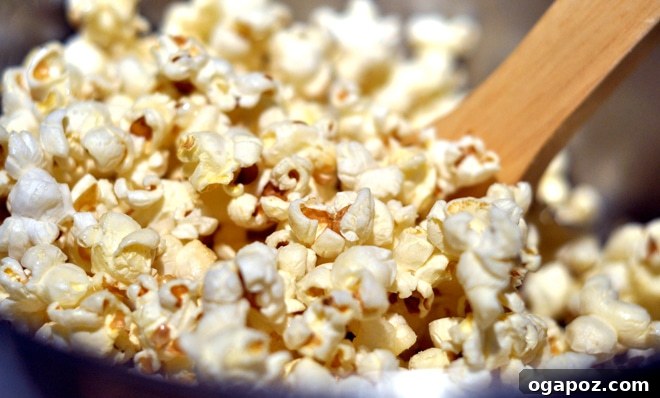
Salt and Cool: Carefully remove the lid (be mindful of trapped steam!). Immediately sprinkle the hot kettle corn generously with salt, to taste. Use a large spoon or spatula to stir the popcorn, distributing the salt evenly and breaking up any clusters that may have formed from the caramelized sugar. Be very careful during this step, as the caramelized sugar is extremely hot and sticky. Allow the kettle corn to cool for 5-10 minutes before serving. As it cools, the sugary coating will harden and become wonderfully crispy.
Tips for Kettle Corn Perfection and Beyond
While the basic recipe is straightforward, a few expert tips can elevate your homemade kettle corn from good to truly exceptional:
- Don’t Overcrowd the Pot: Resist the urge to double the recipe in the same pot. Overcrowding reduces airflow, leads to uneven popping, and can result in burnt sugar or unpopped kernels. If you want more, make multiple batches.
- Even Heat Distribution: A heavy-bottomed pot is crucial for this. Ensure your stovetop burner provides consistent heat.
- Adjust Sweetness and Saltiness: The provided ratios are a great starting point, but feel free to experiment! If you prefer a thicker, crispier sugar layer, you can slightly increase the sugar. Likewise, adjust the salt to your personal preference. Some people like a strong salty contrast, while others prefer just a hint.
- Immediate Salting is Key: The moment the popcorn is done and the lid is off, sprinkle with salt. The residual heat and stickiness of the sugar are essential for the salt to adhere properly. If you wait too long, it won’t stick.
- Preventing Burns: The continuous shaking is your best defense against burning the sugar. Also, removing the pot from heat immediately when popping slows down is vital. Burned sugar leaves a bitter taste that can ruin a whole batch.
- Storage: Store leftover kettle corn in an airtight container at room temperature. It will stay fresh and crispy for 2-3 days, though it’s best enjoyed within the first day.
Kettle corn is more than just a snack; it’s a delightful experience waiting to happen in your kitchen. Your friends will be amazed, and you might even make new ones simply by sharing this delicious homemade treat. It’s perfect for cozy evenings, lively gatherings, or a thoughtful, edible gift. So go ahead, gather your ingredients, put on your favorite music, and get ready to shake up some truly amazing kettle corn. You won’t regret it!