
Spooky Sweet Delight: How to Make the Easiest & Most Adorable Mummy Cookies for Halloween
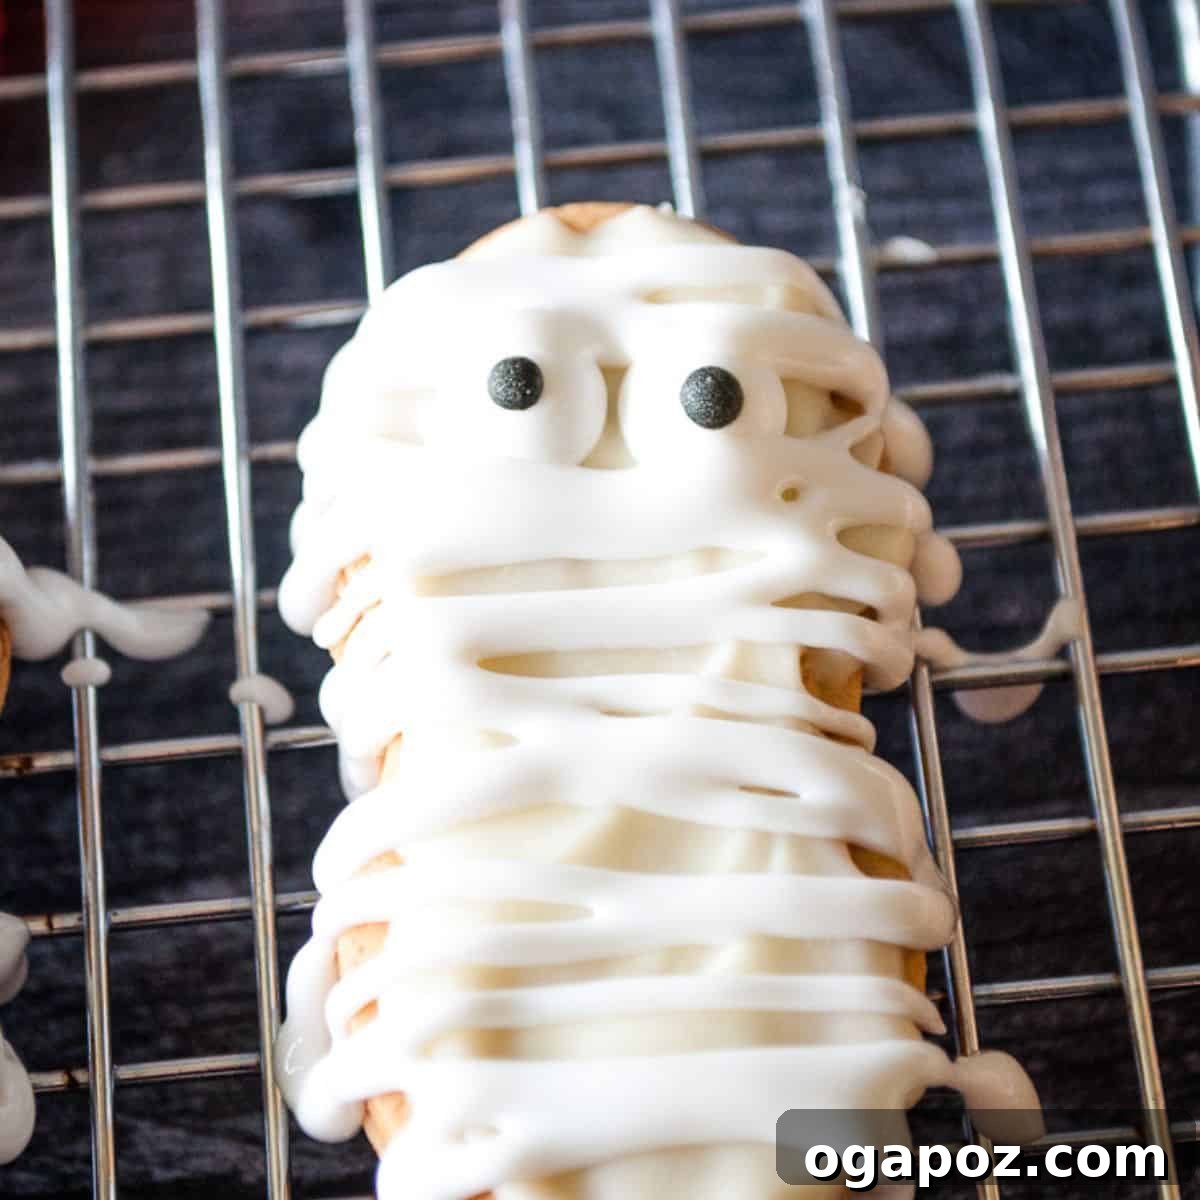
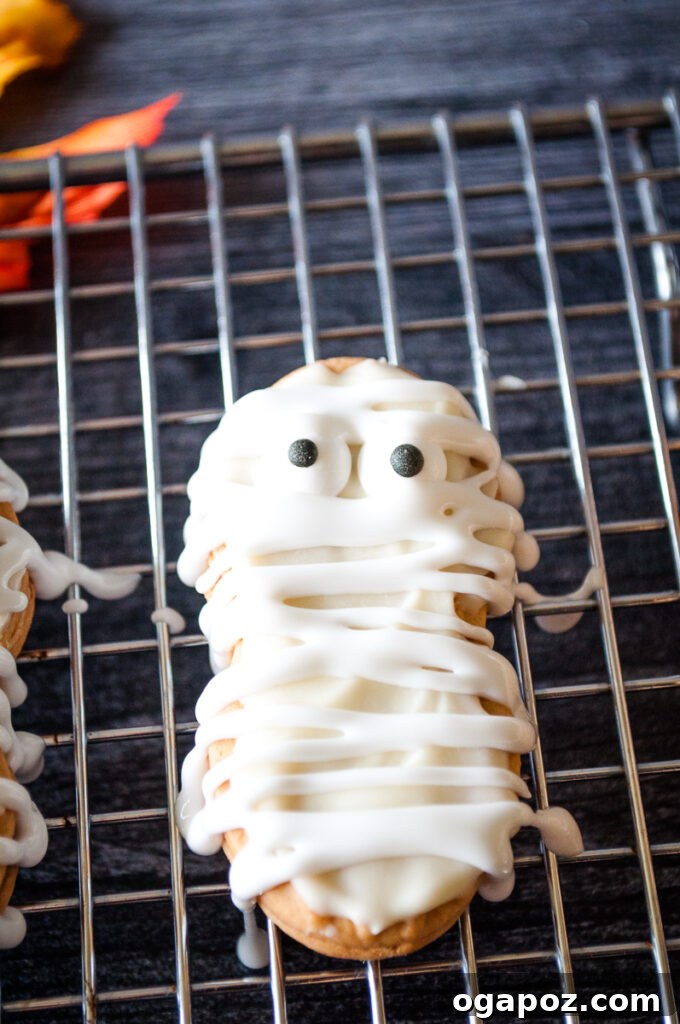
Get ready to wrap up some fun with these incredibly cute Mummy Cookies! Perfect for Halloween parties, school events, or just a delightful family activity, these cookies transform simple Nutter Butter biscuits into charming, ghostly treats using just a few ingredients: white chocolate, cookie frosting, and candy eyes. This recipe is designed to be effortlessly simple, ensuring a successful and fun baking experience for even the most novice bakers and enthusiastic little helpers. Embrace the spirit of the season with a treat that’s as easy to make as it is delightful to eat!
Why Mummy Cookies Are the Ultimate Halloween Treat
Halloween is a magical time for costumes, haunted houses, pumpkin carving, and, of course, delicious spooky treats! While trick-or-treating traditions may vary, the joy of celebrating this festive season with homemade goodies remains a cherished experience for families everywhere. And what better way to embrace the spooky spirit than with a batch of delightful Mummy Cookies?
These aren’t just any Halloween cookies; they’re an interactive and engaging activity that doubles as a delicious dessert! Imagine the delight on your children’s faces as they help create these whimsical characters, transforming ordinary cookies into adorable mummies. The process is so straightforward that it feels more like a fun craft project than a challenging baking endeavor. In as little as 15 to 20 minutes, depending on how many you’re preparing, you can have a tray full of these spooky yet sweet confections, ready to bring smiles to everyone who sees (and tastes) them.
This recipe is your secret weapon for a stress-free yet impressive Halloween celebration. It’s perfect for busy parents, budding young chefs, or anyone looking for a quick and festive snack. These Nutter Butter Mummy Cookies capture the essence of autumn and Halloween – they are simple to make, incredibly fun to decorate, and utterly delicious, making them an instant hit at any gathering or as a special treat for family movie night.
Simple Ingredients for Spooktacular Results
One of the most appealing aspects of these Mummy Cookies is their incredibly minimal and accessible ingredient list. You won’t need any specialized tools or obscure ingredients; everything you need can be found during a quick trip to your local grocery store. This makes them an ideal last-minute treat or a spontaneous weekend project. Here’s a closer look at the key components:
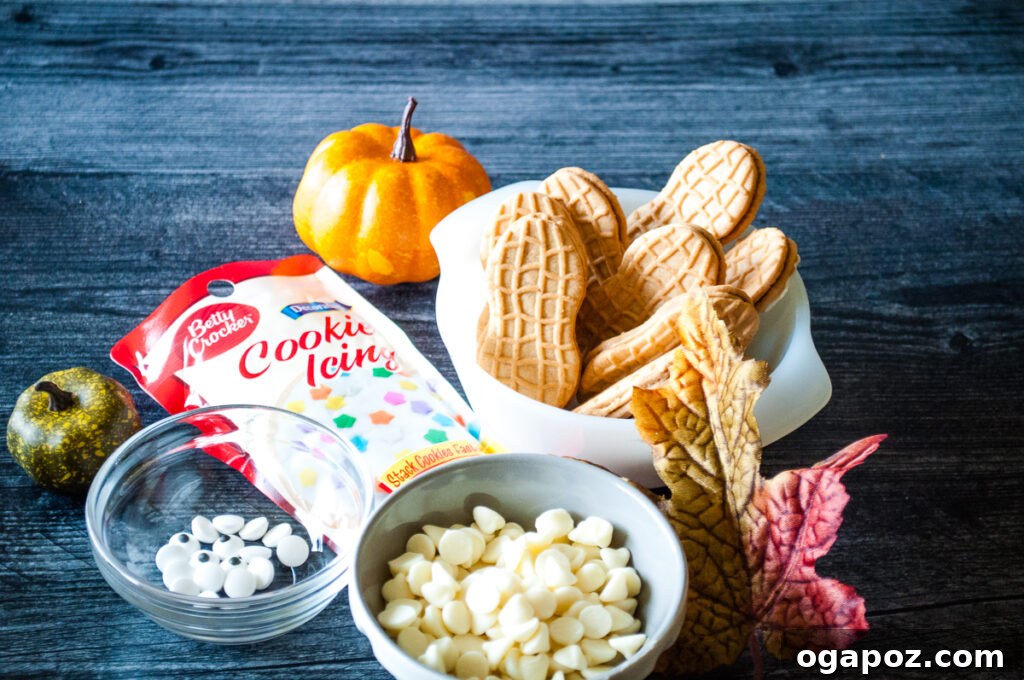
- Nutter Butter Cookies: The distinctive oval shape and delightful peanut butter flavor of Nutter Butter sandwich cookies make them the perfect foundation for our mummy creations. Their sturdy structure holds up well to dipping, and the sweet-and-savory combination with white chocolate is irresistible.
- White Chocolate Chips: These will be melted down to create the smooth, white coating that gives our mummies their ghostly appearance. While white chocolate chips work wonderfully, you can also opt for white melting wafers or candy melts for an even smoother finish and quicker setting time.
- White Cookie Frosting: This is where the magic of the mummy “bandages” comes to life! A ready-made tube of white cookie frosting with a fine tip nozzle is incredibly convenient for piping those delicate lines. If you’re feeling ambitious, a stiff royal icing or buttercream in a piping bag with a small round tip (like a Wilton #2 or #3) can also be used.
- Candy Eyes: These edible googly eyes are absolutely essential for bringing your mummies to life and adding that adorable, slightly spooky touch. Look for them in the baking aisle of your grocery store, especially during the Halloween season, or at craft stores with a baking section. They come in various sizes, so choose ones that fit your Nutter Butter cookies well.
That’s truly all you need! With these four readily available items, you’re just minutes away from crafting a memorable Halloween treat that kids and adults alike will find charming and delicious. These cookies also make fantastic, personal additions to Halloween treat bags or thoughtful homemade gifts for friends, teachers, and neighbors.
Step-by-Step Guide: How to Make Mummy Cookies
Making these spooky, sweet Mummy Cookies is an incredibly fun and straightforward process. No complex baking skills are required, just a desire for some festive fun! Follow these simple steps, and you’ll have a batch of delightful Halloween treats ready to impress in no time.
Step 1: Melt the White Chocolate to Perfection
The first crucial step is to melt your white chocolate chips until they are smooth, luscious, and free of any lumps. You have two excellent options for this, both requiring a bit of care to prevent the chocolate from burning or seizing:
- Double Boiler Method: This is a gentle and reliable way to melt chocolate, providing indirect heat that significantly reduces the risk of burning. Place your white chocolate chips in a heatproof bowl (glass or metal) and set it over a saucepan containing about an inch or two of simmering water. Ensure the bottom of the bowl does not touch the water. Stir the chocolate continuously with a rubber spatula or spoon until it is completely melted and beautifully smooth.
- Microwave Method: For a quicker approach, place the white chocolate chips in a microwave-safe bowl. Microwave the chocolate for 15-second intervals, removing it and stirring thoroughly after each interval. White chocolate can be delicate and seize or burn easily if overheated, so it’s vital to stir well between intervals and stop heating as soon as it’s mostly melted, allowing residual heat to complete the process. Continue until the chocolate is fully melted and has a smooth, pourable consistency.
Pro Tip for Melting: If your melted white chocolate appears too thick for dipping, you can stir in a tiny amount (start with ¼ to ½ teaspoon) of a neutral oil like vegetable oil or refined coconut oil to thin it slightly. Remember to avoid any contact with water, as even a single drop can cause white chocolate to seize and become unusable.
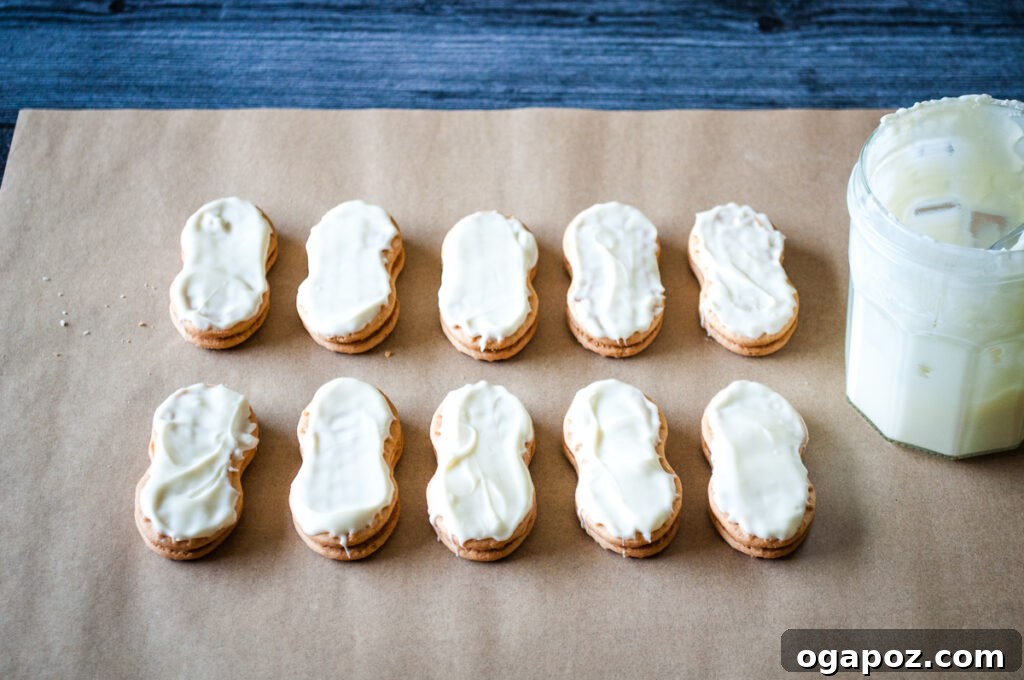
Step 2: Dip Cookies and Adorn with Spooky Eyes
Now for the most exciting part – transforming your cookies into cute, ghostly mummies! Before you begin, prepare a baking sheet by lining it with parchment paper or wax paper. This will prevent your dipped cookies from sticking as they cool.
- Dip the Cookies: Carefully take each Nutter Butter cookie and dip its top half (or the entire cookie, for a fully shrouded mummy effect) into the bowl of melted white chocolate. Ensure the cookie is evenly coated, allowing any excess chocolate to drip back into the bowl. Alternatively, for less mess or more precision, use a small spoon or a butter knife to spread the melted chocolate smoothly over the surface of each cookie.
- Place the Candy Eyes Immediately: This step is time-sensitive! While the white chocolate is still warm and wet on the cookie, immediately place two candy eyes onto the top portion of each dipped cookie. The melted chocolate will act as a natural adhesive, securing the eyes firmly in place as it cools and sets. Position them strategically to give your mummies character – some might be wide-eyed, others slightly askew for a comical look!
- Allow to Cool and Set: Once dipped and eyed, gently transfer the cookies to your prepared baking sheet. Allow them to cool and set up completely. This can be done by letting them sit at room temperature for about 20-30 minutes, or you can accelerate the process by placing them in the refrigerator for 10-15 minutes. It’s crucial that the chocolate is firm and fully set before you proceed to the next step, otherwise, your frosting bandages might smudge.
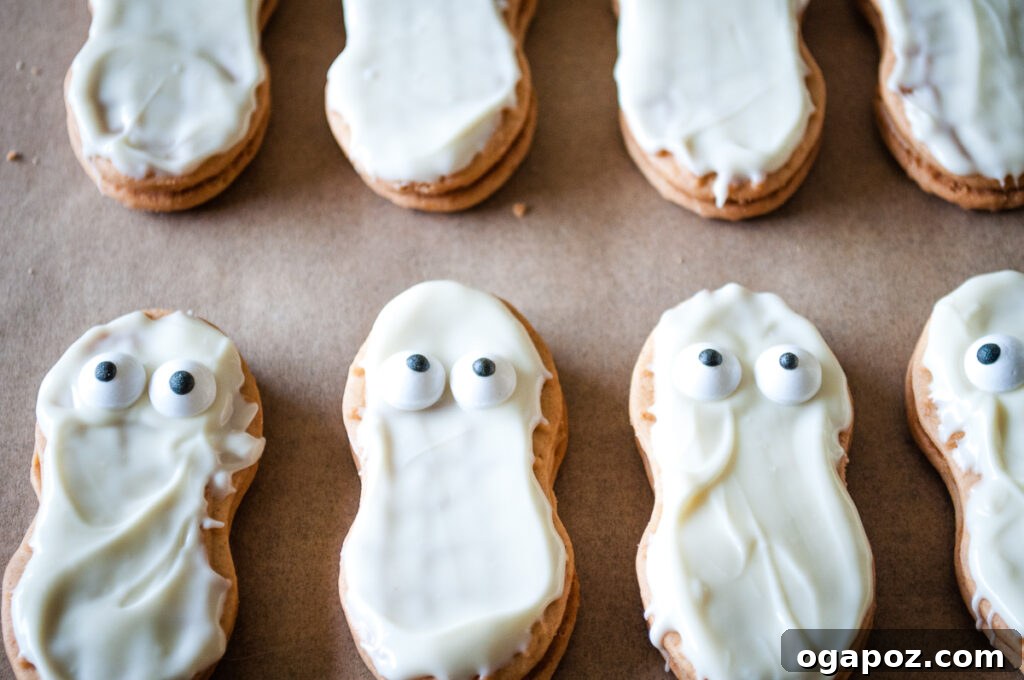
Step 3: Craft the Mummy Bandages with Frosting
With your white chocolate coating fully set, it’s time to add the iconic mummy bandages that truly bring these cookies to life and complete their adorable, spooky transformation.
- Prepare Your Frosting: If you’re using a convenient tube of store-bought white cookie frosting, simply snip a small tip off the end. The smaller the opening, the finer and more realistic your mummy “rags” will appear. For those using homemade frosting or frosting from a tub, transfer it to a piping bag fitted with a small round tip (such as a Wilton #2 or #3). This will give you the best control for detailed work.
- Drizzle the Bandages: Take each chocolate-coated cookie. Holding the frosting tube or piping bag steady, drizzle the white frosting back and forth across the cookie in a random, overlapping, or zig-zag pattern. Don’t strive for absolute perfection; the slightly messy, uneven lines actually enhance the authentic, rustic charm of mummy bandages! Be sure to leave a small gap or “window” around the candy eyes, creating the playful illusion of eyes peeking out from beneath the wrappings.
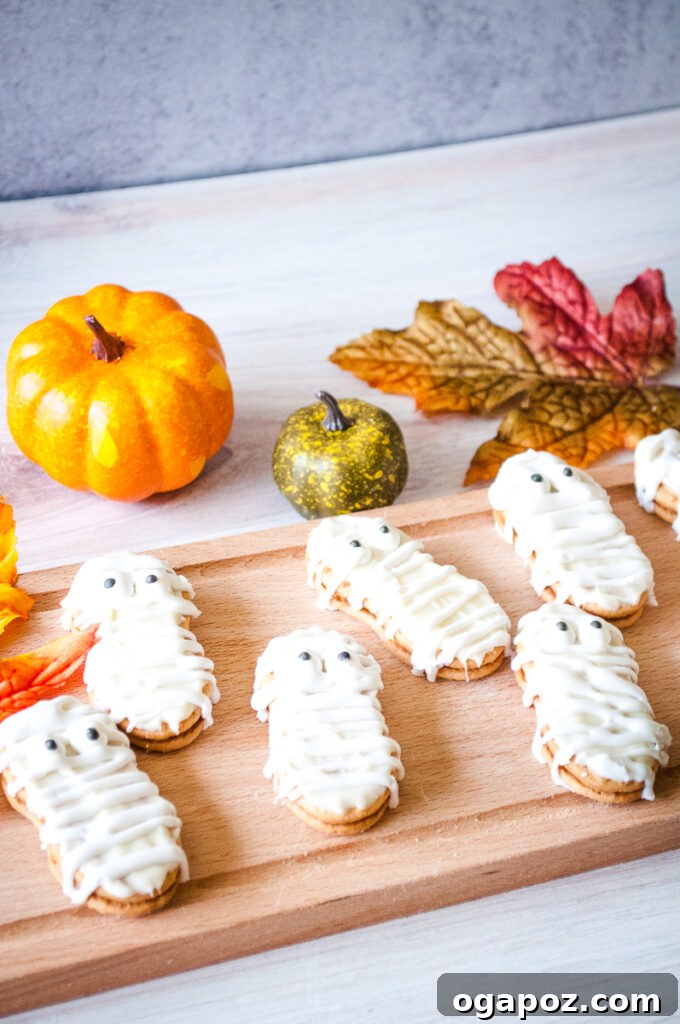
- Allow Frosting to Set Before Serving: After applying all the frosting bandages, gently place the cookies back on the cooling rack or baking sheet. Let them sit at room temperature for approximately 20 minutes to allow the frosting to firm up. This prevents any smudging and makes them much easier to handle, stack, and serve without damaging their delicate decorations.
And there you have it! Your delightful, spooky Mummy Cookies are now fully prepared and ready to impress. This simple, engaging activity is not just about making a treat; it’s about creating wonderful Halloween memories with friends and family.
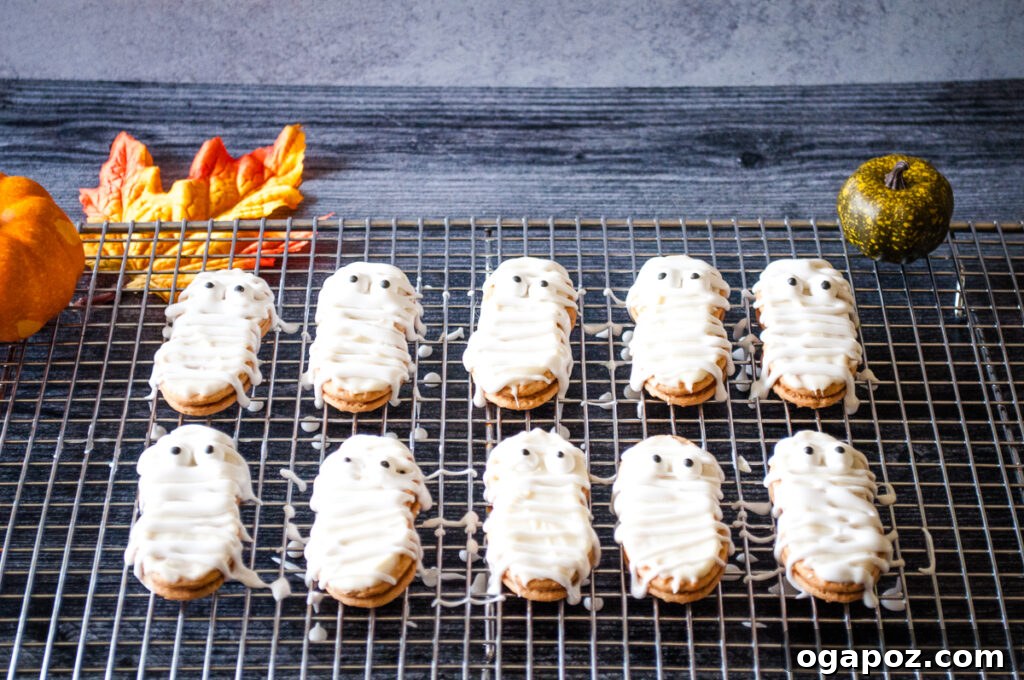
Tips and Variations for Your Mummy Cookies
While this recipe is wonderfully simple and straightforward, a few extra tips can help ensure your Mummy Cookies turn out perfectly every time. Plus, exploring some creative variations can help you customize them for any occasion or dietary preference.
Tips for Success:
- Use Quality Chocolate: Opt for good quality white chocolate chips or candy melts. Higher quality chocolate tends to melt more smoothly and consistently, resulting in a nicer, glossier finish for your mummy base. Cheaper alternatives can sometimes be grainy or difficult to work with.
- Patience with Melting: Never rush the chocolate melting process, especially with white chocolate. Use low heat and constant stirring to achieve a smooth consistency and prevent the chocolate from burning or seizing.
- The Cooling Rack Advantage: Utilizing a wire cooling rack after dipping is crucial. It allows any excess chocolate to drip off, prevents flat, uneven bottoms, and ensures that the cookies cool and set evenly without sticking to a surface. For easy cleanup, place parchment paper or wax paper underneath the rack.
- Frosting Consistency Matters: If your store-bought tube frosting feels too stiff, you can gently warm it by kneading the tube with your hands for a few minutes or by running it under warm water for a brief moment. If using homemade frosting, adjust its consistency with a tiny bit of milk (to thin) or powdered sugar (to thicken) until it’s perfect for piping.
- Make it a Family Affair: These cookies are ideal for involving kids in the kitchen. Let them take charge of dipping the cookies into the chocolate and carefully placing the candy eyes. For the frosting, you can pre-pipe a few mummy lines and let them fill in the gaps, or supervise closely as they create their own unique bandage patterns.
Creative Variations & Customizations:
- Dark Chocolate Mummies: For a dramatic twist, dip your Nutter Butters in melted milk or dark chocolate instead of white. Then, use white frosting for the bandages to create a striking, contrasting effect that really makes the mummy pop.
- Alternative Cookie Bases: While Nutter Butters are perfect, feel free to experiment! Other oval-shaped cookies, rectangular graham crackers, or even popular sandwich cookies like Oreos (for “ghost” cookies when dipped in white) can be fun alternatives. Adjust your dipping technique to suit the cookie’s shape.
- Vibrant Bandages: Add a drop or two of gel food coloring to your white frosting to create colorful mummy bandages. Imagine mummies with bright green, purple, or orange wrappings for a playful monster-like appearance.
- Extra Decorative Accents: Once the frosting sets, you can add tiny Halloween-themed sprinkles, a dusting of edible glitter, or even affix small edible candy spiders or bat decorations for an extra touch of spooky flair.
- No Candy Eyes? No Problem!: If you can’t find edible candy eyes, don’t despair! You can easily create eyes using mini chocolate chips (placed upside down for a dot), small dots of black gel frosting, or even by drawing them on with an edible food marker.
Storage and Serving Suggestions
These Mummy Cookies are not only adorable and delicious but also quite forgiving when it comes to storage, making them an excellent make-ahead treat for your Halloween festivities. Proper storage ensures they remain fresh and picture-perfect for your celebration.
Storage Tips:
Once the chocolate and frosting have completely set, store your finished Mummy Cookies in an airtight container at room temperature. They will remain fresh and delicious for up to 5 days. To prevent them from sticking together or damaging their delicate frosting details, layer the cookies between sheets of parchment paper or wax paper. While not strictly necessary, you can also store them in the refrigerator, especially if your kitchen tends to be very warm, but it’s best to bring them back to room temperature before serving for optimal texture and flavor.
Serving Ideas:
These Mummy Cookies are incredibly versatile and can be presented in a variety of creative ways:
- Halloween Party Platter: Arrange them on a spooky-themed serving platter alongside other festive treats like pumpkin dip, ghost pretzels, monster brownies, or candy corn. Their unique appearance will instantly make them a centerpiece.
- School Lunchbox Surprise: Tuck one or two individually wrapped Mummy Cookies into your child’s lunchbox for a delightful and festive surprise during the Halloween week. It’s sure to bring a smile to their face!
- Trick-or-Treat Handouts (Homemade Touch): If local regulations permit homemade treats, individually wrap these cookies in clear cellophane bags, tie them with a festive orange or black ribbon, and hand them out to trick-or-treaters for a personalized touch.
- Dessert Bar Centerpiece: Use these cookies as a key component of a larger Halloween dessert table. Their distinct and adorable appearance makes them an instant conversation starter and a highlight of any spread.
- Comforting Companion: Enjoy these sweet mummies with a warm cup of coffee, hot apple cider, a cozy mug of tea, or a cold glass of milk for a comforting autumn snack or a perfect ending to a fall meal.
Frequently Asked Questions (FAQ) About Mummy Cookies
Q: Can I make these Mummy Cookies ahead of time for a party?
A: Absolutely! These cookies are ideal for making in advance. You can prepare them up to 3-5 days before your event. Just ensure they are stored correctly in an airtight container at room temperature, layered with parchment paper, to maintain their freshness and prevent smudging.
Q: What should I do if my white chocolate is too thick or seizes while melting?
A: If your white chocolate is too thick after melting, stir in a tiny amount (start with ¼ to ½ teaspoon) of a neutral oil like vegetable or coconut oil to thin it out to a dipping consistency. If it seizes (becomes clumpy, grainy, and hard), it likely came into contact with even a small amount of water or was overheated. Unfortunately, seized chocolate is very difficult to salvage. In most cases, it’s best to discard it and start over with new chocolate, ensuring you melt it slowly and carefully, especially if using the microwave, stirring frequently.
Q: Can I use different types of cookies instead of Nutter Butters?
A: Yes, you can certainly experiment! While Nutter Butter cookies are ideal due to their distinctive oval shape and delicious flavor that pairs well with white chocolate, other oval or rectangular cookies will also work best for maintaining the “mummy” look. Consider shortbread cookies, graham crackers, or even other sandwich cookies. Be aware that you might need to adjust your dipping technique based on the cookie’s size and shape.
Q: My candy eyes keep sliding off the cookies. What’s the trick?
A: The key is to place the candy eyes onto the white chocolate immediately after dipping the cookie, while the chocolate is still wet and pliable. As the chocolate begins to set, it will act as a natural glue, holding the eyes firmly in place. If the chocolate has already started to harden, you can dab a tiny bit of fresh melted chocolate or a small dot of frosting on the back of the eyes before placing them to help them stick.
Q: How can I make these Mummy Cookies even easier for young children to decorate?
A: To maximize the fun for younger children, you can take on the task of melting the chocolate and dipping all the cookies yourself. Then, let the kids focus on the enjoyable part of placing the candy eyes and, with supervision, piping the frosting bandages. You might pipe a few “starter” lines for them and let them fill in the gaps, or simply encourage their creativity with the frosting, emphasizing fun over perfection!
Other Spooktacular & Fall Recipes You’ll Love
Looking for more festive treats, comforting meals, or simple fall recipes to delight your family and guests? Explore some of our other favorite autumn-inspired dishes that are perfect for family dinners, game day gatherings, or just a cozy night in.
Turkey
Instant Pot Turkey Chili
Snack
Mummy Hot Dogs
Beef
Beef and Bean Chili
Chicken
Instant Pot White Chicken Chili
Mummy Cookies Recipe
Julia Jolliff
These adorable Mummy Cookies are the ultimate fun and easy Halloween treat! Made with Nutter Butter cookies, dipped in white chocolate, and decorated with frosting bandages and candy eyes, they are perfect for kids and guests during the trick-or-treating season. A simple, no-bake recipe that’s ready in minutes for maximum spooky delight!
Print Recipe
Ingredients
- ¾ cup white chocolate chips (or white candy melts)
- 10 Nutter Butter Cookies
- 20 Candy Eyes (approximately 2 per cookie)
- 1 container Betty Crocker Cookie Frosting in White (or similar white icing in a tube)
Instructions
- Melt White Chocolate: In a double boiler or a microwave-safe bowl, gently melt the white chocolate chips. If using a microwave, heat in 15-second intervals, stirring well after each, until smooth and fully melted. Ensure the chocolate is a smooth, pourable consistency.
- Dip Cookies: Carefully dip the top half of each Nutter Butter cookie into the melted white chocolate, ensuring it’s evenly coated. Alternatively, use a knife or small spoon to spread the chocolate over the cookie.
- Add Eyes & Cool: Immediately place two candy eyes onto each cookie while the chocolate is still wet. Transfer the dipped cookies to a cooling rack lined with parchment paper. Allow the chocolate to cool and set completely at room temperature or in the refrigerator for 10-15 minutes.
- Prepare Frosting: Once the chocolate is firm, prepare your white cookie frosting. If using a tube, cut a small tip off the end for a fine line. If using a piping bag, fit it with a small round tip (like a Wilton #2 or #3).
- Pipe Bandages: Drizzle the white frosting back and forth across the chocolate-coated cookies in an overlapping zig-zag pattern to create the mummy bandage effect. Leave the candy eyes exposed to “peek” through.
- Set & Serve: Let the frosting set for about 20 minutes at room temperature before serving to prevent smudging. Enjoy your delightfully spooky Mummy Cookies!
Nutrition (Approximate per cookie)
- Calories: 153 kcal
- Carbohydrates: 21g
- Protein: 2g
- Fat: 7g
- Saturated Fat: 3g
- Polyunsaturated Fat: 1g
- Monounsaturated Fat: 2g
- Cholesterol: 3mg
- Sodium: 73mg
- Potassium: 39mg
- Fiber: 0.03g
- Sugar: 15g
- Vitamin A: 4 IU
- Vitamin C: 0.1mg
- Calcium: 27mg
- Iron: 0.03mg
Nutrition information is automatically calculated and should be used as an approximation.
Tried this recipe? Share your creations on Instagram and tag @acedarspoon or use hashtag #acedarspoon! We’d love to see your spooky sweet masterpieces!