

Prepare to fall in love with these utterly addictive Cookie Dough Bites! If you’ve ever found yourself longing for a spoonful of raw cookie dough without the worry, this recipe is your dream come true. These adorable, bite-sized delights are crafted to be completely safe for consumption, requiring no baking at all. Enjoy them as they are, or take them to the next level with a luxurious chocolate coating. They offer the quintessential taste of classic chocolate chip cookie dough, but in a perfectly portioned, irresistible form that’s ready for any occasion. Get ready to impress with these charming and delicious treats!

Why You’ll Absolutely Love These Edible Cookie Dough Bites
These miniature cookie dough truffles are a revelation for anyone who adores the irresistible taste of cookie dough. Simple to prepare, entirely safe to eat, and bursting with that iconic chocolate chip cookie flavor, they truly are a dream come true for dessert enthusiasts. Beyond their deliciousness, there are several compelling reasons why these bites will become your new go-to sweet treat.
- Effortless and Safe Indulgence: Our simple method for heat-treating flour ensures these bites are completely safe to enjoy without any baking. This crucial step eliminates harmful bacteria often found in raw flour, allowing you to savor every mouthful worry-free. Combined with the absence of raw eggs, this recipe makes classic cookie dough cravings a delightful and healthy reality.
- Quick and Easy Preparation: With a straightforward list of readily available ingredients and a minimal number of steps, these cookie dough bites come together incredibly fast. You can whip up a batch in no time, making them perfect for impromptu cravings, last-minute guests, or as a fun activity with the family. No complex techniques or fancy equipment are needed!
- Perfect Texture and Flavor Balance: Each bite delivers a harmonious blend of creamy, sweet, and chocolatey goodness. The dough is soft and chewy, perfectly complemented by the delightful crunch of chocolate chips. It’s exactly like snacking on your favorite cookie dough straight from the bowl, but refined into a sophisticated and portable dessert.
- Versatile for Any Occasion: These charming little bites are not just for everyday snacking. Their attractive appearance makes them a fantastic addition to holiday cookie trays, such as during Christmas, and they serve as wonderful homemade gifts or elegant contributions to any party or potluck. They’re guaranteed to be a crowd-pleaser and spark conversations.

Essential Ingredients for Perfect Edible Cookie Dough Bites
Getting ready to create a batch of irresistible Chocolate Chip Cookie Dough Bites? You’ll be pleased to know that this recipe calls for a handful of fundamental baking ingredients, many of which you likely already have in your pantry. We’ll also touch on some delightful variations and the few kitchen tools that will make your preparation seamless.
Ingredients for No-Bake Cookie Dough
Each ingredient plays a crucial role in achieving the perfect texture and classic flavor of these edible cookie dough balls. Here’s a breakdown:
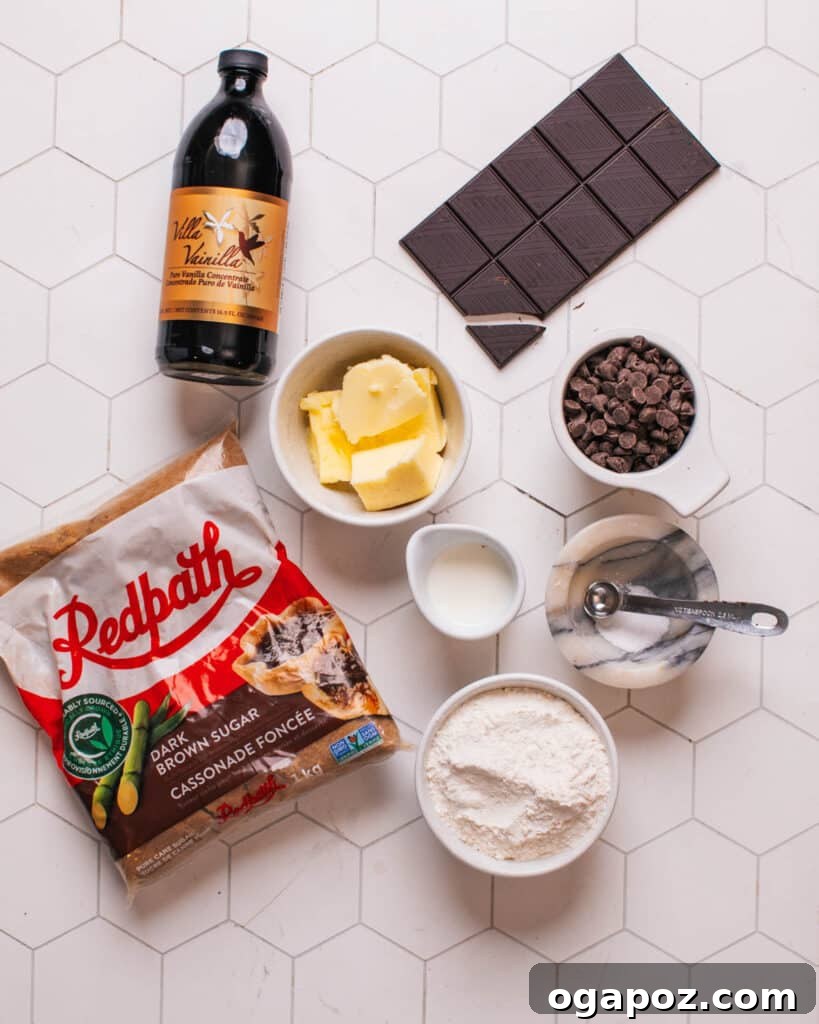
- All-purpose flour: This provides the necessary structure and bulk to our cookie dough, giving it that familiar consistency. Remember, this will be heat-treated for safety.
- Salt: A pinch of salt is vital as it balances and enhances the sweetness of the sugars and the richness of the chocolate, bringing out all the complex flavors.
- Unsalted Butter (softened): Creamy butter adds incredible richness, a melt-in-your-mouth texture, and acts as a binder, holding the dough together beautifully. Ensure it’s softened, not melted, for optimal mixing.
- Brown Sugar (packed): This is key for that signature “chocolate chip cookie” flavor. Brown sugar provides deep molasses notes and contributes to the chewy, soft texture of the dough. Packing it ensures accurate measurement.
- Pure Vanilla Extract: Essential for its warm, sweet aroma and classic flavor. Don’t skimp on good quality vanilla, as it truly elevates the taste profile.
- Milk: A small amount of milk moistens the dough, making it pliable and easy to shape into perfect little balls. Any type of milk (dairy or plant-based) works well here.
- Chocolate Chips: The star of the show! These add delightful sweet, chocolatey bursts in every bite. You can use regular-sized chocolate chips, mini chocolate chips for a more even distribution, or even chopped chocolate bars for varied texture.
For the Chocolate Coating
While optional, a chocolate coating transforms these bites into elegant truffles. Here’s what you’ll need for a smooth, shiny finish:

- Chocolate Chips or Chopped Quality Chocolate Bars: The choice of chocolate greatly impacts the final coating. Higher-quality chocolate bars (like couverture chocolate) will yield a smoother, glossier, and more delicious coating that snaps beautifully. However, budget-friendly milk or dark chocolate chips also work wonderfully and are a convenient option.
- Neutral Oil: A small amount of neutral-flavored oil (like coconut oil, vegetable oil, or canola oil) is added to the melted chocolate. This helps to thin the chocolate slightly, creating a smoother, more fluid consistency for easier dipping and a thinner, more professional-looking coating.
Optional, but highly recommended: A delicate sprinkle of flaky sea salt on top of the wet chocolate coating. This simple addition elevates the flavor profile by providing a beautiful contrast to the sweet chocolate and adds an elegant touch to the presentation.
Creative Variations and Smart Substitutions
One of the best aspects of these cookie dough bites is their adaptability. Feel free to customize them to suit your preferences or dietary needs with these exciting variations:

- Nutty Additions: For an extra layer of texture and rich flavor, fold in about ¼ to ½ cup of finely chopped nuts like pecans, walnuts, or almonds into the dough. Toasting the nuts lightly before adding them can intensify their flavor.
- White Chocolate Twist: Swap out traditional chocolate chips for white chocolate chips in the dough for a sweeter, creamier profile. Alternatively, use white chocolate for the coating, perhaps drizzled with dark chocolate for a striking contrast.
- Gluten-Free Flour Options: To make these bites gluten-free, substitute the all-purpose flour with a high-quality gluten-free all-purpose flour blend (ensure it contains xanthan gum for best results). You could also experiment with almond flour, though the texture might be slightly different. Remember to heat-treat any gluten-free flour just as you would regular flour.
- Dairy-Free and Vegan Options: It’s incredibly easy to make this recipe vegan-friendly! Simply use a good quality vegan butter alternative, swap dairy milk for your favorite plant-based milk (almond, soy, or oat milk work well), and ensure your chocolate chips for both the dough and coating are certified dairy-free.
- Experiment with Flavor Extracts: While vanilla is a classic, don’t hesitate to explore other flavor extracts. Almond extract adds a sophisticated, nutty note, while peppermint extract can create a festive, refreshing treat (especially with dark chocolate coating). A touch of coffee extract can deepen the chocolate flavor beautifully.
- Different Mix-ins: Beyond chocolate chips, consider adding mini M&M’s, sprinkles, chopped candies, or even finely diced dried fruit like cranberries or cherries for different flavor and texture combinations.
The Critical Importance of Heat-Treating Flour for Edible Dough
You might be wondering why raw flour, a seemingly harmless pantry staple, poses a health risk. The truth is, raw flour can harbor harmful bacteria, most notably E. coli. This bacterium can contaminate flour during various stages of its production and processing, from the field where wheat is harvested to the milling facilities. Unlike baked goods, where high temperatures kill these pathogens, raw flour consumed directly in uncooked doughs provides an environment where these bacteria can thrive and cause foodborne illness.
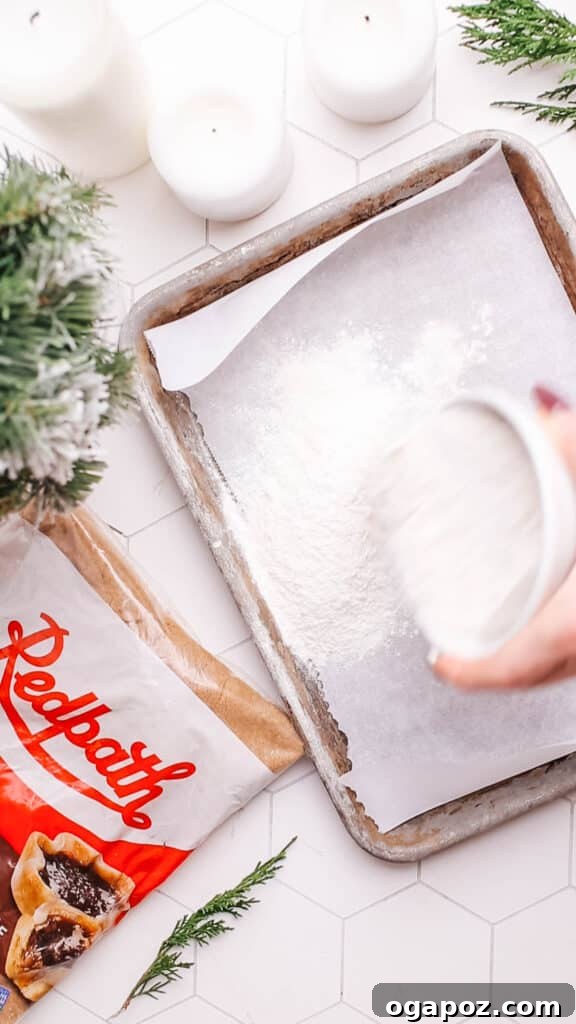
To completely eliminate this risk and ensure your cookie dough bites are safe to eat, the flour must be heat-treated. This involves cooking the flour briefly either in the microwave or the oven until it reaches an internal temperature of 160ºF (71ºC). This thermal treatment effectively kills any potential E. coli or other harmful bacteria, rendering the flour safe for raw consumption. It’s a quick and simple step that makes all the difference in enjoying your no-bake treats worry-free. So, while traditional cookie dough is best enjoyed after baking, these specially prepared bites offer all the deliciousness with none of the health concerns.
Essential Kitchen Tools for Easy Preparation
Making these cookie dough bites is remarkably simple, requiring only a few basic kitchen tools that you likely already own. Having these items ready will ensure a smooth and enjoyable cooking experience:
- Baking Sheet: You’ll need a baking sheet for two key steps: spreading out the flour for heat treatment and providing a surface for freezing the formed dough bites and setting the chocolate coating. Lining it with parchment paper is highly recommended for easy cleanup.
- Microwave-Safe Bowl: This is essential if you opt for the microwave method to heat-treat your flour and for melting the chocolate. Choose a bowl large enough to prevent spills.
- Large Mixing Bowl or Stand Mixer: A sturdy large mixing bowl is perfect for combining your cookie dough ingredients by hand or with a hand mixer. If you have a stand mixer, it will make creaming the butter and sugar even easier and quicker.
- Measuring Cups and Spoons: Accuracy is important in baking (even no-bake!), so a reliable set of measuring cups and spoons is necessary for precise ingredient measurements.
- Rubber Spatula: A flexible spatula is invaluable for mixing the dough, scraping down the sides of your bowl, and gently folding in the chocolate chips. It’s also useful for ensuring an even chocolate coating when dipping the bites.
- Parchment Paper or Silicone Baking Mat: Line your baking sheet with parchment paper or a silicone baking mat. This prevents the dough bites from sticking during freezing and makes transferring them after coating much simpler.
- Refrigerator/Freezer: These appliances are critical for chilling the cookie dough to make it easier to handle and for rapidly setting the chocolate coating.

How to Make Edible Cookie Dough Bites: A Step-by-Step Guide
Creating these delightful Chocolate Chip Cookie Dough Bites is a straightforward and enjoyable process. This detailed guide will walk you through each step, ensuring you achieve perfect, delicious, and safe treats every time.
Phase 1: Preparing the Safe Cookie Dough
- Step 1: Heat-Treat the Flour for Safety. This is the most crucial step for edible cookie dough.
- Oven Method: Spread the all-purpose flour evenly on a baking sheet. Bake in a preheated oven at 350°F (175°C) for 5 to 10 minutes. The flour should reach an internal temperature of 160ºF (71ºC) to ensure all harmful bacteria are destroyed.
- Microwave Method: Place the flour in a microwave-safe bowl. Microwave on high power for 1 minute and 30 seconds, stopping and stirring thoroughly every 30 seconds. Use a food thermometer to confirm it has reached 160ºF (71ºC). Allow the heat-treated flour to cool completely before proceeding.
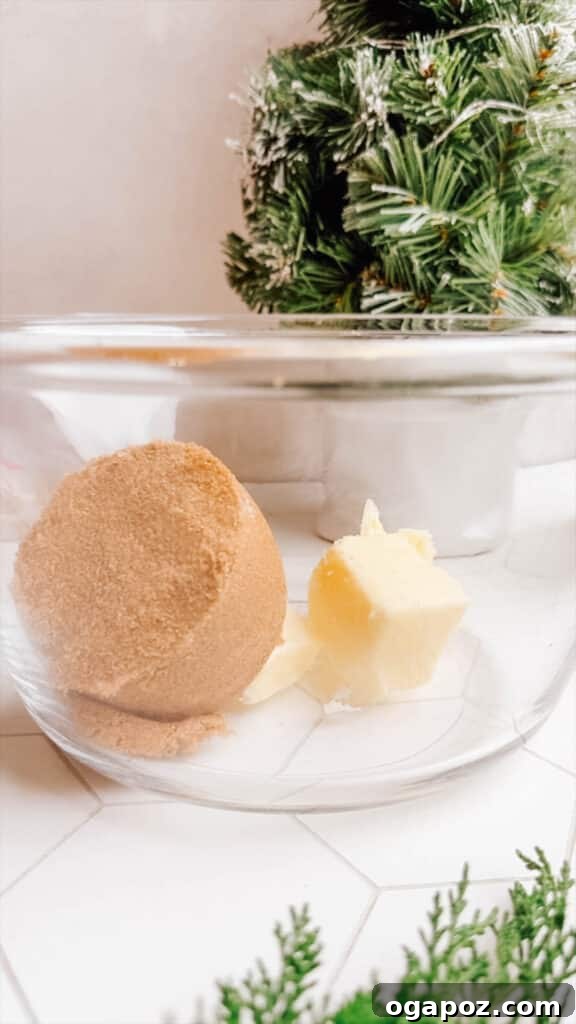
- Step 2: Mix the Wet Ingredients. In a large mixing bowl, or the bowl of a stand mixer fitted with the paddle attachment, cream together the softened butter and brown sugar until light and fluffy. This typically takes 2-3 minutes. Beat in the pure vanilla extract and milk until well combined and smooth.
- Step 3: Combine Dry and Wet Ingredients. Gradually stir the cooled, pre-cooked flour and salt into the wet mixture until just combined. Be careful not to overmix the dough. Once the flour is incorporated, gently fold in the chocolate chips using a spatula until they are evenly distributed throughout the dough.
- Step 4: Chill the Dough. Cover the bowl of cookie dough and refrigerate for approximately 10 minutes. This chilling period firms up the dough, making it much easier to handle and roll into neat balls.
Phase 2: Shaping and Freezing for Perfect Bites
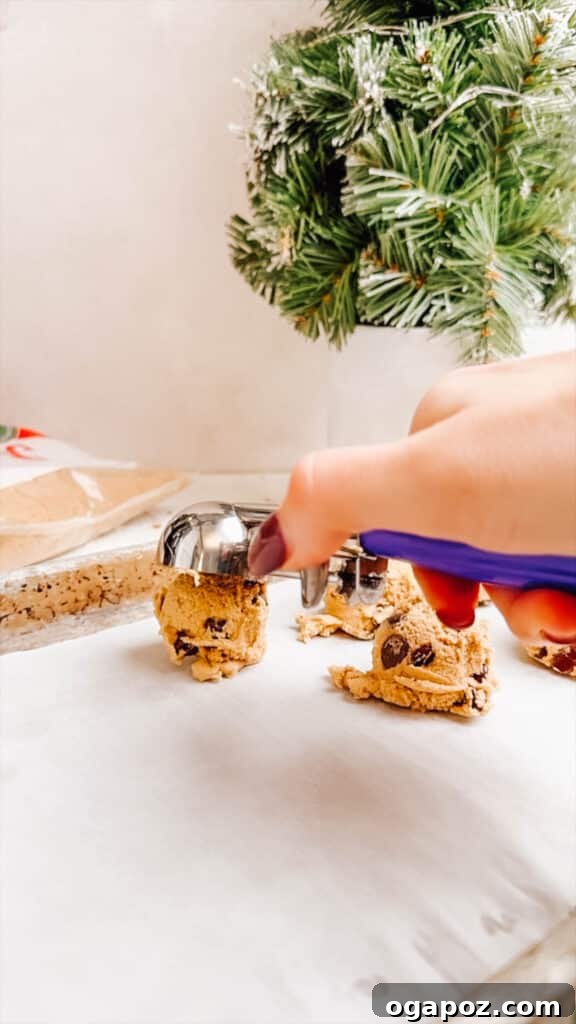
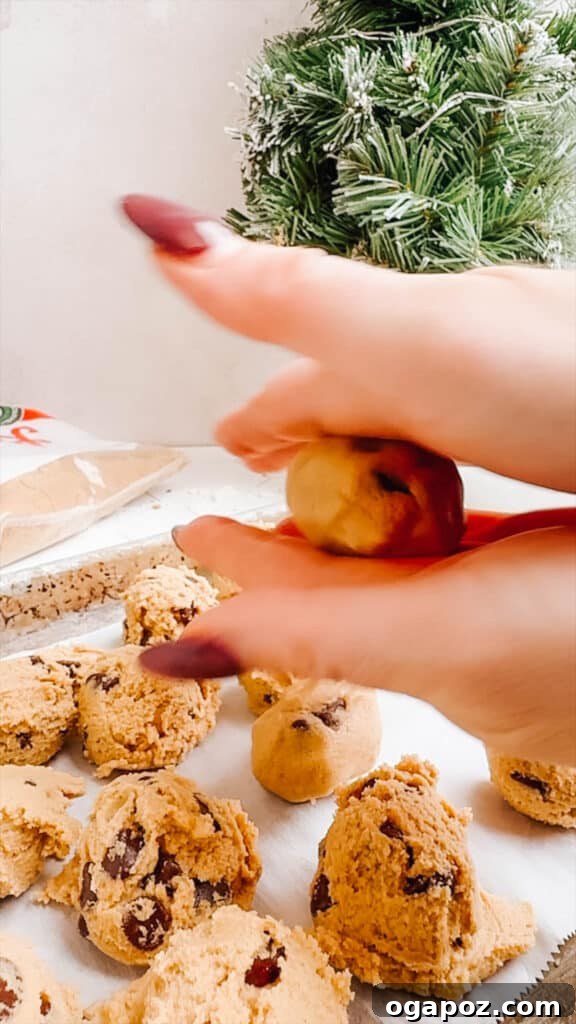
- Step 5: Form the Bites. Line a baking sheet with parchment paper. Using a small cookie scoop or two spoons, scoop out small portions of the chilled dough. Roll each portion between the palms of your hands to form smooth, uniform balls, about 1-inch in diameter. Place these on the prepared baking sheet, leaving a small space between each.
- Step 6: Freeze the Dough Balls. Transfer the baking sheet with the formed dough balls to the freezer. Freeze for about 15 minutes, or until the balls are firm. This crucial step prevents the dough from softening too quickly when dipped, ensuring a smooth and even chocolate coating.
Phase 3: Preparing the Luxurious Chocolate Coating
- Step 7: Melt the Chocolate.
- Microwave Method: Place the chocolate chips (or chopped chocolate) and oil in a microwave-safe bowl. Microwave on 50% power in 30-second intervals, stirring thoroughly after each interval, until the chocolate is completely smooth and melted. Be careful not to overheat the chocolate, as it can seize.
- Double Boiler Method: Alternatively, set a medium heatproof bowl over a saucepan of barely simmering water (ensure the bottom of the bowl does not touch the water). Add the chocolate and oil to the bowl and stir constantly until the chocolate is smooth and fully melted. Remove from heat immediately once melted.
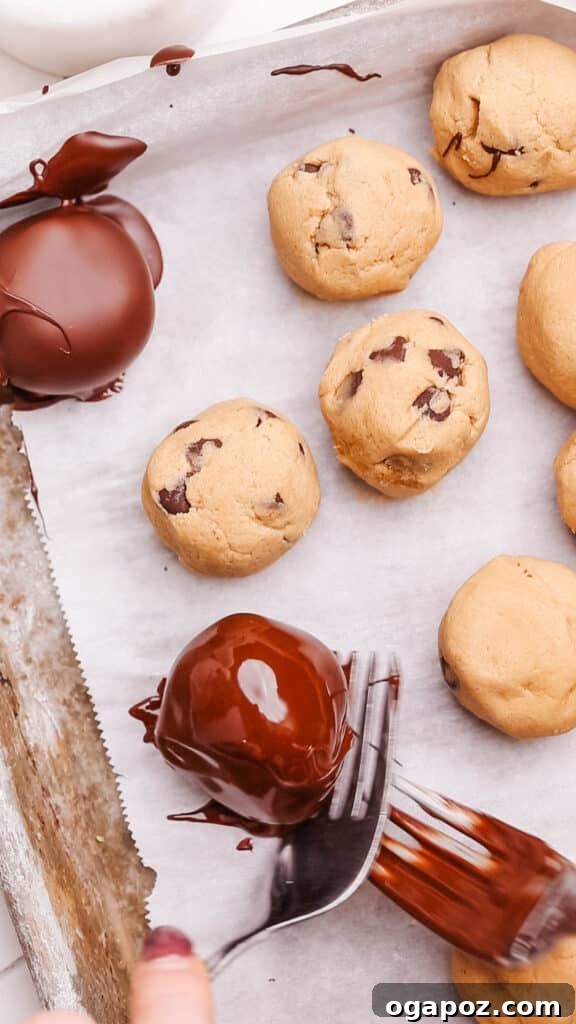
- Step 8: Dip the Dough Bites. Remove the frozen dough balls from the freezer. Using a fork or a dipping tool, carefully dip each dough ball into the melted chocolate, ensuring it’s completely coated. Gently tap off any excess chocolate against the side of the bowl.
- Step 9: Set the Chocolate Coating. Place the chocolate-coated bites back onto the parchment-lined baking sheet. Allow them to stand at room temperature until the chocolate coating has fully set and hardened. While refrigerating can speed up the setting process, it may sometimes cause a slight “bloom” (a whitish, streaky appearance) on the chocolate due to rapid temperature changes. For the best aesthetic, allow them to set naturally at room temperature if time permits.
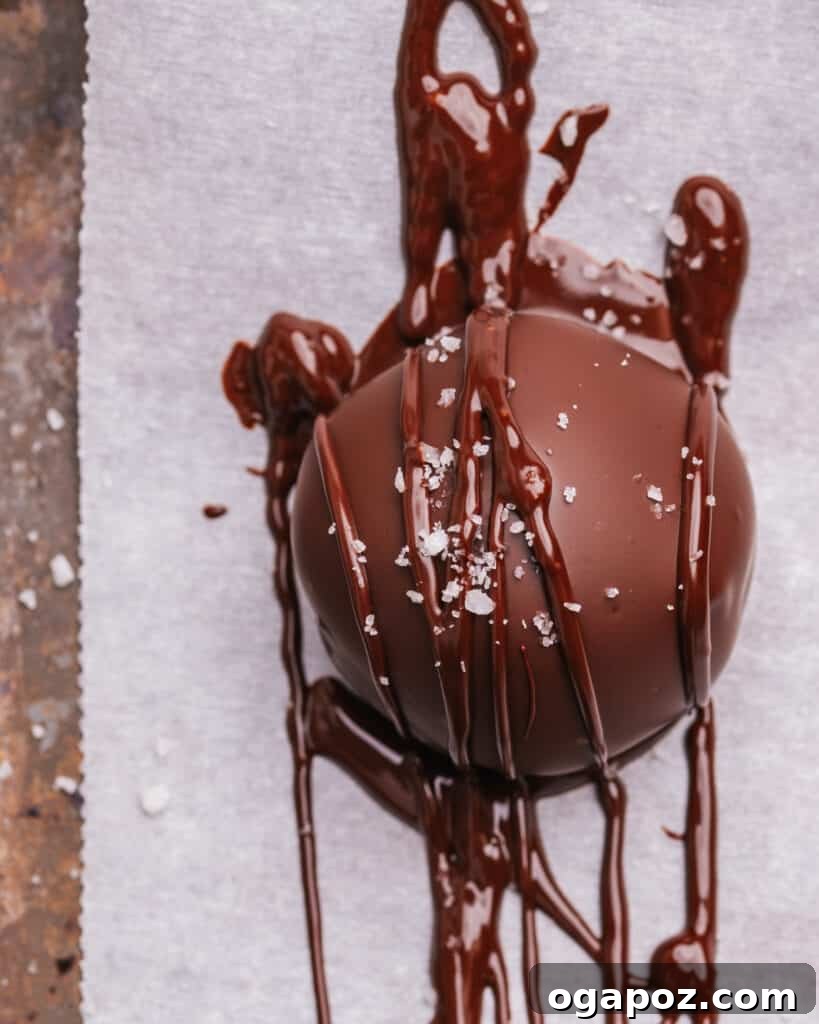
- Step 10 (Optional): Drizzle for Decoration. If you have any leftover melted chocolate, spoon it into a small plastic ziplock bag. Snip a tiny corner off the bag to create a fine piping hole. Drizzle the chocolate in a zigzag pattern across the tops of the cookie dough balls for an elegant and professional finish.
- Step 11 (Optional): Add Flaky Sea Salt. For an exquisite touch, sprinkle a tiny pinch of flaky sea salt over the chocolate-coated bites while the chocolate is still wet. The salt not only adds a beautiful visual element but also provides a wonderful savory contrast to the sweet chocolate and cookie dough.


Make-Ahead and Storage Tips for Freshness
Efficient planning and proper storage are key to enjoying your Chocolate Chip Cookie Dough Bites at their best, ensuring they remain delicious and safe to eat for an extended period. These tips will help you prepare ahead and preserve their quality.
- Prepare Ahead: The raw cookie dough (before rolling or coating) can be prepared up to 2 days in advance. Store it securely covered in an airtight container in the refrigerator. This advance preparation can actually deepen the flavors slightly and often makes the dough firmer and even easier to handle when you’re ready to roll and coat.
- Freezing Uncoated Dough: For longer-term storage, you can freeze the rolled dough balls (before dipping them in chocolate). Arrange them in a single layer on a parchment-lined baking sheet and freeze until solid. Once frozen, transfer them to a freezer-safe zip-top bag or an airtight container, separating layers with parchment paper to prevent sticking. They will keep well in the freezer for up to 3 months.
- Thawing Frozen Dough: When you’re ready to proceed, simply transfer the frozen dough balls to the refrigerator and let them thaw for several hours or overnight until softened. Then, you can continue with the chocolate coating step as described in the recipe.
- Storing Finished Bites: Once the cookie dough bites are coated with chocolate and the chocolate has set, store them in an airtight container in the refrigerator. Layer them between sheets of parchment paper to prevent them from sticking together. They will maintain their freshness and delicious taste for up to 1 week.
- Freezing Coated Bites: For even longer storage of the finished product, the chocolate-coated bites can also be frozen. Place them in a single layer on a baking sheet to freeze solid, then transfer to a freezer-safe container or bag, using parchment paper between layers. They can be frozen for up to 3 months. Thaw them in the refrigerator for a few hours or at room temperature for about 30 minutes before serving for the best texture.
Frequently Asked Questions About Edible Cookie Dough Bites
Here are some quick answers to commonly asked questions about making and enjoying these delightful Chocolate Chip Cookie Dough Bites, providing clarity for all your dessert needs.
- Are these cookie dough bites truly raw?
These cookie dough bites are designed to replicate the wonderful experience of eating raw cookie dough, but with a crucial difference: they are made without raw eggs and use heat-treated flour. This ensures they are completely safe to consume directly, mimicking the raw texture and flavor you love. - Is it genuinely safe to eat these cookie dough bites since they’re not baked?
Absolutely, yes! They are entirely safe to eat because the recipe carefully omits raw eggs and includes a vital step of heat-treating the all-purpose flour. This heat treatment effectively eliminates any potential harmful bacteria (like E. coli) that can sometimes be present in raw flour, making them a worry-free treat. - Can I use commercially available heat-treated flour?
Yes, you certainly can! If you have access to store-bought, pre-heat-treated flour (sometimes labeled as “ready-to-eat” or “safe for raw consumption”), feel free to use it directly in this recipe. This will allow you to skip the initial step of heat-treating the flour at home, making the preparation even quicker. - How long can I store these cookie dough bites, and what’s the best way?
For optimal freshness, store your finished cookie dough bites in an airtight container in the refrigerator for up to 1 week. For longer storage, they freeze exceptionally well! You can freeze them in an airtight container for up to 3 months, thawing them in the refrigerator or at room temperature before serving. - Is it possible to adapt this recipe for vegan or gluten-free diets?
Absolutely! This recipe is very versatile. To make them vegan, simply substitute the dairy butter with a high-quality vegan butter alternative, use plant-based milk (such as almond or oat milk), and ensure your chocolate chips are dairy-free. For a gluten-free version, replace the all-purpose flour with a certified gluten-free flour blend, making sure to still heat-treat it for safety. - Must I use chocolate chips in the dough, or can I try other mix-ins?
While chocolate chips are a classic and delicious choice, feel free to unleash your creativity! You can easily replace them with other delightful mix-ins like chopped nuts, different types of baking chips (butterscotch, peanut butter, or white chocolate), sprinkles, mini M&M’s, or even finely diced dried fruits like cranberries or apricots. The possibilities are endless to suit your taste!
Explore More Popular Cookie Recipes
- Toblerone Cookies
- Chewy Chocolate Chip Cookies
- Chocolate Snowball Cookies
- Greek Almond Cookies (Kourabiedes)
- Mint Chocolate Cookies
- Hermit Cookies (Spiced Date & Raisin)
Discover Other Viral Social Media Recipes You’ll Love
The internet went absolutely crazy for this recipe, and for good reason! Here are some other viral culinary sensations that have captivated millions and are sure to become new favorites in your kitchen:
- Easy 3-Ingredient Banana Pancakes
- My viral Naan Recipe that garnered over 22 million views on Instagram
- 3-Ingredient Banana Nice Cream
- Refreshing Frozen Yogurt Bark
- Decadent Chocolate Date Bark
- Simple Chocolate Peanut Butter Banana Bites
- Impossibly Soft Cinnamon Rolls with Cream Cheese Frosting
Recipe Card: Chocolate Chip Cookie Dough Bites (Quick & Easy)
Indulge in these homemade Chocolate Chip Cookie Dough Bites, a perfect treat for those who love raw cookie dough but want it safe and easy to eat. They feature a soft, sweet cookie dough center, studded with chocolate chips, and coated in a smooth chocolate shell. Ideal for snacking, parties, or just a sweet treat!

Recipe Details
- Author: Jennifer Pallian BSc, RD
- Prep Time: 20 minutes
- Cook Time: 5 minutes (for flour heat treatment)
- Servings: Approximately 20 bites
Ingredients
For the Edible Cookie Dough:
- 1⅓ cup all-purpose flour
- ¼ tsp salt
- ½ cup unsalted butter, softened
- ¾ cup packed brown sugar
- 2 tsp pure vanilla extract
- 3 tbsp milk (dairy or plant-based)
- 1 cup chocolate chips (mini or regular)
For the Chocolate Coating:
- 2 cups milk or semi-sweet chocolate chips (or chopped quality chocolate)
- 1 tsp neutral oil (e.g., coconut oil, vegetable oil)
Instructions
- Heat-Treat the Flour: To ensure the flour is safe to eat, spread the 1⅓ cup all-purpose flour on a baking sheet and bake at 350°F (175°C) for 5-10 minutes, or microwave in a microwave-safe bowl for 1 minute 30 seconds, stirring every 30 seconds. The flour should reach an internal temperature of 160ºF (71ºC). Let it cool completely.
- Make Cookie Dough: In a large mixing bowl, cream together the softened butter and brown sugar until light and fluffy. Stir in the vanilla extract and milk. Gradually add the cooled, pre-cooked flour and salt, mixing until just combined. Fold in the chocolate chips until evenly distributed.
- Chill Dough: Cover the dough and refrigerate for about 10 minutes to firm up, making it easier to handle.
- Form Bites: Line a baking sheet with parchment paper. Scoop out small portions of the chilled dough and roll them into smooth, 1-inch balls. Place them on the prepared baking sheet.
- Freeze Bites: Transfer the baking sheet with the dough balls to the freezer and freeze for about 15 minutes. This helps them hold their shape during the dipping process.
- Melt Chocolate for Coating: Combine 2 cups chocolate chips and 1 tsp oil in a microwave-safe bowl. Microwave on 50% power in 30-second intervals, stirring after each, until smooth. Alternatively, melt in a double boiler over simmering water, stirring until smooth.
- Coat Bites: Dip each chilled dough bite into the melted chocolate, ensuring it’s completely covered. Lift with a fork, tapping gently to remove excess chocolate. Place the coated bites back onto the parchment-lined baking sheet.
- Set Chocolate: Allow the coated bites to stand at room temperature until the chocolate sets (this can take 30-60 minutes). For faster setting, you may refrigerate for about 10 minutes, but be aware this can sometimes cause chocolate bloom.
Notes
- If you have extra melted chocolate, you can spoon it into a small plastic bag, snip a tiny corner, and drizzle it in a zigzag pattern over the set cookie dough balls for a decorative finish.
- For enhanced flavor and presentation, sprinkle a tiny pinch of flaky sea salt over the chocolate-coated bites while the chocolate is still wet. The salt will not stick once the chocolate hardens.
- Storage: Store the finished cookie dough bites in an airtight container in the refrigerator for up to 1 week. They can also be frozen for up to 3 months.
- Variations: Experiment with adding chopped nuts, different flavored baking chips, or substituting vanilla extract with almond or peppermint extract.
- Allergy-Friendly Options: For a gluten-free version, use a heat-treated gluten-free flour blend. For dairy-free/vegan, use plant-based butter, milk, and dairy-free chocolate chips.
- Serving Suggestion: These bites are best enjoyed straight from the fridge for a firm texture and rich flavor.
Nutrition Information (per serving, approximation)
- Calories: 241 kcal
- Carbohydrates: 32g
- Protein: 1g
- Fat: 13g
- Saturated Fat: 8g
- Polyunsaturated Fat: 0.3g
- Monounsaturated Fat: 1g
- Trans Fat: 0.2g
- Cholesterol: 13mg
- Sodium: 69mg
- Potassium: 95mg
- Fiber: 1g
- Sugar: 24g
- Vitamin A: 148 IU
- Calcium: 36mg
- Iron: 0.4mg
Nutrition information is automatically calculated and should only be used as an approximation.
Tried this recipe? Share your experience in the comments below!