
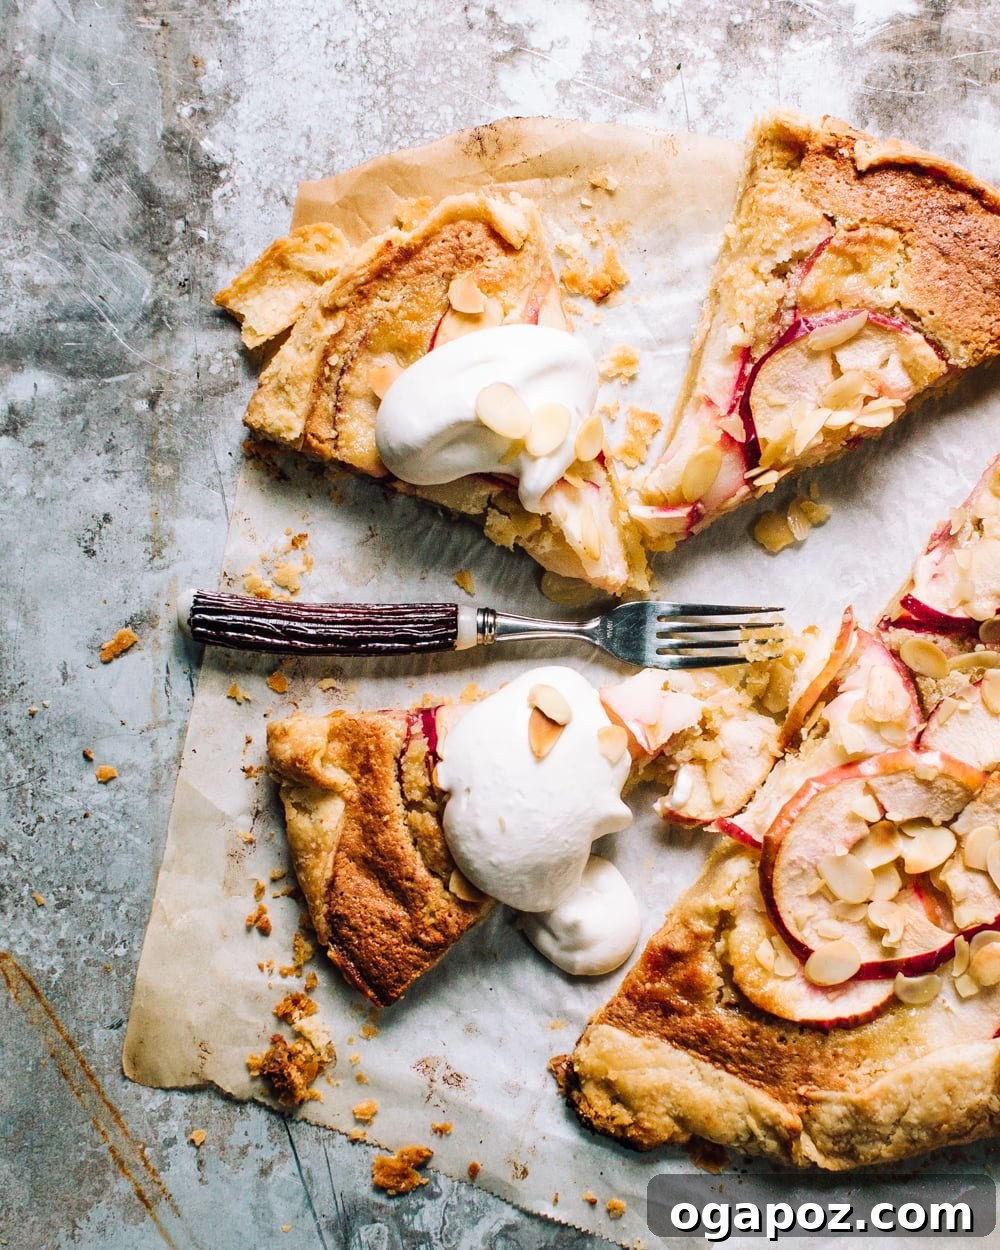
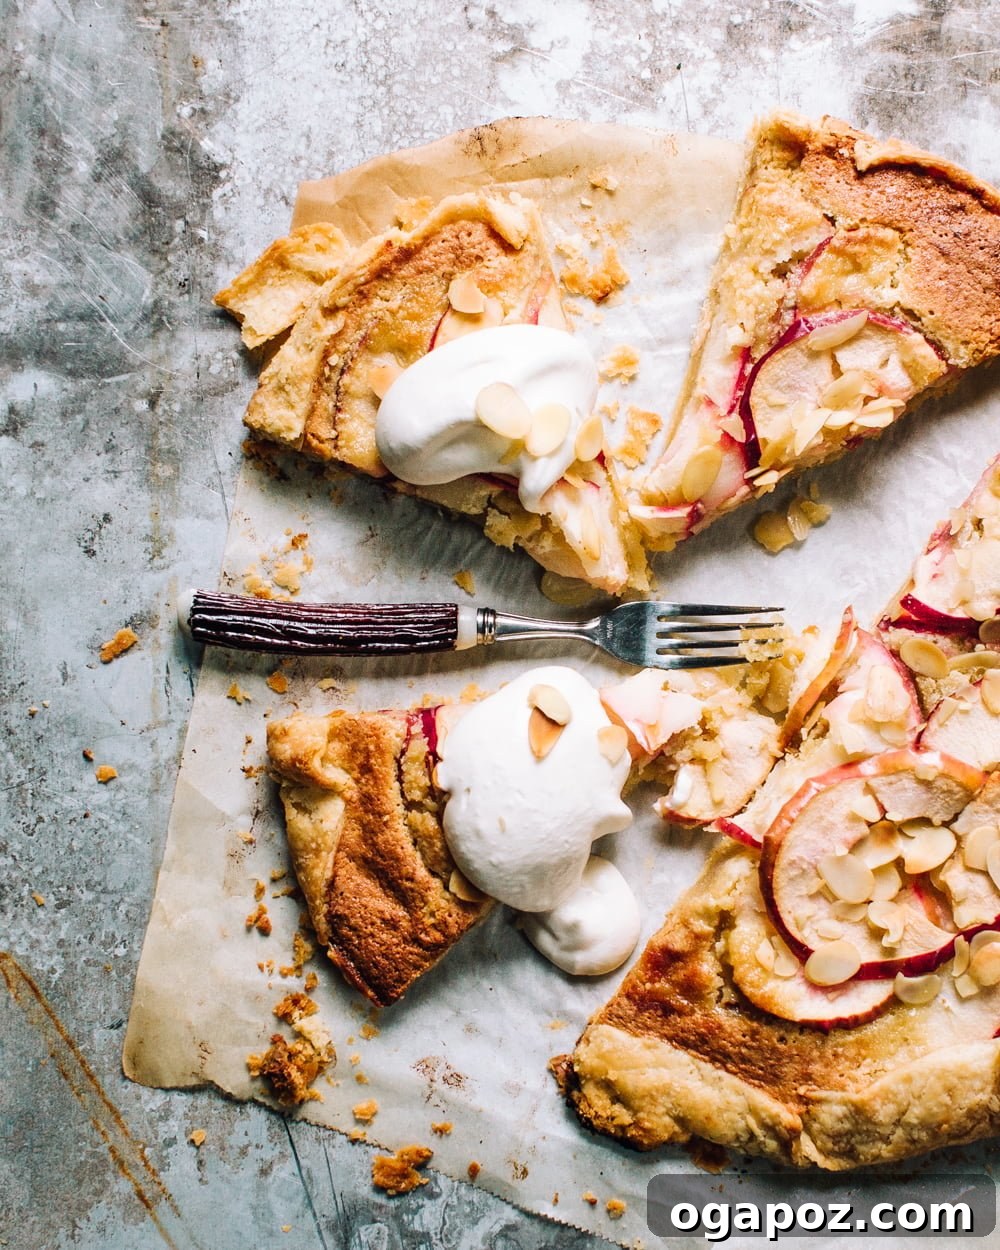
Indulge in the simple elegance of a freeform apple galette, featuring a sumptuously rich almond cream (frangipane) filling and an impossibly flaky, all-butter pastry crust. This dessert promises both visual appeal and exquisite taste, proving that impressive baking can indeed be delightfully easy.
The Charm of a Rustic Apple Galette: Effortless Elegance
There’s a certain magic in a dessert that looks sophisticated but is surprisingly simple to create. This apple tart, made in the style of a freeform galette, embodies that magic perfectly. Often referred to as a “rustic tart” or “crostata,” a galette is essentially a tart without the fuss. It’s designed to be imperfectly perfect, embracing the beauty of a genuinely homemade creation. Unlike its more formal cousin, the traditional tart, a galette doesn’t require a special pan or meticulous crimping. You simply roll out the dough, pile on the filling, and fold the edges inward. The result? A charming, irregular masterpiece that invites everyone to dig in, proving that truly delicious food doesn’t need to be intimidating.
This approach to baking not only simplifies the process but also celebrates the authentic, comforting feel of home cooking. It’s an accessible entry point for novice bakers and a refreshing change for seasoned chefs looking for a less rigid dessert project. The rustic appeal of a galette also means there’s less pressure for perfection; every slight imperfection adds to its unique character and homemade allure. Forget the finicky pastry work, the precise molds, and the endless quest for symmetrical edges. With a galette, freeform is the way to go, allowing your creativity and ingredients to shine through.
Crafting the Perfect Flaky All-Butter Crust: The Foundation of Flavor
Every exceptional tart begins with an outstanding crust, and our apple galette is no exception. This recipe features an easy-to-make, all-butter crust that provides the ideal flaky texture and rich flavor. The secret to achieving this delightful flakiness lies in maintaining cold ingredients and handling the dough minimally. We specifically call for using chilled butter and ice water because temperature plays a critical role in the science of pastry making. When cold butter pieces are incorporated into flour and then baked, the water within the butter turns to steam, creating pockets that separate the layers of dough. This process is what gives the crust its characteristic light and airy, yet crisp and tender, texture.
Using cold butter ensures that it doesn’t melt into the flour before baking. Instead, it remains in distinct pieces, which are essential for those desirable flaky layers. Similarly, ice water helps keep the entire dough mixture cool, preventing the butter from softening prematurely. A perfectly executed all-butter crust offers a depth of flavor that complements the sweet and tart apple filling and the nutty frangipane, elevating the entire dessert experience. It’s a testament to the fact that sometimes, the simplest ingredients, handled correctly, yield the most extraordinary results.
The Non-Negotiable Importance of Chilling Your Dough
Refrigerating your dough is not merely an optional step; it’s a crucial technique that serves multiple vital purposes, directly impacting the quality and workability of your pastry. Skipping this critical chill time can lead to a tough, difficult-to-handle crust that loses its shape and flakiness during baking. Here are three compelling reasons why chilling your dough is an essential part of the process:
- Restores Butter Firmness for Optimal Flakiness: After you’ve worked the butter into the flour, even with cold hands or a food processor, it inevitably softens a bit. Chilling the dough allows the butter to firm up again. When this chilled, firm butter enters a hot oven, it melts slower and releases steam more effectively, creating distinct, airy layers within the crust. Without this firmness, the butter might melt too quickly, resulting in a dense, greasy crust rather than a light, flaky one. This initial structure is vital for preventing the dough from collapsing into a puddle before it can set properly in the heat.
- Relaxes Gluten for a Tender Crust: Gluten, formed when wheat proteins in flour combine with water, acts like the muscle of the dough. The more you mix and knead the dough, the more developed and tightened these gluten strands become. While some gluten is necessary for structure, too much development makes the crust tough and chewy. Allowing the dough to chill gives these tight gluten strands time to relax and loosen. This relaxation is key to achieving a tender, melt-in-your-mouth crust texture that is desirable in any pie or tart. A rested dough is a happy dough, yielding superior results.
- Ensures Even Flour Hydration for Smooth Rolling: When you first mix flour with water, it takes time for the liquid to fully penetrate and hydrate all the flour particles. Chilling the dough provides this necessary time for moisture to evenly distribute throughout the mixture. Proper hydration results in a more cohesive, pliable dough that is significantly easier to roll out without cracking or tearing. An evenly hydrated dough also contributes to a smoother, more consistent texture in the final baked product, ensuring a professional-looking and tasting crust every time.
Therefore, consider chill time a mandatory step for a successful, tender, and shapely crust. Patience is truly a virtue in pastry making, and the brief wait for chilled dough is always rewarded with superior results.
The Efficiency of Your Food Processor: A Baker’s Best Friend
For maximum convenience and consistent results, your food processor is an invaluable tool in preparing this apple galette. You can effortlessly make both the flaky pastry dough and the luscious almond frangipane filling using this single appliance, often without even needing to wash it in between! This not only speeds up the preparation process significantly but also makes cleanup a breeze, saving you precious time and effort.
When it comes to the pastry dough, the sharp blades of the food processor are incredibly efficient at cutting cold butter into the flour quickly, without imparting unwanted warmth from your hands. This is crucial for maintaining the butter’s cold temperature, which, as we discussed, is fundamental for achieving that coveted flaky crust. The processor creates a perfectly uniform crumb mixture, ensuring even distribution of butter throughout the flour, a consistency that can be harder to achieve by hand. For the frangipane almond cream, the food processor excels at blending all the ingredients—blanched almonds, sugar, butter, eggs, and vanilla—into a silky-smooth, homogenous paste. This rich, creamy filling forms the delicious base upon which the apples rest.
While a food processor streamlines the process, don’t despair if you don’t own one. You can certainly make the pastry by hand using a pastry cutter or even your fingertips (working quickly to keep ingredients cold). For the frangipane, a blender or a stand mixer with a paddle attachment would also yield excellent results. However, if you’re looking for efficiency and consistent quality, the food processor remains the top choice for this recipe.
The Allure of Almond Frangipane: A Creamy, Nutty Delight
Central to the exquisite flavor profile of this apple galette is the almond frangipane filling. Frangipane is a classic French almond cream, celebrated for its rich, custardy texture and distinct nutty flavor. It typically consists of ground almonds, sugar, butter, and eggs, often enhanced with a touch of vanilla or almond extract. In this recipe, the frangipane serves a dual purpose: it provides a luxurious, moist base for the apples and bakes up into a beautifully golden, caramelized layer around them, adding incredible depth and complexity to every bite.
Making the frangipane is remarkably straightforward, especially with a food processor. Simply combine blanched almonds (which give the smoothest texture), granulated sugar, eggs, a touch of melted butter, and pure vanilla extract in the processor bowl. Blend until the mixture is smooth and creamy. For an extra boost of almond flavor, a few drops of pure almond extract can be a welcome addition, though it’s entirely optional. Don’t feel compelled to purchase a bottle specifically for this recipe unless you anticipate using it in other baking endeavors. The natural aroma and flavor of the blanched almonds, combined with vanilla, are already wonderfully fragrant and delicious. This rich almond layer not only adds moisture but also negates the need for additional sugar on the apples, allowing their natural sweetness and tartness to shine through while creating a beautiful balance of flavors.
Selecting and Preparing Your Apples for Optimal Flavor and Texture
The choice of apples significantly impacts the taste and texture of your galette. For baking, you want apples that hold their shape well and offer a good balance of sweetness and tartness. Excellent choices include Honeycrisp, Granny Smith, Fuji, Braeburn, or a mix of varieties for a more complex flavor. Aim for firm, crisp apples that won’t turn to mush during baking. When preparing the apples, thin and even slices are key. This ensures they cook thoroughly and tenderly in the baking time, and also allows for a beautiful, fanned arrangement on top of the frangipane. Whether you core and spiralize them for elegant, uniform rings or simply thinly slice them with a sharp knife, the goal is consistency. A light squeeze of fresh lemon juice over the sliced apples not only prevents browning but also adds a bright, zesty counterpoint to the richness of the almond cream and the sweetness of the fruit.
Assembling Your Rustic Masterpiece: A Step-by-Step Guide
With your flaky dough chilled and your velvety frangipane ready, it’s time to bring your apple galette to life. This stage is where the “freeform” nature truly shines, allowing for creativity and a relaxed approach. Start by rolling out your chilled dough. For ease of handling and minimal mess, roll it between two sheets of parchment paper. Aim for a rough circle or oval, about 12-14 inches in diameter, that fits comfortably on your baking sheet. Don’t worry about perfect symmetry; remember, rustic is the goal! Once rolled, gently peel off the top layer of parchment and transfer the dough (still on its bottom parchment layer) to your baking sheet. If desired, you can use a knife to trim the edges slightly for a neater (but still rustic) appearance, or simply embrace the natural curves.
Next, spoon the prepared frangipane almond cream onto the center of the dough, leaving a generous 2-inch border all around the perimeter. This border will be folded over to create the tart’s edge. Now, artfully arrange your thinly sliced apples over the frangipane. You can overlap them in concentric circles, create a fanned pattern, or simply pile them beautifully—let your inner artist guide you. Give the apples a light squeeze of fresh lemon juice, which brightens their flavor and helps prevent discoloration. Finally, sprinkle the remaining 2 tablespoons of sliced almonds over the apples for an added layer of texture and nutty flavor. Carefully fold the dough edges over the outermost layer of apples, creating a beautiful, slightly ruffled border that holds the filling securely in place. The beauty of the galette lies in this casual folding; it doesn’t need to be uniform. For best results, pop the assembled galette into the freezer for about 30 minutes while your oven preheats. This quick chill further firms up the butter in the crust, ensuring maximum flakiness and preventing it from spreading too much during baking.
Baking to Golden Perfection: The Final Transformation
The moment your beautifully assembled apple galette enters the preheated oven at 350ºF (175ºC), a wonderful transformation begins. As the heat permeates the pastry, the cold butter in the crust works its magic, creating those incredible flaky layers. Simultaneously, the almond frangipane begins to puff up, its surface turning a delightful golden brown. It will bubble and peek out enticingly around the edges of the apples, forming a delicious, slightly caramelized crust. The apples themselves will soften, their natural sugars concentrating and mingling with the rich almond cream. The entire kitchen will fill with an irresistible aroma of baking apples, toasted almonds, and sweet vanilla, a true symphony for the senses. Bake the galette for approximately 50 minutes, or until the crust is deeply golden brown, the apples are tender when pierced with a knife, and the frangipane has achieved a rich, caramelized hue. This deep browning is crucial for flavor development and ensures a satisfying crispness to the crust.
Serving Suggestions and Delightful Variations
Once your apple galette emerges from the oven, allow it to cool slightly on the baking sheet before transferring it to a wire rack. While delicious at any temperature, a warm slice of this apple galette is truly divine. Serve it as is, or elevate the experience with a scoop of vanilla bean ice cream, a dollop of freshly whipped cream, or a drizzle of warm caramel sauce. The contrast of the warm, tender fruit and crisp crust with cold, creamy toppings is simply heavenly. This rustic apple galette is impressive enough for a holiday dinner or special occasion, yet simple enough for a casual weekend treat. It offers all the comforting flavors of a traditional apple pie but with an unfussy elegance that makes it stand out.
Feeling adventurous? This recipe is incredibly adaptable! Consider these delightful variations to customize your galette:
- Seasonal Fruits: Swap apples for other fruits like pears, peaches, berries, or plums when they are in season. Adjust baking time as needed for softer fruits.
- Spiced Apples: Introduce a pinch of cinnamon, nutmeg, or cardamom to the apple slices for an extra layer of warmth and spice.
- Citrus Zest: Add a teaspoon of finely grated orange or lemon zest to the frangipane for a brighter, more aromatic flavor.
- Nutty Topping: Before baking, sprinkle the crust with coarse sugar or turbinado sugar for an extra crunchy, sparkling finish.
Whether you stick to the classic apple and almond combination or venture into new fruit pairings, this freeform galette is guaranteed to be a crowd-pleaser. It’s a testament to the fact that baking can be both rewarding and refreshingly straightforward, delivering a dessert that is both visually stunning and profoundly delicious.
Apple Tart with Almond Frangipane
By: Jennifer Pallian BSc, RD
A flaky apple tart made in the style of a freeform galette with a delicious (and deceptively easy) almond cream filling and a flaky, all-butter crust.
Cook Time: 40 minutes
Total Time: 1 hour 10 minutes
Ingredients
For pastry
- 6 oz (1 1/3 cups) all-purpose flour
- ¼ tsp coarse salt
- 5 oz (10 tbsp or 1/2 cup + 2 tbsp) cold butter, cut in 1/2″ chunks
- ¼ cup ice water
For frangipane
- 1 ½ cups (6 oz) sliced, blanched almonds (divided use)
- ⅔ cup (5 oz) granulated sugar
- 2 large eggs
- 2 tbsp melted butter
- 1 tsp pure vanilla extract
- ¼ tsp pure almond extract (OPTIONAL)
- pinch of salt
To assemble tart
- 2 medium apples (cored and spiralized or thinly sliced)
- squeeze of lemon juice
- 2 tbsp sliced, blanched almonds
Instructions
To make pastry:
- Place flour and salt in a food processor and pulse to combine. Add butter pieces and pulse until mixture resembles coarse crumbs (pieces should be half the size of a lentil).
- Dump out onto a piece of parchment paper and sprinkle water over top. Use your hands or a bench scraper to toss the ingredients together to combine, then gently fold and press the mixture together until it forms a cohesive dough. Form into disc, wrap in the parchment paper, and refrigerate one hour (or up to 3 days, or else freeze up to 3 months).
To make frangipane:
- Combine almonds, sugar, eggs, butter, extract(s), and salt in food processor and blend until smooth.
- Let dough soften on the counter for 10-15 minutes before rolling out. Roll out your dough between layers of parchment paper to a shape that fits in your baking pan. Trim the edges and then line the baking pan with parchment and place the dough on top.
- Spoon the frangipane onto the pastry dough, leaving a 2″ border. Arrange apples overtop, and give them a squeeze of lemon. Top with 2 tbsp almonds. Fold the edges of the pastry up around the apples and pop the whole thing in the freezer for 30 minutes while you preheat the oven to 350ºF.
- Bake the tart for about 50 minutes, until crust is deeply browned, apples are tender and frangipane is golden.