
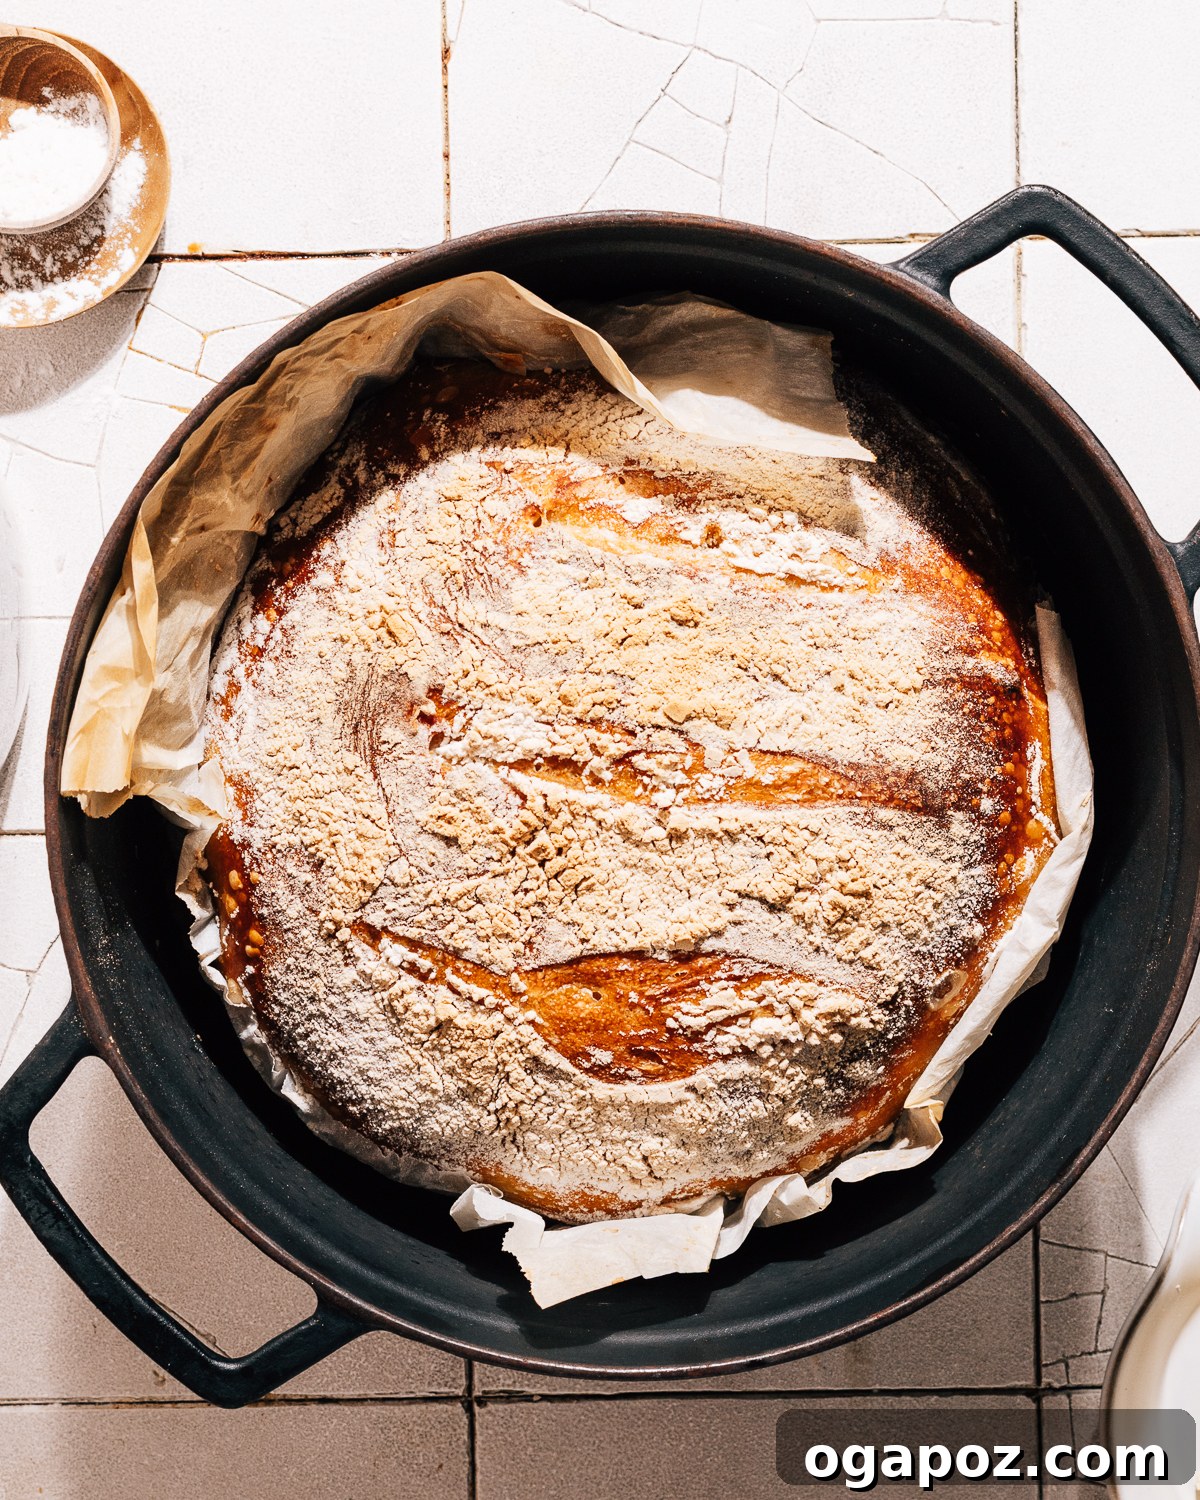
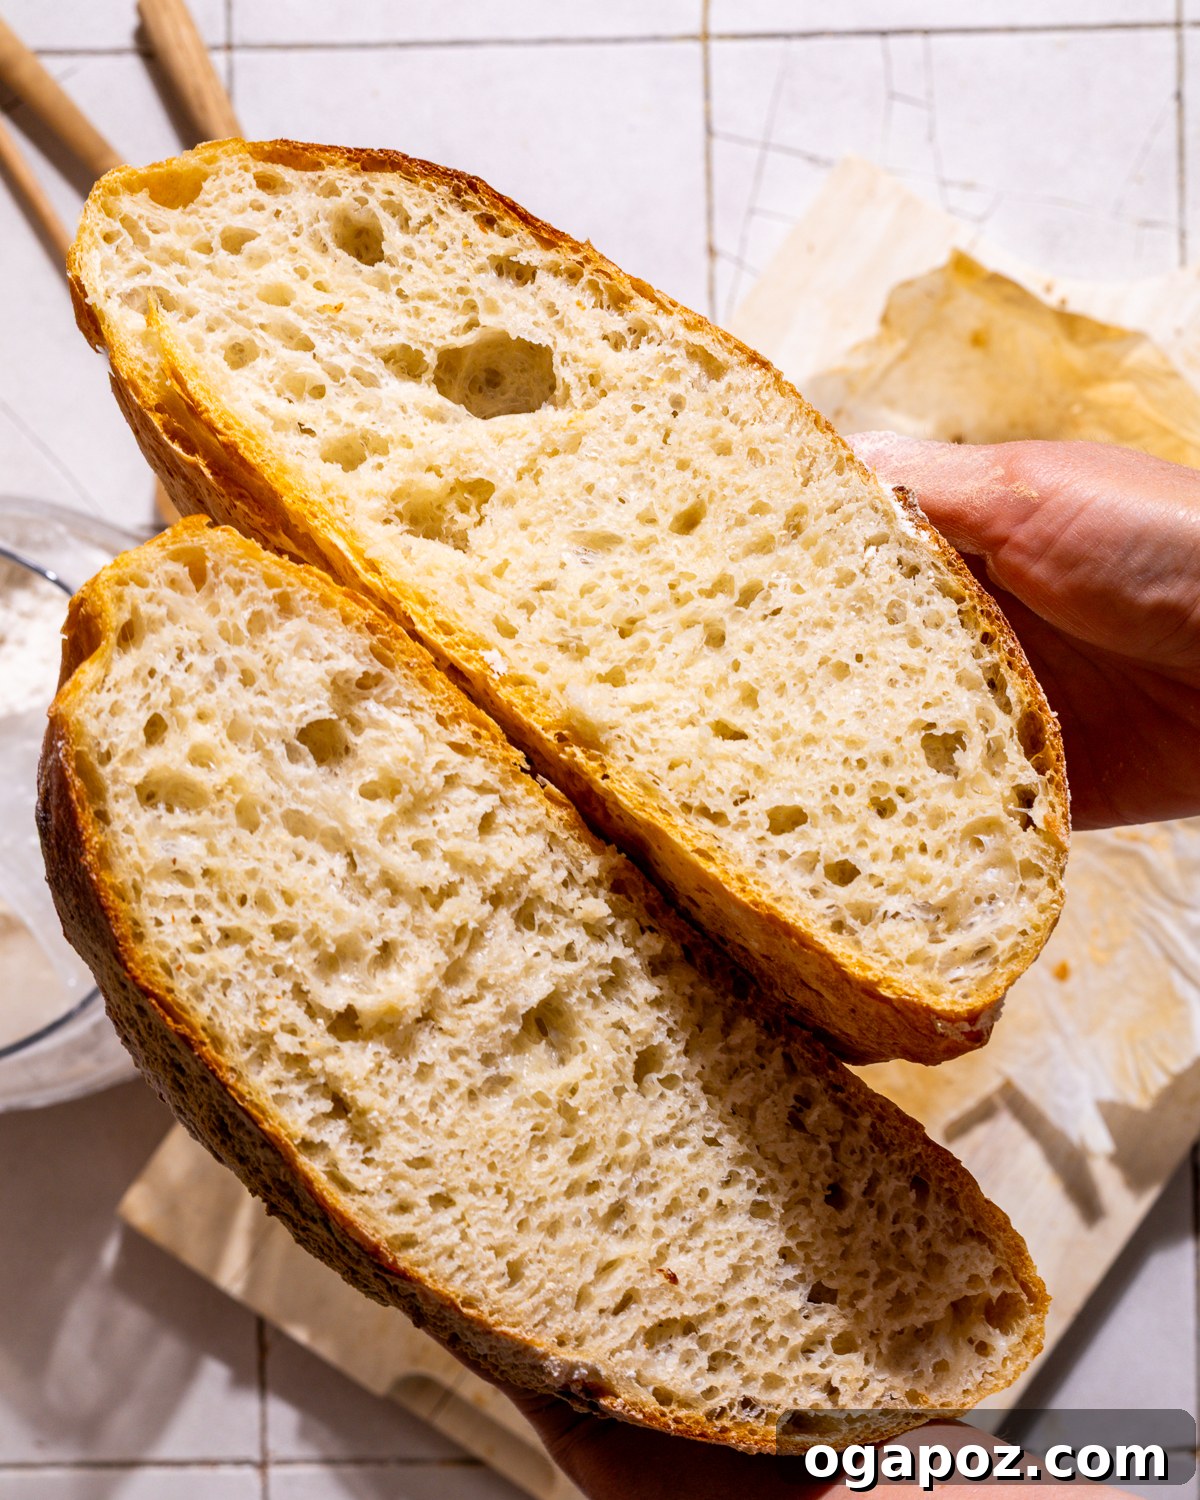
Welcome to the world of truly effortless baking! This No-Knead Dutch Oven Bread recipe is so simple that anyone, regardless of baking experience, can create magnificent loaves of artisan bread. Imagine a golden, crackly crust giving way to a wonderfully tender, airy interior – bread so delicious, it tastes like it came straight from a European bakery. And the best part? All you need is a wooden spoon and a little patience to achieve these stunning results, making fresh homemade bread an everyday possibility.
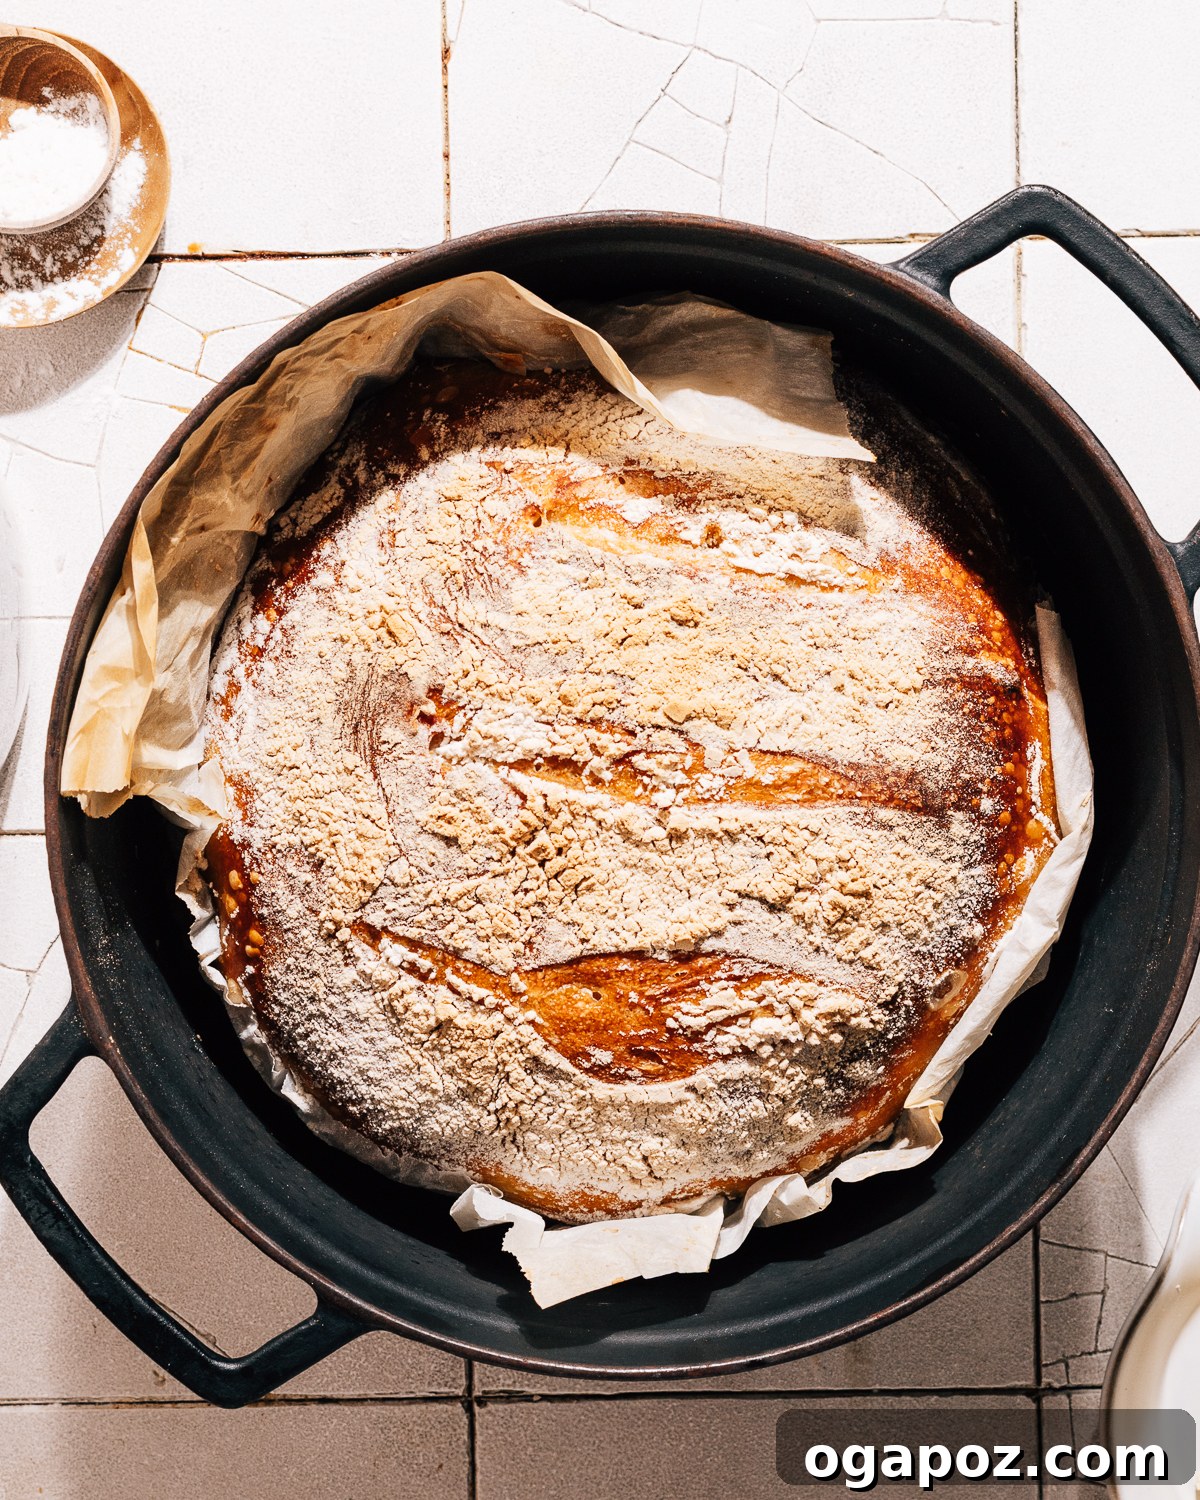
This remarkable recipe provides enough dough for up to 3 glorious loaves of Dutch Oven Bread. The genius of this method lies in its incredible flexibility: you can bake one fresh loaf at a time and confidently store the remaining dough in your refrigerator for up to two weeks. This means you do the minimal prep work just once, then enjoy the unparalleled convenience of warm, homemade bread whenever the craving strikes, without having to start from scratch every single time. Fresh bread has never been this accessible!
The Secret to Bakery-Quality Dutch Oven Bread: No Kneading Required!
Before dedicating my career to sharing simple, delicious recipes, I honed my skills in food science and recipe development for a leading flour company. My days were filled with testing countless bread recipes, meticulously analyzing textures, and assisting professional bakeries in perfecting their craft. When it comes to bread, I can assure you, I know what truly good bread tastes like, and more importantly, how to achieve it consistently.
Traditional homemade bread often demands meticulous technique, precise timing, and years of experience to master. There’s a certain pride that comes with mastering complex kneading methods and intricate folds. However, this revolutionary no-knead Dutch oven bread recipe is a true game-changer, completely leveling the playing field for every home cook, from absolute beginners to seasoned bakers looking for an easier way.
Forget the intimidating steps of hand kneading, the need for expensive stand mixers, or complex shaping routines. If you possess the simple skill of stirring ingredients together in a bowl, you have all the expertise required to make this bread. It’s genuinely that simple. This recipe empowers absolutely everyone to produce impressive loaves with that coveted, thick, crusty exterior and a wonderfully tender, open crumb – the kind of artisan bread you usually only find in upscale bakeries. This unparalleled ease and consistently delicious result are precisely why this recipe has been a beloved weekly staple in my household for decades, bringing joy and the comforting aroma of fresh bread to our kitchen.
Gathering Your Essentials: What You’ll Need for Perfect No-Knead Dutch Oven Bread
Embarking on your no-knead Dutch oven bread journey is exciting, and having all your ingredients and tools ready makes the process even smoother. You’ll be delighted by how few items are required to create such spectacular results. Here’s a detailed look at what you’ll need to create this fantastic bread, transforming simple components into a culinary masterpiece.
Key Ingredients for Your Artisan Loaf
Each ingredient in this recipe plays a vital role in developing the incredible flavor, structure, and texture of your homemade bread. You won’t need anything fancy or hard to find, just standard pantry staples that come together beautifully.
- All-Purpose Flour: Surprisingly, there’s no need for specialized bread flour here. Standard all-purpose flour works beautifully, contributing to the bread’s tender, open crumb without making it overly dense. It’s readily available and consistently delivers excellent results for this recipe.
- Whole Wheat Flour: A small, strategic amount of whole wheat flour is a subtle but powerful secret weapon in this recipe. It ferments slightly faster than white flour due to its higher nutrient content, which helps kickstart and sustain the dough’s rise more effectively. Crucially, this small addition contributes a subtle depth of flavor and a nuanced complexity without making the bread taste distinctly “whole wheat” or heavy. Its presence is mostly undetectable to the palate, yet it significantly enhances the overall character of the loaf.
- Yeast: I primarily use instant yeast (which often goes by names like bread machine yeast, quick-rise yeast, or pizza yeast – they are essentially interchangeable for this application). Instant yeast is incredibly convenient as it can be mixed directly with dry ingredients, simplifying the process. If you opt for active dry yeast, remember to proof it first. This means stirring it directly into the warm water specified in the recipe and letting it sit for about 5-10 minutes until a foamy layer forms on the surface. This foamy indication confirms that your yeast is active and ready to perform its leavening magic.
- Kosher Salt: This isn’t just for enhancing flavor; it’s a critical component for controlling yeast activity and strengthening the gluten structure. Salt slows down fermentation, allowing flavors to develop more deeply over time and preventing the dough from over-rising too quickly. It’s indispensable for the perfect balance and texture, so don’t skip it!
Variations and Substitutions: Customize Your Homemade Bread!
One of the true joys of baking at home is the ability to tailor recipes to your personal taste and dietary needs. Feel free to experiment with these options to make this no-knead Dutch oven bread uniquely yours:
- No Whole Wheat Flour? No Problem: If you don’t have whole wheat flour on hand, don’t let it deter you. Simply substitute it with an equal amount of additional all-purpose flour. Your bread will still be wonderfully delicious, perhaps with a slightly lighter, less complex flavor profile.
- Exciting Add-ins: Get creative and personalize your loaf! Before the final shaping step, gently fold in your favorite additions. Consider a handful of chopped fresh rosemary and minced garlic for an aromatic savory bread, shredded cheddar cheese and diced jalapeños for a spicy kick, or for a sweeter loaf, a mix of cinnamon and plump raisins. Nuts, olives, or various seeds like sunflower, flax, or sesame can also add a delightful crunch and nutty flavor, transforming a simple loaf into a gourmet experience.
Essential Tools for Dutch Oven Bread Success
Having the right equipment ensures a smooth and enjoyable baking experience. The good news is that most of these are standard kitchen items you likely already own, proving that artisan bread doesn’t require a professional kitchen setup:
- Large Mixing Bowl: This is your primary workspace. You’ll mix all the ingredients here, and crucially, it will be the home for your dough during its initial, extended rise. Since the dough will more than double in volume, make sure your bowl is generously sized to accommodate this expansion. A very large stock pot or even a spare Dutch oven (one you won’t be baking in!) can also serve as an excellent, spacious vessel for the rising dough.
- Plastic Wrap or a Damp Kitchen Towel: Absolutely essential for covering your mixing bowl during the long fermentation period. This prevents the dough from drying out and forming a crust, ensuring it rises properly and stays pliable.
- Wooden Spoon or Sturdy Silicone Spatula: For simply stirring all the ingredients together – no fancy stand mixers, dough hooks, or strenuous kneading required for this “no-knead” marvel. A strong spoon or spatula is all you need to bring the dough together.
- Parchment Paper: A true lifesaver for this sticky dough! It prevents your delicate, high-hydration dough from adhering to surfaces and makes transferring the proofed dough into a scorching hot Dutch oven incredibly easy, safe, and mess-free without deflating it.
- Dutch Oven (Cast Iron Pot) or Cast Iron Skillet: The undeniable star of the show! A heavy-duty cast iron pot with a tight-fitting lid, like a Dutch oven, is paramount for achieving that signature crispy, deeply browned crust and a perfectly baked, airy interior. It traps steam during the initial bake, mimicking a professional steam oven, which is key to a beautiful crust. The lid is then removed to allow for thorough browning. A sturdy cast iron skillet can also work as a viable alternative, as detailed in the “no Dutch oven” section.
- Serrated Knife or Kitchen Scissors: For cleanly cutting portions of dough from your refrigerated batch and for scoring the top of your loaf just before baking. Scoring isn’t just decorative; it’s functional, helping to control where the bread expands, allowing for an even rise and preventing uncontrolled tears.
- Oven Mitts: Absolutely essential for safely handling the extremely hot Dutch oven during the preheating and baking process. Safety first when dealing with high oven temperatures!
Scaling Up: Doubling Your No-Knead Dutch Oven Bread Recipe for More Fresh Bread
Given how incredibly popular and versatile this bread is in my home, I almost always double this dough recipe. It’s a fantastic, efficient way to ensure my family of five always has delicious homemade bread throughout the week without constant re-preparation. When doubling the batch, the primary, and often only, consideration is simply having enough space for the significantly larger volume of dough to rise comfortably.
For these larger batches, a truly massive mixing vessel is required. I personally rely on an IKEA Krispig cake carrier turned upside-down, ingeniously transforming it into a capacious bowl with a tight-fitting lid. Its generous 4.5-gallon (17-liter) capacity is perfect for accommodating the expanded dough without overflow. Alternatively, a very large stock pot – what we on the East coast affectionately call a “lobster pot” due to its size – works just as well and is often found in many kitchens.
If you don’t possess such a voluminous container, another perfectly practical option is to divide the doubled dough into two normal-sized portions, each fitting into a standard large mixing bowl. This maintains manageable sizes for fermentation. Apart from ensuring ample rising space and sufficient room for storage in your refrigerator, there are no other special considerations or adjustments needed when doubling this foolproof recipe. Enjoy twice the goodness with minimal extra effort, keeping your kitchen stocked with delicious, fresh artisan bread!
A Step-by-Step Guide to Making Your Perfect No-Knead Dutch Oven Bread
The true beauty of this no-knead Dutch oven bread recipe lies in its incredible simplicity and the minimal hands-on time it demands. Forget complicated baking processes; this is all about minimal effort for maximum reward – an artisan loaf that will impress everyone. You just need a bowl, a spoon, and a desire for truly exceptional homemade bread.
The basic premise is beautifully straightforward: mix all your ingredients, let the dough undergo its initial, long rise until it’s gloriously puffy and full of yeasty bubbles, then transfer it to the fridge for convenient storage. Whenever you crave a fresh, warm loaf, simply ‘saw off’ a portion, give it a gentle shape, and bake. It’s so easy, even a young child can help with the mixing process, making it a fun family activity!
Step 1: Mix the Bread Dough – The Easiest Part of All!
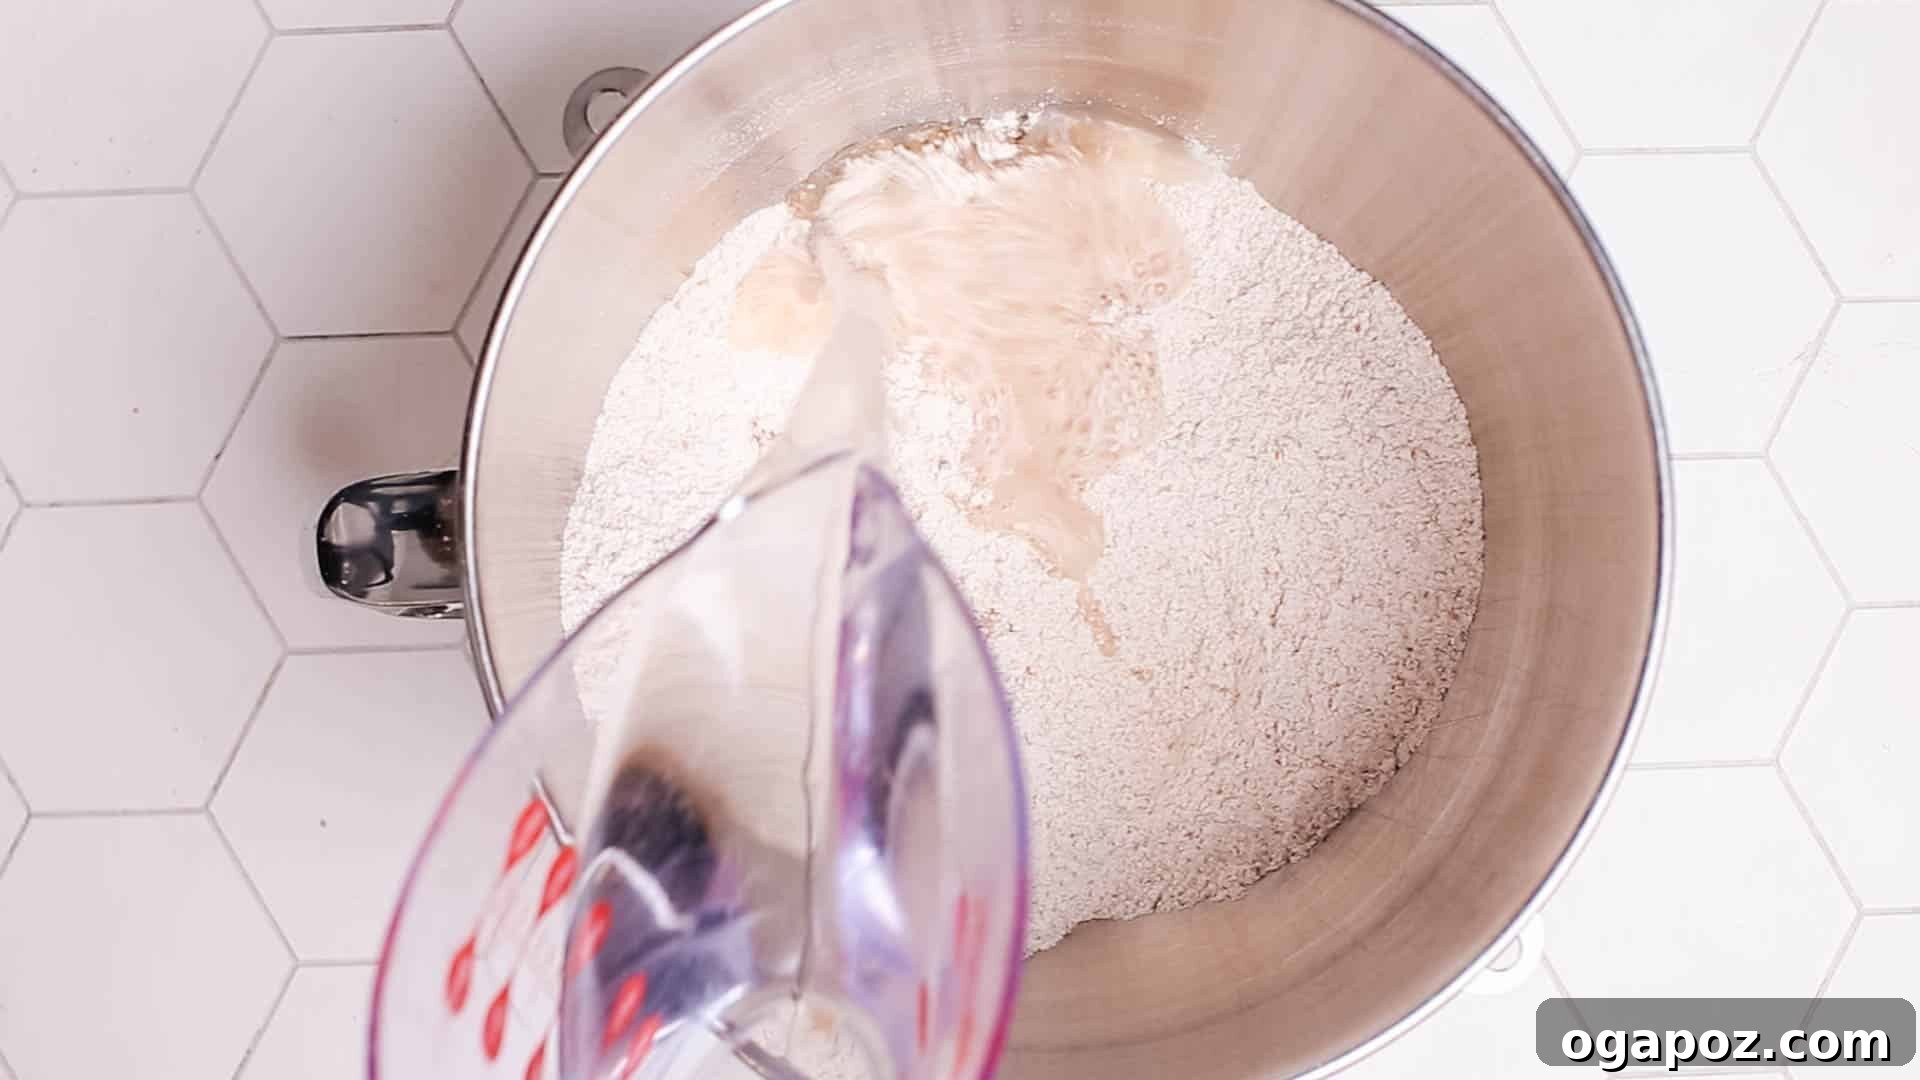
Making the dough for this incredible artisan bread is remarkably simple and requires absolutely no strenuous effort. No stand mixers are necessary, no heavy lifting, just a bowl and a sturdy spoon. Begin by combining all your dry ingredients – both all-purpose and whole wheat flours, yeast, and kosher salt – in your largest mixing bowl. Give them a quick whisk or stir to ensure they are thoroughly distributed and combined evenly.
JENN’S EXPERT TIP FOR PRECISION
For unparalleled accuracy and to minimize dirty measuring cups, I highly recommend using a kitchen scale to measure your ingredients by weight rather than volume. This guarantees consistent results every single time, which is a hallmark of professional baking. While our recipe instructions provide standard volume measurements, exploring weight-based measurements can significantly elevate your baking precision and ensure perfect loaves consistently.
Once your dry ingredients are mixed, pour in the warm water and stir everything together until all ingredients are thoroughly combined, forming a shaggy, sticky dough. It won’t look perfectly smooth or uniform, and that’s precisely what you want for a no-knead dough! Resist any urge to knead the dough; this recipe thrives on minimal handling. Just mix until no dry pockets of flour remain, ensuring a cohesive, albeit sticky, mass.
Once mixed, cover your bowl loosely with plastic wrap or a damp kitchen towel. Place it in a warm, draft-free spot (a slightly warm oven with the light on, or simply on your kitchen counter) and let the dough embark on its initial rise, also known as bulk fermentation. This crucial first rise typically takes two hours or more, depending on your room temperature and the activity of your yeast. There’s no need to constantly check on it; simply let time and yeast do their magical work until the dough has visibly risen, looks bubbly, and feels light.
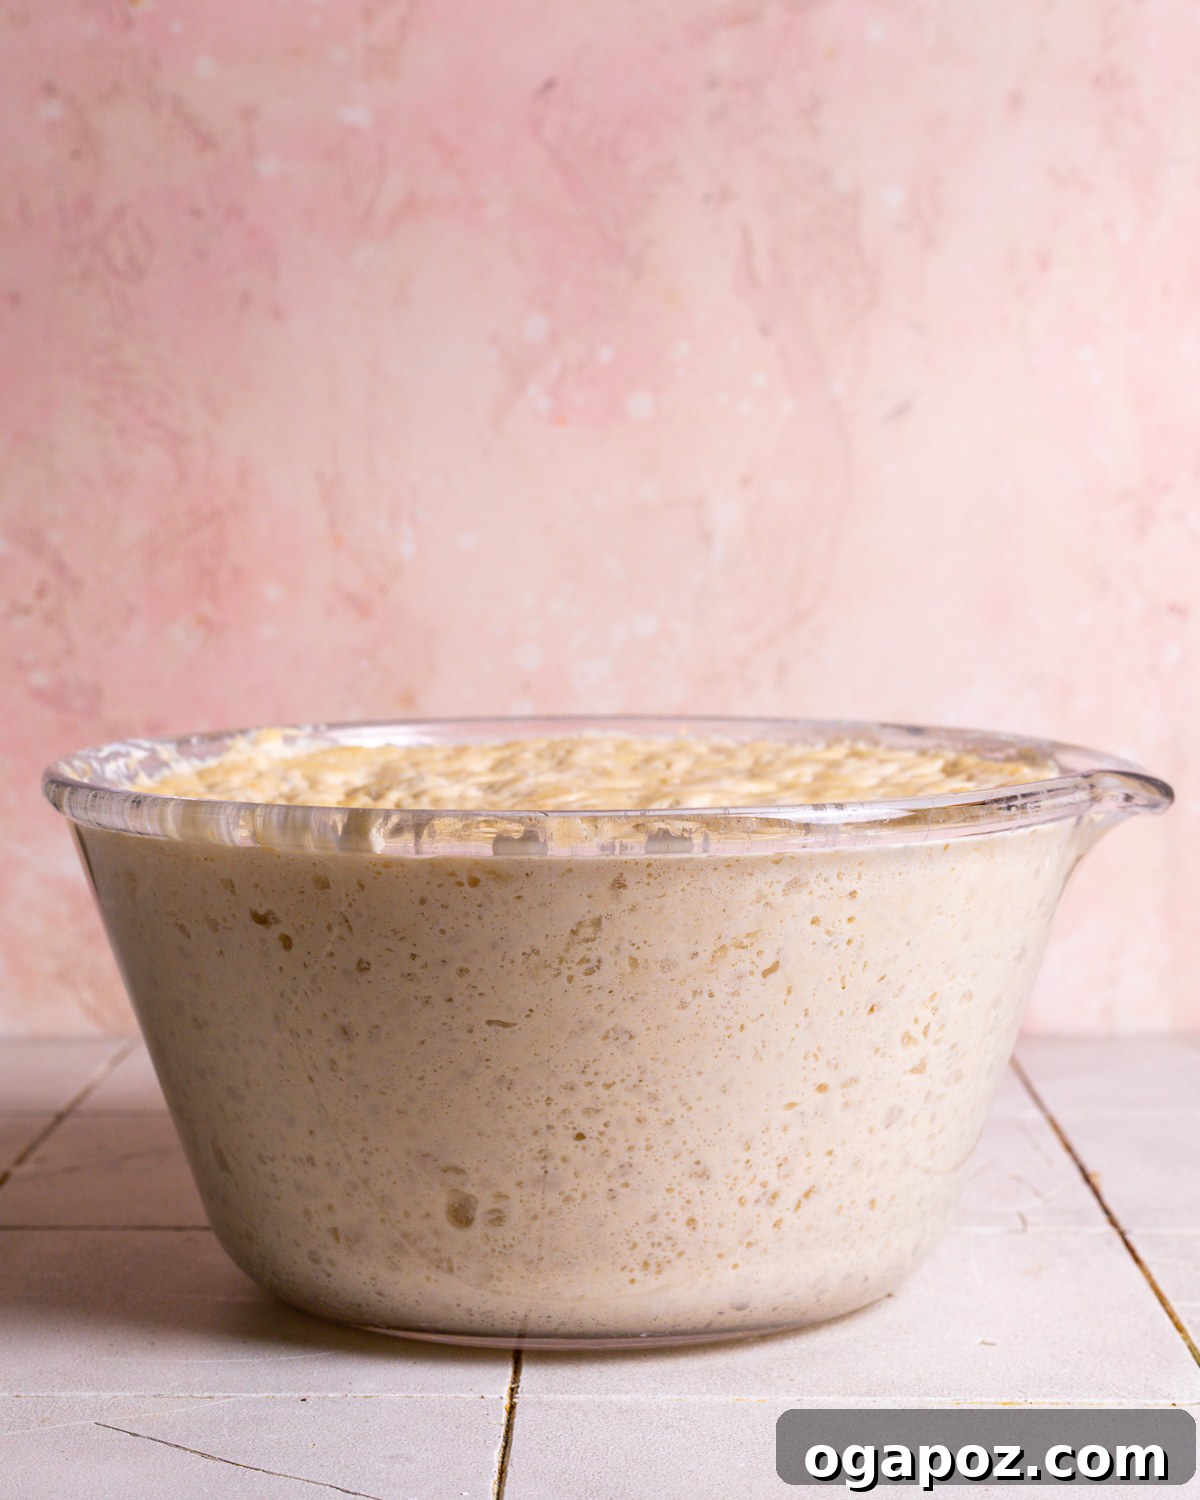
Step 2: Store the Dough for Future Freshness and Enhanced Flavor
After its initial rise, your dough will undergo a wonderful transformation, becoming a gloriously puffy, airy mass, brimming with the delightful aroma of active yeast. At this critical stage, you have two fantastic and convenient options:
- Bake Immediately: If you’re eager to enjoy a fresh loaf right away, you can proceed directly to the shaping and baking steps.
- Refrigerate for Up to Two Weeks: This is where the true magic and convenience of this recipe truly unfold. Transfer the dough, still in its covered bowl, to the refrigerator. The cold temperature significantly slows down yeast activity, allowing the dough to ferment slowly over days, even up to two weeks. This process, known as cold fermentation or cold proofing, is key to developing unparalleled flavor.
JENN’S EXPERT TIP ON DOUGH MATURATION
The longer the dough rests and ferments in the refrigerator, the more pronounced and complex its flavors will become. This slow, cold fermentation develops a depth of taste akin to authentic sourdough, with wonderful tangy notes. Furthermore, extended cold proofing also contributes to a more open, airy crumb with larger, more desirable air holes when baked. You’ll notice a significant improvement in both taste and texture after just 24 hours of refrigeration. By the end of 14 days, your bread will boast a rich, deeply satisfying flavor reminiscent of a traditional, long-fermented sourdough loaf, all with minimal effort!
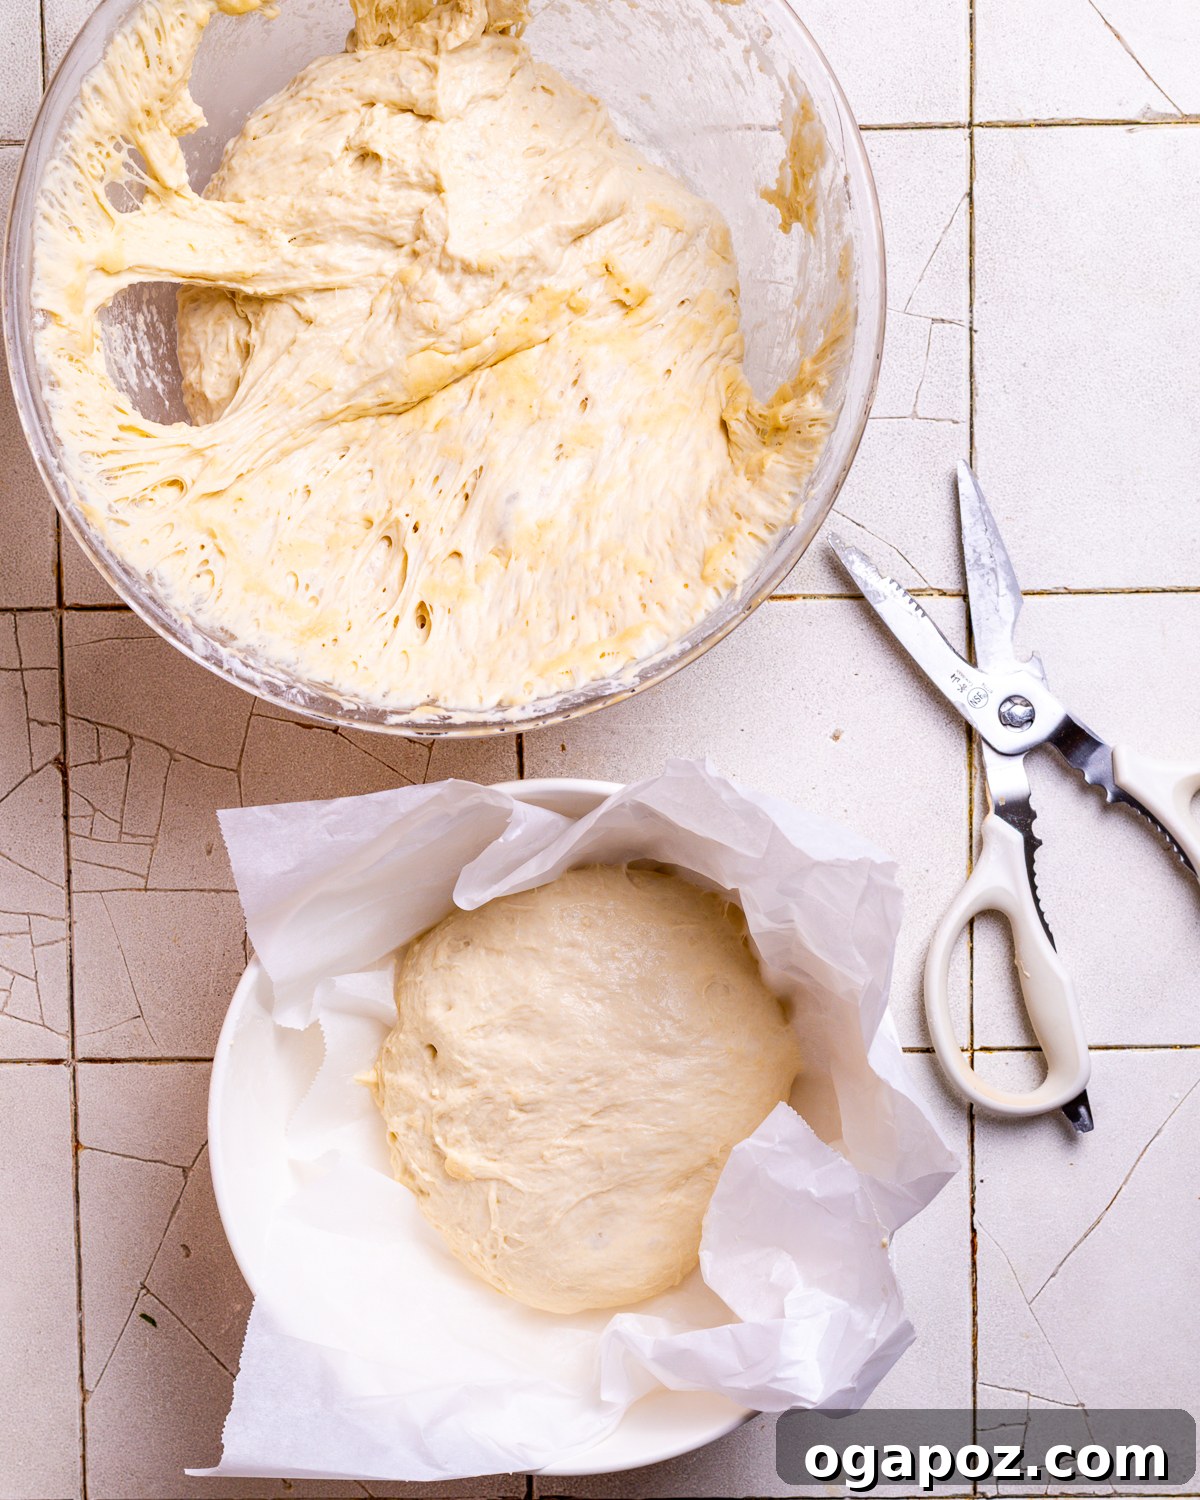
Step 3: Shape the Dough with Gentle Hands for a Perfect Loaf
When you’re ready for that irresistible aroma of fresh bread to fill your home, retrieve your dough from the fridge. It will be very sticky and quite loose in texture, which is perfectly normal and characteristic of a high-hydration, no-knead dough. Generously dust the surface of the dough with flour, then use a serrated knife or kitchen scissors to cleanly cut off the portion you wish to bake (approximately one-third of the total dough for one loaf). The remaining dough can go back into the fridge for later.
To make handling the sticky dough easier and prevent it from clinging to your fingers, lightly wet your hands with water. Gently shape the dough by stretching the top surface and carefully tucking the edges underneath the dough. Continue this motion, rotating the dough as you go, to create a smooth, taut “skin” on top. Imagine you’re wrapping the dough around an imaginary baseball in its center. This technique builds crucial surface tension, which is absolutely vital for achieving a good oven spring and a beautifully rounded loaf.
Once shaped, place the dough seam-side down onto a piece of parchment paper. Then, carefully transfer the parchment paper and dough into a large bowl or a pie plate. This confined space helps the dough maintain its rounded shape and encourages it to rise upwards during its final proof, rather than spreading outwards. Allow the shaped dough to rest in a warm, draft-free spot for about 40 minutes for its second rise (or proofing), giving it time to become light and airy once more.
The parchment paper is truly your best friend here; it will allow you to safely and easily transfer the delicate, proofed dough into the blazing hot Dutch oven without any risk of deflating it, ensuring your hard work results in a spectacular loaf.
Step 4: Bake Your Artisan Bread in a Dutch Oven for Perfection
Baking in a Dutch oven is the ultimate technique for achieving that professional bakery-quality, deeply crisp crust and a beautifully tender, airy interior. This method essentially creates a mini steam oven right in your home kitchen. Here’s how to master this crucial, yet simple, step:
- Preheat Your Dutch Oven to High Heat: Approximately 30 minutes before you’re ready to bake, place your empty Dutch oven (with its lid on) into your cold oven. Then, preheat the oven to a scorching 450°F (232°C). This preheating step is absolutely critical. A super-hot Dutch oven creates an intensely steamy environment the moment the dough is added, which is essential for developing that wonderfully crisp, golden crust while ensuring the inside remains soft and airy.
- Carefully Transfer the Dough: Once your oven (and Dutch oven) has reached the target temperature and your dough has completed its second rise, carefully remove the preheated Dutch oven from the oven using sturdy oven mitts. Be extremely cautious and move deliberately, as the pot will be intensely hot. Using the parchment paper as convenient handles, gently lift the proofed dough and carefully lower it into the hot Dutch oven.
- Score and Cover: Before replacing the lid, generously dust the top of the dough with a little flour. Then, using a sharp serrated knife or kitchen scissors, make a few distinct slashes (scoring) across the top of the dough. This isn’t just for aesthetics; it allows the bread to expand predictably and evenly during baking, preventing uncontrolled tearing and helping achieve a beautiful “ear” on your crust. Now, carefully replace the lid (again, with oven mitts!) and return the Dutch oven to the oven.
- Bake Covered for Steam: Bake with the lid on for 30 minutes. The sealed environment inside the Dutch oven traps the steam released from the dough as it bakes. This trapped steam is the secret to developing that magnificent, crackly crust and an excellent oven spring, allowing the bread to rise to its full potential.
- Bake Uncovered for Golden Perfection: After 30 minutes, carefully remove the lid from the Dutch oven. Continue baking for an additional 10-15 minutes, or until the crust achieves a deep, rich golden-brown hue and the bread sounds hollow when tapped on the bottom. For ultimate precision, the internal temperature of the bread should register at least 190°F (88°C) using an instant-read thermometer. This uncovered baking stage allows the crust to crisp up further and brown beautifully.
- Cool Completely: Once baked to golden perfection, carefully remove the bread from the Dutch oven using the parchment paper and transfer it immediately to a wire rack. It is absolutely crucial to allow the bread to cool completely for at least 1-2 hours (or even longer for larger loaves) before attempting to slice it. This cooling period is non-negotiable! It allows the internal structure (the crumb) to set properly, ensuring beautifully clean slices, a perfect texture, and preventing a gummy interior. Patience is key for the best results!
Baking this no-knead bread in a Dutch oven is truly a transformative experience, enabling you to produce bakery-quality loaves with astonishingly minimal effort. The heavy cast iron distributes heat flawlessly, while the trapped steam orchestrates the ideal environment for a perfect rise and an irresistible, shatteringly crisp crust.
No Dutch Oven, No Problem: Baking Alternatives for No-Knead Bread
While a Dutch oven is highly recommended for achieving the absolute best results with this recipe, you can still enjoy delicious no-knead bread even without one. Don’t let the lack of a specific pot stop you from baking! Simply preheat a heavy cast iron skillet, a pizza stone, or even a sturdy, rimmed baking sheet in your oven to the same temperature (450°F / 232°C). Once hot, carefully transfer the shaped dough (on parchment paper) directly onto the preheated surface. Skip the covered baking step entirely and bake it uncovered for the entire duration (approximately 40-50 minutes), until deeply golden brown and cooked through. While you might not get quite the same ultra-crispy, blistered crust that a Dutch oven provides, your bread will still be incredibly tasty, with a satisfying crust and soft interior – a testament to simple, homemade goodness!
How to Serve Your Delicious Homemade Bread: Creative Pairings
This No-Knead Dutch Oven Bread, like most freshly baked homemade bread, is truly heavenly when served warm. There’s nothing quite like tearing into a still-warm loaf, experiencing its rustic crust and tender crumb. It pairs exquisitely with a generous slather of good quality butter or a drizzle of your finest extra virgin olive oil, perhaps seasoned with a pinch of sea salt and freshly ground black pepper. Beyond this classic pairing, it’s the perfect, comforting accompaniment to a warm bowl of soup or a hearty stew, instantly elevating any meal from ordinary to extraordinary.
Here are some of my favorite recipes that truly sing when served alongside a slice of this artisan bread:
- Life-Changing Creamy Tomato Soup
- Hearty Vegetable Orzo Soup
- Wholesome Ground Turkey Soup
- Comforting Zucchini and Potato Soup
- Savory Ham and Lentil Soup
- Classic Old-Fashioned Vegetable Beef Soup
For an extra burst of flavor, try serving slices with a rich, aromatic garlic butter sauce for dunking – a true indulgence. And don’t forget the day-after delights: this bread makes the absolute best toast for breakfast, perfect for avocado toast or a simple spread of jam. It also serves as the ideal, sturdy foundation for a satisfying sandwich, like my all-time favorite meatloaf sandwich!
Preserving Freshness: The Best Way to Store Your Homemade Bread
To ensure your homemade Dutch oven bread remains fresh, flavorful, and utterly delicious for as long as possible, proper storage is paramount. Follow these simple yet effective tips to maximize its lifespan and enjoy every crumb of your hard work:
- Room Temperature Storage is Best: For optimal freshness and to maintain that desirable crispy crust, always store your baked bread at room temperature. A simple paper bag, a dedicated bread box, or even an airtight container works well. A paper bag is often preferred as it allows the crust to remain crisp while preventing the interior from becoming overly moist and soggy.
- Avoid the Refrigerator at All Costs: This is a common and critical mistake! Never store baked bread in the refrigerator. The cold temperatures dramatically accelerate the staling process, causing the bread to become dry, tough, and unappetizing much faster than if stored at room temperature. This phenomenon is due to a process called starch retrogradation, which speeds up significantly in cool (but not freezing) environments.
- Freezing for Long-Term Enjoyment: If you know you won’t finish the entire loaf within a couple of days, freezing is your absolute best option for long-term storage. For maximum convenience, consider slicing the bread first. Then, wrap the slices tightly in plastic wrap or aluminum foil, or place them in a freezer-safe bag. This method allows you to thaw individual slices as needed, preserving their freshness and quality without having to defrost the entire loaf.
- Reheating Frozen Bread: To revive frozen slices or a whole loaf, simply warm it in a preheated oven at 350°F (175°C) for about 10-15 minutes (less for individual slices, more for a whole loaf). This gentle reheating helps to restore some of the crust’s original crispiness and brings back the bread’s soft, tender interior, almost as if it were freshly baked.
No-Knead Dutch Oven Bread: The Full Recipe
By: Jennifer Pallian BSc, RD
This No-Knead Dutch Oven Bread recipe consistently delivers the best homemade bread I’ve ever had. It boasts a perfectly crusty exterior, a wonderfully tender interior, and is incredibly easy for anyone to make – literally, if you can stir, you can bake this! This recipe yields enough dough for 3 large loaves. You have the flexibility to bake one fresh loaf at a time and store the remaining dough in the refrigerator for up to 2 weeks, ensuring fresh, artisan-quality bread is always on demand.
Prep Time: 5 minutes
Cook Time: 40 minutes
Yields: 3 loaves
Ingredients
- 6 ⅓ cups (approx. 800g) all-purpose flour
- ½ cup (approx. 60g) whole wheat flour
- 1 tbsp (approx. 10g) instant yeast (or active dry yeast, proofed)
- 1 tbsp (approx. 18g) kosher salt
- 3 cups (approx. 720ml) warm water (around 100-110°F / 38-43°C)
Instructions
- Mix the Dough: In a very large bowl, combine the all-purpose flour, whole wheat flour, yeast, and kosher salt. Stir well to mix the dry ingredients evenly. Then, pour in the warm water and stir until all ingredients are fully combined and a sticky, shaggy dough forms. Ensure there are no dry pockets of flour remaining. Cover the bowl loosely with plastic wrap or a damp kitchen towel and let the dough rise in a warm, draft-free place for at least 2 hours, or until visibly risen, bubbly, and about doubled in volume. If you are not baking immediately, cover the bowl tightly and transfer the dough to the refrigerator, where it can be stored for up to 2 weeks.
- Shape the Dough: When you are ready to bake a loaf, line a pie plate or a medium bowl with parchment paper (this helps the dough hold its shape during its final rise). Generously dust the surface of the dough in the main bowl with flour. Using a serrated knife or kitchen scissors, cut off a portion (about 1/3 of the total dough) to make one loaf. Since the dough is very sticky, lightly wet your hands with water to prevent it from sticking to your fingers. Gently shape the dough by stretching the top surface and tucking the edges underneath to create a smooth, taut top. Place the shaped dough, seam-side down, in the parchment paper-lined dish. Let it rest in a warm place for 60-90 minutes for its final proof (second rise).
- Bake the Bread: Approximately 30 minutes before baking, place your Dutch oven (with the lid on) into your cold oven. Then, preheat the oven to 450°F (232°C). Once the oven and Dutch oven are fully preheated, carefully remove the hot Dutch oven with sturdy oven mitts. Using the parchment paper, carefully lift the proofed dough and transfer it into the scorching hot Dutch oven. Dust the top of the dough with a little flour, then make a few slashes across the top with a sharp serrated knife before carefully replacing the lid. Bake with the lid on for 30 minutes. After 30 minutes, carefully remove the lid. Continue baking for an additional 10-20 minutes, or until the crust is deeply golden brown and the bread sounds hollow when tapped on the bottom. The internal temperature should be at least 190°F (88°C).
- Cool Completely: Carefully remove the baked bread from the Dutch oven using the parchment paper and immediately transfer it to a wire rack. Let it cool completely for at least 1-2 hours (or longer for a very large loaf) before slicing. This essential cooling period allows the internal structure of the bread (the crumb) to set properly, ensuring beautifully clean slices and a perfect texture. Slicing hot bread can result in a gummy interior.
Additional Recipe Notes and Tips
- Handling Dough: This dough is naturally quite wet and sticky due to its high hydration. Don’t be alarmed! Lightly wetting your hands with water before shaping is a simple yet effective trick to prevent it from sticking to your fingers.
- No Dutch Oven? Alternative Baking Methods: While a Dutch oven provides the best results, you can still achieve excellent no-knead bread using a preheated cast iron skillet, a pizza stone, or a heavy baking sheet. Simply skip the covered baking step and bake uncovered for the entire duration (approximately 40-50 minutes) until golden brown.
- Yield: This generous recipe yields enough dough for three large loaves of bread, perfect for a family or for freezing.
- Nutrition: The provided nutrition values are an approximation, calculated based on 1/8th of a loaf, representing a generous serving slice. Please note that these figures can vary based on exact ingredient measurements and brands.
- Flour Substitution: If whole wheat flour is unavailable or if you prefer a lighter loaf, simply use an equal amount of additional all-purpose flour to make up the total flour quantity.
- Dough Storage: The prepared dough can be stored in a well-covered bowl in the refrigerator for up to 14 days. Remember, longer cold fermentation allows the flavors to deepen significantly, resulting in a more complex, almost sourdough-like taste and a more open, airy crumb in the finished bread.
- Cooling: Always, always allow your baked bread to cool completely on a wire rack before slicing. This is absolutely crucial for the crumb to set properly and to prevent a gummy texture. Patience will be rewarded with perfect slices!
- Bread Storage: Store any leftover baked bread in a paper bag, a bread box, or an airtight container at room temperature for up to 2 days to maintain its crustiness and freshness. For longer storage, freezing is the best option. Do not refrigerate baked bread, as the cold temperatures will significantly accelerate the staling process.
Approximate Nutrition Information (per 1/8th loaf)
Calories: 174 kcal | Carbohydrates: 38g | Protein: 6g | Fat: 2g | Saturated Fat: 0.02g | Polyunsaturated Fat: 0.3g | Monounsaturated Fat: 0.3g | Sodium: 439mg | Potassium: 16mg | Fiber: 5g | Sugar: 2g | Vitamin A: 0.3 IU | Vitamin C: 0.001mg | Calcium: 35mg | Iron: 2mg
Nutrition information is automatically calculated and should only be used as an approximation. Individual results may vary.