
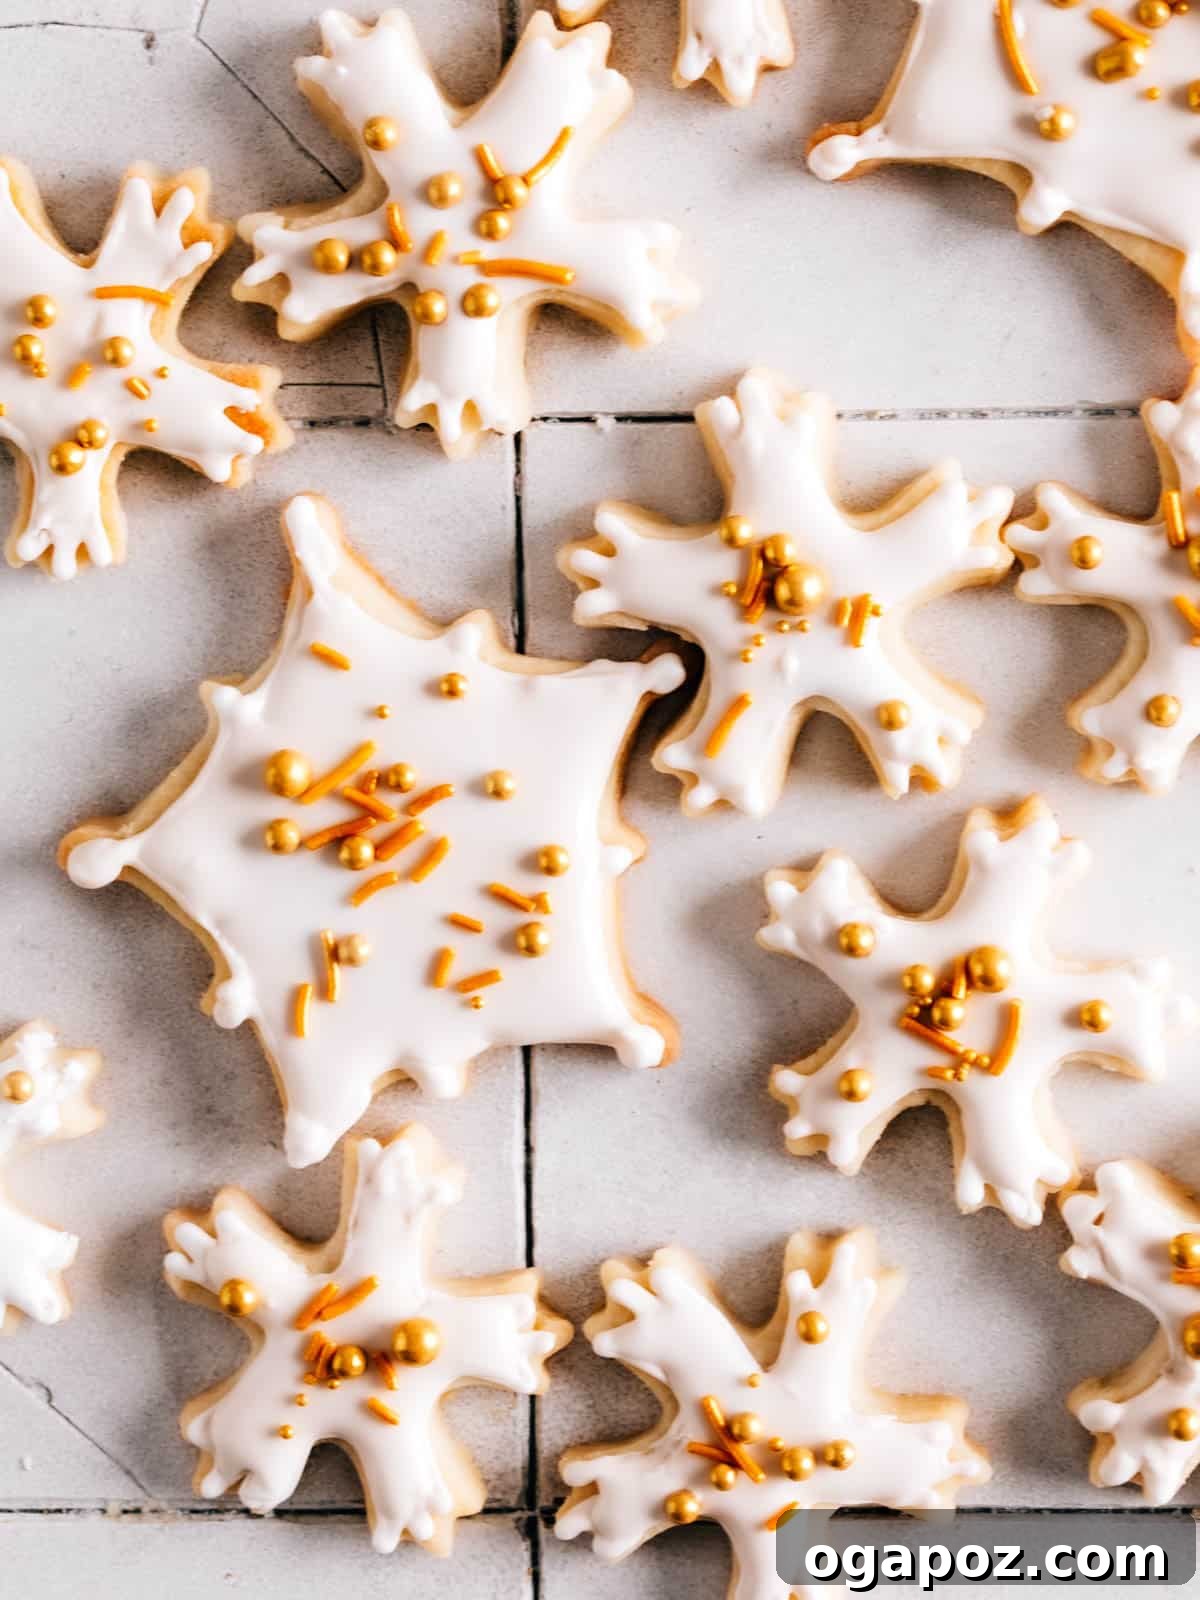
Transform your holiday season with these exquisite yet incredibly simple Snowflake Cookies. This ultimate guide provides a no-fail recipe that requires just one bowl, no chilling, and minimal effort. Learn how to bake perfectly tender cookies that hold their intricate snowflake shape and decorate them beautifully with a smooth, glossy royal icing using our revolutionary, easy method. Get ready to impress your family and friends with these dazzling, homemade treats that are perfect for Christmas gatherings, winter celebrations, or simply a cozy baking day at home.

Why This Snowflake Cookie Recipe is Your Holiday Baking Hero
Baking during the holidays should be a joyous occasion, not a stressful chore. This snowflake cookie recipe is designed to make your festive baking experience as smooth and enjoyable as possible. Here’s why you’ll absolutely adore making these beautiful cookies:
- Effortless One-Bowl Wonder: Say goodbye to piles of dirty dishes! This recipe is a true one-bowl marvel, streamlining your baking process and minimizing cleanup. You’ll spend less time scrubbing and more time enjoying the magic of creating delicious holiday treats. This convenience is a game-changer for busy schedules.
- The Easiest Cookie Icing Method Ever: Forget about tedious piping bags and shaky hands. We’re about to reveal a game-changing technique for icing cookies that guarantees a professional, smooth, and glossy finish with minimal effort. This method is so simple, it’s truly life-changing for anyone intimidated by cookie decorating. Watch our quick video tutorial below to see it in action!
- Only 5 Essential Ingredients: You don’t need a pantry full of exotic items for these beauties. This recipe relies on just five common kitchen staples—butter, flour, sugar, eggs, and vanilla—making it accessible and budget-friendly for everyone. Simple ingredients, extraordinary results!
- Perfect Shape & Tender Texture with “Reverse Creaming”: Our secret weapon is the “reverse creaming” method. Instead of creaming butter and sugar first, we add softened butter directly into the flour mixture. This unique technique coats the flour particles with fat, preventing gluten overdevelopment and overmixing. The result? Cookies that not only hold their beautiful snowflake shape flawlessly during baking but are also wonderfully tender and melt-in-your-mouth delicious with every bite.
- No Chilling Required: Unlike most cut-out cookie recipes that demand an hour or more of chilling time, this recipe is designed for instant gratification. Thanks to precise ingredient proportions and a unique technique, you can roll out and cut your dough immediately after mixing. This cuts down significantly on prep time, meaning you get to enjoy your beautiful cookies faster, which is always a bonus, especially when little ones are eager to help!
- Minimal Cooling Time Before Decorating: The impatient baker’s dream! Royal icing contains no butter or oil, which means it won’t melt or slide off when applied to warm cookies. This significantly cuts down on the waiting time, allowing you to decorate your festive creations almost as soon as they come out of the oven. No more waiting hours for cookies to cool completely – get those sprinkles on and enjoy your masterpiece sooner!
Essential Ingredients for Your Perfect Snowflake Cookies
Crafting delicious snowflake sugar cookies starts with understanding the role of each key ingredient. This recipe utilizes common pantry staples to deliver exceptional flavor and texture, ensuring your cookies are both beautiful and delightful to eat.

- Butter: For convenience, we recommend using salted butter, as it’s a common staple in most kitchens. Salted butter adds a crucial depth of flavor that balances the sweetness of the cookie, enhancing its overall taste. If you prefer or only have unsalted butter on hand, simply remember to double the amount of salt specified in the recipe to achieve that perfect flavor profile. Ensuring your butter is properly softened to room temperature is key for smooth incorporation into the dough and a tender final product.
- All-Purpose Flour & Granulated Sugar: These two foundational ingredients form the structural backbone and sweetness of your cookies. Using the correct measurement for all-purpose flour (ideally by weight for precision) is vital for the dough’s consistency and the cookies’ ability to hold their intricate shape without spreading. Granulated sugar provides the classic sweetness and helps achieve that desirable crisp-tender texture.
- Eggs: Large eggs act as a crucial binding agent, bringing all the disparate ingredients of the dough together into a cohesive mixture. They also contribute significant moisture and help the cookies achieve a slight rise, creating that ideal tender, delicate crumb that melts in your mouth.
- Flavoring – The Heart of Your Cookie:
- Vanilla Extract: This is the cornerstone of classic sugar cookie flavor. A good quality vanilla extract will impart a warm, comforting aroma and taste that is universally loved and provides the quintessential sugar cookie experience.
- Lemon Zest (Optional, but highly recommended!): For an extra layer of brightness and sophistication, we adore adding the finely grated zest of one lemon. This creates delightful lemon snowflake cookies, offering a subtle tangy note that perfectly complements the sweetness and adds a fresh, vibrant twist. If you’re a lemon lover, this addition is a must-try. Alternatively, you could use 1/2 teaspoon of lemon extract for a more pronounced citrus flavor.
- Almond Extract (Alternative): If lemon isn’t your preference, or you’re looking for a different flavor profile, consider swapping the lemon for 1/4 teaspoon of almond extract. Almond provides a delicate, nutty essence that is equally delicious and festive, offering a lovely depth of flavor that pairs beautifully with the simple sugar cookie base.
Step-by-Step Guide to Making These Easy Snowflake Cookies
Follow these straightforward steps to create your perfect batch of charming snowflake cookies. Our unique “reverse creaming” method ensures a dough that’s a dream to work with, yielding beautiful, tender results every time, without the need for chilling.
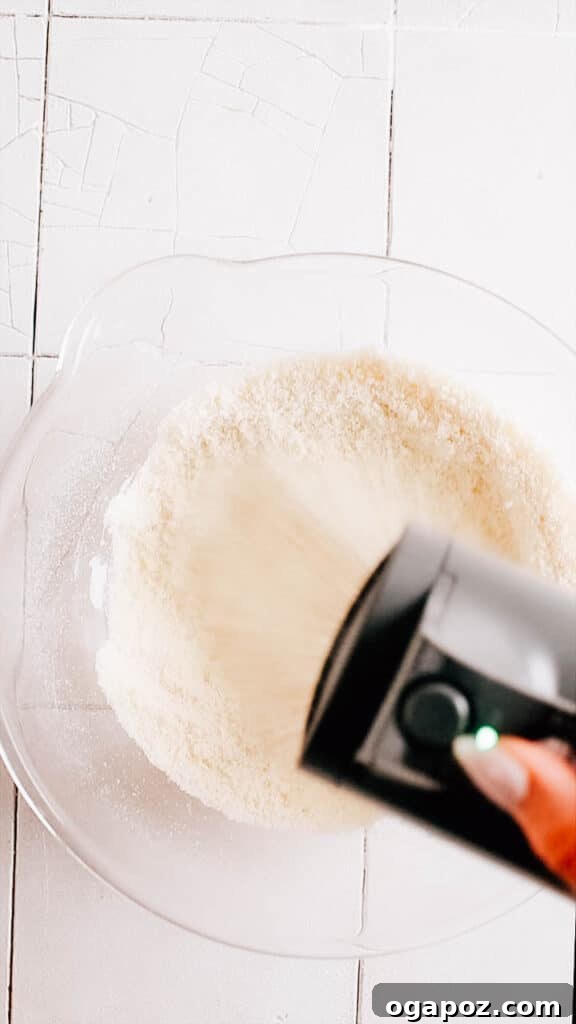



- Prepare the Dough with Reverse Creaming: Begin by preheating your oven and lining baking sheets with parchment paper. In the bowl of a stand mixer fitted with the paddle attachment, combine your dry ingredients—all-purpose flour, granulated sugar, and fine sea salt. Mix these briefly on low speed (about 30 seconds) to ensure they’re well-aerated and evenly distributed. Next, gradually add your softened, cubed butter, beating on low speed until the mixture transforms into coarse crumbs. This “reverse creaming” technique is crucial for preventing overworking the gluten, resulting in delightfully tender cookies that maintain their intricate shape. Finally, incorporate the large egg, vanilla extract, and any optional flavorings like lemon zest. Continue beating on medium-high until the dough just comes together, usually about 30 seconds. If it doesn’t form a cohesive mass in the mixer, simply transfer the crumbly dough onto a piece of parchment paper and gently press and knead it together by hand to form a smooth disc.
- Roll, Cut, and Bake to Perfection: Place your dough disk between two sheets of parchment paper. This clever trick prevents sticking and makes rolling incredibly easy, eliminating the need for extra flour on your workspace. Using a rolling pin, roll the dough out evenly to a precise 1/4-inch thickness. Consistent thickness is key for even baking. Dip your snowflake cookie cutters in a little flour before each cut to prevent sticking, then press firmly into the dough to cut out your festive shapes. For easy transfer and to prevent distortion, carefully remove the excess dough scraps from around your cut shapes, leaving your perfectly formed snowflakes behind on the parchment paper. Then, gently lift the parchment paper with the cookies and transfer it to your prepared baking sheets. Bake until the edges are just lightly golden and the centers appear set and less shiny.
- Cool and Decorate with Royal Icing: Once baked, transfer the cookies to wire racks to cool. Allow them to cool sufficiently so they are easy to handle, but remember, with royal icing, they don’t need to be completely cold to decorate! Once cool enough to touch, it’s time for the fun part: decorating with sweet, smooth royal icing. Our dunking method, detailed below, ensures a beautiful, professional finish. For an extra touch of sparkle and magic, add festive sprinkles immediately while the icing is still wet, ensuring they adhere beautifully and create a dazzling effect.
The World’s Easiest and Most Effective Way to Decorate Cookies
Achieving beautifully decorated cookies doesn’t require artistic talent or hours of painstaking work. Our simple dunking method for royal icing flooding will give you professional-looking results with a fraction of the effort typically associated with intricate cookie decorating. Say goodbye to the frustrations of piping and hello to perfectly smooth, glossy surfaces that will impress everyone!
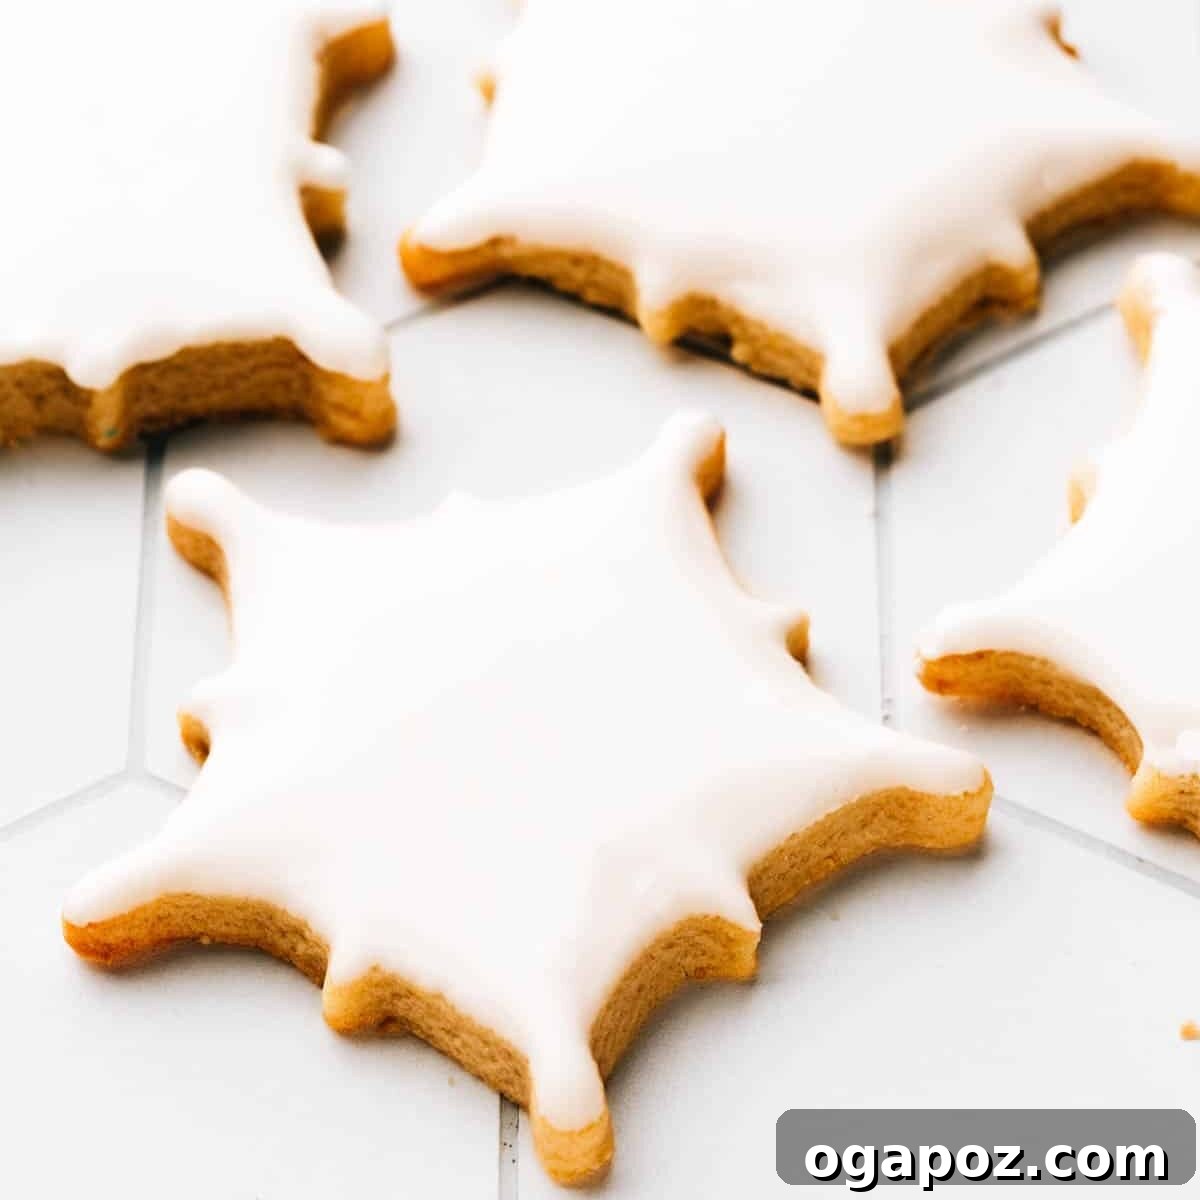
Crafting the Perfect Royal Icing
Royal icing is the ideal medium for decorating cut-out cookies due to its hard-setting, smooth finish and ability to hold intricate designs once dry. It’s surprisingly simple to make, typically consisting of powdered sugar, egg whites (or meringue powder for a safer, more stable alternative), and a splash of vanilla extract for flavor. The basic recipe is provided in the recipe card below.
Achieving “Flood” Consistency: The key to our easy dunking method is having your royal icing at precisely the right consistency – known as “flood” consistency. To achieve this, begin by whisking your prepared icing. Then, gradually thin it out by adding water, half a teaspoon at a time, incorporating thoroughly after each addition. Perform the “10-second test” to check consistency: run a clean spatula through the bowl of icing, creating a line. Count how many seconds it takes for the surface to become completely smooth again, with the line disappearing. For perfect flooding, you’re aiming for the icing to settle back to a smooth surface in approximately 10 to 15 seconds. If it’s too thick, it won’t spread smoothly; if it’s too thin, it will drip off the cookies or create transparent spots. Adjust patiently until you hit that sweet spot!
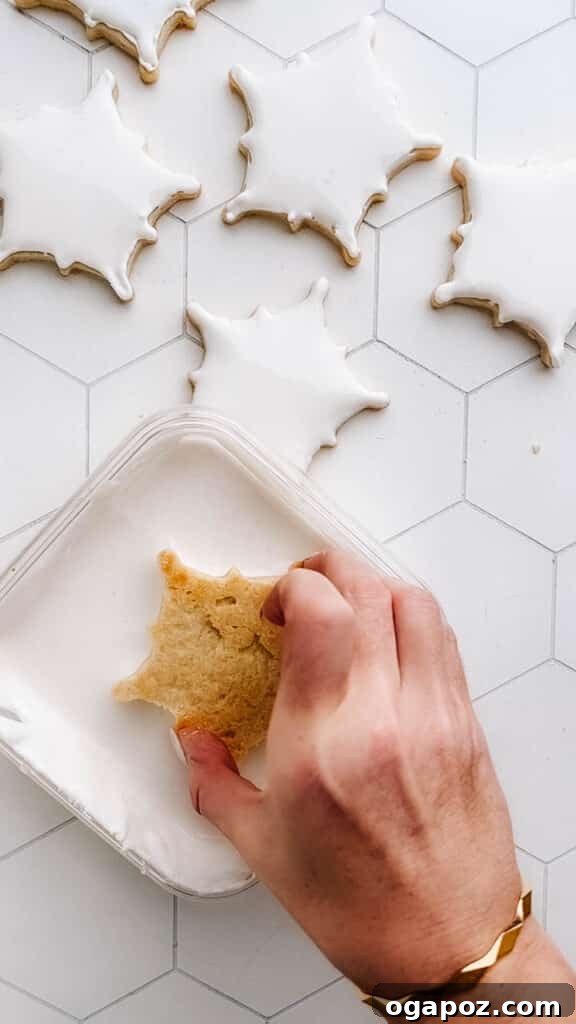
Decorate Your Snowflake Cookies with Ease
Once your royal icing is at the perfect flood consistency and your cookies are cooled, follow these simple steps for a flawless, beautifully iced finish:
1. The Dunk: Gently grasp a cooled cookie by its very edges, ensuring your fingers are only on the sides and not touching the surface you intend to ice. Carefully dip the entire top surface of the cookie facedown into the bowl of royal icing. Make sure only the top surface comes into contact with the icing, keeping the sides clean for a crisp look.
2. The Drip & Flip: While still holding the cookie facedown, slowly lift it from the icing. Allow any excess icing to drip back into the bowl for a few seconds. This helps prevent too much icing on your cookie. Once the dripping slows, quickly but carefully flip the cookie over and immediately place it flat onto your clean counter or a parchment-lined surface.
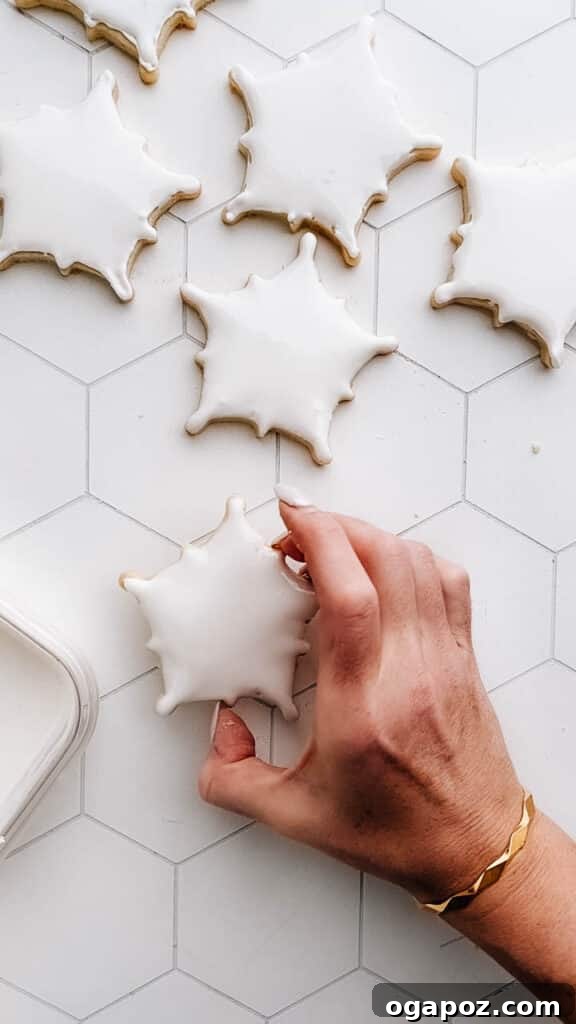
3. The Shake: Still holding the edges of the cookie (or gently placing your fingers on the un-iced edges), give it a quick, gentle back-and-forth shake on the countertop. This motion helps the royal icing settle and spread evenly across the surface, eliminating any streaks or bumps and creating that perfectly smooth, professional look. If there are any small gaps or trapped air bubbles, a toothpick can be used to gently guide the icing to fill empty spots or to pop the bubbles for a pristine finish.
While the dunk method provides a stunning and effortless base, you can always add intricate details. If you wish to create more elaborate snowflake designs, holiday motifs, or other patterns, you can use pastry bags fitted with small piping tips. However, be forewarned: achieving beautifully piped designs with royal icing is a high-level skill, often requiring much practice and patience, making it significantly more challenging than Instagram videos might make it appear!
Pro Tips and Tricks for Flawless Snowflake Cookies
Elevate your snowflake cookie baking with these expert tips designed to ensure perfect results and simplify your process, especially during busy holiday preparations. These insights will help you achieve beautifully shaped, perfectly baked, and flawlessly decorated festive treats.
- Mastering Butter Temperature: The consistency of your butter is paramount for the “reverse creaming” method. Ensure it is beautifully soft to the touch, but not melted or greasy, for optimal incorporation into the dough. If your butter is too cold, it won’t mix properly; if it’s too warm, the dough can become oily. If you’re short on time, there are quick methods to bring butter to room temperature, which will significantly impact the smoothness of your dough and the tenderness of your baked cookies.
- Bake by Size for Even Doneness: If you’re using various snowflake cookie cutter sizes—perhaps tiny ones and larger, more elaborate ones—it’s crucial to bake your smaller and larger cookies on separate baking sheets. Smaller cookies will bake much faster than larger ones, and baking them together risks burning the delicate little ones while the larger cookies are still undercooked or raw in the middle. Grouping by size ensures every cookie bakes to golden perfection with the ideal texture.
- Effortless Dough Removal: Rather than struggling to lift delicate cut-out shapes from the rolled dough, which can easily distort their intricate forms, try this clever trick: press your cookie cutter firmly into the rolled-out dough. Then, simply remove the excess dough scraps from around your shapes, leaving your perfectly formed snowflakes directly behind on the parchment paper. This method makes transferring them to the baking sheet much easier, faster, and prevents any stretching or tearing.
- Patience is Key for Icing Set Time: While it’s tempting to immediately devour your beautifully decorated cookies, patience is a virtue when working with royal icing. Allow your royal icing to set completely for at least eight hours (or even overnight) before stacking or packing them into containers. You can certainly sneak a taste sooner, but premature handling can smudge, crack, or crush the beautiful, delicate icing. A fully set icing ensures your cookies travel well, stack neatly, and look pristine for longer.
- Tackle Sticky Dough with a Quick Freeze: If, after re-rolling the dough a couple of times (which is common for cut-outs), it starts to get too soft or sticky, don’t despair! The warmth of your hands and the ambient room temperature can soften the butter, making the dough difficult to handle. For easier handling and cleaner, sharper cuts, simply gather the dough scraps, press them gently into a disk, and pop the entire piece of dough into the freezer for 5-10 minutes. This quick chill will firm it up, making it pliable and easy to roll and cut again without losing its shape.
- Preventing Dough Stickiness During Cutting: For particularly stubborn or soft doughs, especially when cutting and lifting intricate shapes, an additional trick is to slide a rimless baking sheet directly under your parchment-lined, rolled-out dough. Place the entire sheet into the freezer for a few minutes before cutting. This firming action makes lifting the cut shapes much cleaner and easier, ensuring your snowflakes remain perfectly intact.
Prepare Ahead and Storage Tips for Stress-Free Baking
Maximize your holiday enjoyment by preparing elements of your snowflake cookies in advance. These convenient tips will help you manage your time effectively, reduce last-minute stress, and ensure your cookies stay fresh and delicious for any occasion.
- Royal Icing Prep: You can prepare your royal icing up to 3 days before you plan to decorate your cookies. Store it in an airtight container in the refrigerator. To prevent a crust from forming, press a piece of plastic wrap directly onto the surface of the icing before sealing the container. Before use, let it come to room temperature and give it a good stir, adding a tiny bit of water if needed to regain the desired “flood” consistency.
- Cookie Dough Advance Prep: The cookie dough itself can also be made up to 3 days in advance. After mixing, roll it out as instructed, then chill it until firm. Wrap the rolled dough tightly in aluminum foil or plastic wrap to prevent it from drying out or absorbing refrigerator odors, and store it in the refrigerator. When you’re ready to bake, simply unwrap, let it sit for a few minutes to soften slightly if too hard, then cut, and bake!
Storage Instructions for Snowflake Cookies
Proper storage is essential to keep your decorated snowflake cookies fresh and beautiful for as long as possible:
- Once the royal icing has completely set and hardened (which takes at least 8 hours), store your cookies in an airtight container at room temperature. Layer them between sheets of parchment paper to prevent sticking. They will remain fresh, tender, and delightful for about a week.
- For longer storage, these cookies freeze exceptionally well for up to 3 months, making them perfect for preparing well in advance of a holiday event or enjoying treats long after the season.
How to Freeze Snowflake Cookies
Freezing these beautiful sugar cookies is a fantastic way to prepare ahead or preserve leftovers, ensuring you always have a festive treat on hand:
- Before or After Decorating: You can freeze these cookies either plain (after they’ve been baked and fully cooled) or fully decorated with royal icing.
- For Decorated Cookies: If freezing after decorating, it is absolutely crucial to let the royal icing dry and set completely for at least 8 hours beforehand. This firming up prevents any smudging, sticking, or damage to your beautiful decorations during freezing and thawing.
- Packaging for Freezing: To freeze, arrange the cookies in a single layer on a baking sheet and freeze until solid. Once solid, transfer them to airtight freezer bags or rigid freezer-safe containers. If stacking multiple layers of cookies, place a sheet of parchment paper or wax paper between each layer to prevent sticking and protect their delicate shapes.
- Protect from Damage: Sugar cookies, especially delicate snowflake shapes, can be prone to breaking. Ensure you store them in a part of your freezer where they won’t get bumped, crushed, or have heavy items placed on top of them.
- Thawing: When ready to enjoy, simply transfer the frozen cookies to the refrigerator overnight to thaw gently, or allow them to come to room temperature on the counter for a few hours. This slow thawing helps maintain their texture and prevents condensation from affecting the icing.
Frequently Asked Questions About Snowflake Cookies
For these royal icing snowflake cookies, always add your festive sprinkles after baking and after applying the royal icing, while the icing is still wet. This allows the sprinkles to adhere securely to the surface, ensuring they stay beautifully in place as you handle and enjoy your cookies. If you add them before baking, they will likely melt, bleed their colors, or lose their vibrant shine and crisp texture in the oven.
Royal icing needs a significant amount of time to fully dry and harden. To safely stack or pack your decorated snowflake cookies into storage containers without any risk of smudging, sticking, or damaging the delicate icing, allow at least 8 hours for the royal icing to set completely. In very humid environments, it might even take a bit longer, so it’s best to allow them to air dry in a cool, dry place.
To create a beautiful snowflake design on top of a flooded royal icing base, you’ll need royal icing at a slightly thicker consistency (about 15-20 seconds on the time-to-settle test, meaning it holds its shape better for piped details). Fill a pastry bag fitted with a small round tip (or a sturdy plastic bag with a tiny snipped corner). Begin by piping a “plus” symbol (+) directly onto the dry base icing layer. Then, pipe an “x” shape across the center of the plus, creating a starburst pattern. From there, you can add small dots, V-shapes, or tiny lines to the tips of each spoke to enhance the snowflake effect. The key is to work quickly and confidently before the piped icing lines start to set.
To ensure sugar crystals (or any decorative sugars like sanding sugar or edible glitter) adhere perfectly to your cookies, sprinkle them generously onto the royal icing immediately after you’ve applied it and while it is still wet and pliable. The wet icing acts as the “glue” that the crystals will embed into. Once the crystals are in place, leave the cookies undisturbed and allow the icing to dry completely. Do not move or touch the cookies until the icing is fully set, usually after 8 hours, to prevent any dislodging.
Yes, these sugar cookie snowflake cookies are excellent for freezing! You can freeze them after they’ve been baked and cooled, either before or after they’ve been decorated with royal icing. For decorated cookies, it is essential to ensure the icing has dried for a full 8 hours to prevent any smudging or damage during freezing and thawing. Store them in airtight freezer bags or sturdy containers for up to 3 months, taking care to prevent them from being crushed or broken due to their delicate nature.
Discover More Festive Recipes You’ll Adore
If you’ve enjoyed making these delightful snowflake cookies, we have a treasure trove of other holiday treats waiting for you! Explore our collections to find your next favorite festive bake and fill your home with the delicious aromas of the season:
- Start your culinary journey with all our best Christmas Cookies, featuring a wide array of flavors and styles perfect for gifting, sharing, and holiday parties.
- For those who prefer not to bake, or need quick solutions, our Easy No-Bake Christmas Treats offer fantastic options that are just as impressive and delicious.
- Indulge in rich, decadent flavors with our Chocolate Christmas Desserts – a collection of recipes that will make any chocolate lover swoon and are perfect for a luxurious holiday spread!
- Experience the timeless charm of European holiday baking with our traditional Italian Christmas Desserts, perfect for adding a touch of old-world elegance and authentic flavors to your celebrations.
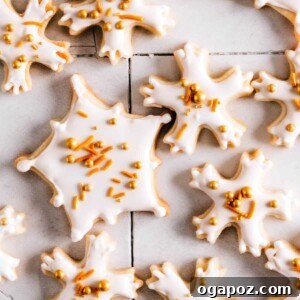
Easy Snowflake Cookies (1 Bowl, 5 Ingredient, No Chill Recipe!)
Jennifer Pallian BSc, RD
30
10
8
22
cookies
Video Tutorial
Ingredients
- 2 ¾ cups all-purpose flour (12.5 oz per batch – weight method strongly recommended for accuracy)
- 1 cup granulated sugar
- ⅓ tsp fine sea salt
- 1 cup salted butter (softened and cut into cubes; if using unsalted butter, increase salt to ⅔ tsp)
- 1 large egg
- 1 tbsp vanilla extract
- 1 tbsp lemon zest (finely grated, optional, or 1/2 tsp lemon extract for alternative flavor)
- 1 batch royal icing (ingredients for which are listed below)
For Royal Icing:
- 3 cups confectioners’ sugar
- 2 egg whites (from large eggs, or use 4 tsp meringue powder + 5 tbsp water)
- 1-2 tbsp water (plus more as needed to reach flood consistency)
- ½ tsp vanilla extract
Instructions
For Snowflake Cookies:
-
Preheat your oven to 350ºF (175ºC). Prepare your baking sheets by lining them with parchment paper; this prevents sticking and ensures easy cleanup.
-
In the bowl of a stand mixer fitted with the paddle attachment, combine the all-purpose flour, granulated sugar, and fine sea salt. Beat on low speed for about 30 seconds to thoroughly mix and aerate the dry ingredients.
-
Add the softened, cubed butter to the dry mixture. Start beating on low speed to incorporate the butter. Gradually increase the speed to medium-high as the butter breaks up and mixes into the flour. Continue beating until the entire mixture resembles coarse crumbs, indicating the butter is evenly distributed.
-
Now, add the large egg, vanilla extract, and the optional lemon zest (if using). Beat on medium-high speed for approximately 30 seconds, or until all ingredients are fully incorporated and the dough begins to come together. If your mixer is powerful, the dough might form a cohesive ball; otherwise, simply transfer the crumbly mixture onto a piece of parchment paper and gently press and knead it together by hand to form a smooth disc.
-
Place the dough disc between two sheets of parchment paper. Using a rolling pin, roll the dough out evenly to a thickness of 1/4 inch. This consistent thickness is key for even baking.
-
Dip your snowflake cookie cutters in flour before each cut to prevent sticking. Press firmly into the rolled dough to cut out your desired shapes. For easy transfer, remove the dough scraps from around the cut shapes, leaving the snowflakes on the parchment paper. Then, carefully lift the parchment paper with the cookies and transfer it to your prepared baking sheets.
-
Bake in the preheated oven, on the center rack. For standard 3-inch cookie shapes, bake for 10-12 minutes. Look for the very edges to just begin turning golden, and the middles of the cookies should appear set and no longer shiny. Add 1 minute more for every 1 inch larger cookie size (or the cookie will have a raw flour taste in the middle).
-
Once baked, immediately transfer the cookies to a wire rack to cool completely.
For Royal Icing and Decorating:
-
To make the royal icing, combine confectioners’ sugar, egg whites (or meringue powder mixture), 1 tablespoon of water, and vanilla extract in the bowl of a stand mixer. Begin beating on low speed until all the sugar is moistened and the mixture is well combined.Increase the speed to medium-high and beat for 1-2 minutes until soft peaks form. The icing should be glossy and smooth.
-
Achieve “flood” consistency by adding more water, 1/2 teaspoon at a time. Stir well after each addition and perform the “10-second test”: run a spatula through the icing; it should settle back to a smooth surface within 10-15 seconds. This consistency is ideal for smooth, even coverage using the dunking method.
-
Once cookies are cool enough to handle, begin decorating. Hold a cookie by its edges and carefully dip just the top surface facedown into the royal icing.Lift the cookie, allowing any excess icing to drip back into the bowl. Immediately flip the cookie over and gently place it on a clean countertop or parchment-lined surface.
-
Grasp the edges of the iced cookie and give it a quick, gentle back-and-forth shake on the countertop. This helps the icing spread evenly and become perfectly smooth. Use a toothpick or the tip of a paring knife to gently guide the icing into any gaps or intricate details of the snowflake outline, or to pop any air bubbles.
-
If you are adding sprinkles or decorative sugars, do so immediately after icing each cookie, while the royal icing is still wet. This ensures they adhere properly.
-
Allow the decorated cookies to dry completely for at least 8 hours (or overnight) before stacking or packing them into airtight containers. This crucial step prevents the icing from smudging or sticking.
Recipe Notes & Expert Tips
- Meringue Powder Alternative: If you prefer to use meringue powder instead of fresh egg whites for your royal icing (which offers better stability and eliminates raw egg concerns), substitute 4 teaspoons of meringue powder and 5 tablespoons of water for the egg whites in the icing recipe.
- Recipe Yield: This recipe typically yields about 20-22 snowflake cookies when using a 3-inch cookie cutter. Feel free to easily double or triple the recipe to create a larger batch for parties, gifting, or freezing.
- Adjusting for Unsalted Butter: Should you opt for unsalted butter in your cookie dough, it’s essential to compensate for the missing salt. Double the fine sea salt amount in the cookie dough ingredients to ensure the flavor remains perfectly balanced and not overly sweet.
- Smart Cutting Technique: To prevent stretching or distorting your delicate snowflake shapes, rather than trying to lift the cut cookies out of the dough, gently press your cookie cutters into the rolled dough. Then, remove the surrounding dough scraps, leaving the clean shapes directly on the parchment paper. This method makes transferring them to the baking sheet much easier.
- Icing Drying Time is Crucial: Patience is a virtue when it comes to royal icing! Allow your beautifully decorated cookies to set for a minimum of eight hours before stacking or storing them. This hardening period prevents smudges and ensures the integrity of your decorations. You can, of course, enjoy a few sooner!
- Re-rolling Dough & Softness: The butter in your dough may soften with repeated handling and re-rolling. If the dough becomes too sticky or difficult to work with, gather the scraps, press them into a disk, and pop the entire piece of dough into the freezer for 5-10 minutes. A quick chill will firm it up, making it pliable and easy to cut again.
- Preventing Dough Stickiness: For particularly stubborn or soft doughs, especially when lifting intricate shapes, slide a rimless baking sheet directly under your parchment-lined, rolled-out dough. Place the entire sheet into the freezer for a few minutes. This firming action makes lifting the cut shapes much cleaner and easier.
Nutrition Information (per cookie)
Carbohydrates: 13g |
Protein: 1g |
Fat: 6g |
Saturated Fat: 4g |
Cholesterol: 27mg |
Sodium: 38mg |
Sugar: 4g
Nutrition information is automatically calculated and should be used as an approximation. It may vary based on specific ingredients and brands used.
Tried this recipe? Share your experience in the comments!
Your feedback helps others discover delicious recipes.