
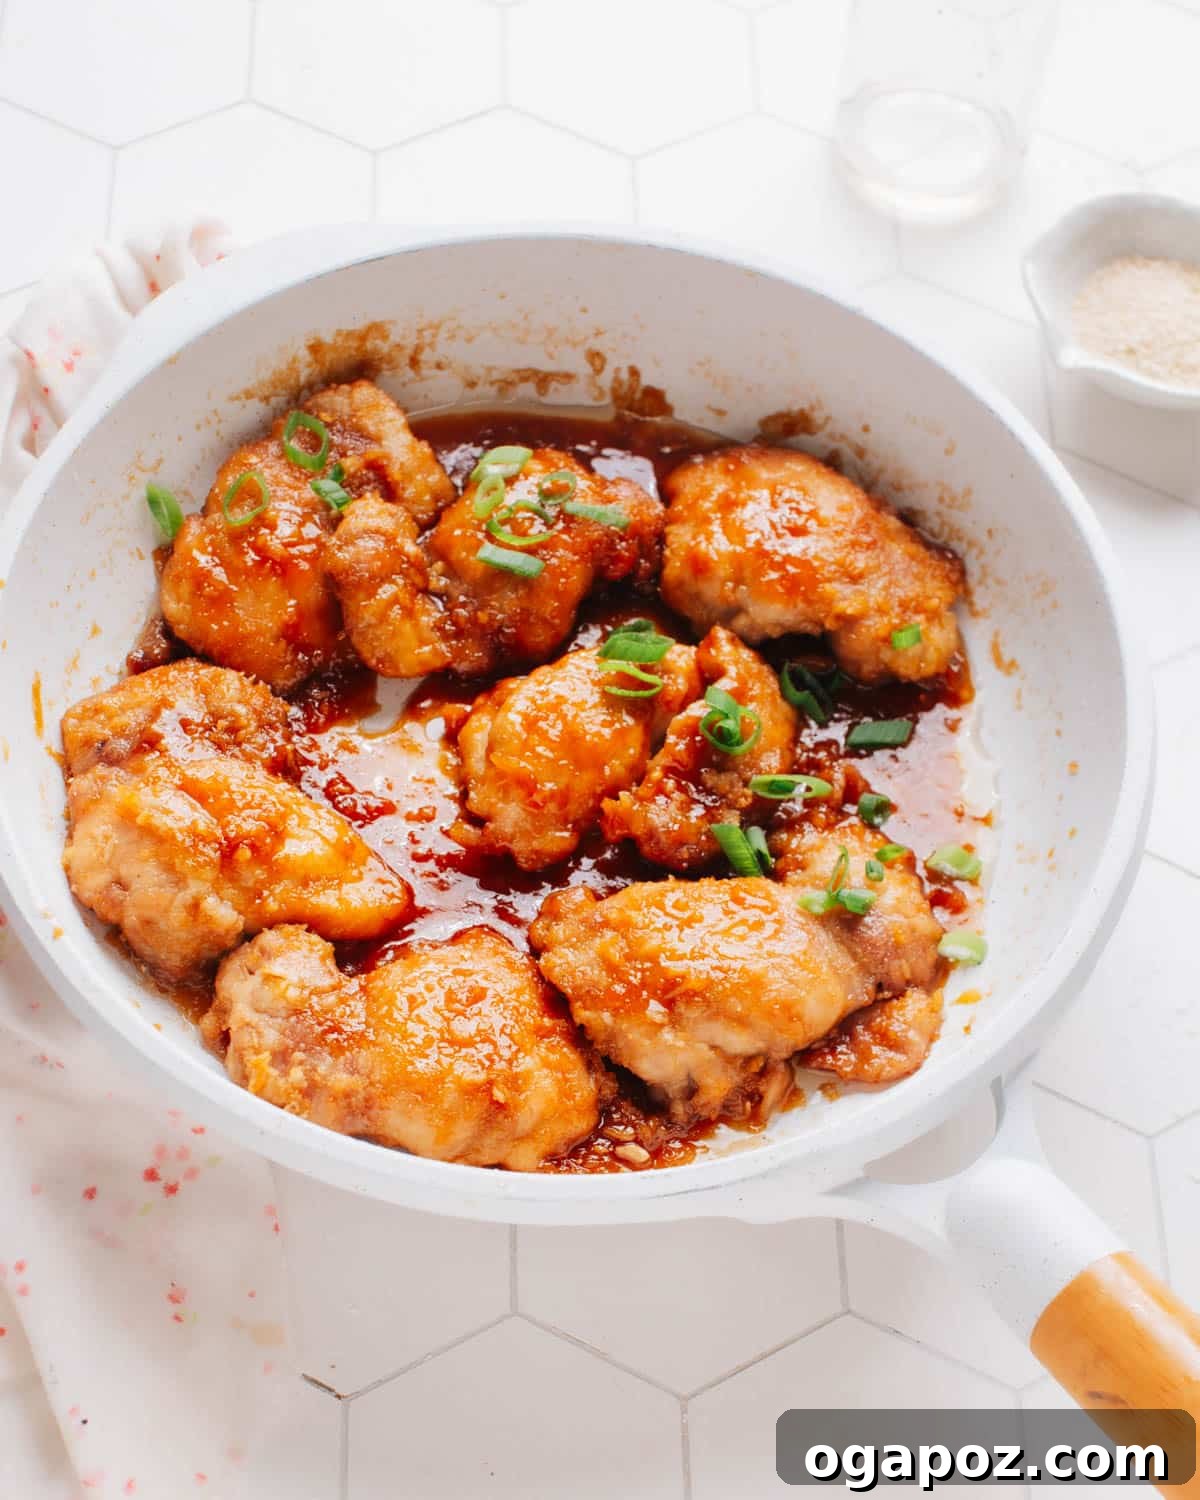
Ultimate Garlic Ginger Chicken: A Sticky, Savory, and Seriously Easy Takeout Fakeout
Prepare to fall in love with this Garlic Ginger Chicken recipe, where succulent pieces of chicken are generously coated in the most captivating, sticky garlic honey ginger sauce. This isn’t just another chicken dish; it’s a culinary revelation that tastes remarkably like your favorite Chinese takeout, yet it’s surprisingly simple to prepare right in your own kitchen. Perfect for those busy weeknights when you crave something incredibly flavorful without the fuss, this recipe promises tender chicken every time. Follow along for my expert tips and tricks to achieve the juiciest, most flavorful results that will have everyone asking for seconds!
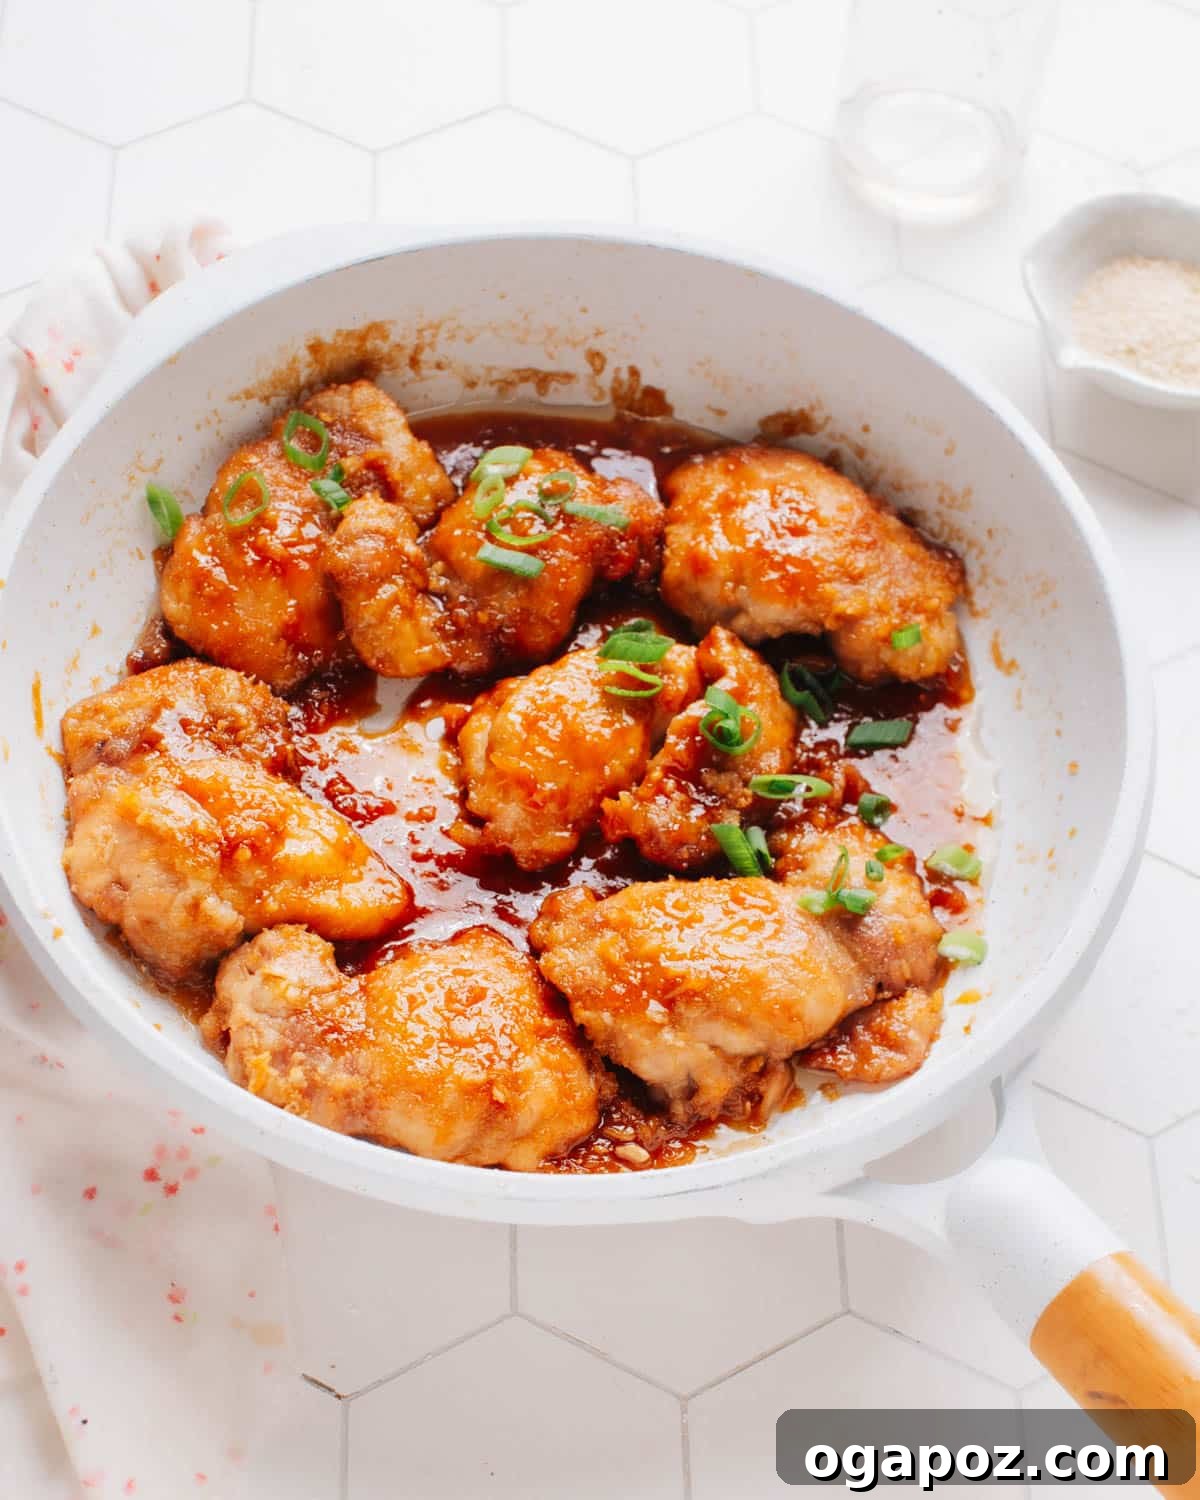
Why This Garlic Ginger Chicken Recipe Will Become Your Favorite
There’s a reason this Garlic Ginger Chicken has quickly become a staple in countless kitchens. Beyond its irresistible flavor profile, it offers a perfect blend of convenience, versatility, and sheer deliciousness. Here’s why you’ll want to add this to your regular dinner rotation:
- Uncomplicated Excellence: Despite its gourmet taste, the steps are straightforward, making it accessible even for novice cooks.
- Faster Than Delivery: Forget waiting for takeout! This dish comes together quicker than most delivery services, ensuring a fresh, hot meal on your table in minutes.
- Family-Friendly Flavors: The sweet and savory balance, combined with the gentle warmth of ginger, appeals to a wide range of palates, making it a guaranteed hit with kids and adults alike.
- Healthier Home Cooked: By preparing it at home, you control the ingredients, allowing you to opt for fresh, wholesome components and adjust sweetness or saltiness to your preference.
- Perfect Texture: The cornstarch coating creates a delightful crisp exterior on the chicken, which then wonderfully absorbs the rich, sticky sauce, delivering an amazing textural contrast.
Essential Ingredients for Unforgettable Garlic Ginger Chicken
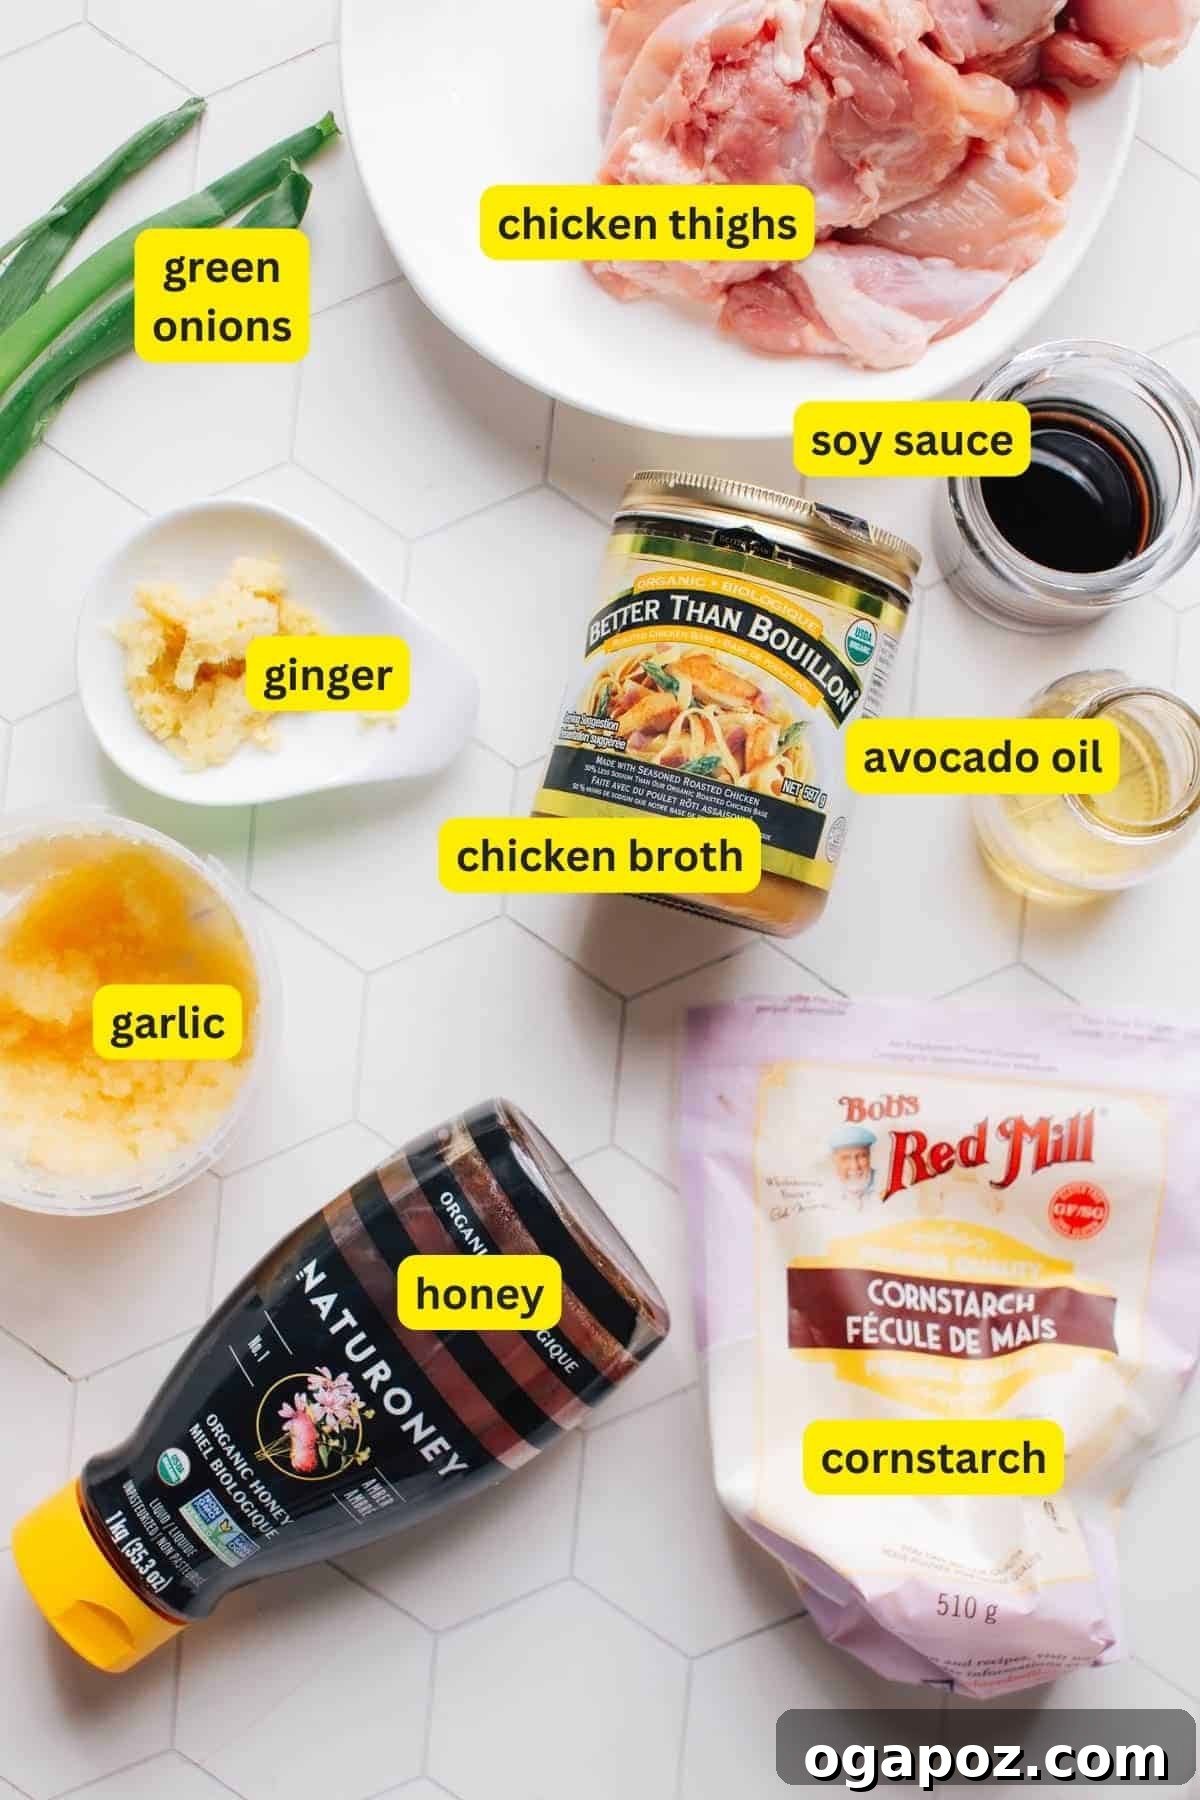
To whip up this incredible Garlic Ginger Chicken, you’ll need a handful of accessible ingredients that pack a punch. Each component plays a crucial role in building the layers of flavor that make this dish so special. Gather these before you begin:
For the Crispy, Juicy Chicken:
- Boneless Skinless Chicken Thighs: These are the star of our dish, chosen for their superior tenderness and flavor compared to leaner cuts. Thighs stay juicy even if slightly overcooked, making them forgiving and perfect for this recipe. You’ll need about 1 ½ lbs, which is approximately 6 medium-sized thighs. While boneless, skinless chicken breasts can be substituted, be mindful to slice them in half crosswise or pound them to an even thinness. This ensures they cook quickly and evenly, preventing them from drying out, which breasts are prone to do.
- Cornstarch: This secret weapon is essential for creating that desirable crispy coating on our chicken. It also helps to lock in moisture, ensuring each bite is incredibly juicy. Furthermore, any residual cornstarch on the chicken will naturally help to thicken the sauce later, giving it that luxurious, sticky consistency.
- Kosher Salt: A fundamental flavor enhancer, kosher salt seasons the chicken from within, elevating its natural taste. Its coarser texture also helps with the browning process.
- Avocado Oil: Ideal for high-heat cooking due to its high smoke point, avocado oil provides a neutral base for searing the chicken without imparting unwanted flavors. Other high-smoke-point oils like canola or grapeseed oil can also be used.
For the Irresistible Honey Garlic Ginger Sauce:
- Honey: The primary source of sweetness, honey contributes to the sauce’s sticky texture and deep golden color. It also offers a nuanced flavor that pairs beautifully with the ginger and garlic. If you’re out of honey, brown sugar can be used as an alternative, providing a similar caramel-like sweetness.
- Chicken Broth: This liquid gold adds depth and savory richness to the sauce without making it overly heavy. It acts as a flavorful diluent for the soy sauce and honey, creating a balanced base.
- Soy Sauce: The cornerstone of many Asian-inspired dishes, soy sauce delivers that essential umami kick and a perfectly salty foundation. For a gluten-free option, tamari works wonderfully as a substitute.
- Minced Garlic Cloves: Fresh garlic is paramount for its pungent aroma and vibrant flavor that truly defines this dish. Aim for freshly minced cloves if possible; however, pre-minced garlic from a jar is a convenient weeknight shortcut that still delivers a good garlic punch.
- Fresh Ginger: The warming, zesty kick of fresh ginger is what sets this recipe apart. Grated fresh ginger infuses the sauce with its distinctive aromatic warmth, balancing the sweetness and complementing the garlic perfectly.
- Green Onions: Used as a garnish, sliced green onions add a crisp, fresh finish, a pop of color, and a mild oniony bite that brightens the entire dish. Don’t skip them!
If you find yourself captivated by the sweet and savory symphony of flavors in this dish, especially the teriyaki-like notes, you’ll absolutely adore my Teriyaki Salmon recipe as well. It offers a similar profile with a delicious seafood twist!
How to Make Ginger Garlic Chicken: Easy Step-by-Step Directions
Let’s get down to business and transform these simple ingredients into a spectacular meal. Follow these easy steps to create your own perfectly sticky and flavorful Garlic Ginger Chicken:
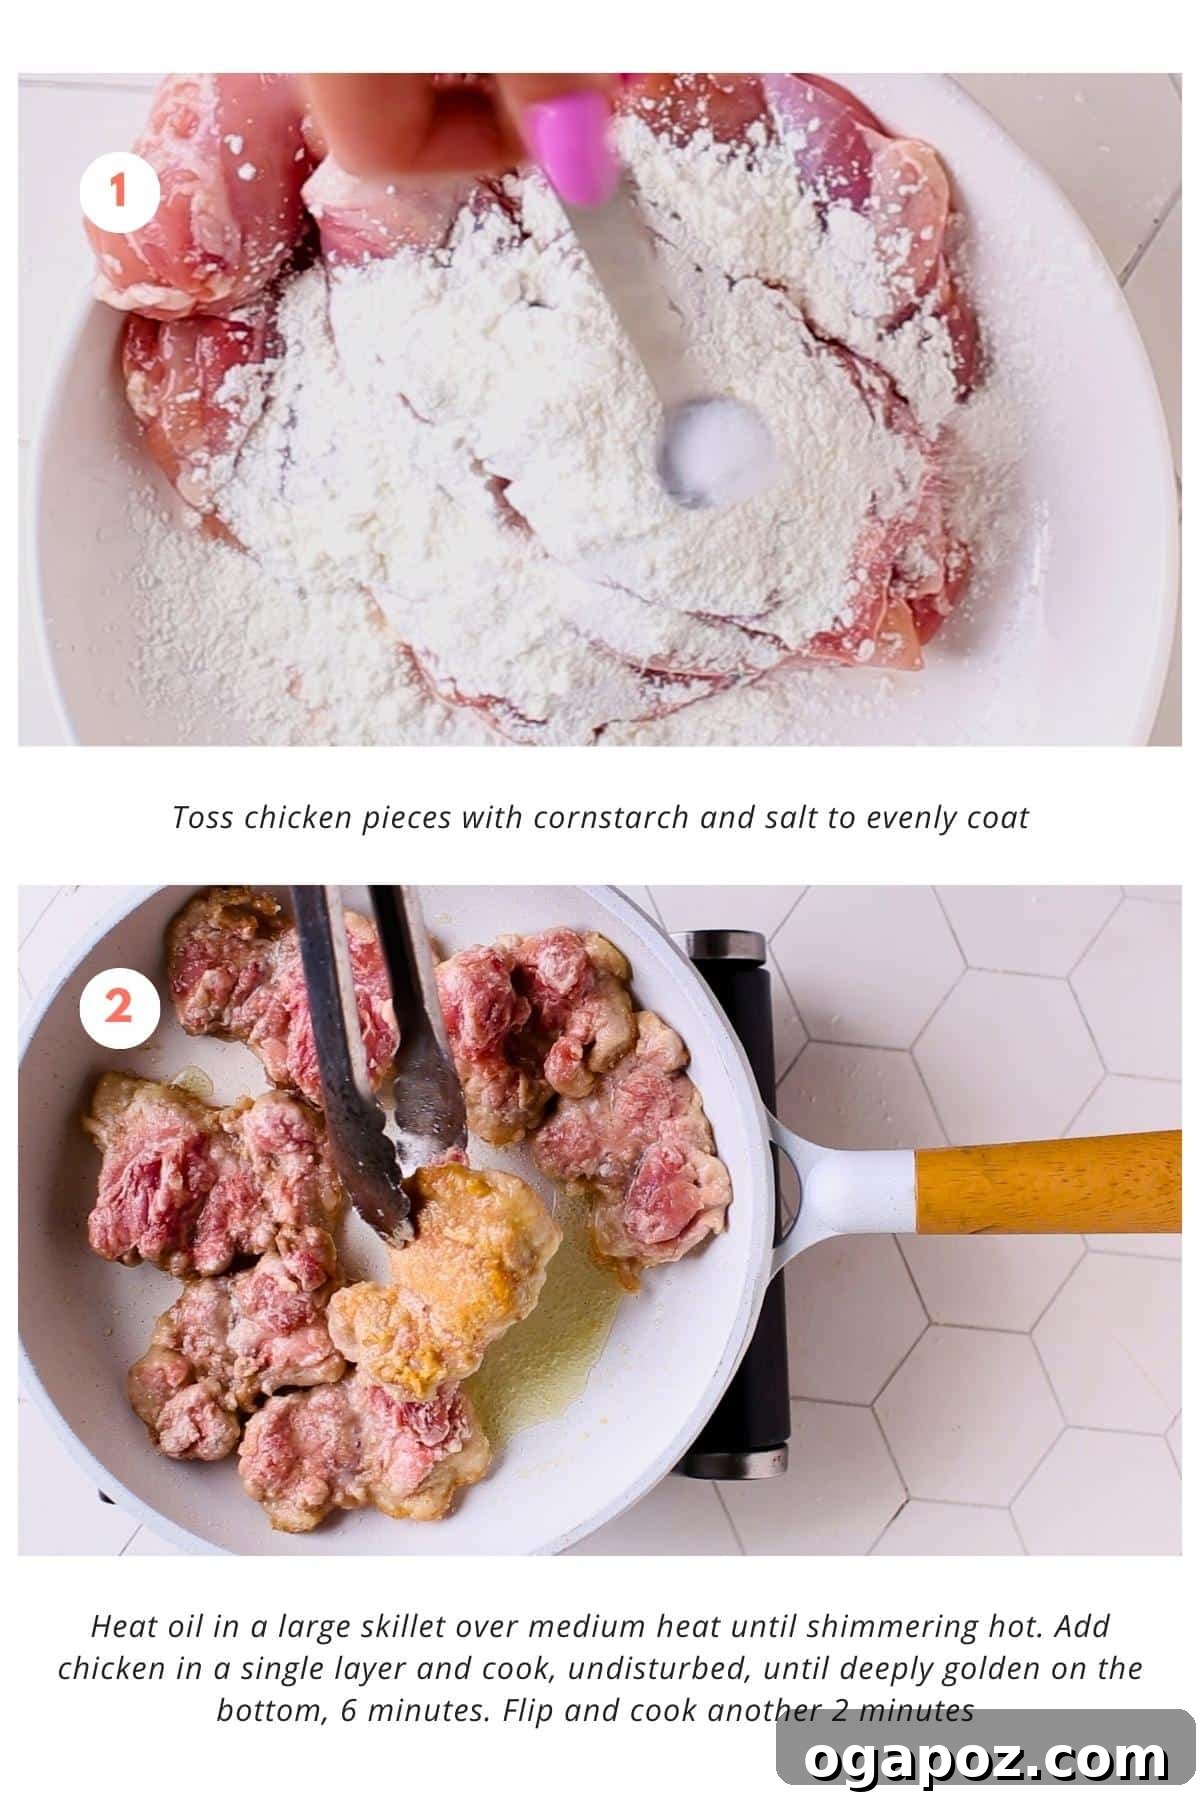
- Prepare the Chicken for Searing: In a medium bowl, combine your bite-sized chicken pieces with cornstarch and kosher salt. Toss them thoroughly, ensuring every surface of each chicken piece is evenly coated. This crucial step creates a dry surface on the chicken, which is key for achieving a beautiful golden-brown crust when seared, while also locking in all the delicious moisture for tender results.
- Sear the Chicken to Golden Perfection: Place a large skillet (cast iron or non-stick works best) over medium-high heat. Add the avocado oil and let it heat until it’s shimmering. Carefully add the coated chicken pieces to the hot skillet in a single layer, ensuring not to overcrowd the pan. If necessary, cook in batches to allow for proper browning. Let the chicken cook, undisturbed, for approximately 6 minutes, until a deep golden-brown crust forms on the bottom. The majority of the cooking will happen on this first side. Flip the chicken and cook for another 2 minutes. At this stage, don’t worry about cooking the chicken all the way through, as it will finish cooking in the sauce.
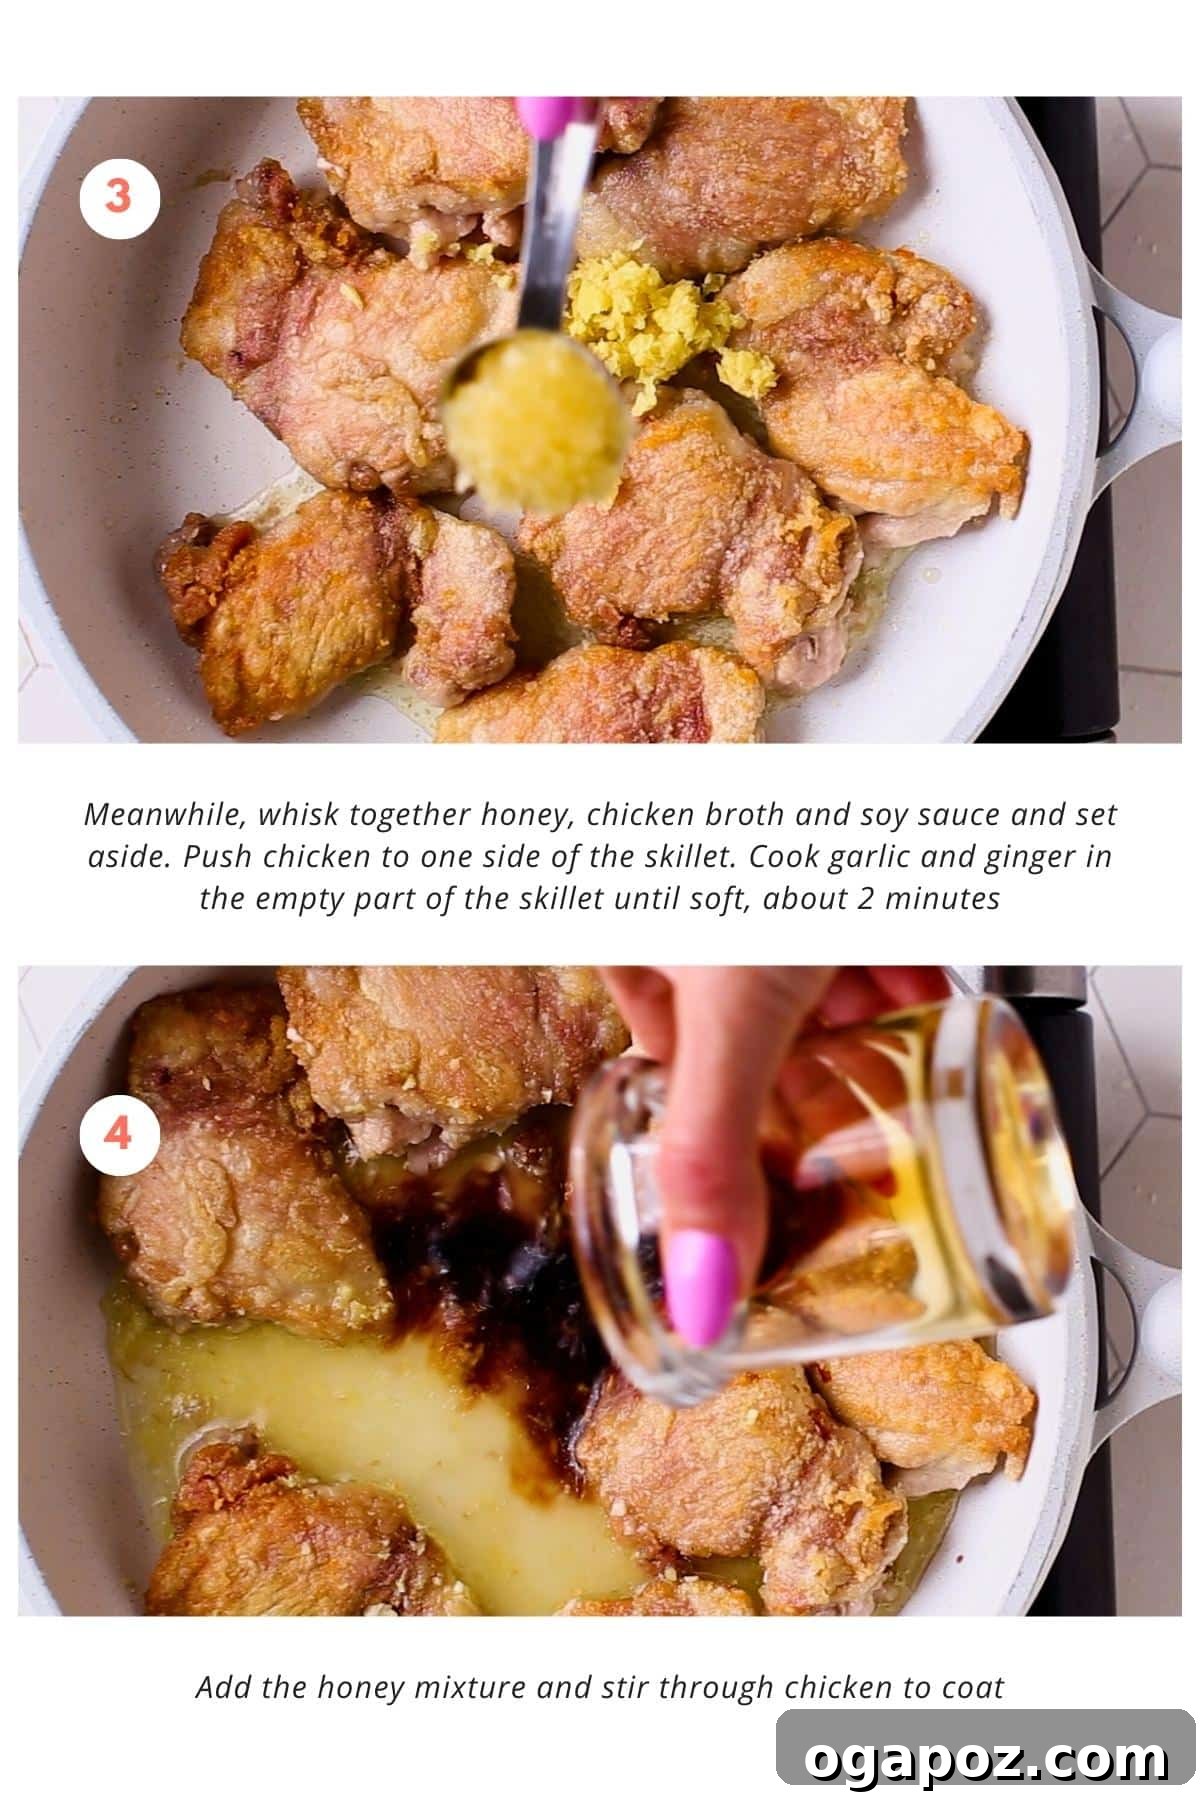
- Prepare the Honey Garlic Ginger Sauce: While your chicken is busy getting gloriously crispy, it’s time to prepare the star sauce. In a small bowl, whisk together the honey, chicken broth, and soy sauce until well combined. Alternatively, for minimal cleanup, you can simply measure these ingredients directly into the pan later without dirtying an extra bowl.
- Infuse with Aromatics: Once the chicken has been seared on both sides, gently push it to one side of the skillet, creating a clear space in the center. Into this empty section, add your minced garlic and grated fresh ginger. Sauté these aromatics for about 2 minutes, stirring constantly, until they become wonderfully fragrant and slightly softened. Be careful not to burn them.
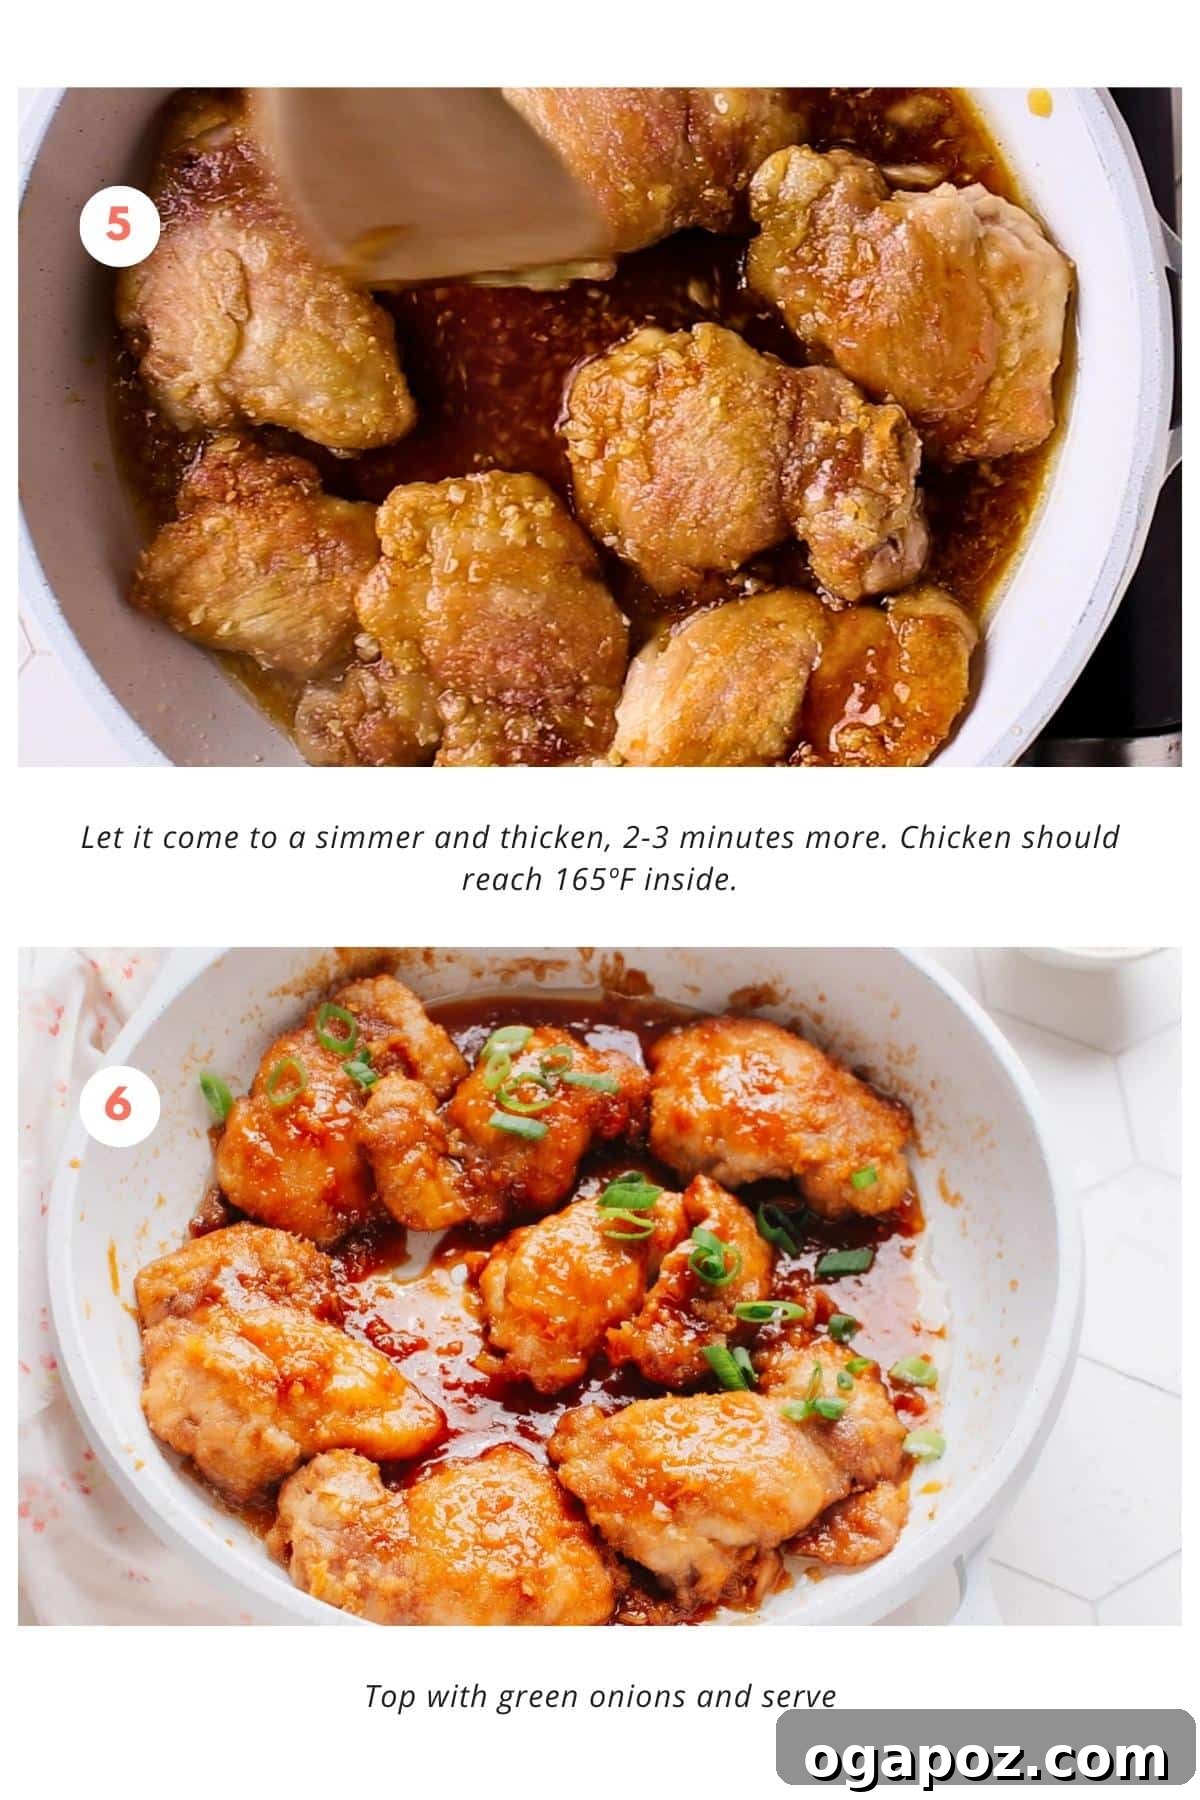
- Combine and Thicken the Sauce: Now, pour the whisked honey mixture directly into the skillet, allowing it to mingle with the fragrant garlic and ginger. Stir everything together, ensuring the chicken pieces are thoroughly coated in the burgeoning sauce. Bring the mixture to a gentle simmer and let it cook for an additional 2-3 minutes. During this time, the sauce will naturally thicken to a luxurious, sticky consistency, clinging beautifully to the chicken. Ensure that the chicken reaches an internal temperature of 165ºF (74ºC) for food safety.
- Garnish and Serve: The final touch! Sprinkle a generous amount of freshly sliced green onions over the finished dish. For an added layer of flavor and visual appeal, a few toasted sesame seeds make a delightful finish. Serve immediately and enjoy!
Expert Tips and Tricks for the Best Garlic Ginger Chicken
Unlocking the secrets to a truly top-tier Garlic Ginger Chicken is simpler than you might imagine. These culinary insights will help you achieve restaurant-quality results every single time:
- Prioritize Freshness: The flavor impact of using fresh ginger and garlic cannot be overstated. While jarred minced garlic is acceptable for convenience, fresh ingredients provide a brighter, more pungent aroma and a depth of flavor that genuinely elevates your dish. Remember, it’s often the small, quality details that make the biggest difference.
- Master Chicken Prep for Texture: The cornstarch coating is a game-changer. It doesn’t just create a golden crust; it also ensures the chicken surface is dry, which is critical for proper browning. More importantly, it locks in the natural juices, guaranteeing a moist and tender bite. Don’t skip this step!
- The Golden Rule of Searing: Never overcrowd your pan when frying the chicken. Giving each piece ample space is essential. Overcrowding lowers the pan’s temperature, leading to steaming rather than searing. This prevents the chicken from developing that coveted gorgeous golden-brown, crispy crust. Cook in batches if necessary.
- Strategic Aromatic Addition: Timing is everything when it comes to ginger and garlic. Always add them to the pan *after* you’ve given your chicken a good sear. This prevents these delicate aromatics from burning and turning bitter, ensuring their vibrant flavors infuse the dish at just the right moment.
- Temperature Check for Safety and Juiciness: While the visual cues are helpful, using a meat thermometer is the most reliable way to ensure your chicken is perfectly cooked. Aim for an internal temperature of 165ºF (74ºC). This guarantees food safety without overcooking, keeping the chicken wonderfully juicy.
- Adjust Sauce Consistency: The cornstarch from the chicken usually thickens the sauce sufficiently. However, if your chicken releases a lot of moisture (which can happen, especially if it was previously frozen), and the sauce seems too thin, whisk together 1 tablespoon of cornstarch with 1 tablespoon of cold water to create a slurry. Stir this slurry into the simmering sauce gradually until it reaches your desired thickness.
How to Serve Garlic Ginger Chicken for a Complete Meal
This versatile Garlic Ginger Chicken is delicious on its own, but it truly shines when paired with complementary sides. Let’s transform it into a complete, satisfying meal! Here are some of my favorite ways to serve it:
- Over Fluffy Rice: The classic pairing! Pile that irresistible sticky goodness over a bed of steaming hot jasmine or white rice. The rice will lovingly soak up every drop of that incredible garlic-ginger glaze, making each spoonful a delight.
- Noodle Nest: For a comforting and twirl-worthy meal, serve your tangy chicken with a nest of noodles. Explore options like chili oil ramen, classic chow mein noodles, or simply boiled egg noodles or rice noodles. The sauce clings beautifully to the strands, creating a symphony of textures and flavors.
- Stir-Fry Friend: Elevate this dish into a one-pan wonder! After searing your chicken, you can use the same skillet to quickly sauté your favorite vegetables. Broccoli florets, sliced zucchini, julienned carrots, bell peppers, or snap peas work wonderfully. For an extra boost of flavor, consider adding a dash of this easy 3-ingredient stir-fry sauce to your veggies.
- Fresh Lettuce Wraps: For a lighter, incredibly fresh, and vibrant bite, spoon a generous amount of Garlic Ginger Chicken into crisp lettuce leaves (such as butter lettuce or romaine hearts). Top with some crunchy red pepper flakes for a kick and fresh cilantro for herbaceous brightness. This option is unexpectedly delicious and one of my personal favorites!
- DIY Asian-Inspired Bowl: Get creative and build your own custom bowl. Start with a base of brown rice, quinoa, or cauliflower rice for a low-carb option. Add your Garlic Ginger Chicken, then layer with colorful toppings like edamame, thinly sliced cucumber, quick pickled onions, and a dollop of spicy mayo or sriracha for a creamy, zesty finish. Trust me, this combination is a game-changer!
Make Ahead and Storage Tips for Convenience
Who says you can’t have tomorrow’s lunch sorted while thoroughly enjoying tonight’s dinner? With these smart make-ahead and storage tips, your future self will undoubtedly thank you for the delicious foresight:
- Cook Now, Sauce Later (Optional for Meal Prep): If you’re planning for multiple meals throughout the week, you can cook the chicken and store it separately from the sauce. When you’re ready to eat, simply reheat the chicken and then toss it with freshly warmed sauce for that just-cooked freshness and best texture. This method helps prevent the chicken from becoming overly soft if it sits in the sauce for too long.
- Effortless Freezing: This dish freezes beautifully! Once the cooked Garlic Ginger Chicken has cooled completely, portion it into individual freezer-safe containers or heavy-duty freezer bags. Ensure they are airtight to prevent freezer burn. Freeze for up to 2-3 months. You’ve just stocked your freezer with your own homemade ready meals – take that, freezer aisle!
- Fridge-Friendly Storage: Your delicious Garlic Ginger Chicken will comfortably chill in an airtight container in the refrigerator for up to four days. This makes it an ideal candidate for meal prepping lunches or having quick dinners at your fingertips throughout the week.
- Reheating Like a Pro: For best results, reheat the chicken and sauce gently. You can use a microwave for a quick reheat (stirring halfway through) or warm it on the stovetop over medium-low heat until piping hot. If reheating from frozen, thaw it in the refrigerator overnight first. Always ensure the chicken is heated through to an internal temperature of 165ºF (74ºC) before serving. Safety first, folks!
- Smart Container Choices: Invest in good quality airtight containers. This isn’t just for freshness; it also helps to lock in those wonderful flavors and prevents your fridge from smelling like a vibrant spice market (though, admittedly, that doesn’t sound too bad!). Glass containers are excellent as they don’t absorb odors or colors.
Remember, the only thing better than a tasty meal is a tasty meal that’s ready exactly when you are. Go ahead, stash some away for a flavor-packed, stress-free meal. You’ve earned that convenience!
Frequently Asked Questions About Garlic Ginger Chicken
You’ve got questions, and we’ve got answers. Let’s tackle some of your burning curiosities about this fantastic Garlic Ginger Chicken recipe:
Simply follow our detailed step-by-step guide above! You’ll be searing cornstarch-coated chicken, building a savory honey-garlic-ginger sauce in the same pan, and simmering it all to sticky perfection. You’ll be serving up a ginger chicken to be proud of in no time.
Ginger is a foundational ingredient in countless Chinese dishes, adding warmth and zest. Popular examples include Kung Pao Chicken, Ginger Beef Stir Fry, Steamed Fish with Ginger and Scallions, and of course, our very own irresistible Garlic Ginger Chicken. It’s truly a versatile and beloved spice in Chinese cuisine.
The cooking time largely depends on the size and thickness of your chicken pieces. For our recipe, which uses boneless, skinless chicken thighs cut into bite-sized pieces, it typically takes about 6 minutes to achieve a deep golden sear on the first side, followed by another 2 minutes after flipping. It will then finish cooking through as it simmers in the sauce, reaching an internal temperature of 165ºF (74ºC).
No, despite often being paired together in the kitchen, ginger and garlic belong to entirely different botanical families. Ginger (Zingiber officinale) is part of the Zingiberaceae family, which also includes turmeric and cardamom. Garlic (Allium sativum) is a member of the Amaryllidaceae family, along with onions, leeks, and chives. They may be from different families, but they certainly make a killer team in the kitchen!
For optimal flavor and to prevent burning, it’s best to add your minced garlic and grated ginger to the pan after you’ve seared your main protein (like the chicken in this recipe). This allows them to quickly become fragrant and infuse the dish without charring, ensuring their delightful flavors permeate the entire meal.
If You Love Quick, Easy Asian Takeout-Inspired Recipes, You Must Also Try These:
If you’re as obsessed with the convenience and incredible flavors of Asian takeout as I am, then you absolutely must try some more of my favorite Takeout Fakeout recipes. They bring the restaurant experience home, often with healthier ingredients and always with maximum flavor!
- Hunan Shrimp: A fiery and flavorful Chinese shrimp dish with a garlicky kick, often ready in under 30 minutes!
- Chicken and Broccoli: A quick, healthy, and incredibly satisfying dinner that’s a staple for a reason.
- Chow Mein Noodles: Recreate this beloved takeout classic at home with fresh ingredients for an authentic taste.
- Thai Red Curry: Dive into the rich, spicy, and creamy world of Thai red curry coconut chicken.
- Pad Woon Sen (Thai Glass Noodle Stir Fry): Experience a flavor explosion with these delightful Thai noodles, balanced beautifully with an array of fresh veggies.
- Gochujang Chicken: A vibrant and flavorful Korean-inspired chicken dish featuring the unique spicy and savory notes of gochujang sauce.
- Orange Chicken: The sweet, tangy, and irresistibly crispy diva of Chinese-American dishes, perfected for your kitchen.
- Thai Basil Pork: A classic Thai stir-fry bursting with savory flavors and the fragrant aroma of fresh basil.
- Honey Garlic Chicken: If you can’t get enough of sticky, saucy chicken, this is the ultimate easy fix.
Print Recipe
Garlic Ginger Chicken
Jennifer Pallian BSc, RD
10 minutes
15 minutes
25 minutes
4
Video Tutorial
Watch the video below to see how easy it is to make this Garlic Ginger Chicken!

Equipment
-
Measuring Cups and Spoons
-
Chef’s Knife
-
Cutting Board
-
Mixing Bowl
-
Non-stick Pan (or Cast Iron Skillet)
-
Tongs
-
Meat Thermometer
-
Airtight Storage Containers
Ingredients
- 1 ½ lbs boneless skinless chicken thighs (about 6)
- 4 tbsp cornstarch
- ½ tsp kosher salt
- 3 tbsp avocado oil (or other high smoke point oil)
- 4 tbsp honey
- ⅓ cup chicken broth
- 2 tbsp soy sauce
- 1 tbsp minced garlic
- 2 tbsp fresh ginger (grated)
- 2 green onions (sliced, for garnish)
Instructions
-
Toss chicken pieces with cornstarch and salt to evenly coat.
-
Heat oil in a large skillet over medium-high heat until shimmering hot. Add chicken in a single layer and cook, undisturbed, until deeply golden on the bottom, about 6 minutes. Most of the cooking is done on the first side. Flip and cook another 2 minutes (don’t worry about cooking it through yet).
-
Meanwhile, whisk together honey, chicken broth, and soy sauce and set aside. Alternatively, you can directly add them to the pan later.
-
Push chicken to one side of the skillet. Cook garlic and ginger in the empty part of the skillet until soft and fragrant, about 2 minutes.
-
Add the honey mixture and stir through chicken to coat. Let it come to a simmer and thicken, 2-3 minutes more. Chicken should reach an internal temperature of 165ºF (74ºC).
-
Top with fresh green onions and serve immediately. A sprinkle of toasted sesame seeds is also a lovely addition.
Notes
Nutrition
Calories:
404
kcal
|
Carbohydrates:
27
g
|
Protein:
34
g
|
Fat:
18
g
|
Saturated Fat:
3
g
|
Polyunsaturated Fat:
3
g
|
Monounsaturated Fat:
10
g
|
Trans Fat:
0.03
g
|
Cholesterol:
162
mg
|
Sodium:
1022
mg
|
Potassium:
490
mg
|
Fiber:
0.5
g
|
Sugar:
18
g
|
Vitamin A:
101
IU
|
Vitamin C:
2
mg
|
Calcium:
28
mg
|
Iron:
2
mg
Nutrition information is automatically calculated, so should only be used as an approximation.
Tried this recipe? Leave a comment!
Your feedback helps others discover delicious meals.