
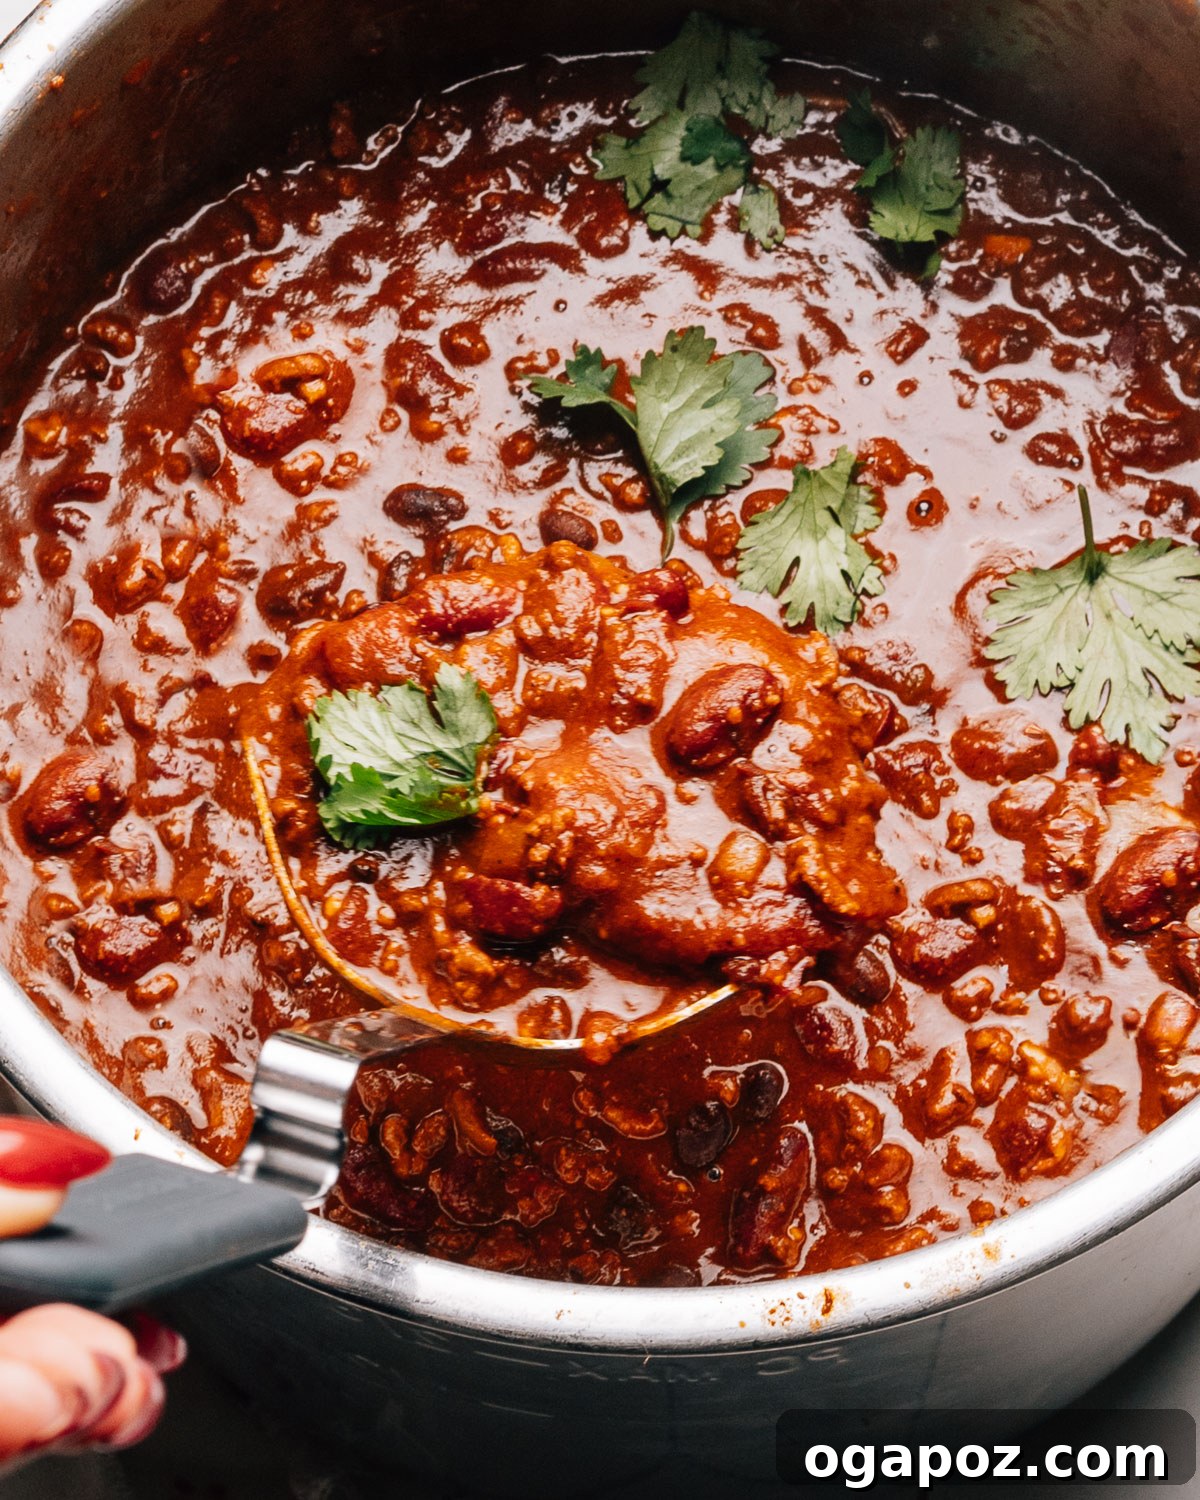
Welcome to your new favorite way to make Instant Pot Chili! This recipe delivers a wonderfully thick, hearty, and flavor-packed chili with ground beef and beans, all cooked quickly in your pressure cooker. What makes this recipe truly stand out are the ingenious tricks designed to ensure it won’t burn to the bottom – a common frustration with many other Instant Pot chili recipes. Get ready to enjoy rich, slow-simmered flavor in a fraction of the time, making it perfect for busy weeknights or a comforting weekend meal.

Chili holds a special place in the hearts of home cooks, and for good reason. It’s a versatile, satisfying dish that warms you from the inside out. As one of my absolute favorite ground beef recipes, it’s not only incredibly delicious but also makes spectacular leftovers. In fact, chili often tastes even better the next day, as the flavors have more time to meld and deepen. This Instant Pot version takes all the beloved qualities of a classic chili and makes it incredibly fast and convenient, proving that you don’t need to simmer a pot all day to achieve profound flavor.
The secret to this speedy, flavorful, and burn-free chili lies in smart layering and browning techniques. These methods mimic the complexity of an all-day simmer while preventing the notorious “Burn” warning that can plague pressure cooker users. By following our simple steps, you’ll consistently achieve a perfectly cooked, deeply flavored chili every time, ready to be customized with your favorite toppings.
Essential Instant Pot Chili Ingredients
Crafting the perfect Instant Pot chili starts with a foundation of fresh, high-quality ingredients. This recipe relies on readily available pantry staples to create a robust and authentic chili con carne flavor profile. Here’s a closer look at what you’ll need to bring this comforting dish to life:
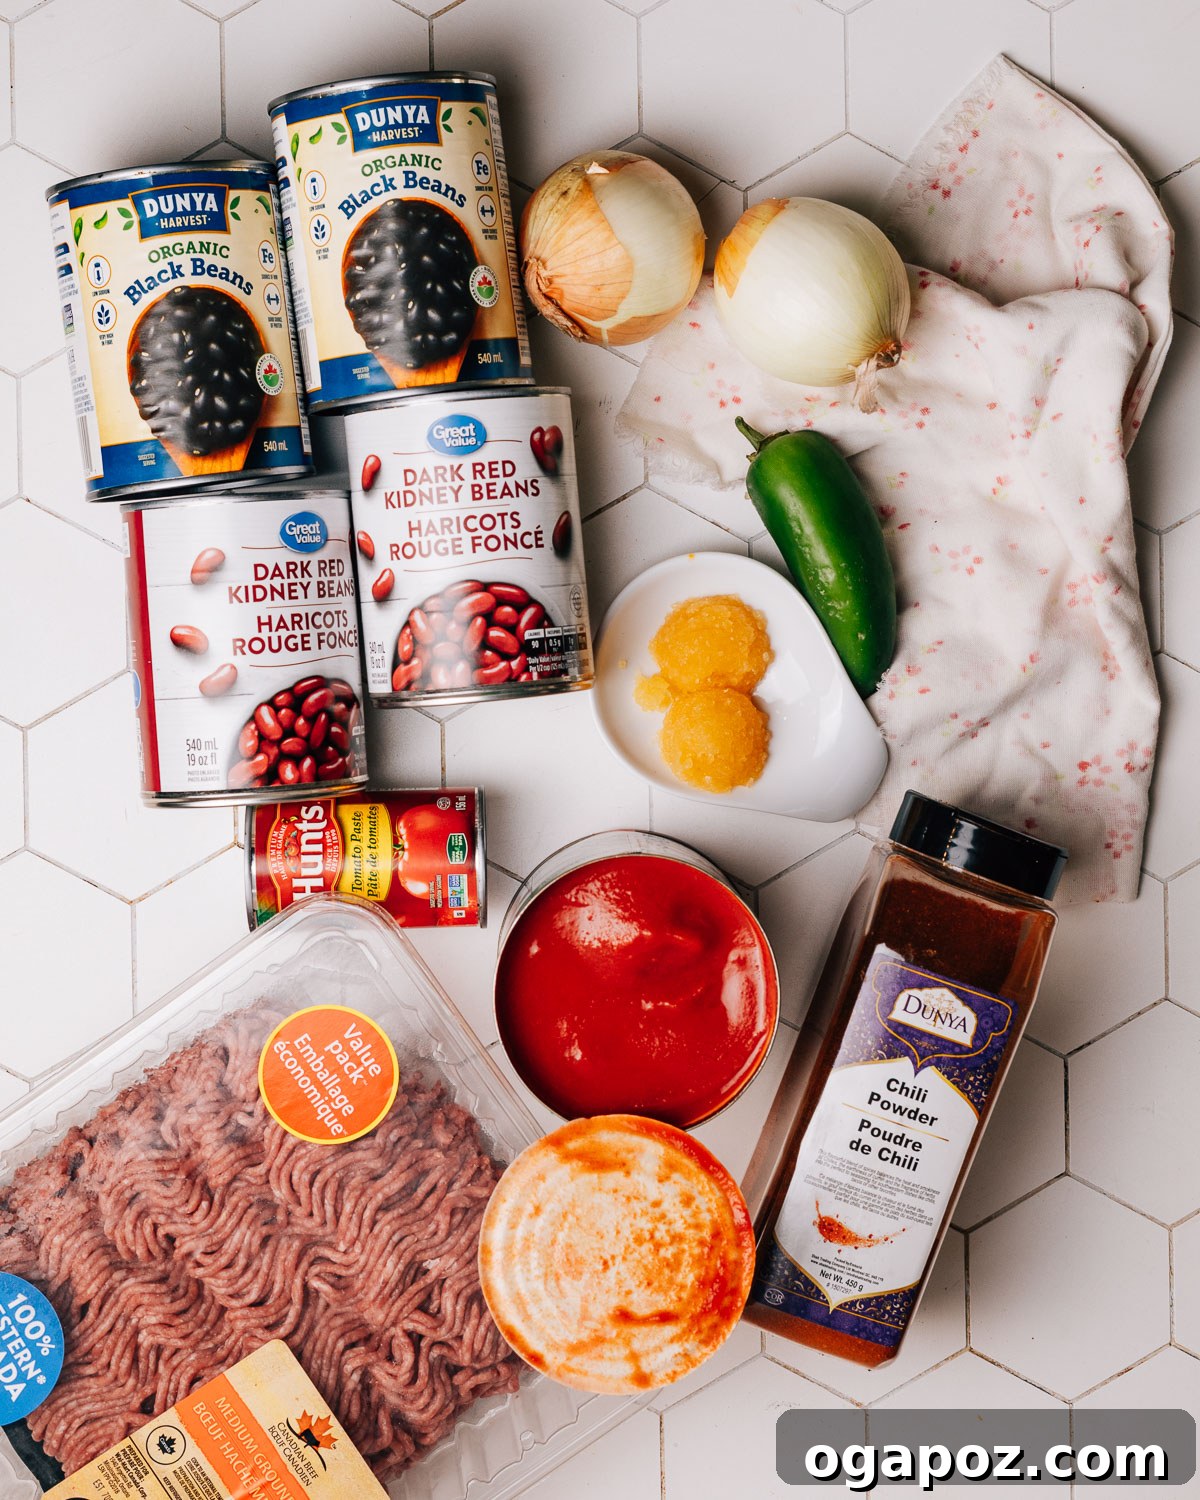
- Olive Oil: Essential for browning the beef and sautéing the aromatics, building the foundational flavors.
- Ground Beef: The star protein, providing richness and substance. We recommend a lean-to-fat ratio that offers flavor without excessive grease.
- Onion: Finely chopped, onions add a crucial layer of sweetness and aromatic depth when softened.
- Jalapeño: For a gentle kick and fresh pepper flavor. You can adjust the heat by removing seeds or adding more.
- Garlic: Minced fresh garlic is indispensable for that savory, pungent backbone of any good chili.
- Chili Powder: This isn’t just ground red chile; it’s a carefully balanced chili seasoning blend that typically includes cumin, ground chiles, oregano, and garlic powder. It’s the primary flavor driver for classic chili.
- Kosher Salt: To season the dish throughout, enhancing all the individual flavors.
- Black Pepper: A simple yet effective seasoning that complements the chili powder.
- Water (or Beef Broth): Provides the necessary liquid for pressure cooking and contributes to the chili’s texture. Beef broth will add an extra layer of savory depth. Using boiling water initially also helps the Instant Pot come to pressure quicker.
- Black Beans: Adds a creamy texture and earthy flavor. Rinsed and drained for best results.
- Kidney Beans: Classic chili bean, offering a firm texture and mild flavor. Also rinsed and drained.
- Diced Tomatoes: A fundamental ingredient for chili, providing acidity and body. We use canned diced tomatoes with their juices for convenience and flavor.
- Tomato Paste: A concentrated burst of tomato flavor that adds immense depth and helps thicken the chili. Browning it slightly can enhance its richness.
You’ll find the precise quantities for each ingredient detailed in the comprehensive recipe card located at the very bottom of this article.
Chili Variations and Smart Substitutions
One of the beauties of chili is its adaptability. Don’t hesitate to make small tweaks to this recipe to suit your personal preferences, dietary needs, or simply what you have on hand. These variations can subtly shift the flavor profile or significantly change the dish, ensuring you can enjoy a delicious chili no matter what.
- Adjusting Heat Level: For a spicier chili, consider swapping the jalapeño for a serrano pepper, which packs more heat. For even more fire, a pinch of cayenne pepper or a diced chipotle in adobo sauce can elevate the spice. If you prefer a milder chili, simply remove the seeds and membranes from the jalapeño, or omit it entirely.
- Exploring Bean Types: While black and kidney beans are classic, feel free to experiment. You could use all kidney beans, pinto beans for a creamier texture, or even a mix of cannellini beans for a different twist. Just remember to rinse and drain all canned beans thoroughly before adding them.
- Meat Alternatives: This recipe shines with ground beef, but it’s incredibly versatile with other proteins. If you’re a fan of pork, explore my award-winning pork green chili recipe for a different flavor profile. For a lighter option, my Instant Pot Turkey Chili is a fantastic choice, and I also offer excellent stovetop versions like white bean turkey chili and ground turkey chili. Ground chicken also works well; simply adjust seasoning as leaner meats may need more salt and spices.
- Creamy Indulgence: If you’re craving a chili with a rich, creamy texture, you have delightful options. My Cream Cheese Chicken Chili offers a decadent twist, or for a healthier yet still satisfying creamy option, try my Healthy White Chicken Chili. A swirl of heavy cream or a dollop of cream cheese can also be stirred into this beef chili at the end for added richness.
- Adding Vegetables: Boost the nutritional value and complexity by adding finely diced bell peppers (any color), corn, or zucchini during the sautéing stage with the onions.
- Smoky Flavor: For an extra layer of depth, a dash of liquid smoke or a tablespoon of smoked paprika can infuse a wonderful smoky essence into your chili.
How to Make Instant Pot Chili: An Easy Step-by-Step Guide
Making delicious chili in your Instant Pot is simpler than you might think, especially when you follow these foolproof steps. Our unique layering technique is key to achieving deep flavor without the dreaded “Burn” warning. Let’s walk through the process:
Step 1: Preheat and Deeply Brown the Beef
Begin by setting your Instant Pot to the “Sauté” function on normal or high. Allow it to preheat for several minutes until the pot is hot and the display reads “Hot” (or simply feels hot when a drop of water evaporates quickly). Add the olive oil, and once it shimmers, add the ground beef. Break up the beef slightly with a spoon, but then resist the urge to stir constantly. Allow the beef to sit undisturbed for 3-4 minutes to develop a deep, rich brown crust on the bottom. This browning step is crucial for building intense, complex flavor rapidly, mimicking the long caramelization process of stovetop cooking. Once deeply browned, you can stir and break up the remaining beef.
Step 2: Soften Aromatics and Bloom the Spices
After browning the beef, stir in the finely chopped onion, minced garlic, and jalapeño. Cook, stirring occasionally, until the onions have softened and become translucent, typically about 5-6 minutes. Next, add the chili powder, 1 teaspoon of kosher salt, and black pepper. Continue to cook for another minute, stirring constantly. This quick “blooming” or toasting of the spices in hot oil is vital. It awakens their essential oils, intensifying their fragrance and flavor, and contributes significantly to that wonderful slow-simmered taste without the wait.
Step 3: Add Liquid and Beans, Then Deglaze the Pot
Pour in the water (or beef broth). Immediately add the black beans and kidney beans (both rinsed and drained), along with the remaining 2 teaspoons of kosher salt. Now comes a critical step: deglazing. Using a wooden spoon or spatula, firmly scrape the entire bottom of the Instant Pot liner until it is perfectly smooth. Ensure no browned bits of beef or spices are stuck to the surface. This complete deglazing is absolutely essential to prevent the dreaded “Burn” warning from triggering during pressure cooking, as even a thin layer of fond can cause scorching.
Step 4: Layer Tomatoes and Tomato Paste (Do Not Stir!)
This is arguably the most important step for preventing a burn warning. Carefully pour the diced tomatoes over the top of the mixture, including their juices. Then, dollop the tomato paste evenly across the surface of the tomatoes. The key here is to DO NOT STIR the tomatoes into the rest of the ingredients. The sugars in tomatoes are prone to scorching when they are in direct contact with the hot bottom of the pot during pressure cooking. By layering them on top, away from the heating element, you significantly reduce the risk of a burn warning and ensure a perfectly cooked chili.
Step 5: Pressure Cook and Natural Rest
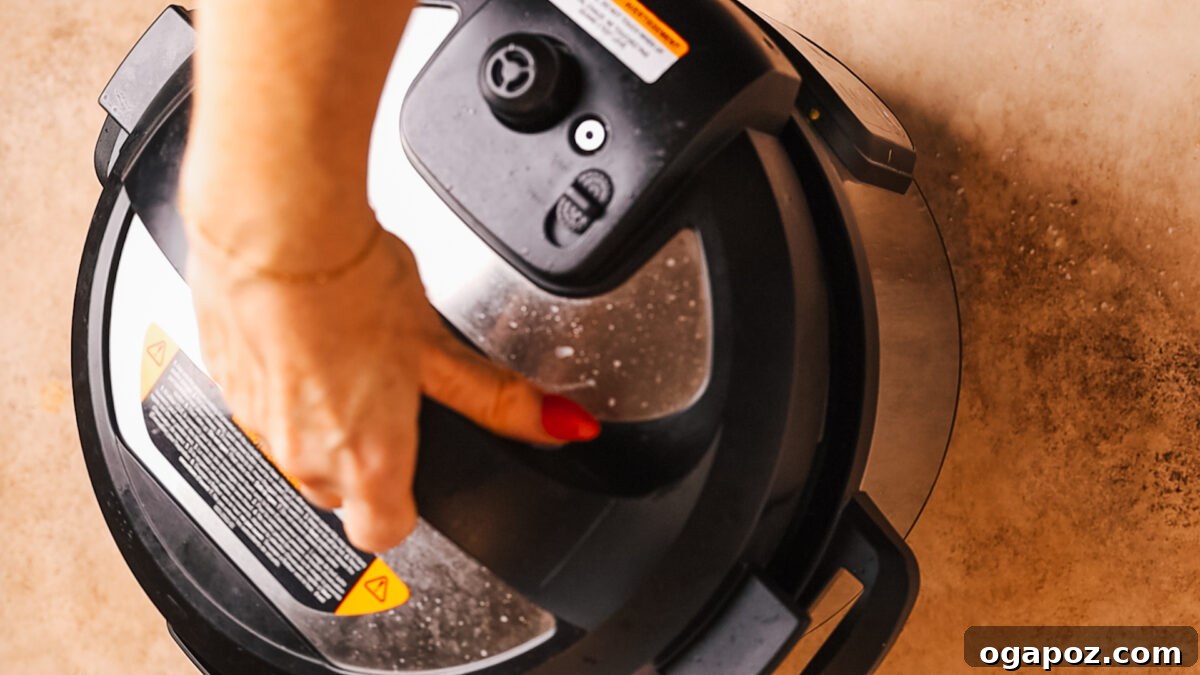
Securely lock the Instant Pot lid in place and set the steam release valve to the “Sealing” position. Select the “Manual” or “Pressure Cook” function on High pressure for 15 minutes. Once the cooking cycle is complete, allow the pressure to release naturally for 10 minutes. This natural release time is important as it allows the ingredients to settle, the flavors to meld further, and the meat to tenderize even more. After 10 minutes, carefully perform a quick release of any remaining pressure by turning the valve to “Venting.” Once the float valve drops, open the lid away from your face.
Step 6: Stir, Taste, and Serve
Gently open the lid and give the chili a good, thorough stir to incorporate all the delicious layers. Taste and adjust the seasoning as needed; you might want a little more salt, a squeeze of lime juice for brightness, or a dash of hot sauce. Serve hot with your favorite toppings.
Pro Tip: No-Burn Trivet Setup for Unrivaled Flavor (Optional, Best Flavor)
For those seeking the absolute richest flavor and an ironclad guarantee against burn warnings, consider this alternative method. Begin by browning your ground beef, sautéing the aromatics, and blooming the spices in a traditional Dutch oven or a large heavy-bottomed pot on your stovetop. At this stage, you can also brown the tomato paste for maximum depth. Stir in the beans, tomatoes, and about two-thirds of the specified water. Meanwhile, in your Instant Pot, add 1 cup of boiling water to the inner pot and place a trivet inside. Line the trivet with crumpled parchment paper, creating a barrier that extends slightly up the sides of the pot. Carefully spoon your partially cooked chili from the Dutch oven into the Instant Pot, placing it on top of the parchment-lined trivet. Then, proceed with pressure cooking as described above. This method ensures direct contact between the chili and the Instant Pot’s base is avoided, while still leveraging the pressure cooker’s speed for tender meat and perfectly cooked beans.
P.S. If you’re a fan of fall-apart tender pressure cooker meat, don’t miss out on my other fantastic recipes, like Instant Pot Roast Beef, Instant Pot Steak, or Instant Pot Pulled Pork. They all showcase the magic of pressure cooking!
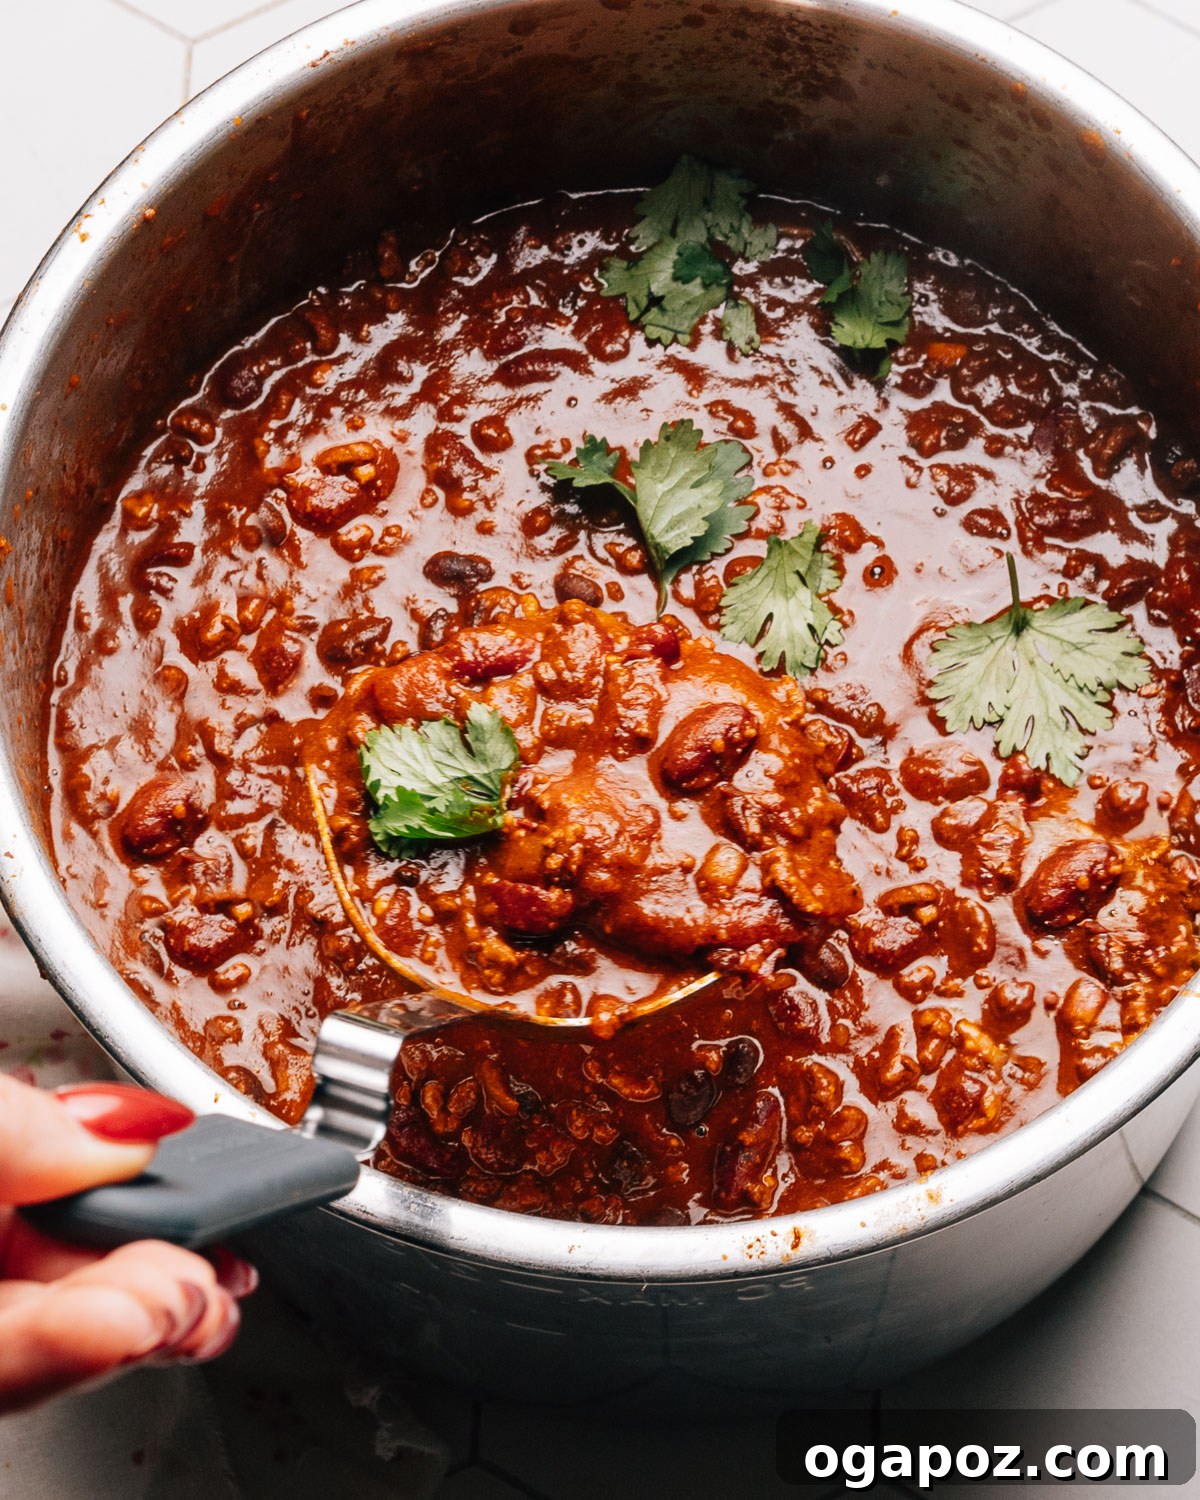
4 Common Mistakes to Avoid When Making Instant Pot Chili
While making chili in the Instant Pot is generally straightforward, a few common pitfalls can lead to less-than-perfect results or, worse, the dreaded “Burn” warning. Knowing these mistakes and how to avoid them will ensure your chili turns out perfectly every time:
- Stirring in Tomatoes Before Pressure Cooking: This is hands down the most frequent reason for a “Burn” warning. Tomatoes, especially tomato paste, contain concentrated sugars that can easily scorch when heated directly against the bottom of the Instant Pot. Always keep your diced tomatoes and tomato paste as the top layer, completely unstirred, to prevent them from caramelizing and sticking to the pot’s base.
- Skipping or Inadequate Deglazing: After browning your ground beef and sautéing aromatics, there will inevitably be some browned bits (fond) stuck to the bottom of the pot. Failing to thoroughly scrape these bits off with a wooden spoon or spatula before pressure cooking is a prime culprit for burn warnings. Even a thin, seemingly insignificant layer of fond can trip the sensor. Take the time to scrape until the bottom of the pot is perfectly smooth.
- Under-Blooming Spices: While not directly a cause of burn warnings, skipping or rushing the “blooming” of your chili powder and other spices is a missed opportunity for flavor. Giving the chili powder a minute or two in hot oil, stirring constantly, allows its essential oils to release, creating a much deeper, more aromatic, and slow-simmered taste that you wouldn’t get otherwise. Don’t rush this step!
- Stirring After Layering Ingredients: Once you’ve added your liquid and beans, and then carefully layered the tomatoes and tomato paste on top without stirring, resist the temptation to give it “just one more stir.” Disturbing the distinct layers will bring the sugary tomato elements into contact with the bottom of the pot, negating your burn-prevention efforts. Trust the process; the pressure cooking will ensure everything combines beautifully.
Make Ahead and Storage for Your Instant Pot Chili
One of the many joys of making a big batch of chili is its excellent make-ahead potential and how well it stores. Cook once, and enjoy easy, flavorful meals all week long. This chili recipe, like many, often tastes even better on the second day as the flavors have more time to fully develop and meld.
Storing Leftover Chili in the Fridge
- Fridge Life: Properly stored in an airtight container, your Instant Pot chili will keep beautifully in the refrigerator for up to 4 days. As mentioned, the flavor only deepens and improves by day two, so don’t hesitate to make a double batch!
- Portion Smart: To make future meals even easier, consider dividing your leftover chili into single-serve containers. These are perfect for quick grab-and-heat lunches or dinners when you’re short on time.
- Airtight is Key: Always ensure your storage containers are truly airtight to prevent flavor loss and keep your chili fresh.
Freezing for Long-Term Enjoyment
- Freeze Flat: For efficient storage and quicker thawing, pour cooled chili into freezer-safe zip-top bags and lay them flat in your freezer until solid. Alternatively, use freezer-safe deli tubs or other rigid containers, ensuring you leave about an inch of headspace for expansion.
- Label and Date: Don’t forget to label your containers with the date and contents. This helps you keep track of your freezer inventory.
- Best Window: For peak flavor and texture, enjoy your frozen chili within 3 months. While it will remain safe to eat longer, quality may start to diminish.
- Thaw Smart: The best way to thaw frozen chili is overnight in the refrigerator. If you’re in a hurry, you can gently thaw it in the microwave using the defrost setting, stirring occasionally, or place the sealed bag in a bowl of cold water (changing the water every 30 minutes).
Reheating Chili Con Carne
- Stovetop Method: For the best reheating results, transfer the chili to a saucepan and reheat over medium-low heat, stirring often. If the chili has thickened considerably in the fridge, add a splash of water or beef broth to reach your desired consistency.
- Microwave Method: For a quick reheat, portion the chili into a microwave-safe bowl. Cover loosely (to prevent splatters) and heat in short bursts (e.g., 60-90 seconds), stirring well between each interval, until heated through.
- Refresh with Brightness: After reheating, a fresh squeeze of lime juice and a tiny pinch of salt can work wonders to brighten and reinvigorate the flavors, making it taste freshly made.
How to Serve This Chili Con Carne Recipe
This hearty Instant Pot chili is a meal in itself, but it truly shines when served with a variety of complementary toppings and side dishes. I love to serve it piping hot, often with something creamy to balance the spice and something crunchy for texture. Whether you serve it in traditional bowls, over a baked potato, or atop fluffy rice, it’s always a crowd-pleaser.
Irresistible Chili Toppings
Elevate your chili experience with a vibrant array of toppings that add texture, flavor, and visual appeal:
- Shredded Cheddar Cheese: A classic for a reason, offering creamy, salty goodness.
- Sour Cream or Greek Yogurt: Adds a cool, tangy counterpoint to the rich chili.
- Pickled Red Onion: Provides a delightful tangy crunch and vibrant color.
- Sliced Jalapeños: Fresh slices for an extra pop of heat and herbaceousness.
- Chopped Cilantro: Fresh herbs brighten the dish with a zesty, aromatic finish.
- Diced Avocado or Guacamole: Adds a creamy, rich, and healthy fat component.
- Lime Wedges: A squeeze of fresh lime juice at the end can truly brighten and balance all the flavors.
- Crushed Tortilla Chips or Fritos: Essential for that satisfying crunch and salty texture.
- Green Onions: Thinly sliced for a mild oniony bite and fresh green color.
Perfect Side Dishes for Chili
While toppings add flair, these side dishes turn chili into a truly complete and comforting meal:
- Rice: Spoon your chili over fluffy Instant Pot rice, flavorful Instant Pot Mexican rice, or classic Basmati rice for a filling foundation.
- Fresh Salsas and Crema: Add brightness with a scoop of my vibrant Taco Salsa and a drizzle of creamy Cilantro Lime Crema.
- Cornbread: Nothing beats a slice of warm, buttery cornbread casserole or classic cornbread to soak up all that rich chili goodness.
- Coleslaw: A fresh, crisp coleslaw offers a refreshing contrast to the hearty chili.
- Mexican Street Corn Salad (Esquites): For extra crunch, sweetness, and a tangy kick, this off-the-cob version of Mexican street corn is a fantastic pairing.
- Baked Potatoes: Leftovers are divine spooned onto fluffy microwave baked potatoes or tender Instant Pot sweet potatoes, loaded with sour cream, crispy bacon bits, and green onions.
- Simple Green Salad: A light, vinaigrette-dressed green salad can provide a refreshing balance.
How to Make the Best Chili Con Carne: Final Notes and Secrets
Mastering Instant Pot chili is about understanding a few key principles that unlock its full flavor potential and guarantee a perfect outcome every time. Here are my final notes and secrets for making the absolute best chili con carne:
- Bloom the Spices: This seemingly small step makes a monumental difference. Toasting your chili powder and other dry spices briefly in hot oil before adding liquid deeply intensifies their flavor and aroma, giving your chili a complexity that tastes like it’s been simmering for hours. Never skip this!
- Layer Smart, Not Hard: The layering technique – specifically placing tomatoes and tomato paste on top without stirring – is your ultimate defense against the Instant Pot’s “Burn” warning. The sugars in tomatoes are notorious for scorching, so keeping them away from the heating element until pressure cooking is complete is a game-changer.
- Salt in Stages: Proper seasoning is crucial for a balanced and flavorful chili. Season your meat and aromatics early to build foundational flavor, and then taste and adjust the salt levels at the very end. This allows you to fine-tune the seasoning after all the ingredients have cooked and melded.
- Rest Matters: Just like a good steak, chili benefits from a rest period. The 10-minute natural pressure release allows the pressure to slowly decrease, preventing a sudden burst of steam that can toughen meat and allows the flavors to settle and integrate more deeply into the ingredients. Be patient!
- Brighten Late: A little acidity can dramatically elevate the entire dish. A fresh squeeze of lime juice, a dash of red wine vinegar, or even a splash of apple cider vinegar stirred in just before serving can “wake up” the flavors and cut through the richness, adding a vibrant finish.
- Thicken Wisely: If your chili isn’t as thick as you prefer after pressure cooking, don’t fret. Simply switch the Instant Pot to “Sauté” mode (lid off) and let it simmer gently for 5-15 minutes, stirring occasionally, until it reaches your desired consistency. The chili will also thicken significantly as it cools and rests, especially overnight. For an instant boost, stir in a spoonful of masa harina or an extra tablespoon of tomato paste at the end and simmer briefly.
- Quality Ingredients Count: While this recipe uses pantry staples, opting for a high-quality chili powder blend, fresh aromatics, and good ground beef will make a noticeable difference in the final taste.
Absolutely! Avoiding the burn warning is a primary focus of this recipe. The key is to strictly follow our layering technique: keep diced tomatoes and tomato paste on the very top layer, ensuring they do not touch the bottom of the pot, and do not stir them in. Additionally, make sure to thoroughly deglaze the pot after browning the beef and sautéing the aromatics, scraping every last bit of fond from the bottom. If your Instant Pot is particularly sensitive or you want extra assurance, consider the alternative trivet with parchment paper method described in the instructions, which creates a physical barrier between the chili and the pot’s base.
Yes, it is highly recommended to drain and rinse the canned beans (black and kidney beans) thoroughly before adding them to the Instant Pot. Draining removes excess liquid, which helps control the chili’s thickness and prevents it from becoming overly starchy. Rinsing also washes away some of the sodium and gives you a cleaner flavor profile. If you prefer a looser chili, you can choose to keep a little of the bean liquid, but then be sure to adjust the added salt accordingly at the end.
Yes, ground turkey is an excellent substitute for ground beef in this Instant Pot chili recipe. Since turkey is typically leaner, you may need a little extra olive oil to ensure proper browning and to help bloom the spices effectively. It’s crucial not to skip the spice blooming step, as lean meats can sometimes taste a bit “flatter” without careful seasoning. Always taste and adjust the salt and other seasonings at the end of cooking to compensate for the difference in fat content and flavor profile.
There are several easy ways to thicken your chili if it’s not quite to your liking. The simplest method is to switch the Instant Pot to “Sauté” mode (without the lid) after pressure cooking and simmer gently for 5-15 minutes, stirring occasionally. The chili will naturally reduce and thicken. Another effective trick is to stir in a tablespoon of masa harina (corn flour) or an additional tablespoon of tomato paste and simmer for a few minutes until thickened. Keep in mind that chili also thickens significantly as it cools, especially after refrigerating overnight.
As written, this Instant Pot chili recipe has a moderate spice level, primarily from the jalapeño and chili powder. To decrease the heat, you can remove all seeds and membranes from the jalapeño before chopping, or omit the jalapeño entirely. For those who love extra heat, you can add a second finely chopped jalapeño, a pinch of cayenne pepper, a diced chipotle in adobo sauce, or a few dashes of your favorite hot sauce. It’s best to taste the chili towards the end of cooking and fine-tune the spice level carefully.
Yes, you can absolutely make a delicious no-bean version of this Instant Pot chili. To maintain a hearty texture, you might want to increase the amount of ground beef by about half a pound, or add other vegetables like finely diced bell peppers or mushrooms during the sautéing stage. You may also need to slightly reduce the amount of water to keep the chili thick. All the other crucial steps, especially the layering of tomatoes and thorough deglazing for burn prevention, remain the same.
This recipe is best suited for a 6-quart or 8-quart Instant Pot. These sizes provide ample space for all the ingredients and allow for proper pressure buildup without overfilling. Using a smaller model (like a 3-quart) may lead to overfilling, which can trigger burn warnings more easily and prevent the pot from coming to pressure correctly. Always ensure you leave adequate headspace, typically not filling past the 2/3 mark, to allow for steam circulation.
Browning tomato paste, either on the stovetop as part of the “Pro Tip” method or briefly in the Instant Pot if carefully done, matters because it deepens and concentrates its flavor significantly. The natural sugars in the tomato paste caramelize, transforming its raw, acidic taste into a richer, more complex, and savory note. This process adds tremendous depth to your chili, contributing to that desirable “all-day simmered” flavor profile. If skipped, the tomato flavor might taste a bit flat or one-dimensional.
Your Instant Pot chili will last for up to four days when stored in an airtight container in the refrigerator. It’s also an excellent candidate for freezing; it can be stored in freezer-safe bags or containers for about three months while maintaining optimal quality and flavor. Remember to cool it quickly before refrigerating or freezing, and label with the date. When reheating from the fridge or freezer, a splash of water or broth can help restore its original consistency, and a fresh squeeze of lime juice can perk up the flavors.
If, despite your best efforts, the “Burn” warning still appears, don’t panic! Immediately turn off the Instant Pot and perform a quick release of the pressure. Once the lid can be safely opened, carefully remove it. At this point, you’ll need to thoroughly scrape the bottom of the pot to remove any stuck-on food, adding about ½ to 1 cup of water or broth to help loosen it. Stir well to ensure the bottom is completely clean. Rebuild your layers, making sure the tomatoes and tomato paste are again on top and completely unstirred. If you’re still concerned, it’s wise to switch to the “No-Burn Trivet Setup” method to prevent further issues and ensure your chili cooks perfectly.
Other Delicious Mexican-Inspired Recipes You’ll Love
If you enjoyed this Instant Pot Chili, you’re in for a treat! Our collection of Mexican-inspired dishes offers a wide range of flavors and textures, perfect for any occasion:
- Juicy Beef Fajitas: Sizzling steak fajitas packed with flavor, and absolutely delicious when paired with our homemade Taco Salsa and creamy Baja Sauce!
- Almost-Authentic Mexican Ground Beef Taco Recipe: The ultimate recipe for classic ground beef tacos, plus smart ideas for what to do with leftover taco meat!
- Flavorful Shredded Beef Tacos: Tender, slow-cooked shredded beef, perfect for filling soft tortillas.
- Zesty Chicken Street Tacos Recipe: Quick and vibrant chicken street tacos, seasoned perfectly with our special Mexican chicken seasoning.
- Creamy Queso Dip: The ultimate cheesy appetizer or topping for any Mexican feast.

Easy Instant Pot Chili (Foolproof Method!)
A hearty, thick chili with ground beef and beans made quickly in the Instant Pot. It boasts rich, all-day-simmered flavor in under an hour, using a special layering technique for guaranteed success!
Print Recipe
Ingredients
- 4 tbsp olive oil
- 2 lbs ground beef
- 3 cups finely-chopped onion (about 2 medium)
- 1 finely-chopped jalapeño
- 2 tbsp minced garlic (about 6 cloves)
- ¾ cup chili powder (spice blend)
- 3 tsp kosher salt (divided use)
- ½ tsp black pepper
- 3 cups boiling water (or beef broth)
- 2 (15-oz) cans black beans, rinsed and drained
- 2 (15-oz) cans kidney beans, rinsed and drained
- 1 (28-oz) can diced tomato, undrained
- 1 (6-oz) can tomato paste
Instructions
Saute the Base
- Preheat the Instant Pot on “Sauté” mode for several minutes until hot. Add olive oil, then once shimmering, add the ground beef.
- Break up the beef a little with a spoon, then let it cook without stirring for 3-4 minutes until deeply browned on the bottom.
- Stir in onion, garlic, jalapeño, chili powder, 1 tsp of salt, and black pepper. Cook, stirring occasionally, until onions are softened and spices are fragrant, about 6 minutes.
- Stir in the water, black beans, kidney beans, and remaining 2 tsp salt. Thoroughly scrape the bottom of the pot to ensure it’s completely smooth and free of any stuck-on bits.
Important Layering Step
- Pour in the diced tomatoes (with their juices) and dollop the tomato paste over the surface. DO NOT STIR THEM IN. (Keeping the sugary tomatoes off the bottom of the pot prevents a ‘Burn’ warning.)
Pressure Cook
- Lock the lid and set the steam release valve to “Sealing.”
- Select “Manual” or “Pressure Cook” on High pressure for 15 minutes.
- When the timer ends, allow pressure to release naturally for 10 minutes, then carefully quick release any remaining steam.
- Open the lid, give the chili a good stir, taste, and adjust seasoning if needed. Enjoy!
Notes
Alternative Method for Richer Flavor & Zero Burn Risk: For truly unparalleled flavor and to eliminate any risk of a ‘Burn’ warning, perform the sautéing steps (browning beef, aromatics, spices, and even the tomato paste) in a large Dutch oven or pot on your stovetop.
- Once the tomato paste has darkened and is sticking to the bottom of the pot, stir in beans, tomatoes, and 2 cups of the water.
- Place a trivet inside the Instant Pot and add the remaining 1 cup boiling water to the bottom of the pot. Line the trivet with a layer of crumpled parchment paper as a barrier, ensuring it comes up the sides of the liner slightly.
- Carefully spoon the chili mixture from your stovetop pot on top of the parchment paper in the Instant Pot and pressure cook as directed in Step 3.
Recipe Tips:
- Using Boiling Water: Starting with boiling water helps the Instant Pot come up to high pressure much quicker! Begin heating a kettle of water while you complete the sautéing steps.
- For a Thicker Chili: If you prefer a thicker chili immediately, let it simmer for 10-15 minutes on “Sauté” mode with the lid off once pressure cooking is complete. It also thickens up SIGNIFICANTLY on day 2, so making it in advance is ideal if you love extra thick chili.
- Chili Powder: Ensure you are using a chili seasoning spice blend (which is a mix of spices) and not pure ground red chile powder, which is much, much spicier and meant for a different purpose.
- Storage: Leftovers store well in an airtight container in the fridge for up to 4 days. It also freezes exceptionally well in airtight containers for up to 3 months.
Nutrition Information
Carbohydrates: 45g |
Protein: 32g |
Fat: 34g |
Saturated Fat: 10g |
Polyunsaturated Fat: 3g |
Monounsaturated Fat: 16g |
Trans Fat: 1g |
Cholesterol: 81mg |
Sodium: 2053mg |
Potassium: 1635mg |
Fiber: 18g |
Sugar: 11g |
Vitamin A: 7193IU |
Vitamin C: 24mg |
Calcium: 196mg |
Iron: 10mg
Nutrition information is automatically calculated and should only be used as an approximation.
Tried this recipe? Share your thoughts in the comments!