
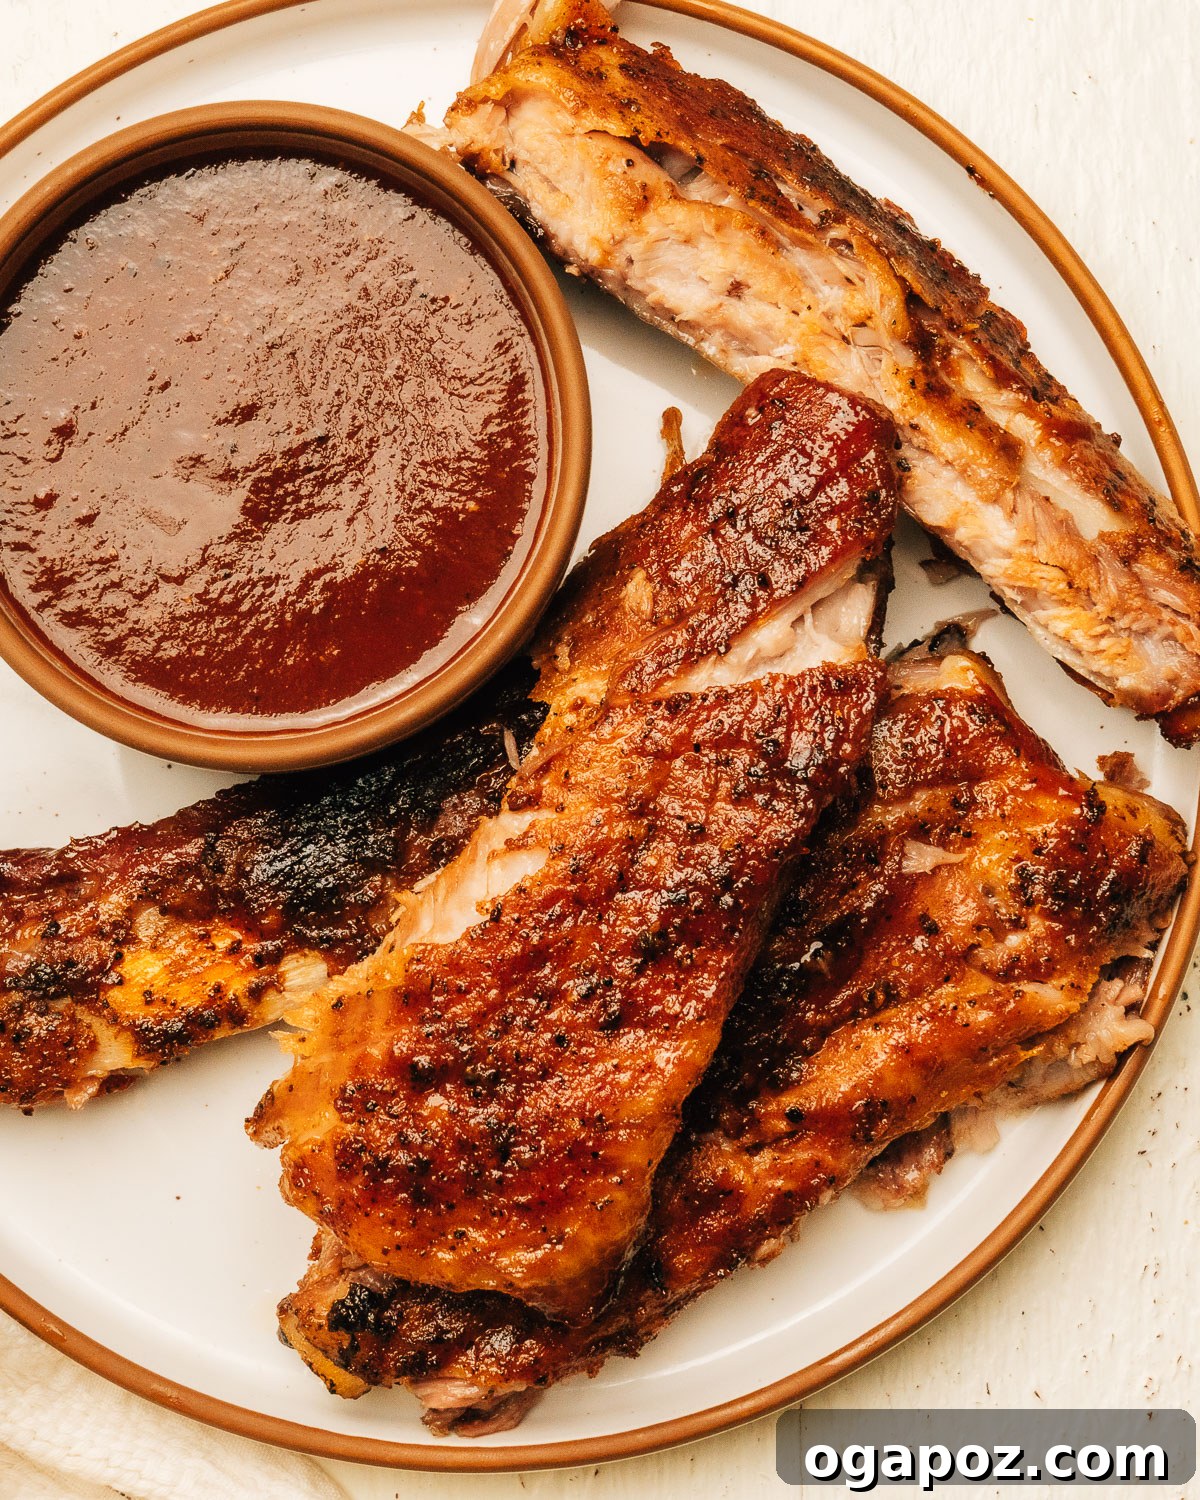
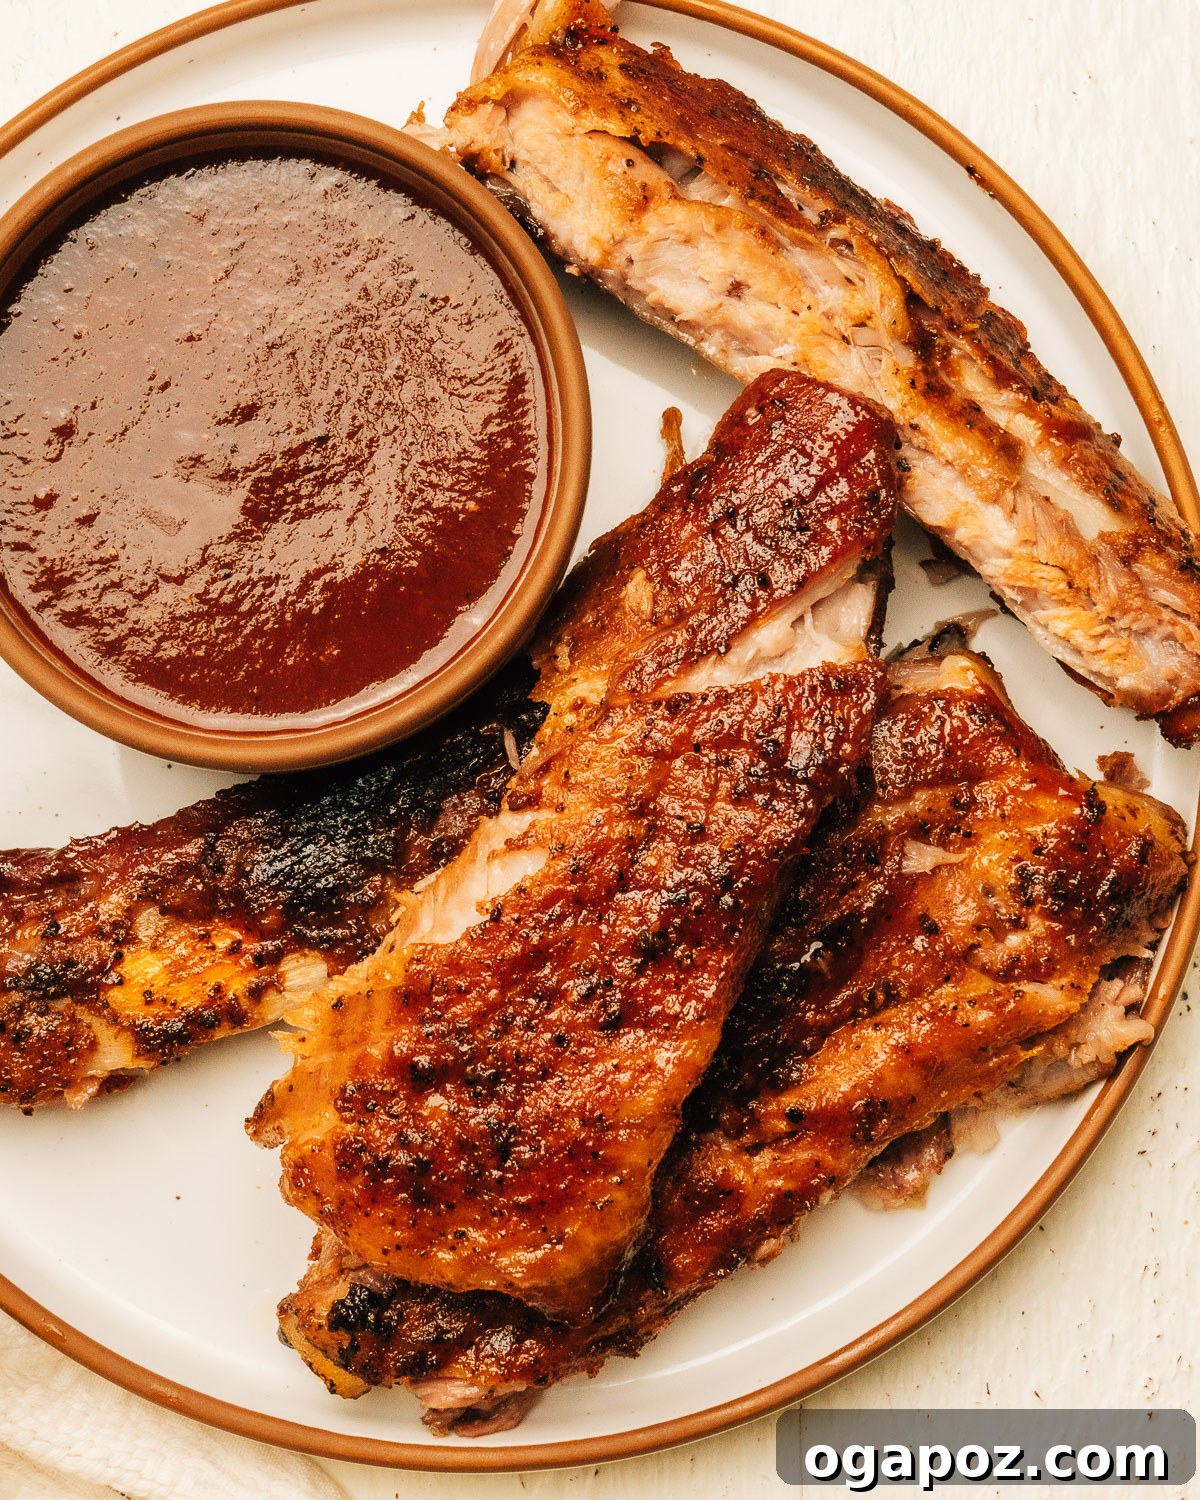
Experience the ultimate in tender, flavorful barbecue with these pork spare ribs. Crafted to perfection, they boast a luscious, fall-off-the-bone texture, a rich, smoky dry rub, and a sweet, sticky homemade BBQ glaze, all achieved effortlessly in your oven. This recipe simplifies the art of making perfect ribs, incorporating invaluable insights from a food scientist to guarantee succulent results without the need for a grill or smoker.
Essential Ingredients for Irresistible Spare Ribs
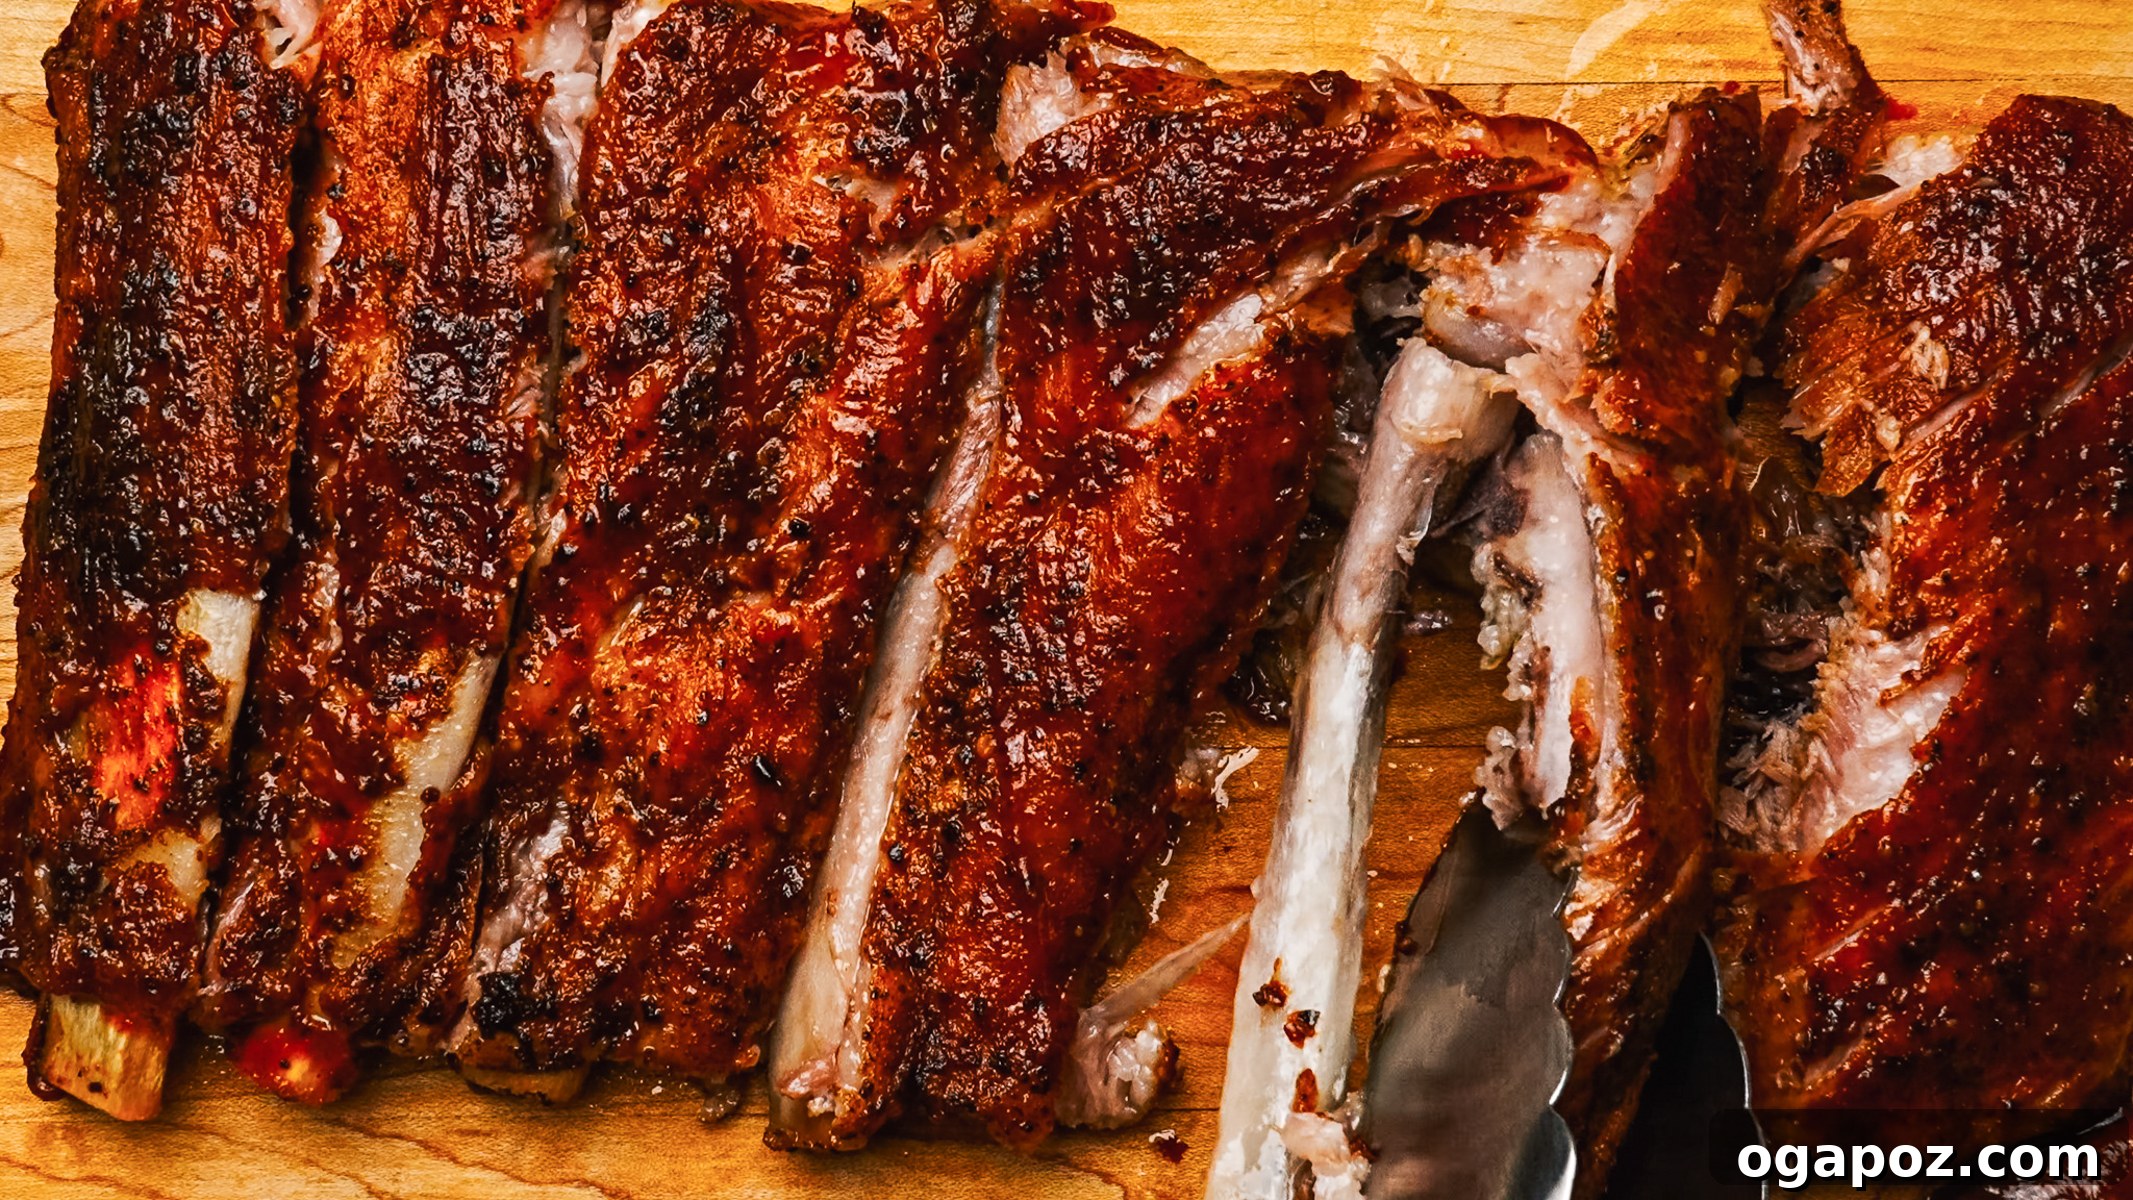
When these mouth-watering, finger-licking barbecue spare ribs emerge from the oven, a simple knife will glide through the meat with virtually no resistance, separating the bones with ease. Prepare an ample supply of napkins – these ribs are deliciously messy!
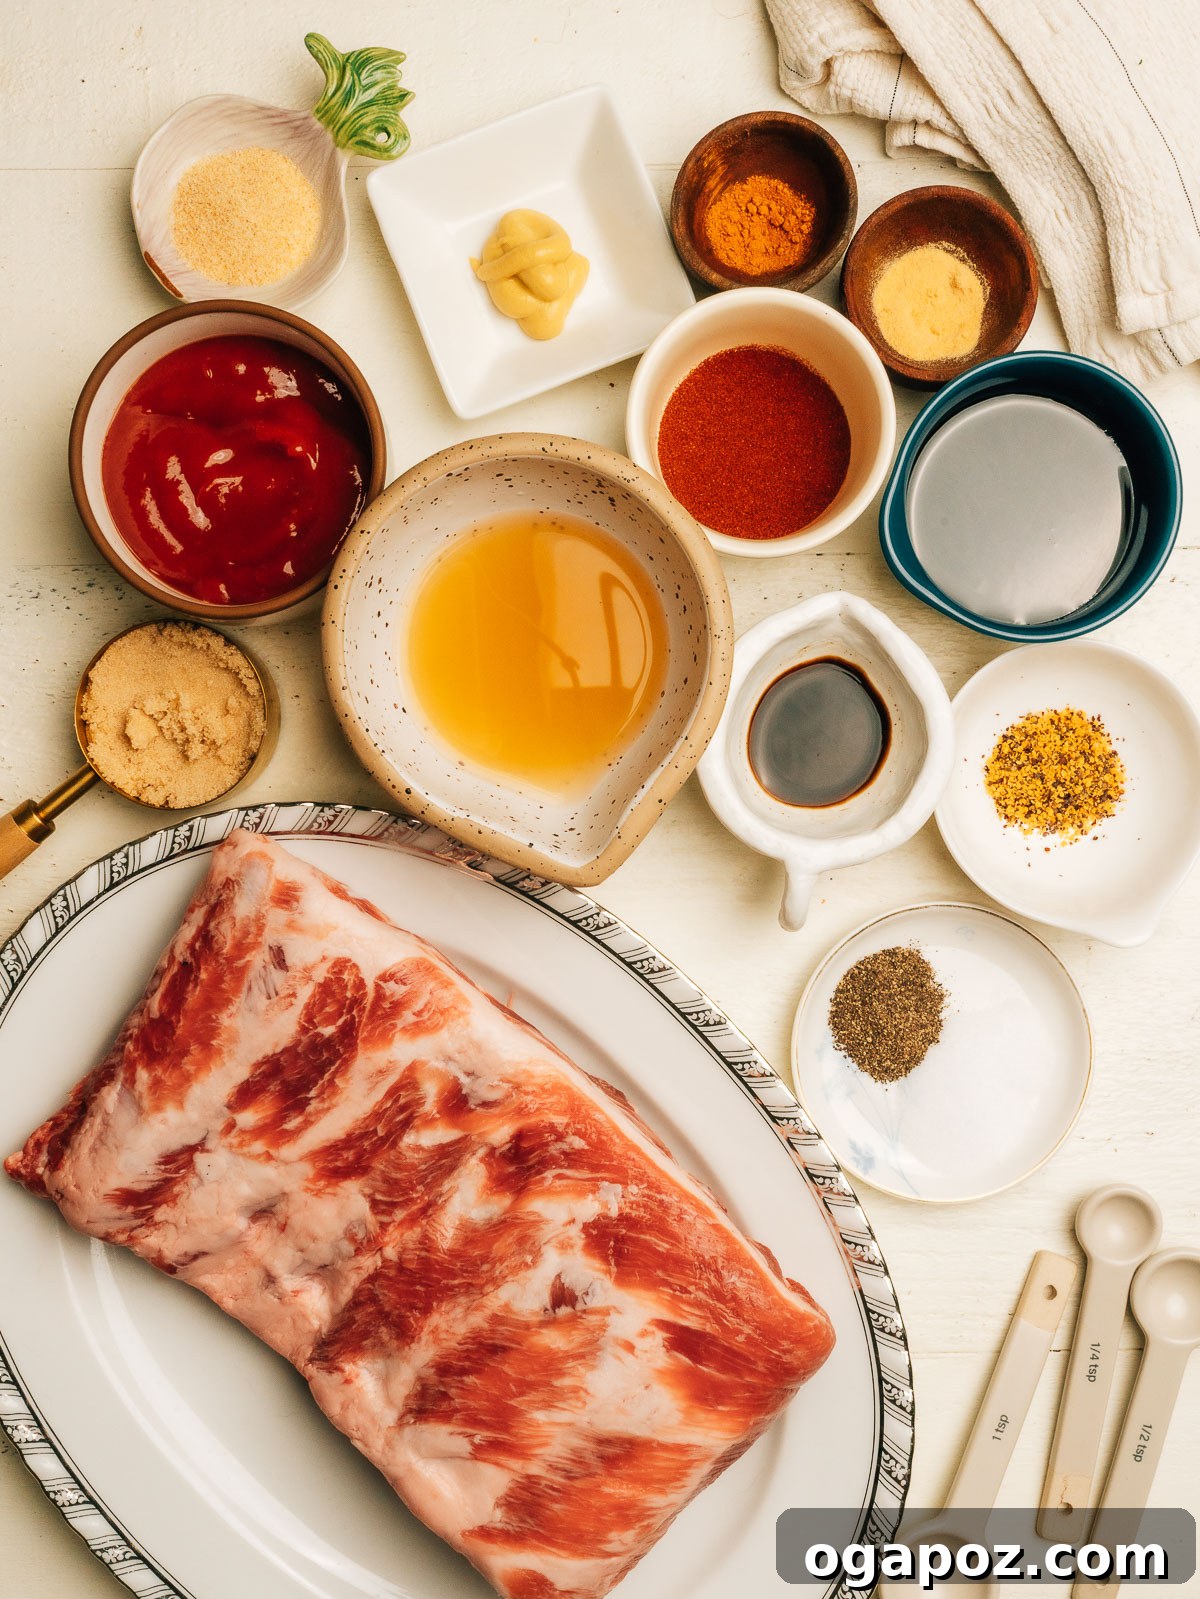
Rib Ingredients: Selecting the Perfect Cut
- Pork spare ribs: You’ll need two full racks, typically weighing between 6 to 7 pounds total. Spare ribs are sourced from the belly side of the pig, closer to the breastbone. This cut is prized for its higher fat content and robust connective tissue, which, when cooked low and slow, renders down into gelatin, infusing the meat with incredible tenderness and rich flavor. When selecting your racks, look for those that are relatively uniform in thickness. This ensures they cook evenly, preventing some parts from drying out while others are still achieving optimal tenderness.
Dry Rub Ingredients: Building a Foundation of Flavor
- Brown sugar: Beyond just adding sweetness, brown sugar plays a critical role in creating that desirable caramelized, sticky crust on your ribs. It also helps the barbecue sauce adhere perfectly during the final broiling step. Do not be tempted to skip this ingredient, as it’s key to both flavor and texture.
- Smoked paprika: This is your secret weapon for imparting a deep, authentic smoky flavor that usually comes from a grill or smoker. It provides an incredible depth of flavor. Ensure you use *smoked* paprika, not sweet or hot varieties, as its unique aroma is doing significant heavy lifting in this recipe.
- Garlic powder: Offering an earthy and savory undertone, garlic powder blends seamlessly into the rub. Unlike fresh garlic, which can scorch and turn bitter during a long baking process, garlic powder distributes flavor evenly without burning.
- Onion powder: This ingredient works in harmony with the garlic powder, rounding out the savory profile and adding another layer of aromatic depth to the dry rub.
- Dry mustard: A subtle yet essential addition, dry mustard contributes a delicate tang and sharpness that brightens the overall flavor profile. While you might not distinctly identify its taste, its absence would leave the ribs feeling less complex and a bit flat.
- Cayenne pepper: Just half a teaspoon introduces a gentle background warmth. Feel free to adjust the amount up or down based on your personal preference for heat. For a spicier kick, you can increase it to a full teaspoon.
Quick BBQ Sauce Ingredients: The Sticky, Sweet Finish
A final, quick broil with this homemade BBQ glaze provides that irresistible caramelized and slightly charred finish. While my easy recipe is highly recommended, your favorite bottled sauce can also be used in a pinch.
- Ketchup: Forming the foundational tomato base, ketchup provides the necessary body, sweetness, and that classic vibrant BBQ color to the sauce.
- Apple cider vinegar: This acidic component is crucial for cutting through the richness of the ribs and the sweetness of the sauce, preventing it from tasting one-dimensional or cloying.
- Brown sugar: Mirroring its role in the rub, brown sugar in the sauce adds sweetness and, importantly, aids in thickening the sauce and achieving that beautiful caramelization under the broiler.
- Molasses: Contributes a deep, complex, slightly bitter, and subtly smoky note. For a milder, sweeter alternative, pure maple syrup makes an excellent 1:1 substitute.
- Worcestershire sauce: A powerhouse of umami, Worcestershire sauce adds a nuanced complexity, making the sauce taste more layered and sophisticated.
- Dijon mustard: Provides a sharp tang that balances the sweetness and richness, ensuring the sauce remains lively and never heavy.
- Smoked paprika: Echoes the smoky notes from the dry rub, creating a cohesive flavor bridge between the seasoning on the ribs and the luscious glaze.
- Garlic powder: For quick and consistent flavor distribution, garlic powder is preferred here, ensuring every spoonful of sauce is equally aromatic.
- Kosher salt: Essential for balancing all the sweet, tangy, and savory flavors, salt brings out the best in every ingredient.
You’ll find the precise quantities for all ingredients in the comprehensive recipe card located towards the end of this post.
Versatile Variations and Smart Substitutions
This oven-baked spare ribs recipe is incredibly adaptable, allowing you to tailor it to your preferences or what you have on hand. If you’re looking for another fantastic rib experience, consider my Chinese restaurant-style Honey Garlic Spare Ribs recipe. Here are the most practical swaps and tweaks to make this recipe your own:
- Baby back ribs: These can be prepared using the exact same smoky dry rub and homemade BBQ sauce. However, baby back ribs are generally leaner and thinner than pork spare ribs, which means they will cook faster. Reduce the covered bake time to approximately 2 to 2.5 hours, and begin checking for doneness earlier to prevent overcooking.
- Beef spare ribs: The “low-and-slow” cooking method works beautifully for both pork and beef ribs. When preparing beef ribs, anticipate a longer baking period, potentially up to 4 hours or more, as beef ribs are typically larger and denser. Always rely on the knife test (meat easily separates from the bone) to determine doneness rather than just the clock.
- Molasses substitute: For a clean 1:1 swap, maple syrup is your best bet. The resulting sauce will be slightly lighter in flavor and color, but still absolutely delicious. In a pinch, honey can also be used, offering a slightly different, but equally pleasant, sweetness.
- Adjusting the heat level: If you prefer spicier ribs, increase the cayenne pepper in the dry rub to 1 full teaspoon. For a smokier heat, a pinch of chipotle chili powder can be added. If you’re cooking for children or those sensitive to spice, omit the cayenne pepper entirely for a mild version.
- Store-bought BBQ sauce: Feel free to use your favorite store-bought barbecue sauce for the glazing step. The robust dry rub handles the majority of the flavor development, so the sauce primarily serves to create that glossy, sticky, caramelized finish. Choose a sauce with a complementary smoky or tangy profile to enhance the ribs.
- No broiler? No problem! If your oven lacks a broiler setting, you can still achieve a wonderful glazed finish. Simply increase your oven temperature to 450°F (230°C) and roast the glazed ribs uncovered for 8 to 10 minutes. It’s crucial to watch them very closely during this stage, as the high sugar content in both the rub and the sauce can burn quickly.
Craving more effortless pork dinners? My slow cooker pork shoulder and crockpot pork loin are two more incredibly delicious, crowd-pleasing recipes that deserve a spot in your regular rotation.
Essential Tools for Perfect Oven-Baked Ribs
You don’t need any specialized kitchen gadgets or advanced equipment to master baking tender spare ribs in your oven. A few common items are all that’s required:
- Large rimmed sheet pan: This is essential. Ensure it’s spacious enough to comfortably fit both racks of ribs flat in a single layer. The rimmed edges are crucial because ribs release a significant amount of flavorful liquid during their long bake, and the sides will contain it, preventing spills and making cleanup much easier.
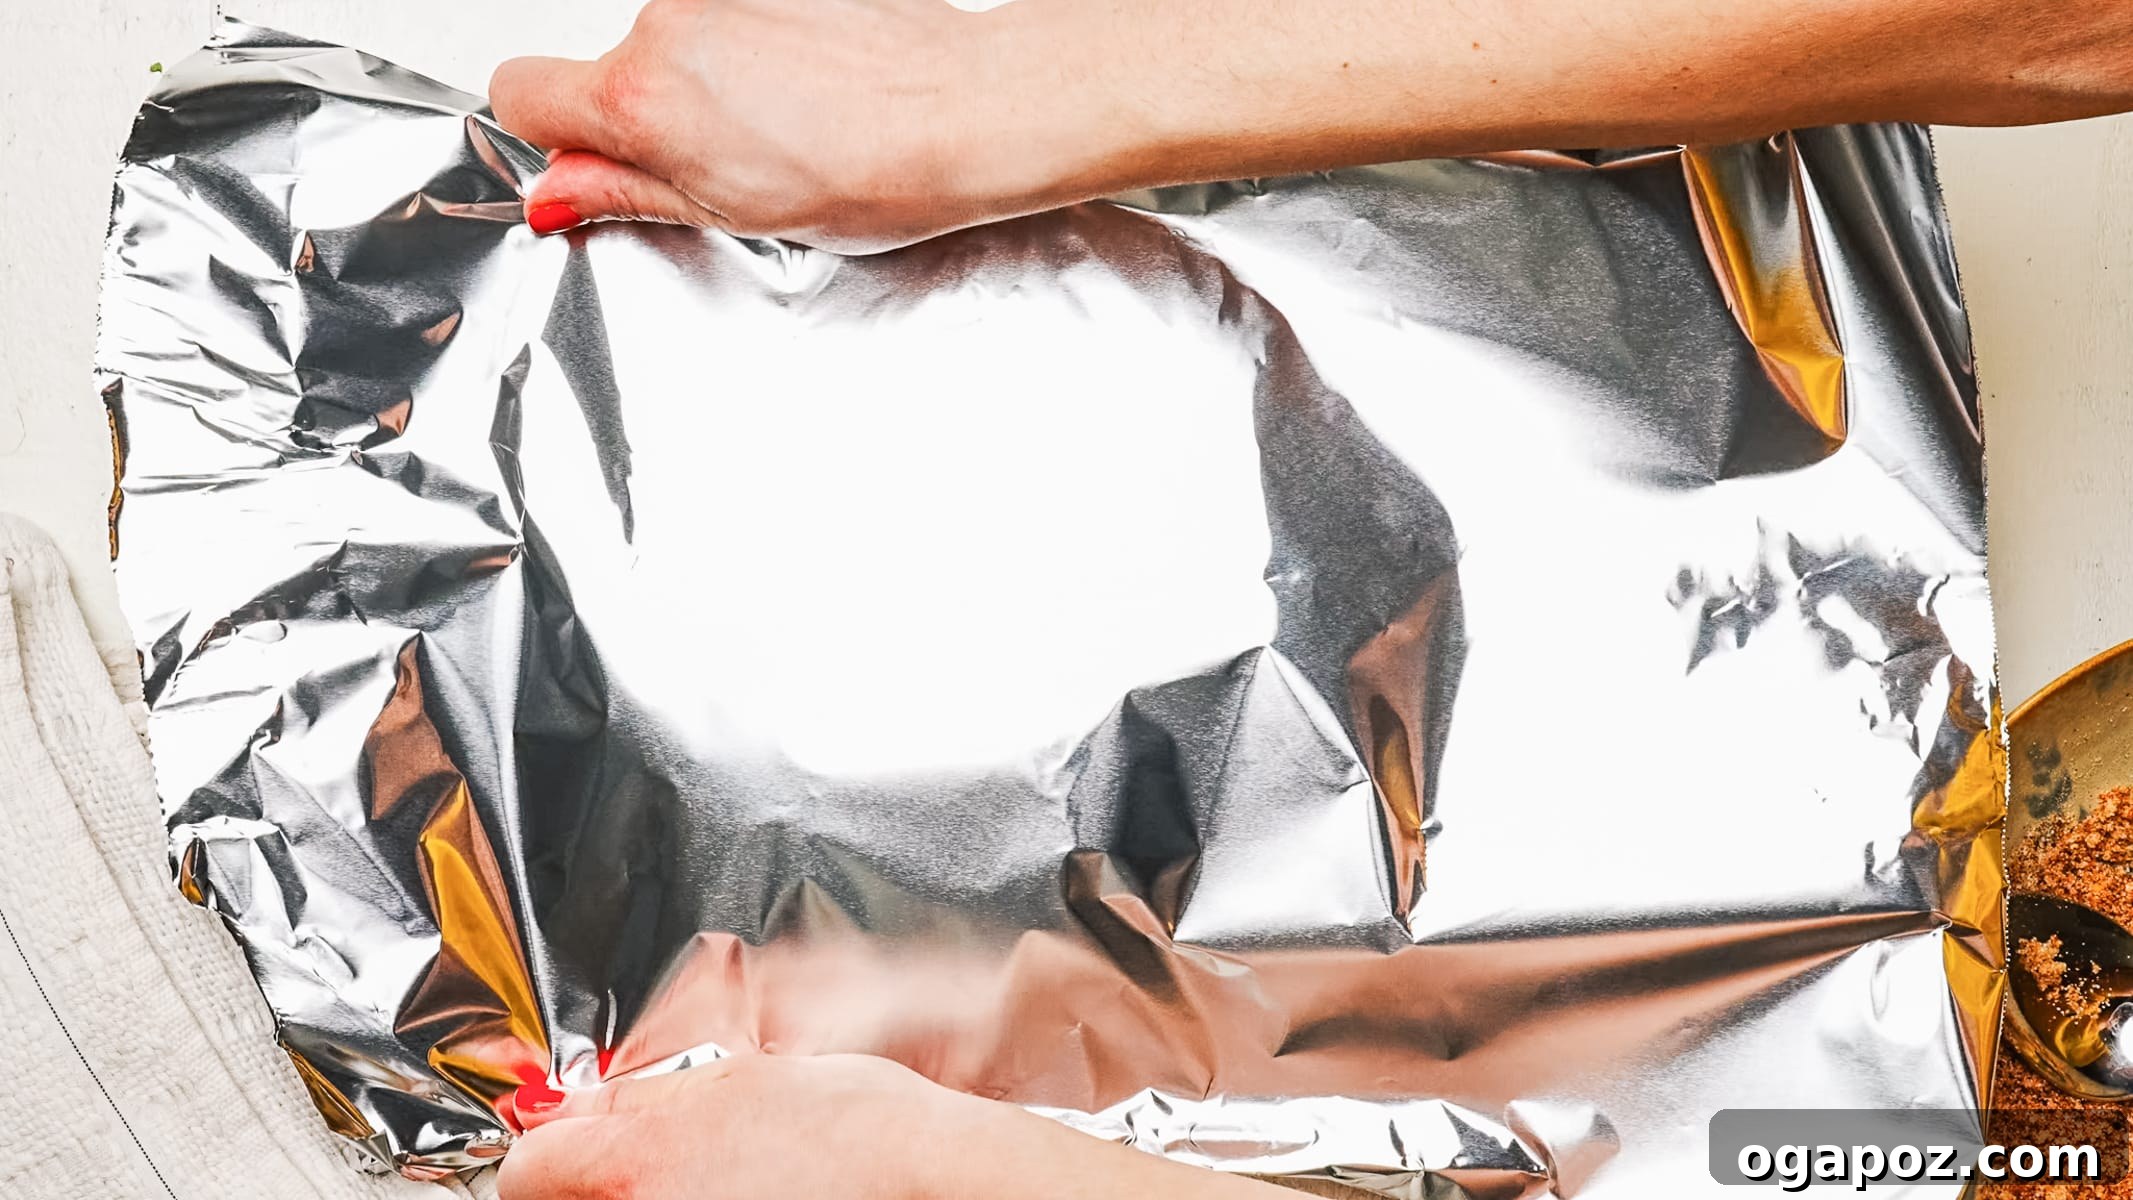
- Aluminum foil: You’ll use aluminum foil for two primary purposes. First, it’s perfect for lining the sheet pan, making post-cooking cleanup a breeze. Second, and critically, it’s used to tightly cover the pan during the “low and slow” baking phase. A tight seal is paramount, as it traps the steam generated within the pan, which is key to tenderizing the ribs from the inside out. Press the edges of the foil down firmly around the pan’s rim to create an impenetrable seal.
- Small bowl: Ideal for efficiently mixing all the dry rub ingredients together before you generously coat the ribs.
- Small saucepan: Used for simmering your homemade BBQ sauce. Choose one with a little extra capacity to prevent the sauce from bubbling over as it thickens.
- Pastry brush or spoon: For applying the BBQ glaze. A silicone pastry brush offers the most even and thorough coating, ensuring every inch of your ribs is beautifully glazed before and during broiling. A spoon can also work if you don’t have a brush.
- Tongs: Invaluable for the “bend test” to accurately check for doneness. When lifted from one end, a perfectly cooked rack of ribs will flex easily in the middle, indicating it’s ready. If it remains stiff, it needs more time.
- Sharp knife: Essential for both checking doneness by sliding between the bones and for cleanly slicing the finished ribs into individual portions. A sharp chef’s knife will make cleaner cuts and reduce tearing compared to a serrated blade.
- Paper towels: An indispensable kitchen item for gripping the tough membrane when you peel it from the bone side of the ribs, and also for thoroughly patting the ribs dry before applying the dry rub, which helps the seasoning adhere better.
How to Cook Spare Ribs in the Oven: A Simple Step-by-Step Guide
Achieving perfectly tender, succulent ribs at home is surprisingly straightforward with this oven-baked recipe. The majority of the cooking time is hands-off, allowing you to relax while your oven does the hard work. Follow these detailed steps to create the best ribs recipe you’ve ever tasted!
1. Prepare the Ribs and Preheat Your Oven
Begin by preheating your oven to 275°F (135°C). This precise low temperature is critical for tenderizing the meat without drying it out. Next, prepare your ribs: flip each rack so the bone-side is facing up. Look for the thin, silvery membrane stretched across the bones. To remove it, slide a butter knife or a small spoon under one end of the membrane to loosen it. Once you have a good grip, use a paper towel to firmly pull the membrane off in one continuous piece. It usually peels away quite easily once it’s started. Removing this membrane is vital as it prevents the rub from properly penetrating the meat and ensures the finished ribs are incredibly tender and pleasant to eat.
2. Apply the Flavorful Dry Rub
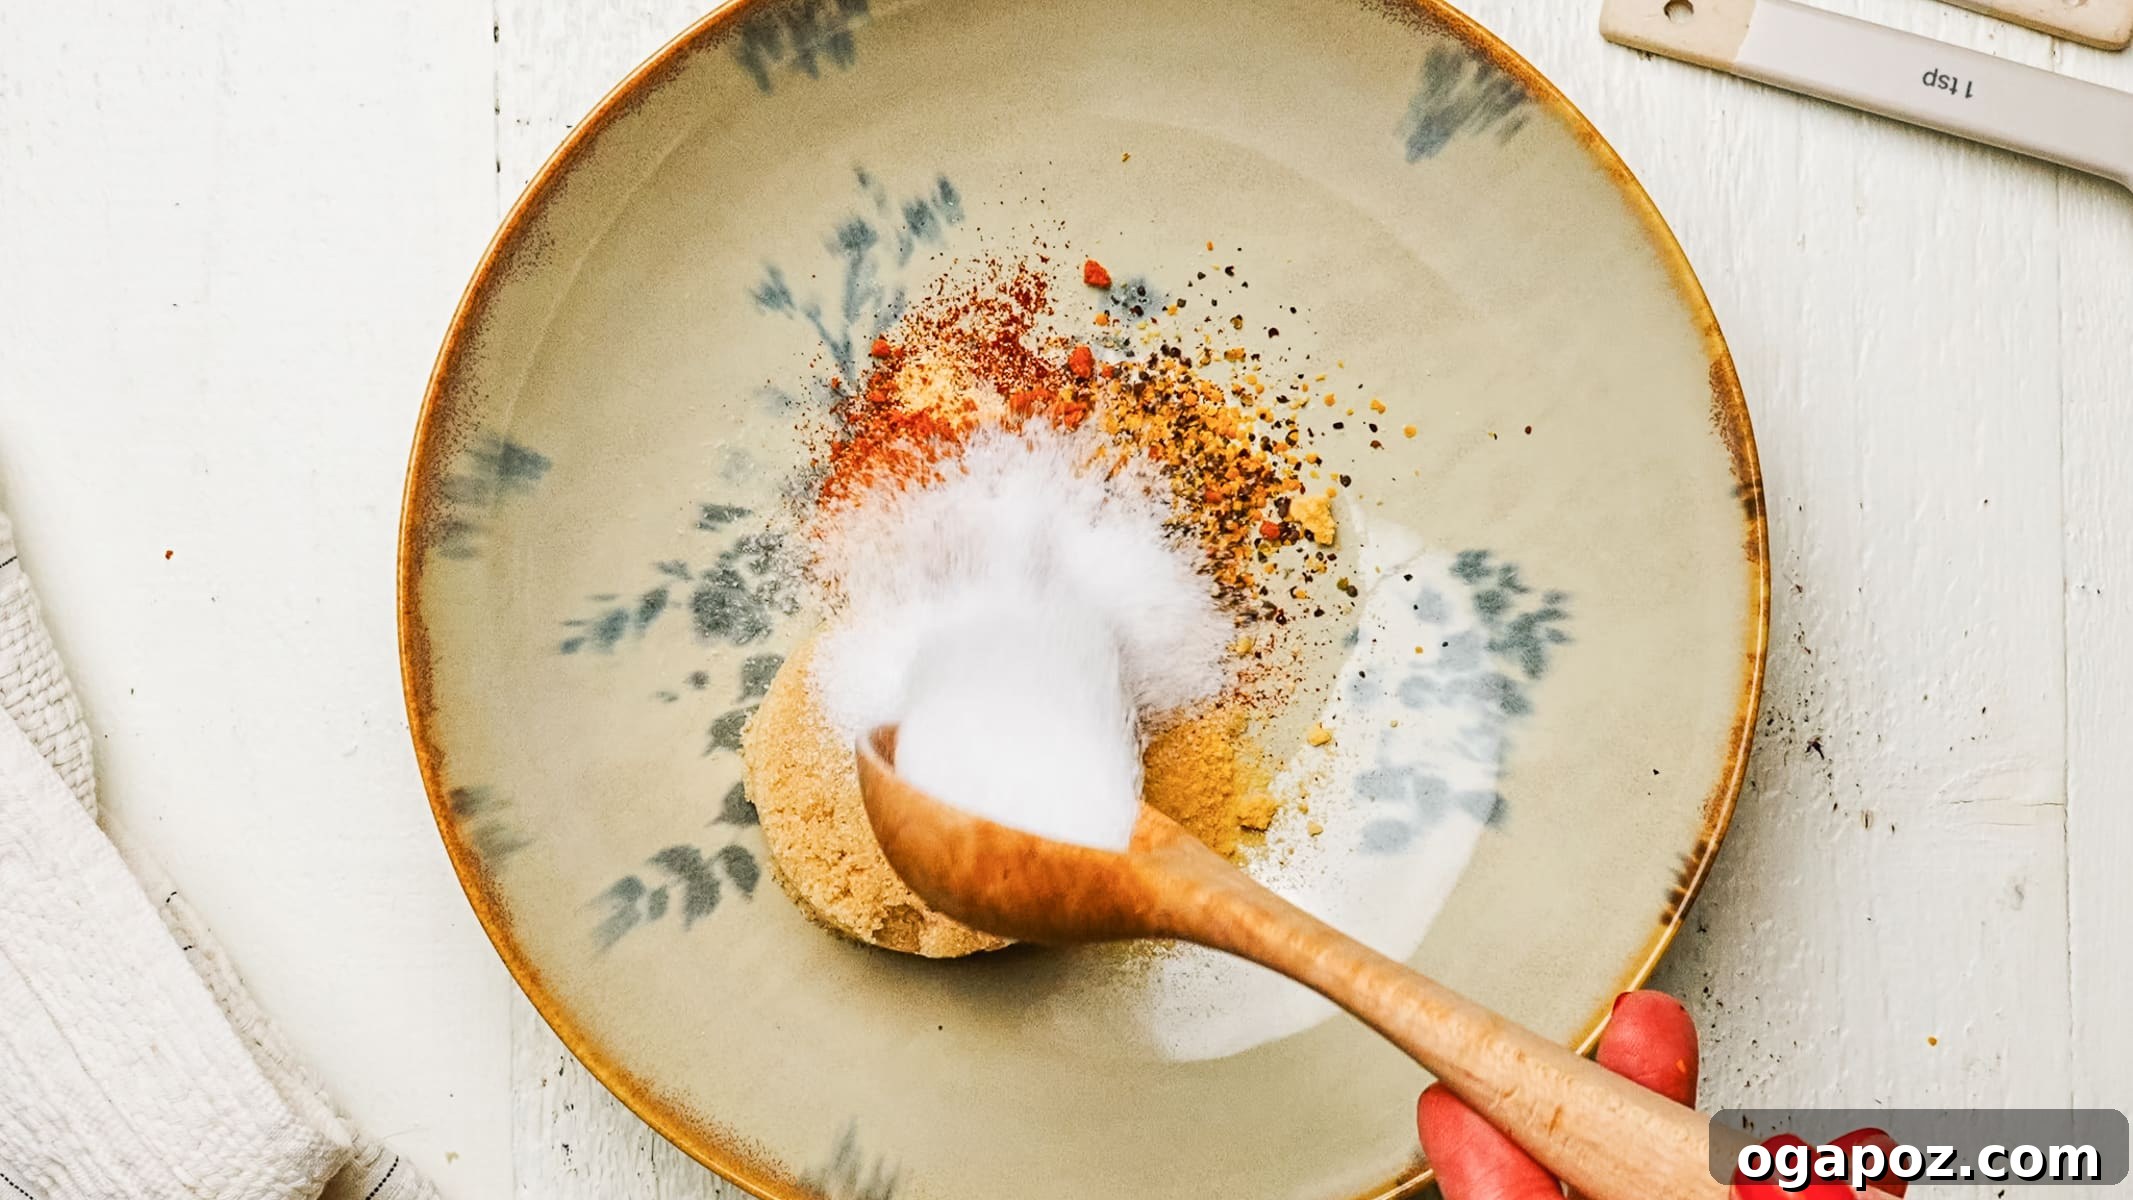
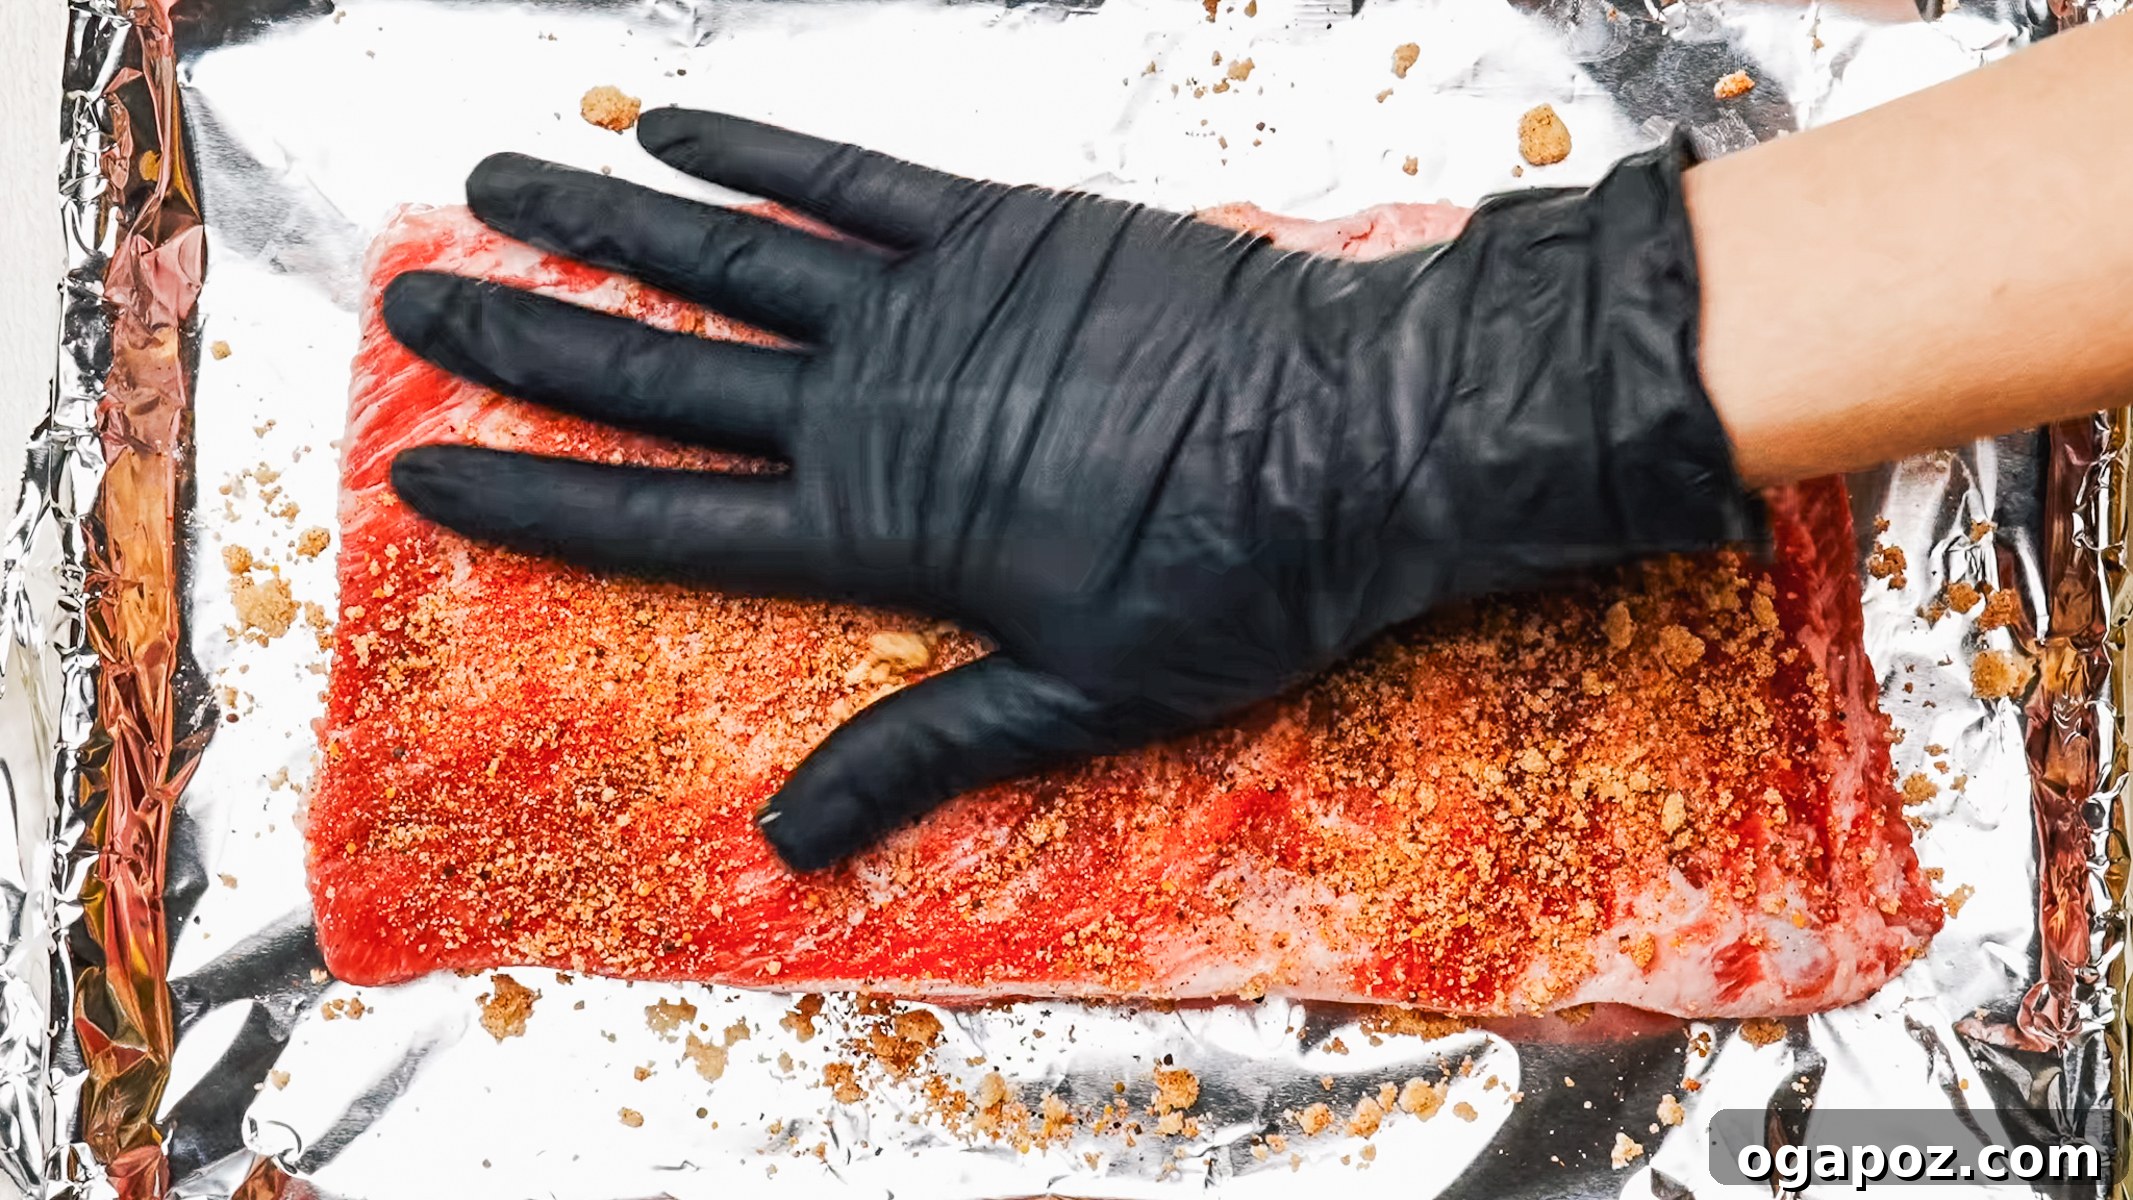
In a small bowl, thoroughly mix all the dry rub ingredients until well combined. Before applying the rub, pat the entire surface of both rib racks completely dry with paper towels. This crucial step helps the rub adhere effectively to the meat, creating a better crust and locking in flavor. Generously sprinkle and press the rub all over both sides of each rack, using your hands to really work it into the meat. Don’t be shy – a good coating is key to the ribs’ smoky flavor. Once seasoned, place the racks meaty side up on your foil-lined rimmed sheet pan.
3. Bake Covered: The Low and Slow Method for Tenderness
Cover the sheet pan tightly with a second sheet of aluminum foil, crimping the edges down firmly around the rim to create a complete and tight seal. This seal is crucial for trapping steam, which creates a moist cooking environment and is the secret to achieving fall-off-the-bone tenderness. Bake the ribs for 2 hours 45 minutes to 3 hours 15 minutes. Doneness is best judged by feel, not just by the clock. The ribs are ready when a knife slides into the meat between the bones with almost no resistance. To further confirm, use tongs to grab one end of a rack and lift it gently. A perfectly cooked rack will bend and flex significantly in the middle, indicating the connective tissues have broken down. If the rack feels stiff and doesn’t flex easily, it requires more time. Reseal the foil tightly and continue baking for another 15 minutes, then test again.
4. Prepare the Quick Homemade BBQ Sauce
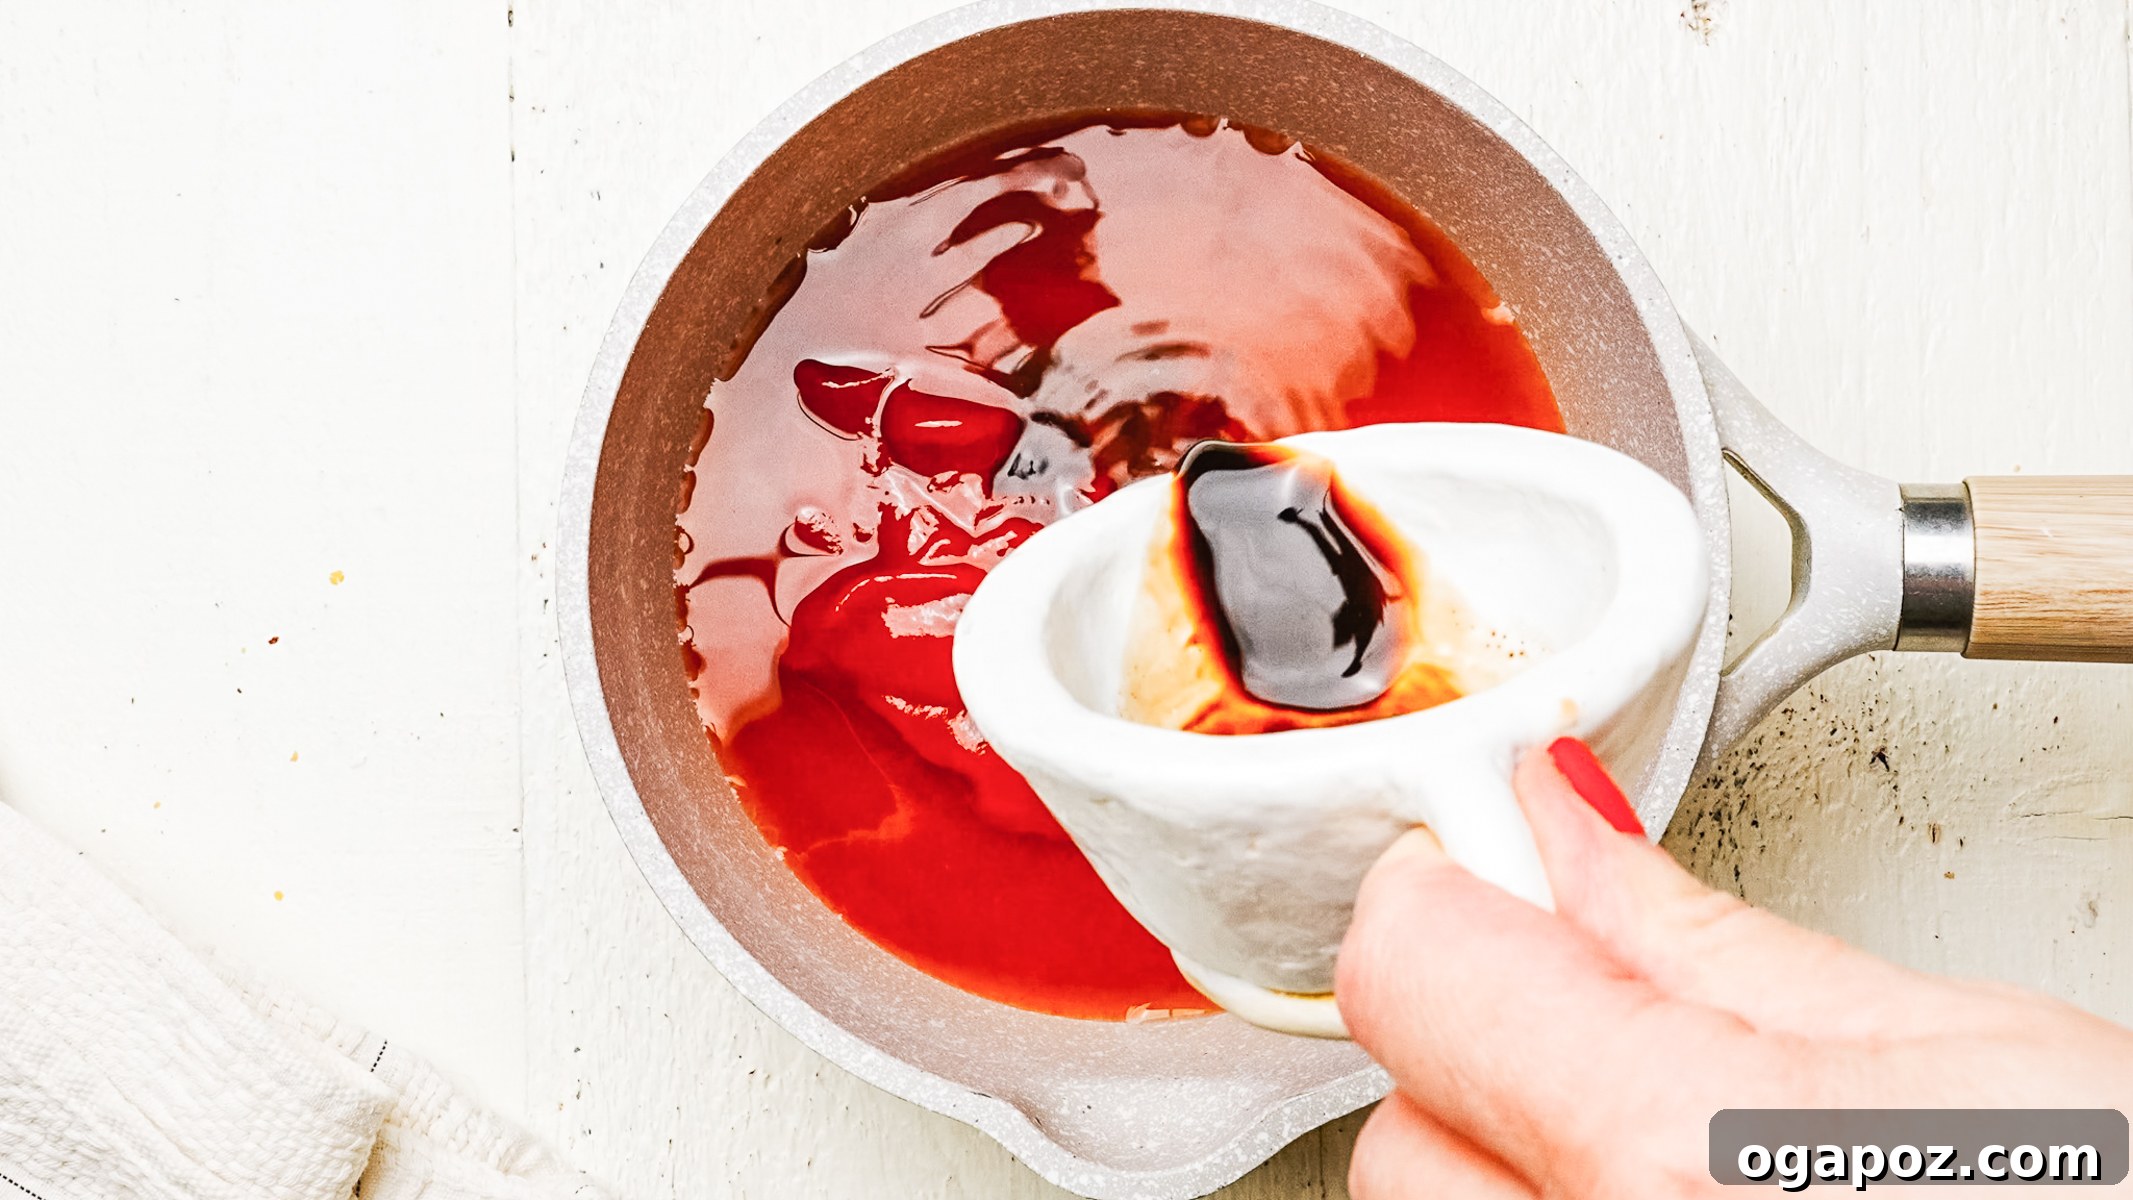
About 20 minutes before your ribs are due to come out of the oven, begin preparing the barbecue sauce. Combine all the BBQ sauce ingredients in a small saucepan. Bring the mixture to a gentle simmer over medium heat, then reduce the heat to medium-low. Cook the sauce for 8 to 10 minutes, stirring frequently, until it appears glossy and has thickened enough to coat the back of a spoon. Remember, the sauce will continue to thicken slightly as it cools. Remove it from the heat once it reaches your desired consistency.
5. Glaze and Broil for a Sticky, Charred Finish
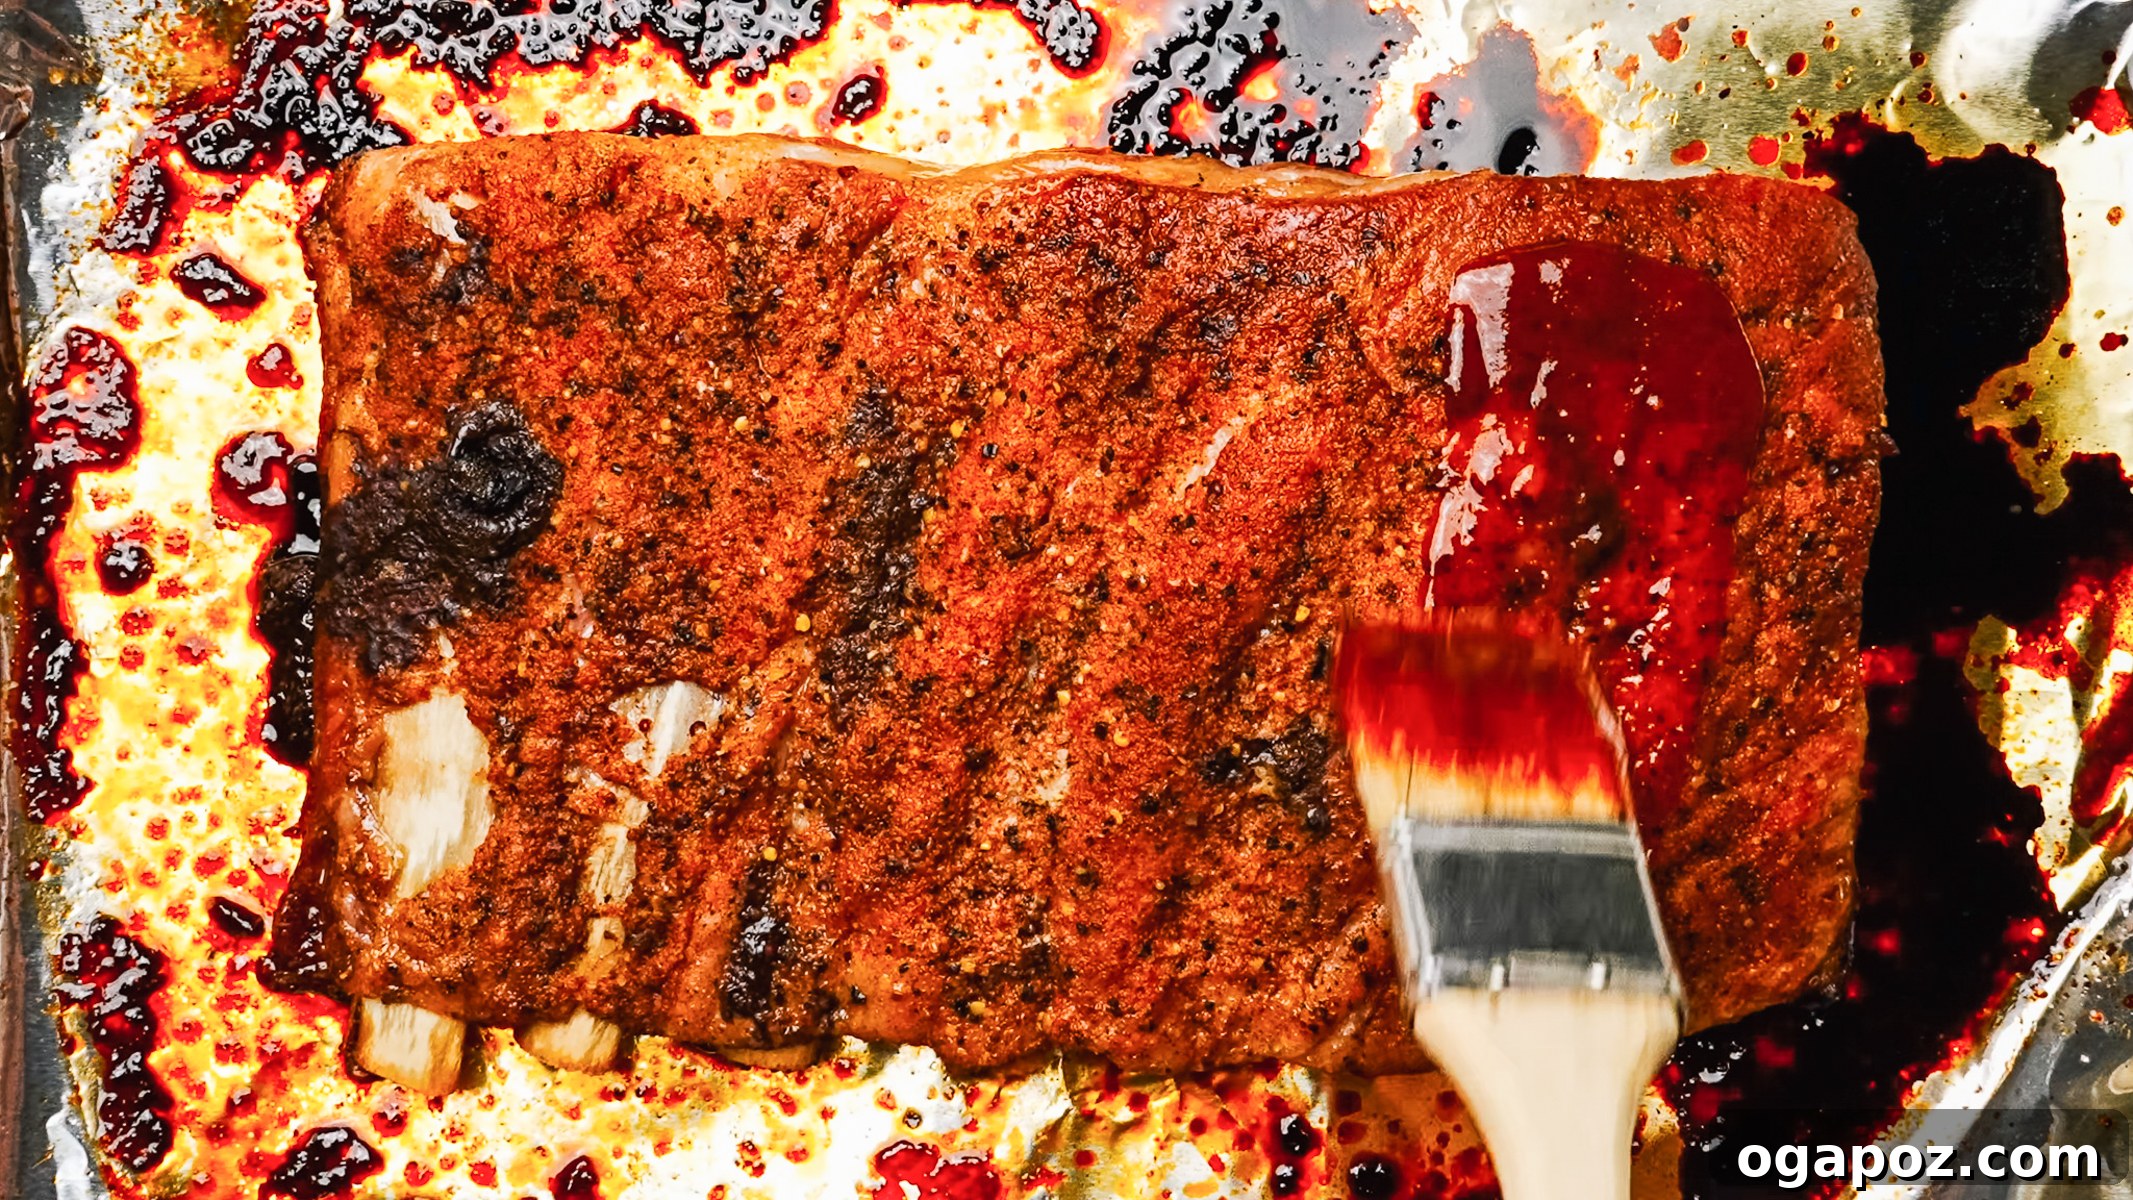
Once the ribs are tender, carefully remove the foil cover from the pan. Switch your oven setting to broil on high. Generously brush the cooked ribs with a thick layer of your prepared BBQ sauce. Slide the pan under the broiler, positioned so the ribs are about 6-8 inches from the heating element. Broil for 2 to 4 minutes, keeping a very close eye on them. You’re looking for the sauce to start bubbling, caramelizing, and developing slightly charred edges. Once the first layer is set and caramelized, brush with another generous layer of sauce and broil for an additional 1 to 2 minutes. Do NOT walk away during this step; the high sugar content in both the dry rub and the BBQ sauce means they can burn very quickly under the intense heat of a broiler.
6. Rest and Slice for Juicy Perfection
After broiling, immediately remove the ribs from the oven. Allow them to rest on the pan, uncovered, for a full 10 minutes before you begin slicing. This resting period is critical; it allows the meat’s juices, which have migrated to the center during cooking, to redistribute throughout the entire rack. Skipping this step will result in juices running out when you cut, leading to drier ribs. After resting, use a sharp knife to slice straight down between the bones to separate the individual ribs. Serve your perfect oven-baked spare ribs immediately, with any remaining barbecue sauce available on the side for dipping.
5 Common Mistakes to Avoid When Making Spare Ribs
Even with a straightforward recipe, certain pitfalls can prevent your oven-baked spare ribs from reaching their full potential. Here are the most frequent errors home cooks make and how to deftly avoid them:
- Skipping the membrane removal: This thin, silvery skin on the bone side of the ribs is not just aesthetic; it transforms into a tough, rubbery texture during cooking, making the ribs less enjoyable to eat. More importantly, it acts as a barrier, preventing your delicious dry rub from properly seasoning the meat underneath. Taking the minute or less to slide a knife under one corner, grip it with a paper towel, and pull it off will make a monumental difference in the final texture and flavor penetration of your ribs.
- Not sealing the foil tightly enough: The “low and slow” baking method relies heavily on steam to tenderize the meat. The aluminum foil cover creates a self-basting, steamy environment that gently breaks down the tough connective tissue from the inside. If there’s any gap or loose seal, that precious steam will escape, leading to dry, tough ribs where the collagen hasn’t had adequate time to break down. Always press the aluminum foil firmly and securely around all four edges of the baking pan to create an airtight seal; this step is doing critical work in achieving tenderness.
- Pulling the ribs before they’re truly done: The cooking time provided in this oven-baked ribs recipe is a guideline, a range, not an absolute fixed number. Every rack of ribs varies slightly in size and thickness, and every oven has its own quirks. Relying solely on the clock is a common mistake. Instead, diligently use both the knife test (knife slides easily between bones) and the bend test (rack flexes easily when lifted). If your ribs still feel stiff and resistant when you lift them, they simply need more time, full stop. Re-cover them tightly and bake for another 15 minutes before testing again.
- Walking away during the broiling process: The broil step is incredibly quick, typically lasting only 3 to 6 minutes in total. However, this is also the most high-stakes part of the cooking. The line between beautifully caramelized and completely charred is very thin, especially with the high sugar content in both the dry rub and the barbecue sauce. You absolutely cannot multitask during this step. Stay vigilantly at the oven, checking the ribs every 60 to 90 seconds, turning the pan if necessary, to ensure an even, golden-brown glaze without any burning.
- Slicing the ribs immediately after cooking: It’s tempting to dive right into hot, fresh-out-of-the-oven ribs, but cutting into them instantly will cause all the accumulated, flavorful juices to pour out onto the pan, leaving you with drier meat. This is arguably the easiest step in the entire recipe and yet the one most frequently skipped. A simple 10-minute rest period allows the juices to redistribute back into the meat fibers, ensuring each rib is noticeably juicier and more tender. Patience for these few extra minutes will be amply rewarded.
Make Ahead and Storage Tips for Your Ribs
One of the best features of this oven-baked spare ribs recipe is how wonderfully they can be prepared ahead of time and stored. They reheat beautifully, often tasting even better the next day, making them perfect for entertaining or meal prep.
Storing Leftover Ribs
- Refrigerator: To maintain their moisture and flavor, store any leftover ribs in an airtight container or wrap them tightly in aluminum foil. Properly stored, they will remain delicious for up to 4 days in the refrigerator. The key here is preventing air exposure, which can dry out the meat.
- Make ahead strategy: You can fully bake the ribs through the covered low-and-slow cooking step. Once tender, allow them to cool completely at room temperature, then refrigerate them in an airtight container or tightly wrapped in foil for up to 24 hours. When you’re ready to serve, simply brush them with your BBQ sauce and finish them under the broiler for that fresh, caramelized glaze. The texture and flavor will be just as exceptional as if they were made fresh.
Freezing Your Perfect Spare Ribs
- After baking: For longer storage, allow the cooked ribs to cool completely. Wrap each rack (or individual ribs, if preferred for easier portioning) tightly in plastic wrap, followed by a layer of aluminum foil. Alternatively, place them in a freezer-safe zip-top bag, ensuring as much air as possible is removed. Frozen ribs can be stored for up to 3 months. Slicing them into individual ribs before freezing is highly recommended for more convenient portion control when thawing.
- Thawing: Always thaw frozen ribs overnight in the refrigerator. Attempting to reheat them directly from a frozen state is not advisable, as the exterior can scorch and dry out before the center has a chance to warm through properly.
Reheating Spare Ribs Without Drying Them Out
- Oven reheating (recommended): This is the superior method for preserving the ribs’ juiciness and tender texture. Place the leftover ribs on a foil-lined baking pan, then cover them tightly with a fresh sheet of aluminum foil. Reheat in an oven preheated to 300°F (150°C) for 20 to 25 minutes, or until thoroughly warmed through. For that fresh-off-the-broiler taste, uncover them, brush with a little extra BBQ sauce, and broil for 2 to 3 minutes until the glaze re-caramelizes.
- Microwave reheating: While not ideal for texture, the microwave works well for a quick weeknight reheat of individual ribs. Place ribs loosely covered (to trap some moisture) and heat in short 60-second bursts until hot. A quick brush with a little extra sauce before serving can help refresh their flavor and appearance.
- Avoid uncovered high heat: Reheating ribs uncovered at a high oven temperature is the quickest way to dry out the meat, turning your tender ribs tough. Always ensure they are covered with aluminum foil until they are warmed through before proceeding with any glazing or broiling steps.
How to Serve Your Delicious Spare Ribs
While oven-baked spare ribs are undeniably a satisfying meal on their own, pairing them with the right accompaniments elevates them into a full, impressive spread perfect for any gathering or family dinner.
Spare Rib Toppings and Flavor Enhancements
- Extra BBQ sauce on the side: Always a must! Provide a generous bowl of additional homemade or store-bought BBQ sauce for dipping and personal preference.
- Pickled jalapeños or quick pickled red onions: The bright, acidic tang of pickles offers a fantastic counterpoint to the richness of the ribs, cutting through the savory and sweet flavors beautifully.
- Fresh cilantro or sliced green onions: A sprinkle of fresh herbs not only adds a pop of color but also introduces a subtle herbaceous freshness that complements the robust flavors.
- Hot sauce: For those who crave an extra kick, a variety of hot sauces can be offered to customize the heat level of each bite.
Classic Side Dishes for Spare Ribs
- Creamy coleslaw: The quintessential BBQ pairing. Its cool, crisp, and tangy profile provides a refreshing contrast to the warm, sticky, and smoky ribs. I consider this a non-negotiable side whenever spare ribs are on the menu.
- Creamy mashed potatoes: Rich, fluffy, and utterly comforting, mashed potatoes are perfect for soaking up any extra barbecue sauce, making them an all-time favorite side for any saucy pork dish.
- Macaroni salad: This cool, creamy pasta salad is a staple at any barbecue for good reason. Its tender pasta and tangy dressing perfectly balance the savory heat and richness of oven-baked ribs.
- Corn on the cob: Simple, sweet, and satisfying. Roasted, boiled, or grilled corn on the cob is always a crowd-pleaser and a perfect partner to any BBQ-style main.
- Cornbread or soft dinner rolls: Essential for mopping up every last drop of that delicious sauce from your plate, ensuring no flavor goes to waste.
Unlock the Best Spare Ribs: Final Notes & Expert Secrets
Achieving truly exceptional oven-baked spare ribs that stand out from the average requires understanding a few key principles and applying some insider secrets. These insights, often drawn from food science, are what guarantee a consistently tender, flavorful, and perfectly glazed result every time.
- 275°F (135°C) is the magic temperature for ultimate tenderness: This precise low oven temperature is not arbitrary. If the temperature is too low, the ribs will take an excessively long time to cook, potentially drying out before the desired tenderness is achieved. Conversely, if the temperature is too high, the exterior of the meat can dry out and toughen rapidly, before the crucial connective tissue and collagen have sufficient time to slowly break down into succulent gelatin. This slow, steady oven method is the scientific reason behind your fall-off-the-bone results, effectively mimicking the tenderizing effects of a smoker or grill without the specialized equipment.
- Always pat the ribs dry before applying the rub: This seemingly minor step is incredibly important. Drying the surface of the ribs thoroughly with paper towels creates the ideal surface for the dry rub to adhere. A dry surface allows the rub to form a more robust, flavorful crust during cooking. If the meat surface is wet, the rub will struggle to stick properly, often clumping or sliding off, leading to an unevenly seasoned and less flavorful outcome.
- Brown sugar performs double duty in this recipe: Its role extends far beyond simple sweetness. In the dry rub, brown sugar acts as a humectant, drawing moisture to the surface of the meat, which then facilitates the Maillard reaction (browning) and caramelization, creating that desirable sticky, flavorful crust. When incorporated into the barbecue sauce, brown sugar not only adds depth of sweetness but also significantly contributes to the sauce’s thickening properties and, most importantly, its ability to char and caramelize beautifully under the broiler. Do not be tempted to reduce the amount of brown sugar in either the rub or the sauce; it’s fundamental to the recipe’s success.
- The “bend test” is your most reliable indicator of doneness, surpassing any timer: Forget the clock as your sole guide for doneness. The “bend test” offers an undeniable physical cue. A perfectly cooked rack of spare ribs will bend and flex with remarkable ease when you lift it from one end using tongs, indicating that the collagen has fully broken down. If the rack remains stiff and rigid, it simply needs more time – there’s no shortcut. Trust the physical feel over an arbitrary timer, and crucially, never compromise the tight foil seal during the baking process, as this maintains the tenderizing steam.
- Apply two distinct layers of glaze under the broiler for optimal results: Rather than one heavy coat, applying two thinner layers of BBQ sauce under the broiler yields a superior finish. The first layer sets, becomes deliciously sticky, and begins to caramelize. The second layer then builds upon this foundation, allowing for more pronounced bubbling, charring, and a deeper, richer glaze without becoming overly thick or prone to sliding off before it sets. This technique ensures a more complex flavor and texture on the exterior of your ribs.
- Smoked paprika is a flavor hero, carrying a significant portion of the smoky essence: This spice is not just an accent; it’s a foundational flavor driver, integrated into both the dry rub and the BBQ sauce. It is the primary reason these oven-baked spare ribs achieve such an authentic smoky taste without the use of a traditional grill or smoker. Therefore, investing in a good quality, fresh smoked paprika is paramount. The vibrant, deep flavor of a high-quality, recently opened jar will make a noticeable difference compared to a stale or inferior product, elevating the overall taste profile of your ribs.
Frequently Asked Questions About Spare Ribs
For those quickly scanning or seeking specific answers, here are common questions about preparing and understanding spare ribs, along with concise, informative responses.
Spare ribs are almost exclusively pork. They are cut from the belly side of a pig, specifically from the lower portion of the rib cage, near the breastbone. While beef ribs (such as short ribs or back ribs) also exist, the term “spare ribs” in recipes or menus almost universally refers to their pork counterpart.
Spare ribs and baby back ribs originate from different sections of the pig. Spare ribs are larger, meatier, and contain more fat and connective tissue, coming from the pig’s belly. Baby back ribs, conversely, are smaller, leaner, and found higher on the pig’s back, near the spine. Due to their composition, spare ribs require a longer cooking time but yield a richer, more robust flavor, while baby back ribs cook quicker and offer a leaner meat profile.
Yes, spare ribs typically have a tough, silvery membrane (or silverskin) running across the bone side of the rack. It is highly recommended to remove this membrane before cooking. If left on, it becomes tough and rubbery during the long baking process, and also prevents the dry rub from properly flavoring the meat. To remove it, simply slide a butter knife or spoon under one corner, grip it firmly with a paper towel, and pull it off in one piece. This takes less than a minute but significantly improves the eating experience.
The ideal oven temperature for cooking tender, fall-off-the-bone spare ribs is 275°F (135°C). This low-and-slow method provides sufficient time for the tough collagen and connective tissues in the ribs to gradually break down into gelatin without prematurely drying out the meat. Higher temperatures can cause the proteins to tighten too quickly, resulting in tougher ribs. The total covered bake time at 275°F typically ranges from 2 hours 45 minutes to 3 hours 15 minutes.
The most reliable indicators for perfectly cooked spare ribs are the knife test and the bend test. For the knife test, insert a knife between two bones; it should slide in with minimal resistance. For the bend test, grasp the rack with tongs and lift it from one end. A done rack will bend and flex easily in the middle, almost to the point of breaking. If the rack feels stiff and does not flex, it requires additional cooking time, typically another 15 minutes, before retesting.
Absolutely, spare ribs are an excellent dish to prepare ahead, especially when cooking for a crowd. You can bake the ribs fully through the initial covered, low-and-slow step. After baking, allow them to cool completely, then refrigerate for up to 24 hours. When you’re ready to serve, simply brush them with barbecue sauce and broil them briefly to achieve a fresh, caramelized glaze. This method often results in even more tender and flavorful ribs the next day.
Yes, using your favorite store-bought barbecue sauce for the final glaze is perfectly acceptable and convenient. In this recipe, the dry rub is responsible for the majority of the deep, savory flavor profile of the spare ribs. The sauce primarily serves to create that sticky, sweet, and caramelized finish under the broiler. Opt for a smoky style sauce to harmonize with the smoked paprika already present in the rub.
The best way to reheat spare ribs while maintaining their juiciness is in the oven. Place the ribs on a foil-lined pan, cover them tightly with aluminum foil, and reheat at 300°F (150°C) for 20 to 25 minutes, or until heated through. To revive the glaze, uncover them, brush with a little extra barbecue sauce, and broil for 2 to 3 minutes. Avoid reheating uncovered at high temperatures, as this will quickly dry out the meat.
More Delicious Pork Recipes You’ll Love
If you enjoyed these fall-off-the-bone spare ribs, you’re sure to find new favorites among these other highly-rated pork dishes. Expand your culinary repertoire with these mouthwatering options:
- Honey Garlic Spare Ribs (Dry Garlic Ribs): A delightful Asian-inspired twist on ribs, offering a balance of sweet and savory garlic flavors.
- Instant Pot Pulled Pork: Achieve incredibly tender, flavorful pulled pork in a fraction of the time with this easy pressure cooker method.
- Roast Pork Loin with Easy Pork Gravy: A classic and elegant meal, perfect for a family dinner or special occasion, complete with a rich, homemade gravy.
- Pulled Pork Tenderloin with Chipotle BBQ Sauce: A quick and flavorful pulled pork option using tenderloin, enhanced with a smoky chipotle barbecue sauce.
- Instant Pot Pork Chops with Easy Gravy: Juicy, tender pork chops prepared quickly in the Instant Pot, served with a simple, savory gravy.
Fall-Off-the-Bone Oven-Baked Spare Ribs
Video
Ingredients
Ribs
- 2 pork spare rib racks about 6-7 lb total
Dry Rub
- 4½ tsp kosher salt
- 1½ tsp black pepper
- 4 tbsp brown sugar
- 2 tbsp smoked paprika
- 1 tbsp garlic powder
- 1 tbsp onion powder
- 1 tsp dry mustard
- ½ tsp cayenne pepper
Quick BBQ Sauce
- 1 cup ketchup
- ¼ cup apple cider vinegar
- 3 tbsp brown sugar
- 2 tbsp molasses or maple syrup
- 1 tbsp Worcestershire sauce
- 1 tsp Dijon mustard
- 1 tsp smoked paprika
- ½ tsp garlic powder
- ½ tsp kosher salt
Instructions
-
Preheat your oven to 275°F (135°C). Flip the ribs bone-side up and peel off the thin membrane. Use a butter knife to loosen a corner, then grip firmly with a paper towel and pull off in one sheet. This ensures the rub penetrates better and the ribs are more tender.
Mix all dry rub ingredients in a small bowl. Pat the ribs thoroughly dry with paper towels; this is crucial for the rub to adhere and form a better crust. Coat the ribs generously all over with the rub, pressing it in firmly on both sides. Place the seasoned racks, meaty side up, on a large rimmed baking sheet that has been lined with aluminum foil for easier cleanup.
-
Cover the entire pan tightly with a second sheet of aluminum foil, crimping the edges down around the rim to create an airtight seal. This tight seal traps steam, which is essential for tenderizing the ribs during the long, slow bake.
Bake for 2 hours 45 minutes to 3 hours 15 minutes. The ribs are done when a knife slides in easily between the bones with almost no resistance, indicating extreme tenderness. To double-check, use tongs to lift a rack from one end; a properly cooked rack should bend and nearly crack in the middle. If it still feels stiff and rigid, reseal the foil tightly and continue baking for another 15 minutes, then perform the test again.
-
While the ribs are baking and nearing their cooking time, prepare the BBQ sauce. Combine all the BBQ sauce ingredients in a small saucepan. Bring the mixture to a gentle simmer over medium heat, then reduce the heat to medium-low. Cook for 8 to 10 minutes, stirring frequently, until the sauce appears glossy and has thickened enough to coat the back of a spoon. Remove from heat and set aside.
-
Once the ribs are tender, carefully remove the foil cover from the pan. Switch your oven setting to broil on high. Generously brush the ribs with a thick layer of the prepared BBQ sauce. Slide the pan under the broiler, ensuring the ribs are about 6-8 inches from the heating element. Broil for 2 to 4 minutes, watching continuously, until the sauce begins to bubble, caramelize, and show slight charring at the edges. Brush with another layer of sauce and broil for an additional 1 to 2 minutes. Do not leave the oven unattended during this step, as the sugars in both the rub and sauce can burn very quickly under the broiler’s intense heat.
-
After broiling, remove the ribs from the oven and let them rest, uncovered, on the pan for 10 minutes. This resting period allows the juices to redistribute throughout the meat, ensuring each rib is incredibly juicy. Then, slice straight down between the bones with a sharp knife to separate the ribs. Serve immediately with any remaining BBQ sauce on the side for dipping.
Notes
For an even deeper flavor, the seasoned ribs can be rubbed and refrigerated, uncovered, overnight before baking. This allows the spices to penetrate the meat more effectively.
Store any leftover ribs in an airtight container in the refrigerator for up to 4 days to maintain freshness and moisture.
To reheat, place ribs wrapped in foil on a baking pan and warm at 300°F (150°C) for about 20 minutes. For a fresh glaze, brush with extra sauce and broil briefly until re-caramelized.
Nutrition
Nutrition information is automatically calculated, so should only be used as an approximation.
Tried this recipe? Share your experience!