
There’s an undeniable joy that comes from biting into a slice of warm, freshly baked bread. For me, living just steps away from a fantastic local bakery means I’m often spoiled with artisan loaves, still warm from the oven, offering a taste experience that bagged supermarket bread simply can’t match. The aroma, the texture, the simple pleasure of breaking off a piece – it’s a daily ritual I cherish. And for those special moments when I crave something the bakery doesn’t offer, I find immense satisfaction in creating it myself, feeling the springy dough come alive in my hands.
Yet, for years, English muffins remained an unexplained exception to my “fresh-only” rule. I succumbed to the convenience of store-bought packages, never truly questioning what was inside those oddly uniform pucks. That was until a moment of curiosity led me to scrutinize the ingredient list on a package of my favorite English muffins. What I discovered was nothing short of alarming.
The Unwanted Truth: Decoding Store-Bought English Muffin Labels
Initially, the ingredient list seemed promising enough: “Whole Wheat Flour, Water, Yeast, Salt, Wheat Gluten, Canola Oil.” These are all standard, wholesome ingredients you’d expect to find in any bread product. If the list had ended there, I wouldn’t have given it a second thought. However, the subsequent entries read like a chemistry textbook, not a recipe for simple breakfast bread. The list continued with “glucose-fructose, calcium propionate, monocalcium phosphate, calcium sulphate, ammonium chloride, azodicarbonamide, diacetylated tartaric acid esters of mono- and diglycerides (??!?), calcium peroxide and ascorbic acid.”
My enthusiasm for those convenient English muffins plummeted. “Yum?” I thought, with a distinct lack of appetite. While many of these additives are generally recognized as safe by food authorities, the sheer volume and complexity of unpronounceable chemicals raised a significant red flag for me. Why were so many artificial ingredients necessary for a product that should, at its core, be made from flour, water, yeast, and salt?
This revelation was the turning point. That bag of English muffins became my last. I resolved to take control of what I consumed and embark on a culinary journey to create these delightful breakfast staples from scratch. Little did I know, it would be one of the easiest and most rewarding baking decisions I’ve ever made.
The Surprising Simplicity of Homemade English Muffins
I genuinely can’t believe it took me so long to venture into making English muffins myself. The truth is, they are incredibly easy to prepare – so much so that they practically make themselves! Forget those preservative-laden, uniform pucks from the store; homemade English muffins blow them out of the water in terms of flavor, texture, and wholesome goodness. The freshness is incomparable, and the satisfaction of knowing exactly what goes into every bite is truly priceless.
If you’re familiar with the revolutionary no-knead bread method, you’ll find making English muffins to be an equally simple, if not faster, process. Unlike traditional bread recipes that demand extensive kneading and lengthy proofing times, these muffins require absolutely no kneading. You simply stir the ingredients together, allowing the natural magic of yeast to do its work. Even better, the waiting time is significantly shorter – just about an hour for the first rise, followed by a brief second rise. If you haven’t yet tried your hand at no-knead bread, consider this your double invitation to dive into the world of incredibly easy, homemade baked goods, stat!
The beauty of this recipe lies in its minimal fuss. It demystifies bread-making, proving that you don’t need to be an expert baker to achieve incredible results. The dough might be a bit sticky, but with a well-floured surface, it’s remarkably cooperative. The reward for such little effort is a batch of warm, chewy, craggly English muffins, far superior to anything you could ever buy.
Crafting the Perfect Craggly Texture: Essential Tips for Success
Achieving that iconic English muffin texture – soft, chewy, with all those beautiful nooks and crannies – is simpler than you might imagine, but a few key techniques make all the difference. Mastering these steps will ensure your homemade muffins are nothing short of perfection.
Dough Dynamics and Handling
Expect the dough for these English muffins to be quite wet and sticky. This high hydration is what contributes to their incredible chewiness and the airy, open texture. Don’t be alarmed by its consistency; it’s exactly as it should be. The trick to handling such a dough is generous flouring. When you transfer the risen dough from the bowl to your work surface, make sure your counter is thoroughly dusted with all-purpose flour. Lightly flour the top of the dough as well, and use floured hands or a floured rolling pin to gently pat it down to about ½ inch thick.
To create perfect rounds, a 3-inch biscuit cutter is ideal. If you don’t have one, an overturned drinking glass with a similar diameter works just as well. Simply dip your cutter or glass in flour before each cut to prevent sticking. After cutting your initial rounds, gather up the dough scraps, gently press them together (avoid overworking them), and pat them out again to cut additional muffins. A floured spatula will be your best friend for carefully lifting the sticky rounds and transferring them to a lightly floured surface for their final short rise. This gentle handling ensures they maintain their shape and airy structure.
The Skillet-to-Oven Secret
One of the most crucial steps to achieving true English muffin character is the two-stage cooking process. You absolutely must cook them first in a hot skillet before transferring them to the oven to finish baking. Skipping the skillet and trying to bake them straight in the oven, as I once mistakenly tried, results in flat, sad buns rather than the distinctively risen, golden-bottomed English muffins we all love. The direct heat of the skillet creates that signature golden-brown, slightly crispy crust on both sides, while the subsequent baking in the oven ensures they cook through evenly and puff up beautifully, developing their internal structure.
Before placing your muffins in the skillet, make sure to dust the pan generously with cornmeal. The cornmeal not only prevents sticking but also contributes to the muffins’ rustic charm and provides a slight textural crunch on the exterior. If you don’t have cornmeal on hand, a little extra flour or even wheat germ can serve as an adequate substitute. Cook them for 3-4 minutes per side until they’re beautifully golden brown, then transfer them to a baking sheet. Once all your muffins have been browned, they’ll spend another 7-10 minutes in the oven, where they’ll achieve that perfect internal cooked state – you’ll know they’re ready when they sound hollow if you gently tap their tops.
Unlocking Nooks and Crannies
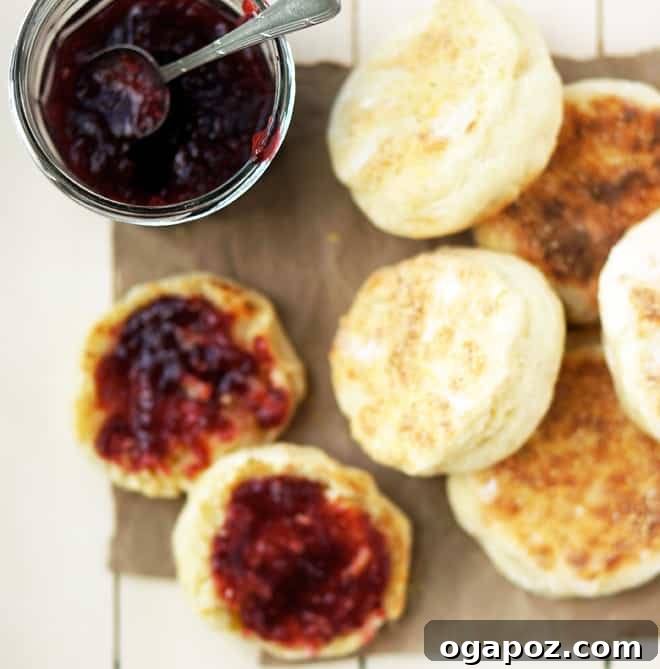
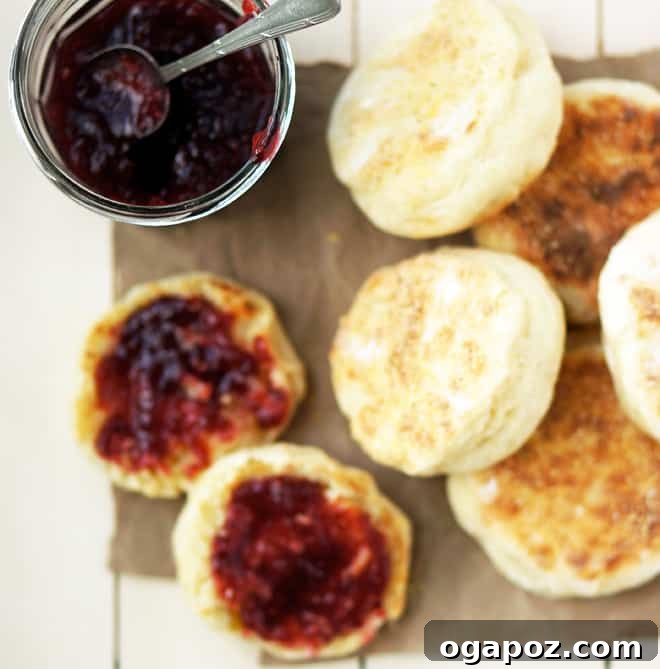
The hallmark of a truly great English muffin is its incredible network of nooks and crannies, those delightful crevices that eagerly soak up melted butter, jam, or any other topping. The secret to preserving these internal textures is how you open your muffin. Resist the urge to slice it in half with a knife! A knife will flatten those precious pockets, leaving you with a smooth, less enjoyable surface.
Instead, use a fork to stab gently around the circumference of the muffin, then carefully pry it apart. This method creates a wonderfully uneven, craggy surface, maximizing the area for butter and toppings to seep into, making every bite an absolute delight. It’s a small detail that makes a huge difference in the overall experience.
The Tangy Secret: Yogurt’s Role
Our recipe includes a secret ingredient that elevates the flavor and texture of these homemade English muffins: plain yogurt. A touch of yogurt in the dough serves a dual purpose. Firstly, it cleverly mimics the subtle tang often found in traditional sourdough English muffins, adding a layer of complex flavor without the need for a sourdough starter. Secondly, the acidity in the yogurt helps to tenderize the dough, contributing significantly to the muffins’ extra soft and delightfully chewy texture. It’s a simple addition that yields remarkably superior results, enhancing both the taste and mouthfeel of these already fantastic treats.
Beyond Breakfast: Versatile Serving Ideas
While English muffins are undeniably a breakfast icon, especially when serving as the perfect vehicle for a classic Eggs Benedict, their versatility extends far beyond the morning meal. Their sturdy yet soft texture makes them ideal for a variety of culinary creations. Top them simply with homemade jam, honey, or a generous dollop of cream cheese. Transform them into mini open-faced sandwiches with avocado, tomato, and a sprinkle of everything bagel seasoning. For a quick lunch, they can form the base of a satisfying tuna melt or a grilled cheese sandwich. And don’t forget the ultimate comfort food pairing: toasted English muffins with copious amounts of melted butter, allowing it to seep into every cranny. The possibilities are truly endless once you have a batch of these delectable homemade muffins on hand.
Ingredients for Homemade English Muffins
- 1 1/2 cups whole milk (or any milk of choice)
- ¼ cup cold unsalted butter, cut into small cubes
- 1 large egg, lightly beaten
- 1/4 cup plain yogurt (full-fat or low-fat, unsweetened)
- 4 cups all-purpose flour (for a richer flavor and texture, use 2 cups whole wheat flour and 2 cups all-purpose flour)
- 1 tbsp granulated sugar
- 2 ¼ tsp instant or rapid rise yeast (one standard packet)
- 1 ½ tsp fine sea salt
- Cornmeal, for dusting the skillet and providing classic texture (extra all-purpose flour can be used as an alternative)
Preparation: Your Step-by-Step Guide to Perfect English Muffins
- Warm the Milk & Melt the Butter: In a large, microwave-safe measuring cup or bowl, gently microwave the milk on high power until it just begins to simmer around the edges, typically about 2 ½ minutes. Be careful not to let it boil over. Immediately stir in the cold, cubed butter until it is completely melted. This method helps to cool the milk slightly while ensuring the butter is fully incorporated. Allow the mixture to cool down until it is just warm to the touch (lukewarm, around 105-115°F/40-46°C). Once it has reached the ideal temperature, stir in the beaten egg and the plain yogurt until well combined. This lukewarm temperature is crucial for activating the yeast without killing it.
- Combine Dry & Wet Ingredients for the Dough: In the bowl of a standing mixer fitted with the beater attachment, combine the all-purpose flour (or your flour blend), granulated sugar, instant or rapid rise yeast, and fine sea salt. Give these dry ingredients a quick stir to ensure they are evenly distributed. With the mixer speed set to low, slowly pour in the prepared milk-butter-egg-yogurt mixture. Beat for approximately 1 minute, or until all the ingredients are thoroughly combined and no dry pockets of flour remain. The resulting dough will be noticeably wet and very sticky – this is perfectly normal and desired for the authentic English muffin texture. Do not attempt to add more flour at this stage, as it will make the muffins dry. Cover the bowl tightly with plastic wrap (saran wrap) and place it in a warm, draft-free spot to rise for a minimum of one hour, or until the dough has visibly doubled in size and appears light and airy.
- Shape the Muffins: Once the dough has risen, generously flour a clean work surface (your counter or a large cutting board). Gently scrape the sticky dough from the bowl onto the floured surface. Lightly flour the top of the dough to prevent sticking, then use your floured hands or a floured rolling pin to gently pat the dough down until it is about ½ inch thick. Dip a 3-inch biscuit cutter (or an upside-down drinking glass) in flour before each cut, then press firmly into the dough to create rounds. Carefully transfer these rounds to a separate, lightly floured baking sheet or piece of parchment paper to rise again. Gather any dough scraps, gently press them together (without kneading aggressively), pat them out, and cut additional rounds until all the dough is used. Cover the shaped English muffins loosely with plastic wrap or a clean kitchen towel and let them rise for another 20 minutes. This short second rise helps them become light and airy.
- Cook and Bake to Perfection: While the muffins are completing their second rise, preheat your oven to 400 degrees F (200°C). Simultaneously, heat a large cast-iron skillet (or two skillets for efficiency) over medium heat. Once hot, generously dust the skillet(s) with cornmeal. Carefully place the English muffin rounds into the hot, cornmeal-dusted skillet, ensuring they are about 1 inch apart to allow for expansion. Cook for 3-4 minutes on the first side, until they are beautifully golden brown and have started to puff up. Flip them over and cook for another 3-4 minutes on the second side until equally golden. As each batch of English muffins is browned, transfer them directly to a clean baking sheet. Once all the muffins have been browned in the skillet, place the baking sheet in the center rack of your preheated oven. Bake for 7-10 minutes, or until the muffins sound hollow when you gently tap their tops, indicating they are fully cooked through.
Storage and Enjoyment: Keeping Your Muffins Fresh
These homemade English muffins are best enjoyed fresh, but they also store beautifully. Once cooled, you can keep them in an airtight container at room temperature for 2-3 days. For longer storage, they freeze exceptionally well. Simply place them in a freezer-safe bag, ensuring as much air is removed as possible, and freeze for up to 3 months. When ready to enjoy, thaw them at room temperature or toast directly from frozen for a quick and delicious treat. Always remember to split them with a fork to preserve those essential nooks and crannies!
Embrace the Homemade Difference
Making English muffins from scratch is a surprisingly simple and deeply satisfying endeavor. You’ll not only avoid the bewildering array of additives found in store-bought versions but also discover a depth of flavor and texture that is simply unparalleled. The chewy interior, the crisp, cornmeal-dusted exterior, and those glorious nooks and crannies waiting to be filled with melted butter are just a few reasons to ditch the bag and embrace the homemade difference. Give this recipe a try, and prepare to elevate your breakfast game to an entirely new level!