
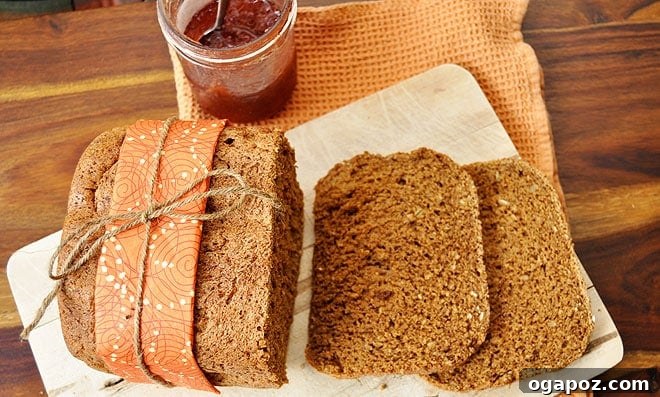
Mastering the Art of Homemade Mixed Grain Bread: Patience, Perfection, and a Recipe You’ll Love
There’s a universally acknowledged rule in the world of baking that often tests the strongest wills: “Cool completely before slicing.” For many, myself included, this seemingly simple instruction feels less like a guideline and more like an exquisite form of torture. Throughout my pre-blogging culinary adventures, I confess, this rule was rarely, if ever, obeyed. It’s a challenge I face with numerous tempting treats: resisting the urge to frost a warm cake, to churn ice cream before it’s fully chilled, to dip a still-warm goodie in chocolate, or to slice into a fresh loaf of bread straight from the oven.
The wait is agonizing when the enticing aroma of warm, freshly baked goodness fills the kitchen. It’s a primal call, urging you to abandon all self-control. That delicate fragrance, wafting its delicious promise, demands immediate gratification. While I may be completely calm and collected in most aspects of life, the phrase “cool completely” still frequently pushes me to the brink of my self-discipline. The allure of that fresh something, sitting tantalizingly on the countertop, often proves too powerful to resist.
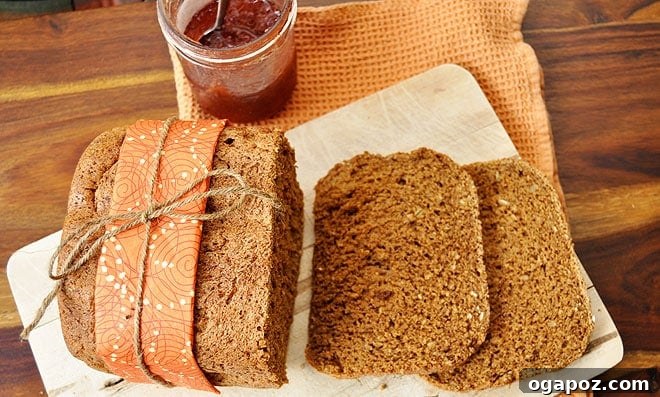
However, the world of food photography has introduced a new layer to this challenge. Now, capturing the beauty of those warm, fresh somethings requires a level of patience I once thought impossible. I’ve learned to flex my resistance muscle, embracing the cooling period as a crucial step for the sake of a prettier, more appealing picture. It’s become strikingly clear what a profound difference it makes to allow fresh bread to fully cool before introducing it to a knife. My newfound patience is consistently rewarded with neat, even, thin slices of bread, perfectly suited for elegant sandwiches or toast – a stark contrast to the often asymmetrical, somewhat squished chunks I used to haphazardly carve off in my haste (which, while equally delicious, were undeniably less photogenic).
The Journey to Homemade Bread: A Personal Revelation
This particular loaf of mixed grain bread sprung from a spontaneous burst of inspiration that struck me at 12:30 a.m. last night (or rather, this morning, thanks to the delightful complication of daylight saving, pushing it closer to 1:30 a.m.). It marked the genesis of a whole new culinary chapter in my life: a commitment to regularly baking my own bread from scratch. This beautifully rustic loaf is a testament to the efficiency and charm of my bread machine, a lovely little apparatus that has transformed my late-night impulses into tangible, delicious realities.
Using a bread machine is remarkably straightforward, but a few key tricks ensure success. The fundamental principle is to layer your ingredients correctly: liquids first, followed by the dry ingredients like flour, oats, and seeds. The yeast, the magical leavening agent, gets sprinkled on top, meticulously kept separate from the liquids until the machine’s mixing cycle begins. For this recipe, I started with a basic bread foundation and enthusiastically customized it to incorporate a generous medley of wholesome grains and nourishing seeds. After carefully loading all the ingredients into the machine, I set the timer for 8:30 a.m. – a time that arrived far too swiftly, thanks to my middle-of-the-night breadmaking urges and the clock springing forward. Waking up to the tantalizing, comforting smell of fresh bread baking is, without a doubt, one of life’s simplest yet profound pleasures.
Why Bake Your Own Bread? Beyond the Aroma
While the intoxicating aroma of baking bread is often reason enough, there are myriad compelling reasons to embrace the art of homemade bread. It’s an act of self-sufficiency, a creative outlet, and a truly rewarding endeavor that offers benefits far beyond mere sensory pleasure.
Health Benefits: Taking Control of Your Ingredients
Baking your own bread gives you complete control over what goes into your body. Say goodbye to the myriad of preservatives, artificial flavors, and excessive sugars often found in commercial loaves. By choosing whole grains, a variety of seeds, and natural sweeteners like molasses, you significantly boost the nutritional profile of your daily bread. You can tailor it to dietary needs, add extra fiber, vitamins, and minerals, making each slice a powerhouse of goodness that supports a healthy lifestyle.
Cost-Effectiveness: Smart Savings in Your Kitchen
While the initial investment in a bread machine or basic baking supplies might seem like a small hurdle, making bread at home is considerably more economical in the long run than purchasing specialty loaves from the bakery or supermarket. Basic ingredients like flour, yeast, and water are inexpensive, and by buying grains and seeds in bulk, you can reduce costs even further. Over time, these savings truly add up, making homemade bread a budget-friendly choice for any household.
The Joy of Creation: A Therapeutic Experience
There’s an undeniable therapeutic quality to baking bread. Whether you’re kneading dough by hand, feeling the elasticity develop, or simply watching your bread machine work its magic, the process is incredibly calming and meditative. The act of transforming simple ingredients into a nourishing staple provides a profound sense of accomplishment and pride. It’s a creative outlet that engages your senses and leaves you with a tangible, delicious reward, fostering a deeper connection to the food you consume.
Unveiling the Perfect Mixed Grain Loaf
The resulting loaf from this adventure is nothing short of magnificent. It’s hearty, with a satisfying chew, deeply nutty from the blend of grains and seeds, and exquisitely flavorful. Each slice is a testament to the beauty of wholesome ingredients coming together in perfect harmony. Its robust character makes it incredibly versatile, a canvas for countless culinary creations.
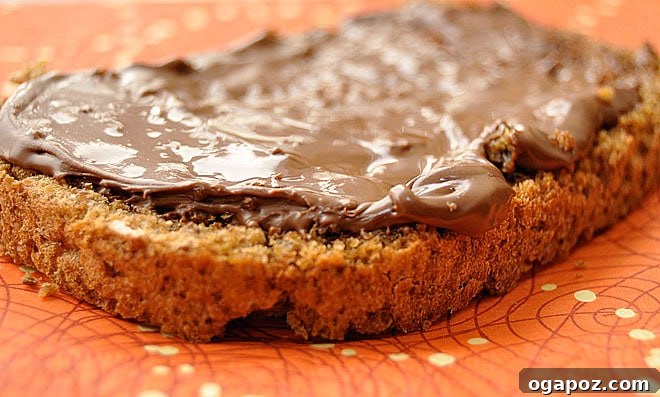
Imagine slathering a warm, toasted slice with creamy almond butter and a drizzle of golden honey for a comforting breakfast. Or perhaps, for a savory delight, a generous smear of grainy mustard topped with thinly sliced turkey or chicken, creating a gourmet sandwich experience right in your kitchen. And for those moments when pure indulgence calls, simply enjoy it warm from the oven (and yes, sometimes the “cool completely” rule can be bent for immediate pleasure!) with a molten spread of Nutella, allowing its rich chocolatey goodness to melt into the soft, yielding crumb.

Your Guide to Baking Irresistible Mixed Grain Bread
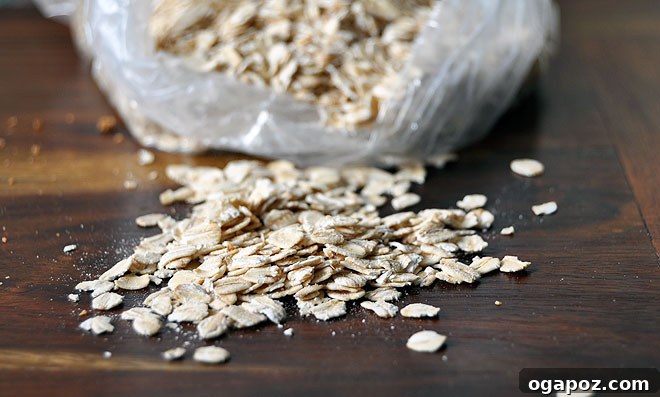
This recipe is designed to be highly adaptable, encouraging you to experiment with different flours, grains, and seeds to create a loaf that truly suits your palate. For my specific creation, I used a blend of 3 cups of robust whole wheat flour, 1 cup of high-protein bread flour, and 1 cup of rolled oats. The remaining 1 cup of “add-ins” was a delightful mix of nutritious flaxseeds, a wholesome muesli cereal, crunchy sunflower seeds, and earthy rye flakes, each contributing to the bread’s unique texture and flavor profile.
Mixed Grain Bread Recipe: Ingredients
- 2 cups water: The foundation of our dough, providing hydration. Ensure it’s lukewarm if using the conventional method, to activate the yeast.
- 1/4 cup molasses: Adds a deep, rich flavor, a subtle sweetness, and contributes to the bread’s beautiful dark color. It also helps activate the yeast.
- 2 tbsp oil: Any neutral oil like vegetable, canola, or olive oil will work. It adds moisture, tenderness, and helps create a soft crumb.
- 4 cups flour: This is where you can truly customize!
- Whole Wheat Flour: For a hearty, nutritious loaf with a denser crumb.
- All-Purpose Flour: For a lighter texture.
- Bread Flour: High in protein, essential for strong gluten development and a chewier texture.
- Combination: Experiment with different ratios! Try 2 cups whole wheat and 2 cups bread flour, or 3 cups whole wheat and 1 cup all-purpose.
- 1 cup rolled oats: Adds texture, fiber, and a lovely nutty flavor. Quick oats can also be used, but rolled oats provide more structure.
- 1 cup of add-ins: Unleash your imagination here! This is your chance to really make the bread your own.
- Seeds: Flaxseeds, chia seeds, poppy seeds, sesame seeds, pumpkin seeds, sunflower seeds.
- Rolled Cereals: More oats, barley flakes, quinoa flakes.
- Whole Grains: Rye flakes, cracked wheat, buckwheat groats (pre-cooked if larger than quinoa).
- Bran: Oat bran, wheat bran for extra fiber.
- Other options: Dried fruit (like raisins or cranberries) can add a touch of sweetness, but consider reducing molasses slightly.
- 1 1/2 tsp salt: Crucial for flavor development and also helps regulate yeast activity. Don’t skip it!
- 2 1/4 tsp (one envelope) instant yeast: The leavening agent that makes your bread rise. Ensure it’s fresh for optimal results. Instant yeast can be added directly with dry ingredients.
Instructions for Your Bread Machine
The bread machine offers unparalleled convenience, allowing you to wake up to the delightful aroma of freshly baked bread with minimal effort.
- Load Ingredients: Carefully measure and add the ingredients to your bread machine pan in the order listed. It’s crucial to add liquids first, followed by dry ingredients, and finally, sprinkle the yeast on top. Ensure the yeast does not come into direct contact with the liquid until the mixing process begins; this prevents premature activation and ensures a proper rise.
- Select Setting: Close the lid, then select the “Whole Wheat” setting on your bread machine. This setting is typically optimized for the denser structure of whole grains, providing longer kneading and rising times.
- Start Baking: Press “Start” if you’re baking immediately, or set the timer for a delayed start if you wish to wake up to fresh bread in the morning. Enjoy the magic as your machine transforms simple ingredients into a beautiful loaf!
Bread Machine Tips: For a darker crust, some machines have a crust color setting. If your loaf consistently comes out dense, ensure your yeast is fresh and your water isn’t too hot (which can kill the yeast) or too cold (which can inhibit it). Always scrape down the sides of the pan during the first few minutes of mixing to ensure all ingredients are incorporated.
Crafting Your Loaf the Conventional Way
Baking bread by hand or with a stand mixer offers a wonderfully tactile and rewarding experience. It allows you to feel the dough’s development and truly connect with the process.
- Combine Dry Ingredients: In a large mixing bowl, thoroughly combine the flour (your chosen combination), rolled oats, any additional cereals, grains, or seeds, the salt, and the instant yeast. Use a whisk to ensure everything is evenly distributed.
- Combine Wet Ingredients: In a separate bowl, whisk together the water, molasses, and oil until well combined.
- Form Dough: Pour the wet mixture into the dry ingredients. Stir with a sturdy spoon or a dough hook (if using a stand mixer) until a sticky, shaggy dough forms. Don’t worry if it looks messy at this stage.
- Knead the Dough: Turn the sticky dough out onto a lightly floured surface. Knead for 8-10 minutes. If using a stand mixer, knead with the dough hook for 6-8 minutes on medium-low speed. Kneading is vital for developing gluten, which gives bread its structure and elasticity. You’ll know it’s ready when the dough is smooth, elastic, and passes the “windowpane test” (you can stretch a small piece thin enough to see light through it without tearing).
- First Rise (Bulk Fermentation): Lightly oil a clean large bowl. Place the kneaded dough in the bowl, turning it once to coat with oil. Cover the bowl with a clean dishcloth or plastic wrap. Allow the dough to rise in a warm, draft-free place (like a turned-off oven with the light on, or near a sunny window) until it has doubled in volume. This usually takes about 1 to 1 1/2 hours, depending on your kitchen’s temperature.
- Punch Down and Divide: Once doubled, gently punch down the dough to release the air. Turn it out onto a lightly floured surface and divide it equally into two pieces.
- Shape Loaves: Shape each piece into a neat loaf. You can do this by flattening each piece into a rectangle, then rolling it tightly from one short end, pinching the seam closed. Place each shaped loaf seam-side down into a greased 9 x 5 inch loaf pan.
- Second Rise (Proofing): Cover the loaf pans again with a clean towel and let them rise in a warm place until doubled in volume, which typically takes about one hour this time. The loaves should look visibly puffy and almost overflowing the pans.
- Preheat Oven: While the loaves are on their second rise, preheat your oven to 375 degrees Fahrenheit (190 degrees Celsius).
- Bake: Place the risen loaves on the bottom rack of your preheated oven. Bake for 25 to 30 minutes, or until the crust is well browned and the loaf sounds hollow when tapped firmly on the bottom. For an even more precise check, an instant-read thermometer inserted into the center of the loaf should read between 200-210 degrees Fahrenheit (93-99 degrees Celsius).
Mastering the “Cool Completely” Rule: The Final Touch
Regardless of whether you used a bread machine or the conventional method, there is one final, crucial step that absolutely cannot be skipped for the best results: *Cool completely before slicing*. This rule, which was once my nemesis, is now recognized as essential for a perfectly textured loaf.
Why is it so important? As bread cools, the internal starches continue to set and firm up. If you slice into a warm loaf, the steam trapped inside escapes too quickly, causing the crumb to become gummy or dense. It also makes for uneven, squashed slices, as the bread hasn’t fully stabilized. Allowing it to cool completely, ideally on a wire rack to ensure air circulation around all sides, results in a firm, even texture, crisp crust, and perfectly clean slices that hold up beautifully for sandwiches or toast. Patience, in this final act, truly yields the most exquisite reward.
Get Creative with Your Grains: Endless Possibilities
One of the most exciting aspects of this mixed grain bread recipe is its inherent flexibility. Consider it a template, an invitation to experiment and personalize your loaf. Don’t be afraid to stray from the exact flour blend mentioned; perhaps you prefer more rye flour for an earthier taste, or a larger proportion of spelt flour for a slightly nuttier, lighter crumb. Explore different ratios of whole wheat to white flour to find your ideal balance of heartiness and softness.
The “add-ins” section is a playground for your culinary imagination. Beyond the seeds and cereals, think about incorporating finely chopped nuts like walnuts or pecans for an extra crunch and richness. A touch of dried herbs, such as rosemary or thyme, can transform this versatile loaf into a savory masterpiece, perfect alongside soups or stews. You could even introduce a small amount of cheese for a cheesy herb bread. The beauty of baking your own bread lies in this creative freedom – each loaf can be a unique reflection of your preferences and pantry.
So, whether you’re a seasoned baker or embarking on your very first bread-making adventure, this mixed grain bread recipe is a fantastic starting point. It promises a loaf that is not only incredibly delicious and nutritious but also deeply satisfying to create. Embrace the process, savor the aromas, and most importantly, practice a little patience for that perfect, homemade slice. Happy baking!