
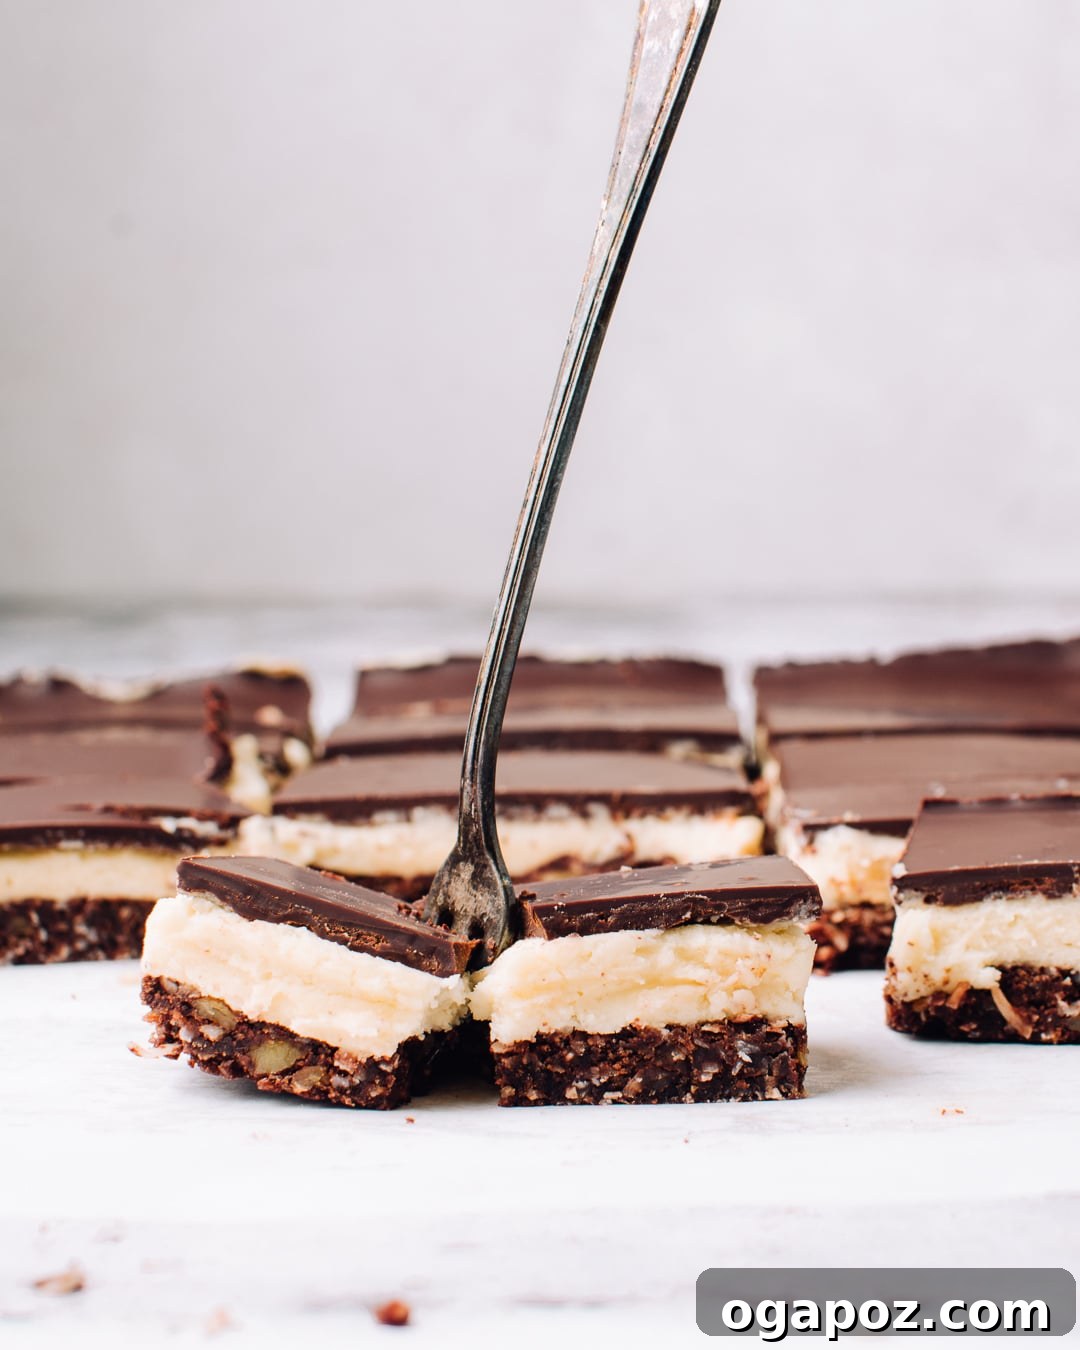
Are you ready to dive into the delightful world of Classic Nanaimo Bars? As much as I adore these iconic Canadian treats, I’ve spent countless hours perfecting my traditional Nanaimo bar recipe. It’s now a tried-and-true method that incorporates clever tricks to achieve an incredibly fluffy filling and beautifully defined layers, ensuring every bite is pure bliss. This recipe promises not just a dessert, but an experience – a symphony of textures and flavors that captifies the palate.
The Enduring Legacy: Unraveling the Origin of Nanaimo Bars
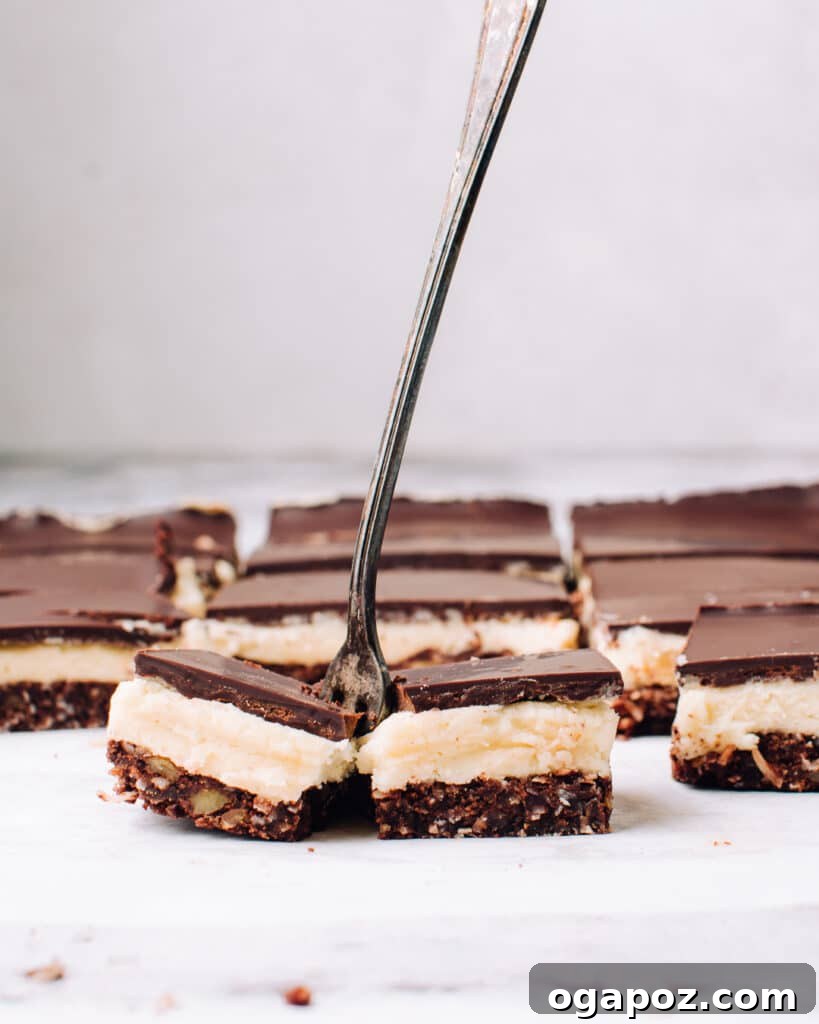
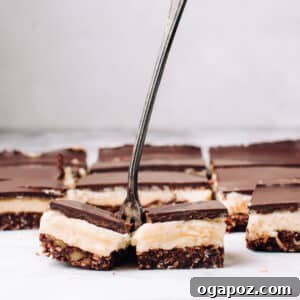
The beloved Nanaimo Bar, a confectionery marvel, emerged from its namesake city of Nanaimo, British Columbia, in the 1950s. While born on the Pacific coast, its fame quickly spread, enchanting taste buds across Canada and earning its rightful place as a national treasure. Many Canadians, myself included, proudly consider it BC’s finest culinary export. These bars are a masterclass in contrasts: a rich, nutty, and distinctly chocolatey crumbly base sets the stage for a cool, sumptuously creamy whipped filling, all crowned with a glossy, silky-smooth chocolate layer.
Imagine the moment your teeth break through that top chocolate layer, a satisfying shatter reminiscent of a perfectly caramelized crème brûlée. This initial crunch gives way to the harmonious layered structure below, delivering a mouthful of fluffy, sweet custard notes mingling with the robust flavor of cocoa and crunchy crumbs. It’s a truly unforgettable dessert experience that balances indulgence with elegant simplicity, making it a perennial favorite for holidays, potlucks, and everyday cravings.
Why My Nanaimo Bar Recipe Stands Out: A Custard-Free Approach
Traditionally, Nanaimo bar filling often includes custard powder. However, I’ve chosen to diverge from this convention for a couple of compelling reasons. Firstly, custard powder typically comes in large tubs, far exceeding the quantity needed for a single batch of Nanaimo bars. This often leads to unused powder languishing in the pantry, eventually expiring—a common sight in many childhood homes, including my own! I’ve come to view it as a single-use item for this particular dessert, which isn’t ideal for minimizing waste.
Secondly, when examining the ingredient list of most custard powders, you’ll often find it’s primarily artificial flavorings, colors, and cornstarch. My philosophy in baking leans towards using more natural ingredients where possible without compromising flavor or texture. Instead, I achieve a truly superior filling by crafting a super-fluffy whipped vanilla cream. This alternative delivers an exquisite richness and an airy texture that has consistently earned my Nanaimo Bars rave reviews, with many claiming them to be the “BEST EVER” (and yes, I’ll humbly accept the compliment!). While my personal preference omits it, I do include the option in my full recipe for those who wish to add custard powder for that classic flavor profile.
Crafting Perfection: Essential Nanaimo Bar Ingredients
It wasn’t until I started baking independently in adulthood that I truly understood the unique composition of a Nanaimo bar. The base, surprisingly, contains no flour, relying instead on an intriguing blend of cocoa, sugar, graham crumbs, coconut, and nuts. This combination creates a depth of flavor that’s hard to pinpoint but utterly irresistible. Each ingredient plays a crucial role in building the signature taste and texture of this decadent treat. Here’s a closer look at what you’ll need to create these layered masterpieces:
- Cocoa powder: Provides the rich, chocolatey foundation for the base. Using a good quality unsweetened cocoa powder will enhance the overall flavor profile.
- Sugar: Balances the bitterness of the cocoa and contributes to the crust’s texture.
- Graham cracker crumbs: The essential binder and texture provider for the no-bake base, offering a subtly sweet and crunchy element.
- Unsweetened shredded coconut: Adds moisture, chewiness, and a distinct tropical aroma that complements the chocolate and nuts beautifully.
- Toasted, chopped nuts (walnuts or pecans): Crucial for depth of flavor and a satisfying crunch. Toasting them first is a game-changer, as it unlocks their full nutty potential.
- Melted salted butter: Binds the base ingredients together and adds a rich, savory note that enhances the sweetness.
- Egg: Acts as a binding agent in the base, helping it set firmly during a brief bake.
- Softened butter (for filling): The foundation of our ultra-fluffy filling, its softness is key for proper aeration.
- Confectioners’ sugar: Gives the filling its characteristic sweetness and smooth, powdery texture.
- Vanilla extract: A vital flavor enhancer for the filling, providing warmth and aromatic depth.
- Heavy cream or milk: Contributes to the creamy consistency and richness of the filling.
- Good quality dark chocolate: This is where splurging makes a huge difference for the top layer. A high-quality chocolate melts smoother and tastes infinitely better.
- Vegetable oil: Just a touch of this in the chocolate topping provides an extra sheen and ensures the chocolate sets with a softer bite, preventing it from cracking too hard when sliced or eaten.
Unlocking the Secret: 5 Tricks for Best-Ever Nanaimo Bars
Creating truly exceptional Nanaimo Bars goes beyond just combining ingredients; it involves a few nuanced techniques that elevate them from good to absolutely legendary. These are my cherished secrets for achieving that coveted ultra-fluffy filling, perfectly distinct layers, and a professional, glossy finish. Master these tricks, and you’ll be making Nanaimo Bars that rival any bakery!
-
The Flavor Foundation: Toast Your Nuts
For the base, never skip the step of toasting your nuts first. While it might seem like a minor detail, it builds a profoundly beautiful, nutty flavor that raw nuts simply cannot provide. Raw nuts often carry an oily, somewhat flat taste, whereas toasting them transforms their natural oils into aromatic compounds, intensifying their flavor and adding a depth that is indispensable. As my chef friend Marnie wisely once quipped, “Why do people who don’t toast nuts even BUY nuts?” Her words echo in my head every time I’m tempted to skip this crucial step. I typically toast them quickly in the oven while it’s preheating, making it an effortless addition to the process.
-
The Art of Aeration: Whipping the Filling to Perfection
The ultimate trick for achieving that signature ultra-fluffy, light-as-air filling lies in how you whip the butter and confectioners’ sugar. If you’re using a stand mixer, it is imperative to use the **whisk attachment**. A paddle attachment, while useful for mixing, will never aerate the mixture sufficiently to achieve the desired light and airy texture. You need to whip the ingredients together well past the point where they are merely combined. Think of it as introducing as much air as possible into the butter, transforming it into a cloud-like consistency.
-
Achieving Silky Smoothness: The Power of Persistent Whipping
Continuing the previous point, you genuinely want to aerate that middle layer until it reaches a silky, fluffy peak. Many home bakers stop mixing once the ingredients appear to be combined, but this is a critical mistake. If you halt the whipping process too soon, your filling will be dense, overly sweet, and have a somewhat pasty or greasy texture—far from the delightful cloud we’re aiming for. Keep whipping! The mixture will visibly lighten in color by a couple of shades and develop a beautiful, glossy sheen. This transformation is your cue that it’s done, and your patience will be handsomely rewarded with a filling that is truly divine. And remember, if you still prefer that traditional custard flavor, I won’t be offended if you gently whip in two tablespoons of custard powder at this stage!
-
Precision Layering: The Oiled Loaf Pan Technique
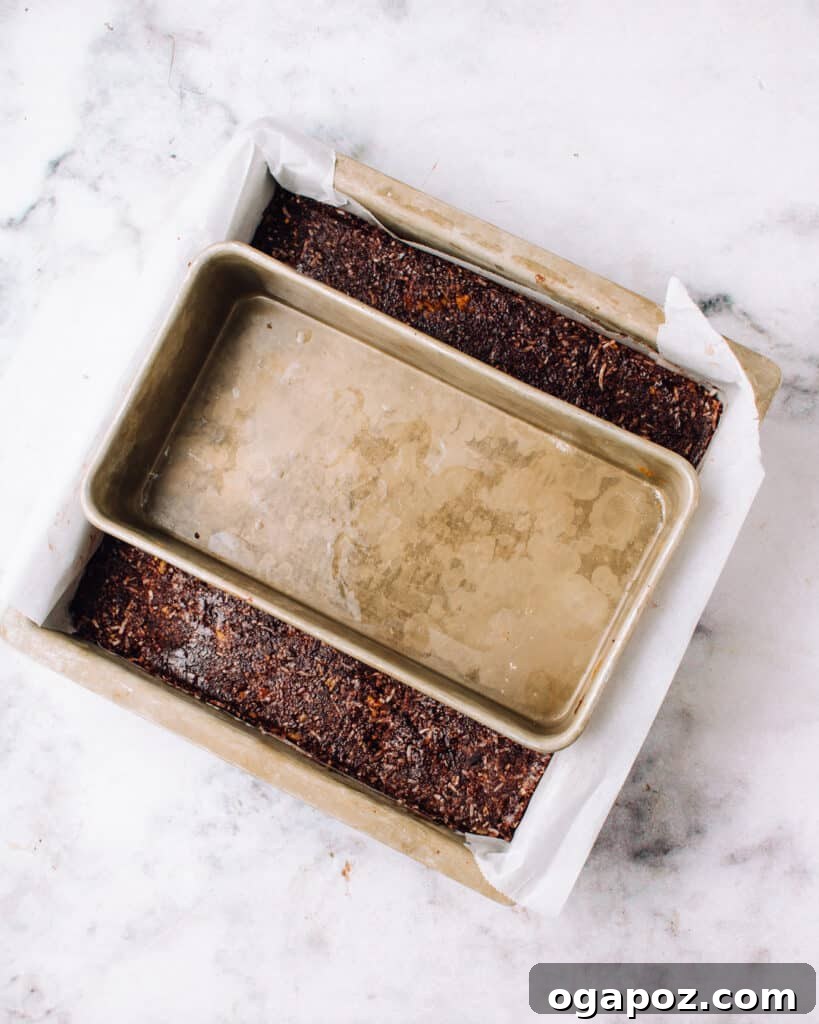
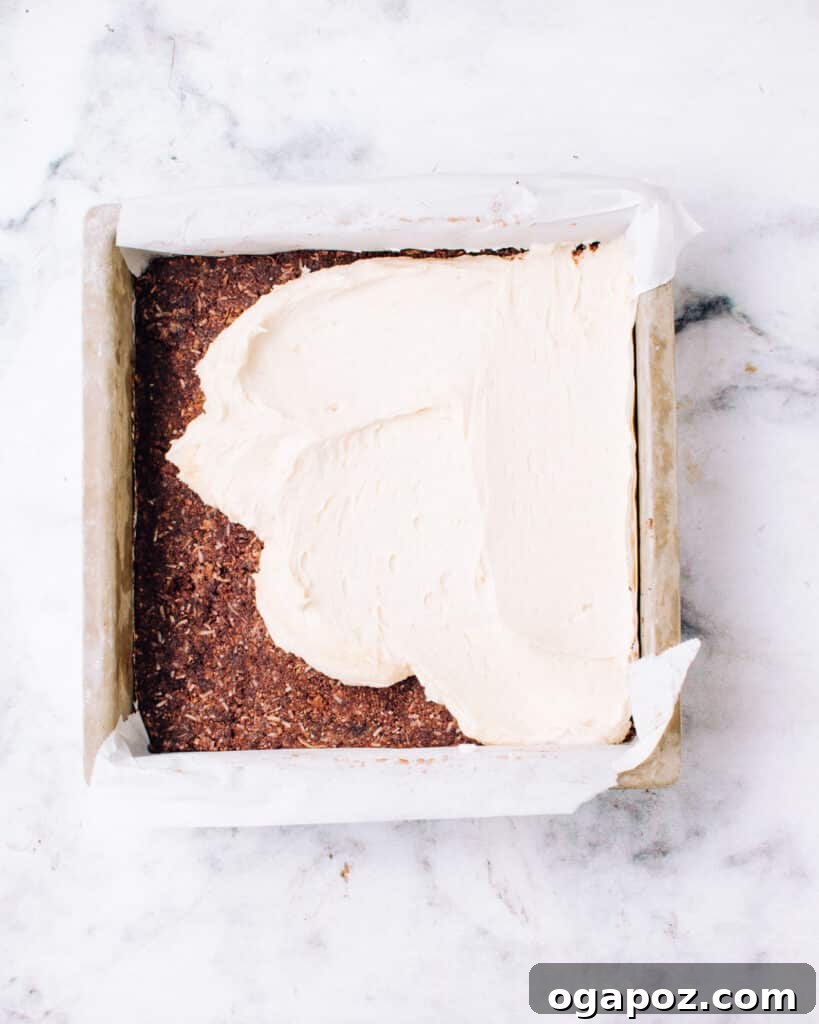
To achieve those really beautiful, tidy, and even layers that define a professional-looking Nanaimo Bar, here’s a clever hack: utilize an oiled loaf pan that fits snugly inside your main baking pan. After baking the base and while it’s still hot from the oven, use the bottom of the oiled loaf pan to press down the crust firmly. The base tends to puff up slightly in spots as it bakes due to the egg content, and this technique ensures a uniformly flat and compact foundation. Repeat this trick for the cream layer: after spreading it, gently use the oiled loaf pan again (wiped clean of any crumbs) to smooth the filling to a perfectly glass-smooth surface. Be gentle, using a side-to-side motion rather than a downward press, to avoid compacting the delicate filling.
-
The Glassy Finish: Pour, Tilt, and Let Nature Take Its Course
The final layer—the chocolate topping—is key to the bar’s appeal, and achieving a gorgeous, smooth, mirror-like surface is surprisingly simple, yet often misunderstood. The secret is: do not touch the chocolate with a spoon, spatula, or anything else once it’s poured. Simply pour the cooled-but-still-pourable chocolate over the chilled filling layer. Then, gently tilt the pan around, allowing the chocolate to spread naturally across the entire surface. This method prevents streaks, ripples, and imperfections, ensuring a flawless, glass-smooth top. Once covered, let the bars sit undisturbed at room temperature until the chocolate hardens completely. Refrigerating warm or even slightly warm chocolate can lead to “blooming,” a harmless but aesthetically unpleasing discoloration, so patience is paramount for that bakery-quality finish.
Preserving Freshness: Storage Instructions for Nanaimo Bars
One of the many wonderful qualities of Nanaimo Bars is their excellent shelf life, allowing you to enjoy them over several days or even weeks. This Nanaimo bar recipe keeps beautifully at room temperature for up to two days, making them perfect for potlucks or entertaining. For longer preservation, store them in an airtight container in the refrigerator for up to five days. If you’re planning ahead or simply can’t resist having a stash, they freeze exceptionally well for up to a month. Just be sure to wrap them tightly to prevent freezer burn. While you get the best, most tender mouthfeel when served at room temperature, allowing the flavors and textures to fully meld, I must confess my personal partiality to an occasional frozen bar—the chilled density offers a uniquely refreshing indulgence!
Craving More Sweet Treats? Explore These Delights:
If you’re looking to expand your dessert repertoire beyond these incredible Nanaimo Bars, I have a few other favorites that I think you’ll absolutely adore. Perfect for any cookie plate, holiday gathering, or just a sweet treat for yourself, these recipes are sure to please:
- Toblerone Cookies: A delightful twist on classic cookies, featuring chunks of your favorite triangular chocolate.
- Peppermint Whoopie Pies: Soft, cake-like cookies filled with a refreshing peppermint cream—ideal for festive occasions.
- Lemon Pistachio White Chocolate Cookies: A sophisticated blend of tangy lemon, earthy pistachio, and creamy white chocolate.
- Chewy Gingerbread Cookies: My go-to recipe for gingerbread that’s wonderfully chewy and spiced, a true holiday classic (I make several pounds of this dough every year!).
Print Recipe
Classic Nanaimo Bars
Sangeetha
Who loves Nanaimo Bars as much as I do? In my classic recipe, a nutty, crumbly cocoa crust belies a cool, creamy whipped filling under a silky-smooth chocolate layer.
20 minutes
12 minutes
32 minutes
16
Ingredients
For the Base:
- ¼ cup unsweetened cocoa powder
- ¼ cup sugar
- 1 ¼ cup graham cracker crumbs
- 1 cup unsweetened shredded coconut
- ½ cup finely chopped pecans or walnuts (toasted)
- ½ cup salted butter, melted
- 1 egg, lightly beaten
For the Filling:
- ⅔ cup butter, softened
- 3 cups confectioners’ sugar
- 1 tbsp vanilla extract
- 5 tbsp heavy cream or milk
For the Topping:
- 8 ounces chopped dark chocolate (good quality)
- 1 tbsp vegetable oil
Instructions
- Preheat oven to 350ºF (175ºC). Line an 8×8-inch square baking dish with parchment paper, ensuring a 1-inch overhang on all sides for easy removal later.
- In a medium bowl, combine the cocoa powder, sugar, graham cracker crumbs, unsweetened shredded coconut, and finely chopped toasted nuts. Drizzle the melted butter over the mixture and toss with a fork until well combined. Add the lightly beaten egg and stir until everything is thoroughly moistened. Press this mixture firmly and evenly into the bottom of the prepared baking dish. Bake for 10 minutes, or until the base is set. Immediately after removing from the oven, use the bottom of an oiled loaf pan (or a flat-bottomed glass) to press the crust down into an even, compact layer. Allow it to cool completely in the pan on a wire rack to room temperature before proceeding.
- For the filling, in a stand mixer fitted with the whisk attachment, combine the softened butter, confectioners’ sugar, vanilla extract, and heavy cream or milk. Begin beating on low speed until the ingredients are just combined, then increase the speed to high. Beat for at least 2 to 3 minutes, or until the mixture becomes remarkably fluffy, light in color, and develops a beautiful sheen. Remember to scrape down the sides of the bowl occasionally to ensure even mixing. This extended whipping is crucial for achieving that signature airy and smooth Nanaimo bar filling texture.
- Once the base is completely cool, spread the prepared fluffy filling evenly over the top. To achieve a perfectly smooth and flat surface, take the oiled loaf pan again (ensuring it’s free of any crumbs) and gently smooth the filling layer using a side-to-side motion, avoiding downward pressure that could compact the delicate filling. Transfer the pan to the freezer for about 10-15 minutes to allow the filling to firm up sufficiently.
- Prepare the chocolate topping: In a microwave-safe measuring cup or bowl, combine the chopped dark chocolate and vegetable oil. Microwave on 50% power for 2-minute intervals, stirring well after each interval. Continue this process in shorter 20-second increments, stirring after each, until the chocolate is 80-90% melted. Remove from the microwave and stir continuously until completely smooth, glossy, and fully melted by the residual heat.
- Remove the chilled bars from the freezer. Pour the cooled-but-still-pourable chocolate topping evenly over the firm filling layer. Do not use a spoon or spatula to spread it. Instead, gently tilt the baking pan from side to side, allowing the chocolate to naturally spread and cover the entire surface evenly. Let the bars sit undisturbed at room temperature until the chocolate topping is completely hardened and set. Refrigerating warm chocolate can sometimes cause harmless discoloration (known as “blooming”), so patience is key for that bakery-perfect, unblemished finish.
- Once the chocolate is fully set, lift the bars out of the dish using the parchment paper overhang. For impeccably clean slices, heat a sharp knife under hot water and wipe it dry between each cut. Slice the large bar into 16 or 24 equal pieces, depending on your desired serving size and how much indulgence you prefer per piece.
Notes
* For a traditional custard-flavored filling, you have the option to add 2 tablespoons of custard powder along with the confectioners’ sugar when preparing the filling. This will give it a more classic, distinct custard note.
Nanaimo bars store exceptionally well. They can be kept at room temperature for up to 2 days in an airtight container. For extended freshness, store them in the refrigerator for up to 5 days, also in an airtight container. They are also freezer-friendly and can be kept frozen for up to a month. For the best texture and flavor experience, it’s generally recommended to serve them at room temperature, allowing the filling to soften slightly. However, for a different delightful experience, a frozen bar can be a surprisingly refreshing treat!
Nutrition Information (Approximate per serving)
Calories: 325kcal | Carbohydrates: 42g | Protein: 4g | Fat: 27g | Saturated Fat: 16g | Polyunsaturated Fat: 3g | Monounsaturated Fat: 6g | Trans Fat: 1g | Cholesterol: 48mg | Sodium: 167mg | Potassium: 201mg | Fiber: 3g | Sugar: 10g | Vitamin A: 448IU | Vitamin C: 0.1mg | Calcium: 34mg | Iron: 3mg
Nutrition information is automatically calculated and should be used as an approximation.
Tried this recipe? We’d love to hear about it! Leave a comment below and share your experience.