
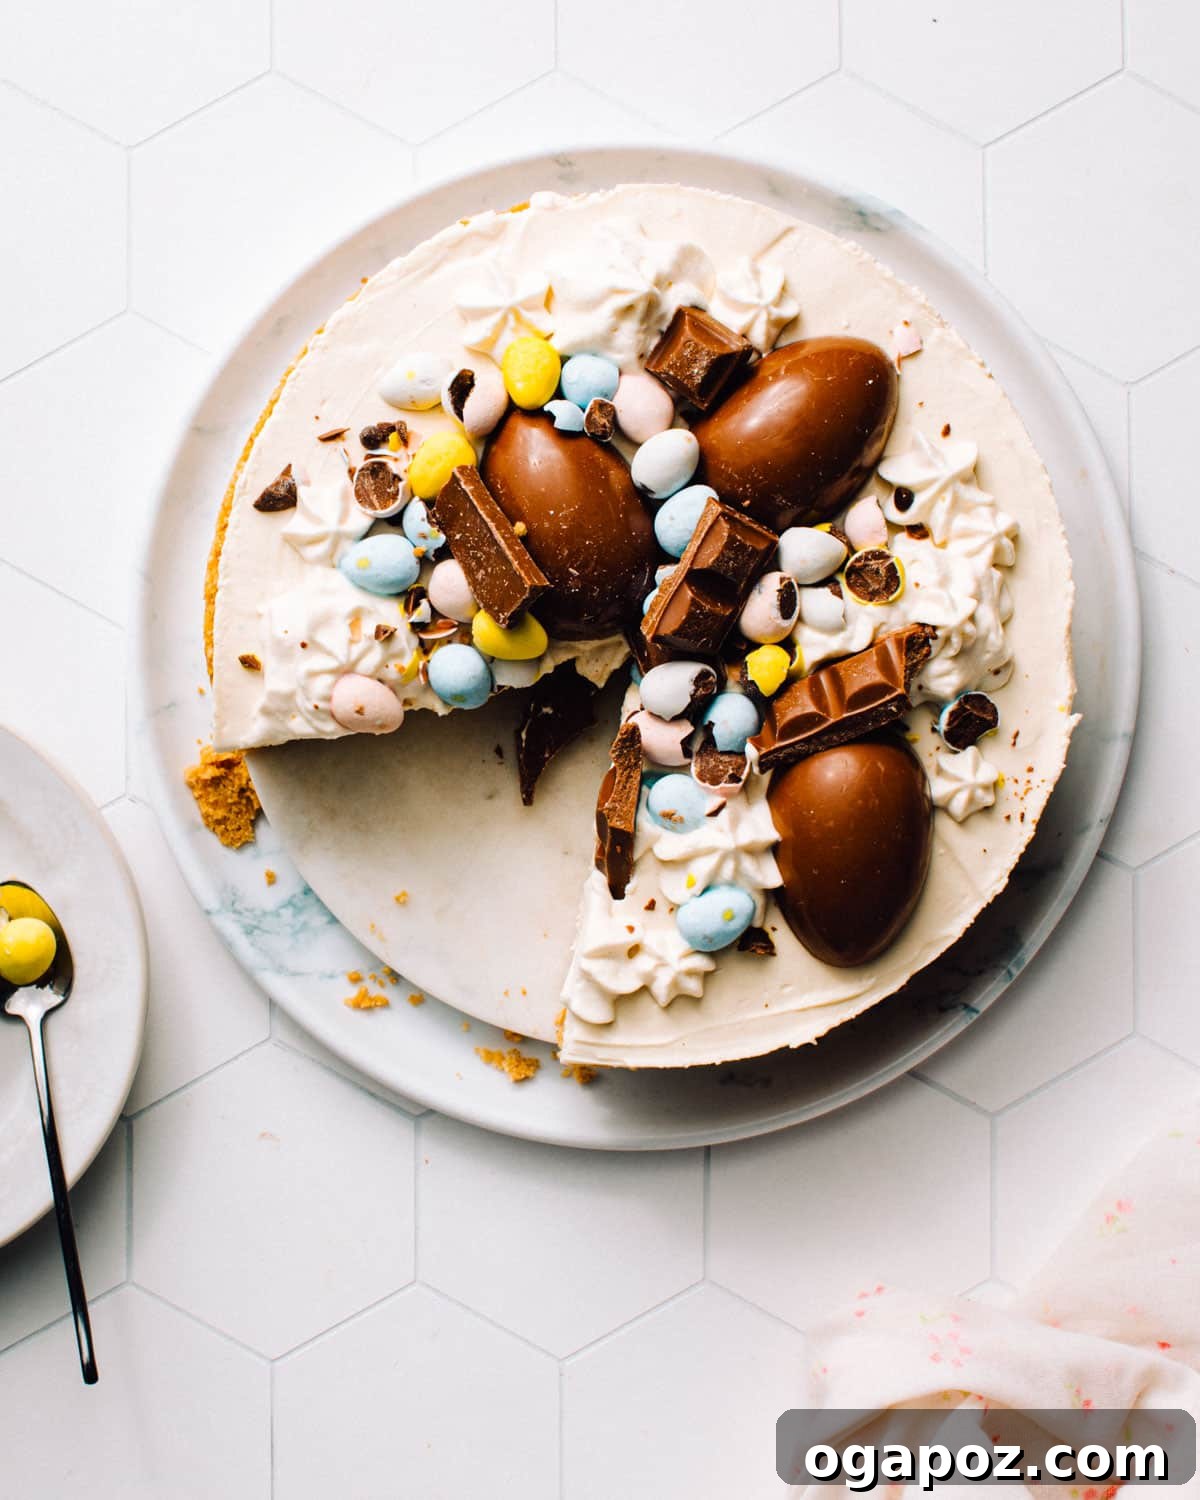
Prepare to impress with this utterly delicious, light-as-air No-Bake Easter Egg Cheesecake. This recipe offers a hassle-free path to a show-stopping dessert, perfect not only for your Easter feast but also for any joyful spring gathering. Its fluffy, creamy texture, combined with the delightful crunch of a classic graham cracker crust and vibrant chocolate Easter eggs, makes it an irresistible treat that will be the highlight of your dessert table. Forget about complicated baking steps or cracking cheesecakes – this recipe is designed for effortless perfection and maximum enjoyment.
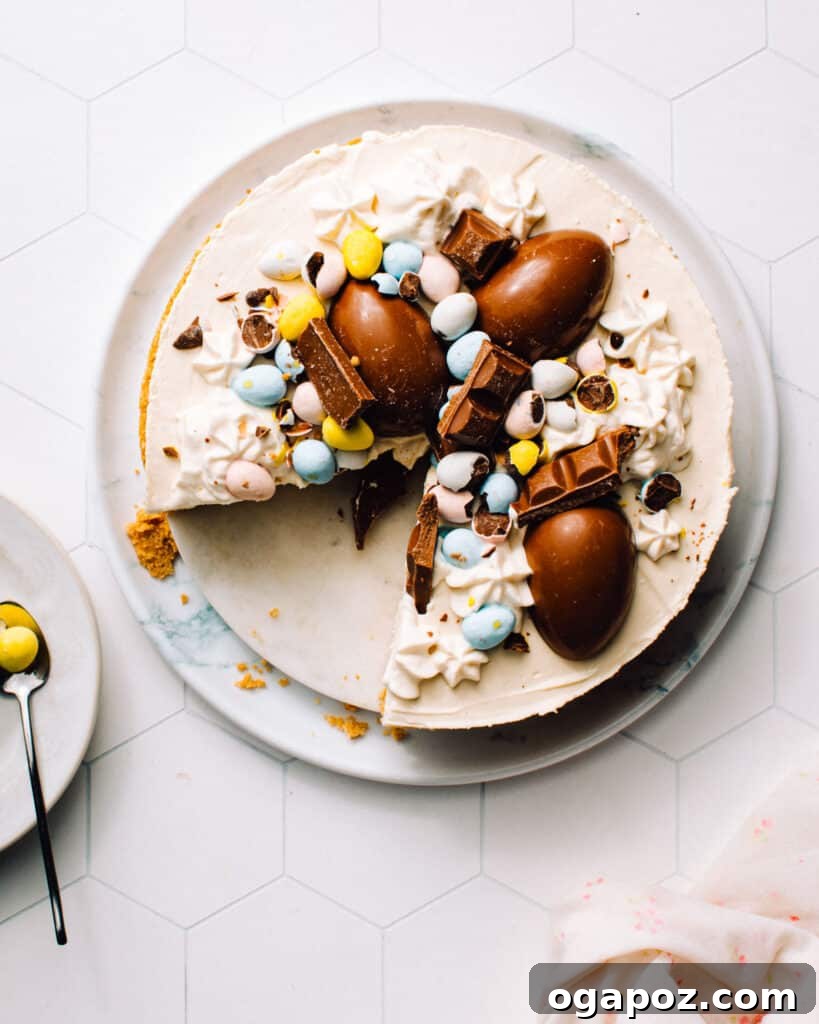
Why This No-Bake Easter Egg Cheesecake Will Be Your New Favorite
There are countless reasons to fall in love with this extraordinary Easter Egg Cheesecake. Beyond its stunning visual appeal, it offers a perfect blend of texture, flavor, and incredible ease of preparation, making it a dream come true for any home baker, novice or experienced.
- Unbelievably Plush, Mousse-Like Texture: The secret to this cheesecake’s ethereal lightness lies in a unique blend of cream cheese, freshly whipped cream, and yogurt. This combination creates a filling that is exceptionally fluffy, smooth, and melts in your mouth, offering a delightful contrast to traditional dense cheesecakes. It’s a truly luxurious experience without any heavy feeling.
- Effortlessly No-Bake, From Crust to Filling: Say goodbye to oven worries, water baths, and the dreaded cheesecake cracks! This recipe is entirely no-bake, simplifying the process dramatically. The graham cracker crust sets perfectly in the fridge, and the filling requires no baking, making it an ideal choice for busy holiday preparations or when you simply want to avoid heating your kitchen. This convenience means less stress and more time to enjoy your spring celebrations.
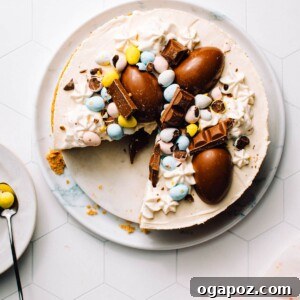
- Irresistible Chocolate Easter Egg Decorations: The true charm of this dessert lies in its festive topping. Colorful chocolate Easter eggs, ranging in size and texture, create a vibrant and playful presentation that appeals to all ages. I personally adore using classic Cadbury Mini Eggs for their unparalleled taste, complementing them with larger chocolate eggs for visual impact. A swirl of fresh whipped cream and a sprinkle of broken Caramilk bar pieces elevate the decoration, transforming a simple dessert into a spectacular centerpiece.
- A Natural Progression for Easter Dessert Enthusiasts: If you’re already a fan of our scrumptious Cadbury Mini Egg Cookies and delightful Easter Brownies, then this no-bake cheesecake is the perfect next addition to your spring baking repertoire. It brings a new dimension of flavor and texture to your holiday table, completing your collection of Easter treats.
Related: Explore over 61 Easy and Delicious Easter Dinner Ideas for your complete holiday meal planning!
Essential Ingredients for Your Perfect Easter Egg Cheesecake
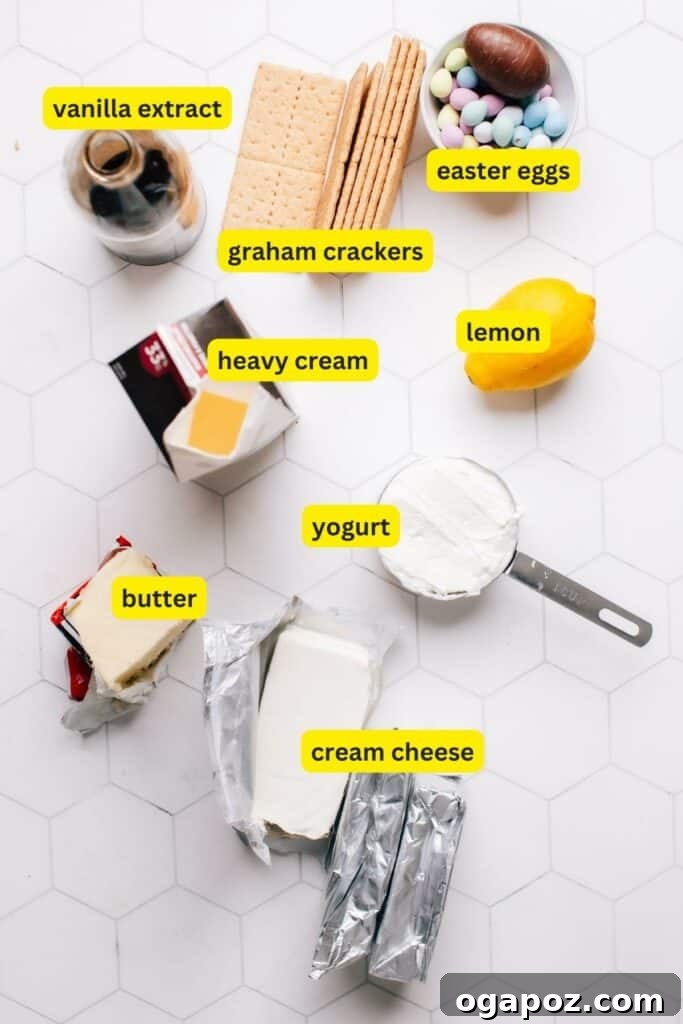
Crafting this heavenly no-bake cheesecake relies on a few key ingredients, each playing a crucial role in achieving its signature light and creamy texture and delightful flavor. Let’s delve into what makes each component indispensable:
- Heavy Cream (Whipping Cream, Double Cream, 35% m.f. Cream): This is fundamental for introducing airiness and lightness into our cheesecake filling. By whipping the cold heavy cream to stiff peaks before gently folding it into the cream cheese mixture, we achieve that sought-after mousse-like consistency. It’s also excellent to whip a little extra to use as a beautiful, fresh topping for the finished cake, adding an extra layer of richness and presentation.
- Cream Cheese: A cheesecake, by definition, must have cream cheese! For the best possible creaminess and structure in a no-bake recipe, I strongly recommend using full-fat, block-style cream cheese. My personal favorite is Philadelphia cream cheese, known for its consistent quality and optimal texture. Avoid low-fat, fat-free, whipped, or spreadable varieties, as these often contain additives that can alter the texture and prevent the cheesecake from setting properly.
- Plain Yogurt: This is my “secret ingredient” that truly elevates this no-bake cheesecake. Plain yogurt not only contributes a lovely, subtle tang that complements the cream cheese beautifully, but it also aids in firming up the fluffy filling without the need for gelatin. The live bacterial cultures in the yogurt subtly help set the cream, similar to how crème fraîche is made, resulting in a naturally stable and incredibly smooth consistency.
- Fresh Lemon Juice: A small but mighty addition, a splash of fresh lemon juice brightens the flavors considerably. Its tartness cuts through the richness of the cream cheese and sugar, enhancing the overall tanginess of the cheesecake and creating a perfectly balanced taste profile that keeps you coming back for more.
- Vanilla Extract: Vanilla is a timeless classic for a reason. It imparts a warm, aromatic foundation to the cheesecake base, harmonizing exquisitely with the rich flavors of cream cheese and serving as a perfect backdrop for the chocolate Easter eggs. High-quality vanilla extract makes a noticeable difference in the final taste.
- Chocolate Easter Eggs for Decoration: This is where the fun and festivity come in! While I am particularly fond of Cadbury Mini Eggs for their superior taste and satisfying crunch, don’t limit yourself. I love to incorporate a mix of various chocolate Easter eggs – different sizes, colors, and even textures – to create a visually dynamic and utterly delightful presentation. Consider using a few larger foil-wrapped eggs alongside smaller, colorful ones for maximum impact.
The Perfect 3-Ingredient No-Bake Cheesecake Crust
The foundation of any great cheesecake is its crust, and for this no-bake Easter delight, we embrace simplicity and perfection with a classic graham cracker crust. It’s incredibly easy to make and requires absolutely no baking, allowing the main cheesecake filling to truly shine.
- Simplicity at its Best: Graham Cracker Crumbs, Sugar, and Melted Butter: That’s all you need! This trio creates a buttery, sweet, and crunchy base that perfectly complements the creamy, airy filling. The beauty of this crust lies in its straightforward preparation and reliable results.
- Crumb Preparation Options: You have a couple of convenient options for your graham cracker crumbs. You can purchase pre-made graham cracker crumbs for ultimate ease. Alternatively, you can create your own by placing whole graham crackers in a sealed plastic bag and crushing them with a rolling pin, which can be quite therapeutic! For a finer, more uniform crumb, a blender or food processor works wonders.
- Versatile Alternatives: While graham crackers are traditional and delicious, feel free to get creative with your crust! You can easily swap them out for digestive biscuits, which offer a similar texture and mild flavor. For a chocolate twist, consider using chocolate wafer crumbs (like crushed Oreo baking crumbs) – just be mindful of adjusting the sugar content slightly if your cookies are very sweet. If you need a gluten-free option, many brands now offer gluten-free cookies that work wonderfully when crushed and combined with butter and sugar.
Related Recipe: Craving more graham cracker goodness? Try our delightful Muffin Tin Cheesecake Bites with Graham Cracker Crust!
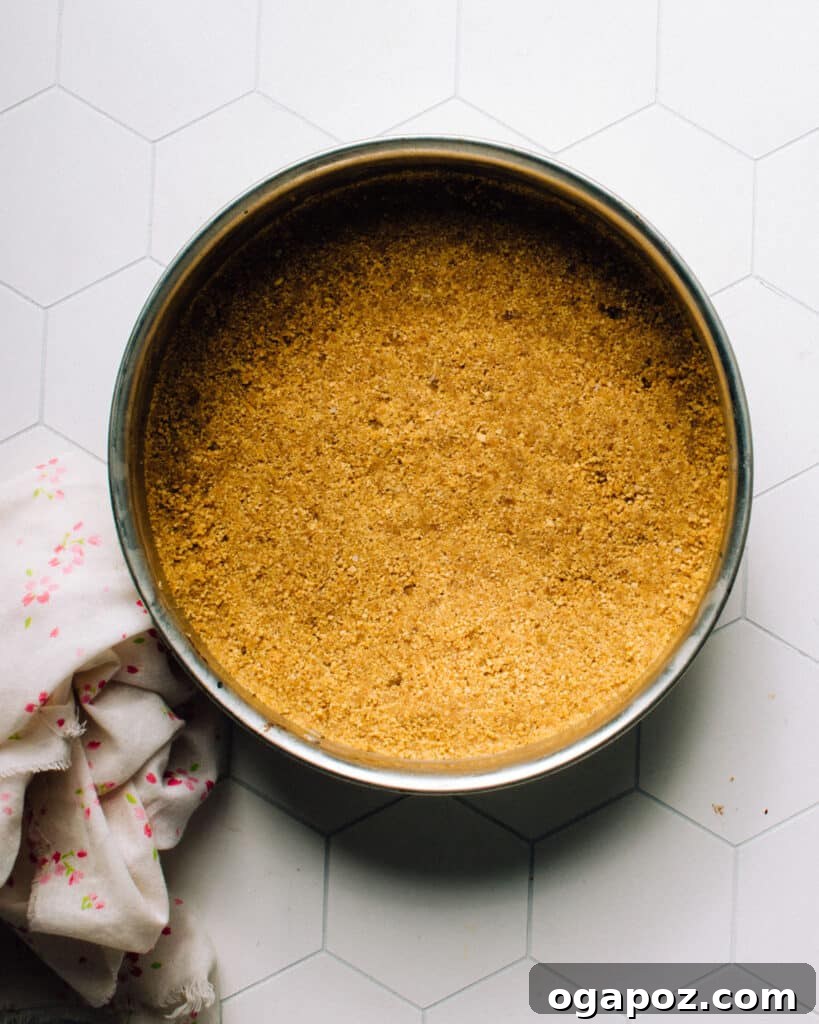
Once you’ve combined your chosen crumbs with melted butter and sugar, the process is incredibly simple. Just press the mixture firmly into the bottom and slightly up the sides of a 9-inch springform cake tin. There’s no need for baking at all! The melted butter naturally solidifies as it chills in the refrigerator, binding the crumbs together into a stable crust.
One of the best aspects of this specific crust recipe is its ideal ratio of butter to crumbs. This balance ensures a crust that is tender enough to be easily cut through with a fork, yet robust enough to allow you to lift tidy, intact slices of cheesecake without crumbling or falling apart. It strikes the perfect balance – not a rock-hard base, nor a messy, disintegrating one. Truly perfect in every way!
Step-by-Step Guide: How To Make This No-Bake Easter Egg Cheesecake
Creating this delightful no-bake cheesecake is a straightforward process, broken down into two main components: the crust and the filling. Follow these detailed steps to ensure a flawless and delicious result.
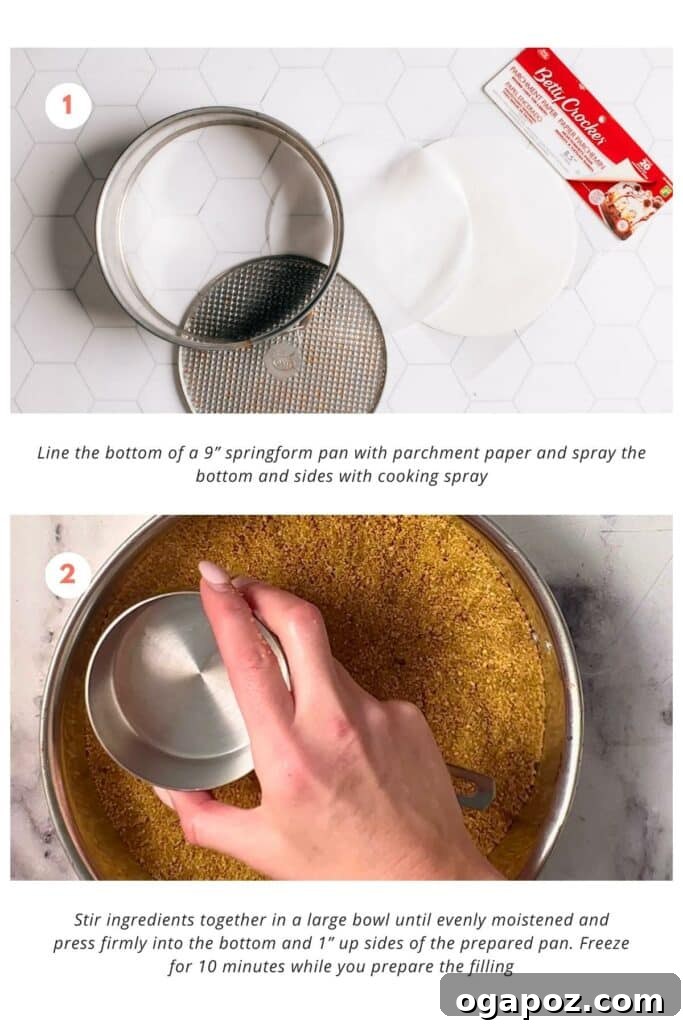
Crafting the Flawless Graham Cracker Crust:
- Prepare Your Pan: Begin by lining the bottom of a 9-inch springform pan with parchment paper. This simple step is crucial for easy removal of the cheesecake later. Lightly spray both the bottom and sides of the pan with cooking spray to prevent any sticking.
- Mix Crust Ingredients: In a large mixing bowl, combine the graham cracker crumbs, granulated sugar, and melted butter. Stir these ingredients thoroughly with a spoon or spatula until the crumbs are uniformly moistened and resemble wet sand. Every crumb should be coated with butter.
- Press and Chill the Crust: Scrape the entire crumb mixture into the prepared springform pan. Using the flat bottom of a measuring cup or a glass (lightly sprayed with nonstick spray for easier release), firmly press the mixture into an even layer across the bottom of the pan and about 1 inch up the sides. Ensure it’s packed in tightly for a stable base. Place the crust in the freezer for at least 10 minutes while you proceed to prepare the cheesecake filling. This quick chill helps solidify the butter, creating a firm crust.
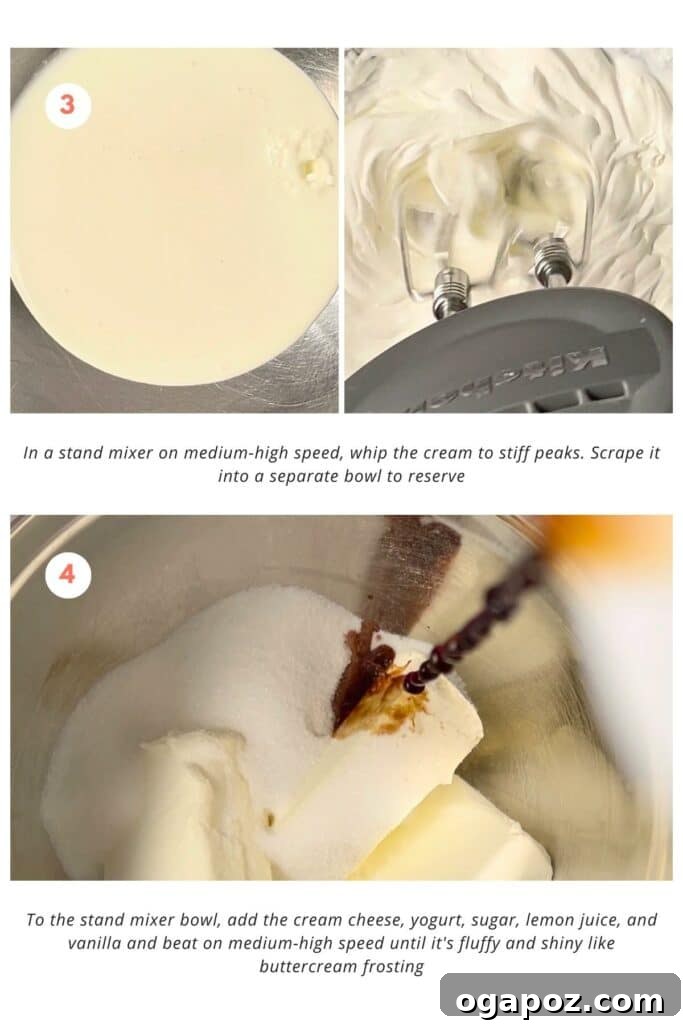
Preparing the Irresistibly Light Cheesecake Filling:
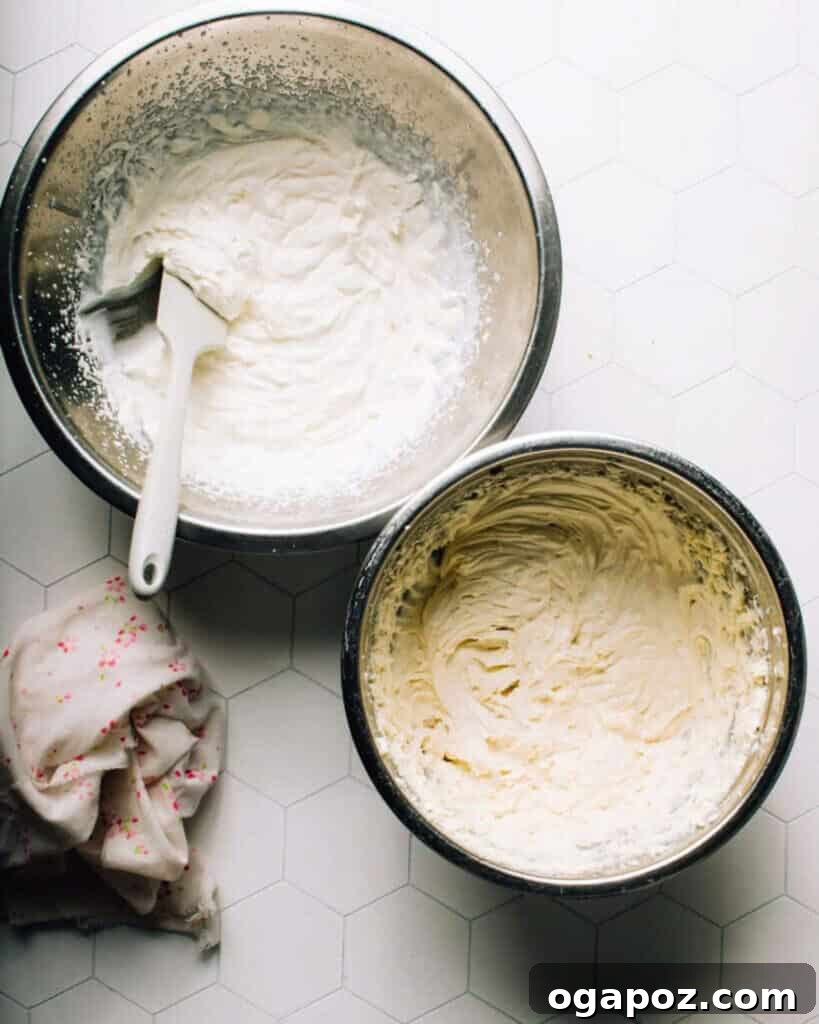
- Whip the Heavy Cream: In the bowl of a stand mixer fitted with the whisk attachment, pour the cold heavy cream. Whip on medium-high speed until it forms stiff peaks. The cream should hold its shape firmly when the whisk is lifted. Carefully scrape the whipped cream into a separate bowl and set aside. There’s no need to wash the stand mixer bowl at this point, as you’ll use it for the cream cheese mixture.
- Create the Cream Cheese Base: To the same stand mixer bowl (no need to clean it!), add the softened cream cheese, plain yogurt, granulated sugar, fresh lemon juice, and vanilla extract. Beat these ingredients together on medium-high speed. Continue beating for about 5 minutes, or until the mixture becomes wonderfully fluffy, smooth, and shiny, resembling the texture of buttercream frosting. If your cream cheese is too cold to achieve this airy consistency, gently warm the bottom of the mixer bowl with a hot, damp towel for a few moments to help it soften further.
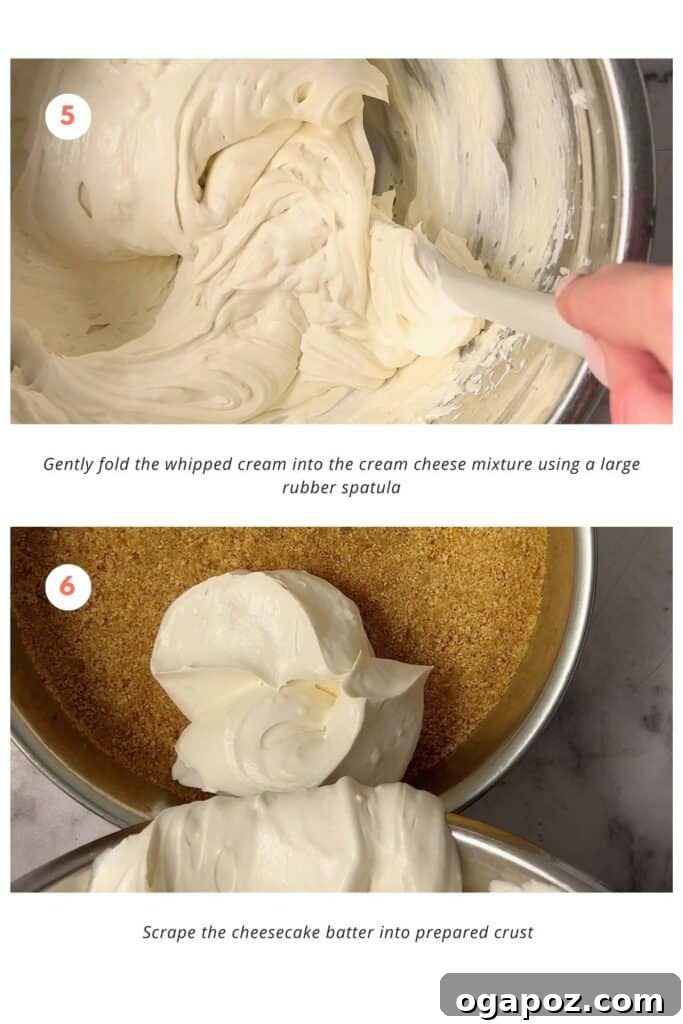
- Gently Fold in Whipped Cream: This step is crucial for maintaining the airy texture. Using a large rubber spatula, gently fold the reserved whipped cream into the cream cheese mixture. Use a motion where you scoop from the bottom and fold over the top, being careful not to deflate the whipped cream. Continue until just combined, ensuring no streaks of plain cream cheese mixture remain.
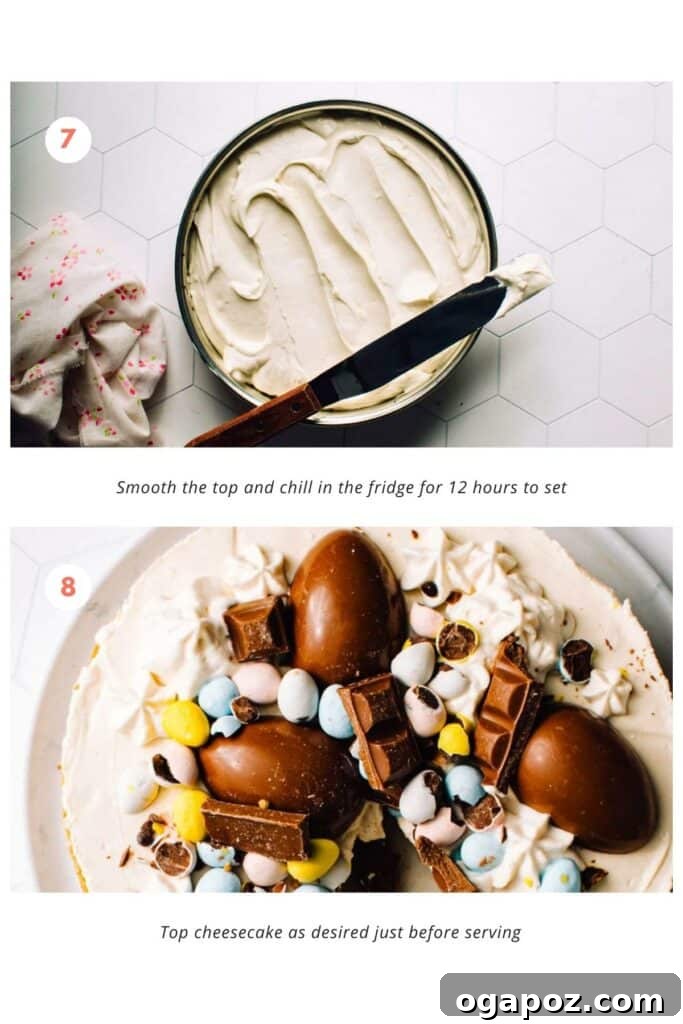
- Assemble and Chill: Carefully scrape the entire cheesecake batter into the prepared graham cracker crust. Use your spatula to gently smooth the top surface of the cheesecake for a polished finish. Now comes the most important part: chilling. Place the cheesecake in the refrigerator and allow it to chill undisturbed for a minimum of 12 hours. This extended chilling time is essential for the cheesecake to fully set and develop its perfect, stable texture. Top the cheesecake with your desired decorations just before serving. Wrap any leftovers tightly with plastic wrap and store them in the refrigerator to maintain freshness.
Expert Pro Tips for Your No-Bake Cheesecake Success
Achieving a picture-perfect and delicious no-bake Easter Egg Cheesecake is easier with a few expert tips. These insights will help you navigate common challenges and ensure your dessert is an absolute triumph.
- Mastering the Crust Press: For an incredibly smooth and perfectly packed graham cracker crust, utilize the flat bottom of a drinking glass or a flat-bottomed measuring cup. Before pressing, spray the bottom of the glass or cup with a little nonstick spray to prevent sticking. The key is to apply firm, even pressure, ensuring the crumbs are tightly packed into the bottom of the pan and extend about an inch up the sides. This creates a sturdy foundation. Once pressed, pop the crust into the freezer while you prepare the filling – this brief chill helps the butter solidify quickly, setting the crust even better.
- Effortless, Tidy Slices: To achieve beautifully clean cuts when serving your cheesecake, always use a sharp, thin knife. For truly pristine slices, run your knife under hot water for a few seconds, then wipe it clean with a towel between each cut. The warm blade glides through the creamy filling without dragging, resulting in neat, professional-looking portions every time.
- The Crucial 12-Hour Chill: This is arguably the most vital step for a no-bake cheesecake. A minimum of 12 hours in the refrigerator allows the filling to fully set, transforming it from a soft batter into a stable, sliceable, and lusciously textured dessert. While this requires a bit of foresight, the payoff in terms of perfect texture and flavor is absolutely worth it. You can conveniently make the cheesecake a full day in advance or in the morning to serve at night. Remember to let the cheesecake set completely before adding any decorative toppings.
- Whisk Attachment for Maximum Airiness: When beating the cream cheese mixture, using the whisk attachment on your stand mixer is more effective than the paddle attachment. The whisk incorporates significantly more air into the mixture, which is essential for achieving that light, fluffy, and mousse-like consistency that makes this cheesecake so special.
Can Easter Egg Cheesecake Be Frozen? A Detailed Look
While the thought of freezing leftover cheesecake for later enjoyment is tempting, it’s generally not ideal for this specific no-bake Easter Egg Cheesecake, or most no-bake cheesecakes for that matter. Understanding why can help prevent disappointment.
The primary reason relates to the high water content naturally present in heavy cream and cream cheese. When these ingredients freeze, the water within them forms ice crystals. As water expands when it freezes, these ice crystals can disrupt the delicate structure of the cheesecake. Upon thawing, these crystals melt, often leaving behind small holes or a spongy texture that detracts from the smooth, mousse-like consistency you worked so hard to achieve.
Furthermore, freezing can cause the fat emulsion in the cheesecake to break down. When thawed, this often results in water separating from the fat, leading to a “weepy” or watery texture. The fat molecules might also clump together, giving the cheesecake a grainy or gritty mouthfeel rather than its intended velvety smoothness.
Therefore, although you might be inclined to use the freezer to speed up the setting process for a quicker dessert, it’s strongly advised to resist the urge. Allow the refrigerator to do the chilling work slowly and steadily for the recommended 12 hours. This patient approach ensures the cheesecake sets perfectly, maintaining its structural integrity and luxurious texture. For storage, tightly wrapped leftovers will keep beautifully in the refrigerator for several days, preserving their quality without the negative effects of freezing.
Frequently Asked Questions About Your Easter Egg Cheesecake
Cutting chocolate eggs can be a bit tricky, but with the right technique, it’s simple. First, place the Easter egg on a stable cutting board to prevent it from rolling. I find a small, not-too-sharp knife, like a cheeseboard knife with its short, square blade and blunt edge, works best. Hold the knife handle firmly with one hand and place your other hand on the flat, upper side of the blade to apply even pressure. Always keep your fingers well away from the cutting edge. Use the part of the knife closest to your body (which is often the heaviest part) to press down on the chocolate egg, then gently rock the knife a little to make a clean, controlled cut. If the eggs tend to roll, crumple up some aluminum foil into a small ‘nest’ to cradle and hold the egg securely in place while you cut it. This ensures safety and precision.
If Philadelphia cream cheese isn’t available or you’re looking for an alternative, you can certainly substitute it with any brand of full-fat, brick-style cream cheese. The key is “full-fat” and “brick” – these varieties have the necessary consistency and fat content to ensure your cheesecake sets properly and remains creamy. Other excellent alternatives that lend a rich texture and flavor include mascarpone cheese, which is even richer and slightly sweeter, or Neufchâtel cheese, a French-style cream cheese that is slightly lighter but still works well in many cheesecake recipes. Crucially, do NOT substitute with low-fat, fat-free, whipped, or spreadable cream cheese products, as their altered compositions will prevent the cheesecake from setting correctly and compromise the desired texture.
Traditional baked cheesecake typically consists of cream cheese, granulated sugar, eggs, and various flavorings like vanilla or lemon zest. It’s renowned for its dense, rich, and incredibly creamy texture, often requiring a water bath during baking to prevent cracking and ensure even cooking. However, this no-bake variety offers a delightful departure from the traditional. While it shares many of the core flavors, it achieves an entirely different, much airier, and more mousse-like texture. This lightness makes it feel less heavy and incredibly refreshing, especially as a spring or summer dessert, offering a wonderful alternative to its baked counterpart.
Other Irresistible Easter Desserts You’ll Love
Looking for more festive treats to round out your Easter celebration? Explore these other delightful recipes:
- Chewy Chocolate Mini Egg Easter Cookies
- Easy Easter Egg Brownies
- Chocolate Easter Egg Cookies
More Beloved Cheesecake Recipes:
If cheesecake is your passion, you’ll adore these other highly-rated recipes from our collection:
- Classic Philadelphia Cheesecake (featuring a creamy 3-Ingredient filling!)
- No-Bake Cherry Cheesecake Bars
- Decadent Chocolate Cheesecake
- Seasonal Pumpkin Cheesecake Bars
- Easy Caramel Apple Cheesecake Recipe
- Sweet Potato Cheesecake with Oat Pecan Crust
Saved
Pin
No-Bake Easter Egg Cheesecake
Jennifer Pallian BSc, RD
30 minutes
0 minutes
12 hours
12 hours
30 minutes
10
Video
Ingredients
For Crust:
- 1 ½ cups graham cracker crumbs (ensure fine crumbs)
- ¼ cup unsalted butter (melted)
- 2 tbsp granulated sugar
For Filling:
- 1 cup cold heavy whipping cream (35% m.f. or higher)
- 3 8 oz bricks of full-fat cream cheese (softened to room temperature, e.g., Philadelphia)
- ¼ cup plain full-fat Greek yogurt (for tang and setting)
- 1 cup granulated sugar
- 4 tbsp fresh lemon juice (freshly squeezed is best)
- 2 tsp pure vanilla extract
Optional Toppings
- 1 cup freshly whipped cream (for piping)
- 1 cup assorted chocolate Easter eggs (e.g., Cadbury Mini Eggs, larger foil-wrapped eggs)
- 1-2 chocolate cream eggs or small chocolate bunnies (for extra festive flair)
Instructions
For Crust
-
Line the bottom of a 9” springform pan with parchment paper, ensuring it’s flat. Lightly spray the bottom and sides of the pan with cooking spray to prevent any sticking.
-
In a spacious mixing bowl, combine the graham cracker crumbs, melted butter, and granulated sugar. Stir these crust ingredients together thoroughly until the crumbs are completely and evenly moistened. Scrape this mixture into your prepared springform pan.
-
Using a greased, flat-bottomed measuring cup or the bottom of a glass, firmly press the crumb mixture into an even layer across the bottom of the pan and about 1 inch up the sides. This firm pressing is essential for a stable crust. Place the crust in the freezer for 10 minutes to set while you begin preparing the filling.
For Filling
-
In a stand mixer bowl (or a large bowl with an electric hand mixer), fitted with the whisk attachment, whip the cold heavy cream on medium-high speed until it forms stiff, distinct peaks. Transfer the whipped cream into a separate bowl and set it aside. You do not need to wash the stand mixer bowl at this point.
-
To the same stand mixer bowl, add the softened cream cheese, plain Greek yogurt, granulated sugar, fresh lemon juice, and vanilla extract. Beat these ingredients together on medium-high speed for approximately 5 minutes, or until the mixture becomes incredibly fluffy, smooth, and shiny, much like a well-made buttercream frosting. If your cream cheese is too cold and not whipping up to this airy consistency, you can slightly warm the bowl by pressing a hot, damp towel on the bottom for a couple of minutes to aid softening.
-
Using a large rubber spatula, very gently fold the reserved whipped cream into the cream cheese mixture. Use a soft, scooping motion to incorporate the whipped cream without deflating the air you’ve built up. Continue folding until the mixture is uniform and no streaks of plain cream cheese are visible.
-
Carefully scrape the entire cheesecake batter into the prepared crust in the springform pan. Use your spatula to gently spread and smooth the top surface of the cheesecake. Place the cheesecake in the refrigerator and chill for a minimum of 12 hours. This prolonged chilling period is absolutely essential for the cheesecake to set properly and achieve its ideal firm yet creamy texture.
To Decorate
-
Just before serving, take your chilled cheesecake out of the refrigerator and top it as desired.
For an elegant touch, I like to pipe additional whipped cream onto the cake using a large star tip fitted on a piping bag. Alternatively, you can use store-bought whipped cream in a can, which often comes with its own star tip.
Arrange your assorted chocolate Easter eggs, starting with larger ones for focal points and filling in with smaller, colorful chocolates and finely chopped pieces for added texture and visual interest.
Any leftover cheesecake should be wrapped tightly with plastic wrap to prevent it from absorbing refrigerator odors and stored in the refrigerator for up to 3-4 days.
Notes
You can very easily make this cheesecake a day in advance. This is actually recommended as it allows for the full 12-hour setting time without rushing. Prepare it the morning before an evening event, or the day before for an Easter lunch. Just remember to let the cheesecake set fully before you add any decorative toppings to ensure they stay fresh and vibrant.
Tips for Success
- Use the flat bottom of a glass (lightly spray it with nonstick spray first) to press the crust evenly into the bottom and approximately 1 inch up the sides of the pan. This technique ensures a compact and uniform base.
- Employ your sharpest knife for the cleanest slices. For even tidier portions, wipe the knife down or rinse it under hot water between each cut. This prevents the creamy filling from sticking to the blade and gives you professional-looking slices.
- A no-bake cheesecake should always be allowed a full 12 hours to fully set. This patience is key to its perfect texture. Don’t rush this step by placing it in the freezer, as it can affect the consistency.
- Always add any decorative toppings, especially those that might melt or lose their crispness, just before serving. This ensures your cheesecake looks its absolute best when presented.
- For incorporating the most air into your filling mixture, the whisk attachment on your stand mixer is significantly more effective than the paddle attachment. This contributes to the desired light and mousse-like consistency.
Nutrition
Carbohydrates: 36g |
Protein: 4g |
Fat: 25g |
Saturated Fat: 15g |
Polyunsaturated Fat: 1g |
Monounsaturated Fat: 7g |
Trans Fat: 0.2g |
Cholesterol: 71mg |
Sodium: 228mg |
Potassium: 100mg |
Fiber: 0.4g |
Sugar: 28g |
Vitamin A: 918IU |
Vitamin C: 1mg |
Calcium: 64mg |
Iron: 1mg
Nutrition information is automatically calculated and should only be used as an approximation. Actual values may vary based on ingredients and preparation methods.
Tried this recipe? Leave a comment!
Share your experience and tips below!