
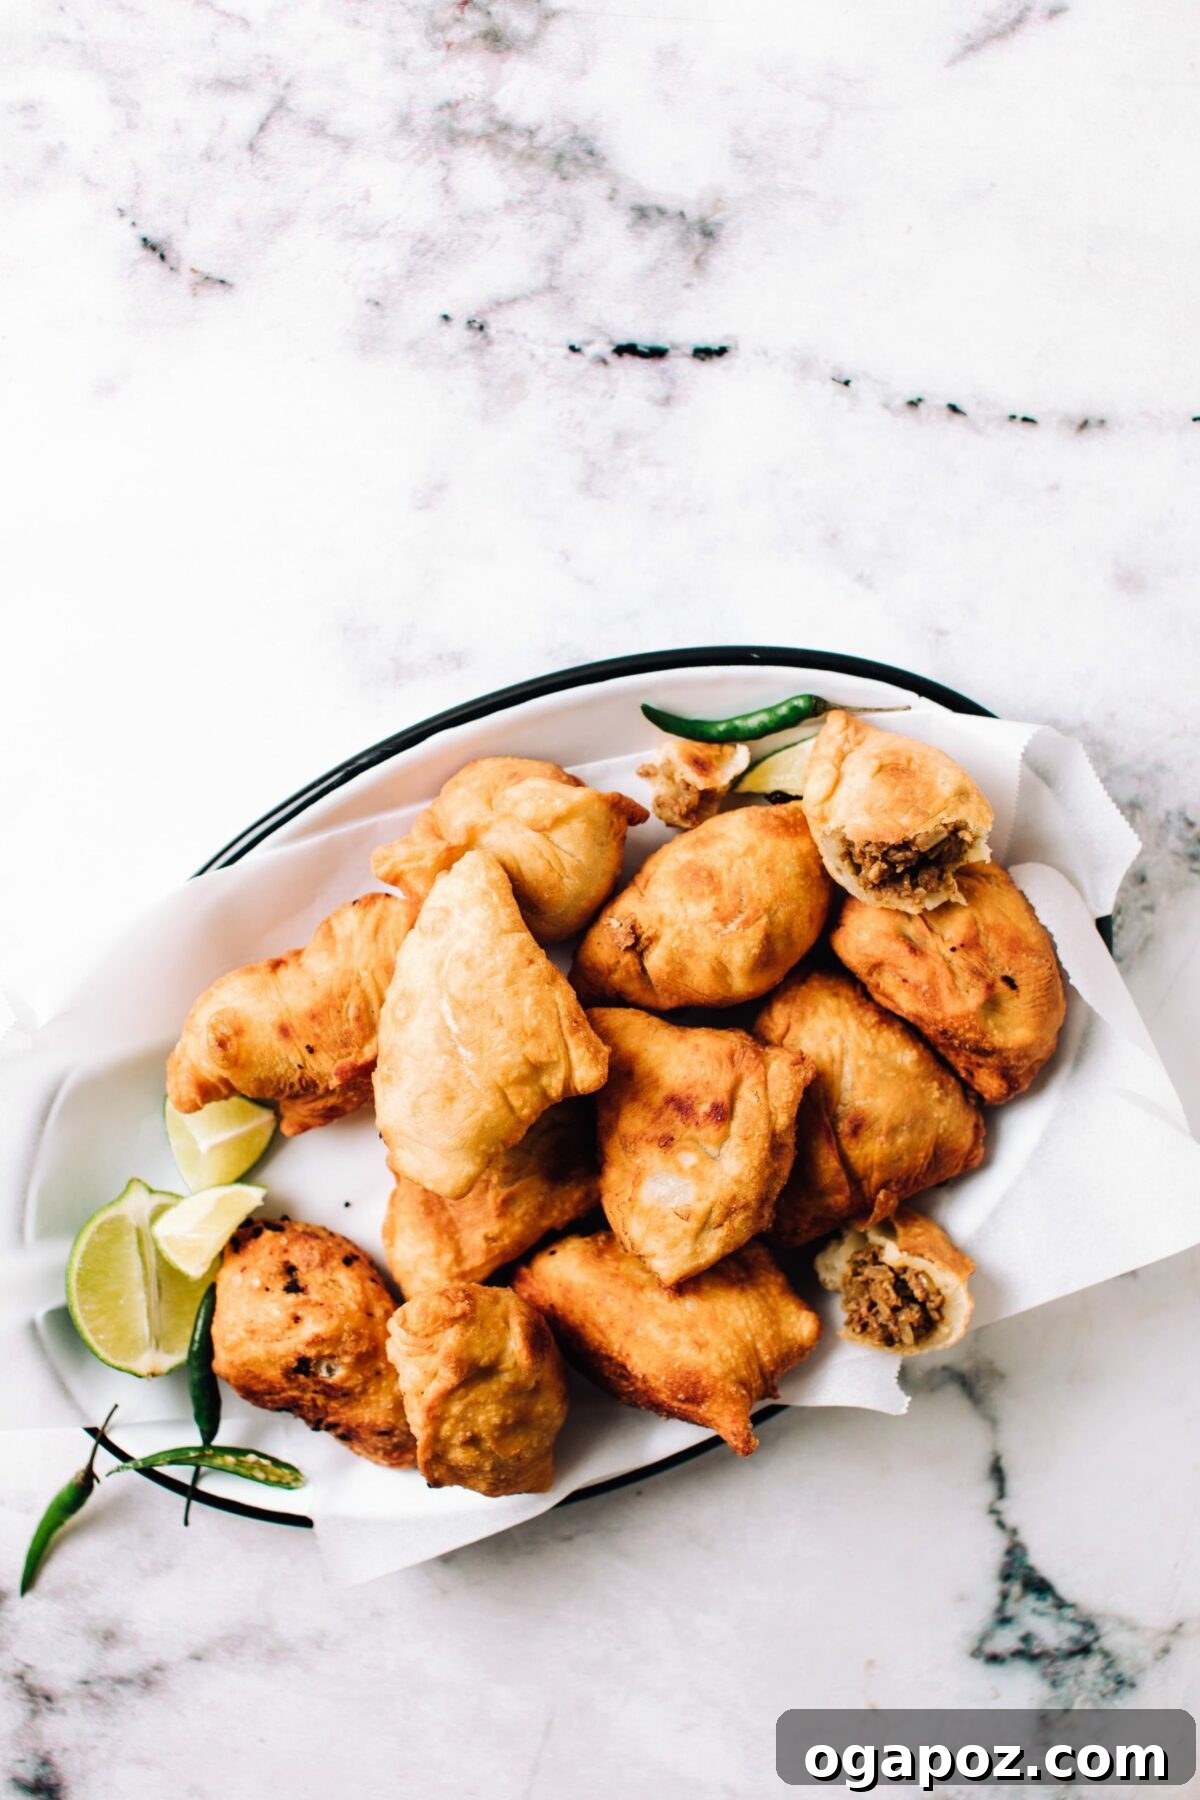
Embark on a culinary journey to craft the most incredibly delicious and surprisingly easy chicken samosas right in your own kitchen. Imagine a perfectly crispy, golden-brown crust encasing a vibrantly spiced and succulent chicken filling – a truly irresistible snack or appetizer that will transport your taste buds straight to the streets of India. This recipe delivers an authentic flavor profile combined with straightforward instructions, making it accessible for home cooks of all skill levels.
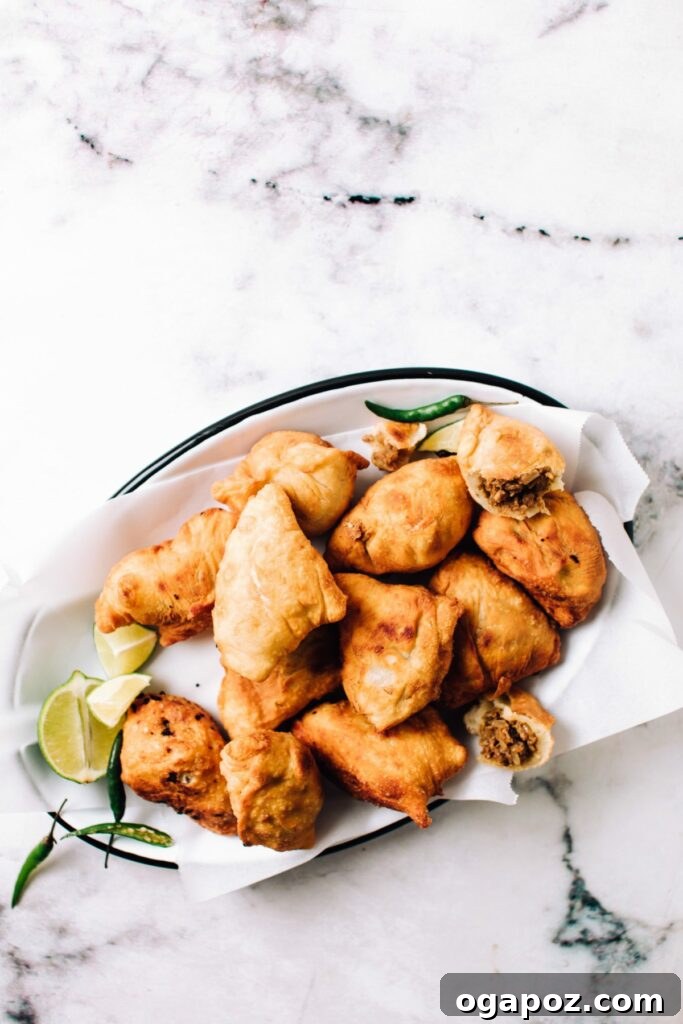
My Indian husband, a connoisseur of traditional flavors, enthusiastically declares these homemade chicken samosas superior to any restaurant offering. His endorsement speaks volumes, assuring you that this isn’t just another recipe, but a true crowd-pleaser that captures the essence of authentic Indian cuisine. The magic of this dish lies in its harmonious blend of aromatic spices and perfectly cooked chicken, all wrapped in a wonderfully flaky pastry.
And for those who might be intimidated by the idea of making samosas from scratch, here’s a testament to its simplicity: even a freelance videographer, making them for the very first time, achieved perfect results and echoed the sentiment that they surpass restaurant quality! This recipe is designed to demystify the process, breaking it down into manageable steps that guarantee success and a truly rewarding cooking experience. Get ready to impress your family and friends with these exceptional samosas.
These savory pastries are exceptionally delicious when served alongside a steaming cup of Authentic Indian Chai. The warm, aromatic tea provides a comforting contrast to the crispy, spicy samosas, making for a perfect afternoon snack or a delightful start to any Indian-themed meal. They’re also versatile enough to serve as a show-stopping appetizer at gatherings or as a satisfying light meal.
Essential Ingredients for Perfect Chicken Samosas
Crafting these delectable chicken samosas begins with selecting the right ingredients. Each component, from the flour for the dough to the last pinch of spice for the filling, contributes significantly to the overall flavor and texture. Let’s delve into the specifics of what you’ll need to create these irresistible bites.
Chicken Samosa Ingredients Breakdown
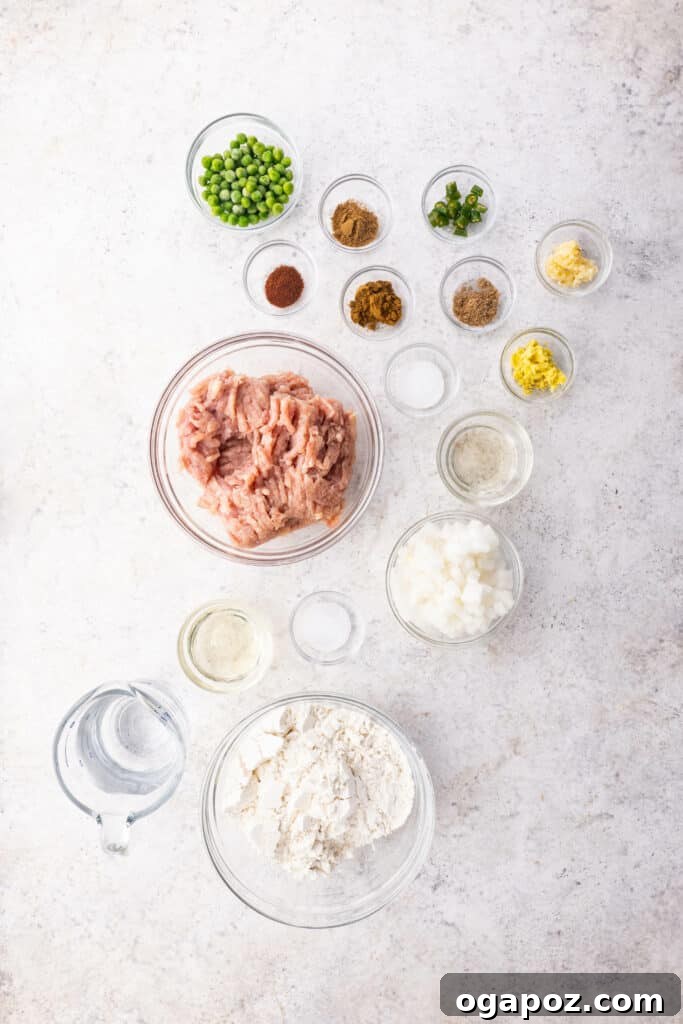
For the Crispy Samosa Dough:
- All-purpose flour (Maida): This is the backbone of our crispy samosa crust. In India, it’s commonly known as maida. Using all-purpose flour helps achieve that desired flaky yet firm texture that holds the filling perfectly while frying to a beautiful golden hue.
- Salt: Essential for seasoning the dough, enhancing its flavor and balancing the richness of the filling.
- Vegetable oil: Not just for frying! A small amount of oil worked into the dough adds moisture and plays a crucial role in creating the signature tender and flaky texture of the samosa pastry. It helps prevent the dough from becoming too tough.
- Water: The binding agent for the dough. Adding it gradually allows you to achieve the perfect consistency – a firm yet pliable dough that’s easy to roll out.
For the Aromatic Chicken Samosa Filling:
- Onion: Finely chopped, onions form the sweet and savory base of the filling, caramelizing slightly to add depth of flavor.
- Ginger: Freshly grated ginger provides a warm, pungent, and aromatic kick that is characteristic of Indian cuisine.
- Garlic: Grated garlic adds another layer of robust, savory flavor, complementing the ginger and other spices beautifully.
- Salt: Crucial for seasoning the chicken and vegetables, bringing all the flavors together in the filling.
- Minced chicken: Ground chicken breast or thigh works wonderfully. Using minced chicken ensures a consistent texture that is easy to fill into the samosa pockets and cooks quickly and evenly.
- Ground cumin seeds (Cumin Powder): Offers an earthy, warm, and slightly pungent aroma, a foundational spice in Indian cooking.
- Coriander Powder: Imparts a mild, citrusy, and slightly sweet flavor that perfectly balances the stronger spices.
- Chili powder: Provides the perfect amount of heat and a vibrant red color to the filling. Adjust the quantity to your preference for mild or spicy samosas.
- Garam masala: A fragrant blend of ground spices, garam masala is added at the end of cooking to infuse the filling with a complex, warm, and rich aroma. If you don’t have it, a good quality curry powder can be a suitable swap, though the flavor profile will differ slightly.
- Frozen green peas: These add a burst of color, a touch of sweetness, and a pleasant textural contrast to the savory chicken filling.
- Green chillies (optional): For those who love extra heat, minced green chillies can be added. They also bring a fresh, bright note. I often enhance the freshness with minced fresh cilantro as well, stirred in at the very end.
Customizing Your Samosas: Variations and Substitutions
One of the beauties of this chicken samosa recipe is its adaptability. Feel free to unleash your creativity and tailor it to suit your personal preferences, dietary needs, or what you have available in your pantry. Here are some fantastic ideas to get you started:
- Vegetarian Delight: For a superb meat-free option, you absolutely must try my super-popular potato samosa recipe. It features a hearty and flavorful spiced potato filling that is just as satisfying and delicious as its chicken counterpart. It’s a fantastic choice for vegetarian guests or simply when you’re craving something different.
- Gluten-Free Option: Don’t let dietary restrictions stop you from enjoying these delightful treats! You can easily make this recipe gluten-free by using a high-quality gluten-free flour blend for the samosa dough. Be sure to choose a blend that is suitable for pastry making to ensure the best texture.
- Alternative Proteins: While chicken is fantastic, feel free to experiment with other ground meats. Ground turkey offers a leaner alternative, absorbing the spices beautifully. For a richer, more robust flavor, consider making my beef samosas, which are equally popular and satisfying. You could also try finely chopped lamb for a truly authentic Indian experience.
The samosa filling itself is so incredibly flavorful and aromatic that I sometimes prepare it on its own. It makes a fantastic standalone dish, perfect for a quick and satisfying dinner served with warm, fluffy butter naan or rice. It’s a testament to the filling’s versatility and deliciousness.
I even find myself using this amazing filling as a shortcut during the holidays! By stuffing it into store-bought puff pastry, I can whip up quick and easy samosa puffs, which are always a hit and require minimal effort for maximum flavor.
Essential Tools for Samosa Success
Having the right kitchen tools on hand can make the samosa-making process smooth, efficient, and enjoyable. While you don’t need a professional setup, these essential items will ensure you achieve the best possible results. Make sure these tools are ready before you begin your culinary adventure.
- Mixing bowl: A spacious mixing bowl is indispensable for combining the flour, salt, oil, and water to prepare the samosa dough. Choose one large enough to allow for comfortable kneading.
- Rolling pin: Essential for rolling out the dough thinly and evenly. A smooth, sturdy rolling pin will help you achieve that perfect, consistent thickness for crispy samosa shells.
- Large frying pan or skillet: You’ll need a large, heavy-bottomed skillet or frying pan for cooking the chicken filling. Its size ensures even cooking and allows you to sauté the ingredients without overcrowding.
- Pastry brush: This small but mighty tool is vital for brushing water along the edges of the dough to create a strong, secure seal when forming the samosa cones. A good seal prevents the filling from spilling out during frying.
- Deep fryer or heavy-bottomed pot/Dutch oven: For frying the samosas to golden perfection, a deep fryer offers precise temperature control. Alternatively, a heavy-bottomed pot or Dutch oven (like a cast-iron pot) is excellent for maintaining consistent oil temperature and safely deep-frying your samosas.
- Slotted spoon or spider skimmer: To safely remove the fried samosas from the hot oil, allowing excess oil to drain away.
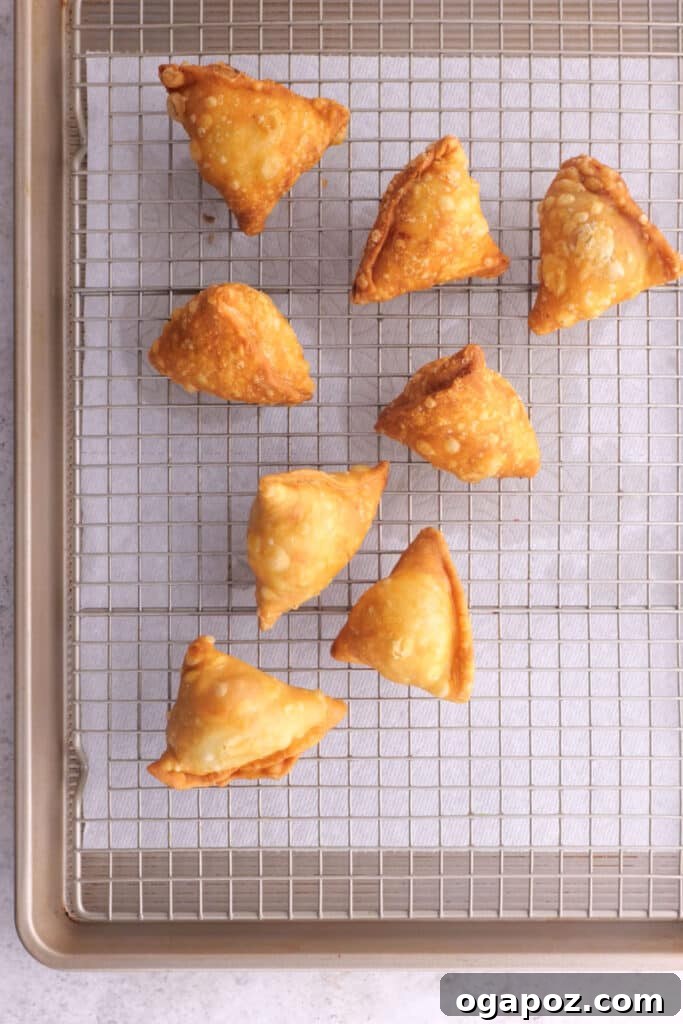
- Wire rack with paper towels: After frying, place the samosas on a wire rack lined with paper towels to drain any remaining oil, ensuring they stay delightfully crisp.
A Step-by-Step Guide: How To Make Chicken Samosas
Making homemade chicken samosas might seem intricate, but by breaking it down into clear, easy-to-follow steps, you’ll find the process incredibly rewarding. This guide will walk you through each phase, from preparing the dough to achieving that perfect golden fry.
1. Preparing the Perfect Samosa Dough
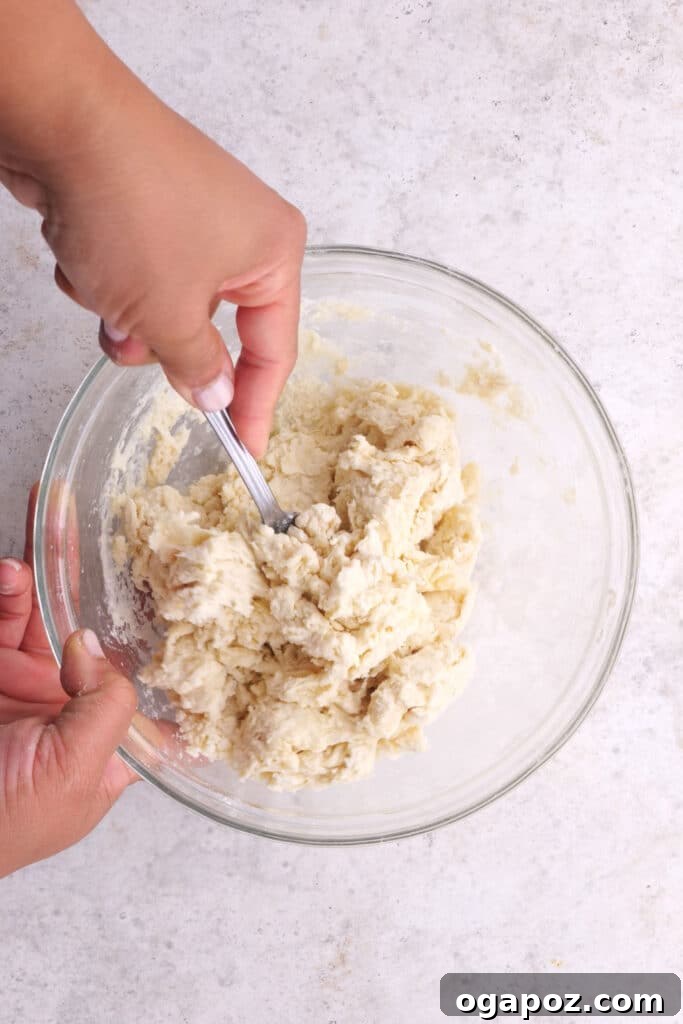
The foundation of a great samosa is its dough. Our easy samosa dough recipe is a simple yet effective mixture of all-purpose flour, a touch of salt, vegetable oil, and water. The key to a flaky crust is not to overwork the dough. First, combine the flour and salt in a large mixing bowl. Then, gradually rub in the vegetable oil until the mixture resembles coarse breadcrumbs. This step, known as ‘moyan,’ is crucial for developing the flaky texture.
Next, slowly add water, a tablespoon at a time, mixing until a firm, non-sticky dough forms. Knead it gently for a few minutes until it’s smooth and pliable. Resist the urge to add too much water; a slightly stiff dough is better for samosas. Once formed, wrap the dough ball in a damp kitchen towel or plastic wrap and let it rest at room temperature for at least 30 minutes. This resting period allows the gluten to relax, making the dough much easier to roll out thinly and ensuring a tender, crispy crust when fried.
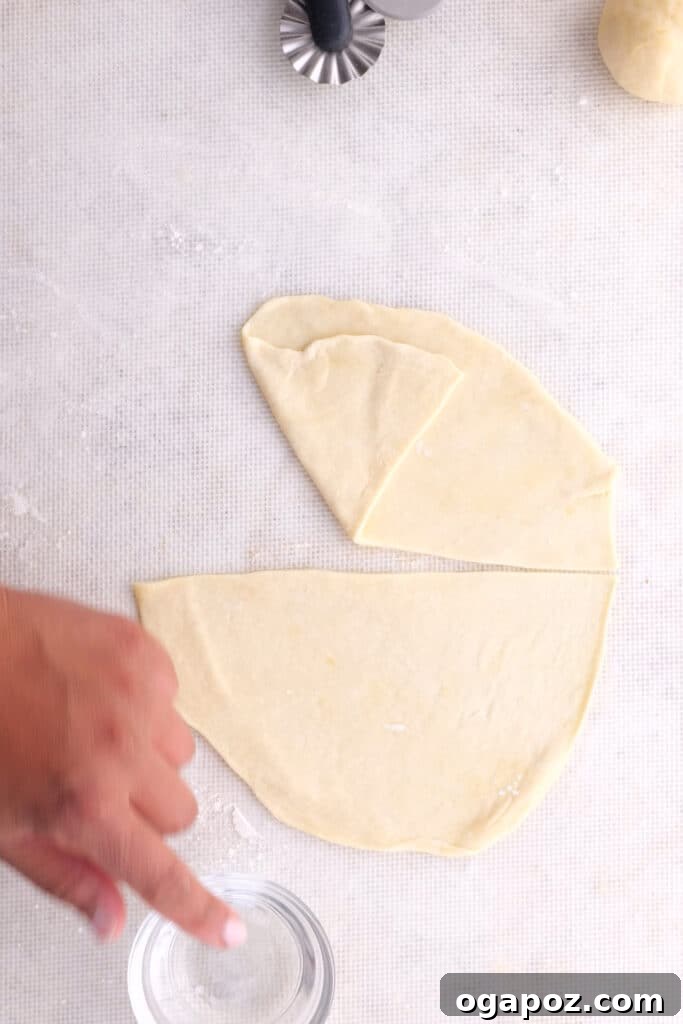
After resting, divide the dough into equal portions and roll each into a smooth ball. On a lightly floured surface, roll each ball into a thin, oblong or oval shape. Then, carefully slice each oblong round down the middle to create two half-moon pieces. Take one half-moon in your hand, brush a thin layer of water along the straight edge, and fold the edges together to form an open cone shape, firmly pressing the seams to seal. This creates the perfect pocket for your delicious filling.
2. Crafting the Flavorful Chicken Samosa Filling
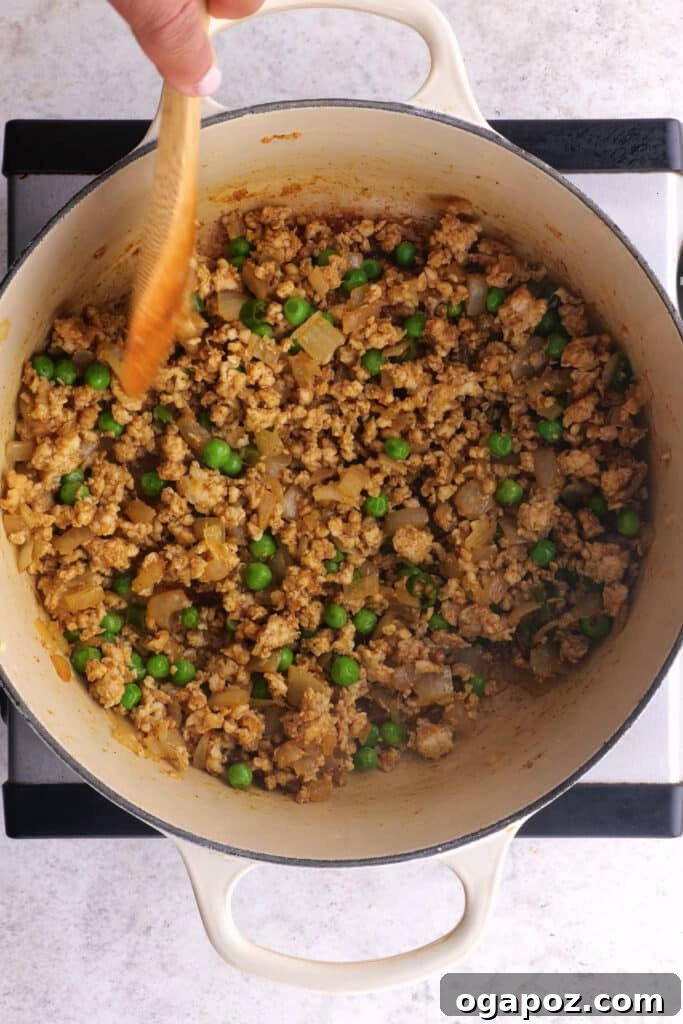
The heart of these samosas is the incredibly aromatic and flavorful chicken filling. Heat a tablespoon of vegetable oil in a large frying pan or skillet over medium-high heat. Add the finely chopped onion, grated ginger, and grated garlic, along with half a teaspoon of salt. Sauté these aromatics until the onion softens and turns translucent, filling your kitchen with an enticing fragrance. This step builds the foundational flavor of your filling.
Next, add the minced chicken to the pan. Break it up with a spoon and cook until it’s no longer pink. Stir in the remaining salt, ground cumin, ground coriander, and chili powder. Continue to cook for about 10 minutes, stirring occasionally, allowing the chicken to fully absorb the incredible flavors of the spices. The chicken should be well cooked and slightly browned.
Finally, sprinkle in the garam masala and add the frozen green peas. Stir everything together and cook for an additional 5 minutes, ensuring the peas are tender and the garam masala’s fragrance is fully integrated. Taste the filling and adjust for salt or heat if necessary; this is your chance to perfect the flavor profile. If using, now is the time to fold in fresh minced green chillies and cilantro for an extra layer of freshness and spice. Be warned: the aroma is so enticing, you’ll need 100% willpower to shovel it into the samosa dough and not directly into your mouth!
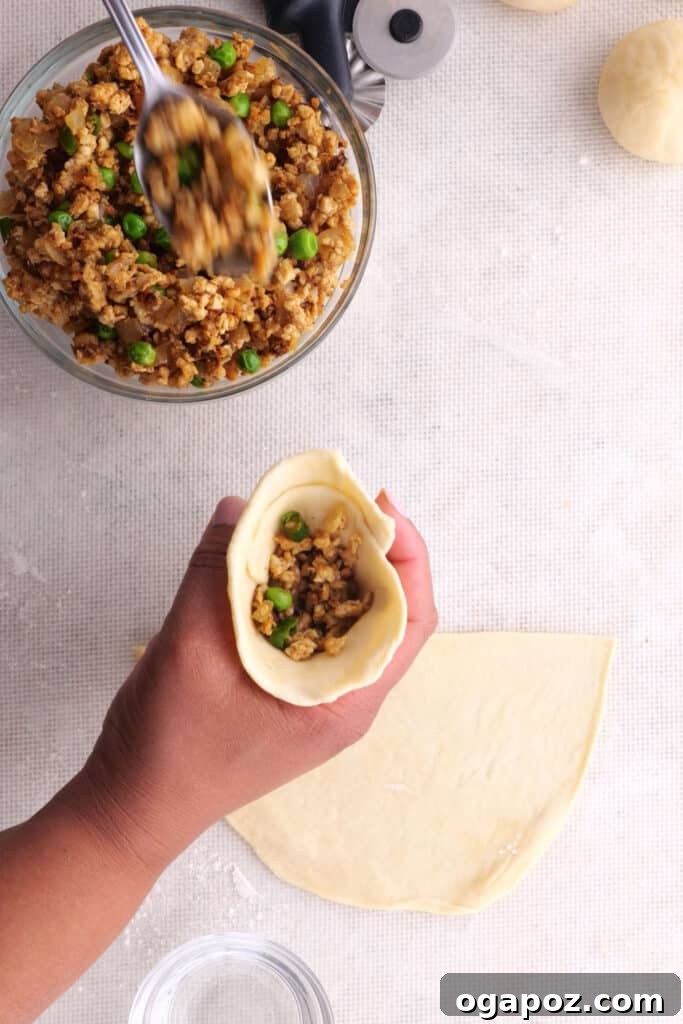
With your dough cones ready and the filling perfectly spiced, it’s time to assemble your samosas. Hold one dough cone in your hand and fill it with about two tablespoons of the cooled chicken mixture. Do not overfill, as this can lead to bursting during frying. Pinch the open edges of the cone together firmly to create a tight seal, ensuring the filling stays securely inside. Gently flatten the bottom of the samosa on a cutting board to help it stand upright, giving it that classic triangular shape. Repeat this process for all remaining dough and filling.
3. Frying the Samosas to Golden Perfection
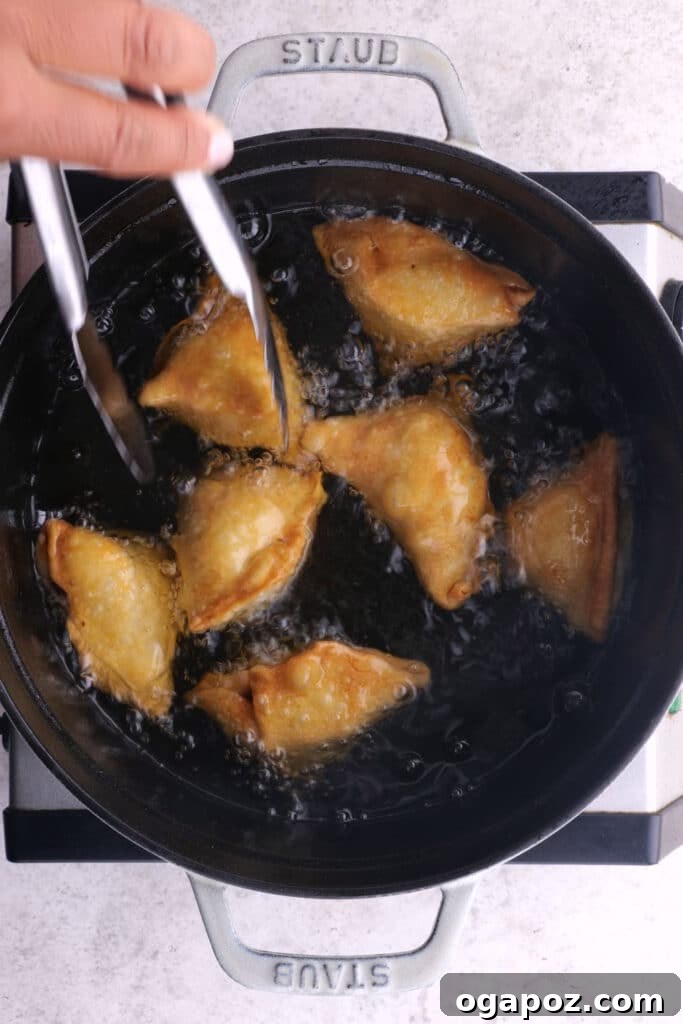
WAIT! Don’t run away. Deep frying is not scary, especially when you follow a few simple guidelines. It’s the final step that transforms your carefully crafted samosas into golden, crispy delights. Pour vegetable oil into a deep saucepan or Dutch oven to a depth of about 3 inches. Place it over medium heat. The key to perfectly cooked samosas is precise temperature control, so a cooking thermometer is highly recommended here.
Allow the oil to heat up slowly to approximately 200°F (95°C). This low temperature is crucial for the first phase of frying, allowing the samosas to cook through evenly without burning the crust. Carefully place the assembled samosas into the hot oil in small batches, ensuring you don’t overcrowd the pan. Fry them at this lower temperature for about 15 minutes, turning occasionally, until they are light golden. Then, increase the heat to high and fry for another 5 minutes at a hotter temperature (around 350-375°F or 175-190°C) until they achieve a deep, rich golden brown color and a truly crispy exterior. This two-stage frying process ensures both a thoroughly cooked filling and an unbelievably crisp crust. Remove the samosas with a slotted spoon and place them on paper towels over a wire rack to drain any excess oil before serving.
Mastering the Art: My 7 Tips for Perfect Samosas Every Time
Achieving restaurant-quality homemade samosas can feel like an art, but it’s entirely within reach with a few expert tips. Frying can be particularly intimidating, but avoiding common mistakes will help you achieve consistently perfect results. Here are seven essential tips to keep in mind, ensuring your samosas are crispy, cooked through, and utterly delicious:
- Choose a Generous Pot for Frying: Always opt for a heavy-bottomed pot, such as a sturdy Dutch oven or a wok, that is larger than you think you’ll need. This provides ample space for the oil to expand and bubble up safely when samosas are added. Filling the oil to a depth of about 3 inches in a spacious pot helps maintain a more stable temperature and prevents overflows.
- Utilize a Cooking Thermometer for Precision: This is arguably the most critical tip for perfect samosas. It’s ideal to use a reliable cooking thermometer to monitor your oil temperature. The secret is a two-stage frying process: initially fry the samosas at a low temperature of approximately 200ºF (95°C) for about 15 minutes. This slow cooking allows the dough to cook through evenly and prevents the crust from browning too quickly. Afterward, briefly increase the heat to a higher temperature (around 350-375°F or 175-190°C) for 5 minutes to achieve that coveted golden-brown, wonderfully crispy exterior.
- Roll the Dough Thinly and Evenly: The thickness of your dough directly impacts the final texture of your samosas. Roll the dough as thinly as possible, aiming for uniform thickness across each piece. Thin dough ensures a super crispy, evenly cooked crust that shatters beautifully with every bite. Thick dough, conversely, can result in a chewy, dense, or even undercooked exterior, detracting from the overall experience.
- Prevent Overcrowding the Frying Pan: Resist the temptation to fry too many samosas at once. Overcrowding the hot oil drastically reduces its temperature, leading to greasy, soggy samosas that absorb too much oil. Instead, fry in small batches, allowing each samosa enough space to cook evenly and maintain the oil’s optimal temperature for that perfect crispness.
- Ensure a Proper Seal on All Edges: A tightly sealed samosa is key to preventing the filling from escaping into the oil during frying. Use a pastry brush to apply a little water along the edges of the dough before pressing them together firmly to create a secure seal. Improper sealing can lead to messy frying and a compromised final product, as the filling can spill out and burn.
- Exercise Caution with Filling Quantity: While it’s tempting to pack your samosas with abundant filling, overfilling is a common mistake. Aim for approximately 2 tablespoons of filling per samosa, depending on the size of your dough pocket. Overfilling can put stress on the dough seams, causing the samosas to burst open during frying and leading to uneven cooking and loss of that delicious filling.
- Allow the Dough to Rest Adequately: Patience is a virtue in samosa making. After kneading, allow the dough to rest for at least 30 minutes at room temperature, ideally wrapped in a damp cloth. This resting period is crucial as it relaxes the gluten in the flour, making the dough much easier to roll out thinly and preventing it from shrinking back. The result is a more tender, flaky, and manageable crust.
Make-Ahead and Storage Solutions for Your Samosas
One of the many great things about homemade chicken samosas is their versatility in terms of preparation and storage. You can easily make them in advance, which is perfect for meal prepping or preparing for a party. Here are some invaluable tips on how to make ahead and store your delicious chicken samosas, ensuring they retain their flavor and crispiness:
- Prepare Components in Advance: To save time on the day of cooking, you can prepare both the chicken filling and the samosa dough a day in advance. Store the cooled chicken filling in an airtight container in the refrigerator. The dough should be wrapped tightly in plastic wrap or a damp kitchen towel and refrigerated. When ready to use, simply bring the dough to room temperature for easier handling.
- Freeze Uncooked Samosas for Future Enjoyment: This is an excellent option for long-term storage. Once you have assembled the samosas, arrange them in a single layer on a baking sheet, making sure they don’t touch each other. Freeze them until they are completely solid (this usually takes a few hours). Once frozen, transfer the solid samosas to a freezer-safe bag or an airtight container. They can be stored in the freezer for up to 2-3 months. When ready to cook, you can fry them directly from frozen, though they may require a few extra minutes of frying time at a slightly lower temperature to cook through evenly.
- Reheat Leftover Fried Samosas with Care: If you have leftover fried samosas, it’s best to reheat them in a way that preserves their crispiness. An oven or an air fryer is your best bet. Preheat your oven to 350°F (175°C) and bake the samosas for 10-15 minutes, or until heated through and crispy. In an air fryer, cook at 350°F (175°C) for 5-8 minutes, shaking the basket halfway through. Avoid microwaving them, as this will inevitably make them soft and soggy, losing their desirable crunch.
Serving Suggestions: How to Enjoy Your Chicken Samosas
Once your homemade chicken samosas are fried to perfection, golden and crispy, they are ready to be served hot and fresh. These versatile pastries can play many roles on your table, making them suitable for various occasions and meal types. Their rich flavors and satisfying crunch are best enjoyed immediately after cooking.
These chicken samosas make an excellent side dish to a larger Indian meal, a fantastic standalone appetizer to kick off any gathering, or a delightful snack any time of day. Their convenient size makes them perfect for dipping and sharing. Elevate the experience by pairing them with a selection of traditional Indian dipping sauces. I particularly love to serve them with a refreshing mint chutney, a sweet and tangy mango chutney, or a zesty tamarind sauce. Each sauce offers a unique flavor profile that complements the spiced chicken filling beautifully.
For a lighter meal, you can also enjoy them alongside a simple green salad dressed with a light vinaigrette. The freshness of the salad provides a wonderful contrast to the warmth and richness of the samosas. Whether it’s a casual evening snack, a festive party appetizer, or a part of a larger dinner spread, these chicken samosas are guaranteed to be a hit!
The Inspiration Behind These Chicken Samosas
This beloved chicken samosa recipe is thoughtfully adapted from Kankana Saxena’s wonderful recipe for Chicken Shingara, featured in her BEAUTIFUL and highly recommended book, Taste of Eastern India. Her culinary artistry truly shines through in her detailed and authentic preparations.
For those unfamiliar with the regional nuances of Indian cuisine, Shingara holds a special place in Kolkata, much like samosas are cherished across the rest of India. While both are triangular, fried savory pastries with delicious fillings, Shingara often features a slightly sweeter crust and a distinct flavor profile, typically incorporating a touch of mustard oil and nigella seeds in its traditional preparations. These subtle differences highlight the rich culinary diversity within India.
While I draw inspiration from Kankana’s authentic approach, I’ve made some slight tweaks to suit my everyday pantry. For instance, I don’t typically keep mustard oil or nigella seeds on hand. However, even with these minor adaptations, her recipes consistently turn out absolutely delicious, proving the robustness and inherent deliciousness of her original concepts. This particular chicken samosa recipe is a testament to how traditional flavors can be lovingly adapted without compromising on taste or authenticity, delivering a dish that is both familiar and exciting.
Explore More Samosa Creations
If you’ve fallen in love with these chicken samosas, you’ll be delighted to know there’s a whole world of samosa variations to explore! From different fillings to clever shortcuts, these recipes will keep your samosa cravings satisfied and your culinary adventures exciting:
- Hearty Beef Samosas: A robust and satisfying alternative for meat lovers.
- Classic Potato Samosas: The quintessential vegetarian samosa, packed with flavorful spiced potatoes.
- Easy 3-Ingredient Samosa Dough Recipe: Simplify your preparation with this incredibly straightforward dough recipe.
- Versatile Samosa Filling Recipe: Master the art of the perfect filling, adaptable for various samosa types.
- Samosa Pie: A delightful twist on the classic, perfect for a family meal or entertaining.
- Shortcut Samosas with Puff Pastry: A clever and quick way to enjoy samosa flavors with store-bought puff pastry.
Discover More Indian Favorites from My Husband’s Kitchen
If these chicken samosas have captured your heart, I’m confident you’ll adore many of these other super tasty, fan-favorite Indian recipes that frequently grace our table. Curated with love and often inspired by my Indian husband’s discerning palate, these dishes are sure to become new staples in your home. Don’t miss out on these culinary gems:
- Spicy Lamb Vindaloo or the equally flavorful Rich Pork Vindaloo Curry for those who love bold, tangy flavors.
- Adarsh’s signature Chicken 65: A vibrant, spicy, and incredibly popular dish that’s perfect as an appetizer or main.
- Creamy Saag Paneer Curry: A classic vegetarian dish featuring spinach and Indian cheese, rich in flavor.
- The recipe for chicken korma that Adarsh praises as the absolute best I’ve ever made – a testament to its creamy texture and delicate spices.
- Amma’s delicious recipe for Masoor Dal: A comforting and nutritious red lentil stew, perfect for any day.
- This delicious Butter Paneer Masala recipe: A creamy, tomato-based curry featuring soft paneer cheese.
- This Butter Chicken Sauce is incredible: Learn to make the luscious, iconic sauce that pairs perfectly with chicken or vegetables.
- Hearty Madras Lentils: One of my favorite vegetarian comfort food dinners, packed with flavor and goodness.
- Luxurious Malai Kofta: Soft, creamy paneer and potato dumplings in a rich, mild gravy – a true indulgence.

Chicken Samosa Recipe
Video
While the interactive video player has been removed, you can usually find a helpful video demonstration for this recipe on the original website to guide you through the cooking process.
Ingredients
Units: US Customary / Metric
Servings Multiplier: 1x / 2x / 3x
For the samosa dough:
- 1 ½ cups all-purpose flour
- ½ tsp salt
- 2 tbsp vegetable oil
- ¾ cup plus 1 tbsp water
For the chicken filling:
- 1 tbsp vegetable oil
- 1 medium onion finely chopped
- 1 tbsp grated ginger
- 1 tsp grated garlic
- 1 tsp salt divided
- 8 oz minced chicken
- ½ tsp ground cumin
- ½ tsp ground coriander
- ¼ tsp chili powder
- 1 tsp garam masala
- ¼ cup frozen green peas
- 2 green chillies chopped (optional)
Instructions
Make the Dough
-
Combine flour and salt in a large mixing bowl, then stir in oil until the mixture resembles coarse crumbs.
-
Add water, little by little, to form a firm, workable dough. Form the dough into a ball and wrap it in a damp kitchen towel or plastic wrap to rest at room temperature for 30 minutes. This allows the gluten to relax for easier rolling.
Make the Filling
-
Heat 1 tbsp oil in a deep, heavy-bottomed saucepan over medium-high heat. Add the onion, ginger, garlic, and 1/2 tsp salt and stir. Cook for 2 minutes or until the onion softens and becomes translucent.
-
Add the minced chicken, remaining 1/2 tsp salt, ground cumin, ground coriander, and chili powder. Cook for 10 minutes, stirring occasionally, breaking up the chicken until it is fully cooked and well-combined with the spices.
-
Sprinkle with garam masala and add the frozen peas. Stir well and cook for 5 more minutes, ensuring the peas are tender and the flavors are fully incorporated.
-
Taste the filling for seasoning and add more salt if needed. If desired, stir in the chopped green chillies for extra heat (the filling will be mild without them). Let the filling cool slightly before assembly.
Assemble the Samosas
-
Divide the rested dough into 6 equal portions, then roll each into a smooth ball on a well-floured surface.
-
Roll each ball into a thin, oblong (oval) shape, then use a knife to slice it in half lengthwise to create two half-moon pieces.
-
Take one half-moon in your hand, brush some water on the straight edge, and fold the edges to form an open cone shape, pressing the seams firmly to seal.
-
Hold the cone and fill it with approximately 2 tablespoons of the cooled chicken filling. Pinch the open end closed to seal completely, ensuring no gaps. Gently press the bottom of the samosa on a cutting board to form a flat base. Continue shaping the remaining samosas until all dough and filling are used.
Fry Samosas
-
Pour vegetable oil into a deep saucepan or Dutch oven to a depth of 3 inches over medium heat. Attach a cooking thermometer to the side of the pot.
-
Once the oil reaches about 200ºF (95°C), carefully place the samosas into the oil in small batches, making sure not to overcrowd the pan. Fry for 15 minutes at this low temperature, turning occasionally, until they are lightly golden and cooked through. Then, increase the heat to high (around 350-375°F or 175-190°C) and cook for another 5 minutes until they achieve a deep golden-brown color and a perfectly crispy exterior. Remove the fried samosas with a slotted spoon and place them on paper towels over a wire rack to drain any excess oil. Serve hot!
Notes
- Storage & Reheating: To store, freeze unbaked samosas in a single layer on a baking sheet until solid, then transfer to a freezer bag. To reheat fried samosas, use an oven or air fryer to maintain crispiness; avoid microwaving.
Nutrition
Nutrition information is automatically calculated, so should only be used as an approximation.
Tried this recipe? Leave a comment!