
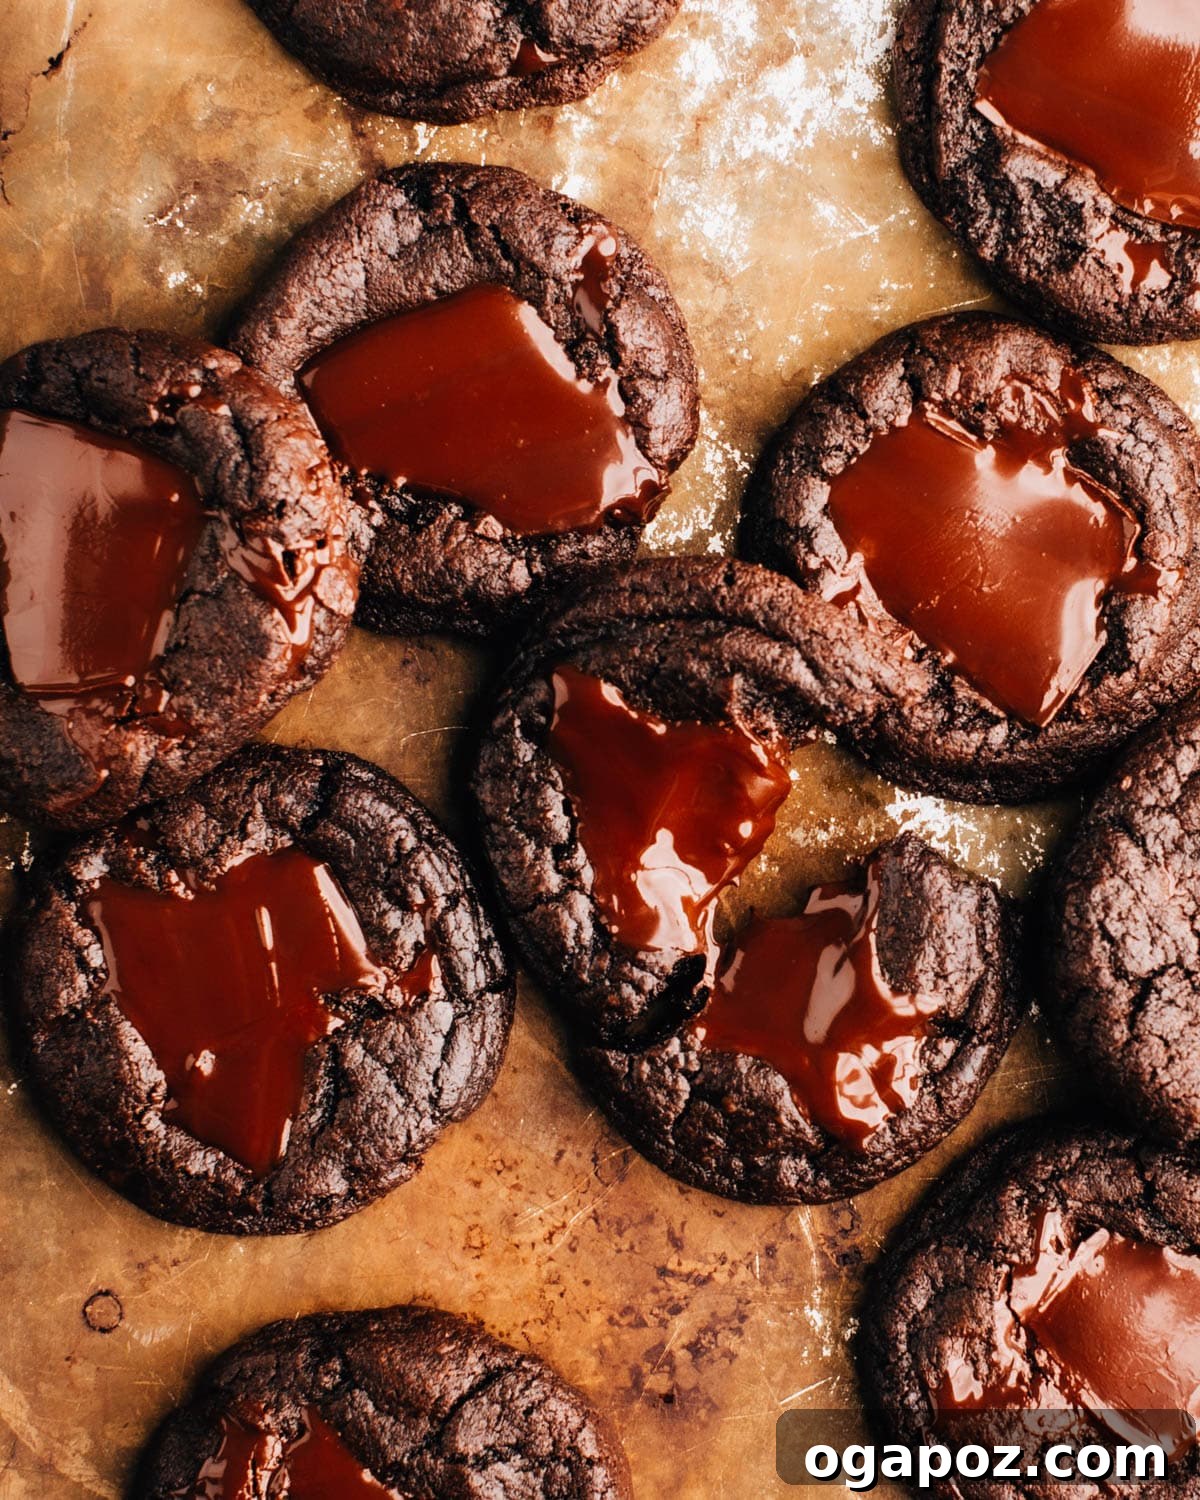
Prepare to be captivated by these extraordinary Mint Chocolate Cookies, a harmonious blend of intensely rich mint and luxurious dark chocolate. Each bite delivers a soft, chewy texture that simply melts in your mouth, making them an instant favorite for any dessert enthusiast. If you’re a devoted fan of the classic mint and chocolate combination, get ready to discover your new go-to cookie recipe.

This isn’t just another cookie; it’s a profound culinary experience. Our Mint Chocolate Cookie recipe yields treats that are deep, dark, and intensely flavorful, reminiscent of our most beloved Brownie Cookies but with an exhilarating minty twist. The robust cocoa flavor beautifully complements the cool, refreshing notes of peppermint, creating an addictive balance that will have you reaching for just one more.
Essential Ingredients for Perfect Mint Chocolate Cookies
Crafting these fudgy chocolate mint cookies requires a selection of surprisingly basic yet high-quality ingredients. Each component plays a crucial role in achieving that perfect taste and texture:
- Butter: For optimal results and precise flavor control, unsalted butter is recommended. However, if salted butter is what you have on hand, it’s a perfectly suitable substitute that has been successfully used in this recipe for years. The key is to bring your butter to a true room temperature. This ensures it creams seamlessly with the sugar, creating a light and airy base for your cookie dough.
- Eggs: Large eggs are ideal for this recipe. Like the butter, having your eggs at room temperature allows them to incorporate more evenly into the batter, leading to a smoother, more consistent dough and ultimately, a better-textured cookie.
- Peppermint Extract or Mint Extract: This is where the invigorating mint flavor truly shines. While both will work, peppermint extract offers a bolder, cooler mint taste that pairs exquisitely with dark chocolate. Start with the recommended amount and adjust to your desired intensity.
- Cocoa Powder: The choice of cocoa is critical for the cookie’s depth of flavor and texture. Natural cocoa powder is acidic and reacts with baking soda to help the cookies rise and achieve a lovely, tender crumb. Dutch-process cocoa, being alkalized, will not react the same way with baking soda, so stick to natural cocoa for the best results unless otherwise specified.
- Baking Soda and Baking Powder: These dynamic duo are the leavening agents that give our cookies their perfect lift and chewy texture. Using both ensures a balanced rise and that characteristic soft, fudgy center.
- Salt: A small but mighty ingredient, a half teaspoon of salt is essential. It beautifully cuts through the inherent sweetness of the cookies and amplifies the rich, complex notes of the cocoa and dark chocolate, preventing the flavors from falling flat.
- Dark Chocolate: For an unparalleled decadent, deep chocolate flavor and incredible texture, chopped dark chocolate bars are our top recommendation. The irregular chunks create pockets of molten chocolate throughout the cookie. If you prefer a more classic “mint chocolate chip cookie” experience, high-quality dark chocolate chips are also an excellent choice. The richness of dark chocolate is key to balancing the mint.
You’ll find the full, precise recipe quantities detailed in the complete recipe card at the very bottom of this article.
Get Creative: Delicious Variations and Substitutions
While this classic mint chocolate cookie recipe is perfection on its own, don’t hesitate to experiment with these exciting variations to tailor them to your taste or occasion:
- Amplify the Mint: For an even more intense minty experience, consider folding mint chocolate chips directly into the cookie dough. These chips, often found seasonally or in specialty baking aisles, are a fantastic way to boost the mint flavor, and can even serve as an alternative or supplement to the peppermint extract. If you love this flavor profile, you’ll definitely want to try my equally delightful Chocolate Mint Brownies!
- Festive Holiday Twist: Transform these cookies into a celebratory treat by mixing crushed candy canes into the cookie dough during the final stages. The crunchy peppermint bits add both texture and a vibrant holiday feel. For an extra festive touch, sprinkle additional crushed candy canes on top of the cookies immediately after baking, much like we do with our popular Candy Cane Cookies. It’s a subtle way to infuse a little extra Christmas cheer into your baking!
- Ingredient Temperature Matters: Achieving the perfect cookie texture often comes down to ingredient temperature. If you’re short on time and need to quickly get your butter and eggs to room temperature, check out my essential guide on How to Quickly Bring Ingredients to Room Temperature for clever hacks.
Tools for Cookie Baking Success
Having the right equipment can make all the difference in your baking journey. Here’s a list of essential tools you’ll need to effortlessly whip up these delightful mint chocolate cookies:
- Electric Mixer or Stand Mixer: Absolutely vital for creaming butter and sugar together until light and fluffy. This step incorporates air into your dough, which is key for a tender cookie. A stand mixer offers hands-free convenience, while a hand-held electric mixer provides versatility.
- Medium Mixing Bowl: You’ll need at least one sturdy mixing bowl for combining all your wet and dry ingredients. Having an extra bowl for whisking dry ingredients separately is always a good practice.
- Baking Sheets: Two baking sheets are recommended. This allows you to bake in continuous batches without waiting for one sheet to cool down before scooping more dough, making the process much more efficient.
- Parchment Paper: A baker’s best friend! Lining your baking sheets with parchment paper prevents cookies from sticking, ensures even baking, and makes cleanup incredibly easy. Do not skip this step for the best results.
- Cookie Scoop or Tablespoon: For perfectly uniform 1-inch balls of cookie dough. A scoop not only saves time but also guarantees that all your cookies bake evenly, preventing some from burning while others are still raw.
- Wire Cooling Rack: Essential for proper cooling. Transferring warm cookies to a wire rack allows air to circulate around them, preventing the bottoms from becoming soggy and ensuring they cool completely and firm up properly.
- Round Glass or Cookie Cutter: A secret weapon for perfecting your cookie shape! After baking, while the cookies are still warm, you can use an overturned glass or round cookie cutter slightly larger than the cookie to gently swirl around the edges, reshaping them into perfectly circular, bakery-worthy treats.
Step-by-Step Guide: How to Make Mint Chocolate Cookies
Creating these rich, fudgy mint chocolate cookies is a straightforward and rewarding process. Follow these detailed steps for cookie perfection:
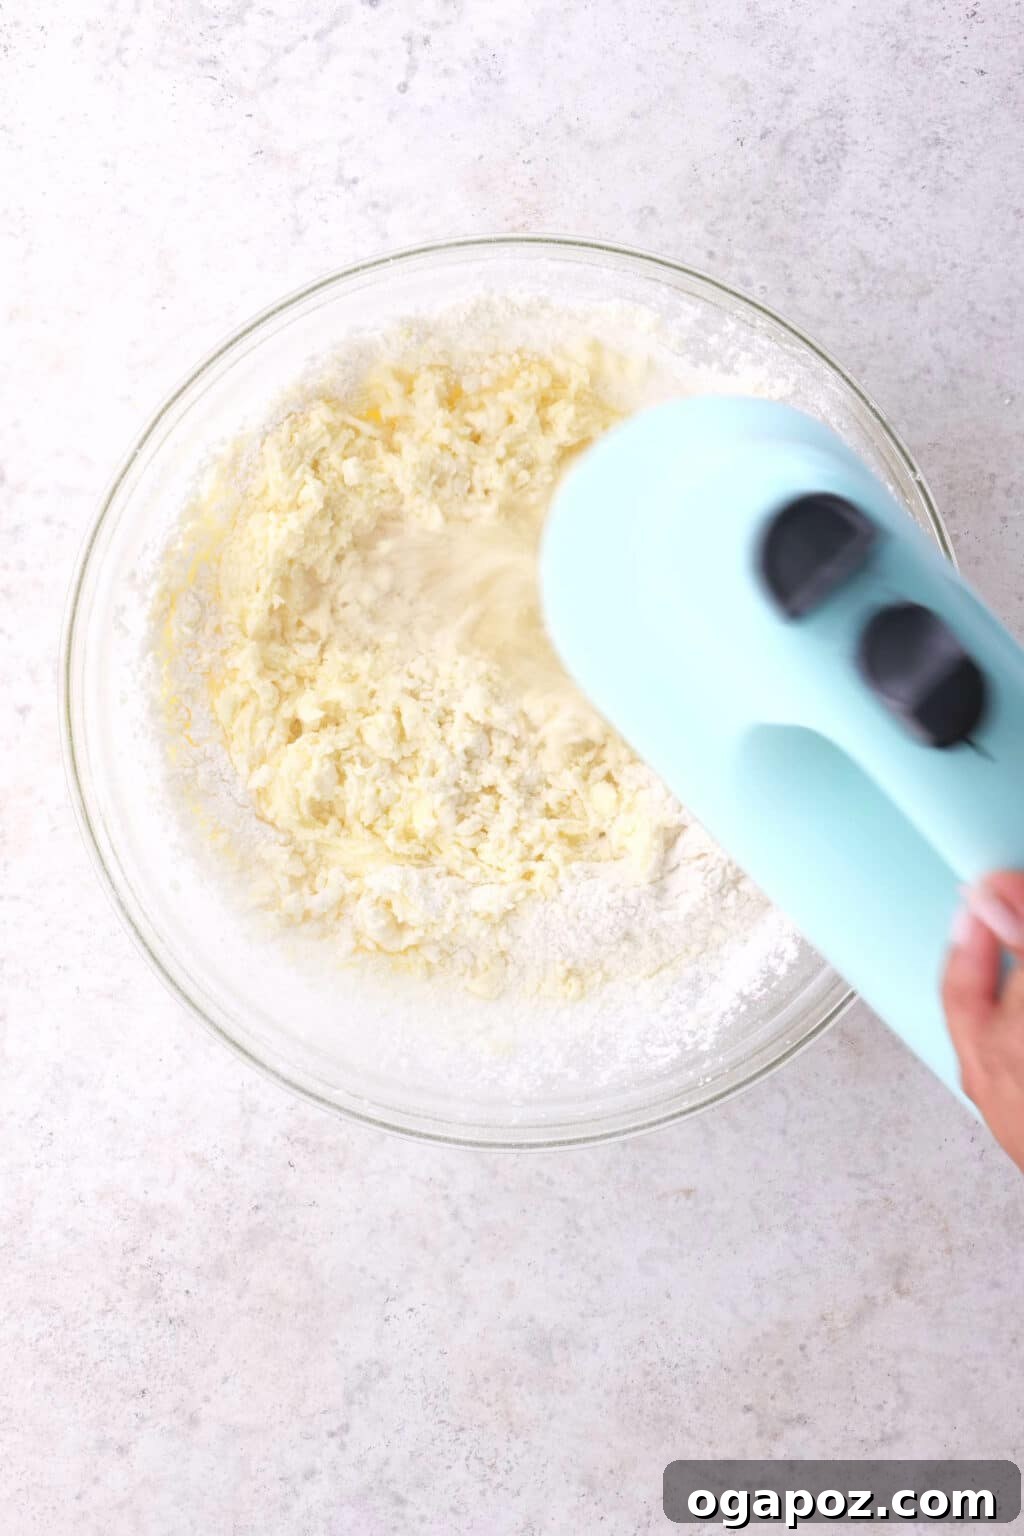
- Cream Butter and Sugar: In a spacious mixing bowl, combine the softened butter and granulated sugar. Using an electric mixer (either a hand-held or stand mixer), beat on medium speed until the mixture becomes wonderfully light and fluffy, usually about 4-5 minutes. This creaming process incorporates air, which is crucial for a tender cookie.
- Incorporate Wet Ingredients: Reduce the mixer speed to low. Add the large eggs one at a time, beating well after each addition until fully incorporated. Then, beat in the pure peppermint extract until evenly distributed. Scrape down the sides of the bowl as needed to ensure everything is well combined.
- Add Dry Ingredients: In a separate, medium-sized bowl, whisk together the all-purpose flour, natural cocoa powder, baking powder, baking soda, and salt. This step ensures the leavening agents and flavorings are evenly distributed throughout the dry mixture. Gradually add this dry ingredient mixture to the wet ingredients in the mixer bowl. Mix on low speed until *just combined*. Be careful not to overmix, as this can lead to tough cookies.
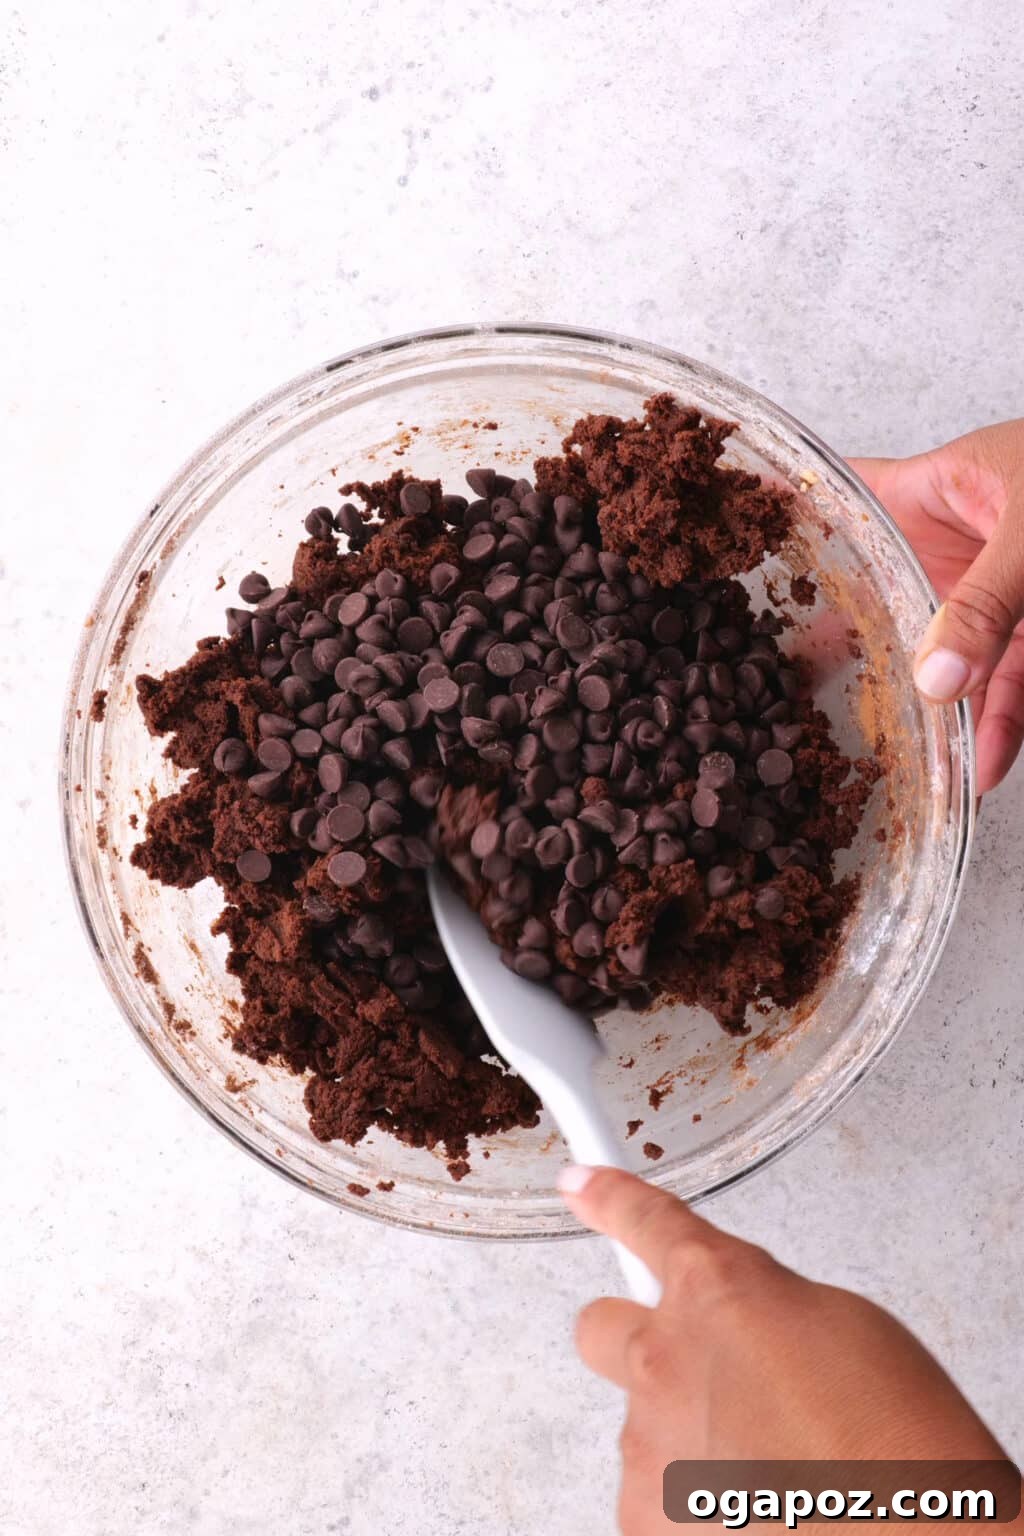
- Stir in Chocolate: Once the flour mixture is mostly incorporated, remove the bowl from the mixer. Using a sturdy spatula or wooden spoon, gently fold in your chopped dark chocolate or chocolate chips. Continue mixing until the chocolate is evenly distributed throughout the dough.
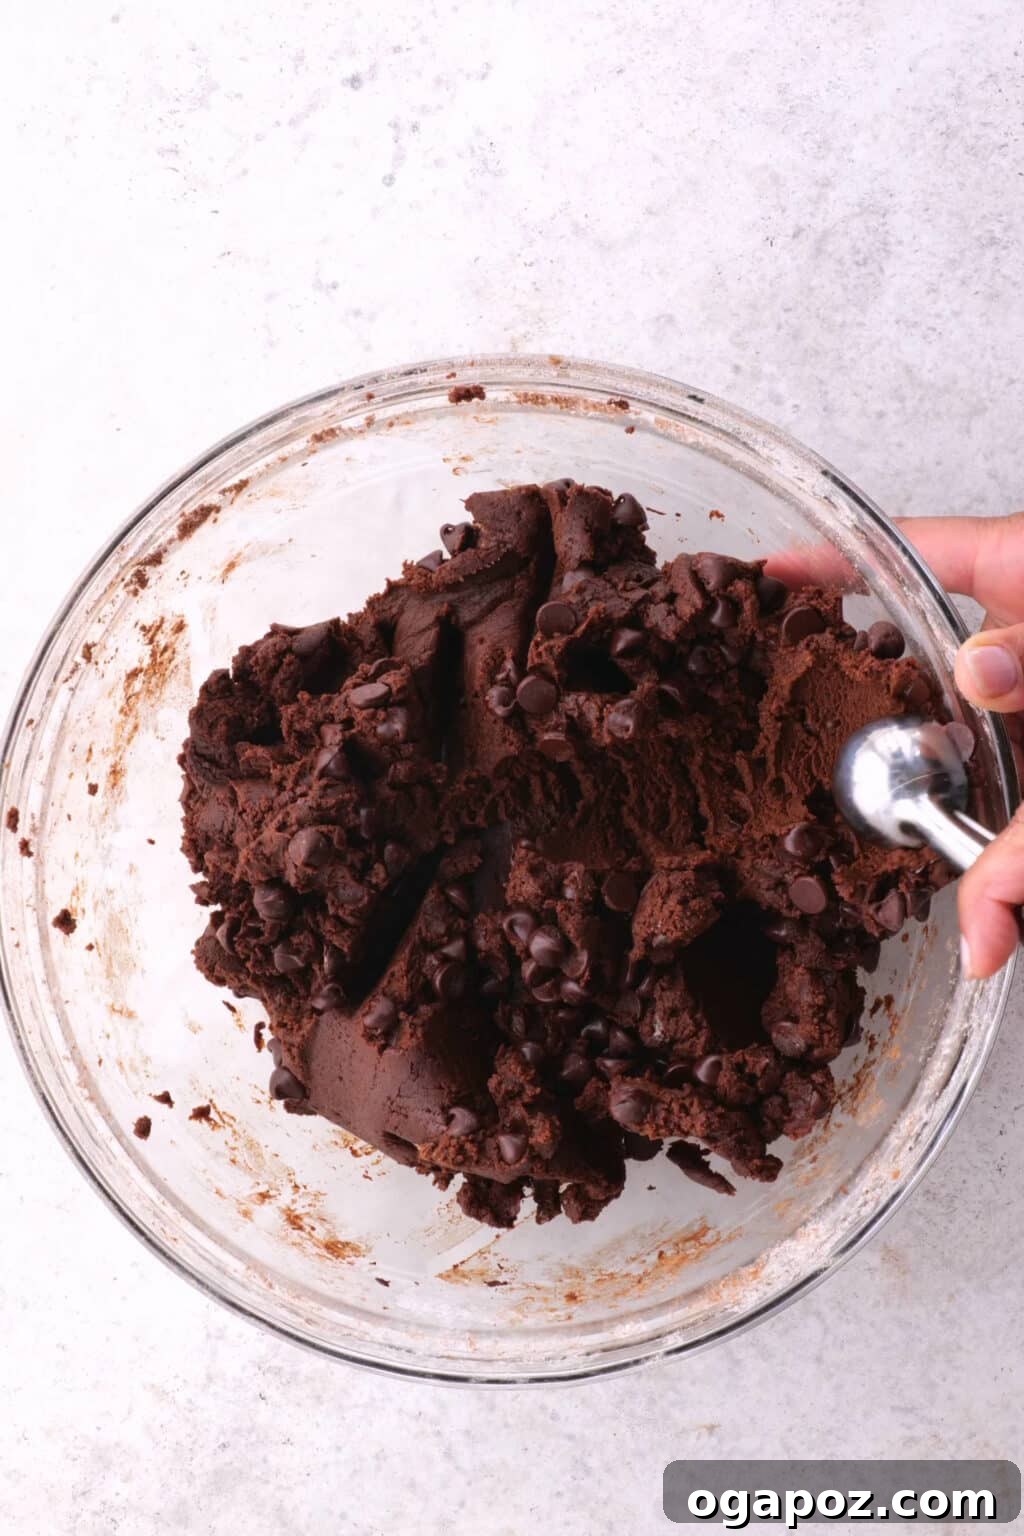
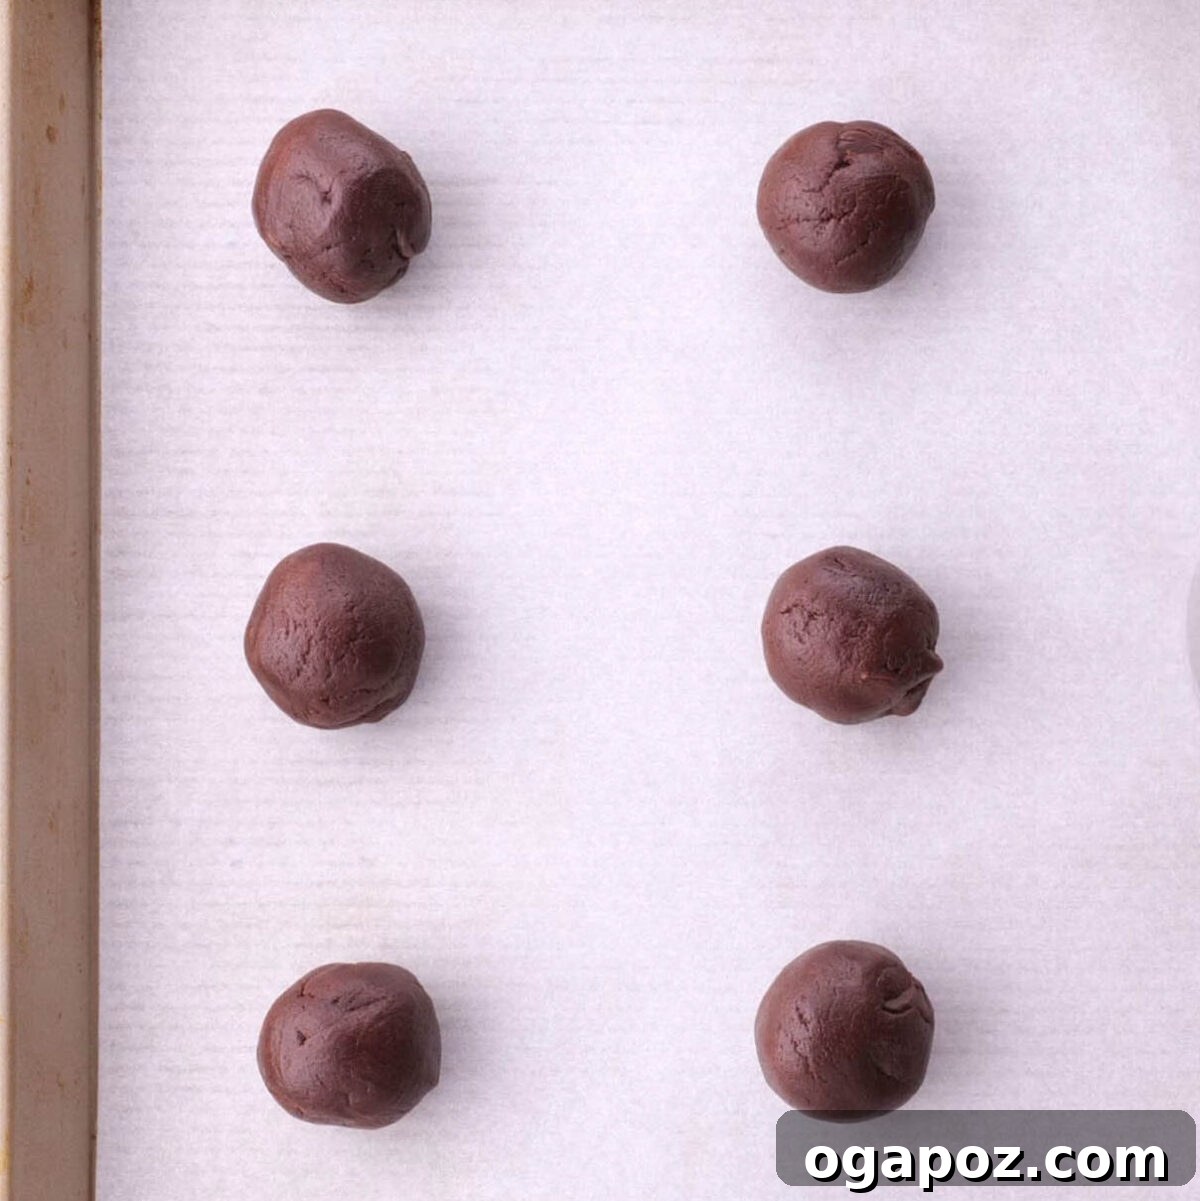
- Scoop and Shape Dough Balls: Using a cookie scoop or a tablespoon, portion the dough into uniform 1-inch balls. Gently roll them between your palms if desired to create perfect spheres. Arrange the cookie dough balls on your parchment paper-lined baking sheets, ensuring they are spaced at least 2 inches apart to allow for proper spreading during baking.
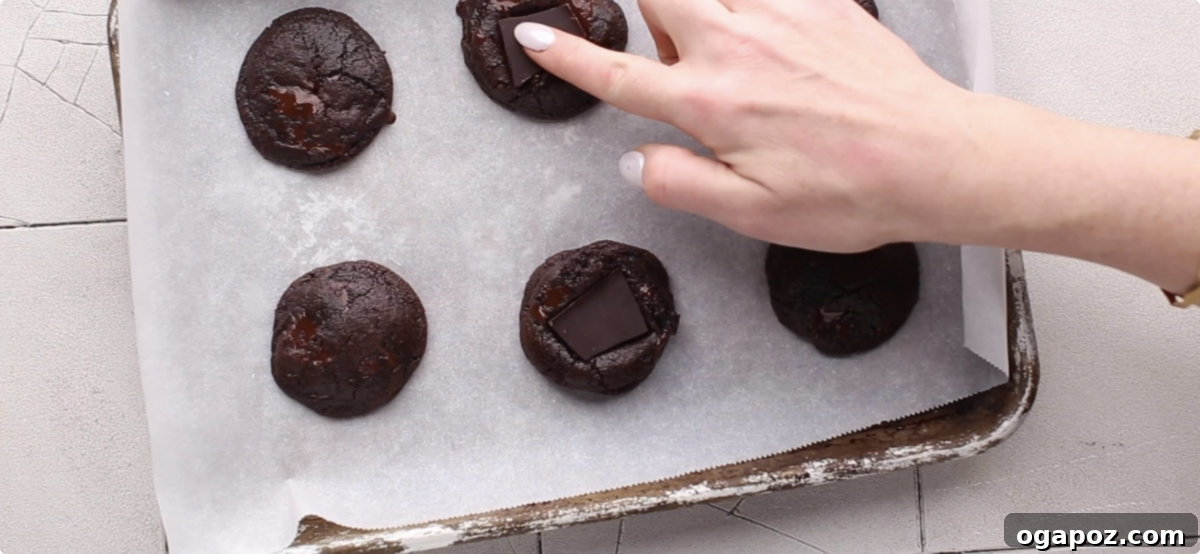
- Bake and “Pan-Bang” for Chewy Perfection: Preheat your oven to 350°F (175°C). Bake the cookies for an initial 6 minutes. Then, remove the baking sheet from the oven and firmly bang the pan on your counter a few times. This helps to deflate the cookies, create crinkly edges, and encourage a chewier texture. While they are still warm and slightly puffed, press a few extra chocolate chips or chunks into the tops of each cookie for a beautiful, finished look. Return the cookies to the oven and continue baking for another 3-5 minutes, or until the edges are set and slightly firm but the centers still appear soft and slightly underdone.
- Cool on Baking Sheets: Once baked, remove the cookies from the oven and let them cool on the hot baking sheets for approximately 5 minutes. This crucial resting period allows the cookies to continue cooking slightly from the residual heat, helping them set up without overbaking.
- Transfer to Wire Rack: After the initial cooling on the baking sheets, carefully transfer the warm mint chocolate cookies to a wire cooling rack. Allow them to cool completely before storing or serving. This ensures they reach their optimal chewy texture and prevents them from becoming soggy.
Avoiding Pitfalls: 5 Common Mistakes in Mint Chocolate Cookie Baking
Even experienced bakers can sometimes make small errors that impact the final outcome of their cookies. Here are the most frequent missteps to be aware of and how to easily avoid them when crafting your delicious mint chocolate cookies:
- Using Too-Soft or Melted Butter: The state of your butter is paramount. If your butter is too warm, oily, or melted, it won’t properly cream with the sugar, leading to a dough that’s difficult to work with and cookies that spread excessively, resulting in a thin, dense, and flat texture. Ensure your butter is truly at room temperature – soft enough to leave an indentation when pressed, but not greasy or melted.
- Overdosing on Peppermint Extract: Peppermint extract is potent, and a little truly goes a long way. Adding too much can result in an overwhelming, almost toothpaste-like flavor that can detract from the rich chocolate. Always start with the exact amount specified in the recipe. You can always add a tiny bit more if you taste the dough (before adding eggs, for safety) and feel it needs a stronger mint kick.
- Overmixing the Cookie Dough: Once you’ve added the flour and other dry ingredients, mix the dough only until they are just combined and no streaks of flour remain. Overmixing develops the gluten in the flour, which can lead to tough, dense, and less tender cookies. This principle applies to many baked goods, including my Chewy Brownies and Moist Chocolate Cake as well!
- Crowding the Baking Sheet: It can be tempting to try and fit as many cookies as possible onto one baking sheet, but resisting this urge is crucial. Cookies spread significantly during baking. If they are placed too close together (less than 2 inches apart), they will merge into one giant, misshapen cookie, preventing proper air circulation and even baking. Always leave ample space between each dough ball.
- Overbaking the Cookies: This is perhaps the most common mistake for any cookie recipe. For soft and chewy mint chocolate cookies, it’s best to pull them from the oven when they still look slightly underdone in the center, with the edges just beginning to firm up and show slight cracks. Remember, cookies continue to cook on the hot baking sheet for a few minutes after being removed from the oven, and they will firm up further as they cool. Overbaking leads to dry, hard, and crumbly cookies.
Make Ahead and Storage Tips for Mint Chocolate Cookies
These mint chocolate cookies are fantastic for making ahead, especially when you want fresh, warm cookies without the full baking process right before an event. This “frozen cookie ball hack” can be an absolute lifesaver during busy times like the holiday season!
Storing Baked Leftovers
To keep your baked mint chocolate cookies at their best, store them in an airtight container at room temperature. They will remain wonderfully fresh and chewy for up to a week. For optimal freshness, you might consider placing a slice of bread in the container to help maintain moisture.
It is critically important to let the cookies cool completely before packing them into any container. If you store them while they are still warm, the trapped steam will cause condensation inside the container, making the cookies overly soft, mushy, and potentially soggy.
Freezing for Future Enjoyment
These cookies freeze beautifully, whether as baked cookies or as raw cookie dough. Freezing is an excellent option if you need to prepare them well in advance or simply want to have a stash of homemade treats ready at a moment’s notice.
Freezing Baked Cookies: Once the cookies are completely cooled, arrange them in a single layer on a baking sheet and flash-freeze them for about 30 minutes until solid. Then, transfer them to a freezer-safe airtight container or heavy-duty freezer bag, layering them with parchment paper to prevent sticking. They can be stored in the freezer for up to 2-3 months. Defrost thoroughly at room temperature before serving.
Freezing Cookie Dough Balls: This is arguably the best method for make-ahead convenience. To freeze the cookie dough, first roll the dough into the recommended 1-inch balls as if you were going to bake them immediately. Next, place these dough balls on a parchment-lined baking sheet and chill them in the fridge for at least one hour. This step helps them firm up and retain their shape. Once the balls have solidified slightly, transfer them to a freezer-safe plastic bag or airtight container. These frozen cookie dough balls can be stored for up to three months. This way, you can bake just a few cookies at a time whenever a craving strikes!
Baking from Frozen Dough
When you’re ready to bake your frozen cookie dough balls, take them out of the freezer and arrange them on a lined baking sheet. Allow them to come to room temperature, which usually takes about 30-60 minutes, before baking. Once fully defrosted and at room temperature, they can be baked according to the original recipe instructions. No need to adjust baking time significantly, though you might add a minute or two if they are still slightly cold in the center.
Elevate Your Experience: How to Serve Mint Chocolate Cookies
These mint chocolate cookies are not for the faint of heart; they are a truly indulgent experience. Their rich, deep, dark, and intense flavor profile demands to be savored. For the ultimate enjoyment, serve them with a tall, frosty glass of cold milk, which perfectly complements and balances their richness.
Irresistible Mint Chocolate Cookie Add-Ins
Looking to customize your cookies further? Consider these delightful additions to enhance their flavor and texture:
- Extra Chocolate Chunks: For even more melty goodness, gently press a few extra dark chocolate chunks or chips onto the tops of the cookie dough balls just before baking, or even after the “pan-banging” step.
- Crushed Candy Canes: As mentioned earlier, crushed candy canes folded into the dough or sprinkled on top after baking add a festive crunch and a burst of peppermint flavor, perfect for holidays.
- Andes Mint Chips: For a quintessential mint chocolate chip experience, fold in Andes mint chips (or similar mint-flavored baking chips) into the dough. They melt beautifully and add a distinct, creamy mint flavor.
- White Chocolate Drizzle: Once the cookies have cooled completely, a delicate drizzle of melted white chocolate across their dark surface adds a touch of elegance and a subtle contrast in flavor.
- Flaky Sea Salt: A sprinkle of flaky sea salt on top of the warm cookies creates a sophisticated sweet-and-salty dynamic that truly brings out the depth of the chocolate and brightness of the mint.
Creative Ways to Enjoy These Cookies
Beyond simply eating them plain, these versatile mint chocolate cookies can be incorporated into various desserts and occasions:
- Thoughtful Gifts: Package them beautifully in decorative boxes or bags to make thoughtful Christmas cookie gifts or presents for any special occasion.
- Mint Chocolate Chip Ice Cream Sandwiches: Transform them into gourmet treats by sandwiching a scoop of your favorite vanilla or mint chocolate chip ice cream between two cooled cookies, creating decadent mint chocolate chip ice cream sandwiches.
- Ice Cream Topping: Crumble cooled cookies over a scoop of creamy vanilla bean ice cream for an instant upgrade to a simple dessert.
- Warm Beverage Companion: Serve alongside cozy hot Christmas drinks like hot cocoa, coffee, or a mint tea for a comforting and indulgent pairing.
- Holiday Cookie Platter: Their rich color and enticing flavor make them a standout addition to any holiday cookie platter, offering a sophisticated alternative to traditional festive treats.
Pro Tips & Science-Based Secrets for Perfect Cookies
Over years of baking these mint chocolate cookies, I’ve gathered a few key insights and techniques that consistently yield the best results. These pro tips and little science-based secrets will elevate your baking:
- The “Pan-Bang” Technique Explained: When you remove the cookies from the oven after the initial bake (around 6 minutes) and bang the pan firmly on the counter, you’re not just flattening them. This action causes the hot, airy cookies to deflate rapidly, pushing air out and creating those desirable crinkly edges and a denser, chewier center. It’s a secret for achieving that coveted soft-baked, fudgy texture.
- Enhancing Appearance with Extra Chocolate: After the pan-banging, while the cookies are still warm and soft, gently press additional chocolate chunks or chips onto their tops. This ensures that every cookie looks as good as it tastes, with visible pockets of melted chocolate. Then, return them to the oven to finish baking.
- Knowing When They’re Done: Resist the urge to overbake! You’ll know these cookies are perfectly done when their edges appear set, slightly dry, and perhaps a bit crackly, but their centers still look wonderfully soft and slightly underbaked. They will continue to firm up as they cool.
- Reshaping for Perfection: For bakery-quality aesthetics, as soon as the cookies come out of the oven and are still warm and pliable, use an overturned glass or a large round cookie cutter (slightly larger than your cookies). Gently place it over each cookie and swirl it around the edges. This simple trick helps reshape any irregular cookies into perfect circles.
- The Importance of Room Temperature Ingredients: Revisited: We’ve mentioned it before, but it’s worth reiterating. Butter and eggs at room temperature are crucial. Room temperature butter creams with sugar more effectively, incorporating more air for a lighter, more tender cookie. Room temperature eggs emulsify better with the fat, creating a smoother, more uniform batter. If you need a refresher, refer to my tips on How to Quickly Bring Ingredients to Room Temperature.
Frequently Asked Questions About Mint Chocolate Cookies
Just skimming through? Here are some quick answers to the most commonly asked questions about making and enjoying mint chocolate cookies:
Absolutely! Mint and chocolate are a universally beloved flavor pairing. The magic lies in chocolate’s unique melting point, which is slightly cooler than your tongue’s temperature, creating a natural cooling sensation. Mint, with its inherent refreshing properties, intensifies this delightful cool feeling, resulting in a well-balanced, classic, and highly addictive flavor combination.
Yes, mint chocolate chips are readily available, especially during the holiday season or in specialty baking sections. Brands like Andes mint chips are a popular choice for their distinct flavor. Hershey’s Chipits also offers a mint chocolate chip option if you want to go “all in” with the mint. Another excellent alternative is to simply chop up dark mint chocolate bars (as demonstrated in the video below the recipe) for rustic, intense chocolate-mint pockets.
The quintessential “mint chocolate chip” flavor is predominantly made with peppermint. Peppermint is significantly stronger than spearmint, containing around 40% menthol, which provides that powerful, invigorating “cool” sensation. Spearmint, with its subtle 1% menthol content, offers a milder, sweeter, and more herbal flavor and aroma, often used when a gentler mint note is desired. For a truly fierce and refreshing mint chocolate cookie, peppermint is the clear choice and what this recipe uses.
Yes, absolutely! Freezing mint chocolate cookie dough is a fantastic make-ahead strategy. Simply roll the dough into 1-inch balls, chill them in the refrigerator for about an hour to firm up, then transfer them to a freezer-safe bag or airtight container. The dough can be frozen for up to three months. When you’re ready to bake, take them out of the freezer and let them come to room temperature before baking as per the recipe instructions.
Baked mint chocolate cookies will stay wonderfully fresh for up to one week when stored in an airtight container at room temperature. To ensure they maintain their perfect soft and chewy texture, always allow them to cool completely before placing them into the container. Storing warm cookies can trap steam, making them overly soft or soggy.
Yes, you can use mint extract as a substitute for peppermint extract. However, be aware that mint extract typically has a slightly milder, often more herbal or complex flavor profile compared to the intense, cool bite of peppermint. Start with the same amount specified in the recipe and taste a tiny bit of the dough (before adding eggs) to see if you prefer to adjust the quantity to achieve your desired mint intensity.
Flat cookies are a common issue that can stem from a few factors. The most likely culprits for mint chocolate cookies being flat are butter that was too warm or melted (instead of just softened), or the cookie dough not being adequately chilled before baking. Ensure your butter is softened but not melted. Additionally, chilling the dough for at least 30 minutes before baking can significantly help the cookies hold their shape and prevent excessive spreading.
For these particular mint chocolate cookies, dark chocolate is undeniably the best choice. Its intense, slightly bitter flavor creates a beautiful contrast and balance with the bright, cooling mint. You can achieve fantastic results using high-quality chopped dark chocolate bars, which create rustic, melt-in-your-mouth chunks, or good-quality dark chocolate chips for convenience. The quality of your cocoa powder also plays a significant role in the overall chocolate depth.
Other Decadent Cookie Recipes You’ll Love
If you’ve fallen in love with these mint chocolate cookies and are eager to explore more delightful cookie creations, here are a few other fantastic recipes that are sure to become new favorites in your baking repertoire:
- Irresistible Toblerone Cookies: A unique twist on classic cookies, packed with the distinct nougat and honey flavor of Toblerone chocolate.
- Soft-Baked Pumpkin Cookies: Perfect for autumn, these tender cookies boast warm spices and a delightful, pillowy texture.
- Loaded Chewy Oatmeal Cookies: A hearty and satisfying cookie, generously studded with all your favorite mix-ins for an ultimate chewy experience.
- Shortbread Cookies with Chopped Chocolates: Buttery, delicate shortbread elevated with rich chunks of chocolate for an elegant treat.
- Spiced Soft Molasses Cookies with Icing: A comforting and warmly spiced cookie with a soft chew, topped with a sweet, delicate icing.
Save this recipe!
Want to easily find this recipe later? Bookmark this page or manually save the link to your favorites!

Pin
Mint Chocolate Cookies (SO Rich and Fudgy)
Jennifer Pallian BSc, RD
15 minutes
9 minutes
24 minutes
36 cookies
Video
Watch this video to see how to make these delicious Mint Chocolate Cookies!
Ingredients
- 1 cup butter, softened
- 1 ¾ cups sugar
- 2 large eggs, room temperature
- 1 tbsp pure peppermint extract
- 2 cups all-purpose flour
- 1 cup natural cocoa powder
- 1 tsp baking soda
- ½ tsp baking powder
- ½ tsp salt
- 2 cups dark chocolate chips or chopped dark chocolate
Instructions
- Preheat oven to 350°F (175°C). Line 2 baking sheets with parchment paper.
- Using an electric mixer, beat softened butter and sugar in a large bowl until light and fluffy (about 5 minutes on medium speed). Beat in eggs and peppermint extract until well combined, scraping down the bowl as needed.
- In a separate bowl, whisk together flour, cocoa powder, baking soda, baking powder, and salt. Gradually add the dry ingredients to the wet ingredients, mixing on low speed until just combined. Fold in chocolate chips or chopped dark chocolate with a spatula.
- Form the dough into 1-inch balls using a cookie scoop or tablespoon. Place them about 2 inches apart on the prepared baking sheets.
- Bake cookies for 6 minutes. Remove the baking sheet from the oven, and firmly bang the pan on the counter to deflate the cookies. Press a few more chocolate chips or chunks into the centers of each cookie. Continue baking for another 3-5 minutes, or until the edges are firm but the centers still appear soft.
- Remove from the oven and cool on the baking sheets for 5 minutes before transferring to a wire rack to cool completely.
Notes
- For the best cookie texture, ensure your butter and eggs are at room temperature. Check our guide on How to Quickly Bring Ingredients to Room Temperature if needed.
- The “pan-banging” technique helps create crinkly edges and a fudgy, chewy interior.
- When pressing in extra chocolate chunks or chips, do so while the cookies are still warm and soft for best adherence and appearance.
- Cookies are done when edges are set and slightly crackly, but centers remain soft. They will firm up as they cool.
- Use an overturned glass to reshape warm cookies into perfect circles after baking.
- Feel free to substitute chocolate chips with high-quality chocolate chunks or chopped dark mint chocolate bars for an even richer flavor (avoid milk chocolate as it scorches easily).
Nutrition Information (per cookie)
Calories: 155 kcal |
Carbohydrates: 21g |
Protein: 2g |
Fat: 8g |
Saturated Fat: 5g |
Polyunsaturated Fat: 0.3g |
Monounsaturated Fat: 2g |
Trans Fat: 0.2g |
Cholesterol: 23mg |
Sodium: 127mg |
Potassium: 42mg |
Fiber: 1g |
Sugar: 15g |
Vitamin A: 200IU |
Vitamin C: 0.3mg |
Calcium: 31mg |
Iron: 1mg
Nutrition information is automatically calculated and should only be used as an approximation.
Tried this recipe? Share your thoughts!
Leave a comment below to let us know how your Mint Chocolate Cookies turned out!