
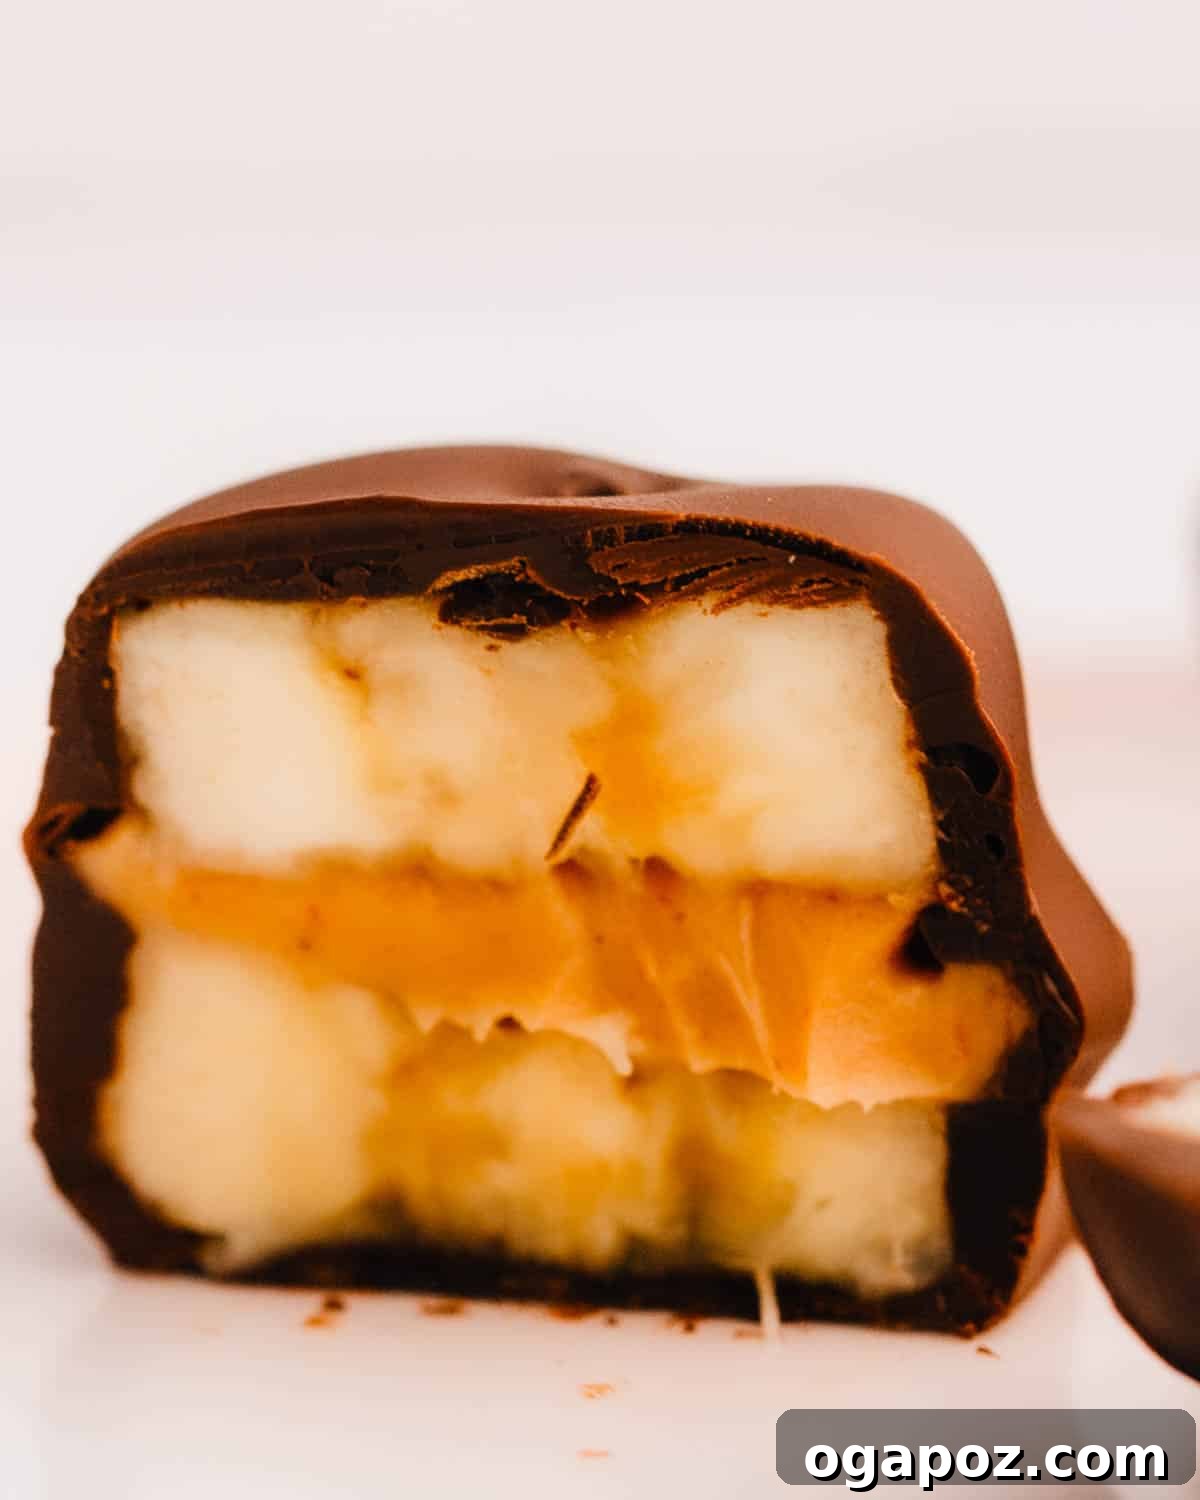
Irresistible 3-Ingredient Chocolate Peanut Butter Banana Bites: Your New Favorite Healthy Treat!
Looking for a simple, healthy, and utterly delicious way to curb your sweet cravings? These Chocolate Peanut Butter Banana Bites are your answer! With just three core ingredients – ripe bananas, creamy peanut butter, and rich dark chocolate – you can whip up a batch of these delightful frozen treats in no time. They’re not only incredibly easy to make but also packed with flavor and wholesome goodness, making them a perfect guilt-free indulgence for any time of day. This recipe transforms humble bananas into a gourmet snack that’s as good for you as it is delicious.
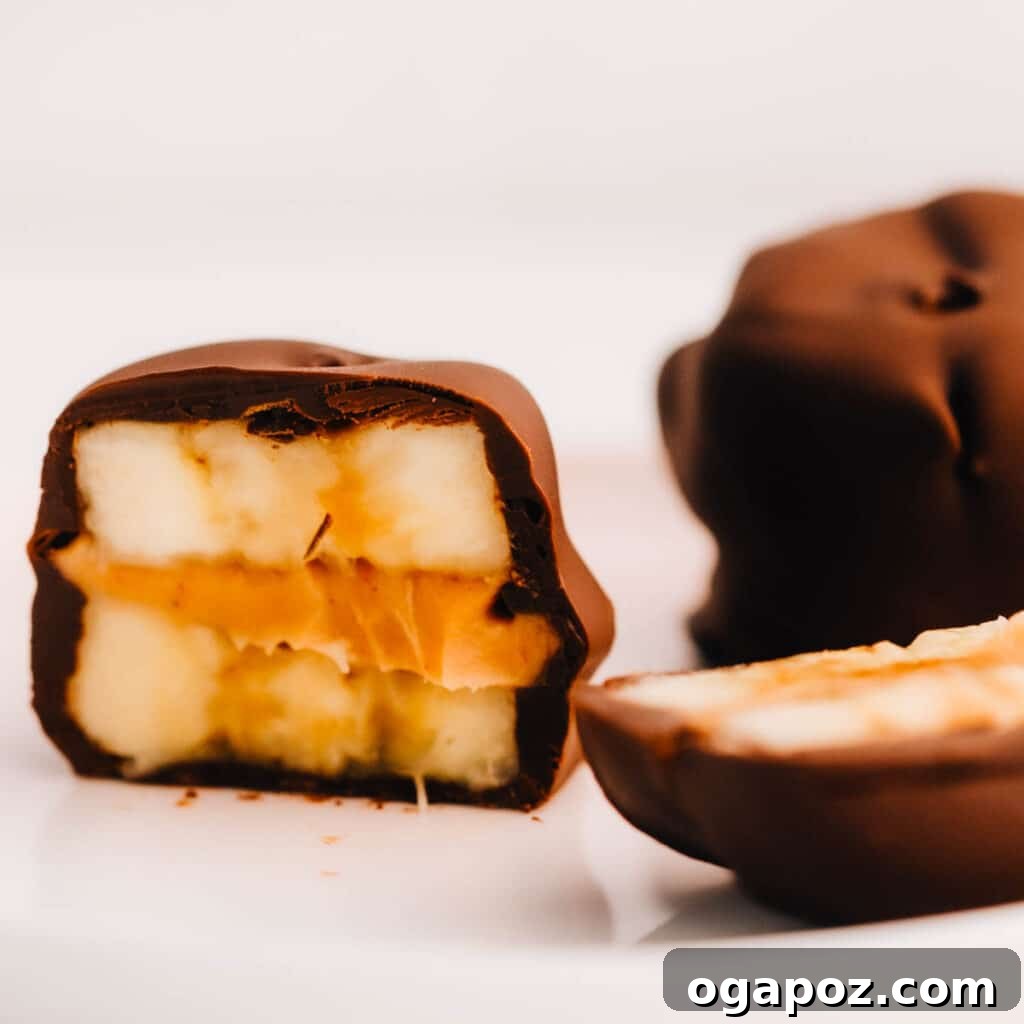
Imagine this: luscious, naturally sweet overripe bananas, frozen to a delightful soft-serve consistency, generously layered with smooth, rich peanut butter, and then enveloped in a thin, crisp shell of dark chocolate. The combination is pure magic – a symphony of textures and flavors that will tantalize your taste buds and leave you craving more. These bites are an excellent alternative to heavier desserts, offering a light, refreshing, and deeply satisfying experience. They’re particularly wonderful enjoyed straight from the freezer on a warm afternoon or as a refreshing after-dinner treat. The slight chill and creamy interior make them incredibly addictive, yet surprisingly light.
Beyond their amazing taste, these frozen banana bites are a fantastic make-ahead option. You can prepare a large batch and store them in your freezer for up to two weeks, ensuring you always have a healthy, homemade snack on hand. This means less time in the kitchen when cravings hit and more time enjoying a wholesome, satisfying treat. Say goodbye to store-bought sugary treats and hello to your new favorite go-to dessert! The convenience combined with their deliciousness makes this recipe a true winner. Are you ready to create something truly special and effortless?
Why These Chocolate Peanut Butter Banana Bites Will Become Your Obsession
Get ready to fall head over heels for this recipe! These frozen banana delights aren’t just a snack; they’re a lifestyle upgrade. Here’s why you’ll absolutely adore them and find yourself making them again and again:
- Effortlessly Simple: Forget complicated recipes with endless steps and obscure ingredients. This treat comes together with just three main components and minimal fuss, making it perfect for even the most novice of cooks or individuals with limited time. You’ll be amazed at how quickly you can transform simple ingredients into something extraordinary.
- A Healthier Indulgence: Who says dessert can’t be good for you? These bites are a lighter, more nutrient-dense alternative to traditional sweets and processed snacks. They leverage the natural sweetness of overripe bananas, significantly reducing the need for excessive added sugars, making them a smart choice for mindful eating.
- Nutrient-Packed Goodness: Each bite is a powerhouse of essential nutrients. Bananas are renowned for their high potassium content, crucial for heart health and muscle function, and ample dietary fiber, which promotes digestive health and helps regulate blood sugar. Peanut butter contributes a beneficial dose of protein and healthy monounsaturated and polyunsaturated fats, keeping you feeling full, satisfied, and energized. Dark chocolate, when consumed in moderation and with a high cocoa content, provides powerful antioxidants that combat free radicals and may support cardiovascular health.
- Kid-Approved & Family-Friendly: This recipe is an absolute hit with children of all ages! Kids love the sweet taste, and the small, bite-sized format makes them easy and fun for little hands to manage. Even better, involving your children in the assembly process is a fantastic way to introduce them to basic cooking skills and encourage healthier eating habits in a fun, engaging manner.
- Perfect for Meal Prep: Their freezer-friendly nature makes these bites ideal for meal planning. Prepare a large batch on the weekend and enjoy a healthy, readily available snack or dessert throughout the entire week. This convenience means you’re always just moments away from a delicious, satisfying treat, helping you stick to your healthy eating goals.
- Incredibly Versatile: While the classic combination of banana, peanut butter, and dark chocolate is undeniably divine, this recipe serves as a fantastic base for endless customization. You can easily swap ingredients, add different toppings, or experiment with various flavor profiles to tailor them to your personal preferences or specific dietary needs.
Essential Ingredients for Your 3-Ingredient Peanut Butter Banana Bites
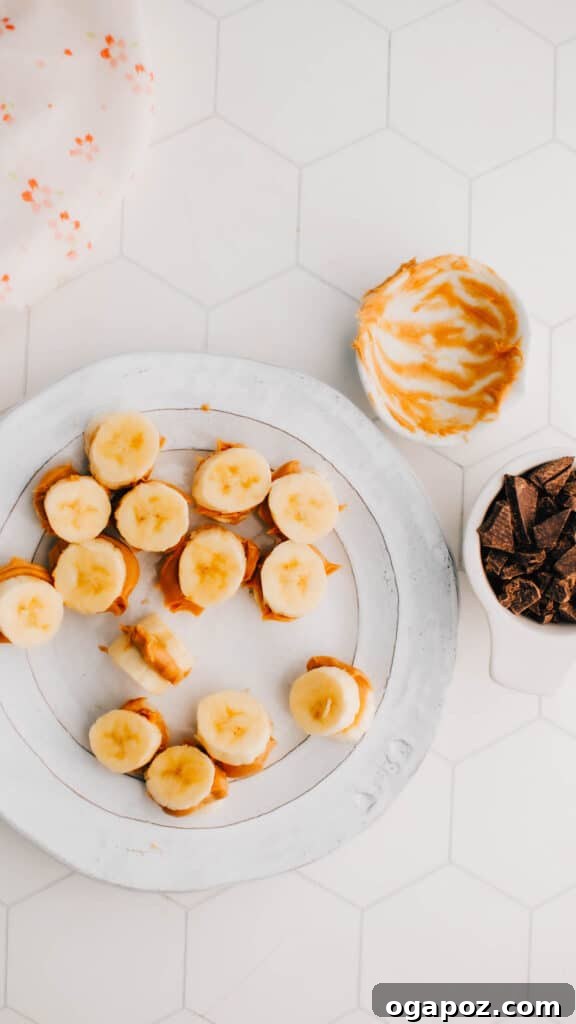
The beauty and brilliance of this recipe lie in its elegant simplicity. You only need three core components to create these fantastic frozen treats, allowing their natural flavors to shine. Here’s a closer look at what you’ll need and some invaluable tips for choosing the best quality ingredients to ensure your bites are absolutely perfect:
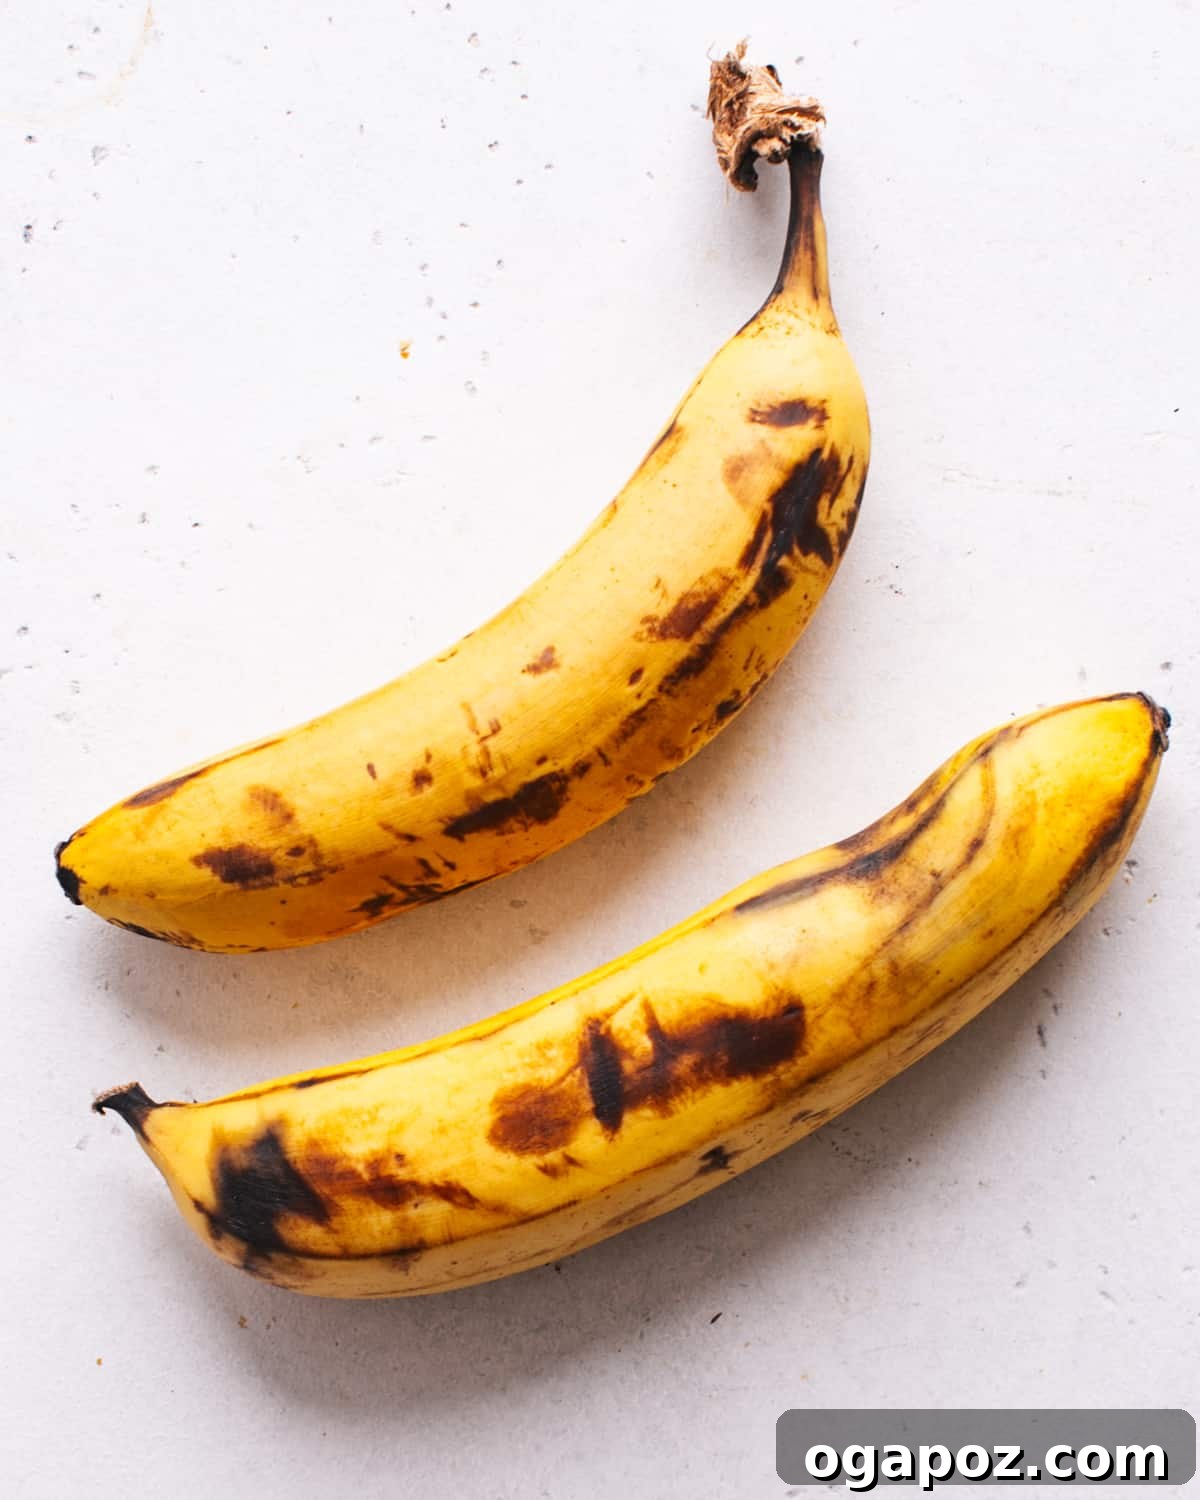
- Overripe Bananas (The Naturally Sweet Foundation): These are truly the irreplaceable star of the show! Overripe bananas, easily identified by their plentiful brown spots and softer texture, are naturally sweeter and boast a wonderfully creamy, almost custard-like texture when frozen. This heightened ripeness is absolutely crucial for achieving the perfect flavor profile and delightful consistency that makes these bites so special. Avoid green or firm yellow bananas, as they lack the necessary sweetness and won’t freeze to the desired soft-serve texture. If your bananas aren’t quite ripe enough, you can speed up the process by placing them in a paper bag with an apple overnight or baking them briefly in a low oven until their skins turn brown (though freezing before baking is typically preferred for this recipe).
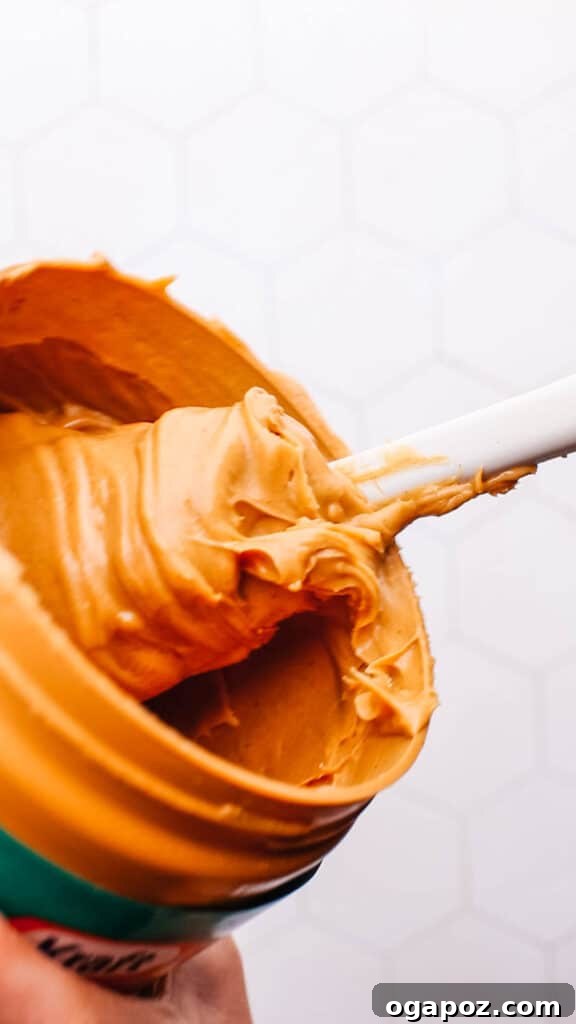
- Peanut Butter (The Creamy, Nutty Core): Whether your heart desires the satisfying crunch of chunky peanut butter or the silky smoothness of creamy, peanut butter adds a delightful nutty flavor and acts as the perfect binding agent between the banana slices. For a healthier option, we recommend choosing natural peanut butter with minimal added sugar and oils, as this allows the pure peanut flavor to come through without unnecessary additives. However, any good quality peanut butter you genuinely enjoy will work beautifully here. Feel free to experiment with different varieties – from classic creamy to roasted crunchy – to discover your favorite textural experience within these bites!
- Dark Chocolate (The Indulgent, Antioxidant-Rich Coating): Dark chocolate is what truly elevates these bites from simple snacks to decadent, yet wholesome, desserts. It provides a rich, slightly bitter contrast to the inherent sweetness of the banana and the creamy richness of the peanut butter, creating a perfectly balanced flavor profile. You have options here: use readily available semi-sweet chocolate chips, finely chopped dark chocolate bars (look for 70% cocoa or higher for maximum benefits), or even a blend of different chocolates. Aim for a good quality chocolate that melts smoothly and evenly for the best coating experience. Remember, the higher the cocoa content, the more beneficial antioxidants you’ll get!
Optional Enhancement for Gourmet Flair: For an extra layer of flavor complexity and a touch of gourmet appeal, consider sprinkling your freshly dipped bites with a pinch of flaky sea salt or finely crushed salted peanuts while the chocolate is still wet. This simple addition introduces a delightful textural crunch and perfectly balances the sweetness, enhancing the overall flavor profile with a sophisticated touch.
Step-by-Step Guide: Crafting Your Perfect Peanut Butter Banana Bites
Making these delicious and healthy 3-ingredient peanut butter banana bites is an incredibly straightforward and enjoyable process. Follow these detailed, easy-to-understand steps to ensure you create a perfect batch of these irresistible treats every single time:
- Prepare Your Bananas with Precision: Begin by carefully peeling your overripe bananas. Using a sharp knife, thinly slice each banana. You have the flexibility to choose your slicing style: either crosswise into neat rounds or lengthwise into longer, flatter pieces, depending on your preferred bite size and visual appeal. The key is to aim for slices that are about ¼-inch thick. This uniform thickness is crucial as it ensures they freeze evenly and are easy to handle and sandwich. For this recipe, two medium bananas should yield approximately 20-24 slices, providing a good number of individual bites.
- Assemble the Peanut Butter Layer with Care: Take one of your prepared banana slices and spread a generous, even teaspoon of your chosen peanut butter across its entire surface. This step is where the magic truly begins, creating a rich, nutty, and creamy core for each bite. Now, gently place another banana slice directly on top, effectively forming a delightful mini banana-peanut butter sandwich. Repeat this process meticulously until all your banana slices and peanut butter are used up, creating numerous charming individual sandwiches.
- Initial Freeze for Optimal Firmness: Arrange your freshly assembled peanut butter banana sandwiches in a single layer on a baking sheet that has been lined with parchment paper. The parchment paper is absolutely crucial here; it acts as a non-stick barrier, preventing your delicate bites from adhering to the baking sheet. Carefully place the baking sheet into your freezer for a quick 15-20 minutes. This initial freeze is a vital preparatory step; it allows the banana bites to firm up sufficiently, which is essential for preventing them from falling apart, becoming overly squishy, or creating a messy experience when you move on to dipping them into the melted chocolate.
- Melt the Chocolate to Perfection: While your banana bites are chilling and firming up in the freezer, it’s the opportune moment to prepare your luxurious chocolate coating. Place your dark chocolate chips or finely chopped dark chocolate into a microwave-safe bowl. Microwave on medium power in short, precise 30-second intervals, ensuring you stir the chocolate thoroughly after each interval. This gradual, controlled melting process is key to preventing the chocolate from seizing (becoming thick and grainy) or, worse, burning. Continue this method until the chocolate is mostly smooth with just a few small, stubborn lumps remaining. Remove it from the microwave and stir vigorously until it becomes completely smooth, glossy, and perfectly pourable. Alternatively, for those who prefer, you can use a double boiler method for melting chocolate, placing a heatproof bowl over a small saucepan of gently simmering water, stirring consistently until the chocolate is smooth.
- Dip into Decadence with Finesse: Once your banana bites are adequately firm from their initial freezer stint and your chocolate is perfectly melted and smooth, it’s dipping time! Using a fork (a standard dinner fork works perfectly), carefully spear or cradle each banana bite and immerse it completely into the melted chocolate, ensuring it’s fully coated from all angles. Lift the bite slowly, allowing any excess chocolate to drip off gracefully back into the bowl. You can get creative here – some prefer a full, even coating, while others might opt for a charming half-dip or a decorative, artistic drizzle.
- Final Freeze for a Flawless Set: Gently place each chocolate-dipped banana bite back onto the parchment-lined baking sheet. It’s important to maintain a single layer to prevent them from sticking together. Return the baking sheet to the freezer for another 15-30 minutes, or until the chocolate coating has completely hardened and the bites are solid, firm, and ready for consumption. This final freeze ensures a satisfying snap when you bite into them.
- Serve and Store for Future Enjoyment: Once fully frozen and firm, your delicious Chocolate Peanut Butter Banana Bites are absolutely ready to be enjoyed! For the optimal texture and taste, many find that allowing them to sit at room temperature for just 1-2 minutes before biting in enhances their creamy, soft-serve-like interior. For convenient storage, carefully transfer the frozen bites to an airtight freezer-safe container or a heavy-duty freezer bag. They will keep beautifully in the freezer for up to two weeks, ensuring you always have a healthy, delightful treat ready for whenever a sweet craving strikes.
Essential Tools to Master Your Banana Bites
You certainly don’t need a professional kitchen filled with fancy gadgets to create these sensational treats! With just a few basic, everyday kitchen tools, you’ll be efficiently assembling your delicious banana bites in no time. Having these items on hand and organized before you begin will make the entire process smooth, enjoyable, and stress-free. Here’s a comprehensive rundown of what you’ll need and why each tool is important:
- A Sharp Knife: This is arguably the most crucial tool for this recipe. A sharp knife is indispensable for neatly and thinly slicing your bananas. A clean, precise cut ensures that your banana slices are uniform in thickness, which is vital for even freezing and easy sandwich assembly. A dull knife, on the other hand, might squish the bananas, making them difficult to work with and potentially compromising the final appearance of your bites.
- A Sturdy Cutting Board: Essential for protecting your countertops from knife marks and providing a stable, safe surface for slicing your bananas. Choose one that doesn’t slip and slide around while you’re working.
- A Baking Sheet: You will utilize this versatile kitchen staple twice throughout the recipe. Firstly, for the initial freeze of the banana-peanut butter sandwiches, and secondly, for the final freeze after you’ve dipped them in chocolate. Ensure your baking sheet is large enough to hold all your prepared bites in a single layer without overcrowding, and that it fits comfortably within your freezer.
- Parchment Paper or Wax Paper: This is your ultimate best friend for preventing the banana bites from sticking stubbornly to the baking sheet. Lining your sheet with parchment or wax paper ensures easy, clean removal of your frozen treats and keeps your bites perfectly intact without any tearing or damage. Aluminum foil can also work as a substitute in a pinch, but parchment or wax paper is generally preferred for its superior non-stick properties and ease of handling.
- A Microwave-Safe Bowl: If you’re opting for the quick, convenient, and popular microwave method to melt your chocolate, a microwave-safe bowl is absolutely essential. Choose one that is deep enough to allow for easy and complete dipping of your banana bites without making a mess.
- A Small Saucepan (Optional but Recommended for Double Boiler): If you prefer the more traditional and gentle double boiler method for melting chocolate, a small saucepan filled with a shallow amount of simmering water is needed. You’ll also require a heatproof bowl that fits snugly over the saucepan without directly touching the water, creating a gentle steam bath for the chocolate.
- A Fork or Small Skewers: A standard dinner fork is ideally suited for dipping the banana bites into the melted chocolate, as its tines allow any excess chocolate to drip off cleanly. Alternatively, small wooden skewers or even sturdy toothpicks can also be incredibly helpful for precise dipping and delicate handling of the bites, especially if you’re creating intricate designs or partial coatings.
Having these fundamental tools readily accessible and in good working order before you embark on your culinary adventure will make the entire process seamless, efficient, and ultimately, much more enjoyable!
Preparation, Storage, and Enjoyment Tips for Lasting Deliciousness
These Chocolate Peanut Butter Banana Bites are not only incredibly delightful but also remarkably convenient, making them a perfect addition to your healthy snack repertoire. Here’s how to maximize the enjoyment and longevity of your delicious homemade treats, from making them ahead of time to storing them perfectly for future cravings:
- Perfect for Meal Prepping & Batch Cooking: This recipe is an absolute dream for those who appreciate the efficiency and convenience of preparing snacks in advance. You can easily double, triple, or even quadruple the recipe to create a substantial batch of these delectable bites. Having a stash of these healthy treats readily available in your freezer means you’re always prepared for a healthy snack attack, a quick energy boost, or an impromptu dessert, making healthy eating effortless.
- Optimal Freezer Storage: Once your banana bites are fully frozen and the chocolate coating has completely hardened and set, it’s crucial to transfer them from the baking sheet into an appropriate storage solution. We recommend using an airtight freezer-safe container or a heavy-duty freezer bag. Proper storage is key to preventing freezer burn, which can compromise both the texture and the fresh flavor of your bites, ensuring they remain as delicious as the day they were made.
- Extended Freezer Lifespan: These delightful bites will happily reside and maintain their quality in your freezer for an impressive period of up to two weeks. Beyond that timeframe, while they will still be safe to eat, their texture might start to degrade slightly, and their peak flavor could begin to diminish. To ensure you enjoy them at their absolute best, we recommend labeling your container with the preparation date so you can easily track exactly how long they’ve been stored.
- Serving Suggestions for Enhanced Flavor: While these bites are undeniably delicious enjoyed straight from the freezer, many find that allowing them to thaw for just 1-2 minutes at room temperature significantly enhances their creamy texture. This slight softening period allows the banana to reach a perfect soft-serve consistency, making each bite even more enjoyable and melting delightfully in your mouth.
- Batch Freezing Technique: If you are indeed making a very large batch, consider freezing them in organized layers within your chosen storage container. To prevent them from sticking together, simply separate each layer with a piece of parchment paper. This ensures easy access to individual bites without any frozen clumps.
- Defrosting for a Softer Treat: If you prefer a less firm, almost thawed banana experience, simply remove a few bites from the freezer about 5-10 minutes before you plan to eat them. This will allow the banana to become softer while the chocolate remains firm, offering a different, equally enjoyable textural experience.
Creative Variations and Substitutions to Explore
While the classic Chocolate Peanut Butter Banana Bites are undeniably fantastic and perfectly satisfying on their own, this recipe offers a wonderful canvas for endless possibilities and customization! Don’t be afraid to unleash your inner culinary artist and tailor these treats to your personal taste, dietary needs, or whatever ingredients you have on hand. Here are a few exciting ideas to inspire your creative juices and make these bites uniquely yours:
- Alternate Nut Butters for Diverse Flavors: If you’re not a fan of peanut butter, or simply eager to try something new, the world of nut butters is your oyster! Swap it out for creamy almond butter, rich cashew butter, or even a decadent hazelnut spread for a completely different flavor profile. For those with nut allergies, sunflower seed butter is an excellent, safe, and equally delicious alternative. Each nut or seed butter will impart its own unique taste and texture, inviting a new experience with every bite.
- Explore the Spectrum of Chocolate: Dark chocolate provides a sophisticated, slightly bitter note, but don’t limit yourself! Milk chocolate will offer a sweeter, creamier coating that’s often a hit with younger palates, while white chocolate can provide a distinct, milder sweetness and a beautiful visual contrast. For a truly adventurous kick, consider stirring a tiny pinch of chili powder into your melted dark chocolate for a surprising Mexican-inspired twist that will awaken your taste buds.
- Infuse with Fruity Enhancements: Elevate your bites by introducing other thinly sliced fruits between the banana layers. Delicate slices of strawberries, tangy raspberries, juicy blueberries, or even exotic kiwi slices can add a vibrant burst of color, an extra layer of sweetness, and a delightful tangy flavor. Just ensure these additions are also thinly sliced to create a neat, manageable sandwich.
- Effortlessly Make Them Vegan: This recipe is inherently plant-based as long as you make a conscious choice in your chocolate! Simply ensure you use certified dairy-free chocolate chips or bars. Always double-check the ingredient list of your chosen chocolate to confirm it contains no hidden dairy products, making these treats accessible to everyone.
- Experiment with Textural Toppings: Beyond the classic flaky sea salt and crushed peanuts, get truly creative with your toppings! Before the chocolate sets, sprinkle your freshly dipped bites with shredded coconut for a tropical twist, finely chopped nuts (think pistachios, pecans, or walnuts) for added crunch, mini chocolate chips for extra chocolatey goodness, colorful sprinkles for a festive and fun look, or a delicate dusting of cinnamon or cocoa powder for an aromatic finish.
- Spice It Up for a Warm Hug: A tiny sprinkle of warming spices like cinnamon, nutmeg, or even a dash of aromatic cardamom can be mixed directly into your peanut butter layer before spreading. This subtle addition can impart an unexpected depth of flavor and a comforting warmth that complements the banana and chocolate beautifully.
- Boost Your Protein Content: For an extra kick of protein, perfect for a post-workout snack, consider mixing a small amount of your favorite unflavored or complementary-flavored protein powder (like vanilla or chocolate) directly into the peanut butter before spreading. Ensure the powder is well incorporated for a smooth consistency.
The culinary possibilities are truly endless with these versatile treats, so don’t hesitate to experiment and discover your own perfect combination of flavors and textures!
Frequently Asked Questions About Peanut Butter Banana Bites
What exactly are Peanut Butter Banana Bites?
Peanut Butter Banana Bites are delightful, small, bite-sized frozen treats. They are meticulously crafted by taking two thinly sliced pieces of overripe banana, sandwiching them together with a generous layer of creamy peanut butter, and then coating the entire assembly in a crisp, decadent shell of melted chocolate. They are designed to be a healthy, refreshing, and incredibly satisfying snack or a light dessert, offering a perfect blend of sweet, salty, and creamy textures.
Are Peanut Butter Banana Bites truly healthy?
Yes, these banana bites are genuinely and remarkably good for you! They are packed with wholesome, natural ingredients that collectively offer numerous health benefits. Here’s a breakdown of why they stand out as a smart and nutritious choice:
* Bananas: A fantastic natural source of essential potassium, which is vital for maintaining healthy blood pressure, heart function, and proper muscle contraction, as well as providing ample dietary fiber, which aids in digestion, promotes gut health, and helps in regulating blood sugar levels.
* Peanut Butter: Contributes a significant amount of plant-based protein, crucial for muscle repair and growth, along with healthy monounsaturated and polyunsaturated fats. These beneficial fats are key to promoting satiety, keeping you feeling full and satisfied for longer periods, and providing sustained energy.
* Dark Chocolate: When chosen with a high cocoa content (ideally 70% or more), dark chocolate is a potent source of powerful antioxidants, such as flavonoids. These antioxidants can help combat harmful free radicals in the body, potentially reducing the risk of chronic diseases and supporting overall cardiovascular health.
Compared to many traditional, highly processed desserts, these frozen banana bites are notably lower in added sugars, unhealthy fats, and artificial ingredients, making them an excellent way to indulge your sweet tooth without compromising your health goals. They offer a delightful balance of natural sweetness, healthy fats, and protein, making them a truly guilt-free pleasure.
Can I make these banana bites without freezing them?
While the freezing step is absolutely crucial for achieving the characteristic firm texture and allowing the chocolate coating to set properly and form a satisfying shell, you could theoretically enjoy the banana and peanut butter combination fresh. However, the true magic and signature experience of these “bites” comes from their frozen state, which uniquely transforms the banana into a delightful, ice cream-like, creamy consistency and provides the chocolate with its irresistible snap. For the best results and the intended, refreshing experience, freezing is not just recommended, but highly essential.
How can I make the chocolate coating smoother and less prone to breaking?
For a consistently smoother and more resilient chocolate coating, several factors are key. Firstly, ensure your chocolate is melted completely and evenly without any signs of overheating, as this can make it seize. A fantastic trick is to stir in a small amount of coconut oil (approximately 1 teaspoon per cup of chocolate chips) into the melted chocolate. This helps to thin the chocolate ever so slightly, making it much easier to dip and ensuring a thinner, more even, and noticeably less brittle shell once it sets. Secondly, always ensure your banana bites are sufficiently cold and firm before you begin dipping them; this helps the chocolate set very quickly upon contact, further preventing it from melting off or creating a thick, uneven layer.
What’s the best way to prevent the banana slices from turning brown?
Overripe bananas are naturally prone to browning once exposed to air. While freezing them helps to slow this process, you can minimize browning before assembly by lightly tossing the banana slices in a tiny amount of lemon juice or a pinch of citric acid. This creates a protective barrier. However, for this recipe, because they are quickly sandwiched and frozen, the browning is usually not a significant issue and doesn’t affect the taste or final appeal once covered in chocolate.
Other Fan-Favorite Recipes You’ll Love
If you’ve enjoyed the simplicity, deliciousness, and healthy appeal of these viral Chocolate Peanut Butter Banana Bites, then you’re definitely in for a treat! Here are some other incredibly popular and easy-to-make recipes that have captured the hearts (and satisfied the taste buds) of many, offering more fantastic options for wholesome indulgence:
- Fluffy 3-Ingredient Banana Pancakes: Discover how to effortlessly transform ripe bananas into wonderfully wholesome, naturally sweet, and incredibly fluffy pancakes with minimal ingredients and effort – perfect for a quick and nutritious breakfast.
- My Viral Butter Naan Recipe: Unleash your inner baker and master the secrets to creating unbelievably soft, irresistibly pillowy naan bread from scratch, a recipe that has garnered millions of views and rave reviews across social media platforms.
- Creamy 3-Ingredient Banana “Nice” Cream: Dive into the refreshing world of healthy desserts with this incredibly simple, dairy-free alternative to traditional ice cream, made purely from frozen bananas for a naturally sweet and creamy treat.
- Refreshing Frozen Yogurt Bark: A cool, vibrant, and highly customizable treat that combines the tang of yogurt with your favorite fruits, nuts, and toppings, offering a guilt-free way to cool down.
- Decadent Chocolate Date Bark: Indulge in a delightful and naturally sweet combination of chewy dates and rich chocolate, creating a satisfying bark that’s perfect for a quick energy boost or a wholesome dessert.
- No-Bake Cookie Dough Bites: Enjoy the irresistible flavor of cookie dough in safe-to-eat, convenient, and perfectly portioned bite-sized treats that require no baking whatsoever.
- Impossibly Soft Cinnamon Rolls with Cream Cheese Frosting: Master the art of baking incredibly tender, warm, and aromatic cinnamon rolls, perfectly topped with a luscious, tangy cream cheese frosting for the ultimate comfort food experience.
Chocolate Peanut Butter Banana Bites Recipe
By: Jennifer Pallian BSc, RD
These 3-Ingredient Peanut Butter Banana Bites are an easy, healthy way to satisfy a chocolate sweet tooth and a smart solution for utilizing overripe bananas. This recipe yields approximately 12 servings, perfect for sharing or stocking your freezer.
Recipe Details:
- Prep Time: 5 minutes
- Cook Time: 0 minutes
- Total Time: 5 minutes (active preparation time, excluding freezing time)
- Servings: 12 bites
Ingredients:
- 2 medium overripe bananas (yellow with brown spots)
- ¼ cup peanut butter (your choice of crunchy or smooth, natural preferred)
- 1 cup dark chocolate chips (or equivalent chopped dark chocolate bar)
- Optional: a pinch of flaky sea salt or finely crushed salted peanuts for topping
Instructions:
- Slice Bananas: Peel the overripe bananas. Using a sharp knife, thinly slice each banana into approximately 10-12 pieces. You can slice them crosswise into rounds or lengthwise into longer pieces.
- Assemble Bites: Take one banana slice and spread about 1 teaspoon of peanut butter evenly over its surface. Place another banana slice on top to create a banana-peanut butter sandwich. Repeat this process until all banana slices are used.
- Initial Freeze: Arrange the assembled banana-peanut butter sandwiches in a single layer on a parchment-lined baking sheet. Place the baking sheet in the freezer for 15-20 minutes to allow the bites to firm up.
- Melt Chocolate: While the banana bites are chilling, melt the chocolate chips. Place them in a microwave-safe bowl and heat on medium power in 30-second intervals, stirring thoroughly after each interval, until the chocolate is smooth and melted. (Alternatively, use a double boiler method).
- Dip Bites: Remove the firm banana bites from the freezer. Using a fork, carefully dip each banana bite into the melted chocolate, ensuring it’s fully coated. Lift and allow any excess chocolate to drip back into the bowl.
- Final Freeze: Gently place the chocolate-coated bites back onto the parchment-lined baking sheet. Return the baking sheet to the freezer for another 15-30 minutes, or until the chocolate coating is completely firm and hardened.
- Enjoy & Store: Once fully frozen, your delicious Chocolate Peanut Butter Banana Bites are ready to be enjoyed! For storage, transfer any remaining bites to an airtight container or freezer-safe bag and keep them in the freezer for up to two weeks.
Notes:
These bites are best enjoyed frozen, offering a delightful creamy texture similar to soft-serve ice cream. For a slightly softer banana center, allow them to sit at room temperature for a minute or two before biting in. You can also serve them slightly thawed once the chocolate has firmly set.
Nutrition Information (per serving, approximation):
- Calories: 126 kcal
- Carbohydrates: 15g
- Protein: 1g
- Fat: 7g
- Saturated Fat: 3g
- Polyunsaturated Fat: 1g
- Monounsaturated Fat: 1g
- Sodium: 24mg
- Potassium: 145mg
- Fiber: 1g
- Sugar: 12g
- Vitamin A: 13 IU
- Vitamin C: 2mg
- Calcium: 15mg
- Iron: 0.1mg
Nutrition information provided is an automatic calculation based on typical ingredient values and should be used as an approximation. Actual nutritional content may vary based on specific brands, exact measurements, and preparation methods.
Tried this recipe? We’d love to hear about your experience! Share your thoughts, tips, and any creative variations you tried in the comments section below. Your feedback helps other home cooks discover new favorites!