
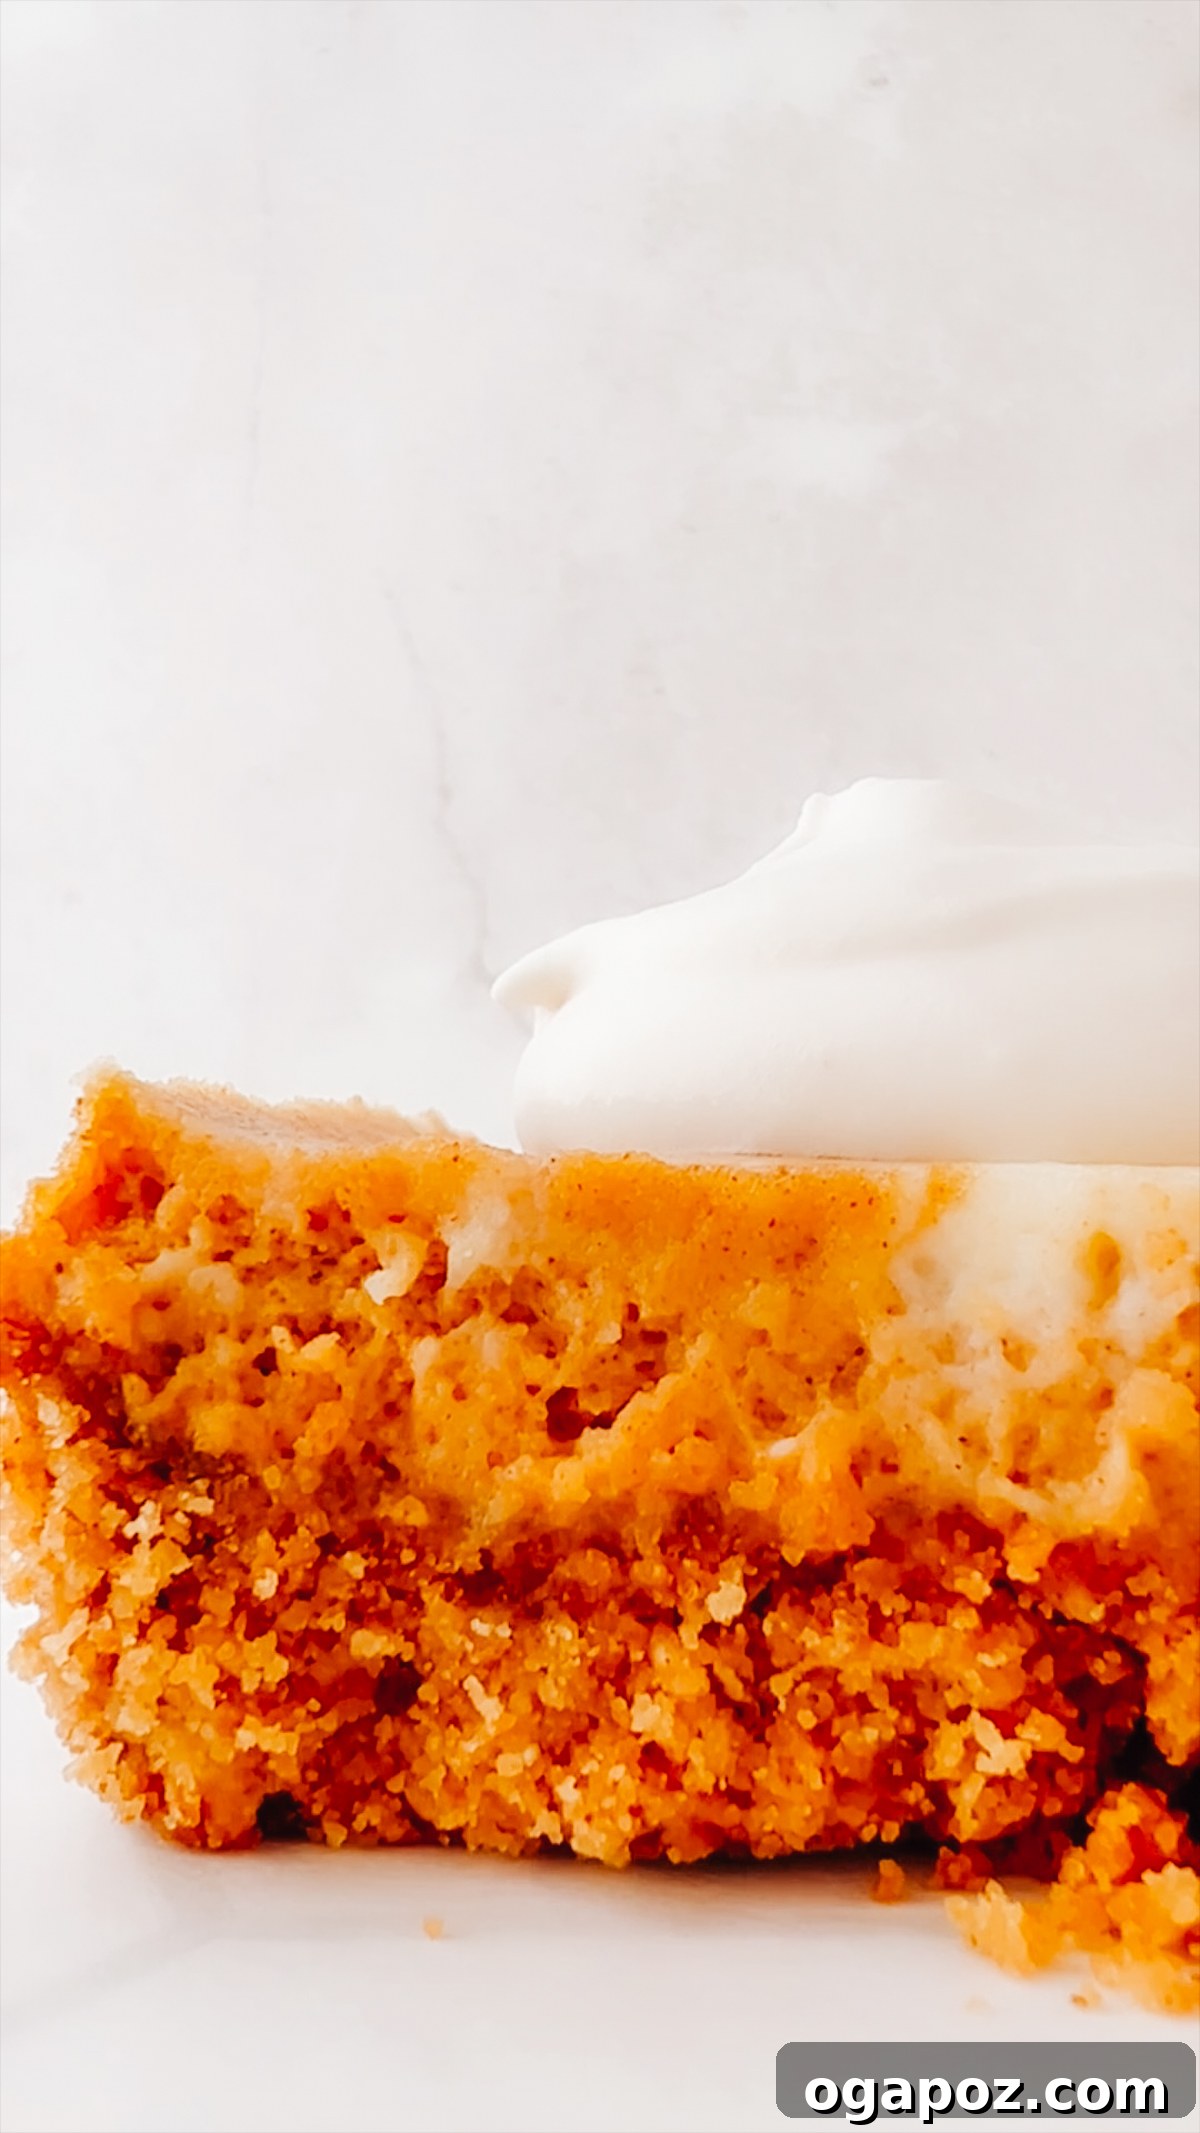
Welcome to the ultimate guide for creating irresistible Pumpkin Cheesecake Bars! These delectable bars are renowned for their stunning appearance, impressive flavor, and surprisingly simple preparation. If you’re searching for a crowd-pleasing fall dessert that captures the essence of the season, look no further. This easy recipe will show you how to bake perfect, creamy, and beautifully marbled pumpkin cheesecake bars that everyone will adore. Get ready to impress your guests with this autumnal masterpiece!
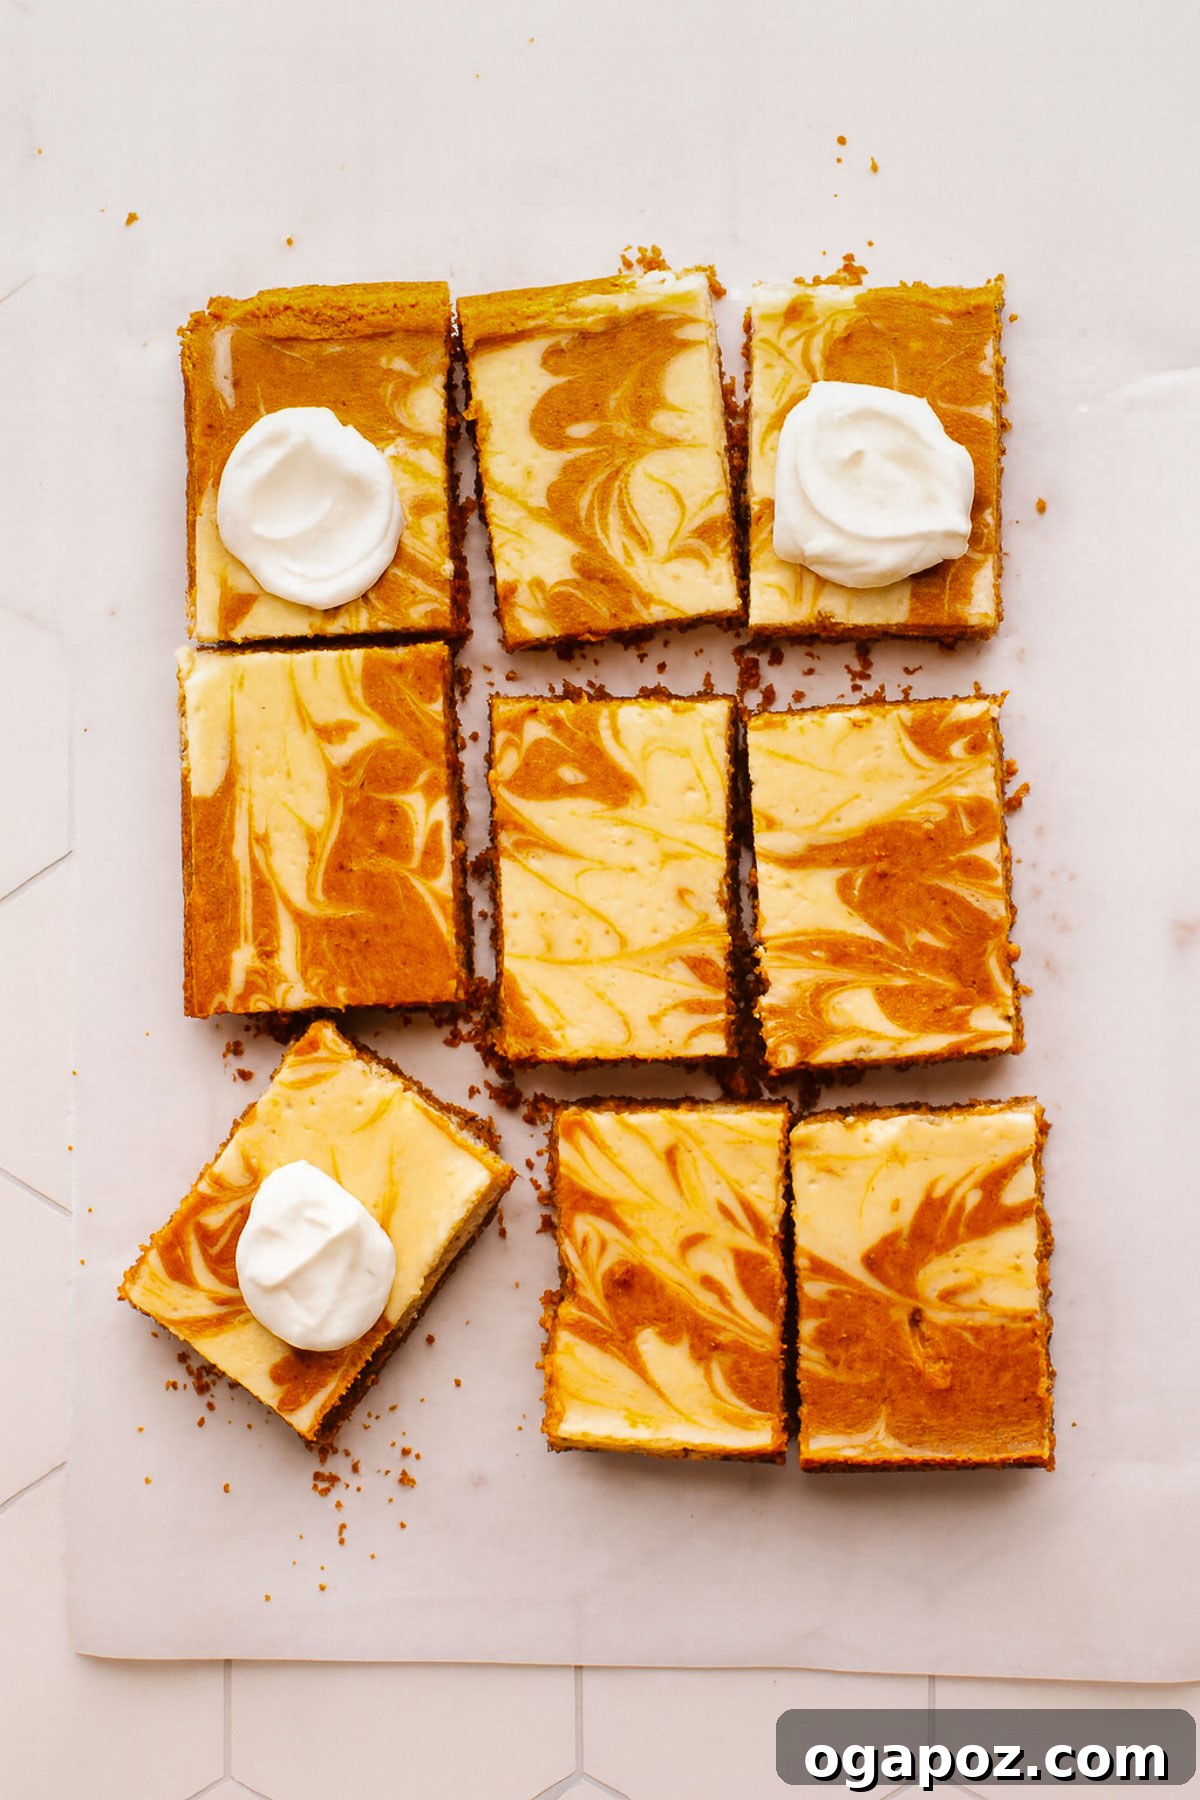
The Best Marbled Pumpkin Cheesecake Bars You’ll Ever Make
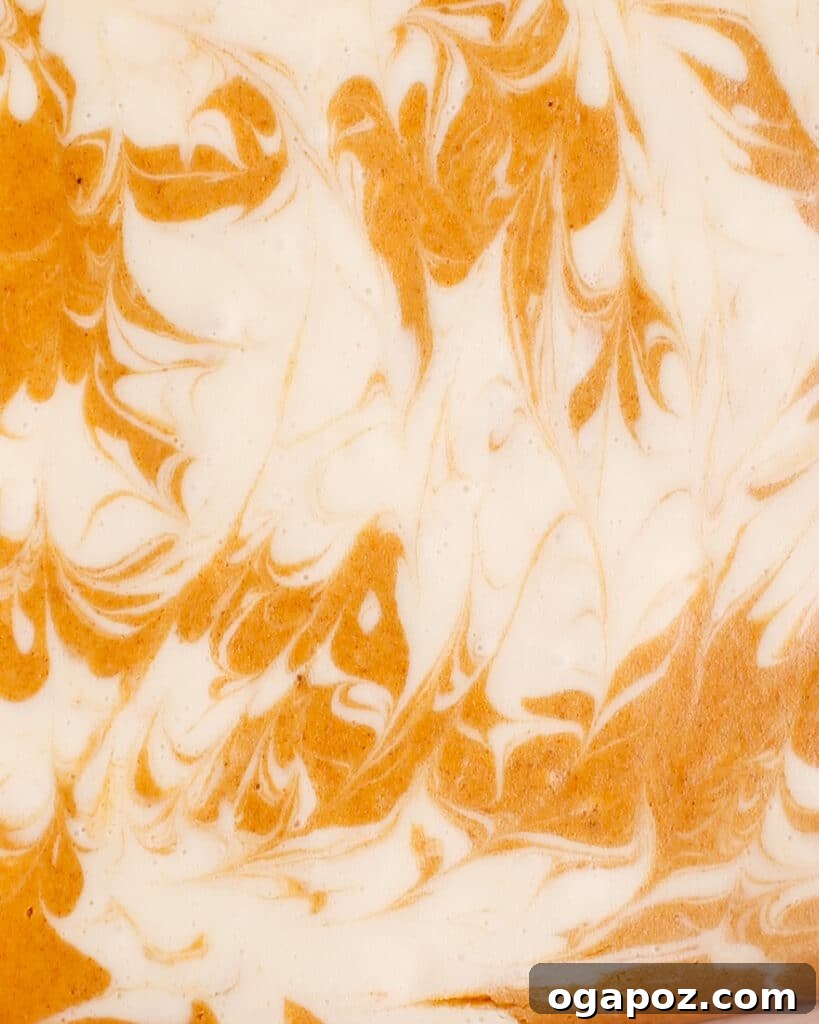
As fall unfolds with its vibrant colors and crisp air, there’s no better way to embrace the season than with the comforting flavors of pumpkin and spice. These pumpkin cheesecake bars are not just any dessert; they are a celebration of autumn in every bite. Imagine a rich, buttery graham cracker crust serving as the foundation for two velvety cheesecake layers: one a classic vanilla and the other infused with warm pumpkin spice. Swirled together, they create a mesmerizing marbled effect that’s as delightful to look at as it is to eat. This recipe promises an ultra-creamy texture, an explosion of fall flavors, and an unforgettable baking experience.
Why These Pumpkin Cheesecake Bars Will Become Your Go-To Fall Treat
- Effortless 2-Ingredient Crust: Forget complicated pastry work! Our graham cracker crust requires just two simple ingredients and comes together in minutes, providing the perfect crunchy contrast to the creamy filling.
- Significantly Shorter Bake Time: Unlike traditional cheesecakes that demand hours in the oven, these bars boast a much quicker baking process, allowing you to enjoy your delicious creation sooner.
- No Water Bath, No Springform Pan Needed: Say goodbye to fussy techniques! This recipe simplifies the cheesecake-making process by eliminating the need for a hot water bath or a specialized springform pan, making it ideal for both novice and experienced bakers. It’s simple, quick, and irresistibly delicious!
- Stunning Marbled Appearance: The technique of swirling two distinct cheesecake batters creates a beautiful marbled pattern, making these bars look incredibly elegant and professional with minimal effort.
- Perfect Balance of Flavors: The delicate blend of sweet vanilla and robust pumpkin spice ensures a harmonious taste that pleases every palate, capturing the true essence of autumn.
Ready to create a dessert that will be the star of your fall gatherings? Let’s dive into the delicious details!
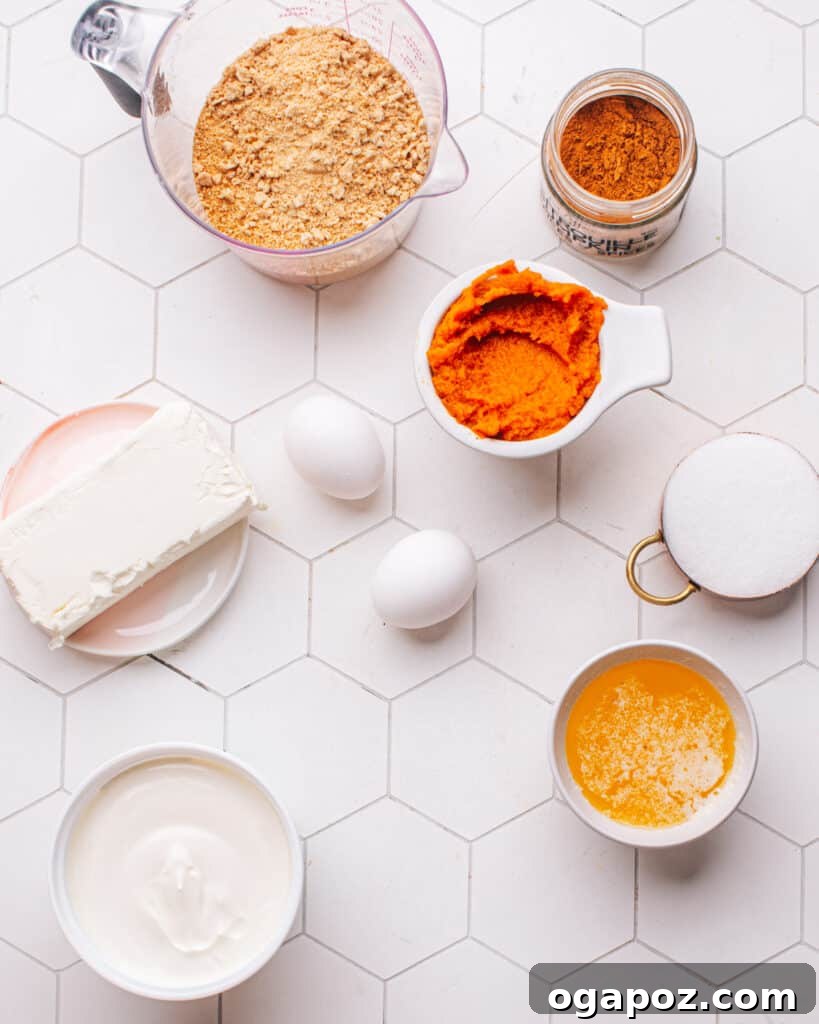
Essential Ingredients & Tools for Perfect Pumpkin Cheesecake Bars
Before embarking on this delightful baking journey, let’s gather all the simple yet essential equipment and high-quality ingredients you’ll need. These carefully selected components are key to achieving the ultimate flavor and texture for one of my favorite pumpkin desserts.
Pumpkin Cheesecake Bar Ingredients: The Heart of Your Dessert
For the irresistible graham cracker crust:
- Graham Cracker Crumbs: These fine crumbs form the perfectly sweet and crumbly foundation for our pumpkin pie cheesecake bars. If you’re starting with whole graham crackers, you’ll need about 28 square crackers (or 14 double-sized crackers). You can easily crush them in a food processor for a uniform texture or by hand using a rolling pin and a Ziploc bag for a more rustic feel.
- Melted Butter: Essential for binding the graham cracker crumbs together, the melted butter adds a rich, golden hue and a delicious buttery flavor to the crust, ensuring it holds its shape beautifully.
For the Lush and Creamy Pumpkin Pie Cheesecake Filling:
Our filling is a masterpiece of two luxurious, creamy flavors swirled together: a classic vanilla cheesecake and a vibrant pumpkin spice cheesecake. The beauty of this recipe is that both start from the same base, minimizing dishes and maximizing efficiency.
- Full-Fat Cream Cheese: The star of any cheesecake, full-fat cream cheese provides the signature rich, tangy, and incredibly creamy texture. Ensure it’s softened to room temperature for a smooth, lump-free batter.
- Sour Cream: This ingredient adds a delightful tanginess and contributes significantly to the smooth, velvety consistency of the cheesecake, preventing it from becoming overly dense.
- Granulated Sugar: Sweetens our bars to the perfect, balanced level. For an extra hint of molasses flavor in the pumpkin mixture, you could even swap a portion of the granulated sugar for brown sugar.
- Eggs: Acting as a crucial binding agent, eggs provide structure to the cheesecake, ensuring it sets properly while maintaining its delicate creaminess.
- Pure Vanilla Extract or Vanilla Bean Paste: A touch of high-quality vanilla elevates the flavor profile, adding warmth and depth to both the plain and pumpkin cheesecake layers.
That’s it for the fundamental cheesecake base! You’ll portion some of this out for the pristine white layer of the bars. To the remaining base, you’ll add these glorious pumpkin elements:
- Pumpkin Puree: The heart and soul of these bars, pure pumpkin puree infuses them with authentic, earthy pumpkin flavor. Always choose 100% pure pumpkin puree, not pumpkin pie filling, which is already spiced and sweetened. If you happen to have any leftover, check out our guide to freezing canned pumpkin puree for future baking endeavors.
- Pumpkin Pie Spice: This fragrant blend of fall spices, typically cinnamon, nutmeg, ginger, and cloves, brings all the beloved flavors of a classic pumpkin pie directly into our creamy cheesecake.
Creative Variations and Smart Substitutions: Personalize Your Bars
A truly great recipe is versatile, allowing for personal touches. Here are some fantastic ways to customize these pumpkin cheesecake bars and make them uniquely your own:
- Explore Different Crusts: While graham crackers are classic, feel free to experiment! Swap them with Oreo crumbs for a chocolatey twist, or use ginger snap cookies for a spicier, more sophisticated base. Cinnamon graham crackers offer an extra layer of warmth, while gluten-free graham crackers make the dessert accessible for all. For a truly unique flavor, try Biscoff cookies to create a delightful biscoff cookie crust – YUM!
- Creamy Alternatives: If you’re looking for a slightly healthier touch or a different flavor profile, substitute the sour cream with an equal amount of full-fat Greek yogurt. It will still provide that desirable tang and smooth texture.
- Custom Spice Blend: No pumpkin pie spice on hand? No problem! Create your own fragrant blend using individual warm spices. A good mix is 1 ½ teaspoons of ground cinnamon, ¼ teaspoon of ground ginger, ¼ teaspoon of nutmeg, and a tiny pinch of ground cloves. Adjust to your taste!
- Exciting Filling Additions: Elevate the texture and flavor by stirring in chocolate chips (mini or regular), chopped pecans, walnuts, or even candied ginger into the pumpkin cheesecake batter for an extra layer of indulgence.
Essential Tools for a Seamless Baking Experience
Having the right tools makes all the difference in ensuring a smooth and enjoyable baking process. Here’s what you’ll need:
- Baking Pan: A 9x9x2-inch square baking pan is specifically recommended for achieving perfectly sized bars with the ideal thickness.
- Standing Mixer (or Hand Mixer): An electric mixer, whether a standing mixer with a paddle attachment or a reliable hand mixer, makes whipping up the creamy cheesecake filling an absolute breeze, ensuring a smooth, lump-free consistency.
- Large or Medium Bowl: You’ll need this for combining your graham cracker crust ingredients efficiently.
- Rubber Spatula: Indispensable for scraping down the sides of your mixing bowl, ensuring all ingredients are thoroughly incorporated.
- Sharp Knife: Crucial for delicately swirling the batters to create that beautiful marbled effect, and later, for clean, precise slices.
- Wire Rack: For best results and to prevent a soggy bottom, cooling the baked bars completely on a wire rack is essential.
With all your ingredients measured and tools at the ready, you’re perfectly set to whip up some unforgettably delicious Pumpkin Cheesecake Bars that are guaranteed to be a huge hit!
Step-by-Step Guide: Crafting Your Perfect Pumpkin Cheesecake Bars
Despite their sophisticated marbled appearance, these pumpkin cheesecake bars are remarkably easy to make. The process involves just a few straightforward steps: preparing a simple graham cracker crust, blending two delightful cheesecake batters, and then artfully combining and baking them until set. Let’s create some magic!
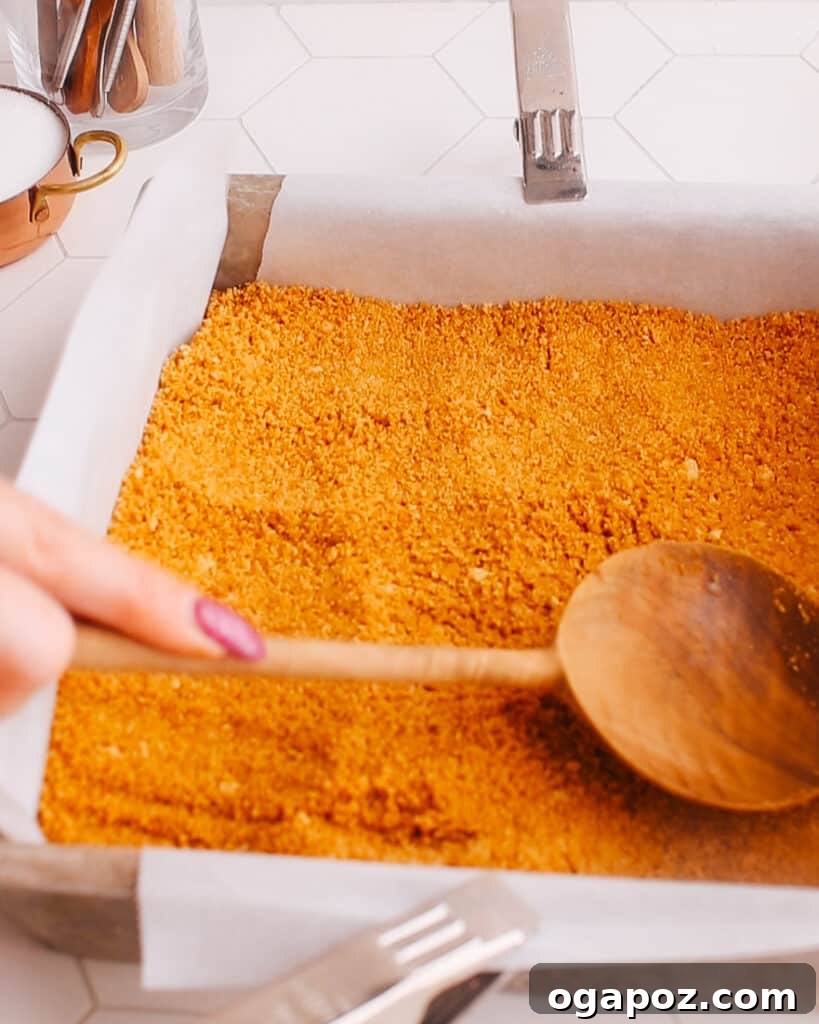
Crafting the Perfect Graham Cracker Crust:
- Prepare Your Oven and Pan: Begin by preheating your oven to 350°F (175°C). Next, prepare your 9x9x2-inch square baking dish. For easy removal and clean slices, it’s highly recommended to line the pan with parchment paper, leaving an overhang on two sides. Alternatively, you can butter it generously or use cooking spray.
- Mix and Press the Crust: In a large bowl, combine the graham cracker crumbs and melted butter. Stir thoroughly until the crumbs are evenly moistened and resemble wet sand. Press this mixture firmly and evenly into the bottom of your prepared baking pan. Use the bottom of a glass or a flat measuring cup to compact it for a sturdy crust. Bake the crust for 12 minutes until lightly golden. Keep your oven heated at 350°F (175°C) for the upcoming steps.
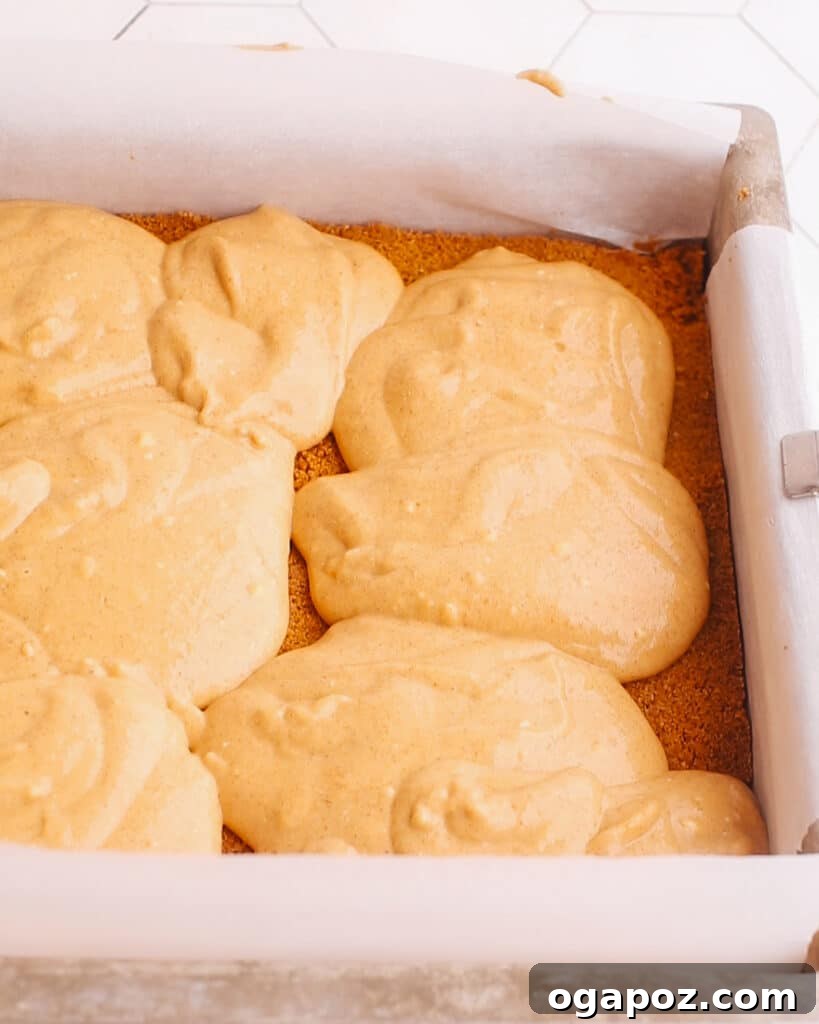
Preparing the Velvety Cheesecake Filling:
- Cream the Base: In the large bowl of your standing mixer (or with a hand mixer), beat together the softened full-fat cream cheese and sour cream on medium speed. Continue mixing until the mixture is completely smooth and free of lumps. This is a crucial step for a silky-smooth cheesecake. Next, gradually add ½ cup of granulated sugar and beat until the mixture is light and fluffy.
- Incorporate Eggs and Vanilla: Gently add the eggs, one at a time, beating just until combined after each addition. Overmixing the eggs can introduce too much air, which can lead to cracks in the finished cheesecake. Finish by mixing in the pure vanilla extract. Remember to occasionally scrape down the sides of the bowl with your spatula to ensure everything is thoroughly incorporated. Now, carefully remove and set aside 1 cup of this plain cream cheese mixture; this will be your vanilla swirl.
- Create the Pumpkin Batter: To the remaining cheesecake batter in the bowl, add the pumpkin puree, the additional 3 tablespoons of sugar, and the pumpkin pie spice. Beat on low speed until all the ingredients are fully combined and the batter is a uniform pumpkin color.
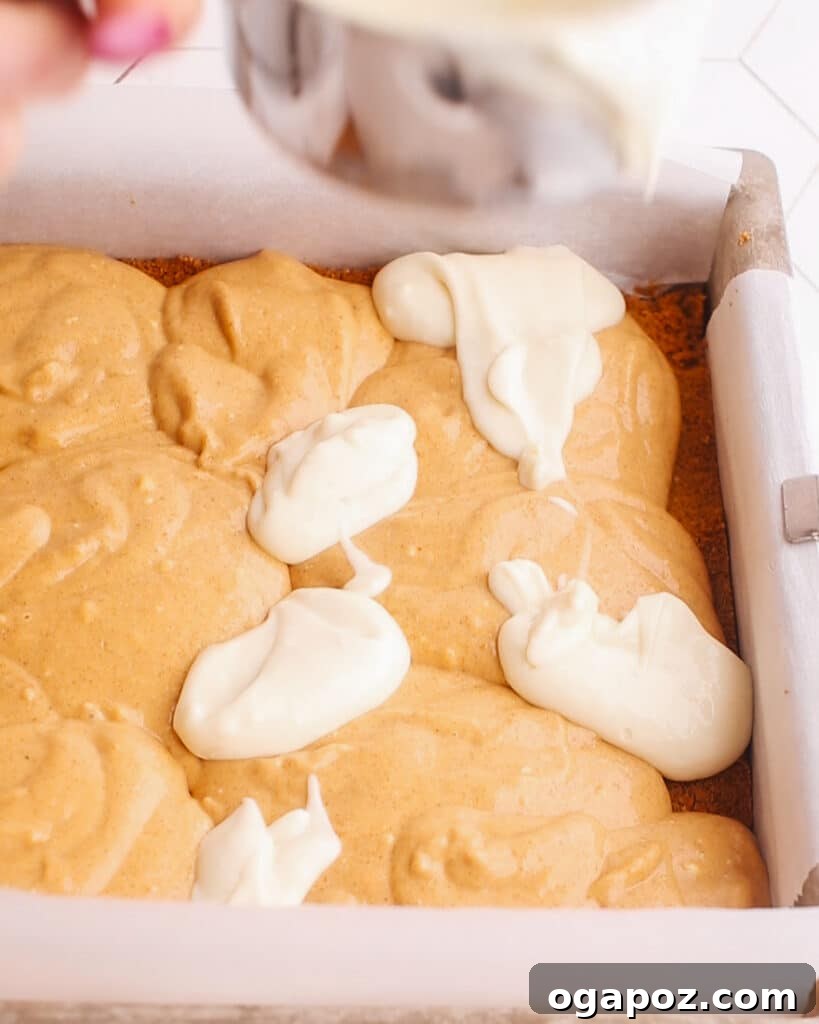
Assembling and Baking Your Marbled Bars:
- Layer and Swirl: Spoon alternating dollops of the plain (vanilla) cheesecake mixture and the pumpkin cheesecake mixture onto your pre-baked graham cracker crust. Don’t worry about perfect placement; the beauty is in the randomness. For that signature marbled look, take a thin knife or a skewer and gently swirl the batters together, being careful not to drag through the crust. Create elegant S-shapes or figure-eights for a captivating design.
- Bake to Perfection: Carefully place your pan into the center of your preheated oven. Bake the pumpkin cheesecake bars for 20-25 minutes. You’ll know they’re done when the edges have puffed up slightly and appear set, while the very center still has a slight, gentle jiggle when the pan is lightly shaken. Avoid overbaking, as this can lead to a dry texture and cracks.
- Cool and Chill: Once baked, remove the pan from the oven and allow the bars to cool completely to room temperature on a wire rack. This gradual cooling process is crucial for preventing cracks. Once at room temperature, for best results and ease of slicing, refrigerate the bars for at least 3-4 hours, or preferably overnight, until thoroughly chilled and firm. Any leftovers should be refrigerated in an airtight container for up to 3 days.
These swirled pumpkin cheesecake bars are destined to be a showstopper, whether for your Thanksgiving dessert spread, a cozy fall gathering, or simply as a delightful treat to savor the delicious flavors of the season. Enjoy every creamy, spiced bite!
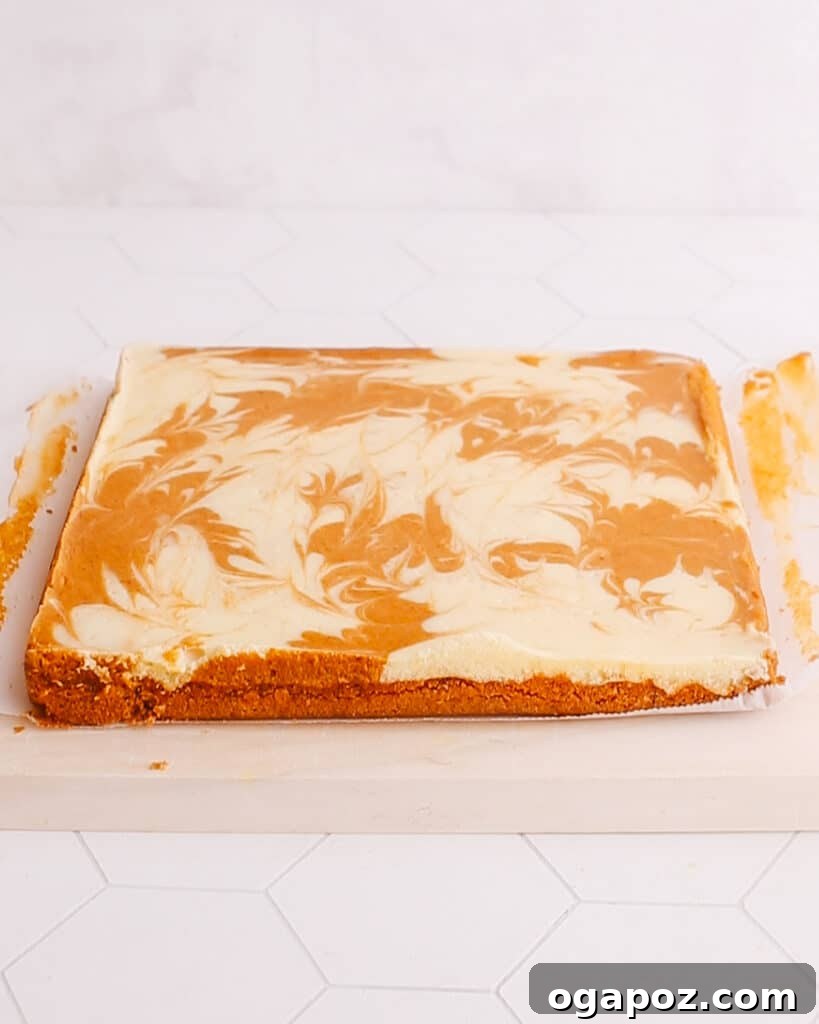
Tips for Serving Your Irresistible Pumpkin Cheesecake Bars
To fully appreciate the deliciousness of these pumpkin cheesecake bars, proper presentation and serving techniques are key. Here’s how to serve them in the most appealing and enjoyable way:
- Cool Completely for Clean Slices: Patience is a virtue when it comes to cheesecake! Before attempting to slice, ensure the bars have cooled completely to room temperature, and ideally, have been thoroughly chilled in the refrigerator for several hours. This firming-up period is vital for achieving clean, neat slices without the bars crumbling or sticking. For extra precision, use a long, sharp knife and wipe it clean with a warm, damp cloth between each cut.
- Elegant Dusting: For a simple yet sophisticated touch, give your chilled bars a light dusting of ground cinnamon, a sprinkle of pumpkin pie spice, or a delicate shower of powdered sugar just before serving. This adds visual appeal and a subtle extra layer of flavor.
- Delightful Accompaniments: Elevate each slice with a generous dollop of freshly whipped cream. For an added layer of indulgence and “wow factor,” consider pairing it with a scoop of premium vanilla bean ice cream and a luscious drizzle of homemade or store-bought caramel sauce or even a sprinkle of toasted pecans. The combination of textures and temperatures is simply divine.
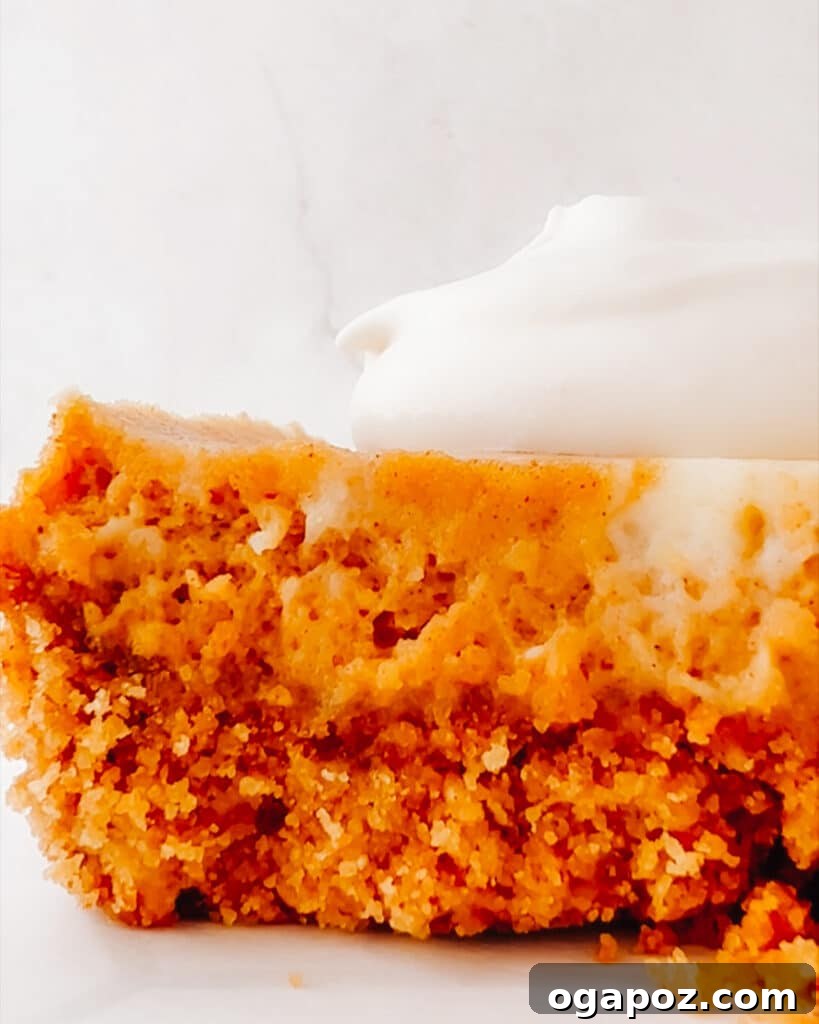
Make-Ahead and Storage Solutions for Convenience
These pumpkin cheesecake bars are not only delicious but also incredibly convenient, as they can be prepared in advance and stored to maintain their freshness and flavor. This makes them a perfect dessert for holiday planning or busy weeks.
- Freezer-Friendly Option: Yes, these bars are excellent for freezing! Once they are fully baked and completely cooled, cut them into individual slices. Arrange them in a single layer on a baking sheet and freeze until solid. Once frozen, transfer the individual bars to an airtight freezer-safe container or a heavy-duty freezer bag, separating layers with parchment paper to prevent sticking. They will retain their quality for up to 3 months. To serve, simply thaw them in the refrigerator overnight or at room temperature for a few hours.
- Refrigerator Storage: After baking and cooling, any leftover bars (or the entire pan before slicing) should be stored in the refrigerator. Wrap them tightly with plastic wrap or place them in an airtight container to prevent them from absorbing odors or drying out. When properly stored, they taste best when chilled and will maintain their peak freshness and delightful texture for up to 3 days.
- Serving Temperature for Optimal Flavor: For the most exquisite flavor and texture, remove the pumpkin cheesecake bars from the refrigerator about 15-20 minutes before serving. This allows them to come to a slightly cooler-than-room-temperature state, enhancing their creamy richness and allowing the spices to truly shine.
Avoid These 4 Common Mistakes for Perfect Pumpkin Cheesecake Bars
Even the simplest recipes can have pitfalls. Being aware of these common mistakes will help you achieve flawlessly creamy and crack-free pumpkin cheesecake bars every time.
- Over-Mixing the Batter: This is arguably the most frequent error in cheesecake making. Beating the batter too vigorously or for too long, especially after adding the eggs, incorporates too much air. This excess air expands during baking, then collapses upon cooling, often leading to unsightly cracks on the surface of your cheesecake. Mix just until combined for a dense, smooth texture.
- Not Cooling Properly: Impatience can ruin your beautiful bars! Cutting into the cheesecake while it’s still warm or even slightly warm can cause it to collapse, crumble, and stick to the knife. The structure isn’t fully set until it’s completely cooled to room temperature and then thoroughly chilled in the refrigerator. Always allow ample cooling and chilling time for perfectly firm and sliceable bars.
- Using the Wrong Pumpkin Product: A common mix-up is grabbing pumpkin pie filling instead of pure pumpkin puree. Pumpkin pie filling is already pre-spiced and sweetened, which will throw off the delicate balance of flavors in this recipe. Always double-check the can to ensure you are using 100% pure pumpkin puree for that authentic pumpkin taste.
- Incorrect Oven Temperature and Frequent Opening: Consistency is key in baking. Not preheating your oven to the correct temperature means the cheesecake won’t bake evenly. Similarly, opening the oven door frequently allows heat to escape and causes sudden temperature drops, which can lead to cracks and uneven cooking. Resist the urge to peek until absolutely necessary!
Frequently Asked Questions About Pumpkin Cheesecake Bars
For those who prefer to skim or have specific questions, here are quick answers to some commonly asked questions about making these delightful pumpkin cheesecake bars.
- Can I use homemade pumpkin puree? Absolutely! Homemade pumpkin puree works wonderfully. Just ensure it is very well-drained and concentrated, similar in consistency to canned pumpkin puree, to prevent adding excess moisture to the cheesecake batter.
- What’s the best way to store leftovers? The best way to store leftover pumpkin cheesecake bars is in an airtight container in the refrigerator. This will keep them fresh, moist, and delicious for up to 3 days.
- Can I freeze these bars? Yes, you can! Once fully cooled, cut the bars into slices. Place them in a single layer in a freezer-safe container, separated by parchment paper, or wrap individually in plastic wrap and then foil. They can be frozen for up to 3 months. Thaw in the refrigerator or at room temperature before serving.
- Why did my cheesecake bars crack on top? Cracks are typically caused by over-mixing the batter (which incorporates too much air) or by sudden temperature changes during baking or cooling. While cracks might affect the appearance, rest assured they won’t impact the delicious taste!
- Can I use a different type of crust than graham crackers? Certainly! You can get creative with your crust. Oreo crumbs make a fantastic chocolatey base, while crushed gingersnap cookies add a spicy kick. Gluten-free graham crackers or even Biscoff cookies also work exceptionally well for a delicious twist.
- Is there a dairy-free alternative for this recipe? While the recipe is designed with dairy, you can explore dairy-free options. Using plant-based cream cheese alternatives and coconut cream (the thick part from a can of full-fat coconut milk, chilled overnight) as replacements can work. However, be aware that these substitutions might slightly alter the taste and texture of the finished bars.
Final Notes, Pro Tips, and Science-Based Secrets for Cheesecake Perfection
Unlock the full potential of your Pumpkin Cheesecake Bars with these expert tips and insights, ensuring every batch you make is nothing short of magnificent.
- Importance of Room Temperature Ingredients for a Smooth Batter: This is a fundamental rule for cheesecake. Ingredients like cream cheese and eggs, when at room temperature, emulsify much more easily and thoroughly with other ingredients. This results in a silky-smooth batter with no lumps, which is essential for that signature creamy cheesecake texture. Cold ingredients will lead to a lumpy batter and a less uniform final product.
- Always Opt for 100% Pure Pumpkin Puree: As mentioned, this distinction is critical. Pure pumpkin puree is simply cooked and mashed pumpkin, offering a natural, earthy flavor. Pumpkin pie filling, on the other hand, is a pre-mixed product with added sugar, spices, and sometimes dairy, which will disrupt the intended flavor profile and sweetness balance of this recipe.
- Avoid Overmixing – Especially After Adding Eggs: This “science-based secret” is vital for preventing cracks. When eggs are beaten vigorously, their proteins create a strong network that traps air. During baking, this trapped air expands, causing the cheesecake to puff up. As it cools, the air escapes, and the structure can contract too much, leading to cracks. Mix just until the eggs are incorporated, and then stop!
- How to Test for Doneness Without Overbaking: Knowing when your cheesecake bars are perfectly baked is a skill. The visual cue is key: the edges should appear set and slightly puffed, while the very center of the bars should still have a slight jiggle when you gently shake the pan. This slight wobble indicates that the center will finish cooking and set as it cools, resulting in that ideal creamy consistency.
- Gradual Cooling is Key to Preventing Cracks: Just like avoiding overmixing, a slow and gradual cooling process is paramount for preventing surface cracks. After removing from the oven, allow the bars to cool completely to room temperature on a wire rack. This allows the cheesecake to slowly adjust to the ambient temperature. Only then should you transfer them to the refrigerator to chill thoroughly, which further sets the structure without thermal shock.
Other Delectable Pumpkin Recipes You’ll Love:
- Indulge in this super-moist, incredibly soft Pumpkin Bread recipe for a cozy breakfast or delightful snack.
- Start your day right with my favorite tender and flavorful Pumpkin Zucchini Muffin recipe.
- Discover the joy of these super soft and wonderfully chewy Pumpkin Cookies, perfect for any occasion.
- Warm your soul with a hearty bowl of Pumpkin and Rice Soup, an ideal comforting dinner.
- I truly adore this rich and creamy Pumpkin Pasta Sauce recipe, a unique twist on pasta night!
If you’re a true enthusiast of all things pumpkin, be sure to head over to my full collection of pumpkin recipes for endless inspiration. And for more creamy delights, explore my other irresistible cheesecake recipes, too!
Pumpkin Cheesecake Bars (Easy Recipe!)
By: Jennifer Pallian BSc, RD
Creamy, beautifully swirled Pumpkin Cheesecake Bars set on an easy, buttery 2-ingredient graham cracker crust. Quick to make, stunning to look at, and incredibly tasty!
Prep Time: 20 minutes
Cook Time: 30 minutes
Servings: 12
Ingredients
For the graham cracker crust:
- 2 cups graham cracker crumbs (see notes)
- ⅓ cup melted butter
For the cheesecake filling:
- 8 oz full-fat cream cheese, softened
- ½ cup sour cream
- ½ cup + 3 tbsp granulated sugar, divided use
- 2 large eggs, at room temperature
- ½ tsp pure vanilla extract or vanilla bean paste
- 1 cup pumpkin puree (100% pure, not pie filling, see notes)
- 1 tbsp pumpkin pie spice (see notes for substitution)
Instructions
To make crust:
- Preheat oven to 350°F (175°C). Prepare a 9x9x2” square baking pan by lining it with parchment paper, leaving an overhang on two sides, or buttering generously.
- In a large bowl, stir together graham cracker crumbs and melted butter until evenly moistened. Press firmly and evenly into the prepared baking pan. Bake for 12 minutes. Keep oven temperature at 350°F (175°C).
To make cheesecake:
- In the large bowl of a standing mixer (or with a hand mixer), beat together softened cream cheese and sour cream until smooth. Add ½ cup sugar and beat until light and fluffy.
- Beat in eggs, one at a time, until just combined. Mix in vanilla extract. Remove 1 cup of this plain cheesecake batter and set aside.
- To the remaining batter in the bowl, add pumpkin puree, the remaining 3 tablespoons of sugar, and pumpkin pie spice. Beat on low speed until well combined.
- Drop spoonfuls of cheesecake batter onto the pre-baked crust, alternating between the plain (vanilla) and pumpkin batters. Gently swirl with a knife or skewer to create a marbled effect.
- Bake in the center of the preheated oven for 20-25 minutes, or until the edges are set and slightly puffed, and the center has a slight jiggle.
- Cool completely on a wire rack to room temperature before cutting into 12 slices. For best results, refrigerate for at least 3-4 hours, or preferably overnight, before slicing. Store leftovers in the refrigerator for up to 3 days.
Notes
- Make sure to use 100% pure pumpkin puree, not pumpkin pie filling.
- If you don’t have pumpkin pie spice, you can easily make your own blend: use 1 ½ tsp ground cinnamon, ¼ tsp ground ginger, ¼ tsp ground nutmeg, and a pinch of ground cloves.
- If using whole graham crackers, you’ll need approximately 28 square crackers or 14 double-sized crackers. Crush them finely in a food processor or by hand using a rolling pin.
- For clean, perfect slices, use a sharp knife and wipe it clean with a warm, damp cloth between each cut.
Nutrition (Approximate per serving)
Calories: 178kcal | Carbohydrates: 22g | Protein: 2g | Fat: 9g | Saturated Fat: 5g | Polyunsaturated Fat: 0.5g | Monounsaturated Fat: 3g | Trans Fat: 0.2g | Cholesterol: 47mg | Sodium: 150mg | Potassium: 95mg | Fiber: 1g | Sugar: 13g | Vitamin A: 3486IU | Vitamin C: 1mg | Calcium: 36mg | Iron: 1mg
Nutrition information is automatically calculated and should only be used as an approximation. It may vary based on specific ingredients and preparation methods.