

How To Make Almond Butter – Your Guide to Creamy, Healthy Homemade Nut Butter
Welcome to the world of homemade goodness! If you’ve ever dreamt of having a versatile, healthy, and incredibly delicious spread readily available, then learning how to make almond butter at home is your next culinary adventure. Forget store-bought versions laden with unwanted sugars and oils; crafting your own means ultimate control over ingredients and an unparalleled freshness that simply can’t be beaten.
Just like its popular cousin, peanut butter, homemade almond butter offers a wholesome alternative that’s surprisingly simple to prepare. Today, we’re diving deep into the art and science of transforming humble almonds into a luscious, smooth butter that will become a staple in your pantry. Get ready to elevate your breakfast, snacks, and even your baking with this nutritious and flavorful creation!
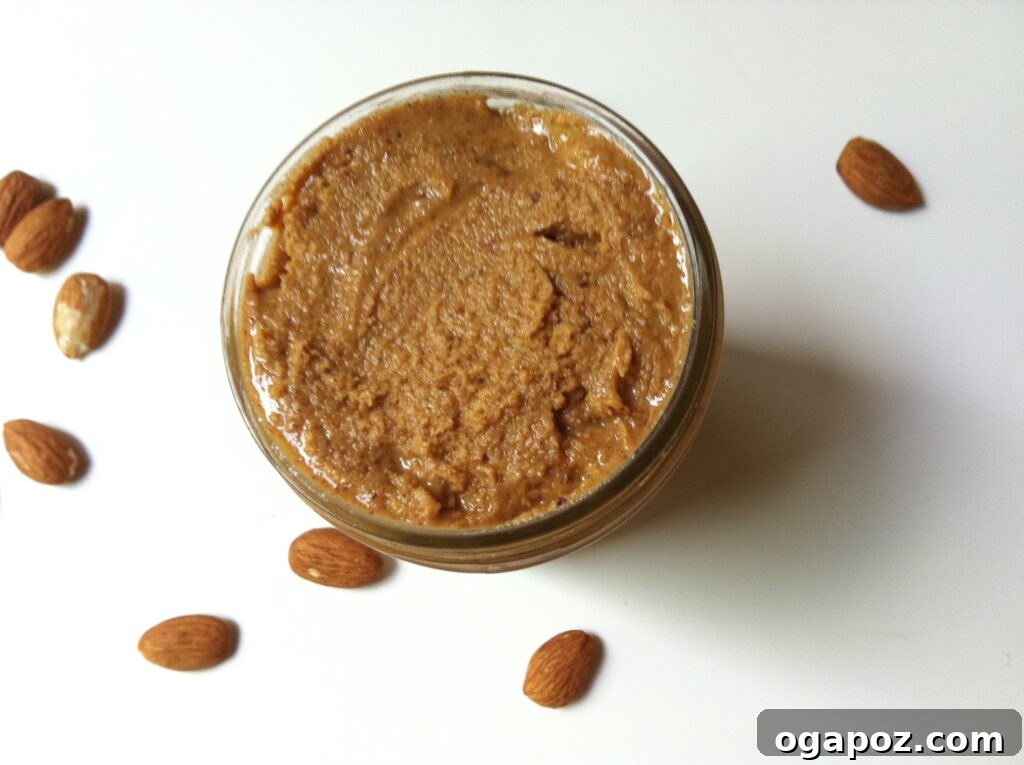
Why Make Your Own Almond Butter at Home?
The appeal of homemade almond butter goes far beyond just taste. Here are compelling reasons why you should consider making this healthy spread yourself:
- Ingredient Control: When you make almond butter at home, you know exactly what goes into it. No hidden sugars, unhealthy oils, or preservatives that are often found in commercial brands. This is crucial for anyone monitoring their diet or avoiding certain additives.
- Superior Freshness & Flavor: Store-bought nut butters can sit on shelves for months. Yours will be fresh, preserving the natural oils and distinct nutty flavor of the almonds, resulting in a much richer and more vibrant taste.
- Cost-Effective: While high-quality almonds can be an investment, making your own butter often proves more economical than regularly purchasing premium almond butter from the store, especially if you buy almonds in bulk.
- Dietary Customization: Whether you prefer a touch of sweetness, a hint of salt, or unique spice blends, you have the freedom to customize your almond butter to suit your personal preferences and dietary needs.
- Health Benefits: Almonds are nutritional powerhouses, packed with healthy monounsaturated fats, protein, fiber, Vitamin E, magnesium, and antioxidants. Enjoying them in butter form makes it easy to incorporate these benefits into your daily diet.
The Simple Art of Making Homemade Almond Butter
You might remember our guide on how to make homemade peanut butter, and the process for almond butter is remarkably similar. The key ingredient, of course, is patience, as almonds take a bit longer to release their natural oils compared to peanuts. But rest assured, the delicious outcome is well worth every minute!
What You’ll Need: Ingredients & Equipment
Making almond butter requires minimal ingredients and just one essential piece of equipment:
Ingredients:
- 2 cups (approximately 280-300g) of Almonds: You have options here!
- Dry Roasted, Unsalted: This is what we used and it provides a deep, nutty flavor right from the start. Many brands offer this.
- Raw Almonds: If using raw, consider toasting them yourself for 10-15 minutes at 350°F (175°C) to enhance their flavor and make the oil extraction process easier. Let them cool completely before processing.
- Blanched Almonds: These have their skins removed, resulting in an even creamier, lighter-colored butter.
- Optional: A pinch of sea salt: To taste, enhances the nutty flavor.
- Optional: A drizzle of neutral oil (e.g., grapeseed, avocado, or melted coconut oil): Only if your almonds are stubbornly refusing to become smooth, or if you prefer a thinner consistency.
Equipment:
- High-Powered Food Processor: This is non-negotiable. A sturdy food processor with a strong motor is essential for breaking down the almonds and achieving that signature creamy texture. A blender typically isn’t powerful enough unless it’s a very high-speed professional model.
- Rubber Spatula: For scraping down the sides of the food processor bowl.
- Airtight Jar or Container: For storing your freshly made almond butter.
Step-by-Step Guide to Making Perfect Almond Butter
Follow these stages closely, and remember, patience is your secret ingredient!
-
Prepare Your Almonds: Measure out your 2 cups of almonds. If you’re using raw almonds, spread them on a baking sheet and toast them in a preheated oven at 350°F (175°C) for 10-15 minutes, stirring once, until fragrant and lightly golden. Allow them to cool completely before proceeding. If using pre-roasted almonds, you can skip this step.

-
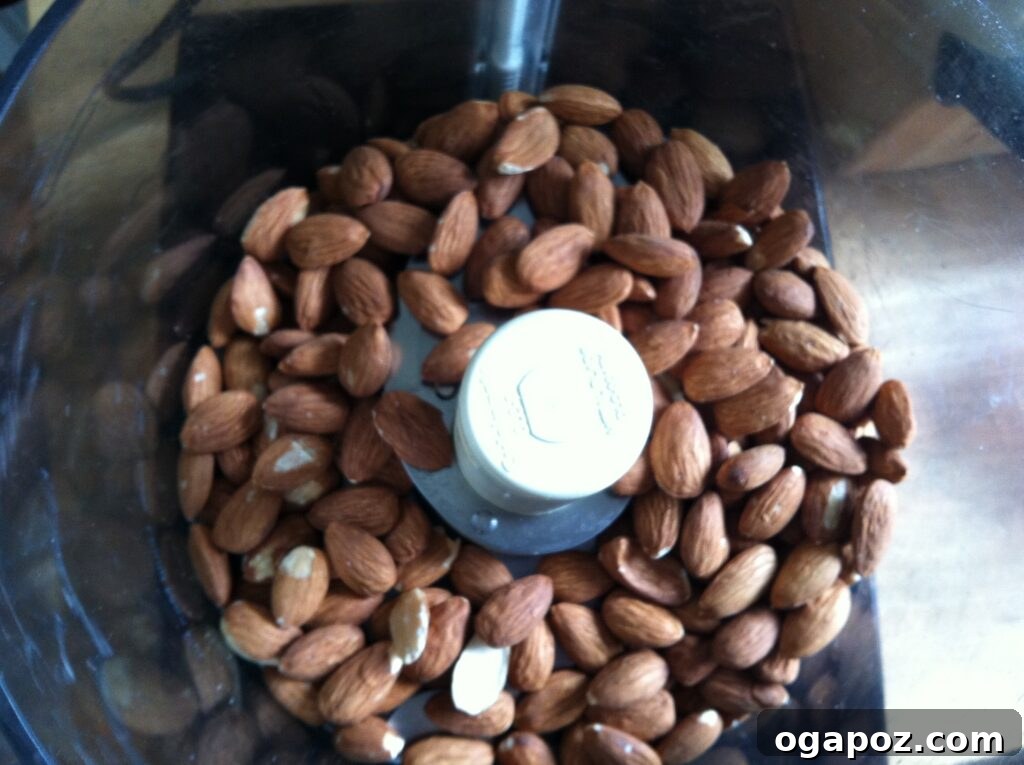
Start Processing: Place the almonds into the bowl of your high-powered food processor. Secure the lid and start processing on high. Initially, you’ll see the almonds breaking down into a coarse flour or meal.
-
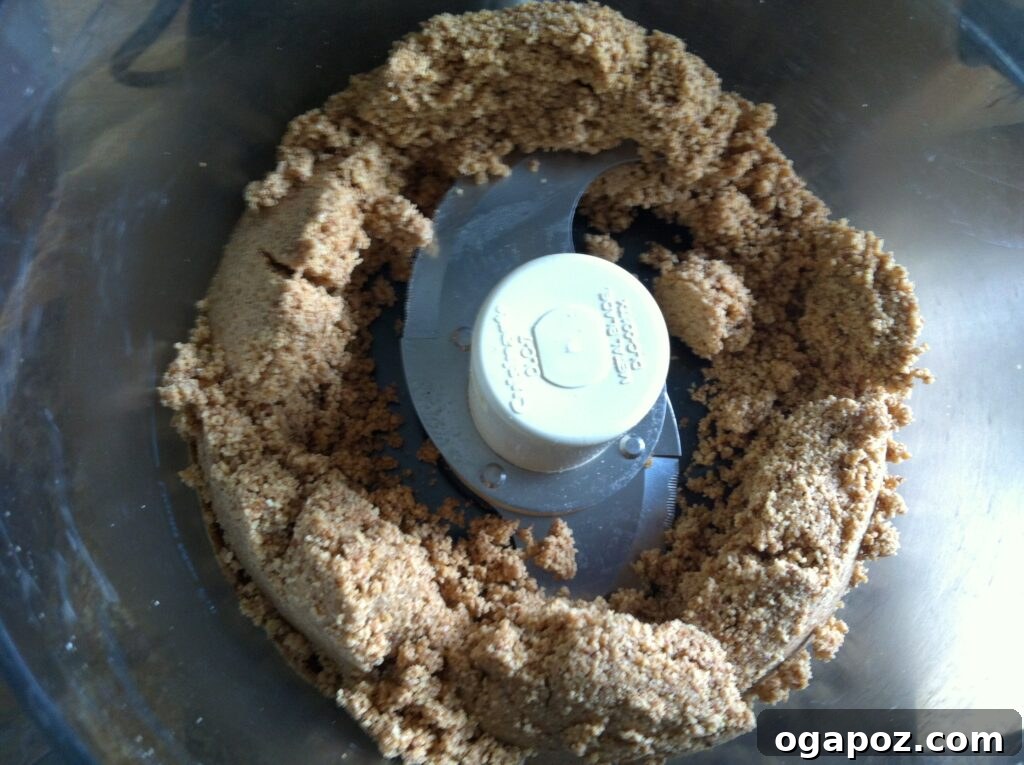
Transforming to a Fine Mixture: Continue to process. The almond flour will eventually clump together and form a fine mixture, almost like a thick paste. This stage might remind you of the texture when processing nuts for recipes like baklava or energy balls.
-
Scrape and Continue: As the processing continues, the mixture will become thicker and begin to cling to the sides of the food processor bowl. This is normal. Turn off the food processor every 1-2 minutes and use a rubber spatula to scrape down the sides, pushing the almond mixture back towards the blades. This ensures even processing and prevents the motor from overheating.
-
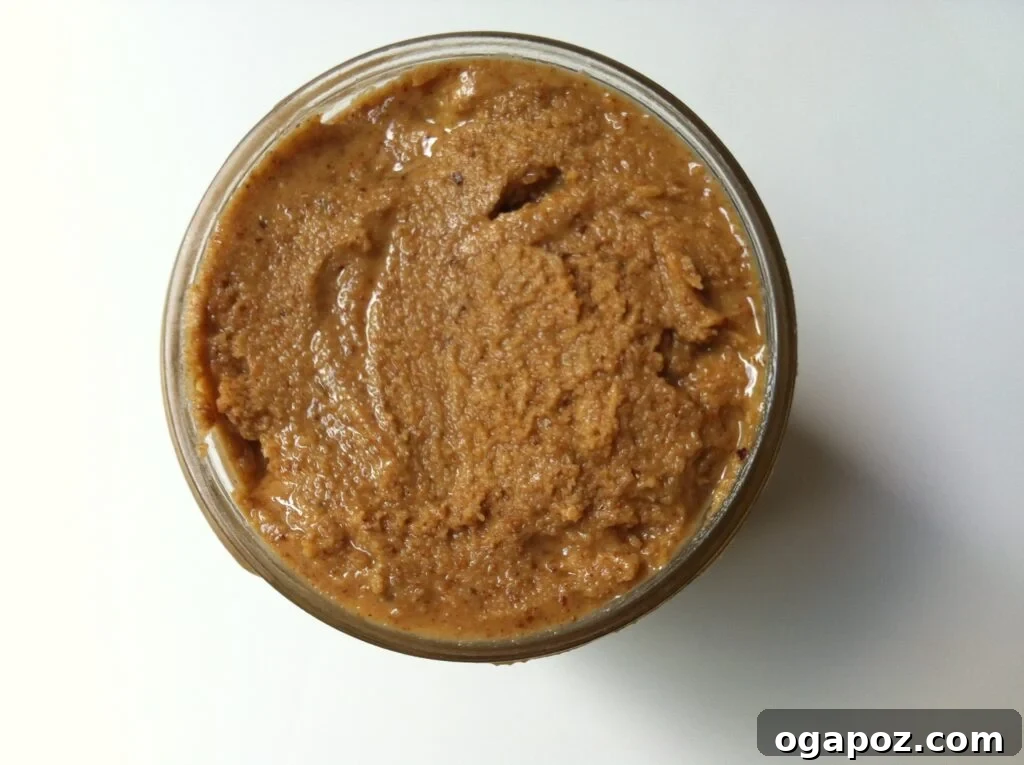
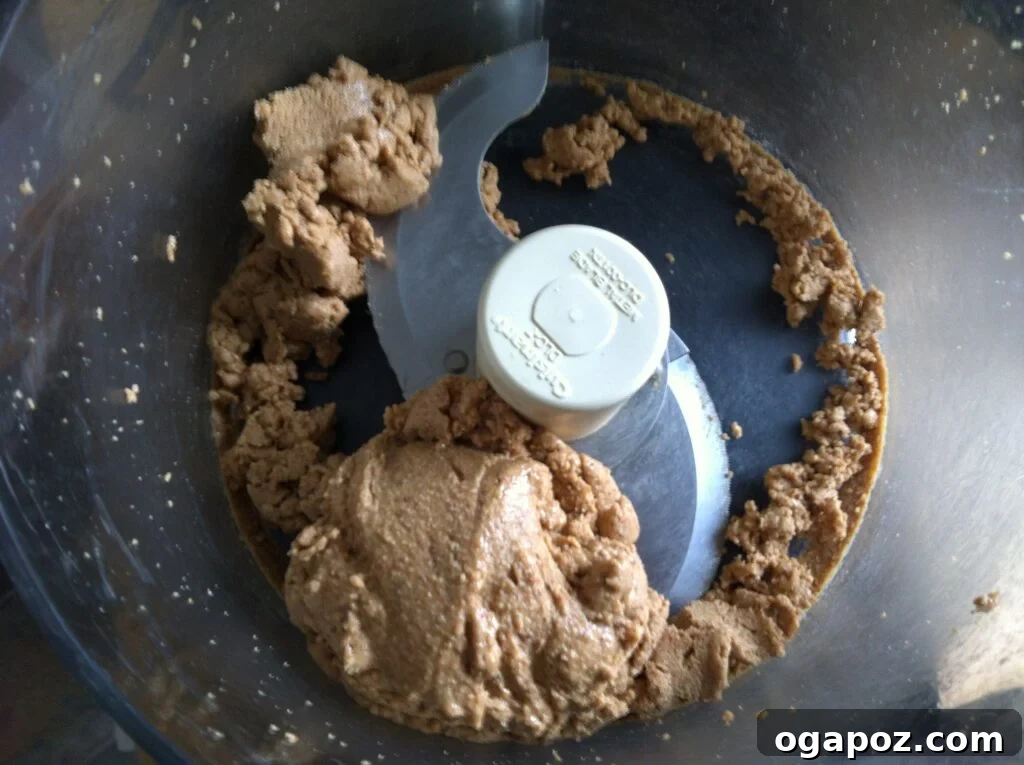
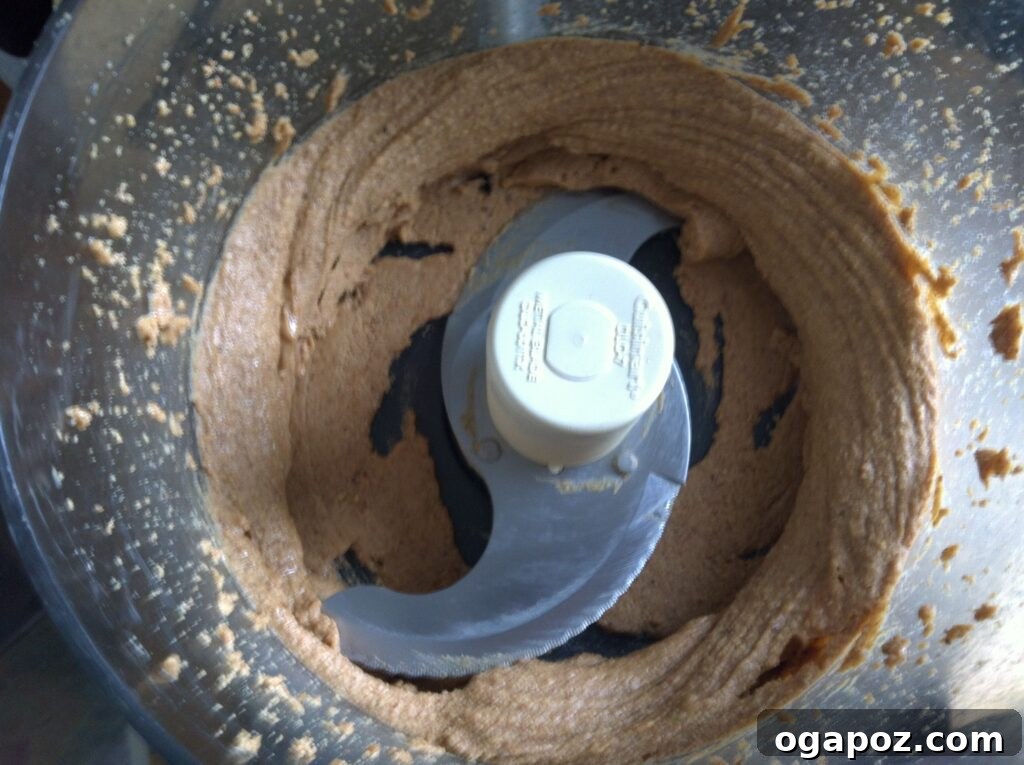
The “Butter” Stage: Keep processing! You’ll notice a distinct change in texture. The mixture will become sticky and clumpy, then transition into a thick, wet paste as the natural oils from the almonds are released. Finally, after a total processing time of typically 8-15 minutes (depending on your food processor), it will magically transform into a wonderfully smooth, creamy, and buttery liquid. It might look thin when warm, but it will thicken upon cooling.
-
Season and Final Mix: Once your almond butter reaches your desired smooth consistency, taste a small amount. If desired, add a pinch of sea salt and process for another 15-30 seconds to fully incorporate it. If you prefer a thinner consistency, or if your almonds are particularly dry, you can add a teaspoon of neutral oil and process briefly until smooth.
Tips for Perfect Homemade Almond Butter
- Patience is Key: Don’t rush the process. It truly takes time for the almonds to release their oils. Stop-and-go processing and scraping are crucial.
- Avoid Overheating: If your food processor starts to get very warm, give it a 5-10 minute break to cool down before continuing. This protects your machine and prevents the nuts from burning.
- Toasting for Flavor: While optional, lightly toasting raw almonds significantly enhances their nutty flavor and makes them easier to process due to the warmth releasing oils more readily.
- Adjust Consistency: If your butter is too thick, a tiny bit of neutral oil (like grapeseed or avocado) can help thin it out. If it’s too thin, it’s usually because it’s still warm; it will thicken as it cools.
- Sweeteners: For a touch of sweetness, add a teaspoon of honey, maple syrup, or a pitted Medjool date along with the salt during the final processing stage.
Customization and Flavor Variations
One of the best parts about making your own almond butter is the freedom to get creative with flavors!
- Sweet Almond Butter: Incorporate sweeteners like a swirl of honey, maple syrup, or a few drops of vanilla extract during the final blend.
- Spiced Almond Butter: Add a dash of cinnamon, nutmeg, pumpkin pie spice, or even a pinch of cardamom for an aromatic twist.
- Chocolate Almond Butter: Blend in a tablespoon or two of unsweetened cocoa powder and a touch of sweetener for a decadent spread.
- Crunchy Almond Butter: Once your butter is smooth, add a handful of finely chopped roasted almonds back into the processor and pulse a few times to achieve a delightful crunchy texture.
Delicious Ways to Enjoy Your Homemade Almond Butter
Now that you’ve got a jar of this golden goodness, the possibilities are endless!
- Classic Spreads: On toast, crackers, rice cakes, or English muffins.
- Fruit Pairings: Especially delicious with apple slices, banana, or pear. The sweetness of the fruit perfectly complements the rich almond flavor.
- Breakfast Boost: Swirl it into your oatmeal, yogurt, smoothies, or spread it on pancakes and waffles for an extra protein and healthy fat kick.
- Baking & Desserts: Use it as a base for energy balls, homemade granola bars, almond butter cookies, or as a healthier frosting alternative.
- Savory Uses: Believe it or not, almond butter can also work in savory applications! Think of it in salad dressings, stir-fry sauces, or even as a dip for veggies.
Remember, if you plan to add honey or any liquid sweetener, it’s often best to add it to the portion you’re about to use, rather than the entire batch, as it can reduce the overall shelf life of the stored butter.
Storing Your Homemade Almond Butter
Proper storage ensures your homemade almond butter stays fresh and delicious for as long as possible:
- Airtight Container: Transfer your freshly made almond butter into a clean, airtight glass jar or container.
- Refrigeration: Store it in the refrigerator. The cold temperature helps to prevent the oils from going rancid and maintains freshness.
- Shelf Life: Homemade almond butter typically lasts for 2-3 weeks in the refrigerator. While it can sometimes last longer, always trust your senses – if it smells or tastes off, it’s time to discard it.
- Separation: Just like natural store-bought brands, oil separation is normal. Simply give it a good stir before each use to re-incorporate the oils.
Embrace the Goodness of Homemade!
Making your own almond butter is a truly rewarding experience. It’s a simple process that yields a superior product, putting you in control of your nutrition and satisfying your cravings for wholesome, delicious food. Once you taste the difference that fresh, homemade almond butter makes, you’ll find it hard to go back to store-bought!
So, gather your almonds, fire up that food processor, and embark on this delightful journey. You’ll be amazed at how easy it is to have a healthy, tasty snack always on hand. Enjoy every creamy spoonful!