
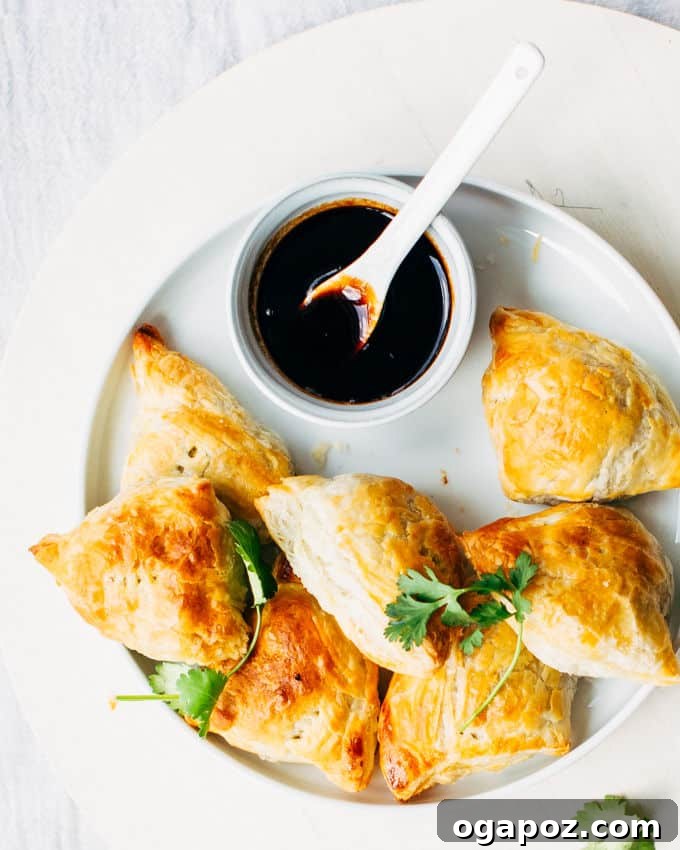
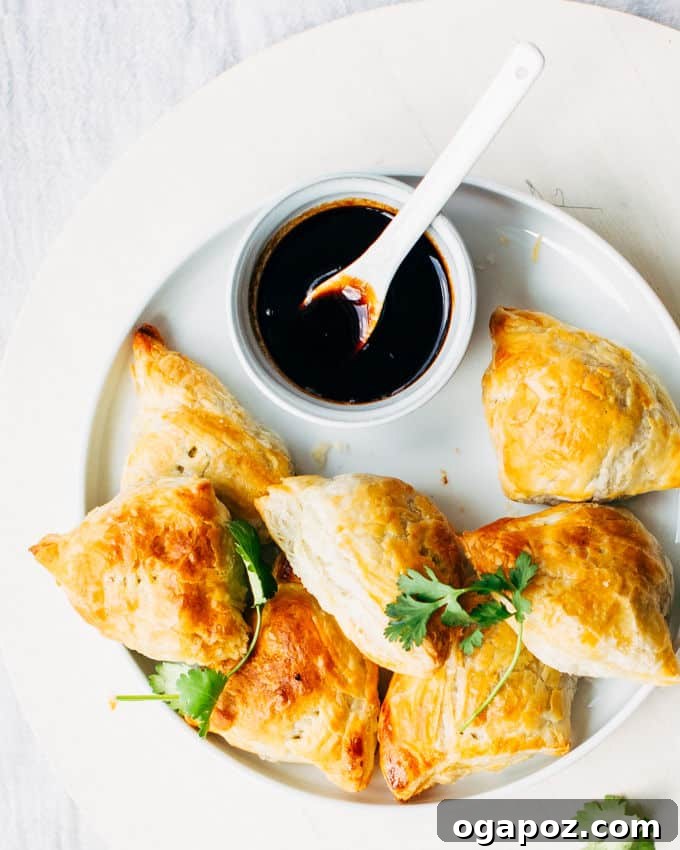
Effortless Flaky Samosas: Your Ultimate Puff Pastry Shortcut Recipe
There’s a unique joy that comes with a warm, perfectly spiced samosa. On countless weekends, my family and I have embarked on a cherished tradition: a drive to the bustling Punjabi market. Our grumbling tummies anticipating the moment we’d tear open those oil-spotted paper bags. A delicious cloud of steam, rich with the heady aroma of cumin, buttery potatoes, and crisp fried pastry, would waft out, instantly making our mouths water. We’d greedily devour them right there in the car, flaky bits scattering everywhere, sticky tamarind chutney dripping down our chins – pure bliss.
Samosas aren’t just one of my absolute favorite snacks; the entire excursion is a highlight of any rainy Saturday. That irresistible combination of savory potato and pea filling encased in a beautifully crisp shell is simply addictive. But let’s be honest, while the experience of eating traditional samosas is magical, the process of making them from scratch can be quite an endeavor.
The Samosa Dilemma: Traditional vs. Time-Saving Homemade Samosas
Traditionally, crafting these delicious little parcels involves making a finicky dough from scratch, rolling it out perfectly, shaping it just so, and then deep-frying each one to golden perfection. While undeniably authentic and delicious, this lengthy process often deters home cooks from attempting samosas at home. The time commitment, the potential for a less-than-perfect pastry, and the mess of deep-frying can feel overwhelming for a casual weekend project or a quick weeknight appetizer. Many aspiring home chefs shy away from making Indian snacks due to the perceived complexity of the pastry, making store-bought options a frequent compromise.
But what if there was a way to capture all that incredible flavor and irresistible flakiness without the fuss? What if you could enjoy a homemade samosa that tastes truly authentic yet comes together with remarkable ease? Today, we’re taking an awesome shortcut that will change your homemade samosa game forever: we’re using store-bought puff pastry!
Puff Pastry: Your Secret Weapon for Quick & Easy Baked Samosas
I’m incredibly excited to share this innovative approach to homemade samosas. Honestly, I can’t believe I hadn’t thought of puff pastry samosas sooner! This brilliant shortcut eliminates the most time-consuming and challenging aspects of samosa making, allowing you to enjoy these beloved Indian delicacies with minimal effort and maximum satisfaction. The beauty of puff pastry is its inherent flakiness, achieved through layers of butter and dough, which mirrors the desired texture of a traditional samosa wrapper but without any of the laborious kneading or delicate handling.
Puff pastry is a true hero in my freezer. It’s my go-to for quick appetizers (like an easy Squash, Roasted Garlic and Goat Cheese Tart), a favorite dinner pie, or an almost-effortless, stress-free dessert (these insanely-yummy Cherry-Cheese Turnovers with almond icing are always a hit!). The versatility of frozen puff pastry lies in its ability to transform simple ingredients into impressive and delicious dishes. It eliminates the time-consuming process and uncertainty involved in making pastry from scratch, ensuring perfectly flaky results every single time. It’s an indispensable item that guarantees culinary success, which is why I’m seriously never without it. Using it for samosas means you get that satisfying crunch and delicate layers without the stress of deep-frying, making these baked samosas a healthier and cleaner alternative.
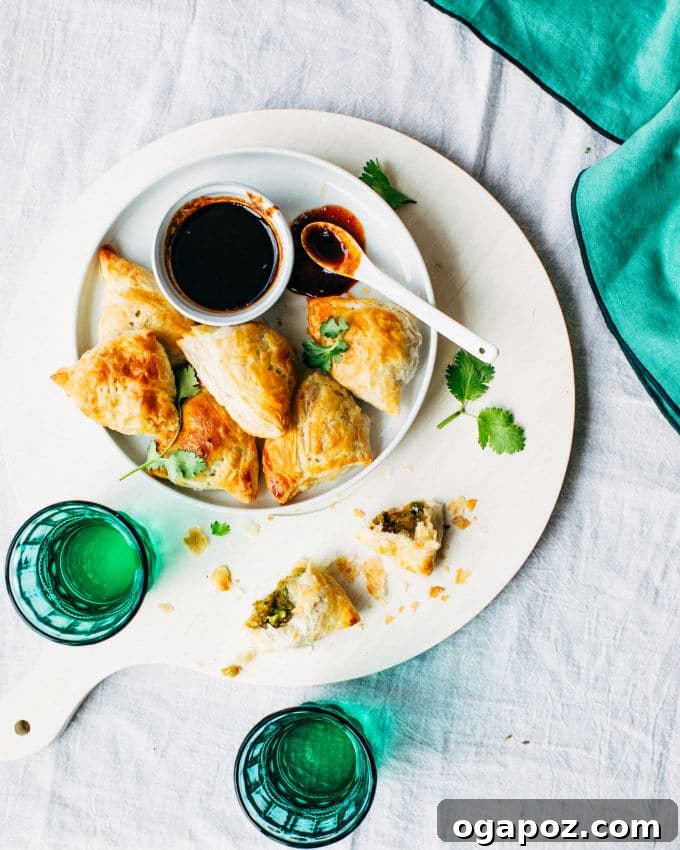
Crafting the Perfect Vegetarian Potato and Pea Filling
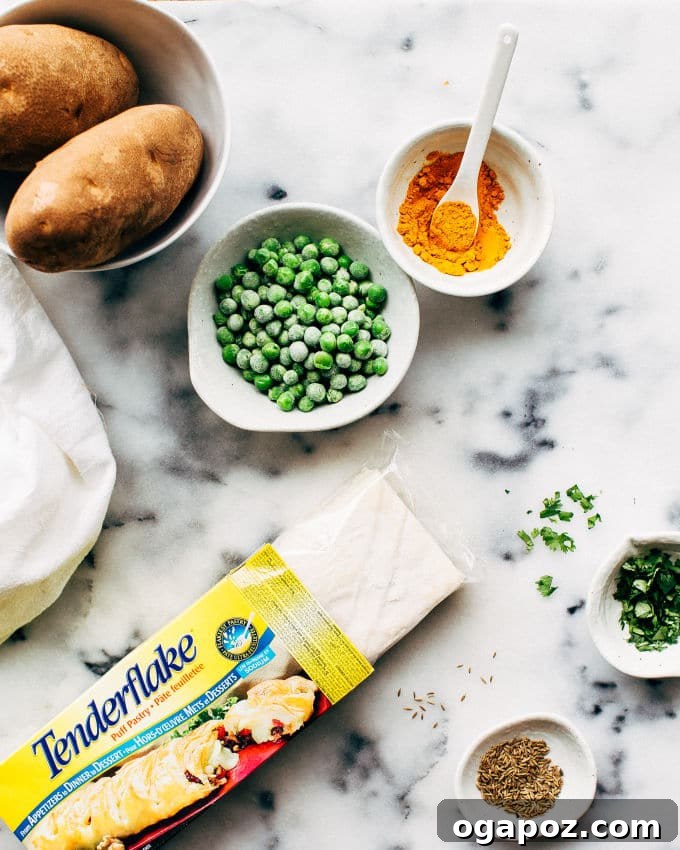
While the puff pastry provides the ultimate shortcut for the crust, the heart of any good samosa is its filling. Our vegetarian potato and pea filling is a symphony of flavors, rich with traditional Indian spices. This recipe guides you through creating a perfectly balanced, aromatic mixture that will complement the flaky pastry beautifully. The combination of tender russet potatoes, naturally sweet green peas, pungent fresh ginger, spicy jalapeño, and a fragrant blend of warm spices like earthy cumin seeds, robust garam masala, vibrant turmeric, and a kick of cayenne pepper creates a truly irresistible experience. The secret lies in gently sautéing the aromatics to unlock their full potential before blending them with the mashed potatoes. This ensures every bite of your homemade samosa is bursting with authentic taste.
This recipe is super easy to follow, but I’ll walk you through each step to ensure your Flaky Shortcut Samosas turn out perfectly golden and delicious, making them a staple in your home cooking repertoire.
Step-by-Step Guide to Baking Flaky Shortcut Samosas
1. Prepare the Puff Pastry and Filling
The first thing on our agenda is to defrost the puff pastry. For optimal results and ease of handling, I recommend thawing it overnight in the refrigerator. However, if time is of the essence, it will typically thaw at room temperature in about 30 minutes. While your pastry is thawing, it’s the perfect opportunity to prepare our star filling. Begin by cooking your russet potato until it’s perfectly tender, then drain it well and coarsely mash it with a fork, leaving some texture for a more satisfying bite. In a separate pan, sauté the finely chopped onion, jalapeño, and grated ginger until they become fragrant and translucent. Then, stir in the vibrant cumin seeds, aromatic garam masala, bright turmeric, a touch of cayenne, and salt. Cook until the spices release their incredible aroma, usually about 30 seconds. Finally, combine this fragrant mixture with the mashed potato, frozen peas, and freshly chopped cilantro. It’s crucial to let this flavorful filling cool completely before you start assembling your samosas – warm filling can make the delicate puff pastry difficult to work with and compromise its flakiness.
2. Roll and Cut the Pastry for Uniform Samosas
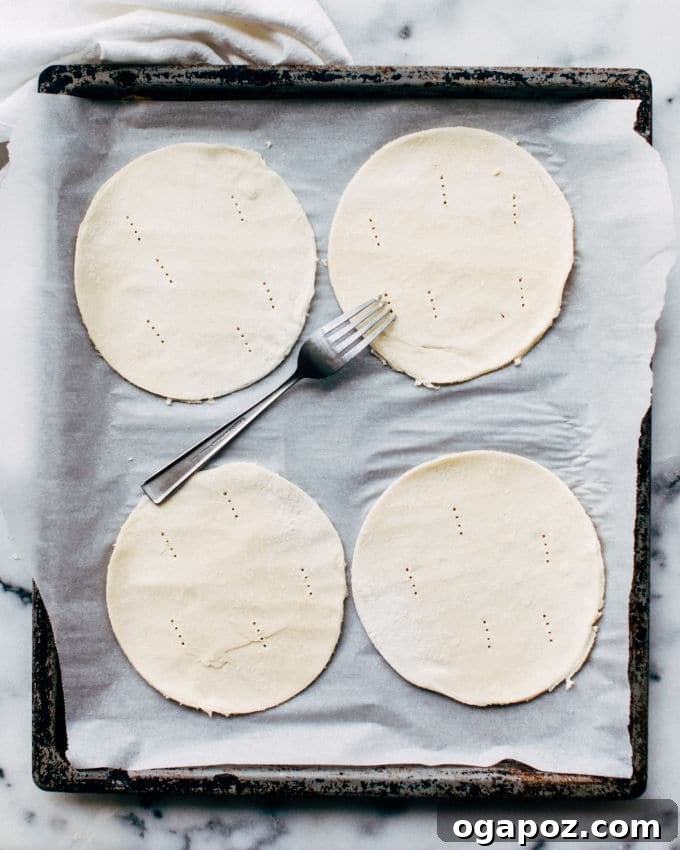
Once your filling is cool and ready, it’s time to get hands-on with the puff pastry. Working with one sheet at a time, gently roll the pastry out on a lightly floured surface into a roughly 13×13 inch square. For consistent shapes and presentation, I find it easiest to use a 6-inch diameter bowl as a template. Simply flip it over and, using a sharp knife, carefully trace around the outside to create four perfect circular pieces from each pastry sheet. Gently transfer these circles to a parchment-lined baking sheet. For best results, place them in the freezer for a few minutes while you repeat this process with the second sheet of puff pastry. Once you’ve made four more circles and placed them on a second baking sheet in the freezer, retrieve your first sheet. Chilling the dough slightly at this stage makes it significantly easier to handle and helps ensure the layers remain distinct, contributing to that irresistible flaky texture after baking.
3. Assemble Your Samosas with Care
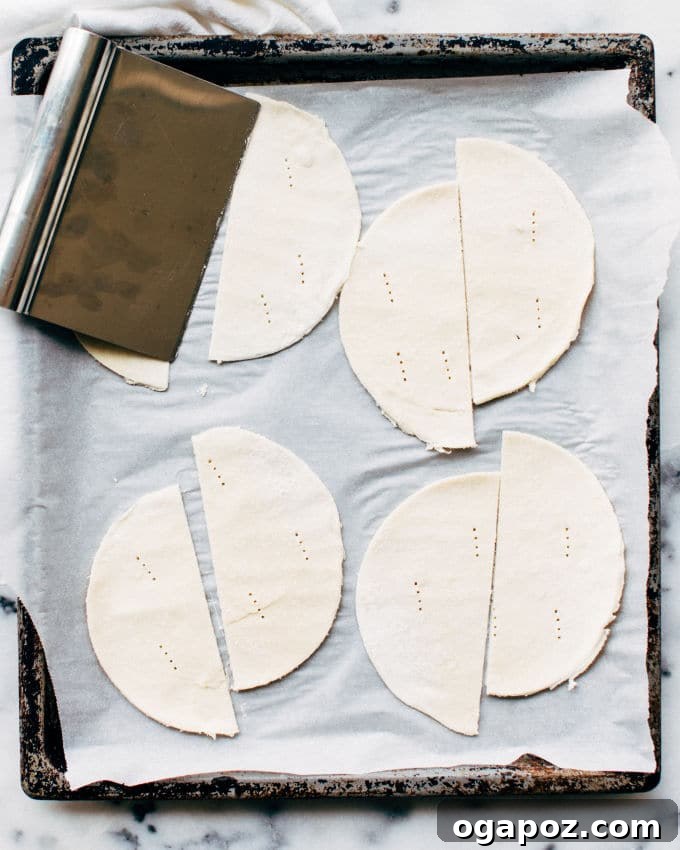
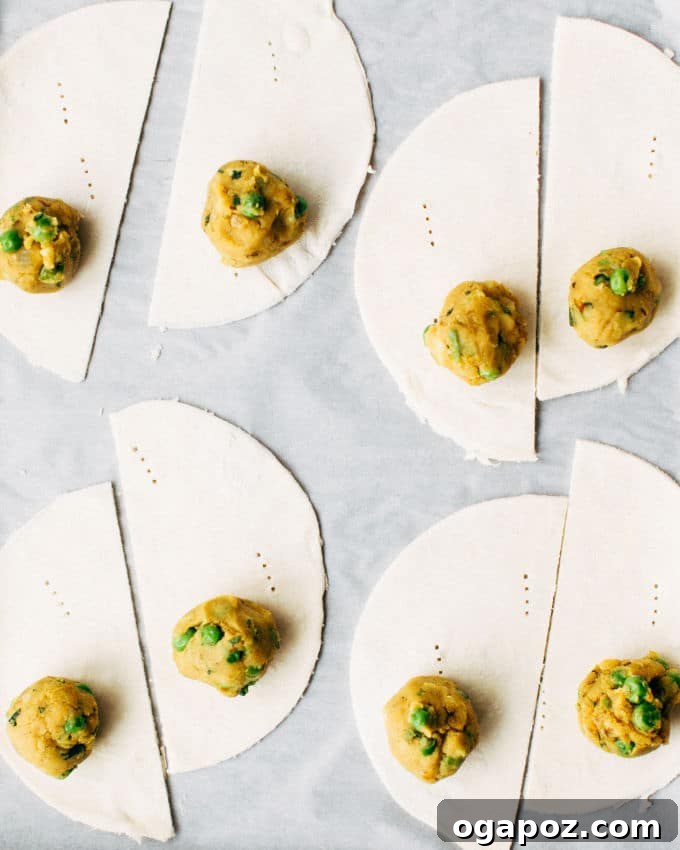
Remove your first chilled pastry sheet from the freezer. Now, using a fork, gently prick each pastry circle several times. This vital step allows steam to escape during baking, preventing excessive puffing in unwanted areas and ensuring an even, beautiful bake. Next, cut each circle precisely in half – a bench scraper works wonderfully for a clean cut, but a sharp knife will also do the trick. Place a generous tablespoon of your cooled potato and pea filling onto the bottom half of each semi-circle. Remember not to overfill, as this can make sealing tricky and potentially cause your samosas to burst during baking. A well-filled but not overflowing samosa is the key to success.
4. Seal and Bake to Golden Perfection
To seal your samosas, lightly brush the straight edges of the pastry with an egg wash (prepared by beating one egg with a tablespoon of water). This acts as a ‘glue,’ ensuring a strong seal. Then, gently fold the top half of the pastry over the filling to meet the bottom edge, forming that classic samosa triangle. Press down firmly all around the edges to ensure a tight, secure seal, which is crucial to prevent the filling from escaping. For an extra decorative touch and an even stronger seal, you can gently crimp the edges with the tines of a fork. As you finish assembling each batch, place them back in the freezer to chill while you work on the remaining pastry. This intermittent chilling helps keep the dough firm and workable. If at any point the dough becomes too soft or difficult to handle, simply pop the entire baking sheet back into the freezer for a few minutes; the cold will quickly firm it up.
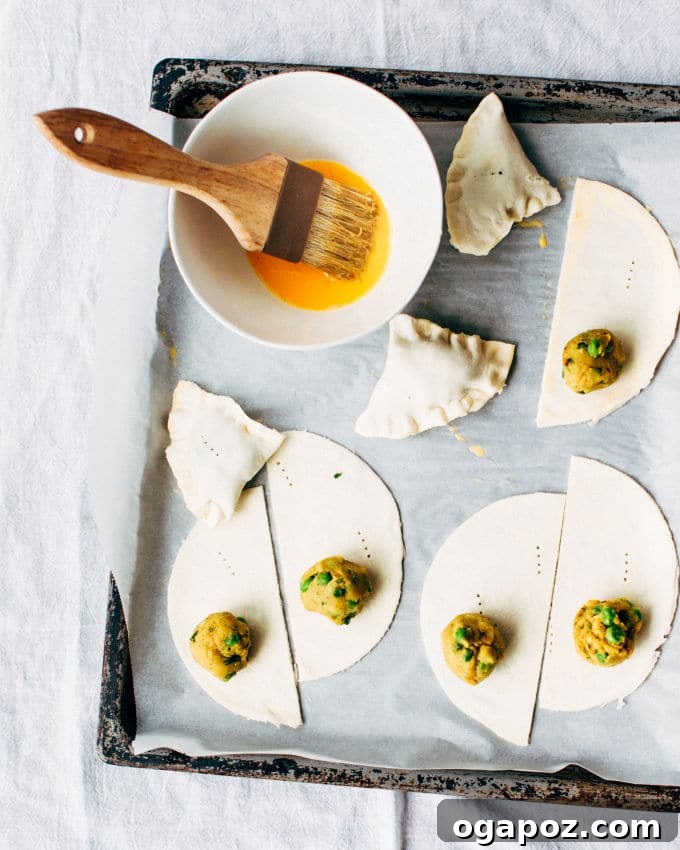
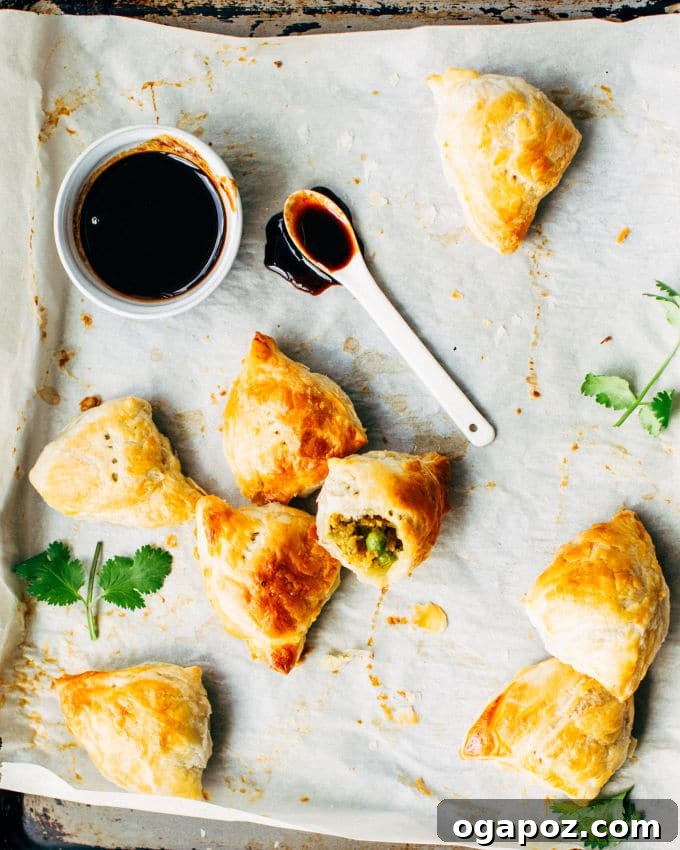
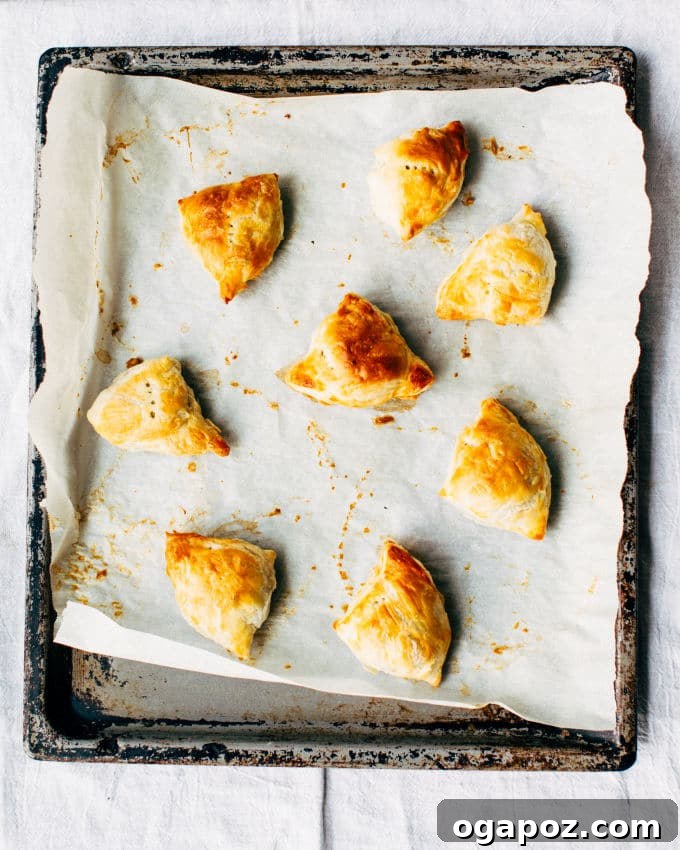
Once all your delicious samosas are filled and sealed, arrange them on a single large parchment-lined baking sheet, ensuring there’s a little space between each one for even baking. Brush them all over with the remaining egg wash – this step is key for achieving that beautiful, golden-brown, flaky crust that everyone loves. Into the preheated oven they go! In just 15 to 20 minutes, depending on your oven, you will have a batch of exquisite, golden, puffed, and wonderfully flaky samosas ready to be devoured.
Serving Suggestions and Customization for Your Flaky Samosas
These baked puff pastry samosas are golden, buttery, incredibly flaky, and light – so light, in fact, that it’s easy to scarf down a dozen straight from the oven! Which, I admit, we have done many, many times. They truly disappear instantly. The delicate layers of the puff pastry, combined with the richly spiced filling, create a mouthwatering contrast that makes them incredibly addictive. If you’re serving a crowd, I highly recommend making a double batch, because these easy samosas will likely vanish in about 15 seconds! Serve them hot with your favorite sticky tamarind chutney or a tangy mango chutney for dipping. For a complete Indian-inspired meal, you could even double down on mango recipes with this delicious Mango Kulfi for dessert, creating a perfectly balanced feast of flavors.
Feel free to customize the filling to your liking and make this shortcut samosa recipe truly your own. Want more heat? Add an extra jalapeño or a pinch more cayenne pepper. Prefer a milder flavor? Simply reduce the spice quantities. You could also experiment with adding other finely diced vegetables such as carrots, corn, or bell peppers for added nutrition and texture. For an even richer filling, consider crumbling in a touch of paneer (Indian cheese). These samosas are incredibly versatile and forgiving, making them a fantastic addition to your culinary repertoire. They also store well; you can freeze unbaked samosas for up to a month and bake them directly from frozen, adding a few extra minutes to the baking time. Reheat baked samosas in a warm oven for a few minutes to restore their crispness.
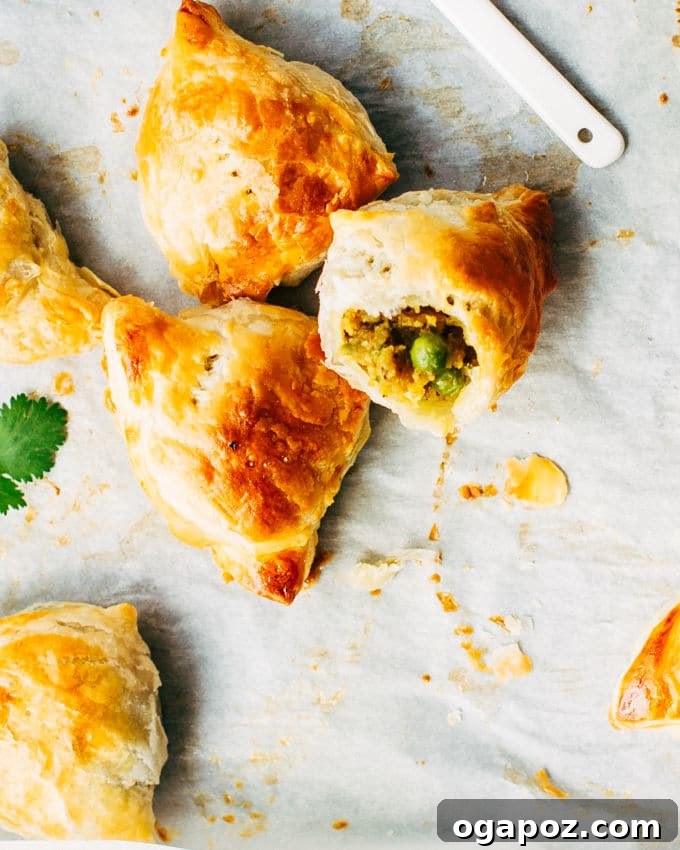
And if you’re absolutely hooked on the idea of easy samosa flavors and want to explore more variations, don’t forget the dinner pie I linked to earlier – it’s actually my famous Samosa Pie, and everyone who tries it absolutely loves it! It’s another innovative way to enjoy those beloved Indian flavors in a comforting, family-friendly format.
This recipe successfully brings the authentic taste of Indian samosas to your kitchen with a fraction of the effort, transforming a once daunting task into a simple pleasure. Whether you’re a seasoned cook looking for a quick fix or a beginner eager to explore Indian cuisine, these Flaky Shortcut Samosas are sure to become a cherished favorite. Enjoy the enticing aroma, the delightful flavor, and the sheer joy of creating something truly special without any of the usual stress.

Print Recipe
Flaky (Shortcut!) Samosas
By: Jennifer Pallian BSc, RD
Quick & easy homemade samosas with a vegetarian spiced potato and pea filling and a secret shortcut flaky crust. They’ll disappear instantly.
Prep Time: 30 minutes
Cook Time: 15 minutes
Total Time: 45 minutes
Servings: 16 samosas
Ingredients
- For the Filling:
- 1 large russet potato (about 1 lb), peeled and chopped
- 3 tbsp butter
- ½ cup finely chopped onion
- 2 tbsp finely chopped jalapeño
- 2 tsp finely grated ginger, packed
- 1 tsp cumin seeds
- 1 tsp garam masala
- ½ tsp turmeric
- ¼ tsp cayenne
- 1 ¼ tsp salt
- ⅓ cup frozen peas
- 2 tbsp finely chopped fresh cilantro
- For the Samosas:
- 1 box Tenderflake puff pastry, thawed (contains 2 sheets)
- 1 egg, beaten with 1 tbsp water (for egg wash)
- Tamarind or mango chutney for serving
Instructions
- Prepare Puff Pastry: Defrost the puff pastry overnight in the refrigerator, or at room temperature for about 30 minutes. Preheat oven to 375ºF (190°C).
- Cook Potato: Cover the chopped potato with 1 inch of water in a medium saucepan. Cook until tender (about 10-15 minutes). Drain well in a colander and coarsely mash it with a fork. Set aside.
- Sauté Aromatics: Return the saucepan to medium heat and melt the butter. Add the finely chopped onion and cook for about 6 minutes, until translucent and just starting to brown.
- Add Spices & Finish Filling: Add the jalapeño and ginger, and cook for another minute. Stir in the cumin seeds, garam masala, turmeric, cayenne, and salt. Cook for about 30 seconds, or until the spices become aromatic. Add the mashed potato, frozen peas, and fresh cilantro; stir until well combined. Transfer the filling to a bowl and refrigerate to cool completely.
- Prepare Pastry Sheets: While the filling cools, line two large baking sheets with parchment paper. Take the first piece of dough from the box and roll it into a square of about 13×13 inches on a lightly floured surface.
- Cut Pastry Circles: Use a bowl that’s about 6 inches in diameter as a template. Flip it over and, using a sharp knife, trace around the outside to make 4 pastry circles. Transfer these circles to one of the prepared baking sheets and place it in the freezer for a few minutes. Repeat this process with the second square of puff pastry dough, making 4 more circles, and transfer them to the second baking sheet, then place it in the freezer. Remove the first sheet from the freezer.
- Prick and Cut: Prick each pastry circle several times with a fork. Then, cut each circle in half (a bench scraper or sharp knife works well). Spoon about 1 tablespoon of the cooled filling onto the bottom half of each half-circle.
- Fold and Seal: Brush the straight edges of each half-circle very lightly with the egg wash. Fold the pastry over the filling to create a triangular samosa shape and press down firmly to seal the edges. For a tighter seal and decorative finish, you can crimp the edges with a fork. Chill the assembled samosas in the freezer while you repeat the filling and sealing process with the second batch of pastry. (If at any point the dough becomes too soft to work with, simply pop the entire baking sheet back into the freezer for a few minutes.)
- Bake Samosas: When all the samosas are filled, sealed, and arranged on a single large parchment-lined baking sheet (you may need to combine from two sheets), brush them all over with the remaining egg wash. Bake for 15-20 minutes, or until they are beautifully puffed and golden brown. Let them cool for about 5 minutes before serving. Serve hot with tamarind or mango chutney for dipping!
Tried this easy samosa recipe? We’d love to hear your thoughts! Leave a comment below!