

Mastering Royal Icing: Your Essential Guide to Beautifully Decorated Cookies

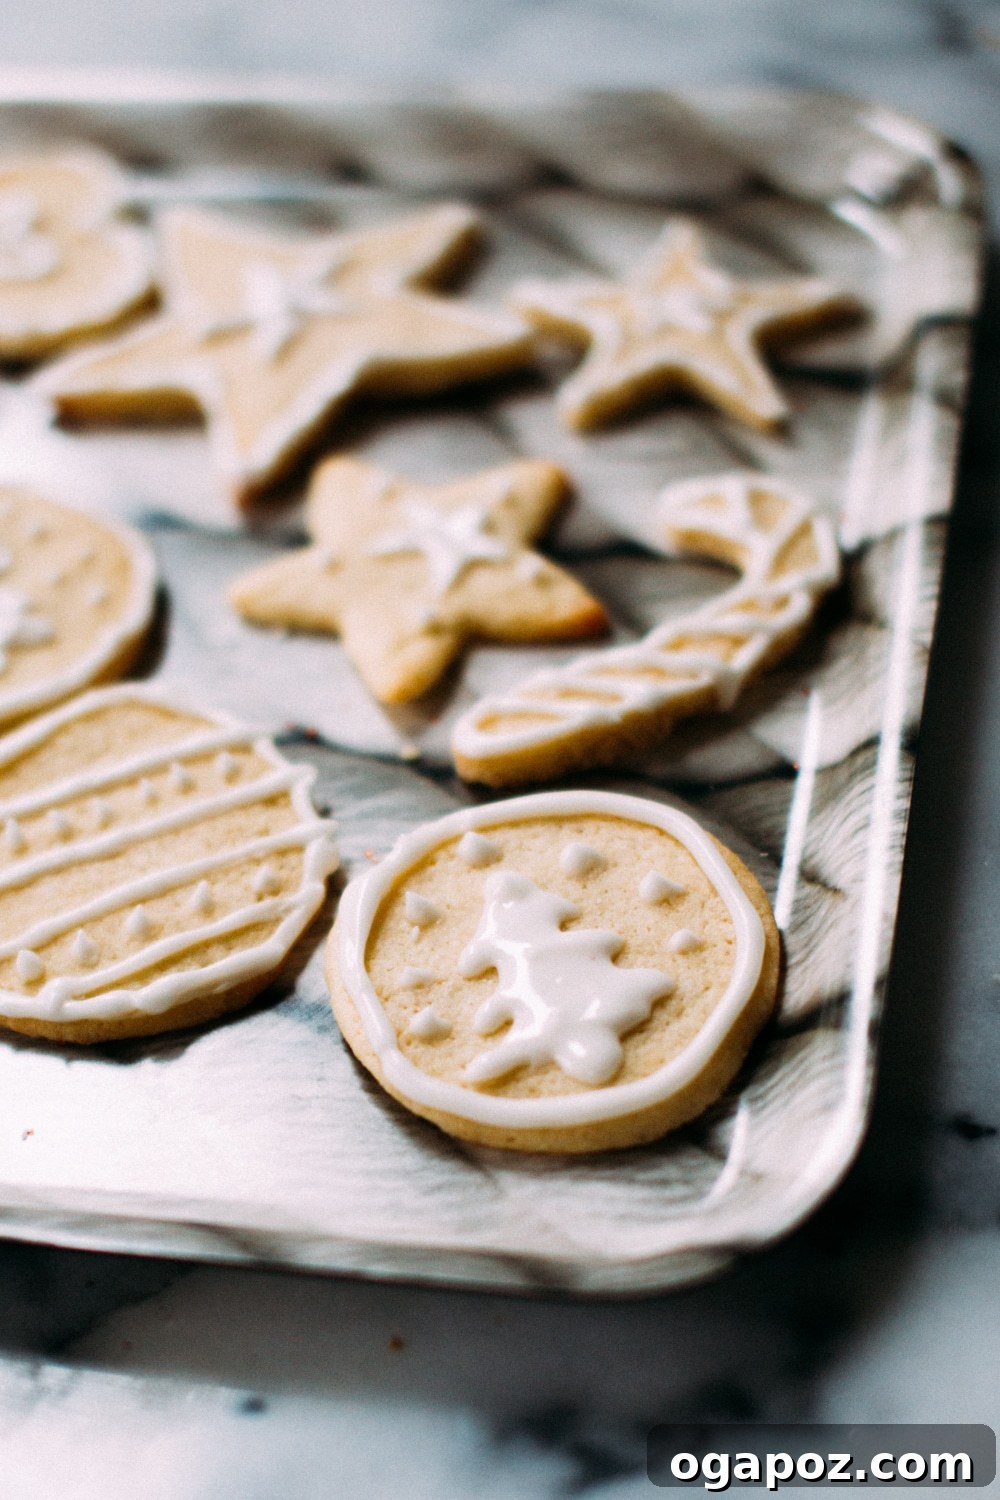
Royal icing stands as a cornerstone in the world of cookie decoration, renowned for its elegant finish and remarkable durability. Whether you’re adorning classic gingerbread men for the holidays or crafting intricate designs on sugar cookies for any occasion, this simple yet versatile icing is an absolute game-changer. It’s incredibly easy to make, requires only a few basic ingredients, and offers a host of benefits that make it superior to many other decorating options.
Unlike butter-based icings, royal icing contains no butter, which means it won’t melt or smudge, even on cookies that aren’t perfectly cooled. This characteristic makes it ideal for stacking, packing, and transporting your beautifully decorated treats without fear of damage. Once dry, royal icing hardens to a virtually indestructible finish, preserving your intricate designs and ensuring your cookies look as good upon arrival as they did when they left your kitchen. Plus, it freezes exceptionally well, allowing you to prepare it in advance and have it ready whenever inspiration strikes.
You don’t need to be a professional pastry chef to achieve stunning results with royal icing. Its forgiving nature and ease of handling make it a joy to work with, even for novice decorators. This comprehensive guide will walk you through everything you need to know, from selecting the right ingredients to mastering various consistencies and decorating techniques, ensuring your cookies always stand out.
The Simplicity of Royal Icing Ingredients
One of the most appealing aspects of royal icing is its minimalistic ingredient list. At its core, you only need two primary components: egg whites and confectioners’ (powdered) sugar. This simplicity means you can whip up a batch quickly with staples you likely already have on hand.
Choosing Your Egg Whites: Safety and Alternatives
For safety and convenience, especially when serving cookies to others, using pasteurized egg whites in a carton is highly recommended. These are readily available in most grocery stores and eliminate any concerns about raw egg consumption. If you prefer to use fresh eggs, ensure they are very fresh and crack them carefully, separating the whites completely from the yolks. A large egg typically yields about ¼ cup of egg white.
Another excellent alternative, particularly if you’re concerned about raw eggs or prefer a shelf-stable option, is meringue powder. Meringue powder is a dried mixture of egg whites, sugar, cornstarch, and sometimes other ingredients. When mixed with water and confectioners’ sugar, it creates a stable and vibrant royal icing. Always follow the manufacturer’s instructions for ratios if using meringue powder, as they can vary slightly.
Confectioners’ Sugar: The Sweet Foundation
Confectioners’ sugar (also known as powdered sugar or icing sugar) is essential for royal icing’s smooth texture and firm set. It’s finely ground with a small amount of cornstarch to prevent caking. For the smoothest possible icing, it’s always a good idea to sift your confectioners’ sugar before mixing. This step removes any lumps, ensuring your icing flows beautifully and prevents clogged piping tips.
Optional Additions: Flavor and Color
- Water: A crucial ingredient for adjusting the consistency of your royal icing, allowing you to transition from stiff piping icing to thinner flooding icing. Always add it gradually, a tablespoon at a time, to achieve the desired texture.
- Food Coloring: While many decorators enjoy the elegant simplicity of all-white designs, food coloring allows for endless creative possibilities. For vibrant, bold hues, gel food coloring is highly recommended over liquid food coloring. Gel colors are concentrated and won’t significantly alter the consistency of your icing, unlike liquid colors which can thin it out. Add color sparingly and mix thoroughly, as the color will often deepen slightly as it sits.
- Flavor Extracts: Enhance the taste of your cookies by adding a dash of flavor to your royal icing. Popular choices include vanilla extract, almond extract, lemon extract, or even peppermint for festive treats. Add a few drops to your mixed icing, ensuring it doesn’t thin the consistency too much.
Essential Tools for Royal Icing Decoration
Having the right tools can make your cookie decorating experience much smoother and more enjoyable. While you can start with basic kitchen items, investing in a few specialized tools will elevate your designs.
- Stand Mixer with Whisk Attachment: This is a game-changer for royal icing. A stand mixer makes quick work of whipping egg whites and sugar, ensuring a smooth, lump-free icing without much effort. A hand mixer can also work but requires a bit more arm power.
- Mixing Bowls and Spatulas: For preparing and storing different colors and consistencies of icing.
- Piping Bags: Disposable piping bags are convenient and hygienic. Reusable silicone bags are also an eco-friendly option.
- Piping Tips: A variety of small round tips (e.g., Wilton #1, #2, #3) are indispensable for outlining and adding fine details. Larger round tips (e.g., #4, #5) can be useful for broader details or quick fills.
- Couplers: These allow you to change piping tips on the same bag without changing the icing.
- Squeeze Bottles: As mentioned, these can be incredibly useful, especially for flooding large areas. The accordion squeeze bottles are great for getting every last drop of icing out. You can often see them in action in posts like this Chewy Gingerbread Cookies recipe.
- Toothpicks or Scribes: Essential for manipulating icing, popping air bubbles, and creating intricate designs like marbling (wet-on-wet technique).
- Small Dishes or Bowls with Damp Cloths: Keep these handy to cover your icing while you work, preventing it from drying out.
I find this set particularly useful for cookie decorating, especially appreciating the accordion squeeze bottles for their efficiency.
Mastering Royal Icing Consistency for Flawless Decoration
Achieving the correct consistency is perhaps the most critical aspect of working with royal icing. Different techniques require different thicknesses, and understanding how to adjust your icing will unlock a world of decorating possibilities. The initial mixture of egg whites and confectioners’ sugar will typically yield a very thick, stiff consistency.
Stiff Consistency (Piping Consistency)
- Appearance: Holds its shape perfectly when piped, with distinct peaks.
- Use: Ideal for outlining cookies, creating intricate details, borders, filigree work, lettering, and building dimensional elements like flowers or small royal icing transfers.
- How to Achieve: This is generally the consistency you get right after mixing the basic ingredients without adding extra water. If it’s too stiff, add a tiny drop of water (literally a drop or two) at a time.
Medium Consistency
- Appearance: A bit thinner than stiff, but still holds its shape. When a spoonful is dropped back into the bowl, it holds its form for a few seconds before slowly melting back into the main batch.
- Use: Good for slightly bolder outlines, simple details, or small filling areas where you want a bit more body than a flooding consistency.
- How to Achieve: Add water very sparingly to stiff icing until it reaches the desired flow.
Flooding Consistency (Run-out Consistency)
- Appearance: Smooth, pourable, and spreads easily. The “10-second rule” is a popular test: when you drag a knife or spoon through the icing in the bowl, the line should disappear and become smooth again within 8-12 seconds.
- Use: Perfect for filling in outlined areas, creating a smooth, even background on your cookies. This is also used for wet-on-wet techniques.
- How to Achieve: Gradually add water, a tablespoon or two at a time, to stiff icing, mixing well after each addition. Be very careful not to over-thin, as it’s harder to thicken it back up without adding more confectioners’ sugar (which can be messy).

Decorating Techniques with Royal Icing
Once you’ve mastered your icing consistencies, you’re ready to bring your cookie designs to life. Here are some fundamental techniques:
1. Outlining Your Cookies
The first step for most flooded designs is to create a dam or border around the perimeter of your cookie. Use stiff or medium consistency royal icing with a small round piping tip. Apply steady, even pressure, letting the icing fall onto the cookie surface rather than dragging the tip. This creates a raised edge that will hold your thinner flooding icing in place.
2. Flooding the Background
After outlining, switch to your flooding consistency icing. Fill a piping bag or squeeze bottle with the thinner icing. Starting from the edges and working your way in, gently squeeze to fill the outlined area. Use a toothpick or scribe tool to guide the icing into corners and to spread it evenly across the surface. Lightly tapping the cookie on your counter can help level the icing and release any trapped air bubbles.
Allow the flooded layer to dry completely before adding any details on top. This can take anywhere from a couple of hours to overnight, depending on the thickness of your icing and humidity levels. A good test is to gently touch the surface; if it’s firm and doesn’t indent, it’s ready.
3. Adding Details and Layers
Once your base layer is dry, you can begin adding intricate details with stiffer consistency icing. This allows for crisp lines, dots, stripes, and other patterns that stand proud of the base. Experiment with different piping tips to achieve various effects.
4. Wet-on-Wet Technique
For stunning marbled effects or seamless designs, apply a second color of wet royal icing onto a freshly flooded (still wet) base layer. The two wet icings will spread and blend together. Use a toothpick to drag through the wet colors, creating swirls, dots, or feathered patterns. Work quickly, as the icing will start to set.
Troubleshooting Common Royal Icing Issues
Even experienced decorators encounter challenges. Here are some common problems and how to address them:
- Cratering: This is when a hole appears in the center of your flooded icing. It often happens when the flooding consistency is too thin, or if the air is too dry. To prevent it, ensure your flooding icing isn’t too runny, and consider using a fan on a low setting to help the icing dry evenly from the edges inward.
- Color Bleed: Dark colors bleeding into lighter colors can be frustrating. To minimize this, ensure your first layer of icing is completely dry before adding a contrasting color on top. Also, avoid excessively thin icing, which can be more prone to bleeding.
- Air Bubbles: Small bubbles can appear on the surface of your wet icing. Gently tapping the cookie after flooding and using a toothpick to pop any visible bubbles can help achieve a smooth finish.
- Cracked Icing: This can occur if the cookie flexes after the icing has dried, or if there’s too much humidity during drying. Ensure cookies are fully cooled before decorating, and allow icing to dry in a stable environment.
- Icing Drying in the Bag/Tip: Royal icing dries quickly when exposed to air. To prevent this, keep a damp cloth over any unused icing in bowls and cover the tips of your piping bags with a damp paper towel or plastic wrap when not actively piping.
Storage and Shelf Life of Royal Icing
Royal icing dries hard and fast, so proper storage is crucial for any unused portions. Always cover your icing tightly to prevent it from drying out.
- Short-Term Storage (Refrigeration): For use within a few days, refrigerate royal icing in airtight containers or directly in icing squeeze bottles with the tips covered. Ensure there is no air exposure. When ready to use, let it come to room temperature and stir thoroughly. You may need to add a few drops of water to restore the consistency.
- Long-Term Storage (Freezing): Royal icing freezes perfectly! Store it in an airtight container in the freezer for up to a month. Thaw it in the refrigerator overnight, then let it come to room temperature. Stir vigorously, and adjust consistency with a few drops of water if necessary.

Easy Royal Icing Recipe
By: Jennifer Pallian BSc, RD
Easy royal icing for decorating cookies – it freezes well and packs well, and makes beautiful designs.
Prep Time: 2 minutes
Cook Time: 2 minutes
Total Time: 4 minutes
Yields: Enough for approx. 2 dozen cookies
Ingredients
- ¼ cup pasteurized egg whites (or 2 large egg whites)
- 3 cups confectioners’ sugar, sifted
- Water, as needed (for adjusting consistency)
- Food colouring, as desired (gel colours recommended)
- Optional: ¼ tsp vanilla extract or other flavorings
Instructions
- In a large mixing bowl, using the whisk attachment on a stand mixer (or a hand mixer), combine the egg whites and sifted confectioners’ sugar.
- Beat on low speed until the sugar is incorporated, then increase to medium-high speed. Beat until the mixture is smooth, glossy, and holds soft to medium peaks (about 2-4 minutes). This will be a stiff or piping consistency.
- If you want to “flood” (completely cover) your cookies, which requires a thinner consistency, gradually beat in about 1-3 tablespoons of water, one teaspoon at a time, until the icing reaches a flooding consistency (when a spoon is drawn through, the line disappears within 8-12 seconds).
- If using food coloring or flavorings, add them now and mix until evenly distributed.
- Use immediately or store as directed below.
Notes
This recipe makes enough royal icing to decorate approximately 2 dozen standard-sized cookies. Always keep unused icing covered tightly with plastic wrap or a damp cloth to prevent it from drying out and hardening.
Beyond Cookies: Creative Uses for Royal Icing
While cookies are the classic canvas for royal icing, its versatility extends far beyond. Consider using it for:
- Gingerbread Houses: Royal icing acts as both glue and snow, providing a strong bond for structural elements and a beautiful decorative finish.
- Edible Decorations: Pipe intricate designs onto parchment paper, let them dry completely, and then carefully peel them off to create delicate, freestanding edible toppers for cakes, cupcakes, or other desserts.
- Cake Decorating: While less common for frosting entire cakes, royal icing can be used for elaborate piping work, lace patterns, or adding small, firm decorative elements to fondant-covered cakes.
- Pastries and Tarts: A simple drizzle of thinned royal icing can add an elegant touch to various pastries.
Conclusion: Unleash Your Inner Cookie Artist
Royal icing is a decorator’s dream – easy to prepare, incredibly versatile, and capable of transforming simple cookies into edible works of art. Its firm, durable finish ensures your creations not only look stunning but also travel and store beautifully. By understanding the basic ingredients, mastering consistency, and practicing a few key techniques, you’ll be well on your way to decorating cookies that impress and delight everyone who sees (and tastes!) them.
So, gather your ingredients, choose your favorite cookie cutters, and get ready to experience the magic of royal icing. Happy decorating!