
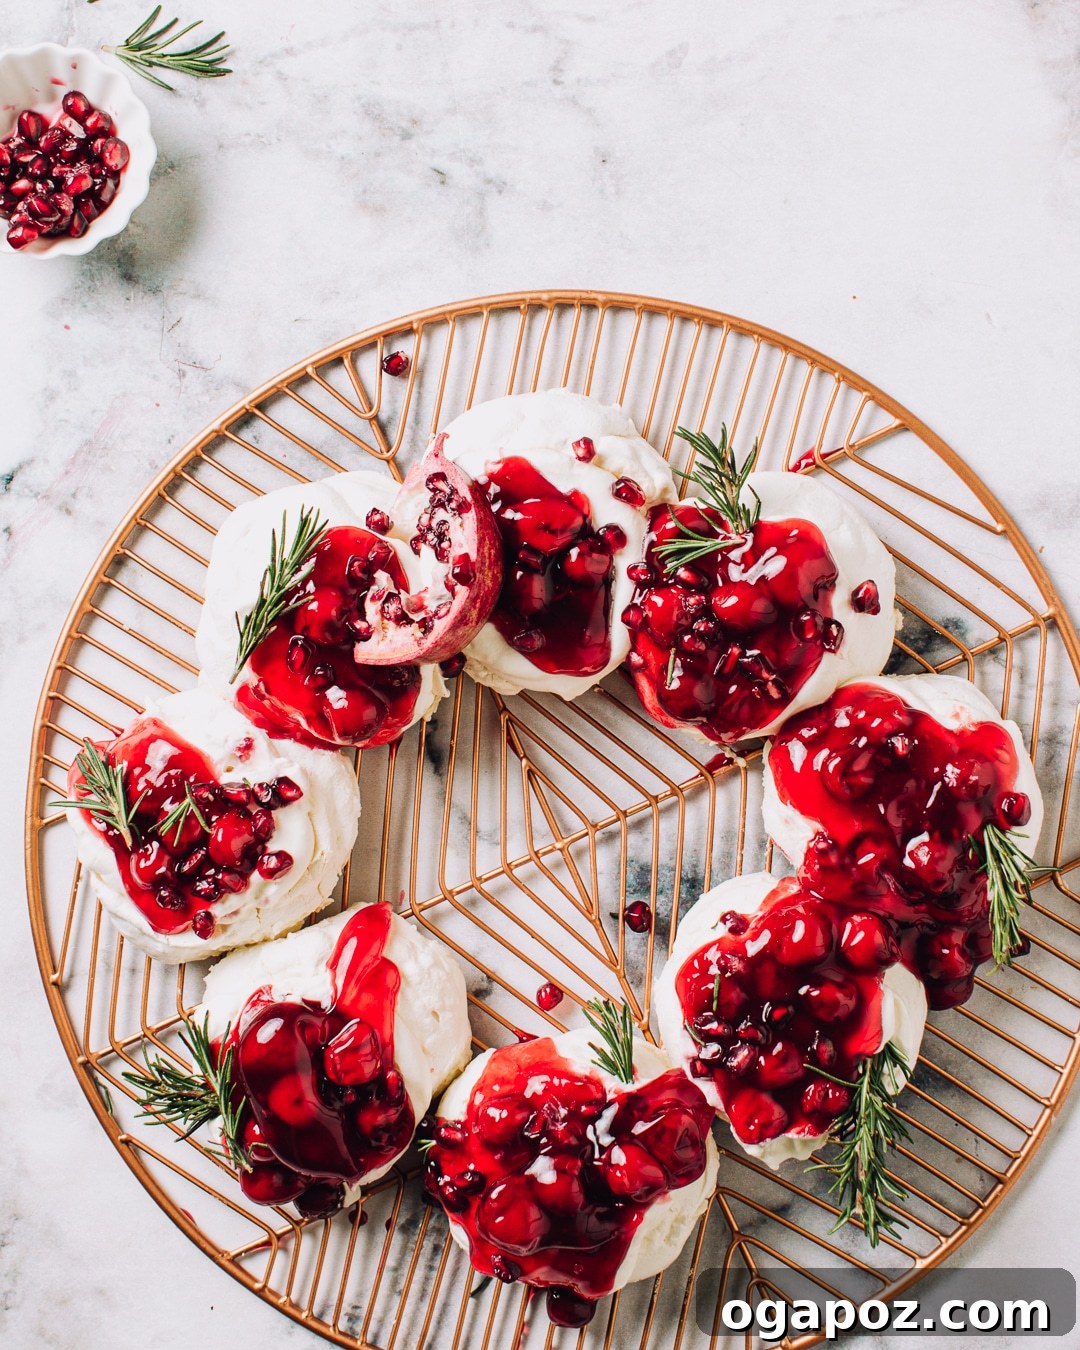
Christmas Pavlova Wreath: The Ultimate Festive Dessert
Get ready to dazzle your guests this holiday season with a truly show-stopping dessert: the Christmas Pavlova Wreath. This elegant, light, and creamy meringue masterpiece, adorned with luscious whipped cream and vibrant cherry pie filling, promises to be the crown jewel of your festive table. Pavlova, with its crisp exterior and soft, marshmallowy interior, offers a delightful contrast in textures that is simply irresistible. Our comprehensive guide will walk you through every step, ensuring you create a perfect Christmas Pavlova Wreath that looks as incredible as it tastes.
Why a Pavlova for Your Christmas Celebration?
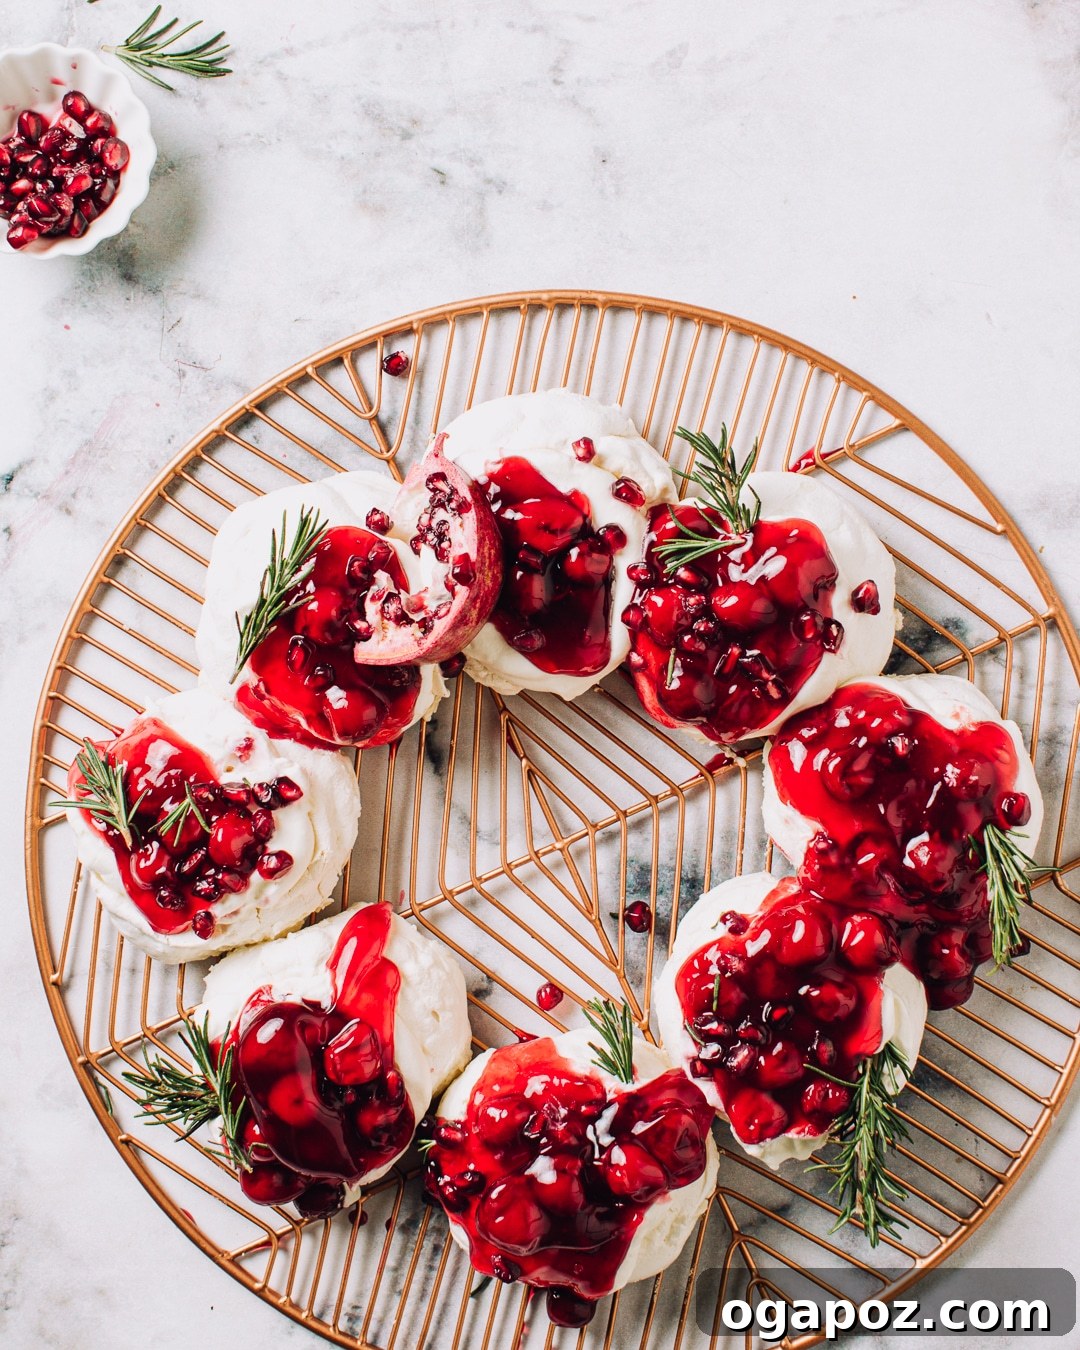
While traditional puddings and pies have their place, a Christmas Pavlova Wreath brings a breath of fresh air and undeniable elegance to any holiday spread. Its light and airy texture is a welcome relief after a rich festive meal, offering a dessert that feels indulgent yet remarkably delicate. The wreath shape is inherently festive, allowing for beautiful presentation and easy serving. Adorned with seasonal fruits, vibrant cherry filling, and fresh green garnishes like rosemary, it becomes a visual masterpiece that perfectly captures the spirit of Christmas. It’s also naturally gluten-free, making it a wonderful option for guests with dietary restrictions.
The Enchanting History of Pavlova
The origins of pavlova are steeped in a friendly rivalry between Australia and New Zealand, both claiming to be the birthplace of this iconic dessert. It is widely believed to have been created in honor of the Russian ballerina Anna Pavlova during one of her tours to Australasia in the 1920s. Her ethereal grace and lightness are said to have inspired the dessert’s name and delicate qualities. Regardless of its exact birthplace, pavlova quickly became a beloved dish, particularly in the summer months (which coincide with Christmas in the Southern Hemisphere). Its popularity has since spread globally, becoming a cherished dessert for celebrations, especially during the festive season.
Mastering the Art of Pavlova Making
Creating a perfect pavlova is a delightful culinary endeavor that requires a bit of precision and understanding of the ingredients. The key lies in achieving a stable, glossy meringue that bakes to a crisp shell with a soft, cloud-like interior. Let’s gather everything you need before we dive into the process.
Essential Ingredients for Your Pavlova Wreath
To embark on your pavlova journey, gather these key components:
- 6 large egg whites, at room temperature
- ⅜ tsp cream of tartar (or a substitute like 1 tsp lemon juice or white vinegar)
- 1 cup granulated sugar
- 2 tbsp cornstarch
- 1 ½ tsp pure vanilla extract
- ½ tsp coarse salt
For the Festive Topping:
- ½ cup whipping cream (heavy cream)
- ½ tsp pure vanilla extract
- 1 can E.D. Smith Cherry Pie filling (or your preferred fruit topping)
- Rosemary sprigs (optional, for garnish)
- Pomegranate arils (optional, for garnish)
Equipment You’ll Need:
Having the right tools on hand will make the pavlova-making process smooth and enjoyable:
- Stand mixer with whisk attachment (a hand mixer can also work, but a stand mixer is ideal for stability)
- Large, rimless baking sheet
- Parchment paper
- 9-inch round cake pan or a similar round object (for tracing your wreath guide)
- Large pastry bag fitted with a big round tip (for precise wreath shaping)
- Tall glass (to hold the pastry bag upright while filling)
- Spatula or large spoon (for filling the pastry bag and shaping the meringue if not piping)
Step-by-Step Guide to Your Christmas Pavlova Wreath
- Prepare Your Baking Surface: Preheat your oven to a gentle 250ºF (120ºC). Line a rimless baking sheet with parchment paper. Using an overturned 9-inch cake pan or a similar round object, trace a circle onto the parchment. This will be your guide for shaping the wreath. Once traced, flip the parchment paper over so the pencil marks are facing down; this prevents any potential transfer of pencil lead to your delicate pavlova. Set this aside, ensuring your oven is fully preheated before baking.
- Whip the Egg Whites: In an impeccably clean stand mixer bowl (any trace of grease or oil can prevent egg whites from whipping properly), combine the room-temperature large egg whites and cream of tartar. The cream of tartar acts as an acid, stabilizing the egg whites and helping them achieve maximum volume. Begin beating on medium-low speed. The goal here is to introduce air slowly and steadily into the whites. Continue beating until the egg whites become foamy and opaque, resembling a light cloud.
- Gradually Add Sugar for Glossy Peaks: Once the egg whites are foamy, increase the mixer speed to medium-high. While the mixer is running, begin to add the granulated sugar, one tablespoon at a time, very slowly. This gradual addition is crucial for dissolving the sugar thoroughly into the meringue, which results in a stable, smooth, and glossy texture. Continue beating until stiff, glossy peaks form – when you lift the whisk, the meringue should hold its shape firmly without drooping. To ensure all sugar is dissolved, rub a small amount of meringue between your fingers; it should feel completely smooth, not grainy.
- Incorporate Flavor and Stability: Once your meringue has reached stiff, glossy peaks, gently beat in the cornstarch, vanilla extract, and coarse salt. The cornstarch is vital for creating that signature marshmallowy, chewy interior while maintaining a crisp exterior. Vanilla adds a delightful aroma and flavor, enhancing the overall sweetness, and salt balances the richness. If your cornstarch appears clumpy, a quick sift before adding can prevent any lumps from appearing in your smooth meringue.
- Shape Your Festive Wreath: Transfer the magnificent, stable meringue into a large pastry bag fitted with a big round tip. For easier filling, place the pastry bag inside a tall glass to hold it upright and steady. Alternatively, if you don’t have a pastry bag, a large spoon or an offset spatula can be used to carefully shape the meringue. The pastry bag, however, allows for more precise and uniform mounds.
- Form the Wreath Mounds: Hold the pastry bag upright (or use your spoon) and pipe (or spoon) eight distinct mounds of meringue around the traced circle on your parchment paper. These individual mounds, placed close together, will form the basis of your beautiful wreath. Don’t worry if they aren’t perfectly uniform at first; you can always go back and add more meringue to any mound to achieve a consistent size and shape, ensuring an even bake.
- Create Indentations for Toppings: Once all the mounds are piped and you’re satisfied with the wreath’s shape, use the back of a spoon to create a slight well or dip in the center of each meringue mound. These indentations are functional, as they will serve as perfect little cradles for your delectable whipped cream and vibrant cherry pie filling later, preventing them from sliding off.
- Bake to Perfection: Carefully transfer the baking sheet with your beautifully shaped pavlova wreath into the preheated oven. Bake for precisely 1 hour at 250ºF (120ºC). This low and slow baking temperature is crucial for drying out the meringue rather than browning it too quickly. After 1 hour, turn off the oven completely but *do not open the oven door*. Allow the pavlova to cool slowly inside the oven for at least another 1 hour, or even longer (up to several hours or overnight). This gradual cooling prevents the pavlova from cracking due to an abrupt temperature change and ensures its crisp exterior and soft, marshmallowy interior.
- Assemble and Serve Your Masterpiece: Once the pavlova is completely cooled – and only then – prepare your toppings. In a clean bowl, whip the cold whipping cream with ½ teaspoon of vanilla extract until soft peaks form. Spoon the freshly whipped cream into the wells of each meringue mound. Generously top with spoonfuls of vibrant E.D. Smith Cherry Pie filling, distributing it evenly over the cream. For an extra festive touch and a pop of color, garnish with fresh rosemary sprigs and sparkling pomegranate arils, if desired. Serve immediately and delight in its exquisite texture and unforgettable flavor!
Expert Tips for a Flawless Christmas Pavlova
Achieving pavlova perfection is simpler with a few tried-and-true tips:
The Importance of Fresh Egg Whites
Always opt for fresh egg whites for your pavlova. While pasteurized egg whites might seem convenient, they often lack the structural integrity needed for a stable meringue. They will whip up, but the meringue typically collapses in the oven, leading to a flat and dense texture instead of the desired airy lightness. Fresh eggs provide the best foundation for a robust and voluminous meringue, making all the difference in the final outcome.
Achieving the Perfect Meringue Consistency
Patience is key when whipping meringue. Start slow with egg whites and gradually increase speed. The slow addition of sugar is crucial; adding it too quickly can deflate the foam and result in a grainy or unstable meringue. Beat until the meringue is glossy, firm, and holds stiff peaks. You should be able to turn the bowl upside down without the meringue falling out (though do this cautiously!). Ensure all sugar crystals are dissolved by rubbing a small amount between your fingers; if it feels gritty, continue beating.
The Ideal Baking Temperature
Pavlova should always be cooked at a low temperature for a longer time, typically around 250ºF (120ºC). This gentle heat allows the meringue to slowly dry out and become crisp without browning or burning, while simultaneously creating that wonderful soft, marshmallowy interior. A higher cooking temperature encourages the exterior to brown and set too quickly before the interior has a chance to achieve its signature chewy texture, often leading to a brittle and less desirable result.
Knowing When Your Pavlova is Cooked to Perfection
Your pavlova is perfectly cooked when its exterior is crisp and dry to the touch, but still pale and unbrowned. When you gently tap the outside, it should sound hard and hollow. The interior, however, should remain soft, moist, and marshmallowy. A common test is to insert a toothpick into the center; it should come out sticky. To eliminate any doubt and prevent cracking from sudden temperature changes, it’s best to let the pavlova cool completely inside the oven with the oven turned off. This gradual cooling process is as important as the baking itself.
Timing Your Toppings for Optimal Freshness
The golden rule for pavlova is to add the cream and fruit toppings just before serving. If you add them too early, the moisture from the whipped cream and fruit will gradually be absorbed by the meringue, causing it to lose its glorious crispness and become soggy. Furthermore, ensure the pavlova base is completely cool before adding any whipped cream. Applying whipped cream to a warm meringue will inevitably result in a runny, melted mess, turning your beautiful creation into a puddle.
Storing Your Pavlova: A Guide to Freshness
Proper storage is essential to maintain the pavlova’s delicate texture. A plain pavlova base, without any cream or fruit toppings, should be stored in an airtight container at room temperature. It will remain crisp and delicious for one to two days. Avoid refrigerating an untopped base, as the humidity in the refrigerator can soften the meringue. Once you’ve added the whipped cream and fruit toppings, the pavlova must be refrigerated. Cover it loosely to prevent condensation, but remember that its texture will begin to soften over time. For the best possible texture and appearance, it is always recommended to add toppings as close to serving time as possible.
Make-Ahead Strategies for Stress-Free Holiday Baking
The beauty of pavlova is that you can prepare parts of it in advance, making holiday entertaining much less stressful. You can make the meringue base a day or two in advance and store it at room temperature in an airtight container, ensuring it stays crisp. For the toppings, you can whip the cream and prepare the fruit up to four hours in advance. However, keep in mind that whipped cream tends to loosen over time, and fruit toppings may start to release their juices, potentially causing them to slide off or make the meringue slightly soggy if left too long. Assembling just before serving remains the gold standard for an immaculate presentation and texture.
Can You Freeze Pavlova? What to Expect
While you cannot freeze a pavlova once it has been topped with cream and fruit, freezing the meringue base is technically possible, though not always ideal. Upon thawing, a frozen pavlova base will likely weep moisture, which compromises its crisp exterior and can lead to a slightly chewier, less delicate texture. Furthermore, pavlovas are incredibly fragile, and the freezing and thawing process can make them prone to cracking or breaking into shards. For the best results, it is always preferable to enjoy your pavlova fresh or to make the base just a day or two in advance, rather than freezing it.
Creative Variations and Garnish Ideas
While the classic cherry pie filling is superb for Christmas, don’t hesitate to get creative with your pavlova toppings. Consider a mixed berry compote with fresh raspberries, blueberries, and strawberries for a vibrant and tangy contrast. Lemon curd and fresh passion fruit offer a tropical twist. For a truly decadent holiday version, drizzle with melted dark chocolate and sprinkle with toasted nuts. Other festive garnishes include candied cranberries, a dusting of edible gold glitter, delicate mint leaves, or even small meringue kisses. The possibilities are endless, allowing you to customize your pavlova wreath to perfectly match your taste and holiday theme.
Conclusion: Your Unforgettable Christmas Dessert
With this detailed guide, you are now equipped to create a spectacular Christmas Pavlova Wreath that will undoubtedly be the talk of your holiday gathering. Its ethereal texture, vibrant colors, and exquisite taste make it a truly unforgettable dessert. Follow these steps, embrace the joy of baking, and prepare to impress your family and friends with a festive masterpiece that embodies the magic of the season. Happy baking, and happy holidays!