
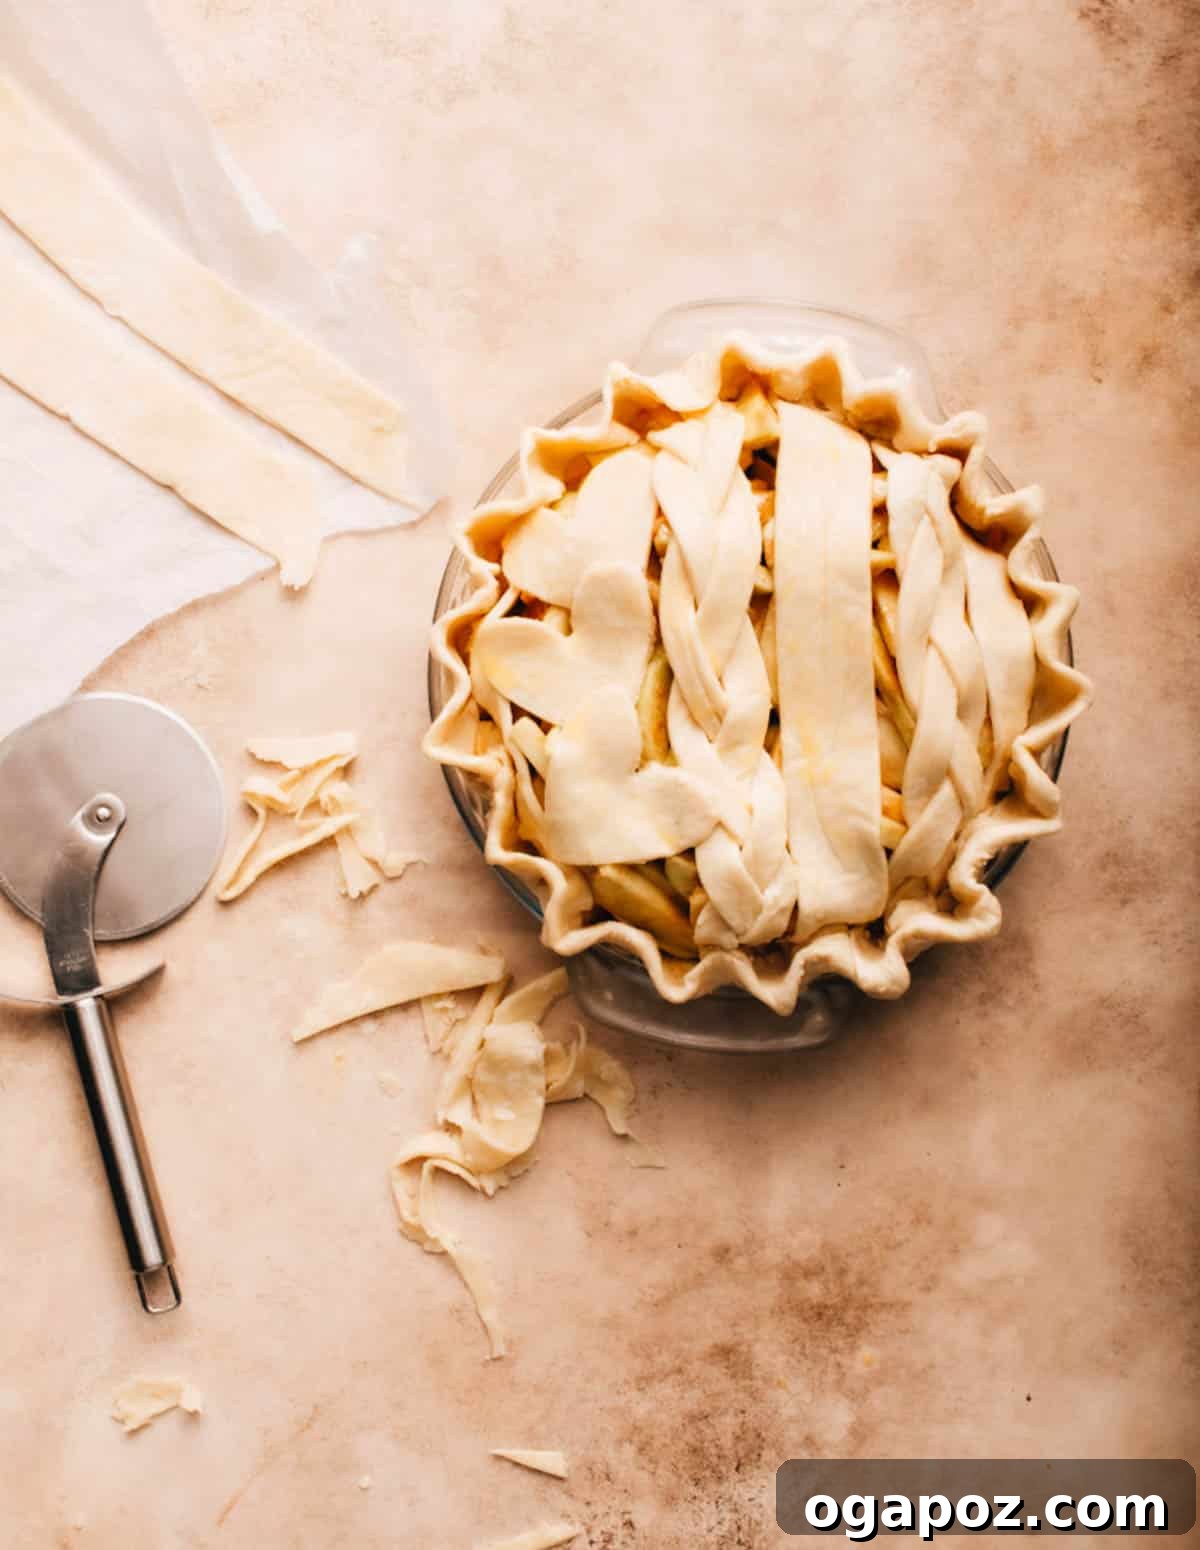
Embark on a culinary journey to master the art of homemade pie making with this truly foolproof, easy pie crust recipe. Say goodbye to complicated techniques and special equipment like a food processor; this recipe delivers a PERFECT flaky, tender pie crust every single time, using just your hands and basic kitchen tools.

P.S. This isn’t just any recipe. It’s the very same easy pie crust I shared in Chatelaine magazine, and their Creative Director praised it as the best pie crust she’d ever tasted. High praise indeed for a recipe designed for simplicity and superior results!
Year after year, this versatile pie dough forms the foundation for my beloved easy apple pie and super easy pumpkin pie for Thanksgiving and other special occasions. It’s a testament to its reliability and delicious flavor.
5 Game-Changing Secrets to the Best Pie Crust (Hand-Mixed, No Food Processor Needed)
Crafting an exceptional pie crust by hand might seem daunting, but these five essential secrets unlock the path to a tender, flaky masterpiece without relying on a food processor. Understanding the ‘why’ behind each step transforms you from a baker to a pie crust artisan.
- Incorporate Most of the Butter Until Crumbly: Begin by mixing roughly two-thirds of your cold butter into the flour until the mixture resembles damp breadcrumbs or coarse sand. This crucial step coats the flour particles with fat, effectively minimizing gluten formation. The result? A remarkably soft and tender pie dough that melts in your mouth.
- Introduce Remaining Butter in Visible Chunks: After establishing a tender base, add the rest of the butter in distinct, pea-sized pieces. These larger butter chunks are the secret to flakiness. As the pie bakes, these butter pockets melt, releasing steam that creates airy layers within the crust, giving it that coveted flaky texture.
- Choose High-Quality Butter as Your Fat: For a truly delicious pie crust that’s more than just a vessel for filling, butter is the undisputed champion. Its rich flavor and golden hue are irreplaceable. To counteract butter’s lower melting point compared to shortening, ensure your dough is thoroughly chilled (ideally freezer-cold) and initiate baking in a super-hot oven. This strategy allows the starch in the flour to set and structure the crust before the butter fully spreads, preserving those delicate, artistic details and flaky layers.
- Prioritize Chilling the Dough (Multiple Times!): Chilling is non-negotiable for an outstanding pie crust, serving three critical purposes:
- Maximizes Flakiness: A pre-bake chill hardens the butter pieces, ensuring they remain distinct until they create steam pockets in the oven. This prevents excessive spread and enhances flakiness.
- Relaxes Gluten for Tenderness: Resting time allows the gluten, developed during mixing and rolling, to relax. A relaxed dough is softer, easier to handle, and less prone to shrinking back in the pie plate, resulting in a tender, well-shaped crust.
- Promotes Hydration and Smoothness: Chilling also gives water ample time to fully absorb into the flour, distributing moisture evenly throughout the dough. This hydration process makes the dough smoother, more pliable, and less sticky, improving its texture and workability.
- Work Smart, Not Hard: Roll Dough Before Final Chill: This tip is a game-changer! Roll your pie dough out while it’s still relatively soft and pliable, *before* its final, long chill in the refrigerator. Attempting to roll out a rock-hard, fridge-cold hunk of dough is not only an arm workout but also counterproductive. By rolling it when it’s softer, you complete the necessary pressing and pulling actions *before* the extensive resting period. This allows the gluten to relax completely during the chill, resulting in a dough that’s exceptionally soft, maintains its shape beautifully, and is incredibly easy to transfer to your pie plate. No more fighting with stubborn, cracking dough!
Embracing these principles will elevate your homemade pie crust from good to extraordinary, ensuring tender, flaky results every single time.
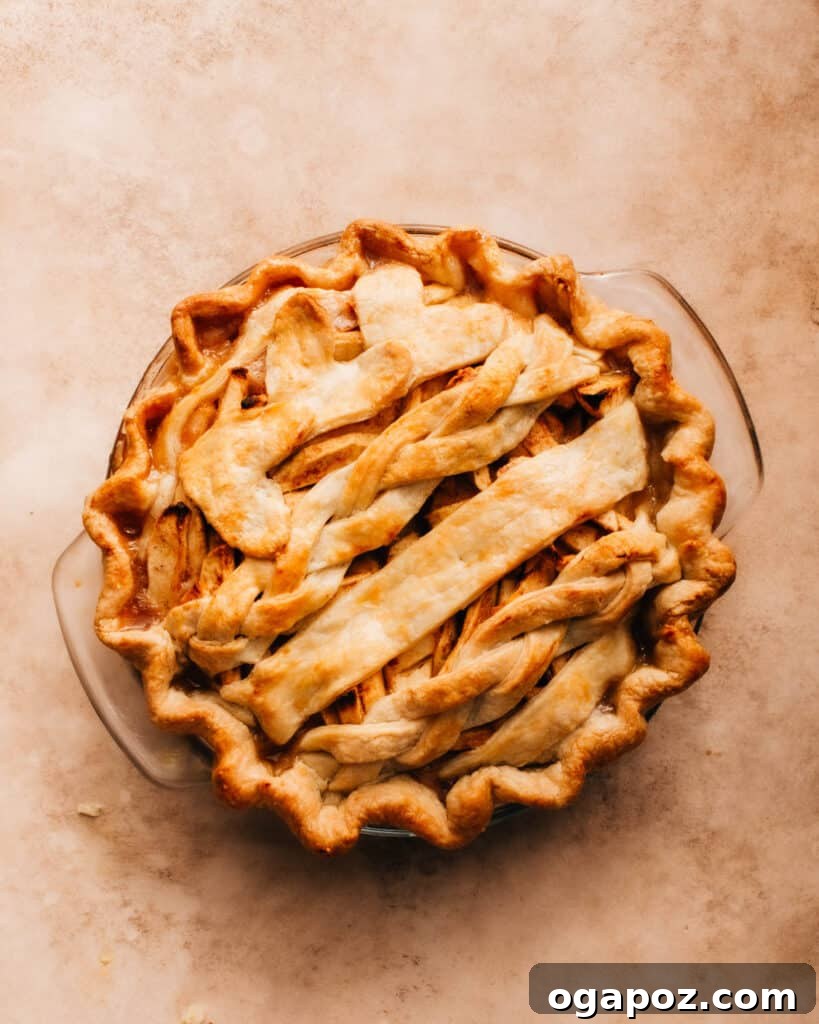
The Simple Essentials: Perfect Pie Crust with Just 3 Ingredients (+ Water)
A truly great pie crust doesn’t require a long list of exotic ingredients. In fact, its beauty lies in the simplicity and quality of just a few core components:
- All-Purpose Flour: The foundational building block, providing the essential structure and body for your pie crust. It’s the ingredient that holds everything together, so choose a good quality brand.
- Kosher Salt: More than just a seasoning, salt plays a dual role. It enhances the overall flavor of the crust, preventing it from tasting bland, and it also subtly strengthens the gluten structure, contributing to a desirable texture.
- Unsalted Butter: The star of the show! Cold unsalted butter is responsible for that exquisite tender, flaky texture and rich, irresistible flavor. Using unsalted butter gives you complete control over the salt content in your recipe.
- Ice Water: The crucial binding agent. Using ice-cold water is vital for keeping the butter firm during mixing, which is key to developing those desirable flaky layers. It helps bring the dough together without overworking it.
Related Pie Crust Recipes: Looking for other easy crust options? Don’t miss my No-Roll Pie Crust for a truly minimal effort approach, or try a classic Graham Cracker Crust for a sweet, crumbly base!
Exploring Variations and Smart Substitutions for Your Pie Crust
While this recipe champions an all-butter crust for its unparalleled flavor and texture, you can adapt it to suit different dietary needs or flavor preferences. Here are some popular variations and substitutions:
- Salted Butter: If unsalted butter isn’t available, or if it’s your preference, you can certainly use salted butter. However, remember to reduce the kosher salt in the recipe to 1 teaspoon to ensure a balanced flavor and prevent your crust from becoming overly salty.
- Whole Wheat Flour: For a crust with a nuttier flavor and a more rustic texture, consider swapping out half of the all-purpose flour with whole wheat flour. This adds a delightful depth and heartiness to your pie.
- Crisco or Vegetable Shortening: If you’re aiming for a dairy-free pie crust, vegetable shortening (like Crisco) is an excellent substitute for butter. Be aware that shortening will result in a flakier, but less flavorful, crust compared to butter. The texture will be different, often more crumbly.
- Lard: For a truly old-school, incredibly flaky and tender crust reminiscent of traditional recipes, replace half of the butter with high-quality lard. Lard has a higher melting point than butter, contributing to exceptional flakiness, and adds a unique savory depth.
- Gluten-Free Flour Blend: While this recipe is optimized for all-purpose flour, many high-quality 1:1 gluten-free baking blends can be used as a substitute. Look for blends designed for pastry and be prepared for a slightly different texture and handling experience.
Experiment with these variations to discover your favorite homemade pie crust style!
Essential Kitchen Tools for Hand-Making Pie Crust
One of the beauties of this no-food-processor pie crust recipe is its reliance on basic kitchen essentials. Before you begin your baking adventure, gather these tools to ensure a smooth and efficient process:
- Kitchen Scale (Optional but Recommended): While cup measurements are provided, a kitchen scale offers the most accurate measurements for flour, butter, and water. Precision in baking, especially for pie crust, makes a significant difference in consistency.
- Large Mixing Bowl: Essential for combining your dry ingredients and incorporating the butter without making a mess.
- Whisk: To thoroughly combine your dry ingredients (flour and salt) before adding the fat.
- Silicone Spatula or Fork: Ideal for gently mixing in the ice water without overworking the dough.
- Parchment Paper: A true pie crust hero! You’ll need several large sheets. It prevents sticking, makes rolling out the dough incredibly easy, and aids in transferring the delicate dough to the pie plate. (Curious about what parchment paper is made of? Find out more here!)
- Rolling Pin: A classic tool for evenly flattening your dough. Any standard rolling pin will do the job perfectly.
- Pie Plate (or Pie Dish): The vessel for your delicious creation. A standard 9-inch pie plate is most common.
- Baking Sheet: Placing your pie on a baking sheet in the oven helps ensure even heat distribution and catches any potential drips, keeping your oven clean.
- Aluminum Foil: Useful for covering and chilling the rolled-out dough, and later, for protecting the edges of your pie crust from over-baking and burning while the filling cooks.
- Pastry Blender or Your Hands: While not explicitly listed in the original, a pastry blender can be helpful for cutting butter into flour if you prefer not to use your fingers for the initial steps. However, your clean hands are perfectly capable and often yield the best results for sensing dough texture.
With these simple tools at the ready, you’re perfectly equipped to create a spectacular homemade pie crust.
Step-by-Step Guide: How to Make Flaky Pie Crust Without a Food Processor
Creating a perfect pie crust by hand is a rewarding process, and with these detailed steps, complete with the “why” behind each action, you’ll feel like a pro. This guide will walk you through transforming simple ingredients into a tender, flaky foundation for any pie.
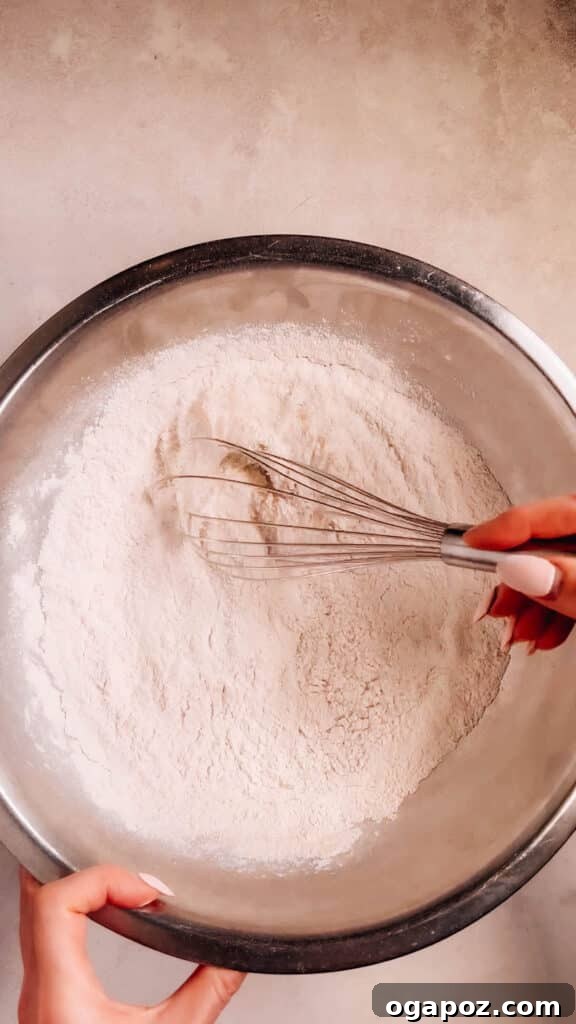
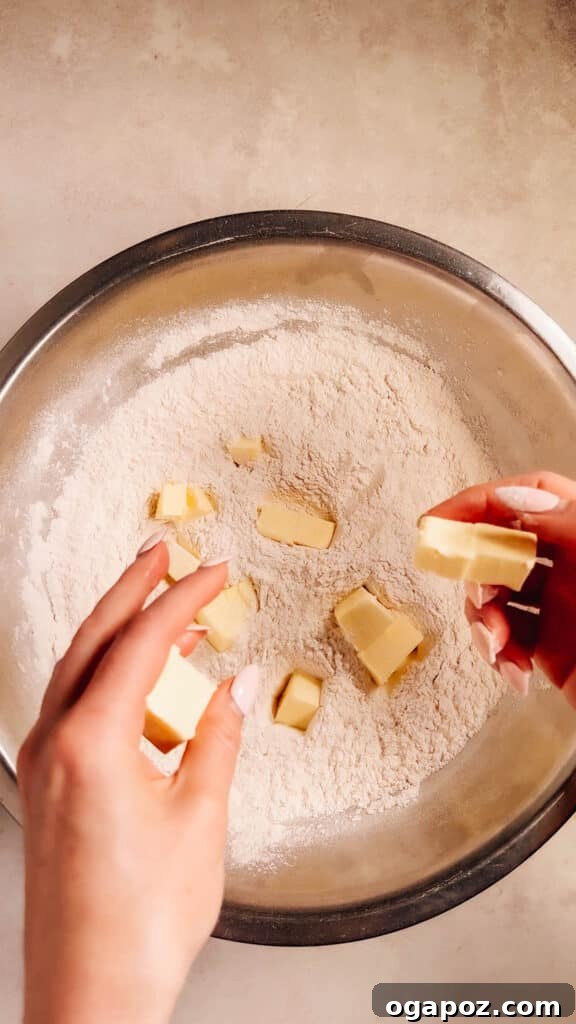
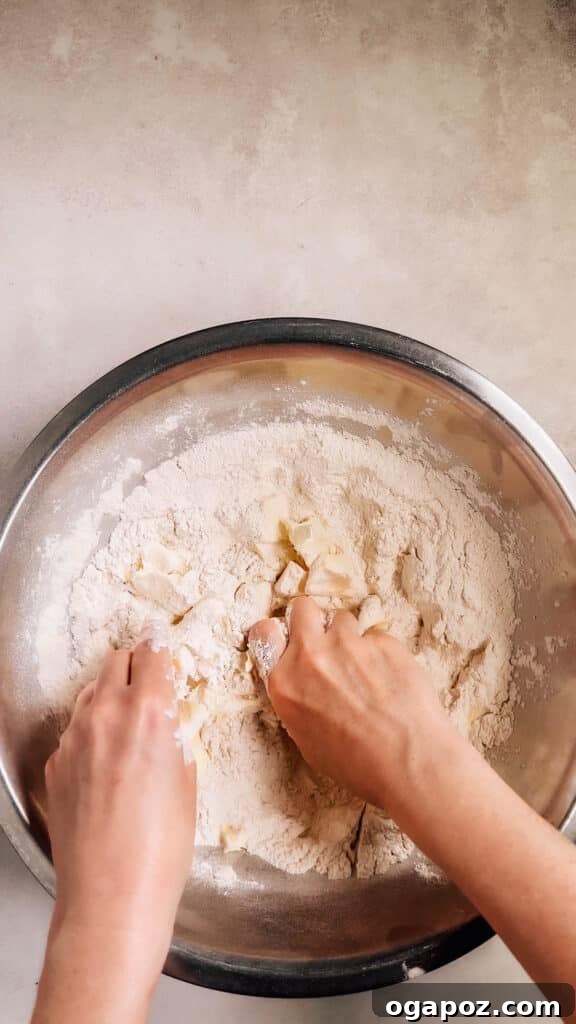
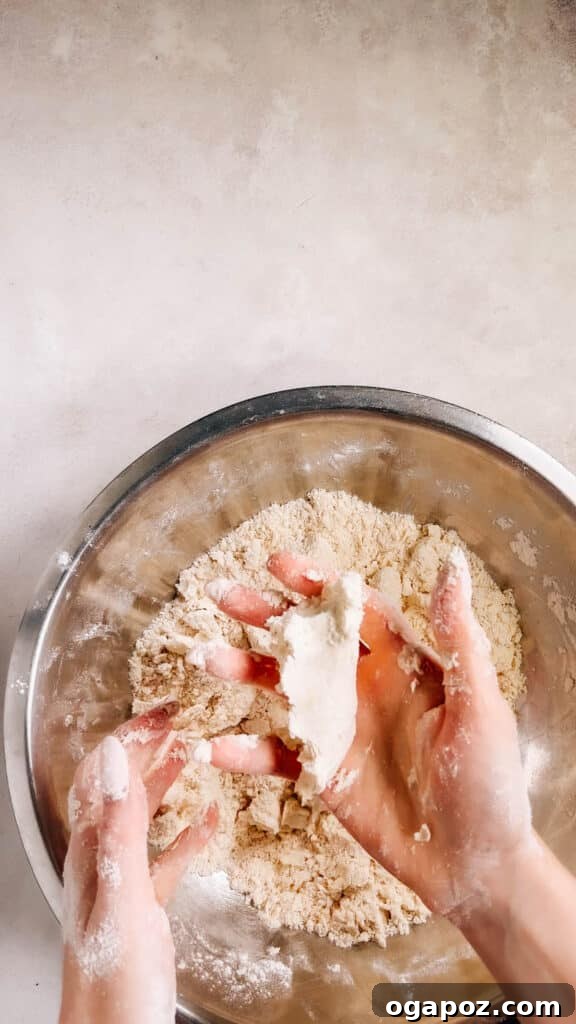
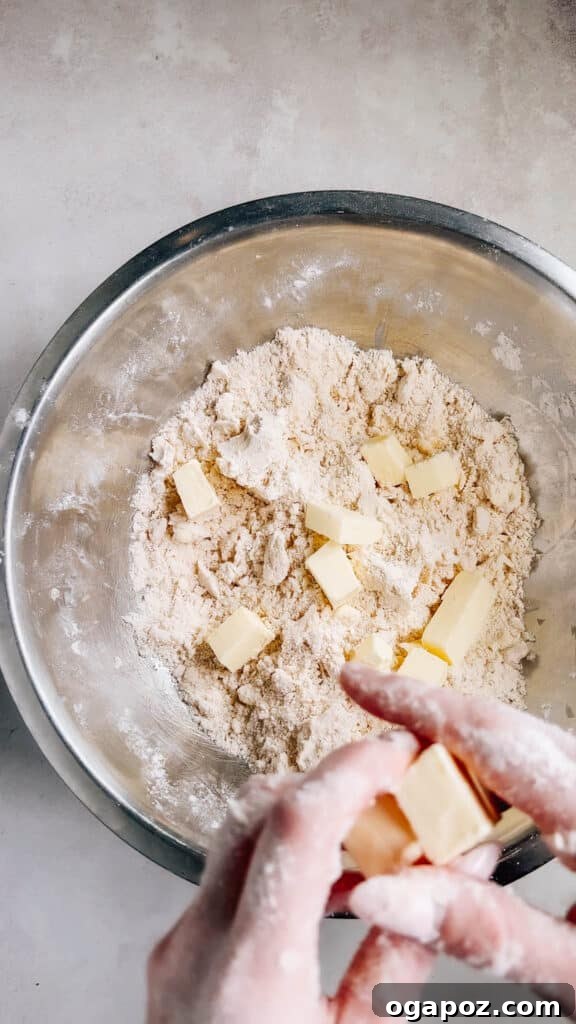
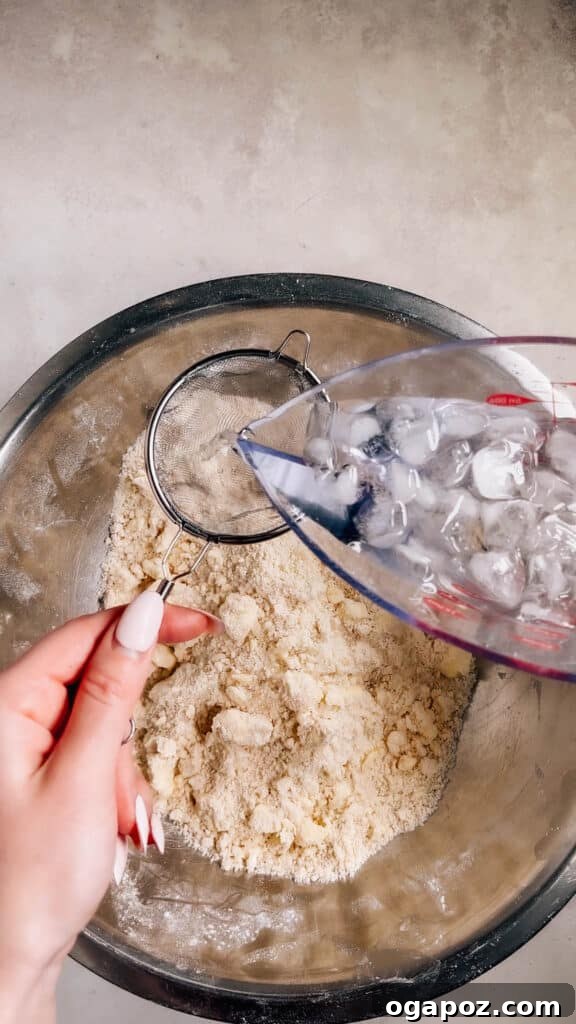
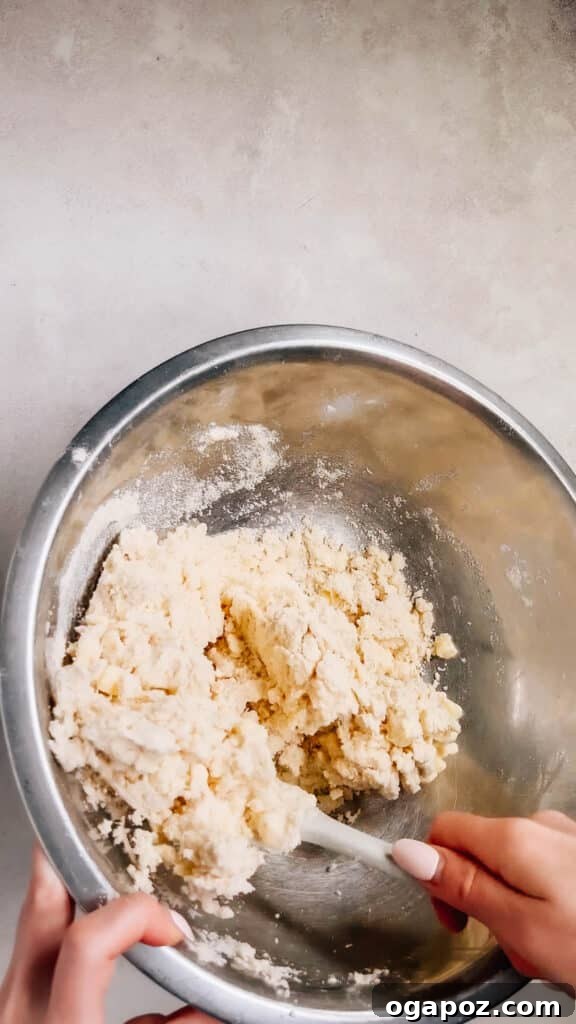
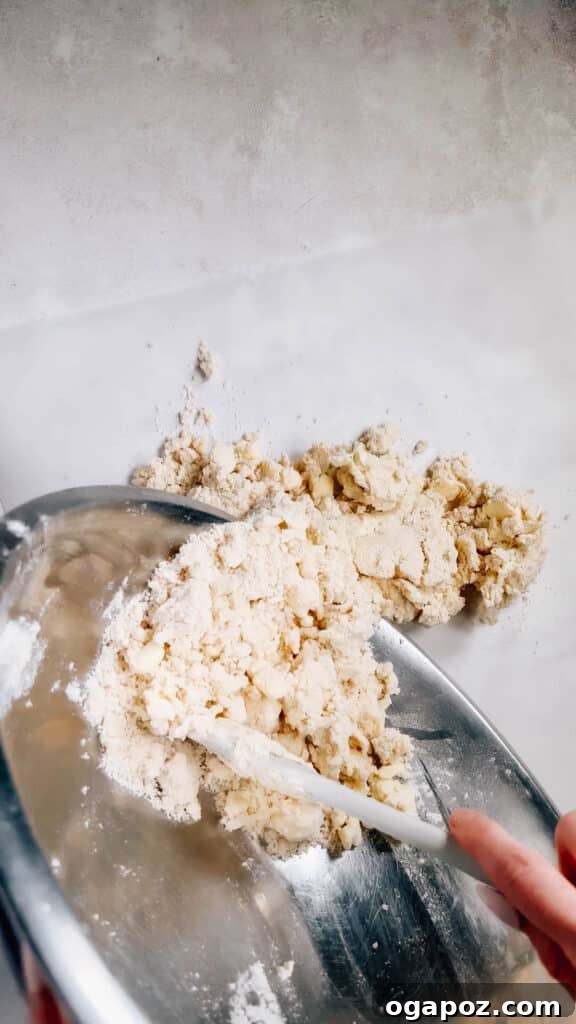
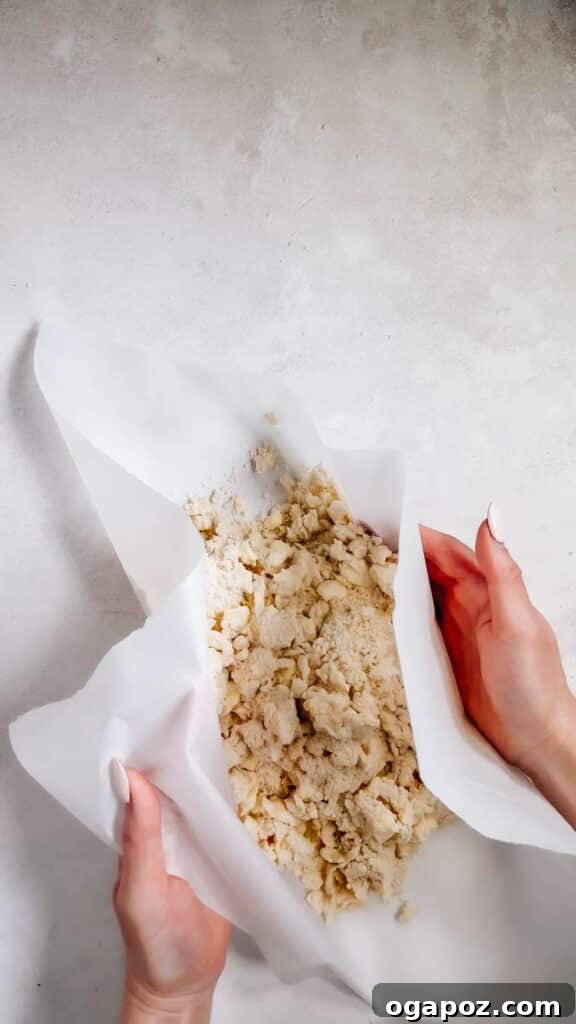
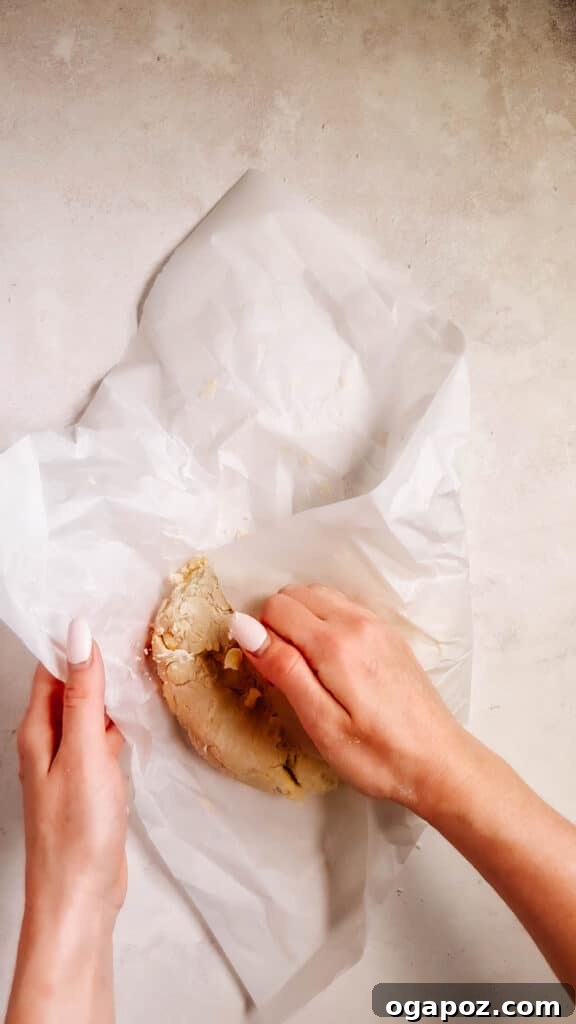
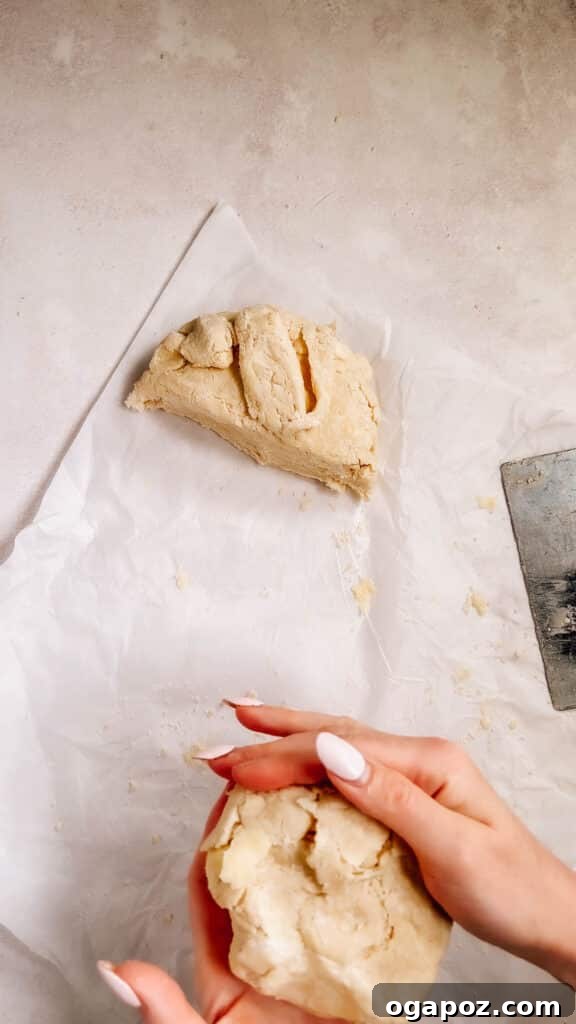
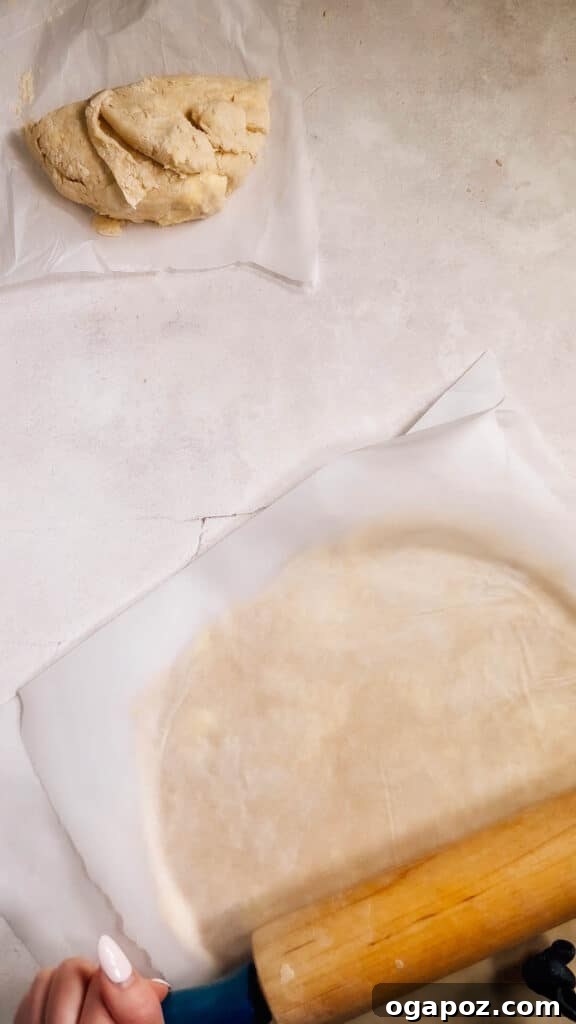
As a food scientist, I believe understanding the ‘why’ behind each step is crucial for mastering any recipe. These explanations are designed to empower you with baking knowledge, ensuring your success.
1. Precisely Measure Ingredients:
- While it might seem basic, accurate ingredient measurement is the cornerstone of perfect pie crust. Flour density can vary significantly depending on how it’s scooped, leading to inconsistent results. For the most precise and reliable outcome, I strongly recommend using a kitchen scale. (Look for the “metric” button on recipe cards to see exact weights.)
- Science Behind It: A correct ratio of flour, fat, and water is absolutely essential. Too much flour makes the dough dry and crumbly. Excess butter can make it greasy and unable to hold its shape. Too much water develops too much gluten, resulting in a tough, chewy crust. Precision is key to achieving that delicate balance.
2. Incorporate the First Portion of Butter for Tenderness:
- In a large bowl, combine your measured flour and salt. Then, add approximately two-thirds of your very cold butter, cut into small, 1-inch pieces. Using your fingers, gently squeeze and rub the butter pieces into the flour until the mixture resembles coarse almond meal or damp breadcrumbs. The butter should be evenly distributed, coating most of the flour.
- Science Behind It: This initial step is critical for tenderness. By coating the flour particles with fat, you create a barrier that prevents the flour from absorbing too much water later on. Less water absorption means less gluten development, which translates directly to a softer, more tender, and melt-in-your-mouth crust. When properly worked in, the mixture will hold together when squeezed, as shown in picture #4 above.
3. Add Remaining Butter for Flakiness:
- Now, add the remaining one-third of your cold butter to the mixture. This time, work it in more gently, ensuring that some distinct, pea-sized chunks of butter remain visible within the flour.
- Science Behind It: These larger butter chunks are the secret to achieving a flaky crust. During baking, these cold butter pieces melt, releasing steam that creates tiny air pockets between the layers of dough. This rapid steam expansion is what pushes the layers apart, resulting in that desirable light, airy, and flaky texture. Continue rubbing the butter in, but intentionally leave some larger pieces, as seen in picture #6 above.
4. Quick Chill the Mixture:
- Once all the butter is incorporated (some rubbed in, some in chunks), place the bowl of flour and butter mixture into the freezer for about 10 minutes.
- Science Behind It: Keeping the butter as cold as possible is paramount. A quick chill firms up the butter pieces, ensuring they remain distinct and don’t fully integrate with the flour. This separation is exactly what you want for maximum flakiness, as it preserves those crucial pockets of fat that will later create steam.
5. Gradually Add Ice Water:
- Remove the bowl from the freezer. Gradually add very cold water, ideally ice water, to the mixture. A good tip is to fill a large measuring cup with ice, top it with water, then pour the exact amount needed through a sieve into another measuring cup (or simply weigh the water on a scale, as I do). Use a silicone spatula or a fork to gently toss the water through the flour and butter mixture. Mix only until it forms a clumpy, shaggy mess – don’t overmix! It will look uneven, as shown in photos #7 and #8 above.
- Science Behind It: Cold water serves two main purposes. Firstly, it helps maintain the butter’s firmness, which is vital for achieving those flaky layers. Secondly, it begins to hydrate the flour, bringing the dough together without over-activating the gluten. Gentle mixing prevents toughness.
6. Form the Dough with Folding and Pressing:
- Carefully dump the shaggy mixture onto a large sheet of parchment paper. Use the parchment paper itself to help you fold and press the messy mixture together. Gently gather the dough and press it into a round disc shape. Keep moving and folding the dough with the paper until it loosely holds its form.
- Science Behind It: This folding and pressing technique is far gentler than traditional kneading. It combines the ingredients effectively without overworking the gluten, ensuring your crust remains tender. As seen in photo #10, it will come together into a disc, but the edges might still look a bit dry and cracked. This is completely normal and expected at this stage.
7. Allow for an Initial Rest:
- Once formed into a disc, set the dough aside at room temperature for at least 30 minutes.
- Science Behind It: This resting period is crucial for allowing the flour to fully hydrate and for the gluten strands to relax. Hydration means the water fully absorbs into all the flour particles, moving from wetter to drier areas, making the dough more uniform. A relaxed dough is significantly softer, more pliable, and much easier to roll out without tearing or springing back.
8. Divide and Roll Out the Dough (Smartly!):
- After the initial rest, divide the dough into two equal pieces if you’re making a double-crust pie (or keep it as one for a single crust). Now, and this is where the “work smart” philosophy comes in, roll out each piece of dough between two large sheets of parchment paper. Notice how the dough is smoother after resting, with fewer dry, floury edges (though a little dryness is still fine).
- Science Behind It: Rolling the dough out *before* its final, long chill is a true game-changer. It saves you immense effort and results in a significantly more tender crust. By performing the rolling and shaping actions when the dough is still relatively soft, you allow any gluten development from this work to relax during the subsequent long chill. Rolling cold, hard dough forces you to work it more vigorously, tightening the gluten and making the crust tough. Plus, it’s just incredibly difficult to handle!
- For detailed rolling instructions, refer to the “Rolling Technique: Rotating and Flipping for Even Thickness” section below.
9. Final Chill for Structure and Flakiness:
- Once rolled out, stack the two pieces of dough with their parchment paper in between, then wrap them securely in aluminum foil. Place the wrapped dough in the refrigerator for at least 2 hours, or even overnight.
- Science Behind It: This final, extended chill is incredibly important. It allows the fat (butter) in the dough to firm up completely, ensuring those pockets of butter are ready to create steam for maximum flakiness. It also provides ample time for any remaining gluten to relax fully, resulting in a supremely tender and easy-to-handle crust. This step cannot be rushed!
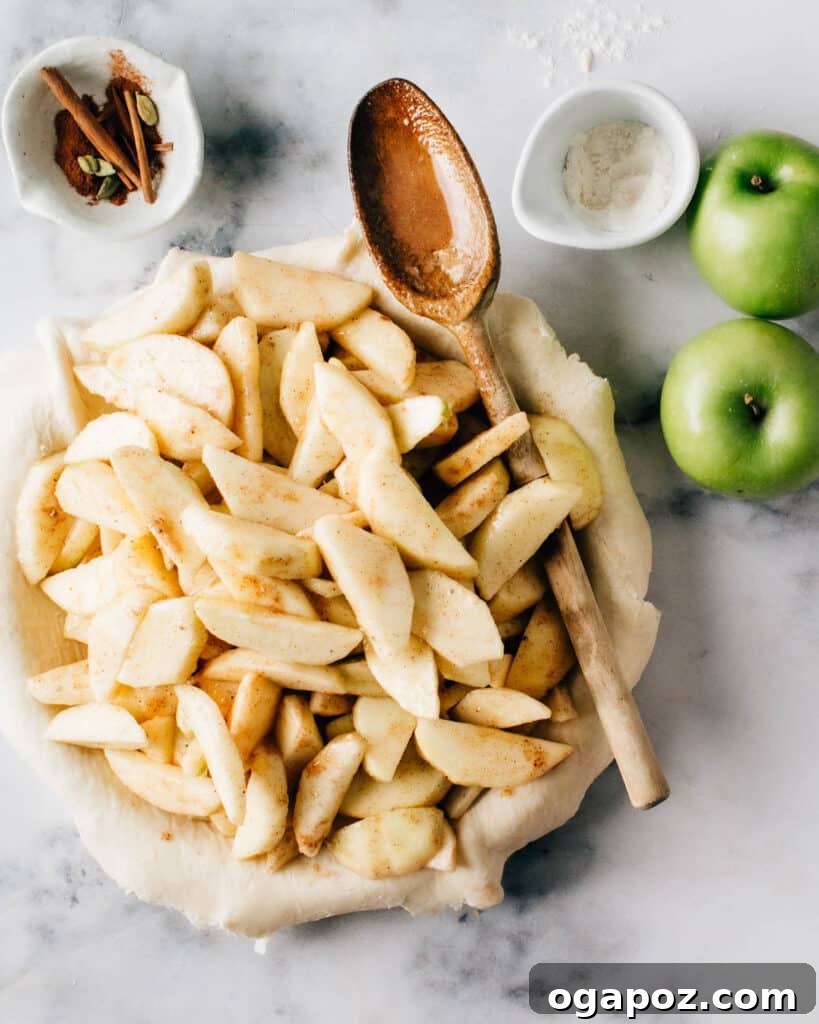
Prep for Baking: The Final Chill Before Heat:
Even after assembling your pie, a final quick chill can make a big difference.
- Fill your pie with your desired filling and place it in the freezer for about 30 minutes before baking.
- Science Behind It: This final freezing step sets the overall shape and structure of the pie, especially any decorative crimping or lattice work. The cold butter in the crust will be firm, preventing it from slumping or losing its shape during the initial blast of oven heat. This ensures your beautiful pie maintains its integrity.
Baking the Pie: The Hot Start Method:
Achieving a golden-brown, flaky crust requires a specific baking temperature strategy.
- Always start your pie in a very hot oven (425°F is a good starting point), then lower the temperature after a short period (typically 15-20 minutes) to a moderate heat (350°F) for the remainder of the baking time.
- Science Behind It: The initial high heat creates a powerful burst of steam from the cold butter and water in the dough. This rapid steam expansion quickly puffs up the crust, creating countless flaky layers, and crucially, sets the outer structure of the crust. This prevents your edges from melting and collapsing. Lowering the heat then allows the filling to cook through and the crust to brown evenly without burning the exterior.
Mastering the Rolling Technique: Rotating and Flipping for Even Thickness
An evenly rolled pie crust is key to consistent baking and a beautifully presented pie. This tried-and-true approach, using parchment paper, makes rolling out dough effortless and ensures uniform thickness, even without flouring your surface repeatedly.
- Prepare Your Workspace with Parchment Paper: Start by placing your dough disc directly between two generously sized sheets of parchment paper. Choose paper larger than you think you’ll need. To prevent slipping, let one corner of the bottom parchment sheet hang over the edge of your counter, using your hip or body weight to pin it down. This setup eliminates the need for extra flour, preventing a tough crust, and guarantees no sticking.
- Begin the Initial Roll: Using your rolling pin, start rolling from the center of the dough outward. Apply gentle, even pressure. Let the weight of the rolling pin do most of the work; avoid pressing too hard, which can create uneven spots or tear the dough.
- First Quarter Turn (90 Degrees): After a few rolls in one direction, give the entire parchment paper sandwich (dough included) a quarter turn, rotating it 90 degrees. This ensures that you’re not continually rolling in the same direction, which can lead to an oval or irregularly shaped crust.
- Continue Rolling and Turning: Roll the dough a few more times from the center outward, then perform another quarter turn. By continually rotating the dough, you guarantee that it expands evenly in all directions, maintaining a round shape and consistent thickness.
- Flip the Dough (A Game-Changer): Carefully peel back the top layer of parchment paper, then gently flip the dough over. Replace the parchment paper. This maneuver helps to thin the dough more uniformly, especially if one side was thicker than the other. Peeling and repositioning the paper also prevents the dough from developing wrinkles or sticking.
- Repeat Rolling, Turning, and Flipping: Continue the cycle of rolling, rotating, and flip the dough one more time if needed. Throughout this process, keep a watchful eye on the thickness of your dough. Your goal is a consistent thickness across the entire circle, typically around 1/8-inch (about 3mm) for a standard pie crust.
- Final Thickness Check and Transfer: Once you’re satisfied with the even thickness, carefully peel off the top sheet of parchment paper. The dough should be smooth and ready to transfer. You can use the bottom sheet of parchment paper to help lift and invert the dough into your pie dish, making transfer seamless and preventing tears.
This method ensures a perfectly round, evenly thick, and beautifully workable pie crust every time, making the most delicate part of pie making a breeze.
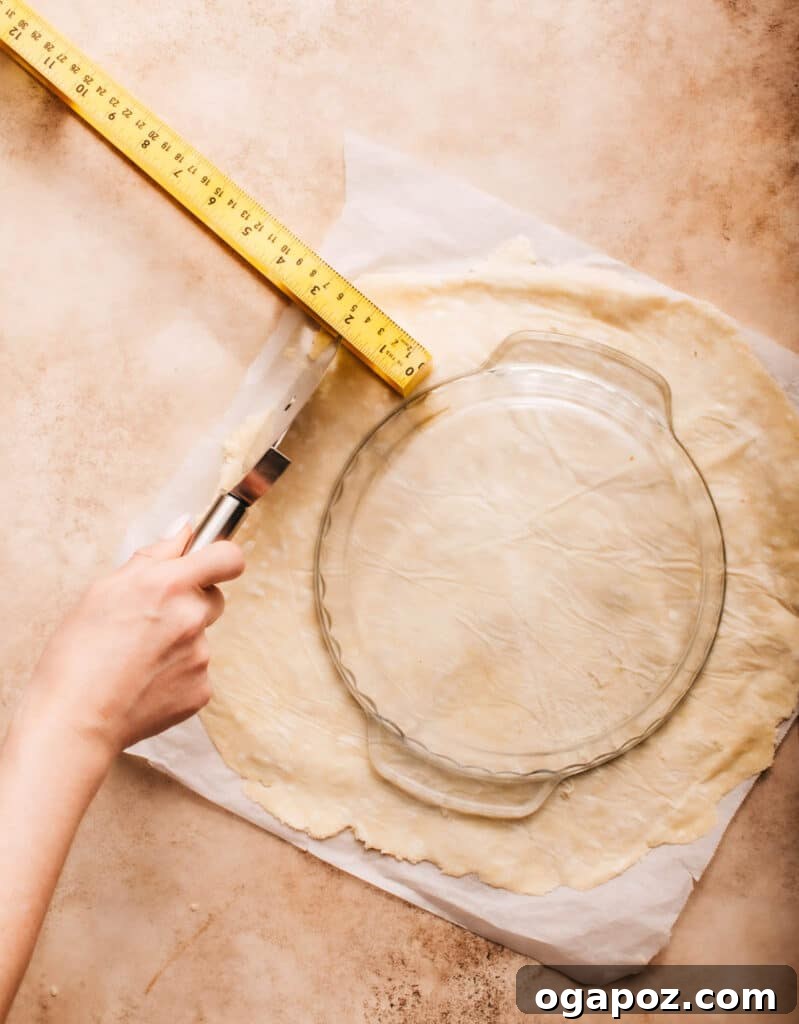
Optimal Pie Crust Size: How Large Should You Roll Your Dough?
Getting the right diameter for your rolled-out pie dough is crucial for a beautifully fitted crust, ensuring it covers the bottom, sides, and allows for an elegant edge. The ideal size will always depend on the dimensions of your pie pan.
As a general rule of thumb, you want the diameter of your rolled dough to be approximately 2 to 3 inches larger than the top diameter of your pie pan. This provides ample overhang for trimming, crimping, or creating decorative edges.
Let’s consider a common example:
For a standard 9-inch pie pan (which typically measures 9 inches across the top):
- Base Diameter: The base of the pan is usually around 9 inches.
- Accounting for Depth: Add roughly 1 to 1.5 inches for each side to account for the depth of the pan as the dough goes down and up the sides. This brings your estimated needed diameter to about 11-12 inches.
- For Overhang and Edges: If you plan to create a decorative crimped edge, a lattice top, or simply want a generous overhang to prevent shrinking, add another 1 to 2 inches.
Therefore, for a standard 9-inch pie pan, you would typically aim to roll out your dough to a diameter of approximately 12 to 14 inches. This generous size ensures you have plenty of dough to fully line the base and sides, with enough excess to create whatever beautiful edge you envision for your pie.
Always err on the side of rolling it a little larger than necessary; you can always trim away excess dough, but it’s impossible to add more once it’s too small!
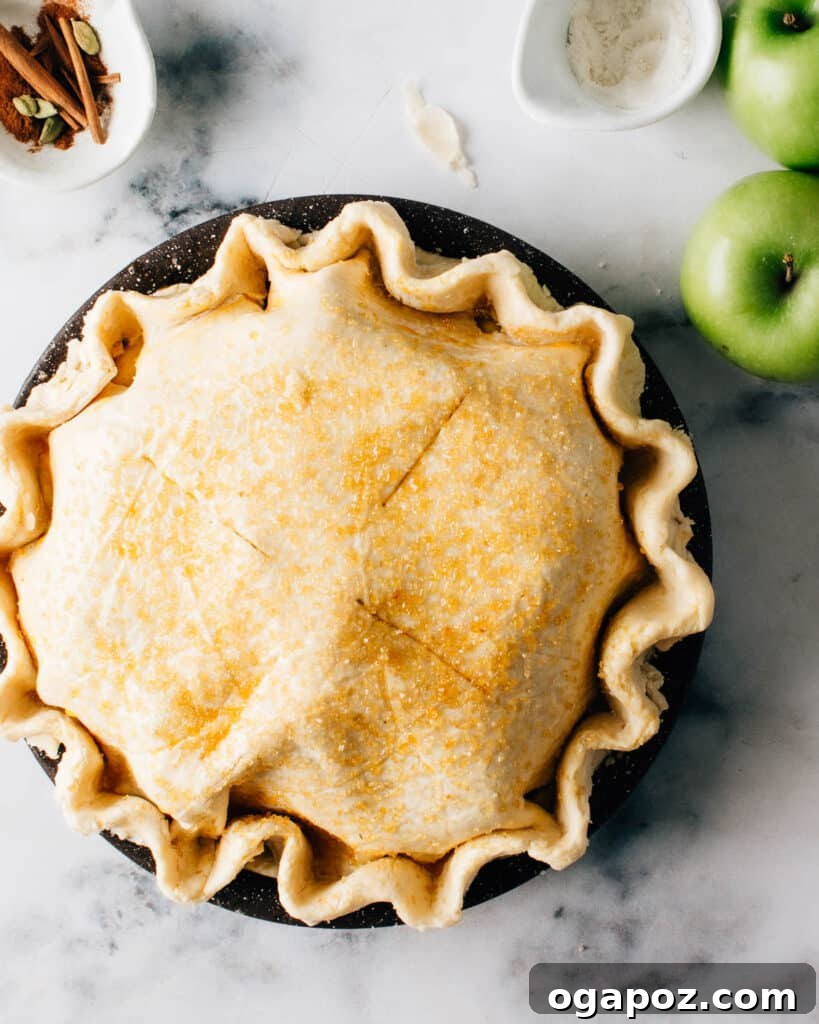
Homemade Pie Crust: Make-Ahead and Storage Solutions
One of the best features of this pie crust recipe is its make-ahead potential. Planning ahead allows you to streamline your baking process, making pie preparation a breeze and ensuring you’re always ready for a delicious treat. Here’s how to prep and store your homemade pie crust:
- Make Ahead (Refrigeration): You can prepare the pie dough up to 3 days in advance. I highly recommend rolling it out between parchment paper before refrigerating. Store the rolled-out dough flat, first wrapped tightly in parchment paper, then secured with aluminum foil to prevent it from drying out or absorbing odors.
- Freeze Unbaked Dough: For longer storage, freeze your unbaked pie dough for up to 3 months. Again, my preferred method is to roll it out between parchment paper first. Store it flat, wrapped in parchment and then foil, in a freezer-safe bag or container. When ready to use, simply thaw the dough in the refrigerator overnight before transferring it to your pie plate and filling.
- Freeze Baked Pie: If you’ve baked an entire pie, you can freeze it for up to 2 months. Ensure the pie is completely cooled to room temperature before wrapping it securely in several layers of aluminum foil. For extra protection, place the wrapped pie in an airtight container or a large zip-top freezer bag. This prevents freezer burn and maintains freshness.
- Reheat Frozen Pie: To reheat a fully baked and frozen pie, there’s generally no need to thaw it first. Bake the pie, still covered with foil, in a preheated oven at 350°F (175°C) for approximately 60 minutes, or until it’s warmed through to your liking. If you choose to thaw the pie in the refrigerator first, you can reduce the reheating time accordingly.
- Storing Leftovers (Refrigerated): Any leftover slices of baked pie can be stored in the fridge for up to 5 days. Cover the pie loosely with plastic wrap or transfer individual slices to an airtight container to maintain its freshness and prevent it from drying out.
With these make-ahead and storage tips, you’re always just a few steps away from a delicious, homemade pie. Now that you’ve mastered the art of the perfect pie crust, dive into how to make any kind of fruit pie with one easy recipe!
Beyond the Crust: Absolute Must-Try Pie Recipes!
Now that you have the ultimate foolproof pie crust in your repertoire, it’s time to put it to good use! Explore these delicious pie recipes, both sweet and savory, that are perfect partners for your homemade crust.
Favourite Sweet Pies:
- Easy Apple Pie Recipe: A classic for a reason, perfect for showcasing your flaky crust.
- Easy Pumpkin Pie Recipe: Velvety smooth and spiced just right, a holiday staple.
- Strawberry Rhubarb Pie: A delightful balance of sweet and tart, bursting with seasonal flavor.
- Blueberry Pie: Simple, juicy, and utterly satisfying.
- Chai Apple Pie: A warm and inviting twist on the traditional apple pie, infused with aromatic chai spices.
- Peanut Butter Pretzel Pie: A decadent and salty-sweet treat that’s impossible to resist.
Favorite Savory Pies:
- Hearty Beef Pot Pie: Comfort food at its finest, with tender beef and vegetables under a golden crust.
- Classic Turkey Pot Pie: A delicious way to use up leftover turkey, or simply enjoy a comforting meal.
- Flavorful Samosa Pie: An innovative and delicious fusion, bringing the flavors of a samosa into a pie.
Each of these recipes will shine even brighter with the incredible base you’ve just learned to create!
Cracking the Code: The Delicate Balance of Tender and Flaky Pie Crust
Making pie crust can feel like a culinary tightrope walk because you’re striving for two seemingly contradictory qualities: a crust that is both exquisitely flaky AND tender. And to complicate matters, the scientific principles behind achieving each characteristic are distinctly different.
- For Tenderness: To ensure a tender crust that melts in your mouth, a significant portion of the fat must be thoroughly worked into the flour until it’s finely dispersed, coating the flour particles and inhibiting gluten development.
- For Flakiness: Conversely, to achieve that desirable flaky texture, you need distinct, visible chunks of fat distributed throughout the dough. These chunks create steam pockets during baking, which are responsible for lifting and separating the layers.
Then, there’s the essential element of flavor. Let’s be honest: for a truly delicious pie crust, butter is paramount. Its rich, creamy flavor and golden hue are unbeatable. However, butter introduces its own challenge:
- Butter’s Melting Point: Butter has a lower melting point than other fats like shortening or lard. This means it can melt too quickly in the oven before the crust’s structure is fully set. This can lead to the butter spreading out, potentially compromising those delicate flaky layers and causing any decorative details to slump.
It’s enough to make you exclaim, “Dough, or d’oh!”
But fret not! After years of dedicated testing, experimenting, and tasting countless pies, I’ve meticulously developed a recipe that ingeniously addresses these challenges. I am genuinely confident that I’ve crafted a method that consistently delivers a tender, flaky, incredibly flavorful, AND utterly foolproof pie crust – all without the need for a food processor!
I am absolutely thrilled to share these proven techniques with you, empowering you to create the pie crusts of your dreams!
Want to save this recipe? Bookmark this page or print it out to make it later!
Foolproof, Easy Pie Crust Recipe (Without Food Processor)
Jennifer Pallian BSc, RD
20
1
3
2
30
3
53
12
Ingredients
- 3 cups all-purpose flour
- 1 ½ tsp kosher salt
- 1 ⅛ cup unsalted butter cold, and cut into 1-inch pieces
- 9 ½ tbsp ice water (that’s 1/2 cup + 1 1/2 tbsp)
Instructions
-
Measure Your Dry Ingredients: In a large bowl, whisk together the all-purpose flour and kosher salt until well combined.
-
Add Most of the Butter for Tenderness: Add about two-thirds of the cold, 1-inch butter pieces (roughly 3/4 cup or 170g) to the flour mixture. Using your fingertips, work the butter into the flour by squeezing and rubbing until the mixture resembles damp crumbs or almond meal. This coats the flour in fat, creating a tender crust.
-
Incorporate Remaining Butter for Flakiness & Chill: Add the remaining butter pieces to the mixture. Gently mix them in, but ensure some small chunks of butter (pea-sized) remain visible. These distinct chunks create steam pockets for a flaky crust. Place the bowl in the freezer for 10 minutes to keep the butter firm.
-
Add Ice Water: Remove the bowl from the freezer. Gradually add the ice-cold water (9 ½ tbsp) to the mixture. Use a silicone spatula or fork to gently toss and mix until the mixture is mostly hydrated and forms a shaggy, clumpy mess. Avoid overmixing.
-
Form the Dough & Rest: Dump the shaggy mixture onto a large piece of parchment paper. Use the paper to help you fold and press the dough together a few times until it forms a cohesive disc. Let the dough disc rest at room temperature for 30 minutes. This allows the flour to hydrate and gluten to relax.
-
Divide and Roll Out the Dough: Divide the rested dough into 2 equal pieces (for a double crust) or keep as one (for a single crust). Place each piece between two sheets of parchment paper and roll it out into a circle about 1/8-inch thick, ensuring it’s about 2-3 inches larger than your pie plate diameter. Trim any very shaggy edges.
-
Final Chill: Stack the rolled-out dough circles with parchment paper in between. Wrap the stack tightly in aluminum foil. Refrigerate for at least 2 hours, or ideally overnight (up to 3 days), or freeze for up to 3 months. This is crucial for tenderness and flakiness.
-
Prepare for Baking: When ready to bake, place a baking sheet in your oven and preheat to 425°F (220°C). This preheated sheet helps achieve a crisp bottom crust.
-
Assemble & Bake Your Pie: Gently transfer one rolled-out dough circle to your pie plate. Fill with your chosen filling. If making a double-crust pie, add the top crust. Crimp the edges to seal and cut a few steam vents in the top. Freeze the assembled pie for 30 minutes while the oven finishes preheating. Bake on the hot baking sheet for 20 minutes at 425°F (220°C). Then, reduce the oven temperature to 350°F (175°C) and continue baking until the filling is cooked through and the crust is golden brown (baking time will vary depending on the pie filling). If edges brown too quickly, loosely cover them with aluminum foil.
Notes
Nutrition
Carbohydrates: 22g |
Protein: 3g |
Fat: 17g |
Saturated Fat: 10g |
Polyunsaturated Fat: 1g |
Monounsaturated Fat: 4g |
Trans Fat: 1g |
Cholesterol: 41mg |
Sodium: 414mg |
Potassium: 5mg |
Fiber: 3g |
Sugar: 1g |
Vitamin A: 480IU |
Calcium: 25mg |
Iron: 1mg
Nutrition information is automatically calculated and should only be used as an approximation.
Tried this recipe? Share your experience in the comments below!