
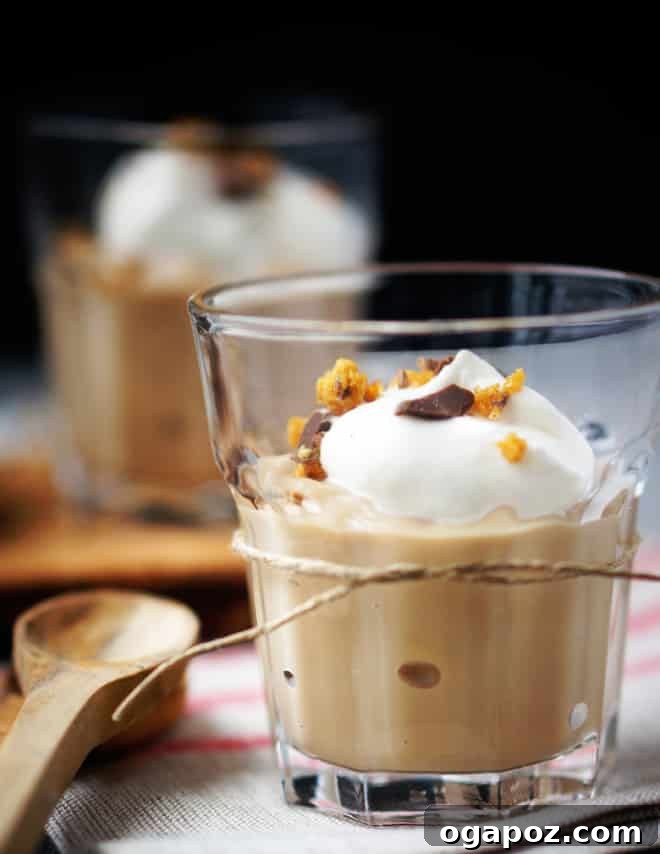
This Butterscotch Pudding with Toffee Crumbles is not merely a dessert; it’s an experience in pure indulgence. Imagine a silky, incredibly creamy custard that melts in your mouth, infused with a deep, rich caramelized butterscotch flavor. Each spoonful is a journey of luxurious texture, beautifully complemented by a cloud of freshly whipped cream and the delightful crunch of chocolate-covered toffee bits. This homemade butterscotch pudding recipe elevates a classic comfort food to gourmet heights, proving that truly exceptional desserts are within reach, even for the home cook. Prepare to impress your family and friends with this utterly divine treat that promises to become a cherished favorite.
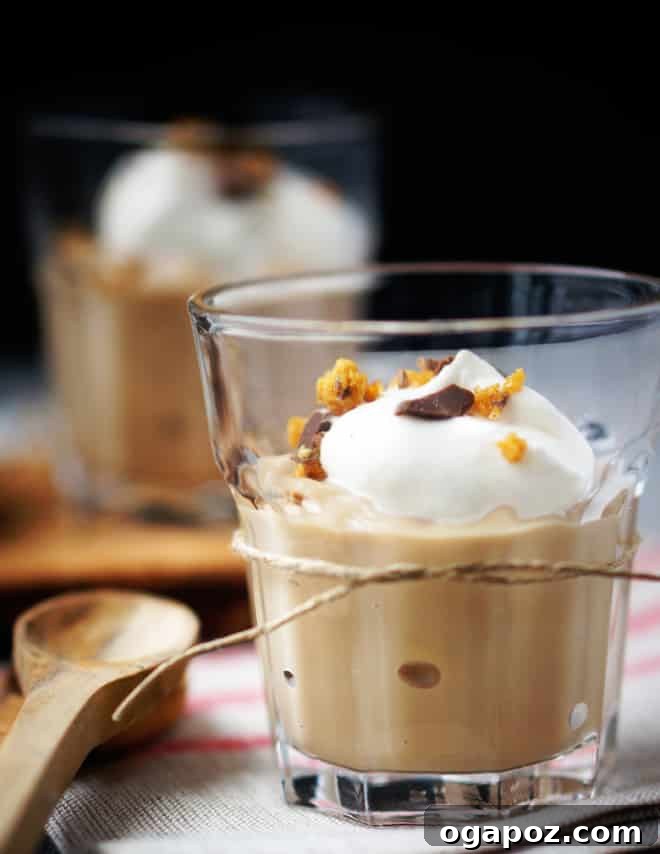
Essential Ingredients for Dreamy Butterscotch Pudding
Crafting this dreamy homemade pudding starts with selecting the right ingredients. Each component plays a vital role in achieving that perfect balance of sweetness, richness, and creamy texture. Here’s a closer look at what you’ll need:
- Butter: High-quality salted butter is key. It provides a foundational richness and introduces a subtle hint of salt that perfectly contrasts and balances the sweetness of the butterscotch, creating a more complex and satisfying flavor profile. Unsalted butter can be used, but you might want to increase the added salt slightly.
- Dark brown sugar: This is the star of the butterscotch. The higher molasses content in dark brown sugar is crucial for developing that deep, unmistakable caramelized flavor and beautiful amber hue unique to true butterscotch. Avoid substituting with light brown sugar if possible, as it will yield a milder taste.
- Heavy cream: Used generously in both the pudding base and the decadent whipped topping. Heavy cream (with at least 36% milk fat) ensures maximum creaminess and a luscious mouthfeel for the pudding, and whips up into a stable, airy topping.
- Milk: Whole milk is recommended for its fat content, which contributes to the pudding’s body and richness without making it overly heavy. You can use 2% milk, but the final pudding might be slightly less decadent.
- Cornstarch: This natural thickener is essential for achieving the perfect spoonable consistency in the pudding. It works in conjunction with the egg yolks to provide a smooth, velvety texture. Ensure it’s whisked thoroughly to prevent lumps.
- Salt: A small but mighty ingredient. Just a pinch of salt helps to amplify the flavors of the butterscotch and cuts through the sweetness, preventing the pudding from tasting cloyingly sweet.
- Egg yolks: These are vital for both richness and structure. Egg yolks contribute to the custard-like texture, adding a luxurious creaminess and helping the pudding set beautifully. They also lend a subtle yellow hue.
- Scotch or whiskey: This is the “scotch” in butterscotch, and while optional, it is highly recommended. A splash of Scotch or whiskey adds a wonderful depth and sophisticated nuance to the flavor profile, enhancing the caramel notes without being overtly alcoholic.
- Vanilla extract: Pure vanilla extract rounds out all the flavors, adding a warm, aromatic dimension that complements the butterscotch beautifully. Always use pure vanilla for the best results.
- Chocolate-covered toffee bar: For the ultimate topping! Crushed Heath or Crunchie bars provide a delightful contrast in texture—a crisp, buttery, chocolatey crunch against the smooth pudding.
You’ll find precise quantities for each ingredient in the comprehensive recipe card located at the bottom of this article.
Customize Your Creation: Variations and Substitutions
One of the joys of homemade desserts is the ability to customize them to your taste or dietary needs. This butterscotch pudding recipe is wonderfully versatile, allowing for several delightful variations and substitutions:
- Bourbon swap: If Scotch isn’t your preference, try bourbon. Bourbon will impart a slightly sweeter, vanilla-forward, and often smokier flavor, adding a different layer of complexity to the butterscotch. Dark rum is another excellent alternative for a warm, molasses-rich note.
- Alcohol-free option: For a completely alcohol-free pudding, simply omit the whiskey entirely. The pudding will still be incredibly flavorful and delicious without it. You can enhance the vanilla notes by adding an extra half teaspoon of vanilla extract or a touch of a non-alcoholic vanilla bean paste.
- Light brown sugar alternative: While dark brown sugar offers the most authentic and deep butterscotch flavor, light brown sugar can be used in a pinch. Be aware that it will result in a milder, less intensely caramelized butterscotch taste. If using light brown sugar, consider adding a tiny dash of molasses (about ¼ teaspoon) to boost the depth of flavor.
- Diverse topping ideas: Don’t limit yourself to toffee! Get creative with your toppings. Consider crushed shortbread cookies for a buttery crunch, a drizzle of homemade caramel sauce for an extra layer of sweetness, toasted pecans or walnuts for a nutty element, or even a sprinkle of flaky sea salt to enhance the caramel notes. A dusting of cinnamon or nutmeg can also add a cozy touch.
- Dairy-free rendition: To make this pudding dairy-free, substitute full-fat coconut cream for heavy cream (ensure it’s well-chilled for whipping) and a rich plant-based milk like oat milk or full-fat coconut milk for regular milk. Note that the flavor profile might have a subtle coconut hint, which can be quite delightful!
- Spiced butterscotch: Infuse your butterscotch with warm spices like a pinch of ground cinnamon, nutmeg, or even a tiny hint of cardamom when you add the milk. This creates a cozy, autumnal twist perfect for colder months.
Gather Your Tools for Pudding Perfection
You’ll be pleased to know that you likely already possess all the necessary equipment to whip up this exquisite butterscotch pudding. No fancy gadgets are required, just a few kitchen staples that ensure a smooth and enjoyable cooking process:
- Medium saucepan: This pan is dedicated to creating the rich butterscotch base. Its size allows for controlled caramelization of the sugar without it spreading too thin or burning too quickly. A light-colored bottom is a bonus, helping you monitor the sugar’s color change.
- Large saucepan: This is where the magic of the pudding base happens. A larger pan provides ample space for whisking the milk, cornstarch, and eventually the butterscotch, preventing spills and allowing for even cooking as the pudding thickens.
- Whisk: Your best friend for this recipe! An efficient whisk is absolutely essential for achieving a smooth, lump-free pudding. It ensures that the cornstarch dissolves properly, prevents scorching on the bottom of the pan, and thoroughly combines the egg yolks without scrambling.
- Fine-mesh sieve: While optional, a fine-mesh sieve is your secret weapon against any potential lumps or slight curdling. If you’re new to making custards or simply want to guarantee an impeccably smooth pudding, passing it through a sieve for 30 seconds can save your dessert and elevate its texture.
- Glass measuring cup: This is incredibly useful for tempering the egg yolks. Its heat-proof nature and pour spout make it ideal for slowly incorporating the hot pudding mixture into the yolks, a critical step to prevent them from scrambling.
- Electric mixer: For the ultimate fluffy whipped cream topping, an electric mixer (handheld or stand mixer) is highly recommended. It ensures light, airy peaks in a fraction of the time compared to hand whisking.
- Serving glasses or ramekins: For that elegant, individual presentation that makes this dessert feel even more special. Clear glasses showcase the beautiful layers of pudding, whipped cream, and toffee crumbles.
- Plastic wrap: Crucial for covering the pudding during chilling. Ensure it’s pressed directly onto the surface to prevent a skin from forming.
- Rubber spatula: Ideal for scraping down the sides of the pan and ensuring all ingredients are fully incorporated, minimizing waste and ensuring even cooking.
How to Make Homemade Butterscotch Pudding: Your Easy Step-by-Step Guide
Despite its luxurious taste and appearance, this butterscotch pudding comes together with surprising ease. The active cooking time is minimal, roughly 20-25 minutes, making it a perfect project for an afternoon or evening. The hardest part, truly, is patiently waiting for it to chill to perfection! Follow these clear steps for a flawless dessert every time.
Step 1: Create the Irresistible Butterscotch Base
Begin by melting the specified amount of salted butter in your medium saucepan over medium heat. Once the butter is fully melted and slightly fragrant, add the dark brown sugar. Stir this mixture continuously until all the sugar appears thoroughly moistened and begins to clump together like wet sand. This initial stirring ensures even melting.
Now, the critical part: stop stirring! Let the mixture bubble gently for approximately 5 to 7 minutes. Resist the urge to stir, as this can cause the sugar to crystallize. Keep a close eye and nose on it; you’ll know it’s ready when it transforms from a sandy texture into a smooth, molten, liquid caramel, and a rich, nutty, and distinctly toasty aroma fills your kitchen. The color should deepen to a beautiful amber. Immediately remove the saucepan from the heat to prevent burning. Carefully and slowly whisk in 1 cup of heavy cream. Be cautious as the mixture will bubble up vigorously. Continue whisking until the butterscotch is smooth and fully combined. Set this glorious butterscotch sauce aside.
Step 2: Prepare the Velvety Pudding Base
In your large saucepan, off the heat, whisk together the milk, cornstarch, and salt until the cornstarch is completely dissolved and there are no visible lumps. This ensures a silky-smooth pudding texture from the start. Place the saucepan over medium-high heat. Stir constantly with your whisk to prevent the milk from scorching on the bottom of the pan and to ensure even heating. Continue stirring until the mixture comes to a full boil, indicated by large, rolling bubbles. Once boiling, reduce the heat to low. Now, carefully whisk in your prepared butterscotch sauce until it is thoroughly combined with the milk mixture, creating a uniform, pale caramel-colored liquid.
Step 3: Master the Art of Tempering Egg Yolks
This step is crucial for achieving a smooth, rich custard without scrambling the eggs. In your glass measuring cup, beat the two large egg yolks thoroughly with a fork until they are light yellow and uniform. With one hand, very slowly and in a thin, steady stream, pour about 1 cup of the hot pudding mixture into the beaten egg yolks. Simultaneously, with your other hand, whisk the egg yolks constantly and vigorously. The key is to raise the temperature of the egg yolks gradually, preventing them from cooking too quickly. This process is called tempering.
Once the egg yolks are tempered, slowly whisk this egg-pudding mixture back into the large saucepan containing the remaining pudding. Return the saucepan to medium-low heat. Stir constantly, gently but firmly, for about 5 minutes, or until the pudding thickens significantly. You’ll notice a few sputtering bubbles breaking the surface, indicating it’s properly cooked and thickened. The pudding should coat the back of a spoon and hold its shape. Remove from heat.
Step 4: Finish and Chill for Perfect Set
Transfer the warm pudding to a clean, large bowl. If you notice any small lumps or suspect any slight curdling (a common occurrence and easily fixed!), press the pudding through a fine-mesh sieve directly into the bowl. This extra step takes mere seconds and guarantees an incredibly smooth, restaurant-quality texture. Stir in the Scotch or whiskey (if using) and the vanilla extract, ensuring they are fully incorporated.
Now, for chilling: cover the pudding with plastic wrap, pressing the wrap directly onto the surface of the pudding. This is a critical technique to prevent a rubbery skin from forming as it cools. Refrigerate the pudding for at least 3 hours, or preferably up to 24 hours, to allow it to fully chill and set. The longer it chills, the firmer and more developed the flavors will become.
Step 5: Prepare the Fluffy Whipped Cream Topping
Just before you are ready to serve this delightful dessert, prepare the whipped cream. In a cold bowl (chilled metal bowls work best), beat the cold heavy cream on high speed with an electric mixer until soft peaks begin to form. This means the cream will hold its shape slightly but still be soft and billowy. Gradually beat in the granulated sugar and the vanilla extract until the cream forms medium to firm peaks. Be careful not to overbeat, or you’ll end up with butter!
To serve, dollop generous amounts of the freshly whipped cream onto individual servings of the chilled butterscotch pudding. Finish by sprinkling generously with your crushed chocolate-covered toffee bar crumbles. Serve immediately and enjoy the symphony of flavors and textures!
5 Common Mistakes to Avoid for Perfect Butterscotch Pudding
Making butterscotch pudding from scratch is incredibly rewarding, but like any culinary endeavor, there are a few pitfalls to watch out for. Knowing these common mistakes and how to prevent them will ensure your pudding turns out perfectly silky and delicious every time:
- Burning the butterscotch: Sugar caramelizes quickly and can go from perfectly golden to burnt in a matter of seconds. Burnt sugar has an acrid, bitter taste that is impossible to salvage. To avoid this, watch your butterscotch closely during the simmering stage, especially after you stop stirring. Trust your nose—when you smell that nutty, rich caramel aroma, and see a molten, amber liquid, remove it from the heat immediately. A light-bottomed pan can help you monitor the color more accurately.
- Adding eggs too fast: This is perhaps the most frequent culprit behind a lumpy or “scrambled” pudding. Egg yolks need to be gradually brought up to temperature, a process known as tempering. If you dump hot pudding directly into cold egg yolks, the sudden heat will cook the eggs instantly, resulting in an unappetizing scrambled texture. Always pour the hot mixture into the beaten yolks in a very slow, thin, steady stream while whisking the yolks constantly and vigorously. This gentle introduction of heat prevents curdling.
- Skipping the sieve: While not strictly mandatory if you’re very careful, a fine-mesh sieve is your insurance policy for an impeccably smooth pudding. If, despite your best efforts, you notice any tiny lumps or a slightly grainy texture after cooking, straining the pudding through a fine-mesh sieve into your chilling bowl will instantly resolve the issue. It takes mere seconds and will transform your pudding into a velvety dream.
- Not pressing plastic wrap directly onto the surface: This seemingly minor step is crucial for maintaining the pudding’s beautiful texture. If you simply cover the bowl, a rubbery, unsightly skin will form on the surface of the cooling pudding as moisture evaporates. By pressing plastic wrap directly onto the pudding’s surface, you create a barrier that prevents this skin from developing, ensuring a perfectly smooth top layer.
- Scraping the pot: As the pudding cooks, the mixture closest to the heat source at the bottom and sides of the saucepan tends to cook faster and can sometimes slightly curdle or stick. When transferring the pudding to the chilling bowl, resist the urge to vigorously scrape every last bit from the pot. Leave behind that thin, potentially overcooked layer. It’s better to lose a tiny amount of pudding than to incorporate any compromised bits that could affect the overall smooth texture of your dessert.
Make Ahead and Storage Tips for Convenience
This butterscotch pudding is an ideal dessert for meal prepping or preparing in advance, which is fantastic for entertaining or simply having a luxurious treat ready when a craving strikes. In fact, it absolutely benefits from chilling time, allowing the flavors to meld and the custard to set perfectly.
Storing Leftovers
- Refrigerate: Any leftover pudding (without the whipped cream and toffee toppings) should be stored in an airtight container in the refrigerator. Ensure that plastic wrap is pressed directly onto the surface of the pudding to prevent a skin from forming and to keep it fresh. When stored correctly, the pudding will maintain its quality for up to 4 days.
- Keep toppings separate: Always store the whipped cream and crushed toffee in separate airtight containers. Add these delightful embellishments just before serving. Whipped cream can deflate or become watery, and toffee crumbles can lose their crunch and become soggy if added too far in advance.
Freezing
- Not recommended: Unfortunately, egg-thickened puddings, like this butterscotch delight, do not fare well when frozen. The delicate emulsion can break down, causing the texture to become grainy, watery, or separated once thawed. For the best experience, enjoy this pudding fresh from the refrigerator.
Reheating Butterscotch Pudding
- Serve cold: This butterscotch pudding is specifically designed to be enjoyed chilled, offering a refreshing and silky experience. It’s meant to be served straight from the refrigerator, showcasing its firm yet smooth custard consistency.
- Room temperature preference: If you prefer your pudding with a slightly less intense chill, you can let individual servings sit out at room temperature for about 10-15 minutes before serving. This allows it to slightly soften and enhances the nuances of its flavor. Avoid actively reheating, as this can negatively impact the texture.
Pro Tips & Science-Based Secrets for Butterscotch Perfection
Having made this pudding countless times, I’ve gathered some insights and learned a few science-backed secrets that can help you achieve truly outstanding results. These pro tips will guide you towards a pudding that’s consistently silky, flavorful, and absolutely irresistible:
- Observe the butterscotch closely: Don’t just rely on a timer. The visual cues and aroma are your best indicators. The butterscotch should transition from a thick, sandy consistency to a clear, molten liquid. More importantly, it will emit a distinct nutty and toasty fragrance when perfectly caramelized. This deep aroma signifies the development of complex flavor compounds (Maillard reaction products) that are key to butterscotch.
- Hands-off approach to caramelizing sugar: Once the brown sugar is fully moistened and starts to bubble, resist the urge to stir it. Stirring can introduce air and cause the sugar crystals to clump together and recrystallize, leading to a grainy sauce. Allow the sugar to melt and caramelize undisturbed for the smoothest possible butterscotch.
- Temper with patience: The scientific principle behind tempering eggs is gradually increasing their temperature to prevent thermal shock. This slow, steady stream of hot liquid into the egg yolks, combined with constant whisking, ensures the eggs integrate smoothly into the pudding base without scrambling. If you rush this, the egg proteins will coagulate too quickly, creating lumps.
- Don’t hesitate to restart a burnt batch: If your butterscotch accidentally burns, do not try to salvage it. Burnt sugar has a harsh, bitter flavor that will permeate the entire pudding, making it inedible. It’s just butter and brown sugar; discard it and start fresh. It’s a small investment for a perfect dessert.
- Strain as your safety net: Even experienced cooks can sometimes get a tiny lump or two. A fine-mesh sieve is an immediate and effective fix. It removes any potential curdled bits or undissolved cornstarch, guaranteeing a perfectly smooth, luxurious texture. It’s a simple step that takes minimal effort for maximum impact on quality.
- Dark brown sugar is non-negotiable for authentic flavor: The high molasses content in dark brown sugar is the chemical reason for butterscotch’s signature deep, rich, and slightly smoky flavor. It reacts differently during caramelization compared to white or light brown sugar, yielding a more profound taste. For the best, most authentic butterscotch, stick with dark brown sugar.
- Chill time is flavor development time: While the pudding sets quickly, allowing it to chill for at least 3 hours (and ideally longer) not only ensures a firm texture but also allows the complex flavors of the butterscotch, cream, and vanilla to fully meld and deepen. Patience truly pays off here.
- Quality of ingredients matters: Using fresh, high-quality dairy, pure vanilla extract, and good butter makes a noticeable difference in the final taste and texture of your pudding. The simpler the recipe, the more each ingredient shines.
Frequently Asked Questions About Butterscotch Pudding
Curious about certain aspects of making this delightful dessert? Here are some quick and comprehensive answers to the most commonly asked questions about butterscotch pudding, ensuring you have all the information you need for success.
While both butterscotch and caramel are deliciously sweet, caramelized sauces, their core difference lies in their primary sugar ingredient. Caramel is traditionally made with white granulated sugar, which yields a clean, sweet, and nutty caramelized flavor. Butterscotch, on the other hand, is made primarily with brown sugar. The molasses inherent in brown sugar gives butterscotch its distinctively deeper, richer, and more complex flavor profile, often described as having notes of toffee, molasses, and butter. This also contributes to its slightly darker color compared to classic caramel.
Absolutely! You can confidently make this butterscotch pudding recipe without any alcohol, and it will still be incredibly flavorful and satisfying. The Scotch or whiskey adds a layer of depth and sophistication, but it is not essential for the pudding’s structure or deliciousness. If you choose to omit it, I recommend adding an extra splash (about an additional 1/2 teaspoon) of pure vanilla extract to further enhance the overall warm, sweet aroma and flavor of the pudding.
Pudding typically curdles when the egg yolks are exposed to high heat too quickly, causing them to scramble or coagulate unevenly. This usually happens during the tempering process. To prevent this, always add the hot pudding mixture to the beaten egg yolks very slowly in a thin stream while whisking the yolks constantly and vigorously. If your pudding does end up slightly lumpy or curdled, don’t despair! A quick and effective fix is to immediately push the finished pudding through a fine-mesh sieve into a clean bowl before chilling. This will remove any curdled bits and result in a wonderfully smooth texture.
You’ll know your butterscotch base is perfectly cooked when it undergoes a clear transformation. Initially, the butter and brown sugar mixture will look thick and sandy. As it cooks and caramelizes without stirring, it will melt down into a uniform, molten liquid that is smooth and glossy, not grainy. The color will deepen to a rich amber, and most importantly, your kitchen will be filled with a distinct, rich, nutty, and toasted caramel aroma. This typically takes about 5 to 7 minutes of gentle bubbling after you stop stirring. Trust your senses more than the clock.
While you can use light brown sugar as a substitute if dark brown sugar is unavailable, it’s important to understand that your pudding will have a noticeably milder butterscotch flavor. Dark brown sugar contains a higher percentage of molasses, which is what gives butterscotch its characteristic deep, rich, and more robust caramelized taste. For the most authentic and intensely flavorful butterscotch pudding, I strongly recommend sticking with dark brown sugar.
When stored correctly, homemade butterscotch pudding maintains its quality for up to 4 days in the refrigerator. To ensure optimal freshness and prevent a skin from forming, make sure the pudding is covered with plastic wrap pressed directly onto its surface. Remember to add any toppings, such as whipped cream and toffee crumbles, just before serving to keep them fresh and crisp.
Yes, absolutely! This butterscotch pudding is an excellent make-ahead dessert. In fact, it benefits greatly from being prepared in advance, as it requires a minimum of 3 hours to chill and set properly in the refrigerator. You can make the pudding up to 24 hours before you plan to serve it. Just ensure it’s tightly covered with plastic wrap pressed onto its surface and stored in the fridge. Prepare the whipped cream and crush the toffee only just before serving.
If you’re looking to experiment with different flavor profiles, several other spirits can be excellent substitutes for Scotch in butterscotch pudding. Bourbon is a popular choice, offering a sweeter, often vanilla-infused and slightly smoky note. Other types of whiskey, such as rye or Irish whiskey, can also work. Dark rum is another fantastic option, lending a rich, molasses-like undertone that beautifully complements the brown sugar. Each will impart a unique character to your pudding.
If your pudding is too thick, it might have been cooked for too long or had too much cornstarch. You can try whisking in a small amount of warm milk or cream, one tablespoon at a time, until you reach your desired consistency. If it’s too thin, it likely wasn’t cooked long enough or the cornstarch wasn’t fully activated. In this case, you can gently return it to the saucepan and cook over low heat, whisking constantly, until it thickens to the right consistency, ensuring it reaches a sputtering boil before removing from heat.
While you can use other types of milk, be aware that the richness and overall texture of the pudding will be affected. Whole milk is recommended for its fat content, which contributes significantly to the pudding’s creamy body. Skim milk will result in a much thinner, less luxurious pudding. Plant-based milks like almond milk can be used, but full-fat oat milk or coconut milk (for dairy-free) are better choices as they offer more fat and a richer consistency that more closely mimics dairy milk, though they might impart their own subtle flavors.
Other Decadent Pudding Recipes You’ll Love
If you’ve fallen in love with the comforting allure of homemade pudding, we have more delightful recipes for you to explore. Expand your repertoire of creamy, dreamy desserts with these fantastic options:
- Salted Double Chocolate Pudding
- Tropical Chia Pudding Parfait
- No-Bake Chocolate Tart
- Vitamix Chocolate Mousse
- No-Bake Cherry Cheesecake Bars
Butterscotch Pudding (with Toffee Crumbles)
Ingredients
For the Pudding:
- 3 tbsp salted butter
- ¾ cup packed dark brown sugar
- 1 cup heavy cream
- 2 cups milk
- ⅓ cup cornstarch
- ¼ tsp salt
- 2 large egg yolks
- 1 tbsp Scotch or whiskey (optional)
- 2 tsp vanilla extract
For the Topping:
- ¾ cup cold heavy cream
- 3 tbsp granulated sugar
- ½ tsp vanilla extract
- 1 chocolate-covered toffee bar (such as Heath or Crunchie), crushed
Instructions
- Melt butter in a medium saucepan over medium heat. Add brown sugar and stir until all sugar is wet-looking and clumped. Stop stirring and let the mixture bubble and caramelize for 5-7 minutes, until it looks molten and smells nutty and caramelly. Remove from heat and carefully whisk in 1 cup of heavy cream until smooth. Set aside.
- In a large saucepan off the heat, whisk together milk, cornstarch, and salt until smooth and lump-free. Place over medium-high heat and cook, stirring constantly, until the mixture comes to a full boil. Reduce heat to low and whisk in the prepared butterscotch sauce until fully combined.
- In a glass measuring cup, beat egg yolks with a fork. Slowly and steadily, pour about 1 cup of the hot pudding mixture into the beaten yolks while whisking the yolks constantly. This tempers the eggs. Whisk the tempered yolk mixture back into the remaining pudding in the saucepan. Stir over medium-low heat until the pudding thickens and a few sputtering bubbles appear at the surface, about 5 minutes.
- Transfer the pudding to a clean bowl. If any lumps are visible, press the pudding through a fine-mesh sieve. Stir in the Scotch (if using) and 2 tsp vanilla extract. Cover the pudding with plastic wrap, pressing the wrap directly onto the surface to prevent a skin from forming. Refrigerate for at least 3 hours, or up to 24 hours, until thoroughly chilled and set.
- Just before serving, prepare the whipped cream topping. In a chilled bowl, beat ¾ cup cold heavy cream on high speed with an electric mixer until soft peaks form. Beat in 3 tbsp granulated sugar and ½ tsp vanilla extract until medium-firm peaks are achieved.
- Dollop whipped cream onto individual servings of chilled butterscotch pudding and sprinkle generously with crushed chocolate-covered toffee crumbles. Serve immediately.
Notes
- Dark Brown Sugar: For the most authentic and deep butterscotch flavor, use dark brown sugar. Light brown sugar will yield a milder taste.
- Butterscotch Readiness: The butterscotch is ready when it’s molten, smells nutty and toasty, and has a rich amber color. If it burns, discard and start fresh – it’s just butter and sugar!
- Tempering Eggs: Always add hot pudding to egg yolks very slowly while whisking constantly to prevent scrambling.
- Curdling Fix: If your pudding shows any lumps or signs of curdling, simply press it through a fine-mesh sieve before chilling for a perfectly smooth result.
- Don’t Scrape the Pot: To avoid incorporating any potentially overcooked bits, pour the pudding out and leave any thin layer stuck to the bottom or sides of the saucepan behind.
- Scotch: The Scotch adds depth but is optional. For an alcohol-free version, simply omit it and add a bit more vanilla extract.
- Plastic Wrap: Press plastic wrap directly onto the pudding’s surface during chilling to prevent a rubbery skin from forming.
- Toffee Topping: Heath, Skor, or Crunchie bars work wonderfully. Crush them just before serving to maintain their delightful crunch.
- Make Ahead: This pudding can be made up to 24 hours in advance. Add whipped cream and toffee just before serving for best results.
- Leftovers: Store covered in the fridge for up to 4 days. Freezing is not recommended as it can affect the texture.
Nutrition
Nutrition information is automatically calculated and should only be used as an approximation.