
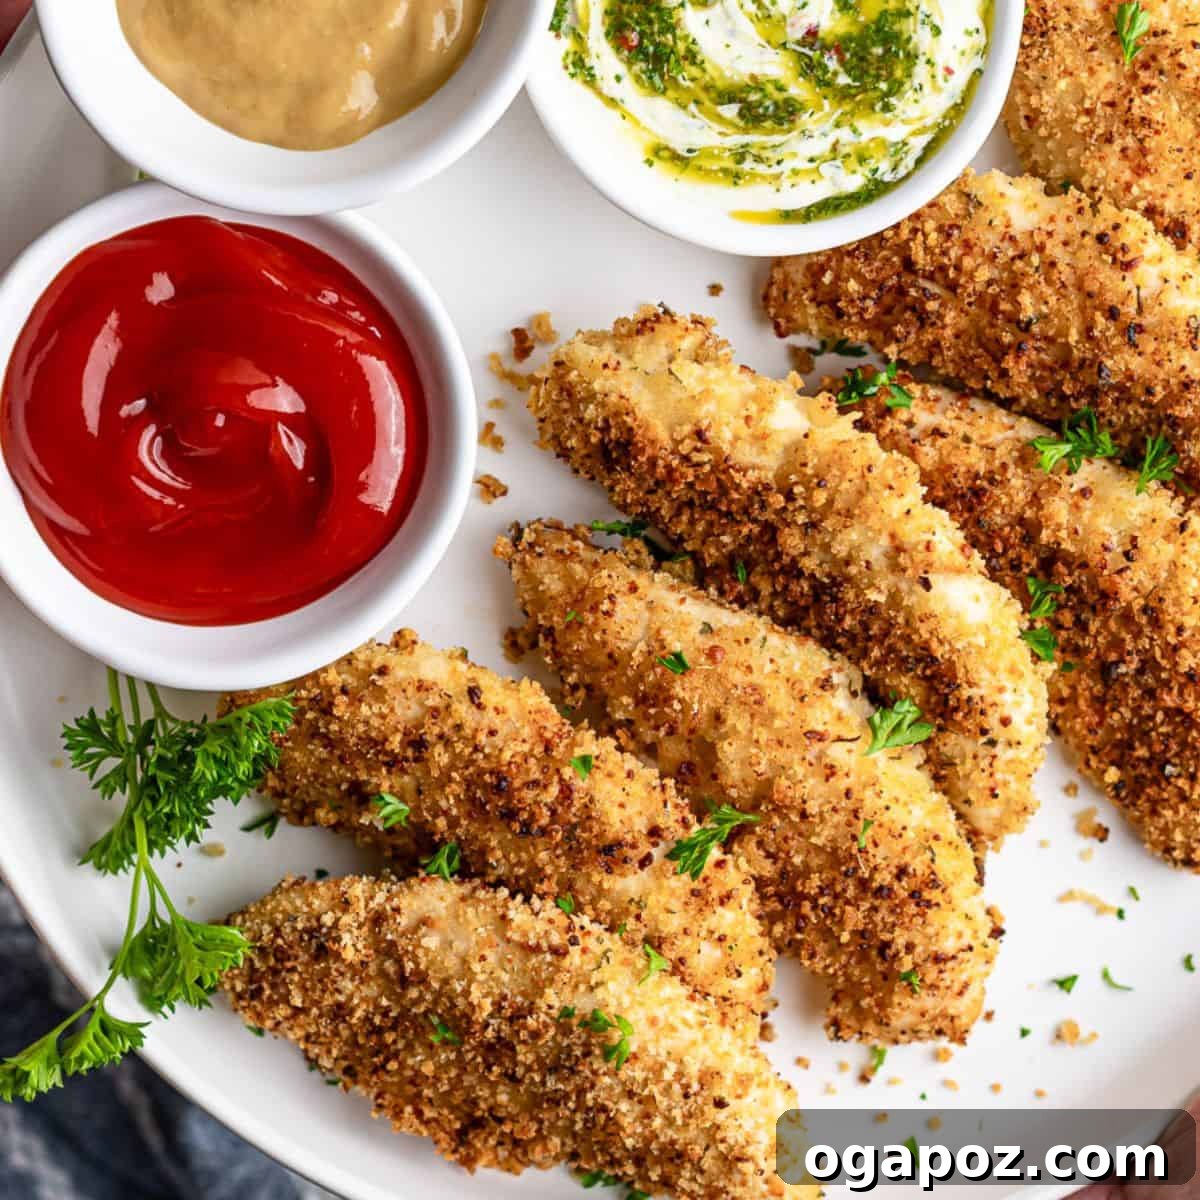
Need **perfectly crispy, golden-brown baked chicken tenders** in under 35 minutes? This recipe for oven-baked chicken fingers delivers on all fronts: juicy on the inside, wonderfully crunchy on the outside, and absolutely no messy oil splatter from deep frying. They’ve been a consistent weeknight hero in my household for years, a true family favorite that even the pickiest eaters adore. For those moments when time is truly of the essence, or if you prefer an alternative cooking method, be sure to check out my Air Fryer Chicken Tenders recipe. Plus, with a convenient batch-and-freeze option, effortless lunches and dinners are well within reach all week long.
Why You’ll Love These Crispy Oven-Baked Chicken Tenders
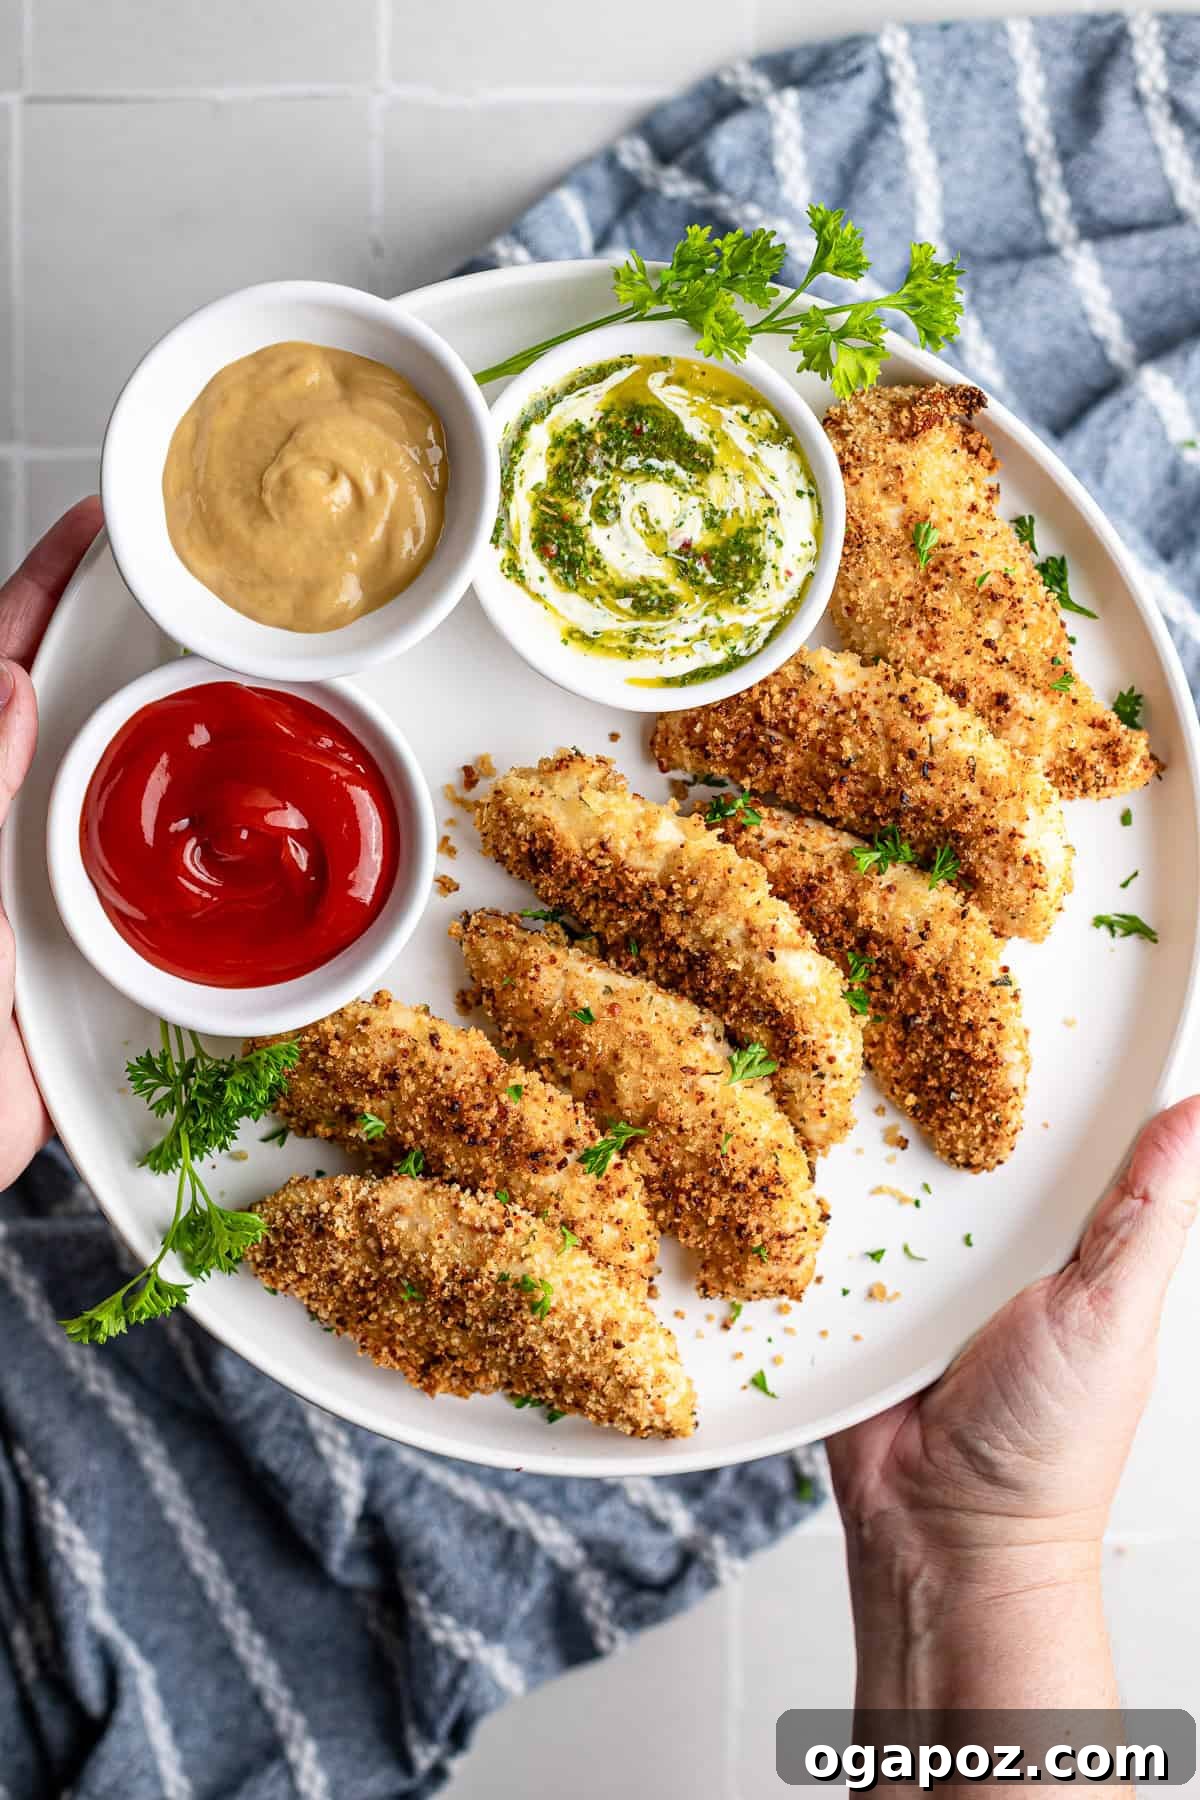
This **oven-baked chicken tenders** recipe isn’t just another meal; it’s a testament to how delicious and satisfying healthy comfort food can be. It has firmly established itself as a cherished weeknight staple in our home, effortlessly fitting into even the busiest schedules. There’s an undeniable joy in sliding a tray of perfectly crisp, golden-brown chicken tenders from the oven, especially when you have full confidence in the wholesome ingredients you’ve used.
What truly elevates these **crispy chicken fingers** is their exceptional texture and thoughtfully balanced seasoning. The secret to their incredible crunch lies in the panko breadcrumbs, which create a light, airy coating that crisps up beautifully in the oven without ever becoming heavy or greasy. Meanwhile, a masterful blend of garlic powder, fragrant thyme, and smoky paprika infuses the chicken with savory warmth, enhancing its natural flavor without overwhelming it. This carefully crafted seasoning profile makes these tenders universally appealing, even to palates that shy away from overly bold spices.
Beyond their delightful taste and texture, these **easy baked chicken tenders** offer unparalleled versatility. You can effortlessly adapt the spice blend or swap out the breadcrumbs to match your family’s preferences or dietary needs. Furthermore, their freezer-friendly nature makes them a dream come true for meal prepping. Imagine having a batch ready to go for quick school lunches, impromptu dinners, or even a last-minute gathering. The minimal prep time and the complete absence of oil splatter or a complicated frying setup only add to their appeal, making them a truly fuss-free option for any home cook looking for delicious, reliable results.
Looking for delightful accompaniments to complete your meal? These **panko chicken tenders** pair wonderfully with a variety of sides. For a vibrant, veggie-forward meal, consider serving them alongside Crispy Air Fryer Zucchini Fries or colorful Mediterranean Roasted Vegetables. The possibilities are endless when it comes to creating a wholesome and satisfying dinner.
Ingredients You’ll Need for Golden Baked Chicken Tenders
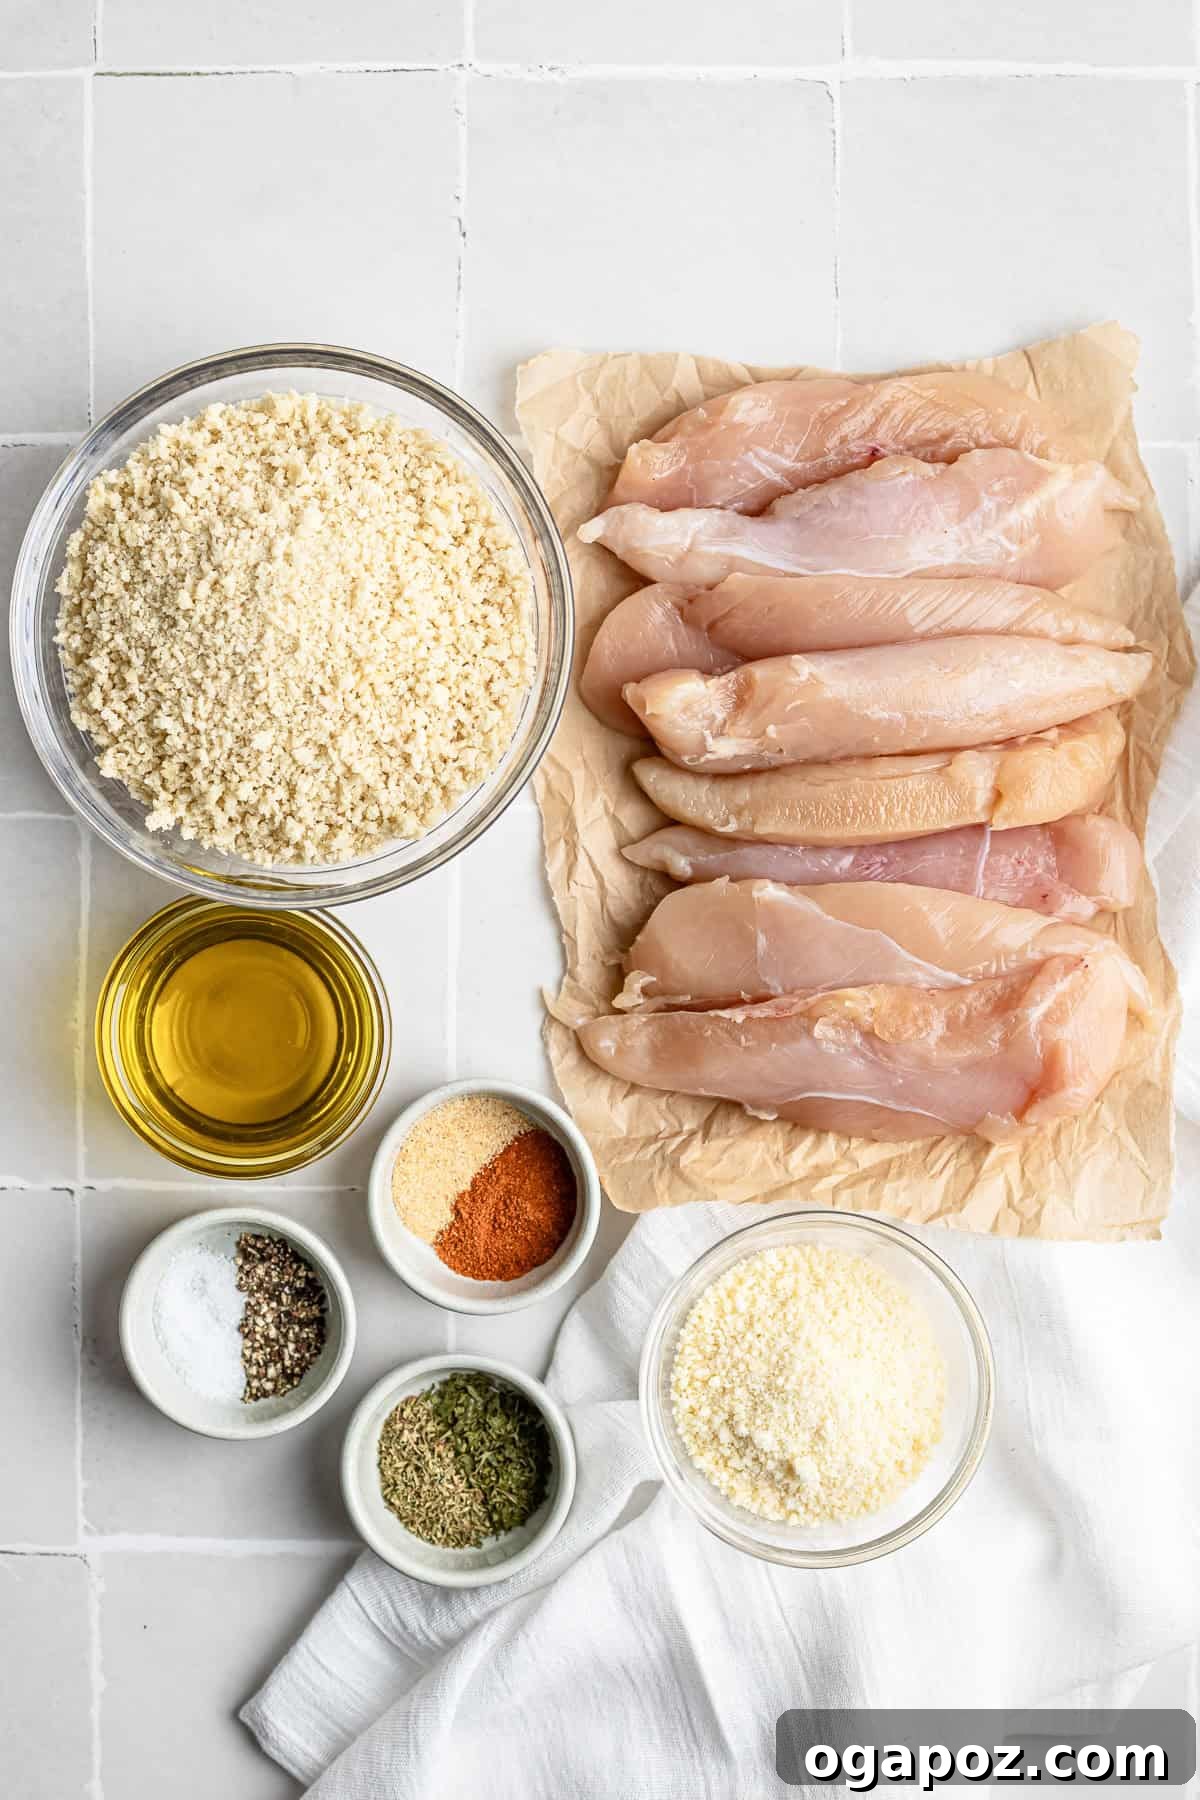
Crafting these delectable **golden-brown chicken tenders** requires only a handful of readily available pantry staples. Each ingredient plays a crucial role in achieving that perfect crispy texture and savory flavor. You’ll find exact measurements and printable instructions in the comprehensive recipe card further down this page.
- Chicken Tenderloins: These lean cuts of chicken are ideal for this recipe due to their uniform size and quick cooking time, ensuring tender, juicy results. While tenderloins are preferred, you can absolutely use boneless, skinless chicken breasts. Simply slice them into 1-inch thick strips to mimic the shape and ensure even cooking. Chicken cutlets or even boneless chicken thighs can also be used, though cooking times may vary slightly based on thickness.
- Panko Breadcrumbs: The cornerstone of our extra-crispy coating! Panko breadcrumbs, originating from Japan, are lighter and flakier than traditional breadcrumbs, leading to an incredibly crunchy crust. If panko isn’t available, regular fine breadcrumbs will work, though the texture will be slightly less crisp. For a unique twist or to cater to dietary needs, consider using crushed cornflakes, pretzels, Ritz crackers, or even saltines for the coating. For **gluten-free chicken tenders**, simply opt for your favorite brand of gluten-free panko breadcrumbs.
- Parmesan Cheese: Freshly grated Parmesan cheese introduces a wonderful savory depth and a delightful umami note to the coating. As the tenders bake, the Parmesan also contributes to that irresistible golden-brown color. For those seeking a dairy-free alternative, shredded mozzarella can be used, or for an equally savory, umami-rich and dairy-free swap, nutritional yeast (especially varieties like Bragg’s Roasted Garlic) works beautifully.
- Garlic Powder, Thyme, Paprika, Dried Parsley: This carefully balanced blend of spices ensures the **baked chicken tenders** are bursting with flavor without being overpowering. Garlic powder provides a warm, pungent base, thyme adds an earthy, aromatic touch, paprika contributes a mild sweetness and vibrant color (smoked paprika can add an extra layer of complexity), and dried parsley offers a hint of fresh herbaceousness. Feel free to adjust these spices to suit your family’s preferences. For an added kick, consider incorporating a pinch of cayenne pepper, or explore flavors with za’atar for a Middle Eastern twist, or Italian seasoning for a classic profile.
- Olive Oil (or Egg): This acts as the essential binder, ensuring the breadcrumb coating adheres perfectly to the chicken. A light dredge in olive oil not only helps the dry ingredients stick but also promotes a crispier exterior as it cooks. Alternatively, a beaten egg provides a slightly richer, thicker coating. Both options yield delicious results; choose based on your preference for crispness versus richness. Avocado oil is another great neutral-flavored oil option.
How to Bake Chicken Tenders: Step-by-Step for Maximum Crispness
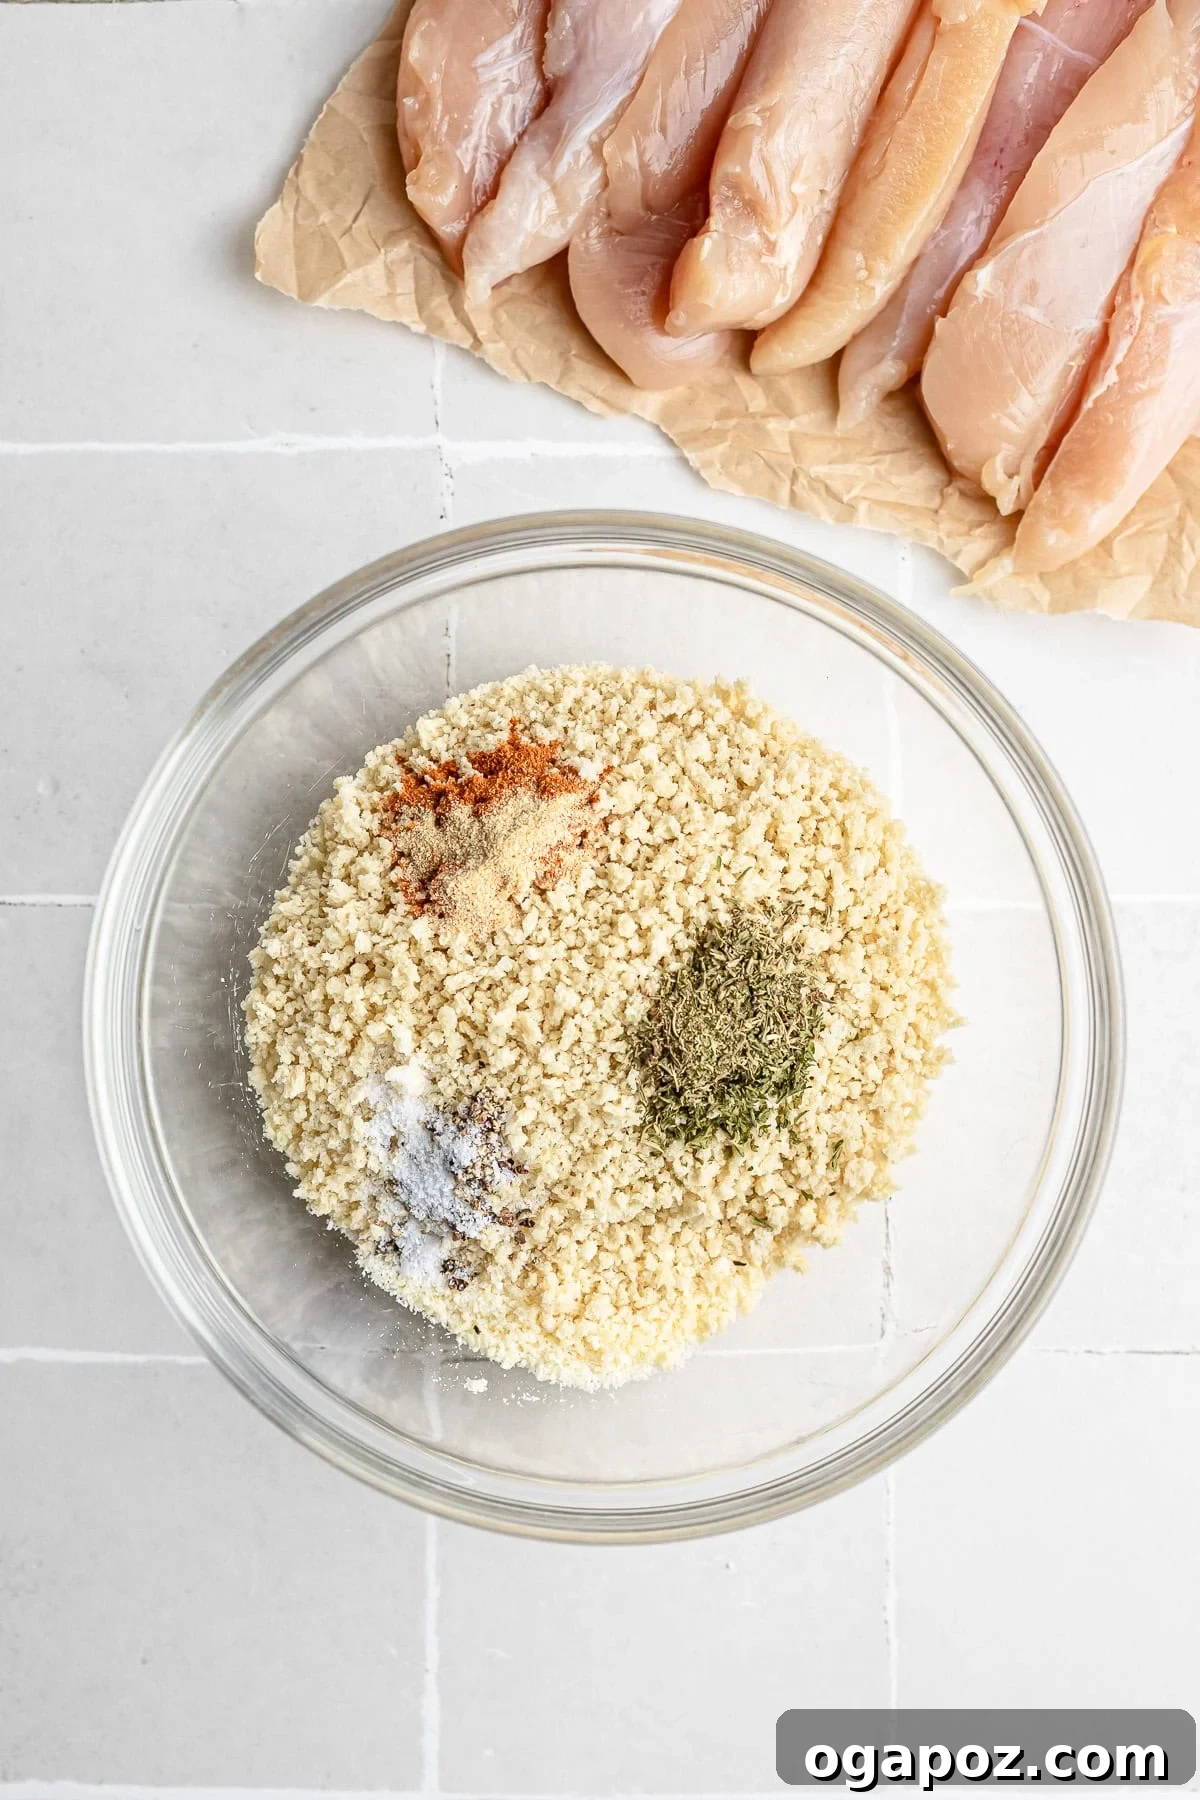
Step 1: Prepare Your Baking Setup and Coating. Preheat your oven to a robust 400°F (200°C). This high heat is crucial for achieving that coveted crisp exterior quickly. For the absolute crispiest results, place a wire rack on top of a baking sheet. This elevates the chicken, allowing hot air to circulate all around, preventing soggy bottoms. In a wide, shallow bowl, combine your panko breadcrumbs, grated Parmesan cheese, garlic powder, thyme, paprika, dried parsley, salt, and black pepper. Use a fork or whisk to thoroughly mix these ingredients until well combined. This ensures every bite is seasoned perfectly.
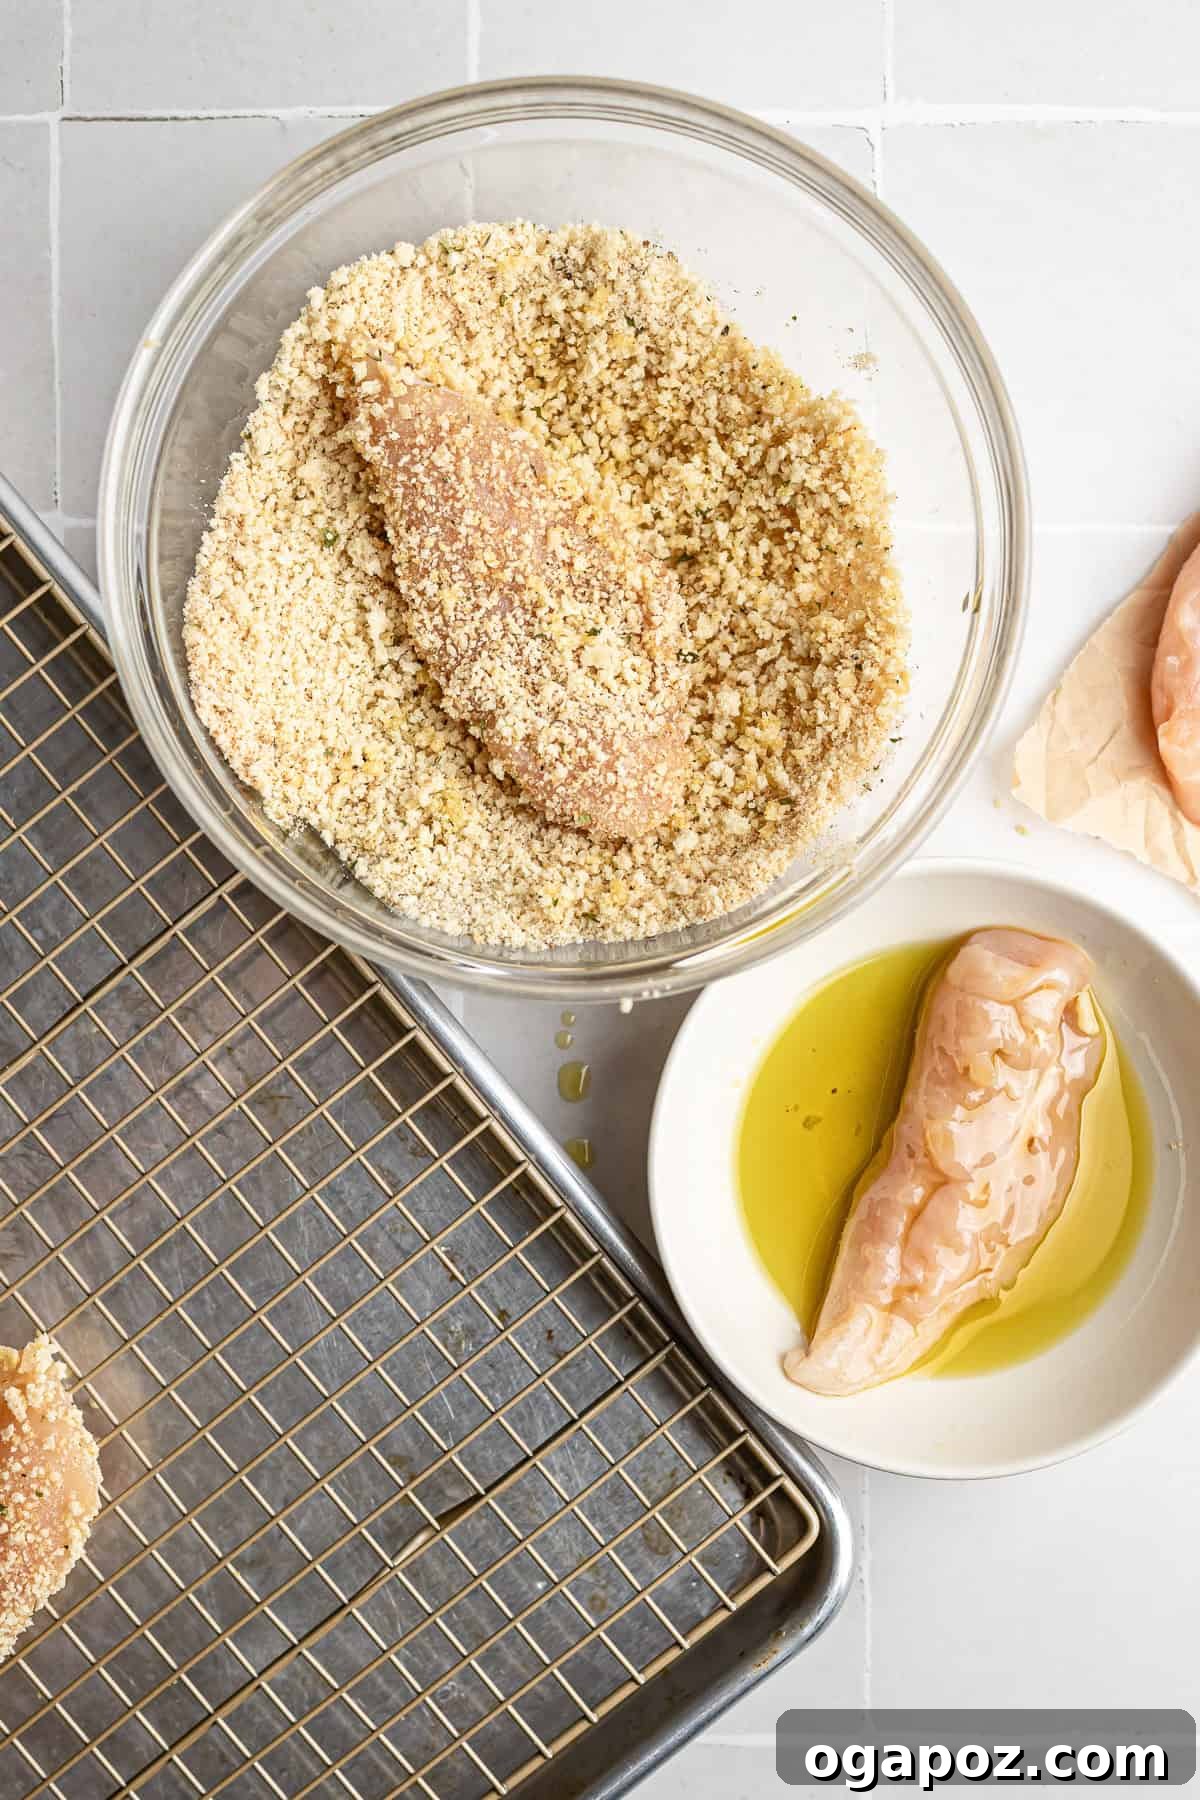
Step 2: Coat the Chicken. In a second shallow dish, pour in the olive oil. If you prefer using egg for a richer coating, lightly beat one egg in this dish instead. Take each chicken tenderloin and dredge it thoroughly in the olive oil or egg mixture, ensuring it’s completely coated. Gently shake off any excess liquid. Immediately transfer the wet tender to the breadcrumb mixture. Press lightly but firmly to help the panko and spices adhere to all sides of the chicken. A good coating is key to a crispy exterior.
Why 400°F + a wire rack equals fryer-level crunch: Baking at 400°F (200°C) provides intense heat that quickly toasts the breadcrumbs, initiating the crisping process. The wire rack is a game-changer because it allows steam to escape from underneath the chicken, rather than getting trapped and making the bottom soggy. This combination ensures the coating turns beautifully golden and achieves maximum crunch before the chicken itself has a chance to dry out, resulting in perfectly juicy tenders every time.
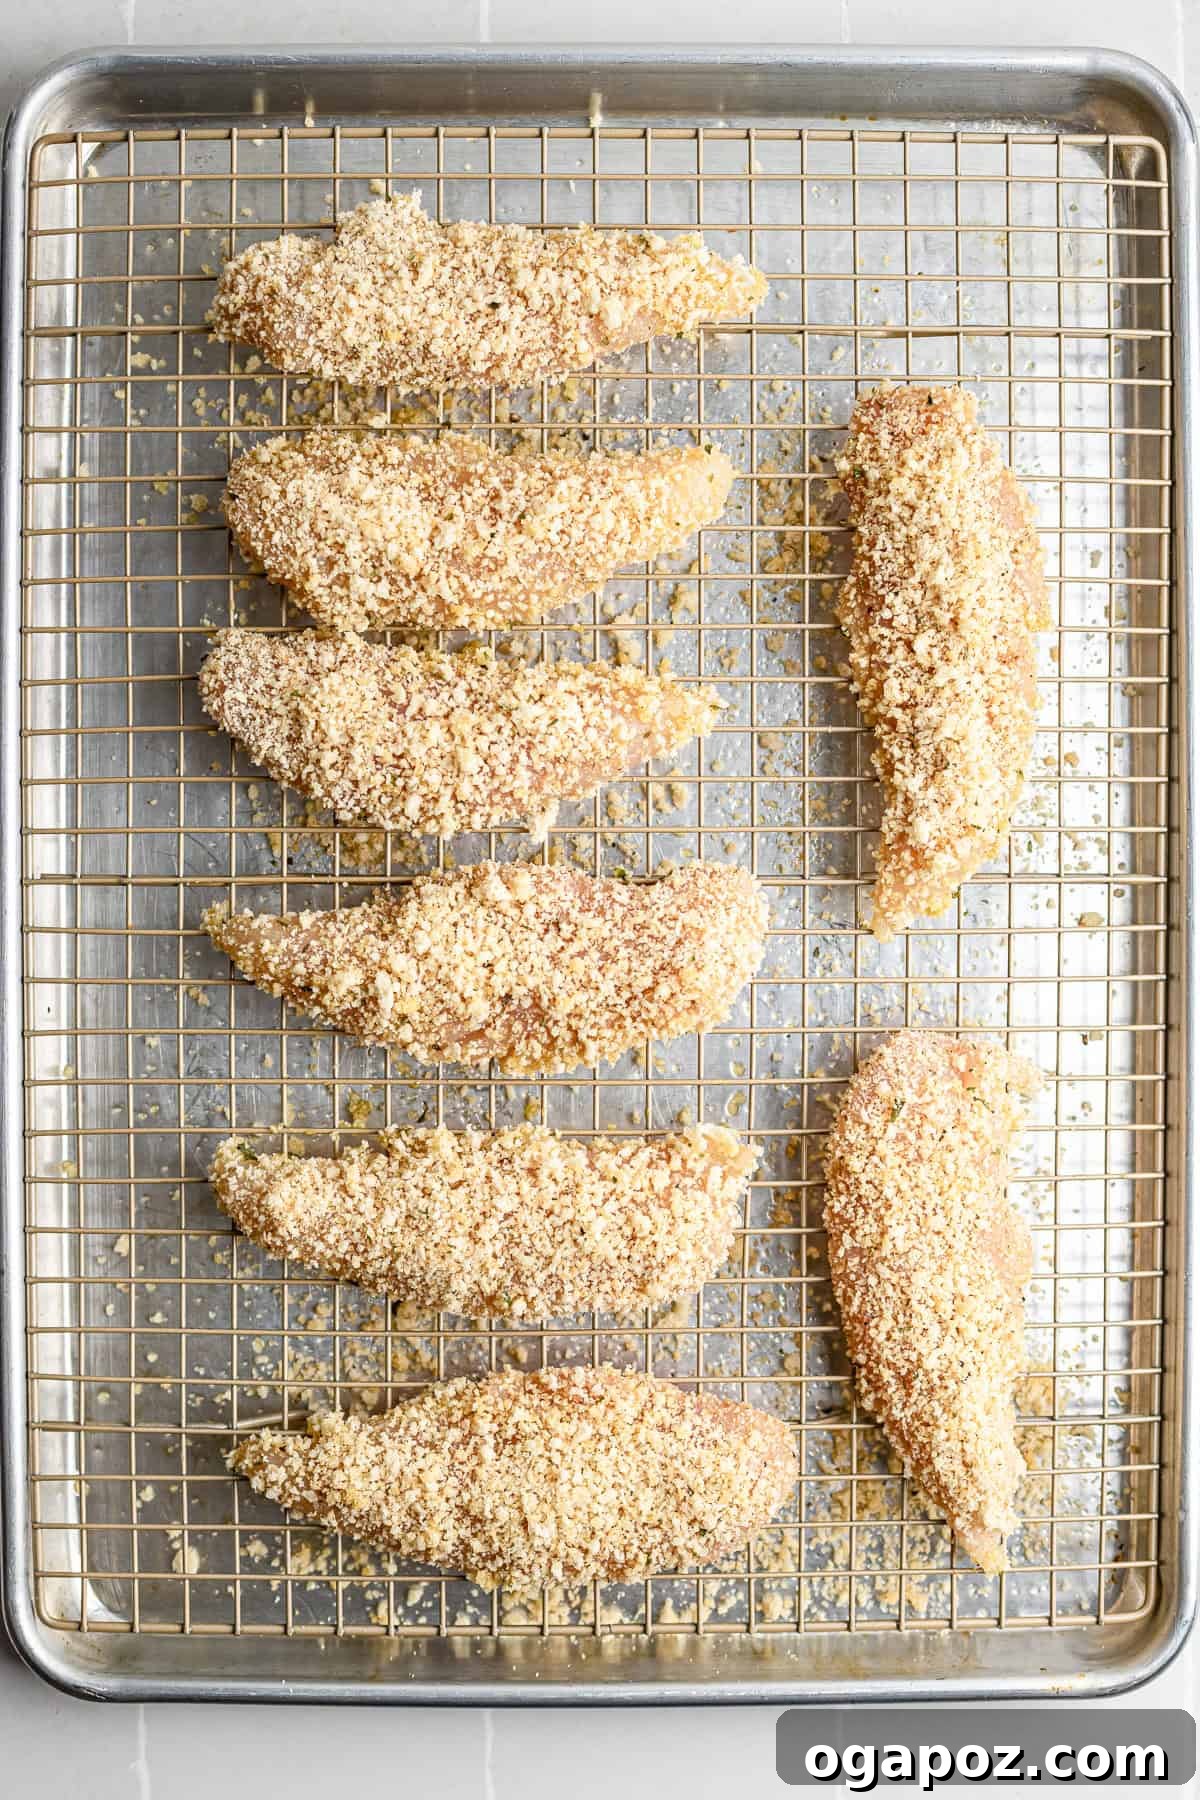
Step 3: Bake to Golden Perfection. Arrange the breaded chicken tenders on your prepared baking sheet (with or without the wire rack). Ensure they are spaced out evenly to prevent overcrowding, which can lead to steaming instead of crisping. Bake for approximately 25 minutes. About halfway through the cooking time (around 12-13 minutes), carefully flip each tender to ensure both sides brown evenly and develop that irresistible crunch. Continue baking until the chicken is gloriously golden brown and reaches an internal temperature of 165°F (74°C) as measured with a meat thermometer. This internal temperature guarantees the chicken is cooked through and safe to eat.
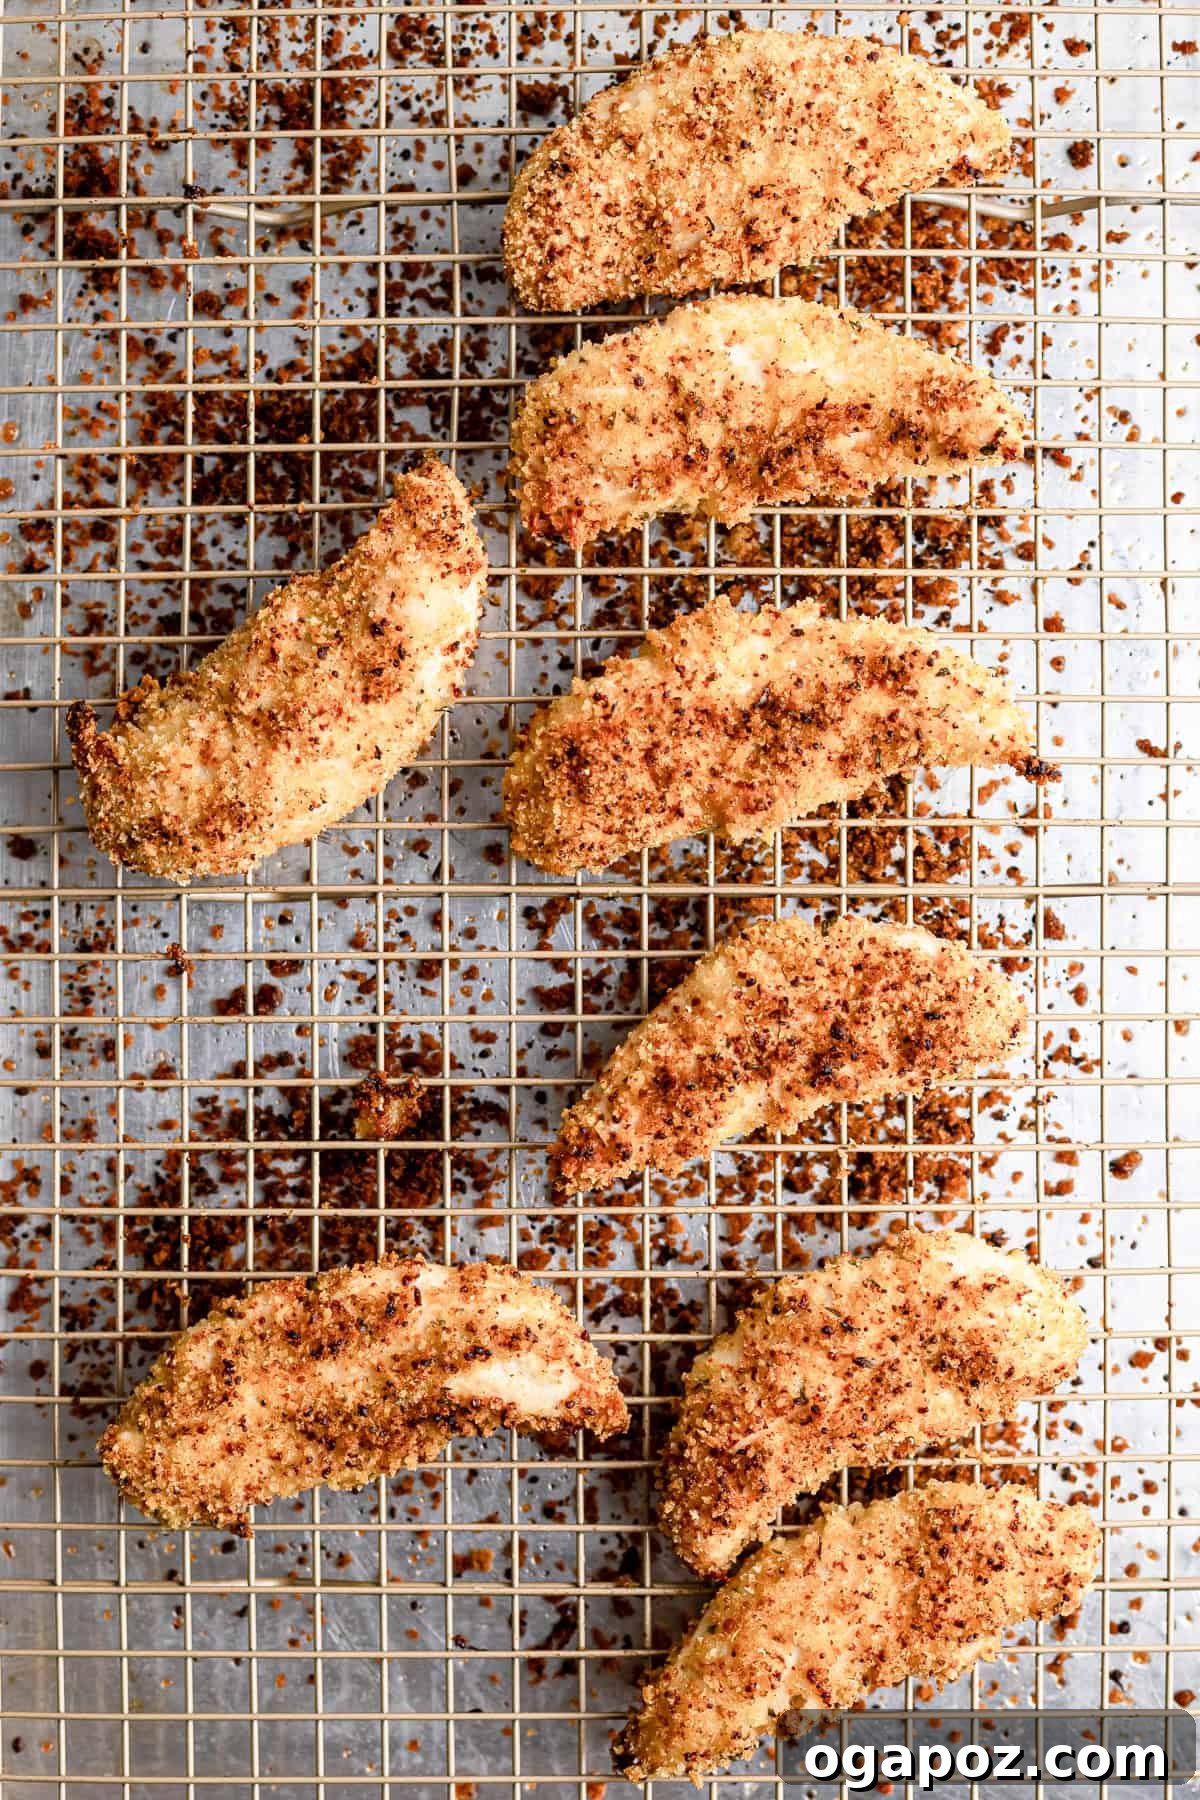
Step 4: Serve and Enjoy! Once baked, remove the **homemade chicken fingers** from the oven. For optimal crispness, allow them to rest on the wire rack for a few minutes before serving. This brief resting period helps the coating firm up even further. Serve these delightful tenders warm with your favorite dipping sauces (check out our suggestions below for inspiration!). If you’re planning to enjoy them later, allow them to cool completely before transferring them to an airtight container. They will keep well in the refrigerator for up to 5 days, making them perfect for meal prep.
Recipe Tips for Best Crispy Results
Achieving perfectly **crispy baked chicken tenders** is simple with a few smart techniques. These tips are designed to ensure your chicken comes out golden, juicy, and crunchy every single time.
- Prevent Breading from Falling Off: If you’ve ever struggled with the breading separating from the chicken, here’s the foolproof fix. First, ensure your chicken tenderloins are patted thoroughly dry with paper towels before you begin the dredging process. Excess moisture creates a barrier between the chicken and the coating. Second, for an extra measure of stickiness, once coated, let the tenders chill in the refrigerator for 10–15 minutes. This brief chill time helps the breading adhere firmly to the chicken, preventing it from flaking off during baking and promoting an even crispier finish.
- Alternative Binders (Oil-Free or Egg-Free Options): While olive oil or egg provides excellent adhesion, you have other fantastic options. For a rich, tangy binder, a thin layer of plain Greek yogurt works wonders. It not only helps the breadcrumbs stick but also adds a subtle flavor and keeps the chicken incredibly moist. Mayonnaise is another excellent choice; its oil content will help crisp up the coating beautifully while adding a savory depth. These alternatives are great for dietary preferences or simply for exploring different flavor profiles.
- Always Use a Wire Rack for Maximum Crunch: This is arguably the most critical tip for achieving **extra crispy chicken tenders**. Placing the breaded chicken on a wire rack set over a baking sheet allows hot air to circulate freely around all sides of the tenders. This means the bottoms won’t sit in their own steam, which is the primary cause of sogginess. The result is an evenly cooked, consistently crisp crust from top to bottom. If you don’t have a wire rack, a parchment-lined baking sheet is the next best option, but remember to flip the tenders diligently halfway through baking.
- Lightly Spritz with Olive Oil Spray: For an extra boost of crispness and a beautiful golden color, lightly mist your breaded tenders with olive oil or avocado oil spray just before they go into the oven. This fine layer of oil helps the breadcrumbs achieve a deeper golden hue and contributes to that desirable crunch without adding excessive fat.
- Don’t Forget to Let the Breading Set: As mentioned, chilling the coated tenders for 10-15 minutes in the fridge (if you have the time) significantly helps the breading adhere during the baking process. This step is a small effort that yields noticeable results in terms of coating integrity and crispness.
Want even more crunch? Check out the advanced tricks below for making these **baked chicken tenders** exceptionally crispy!
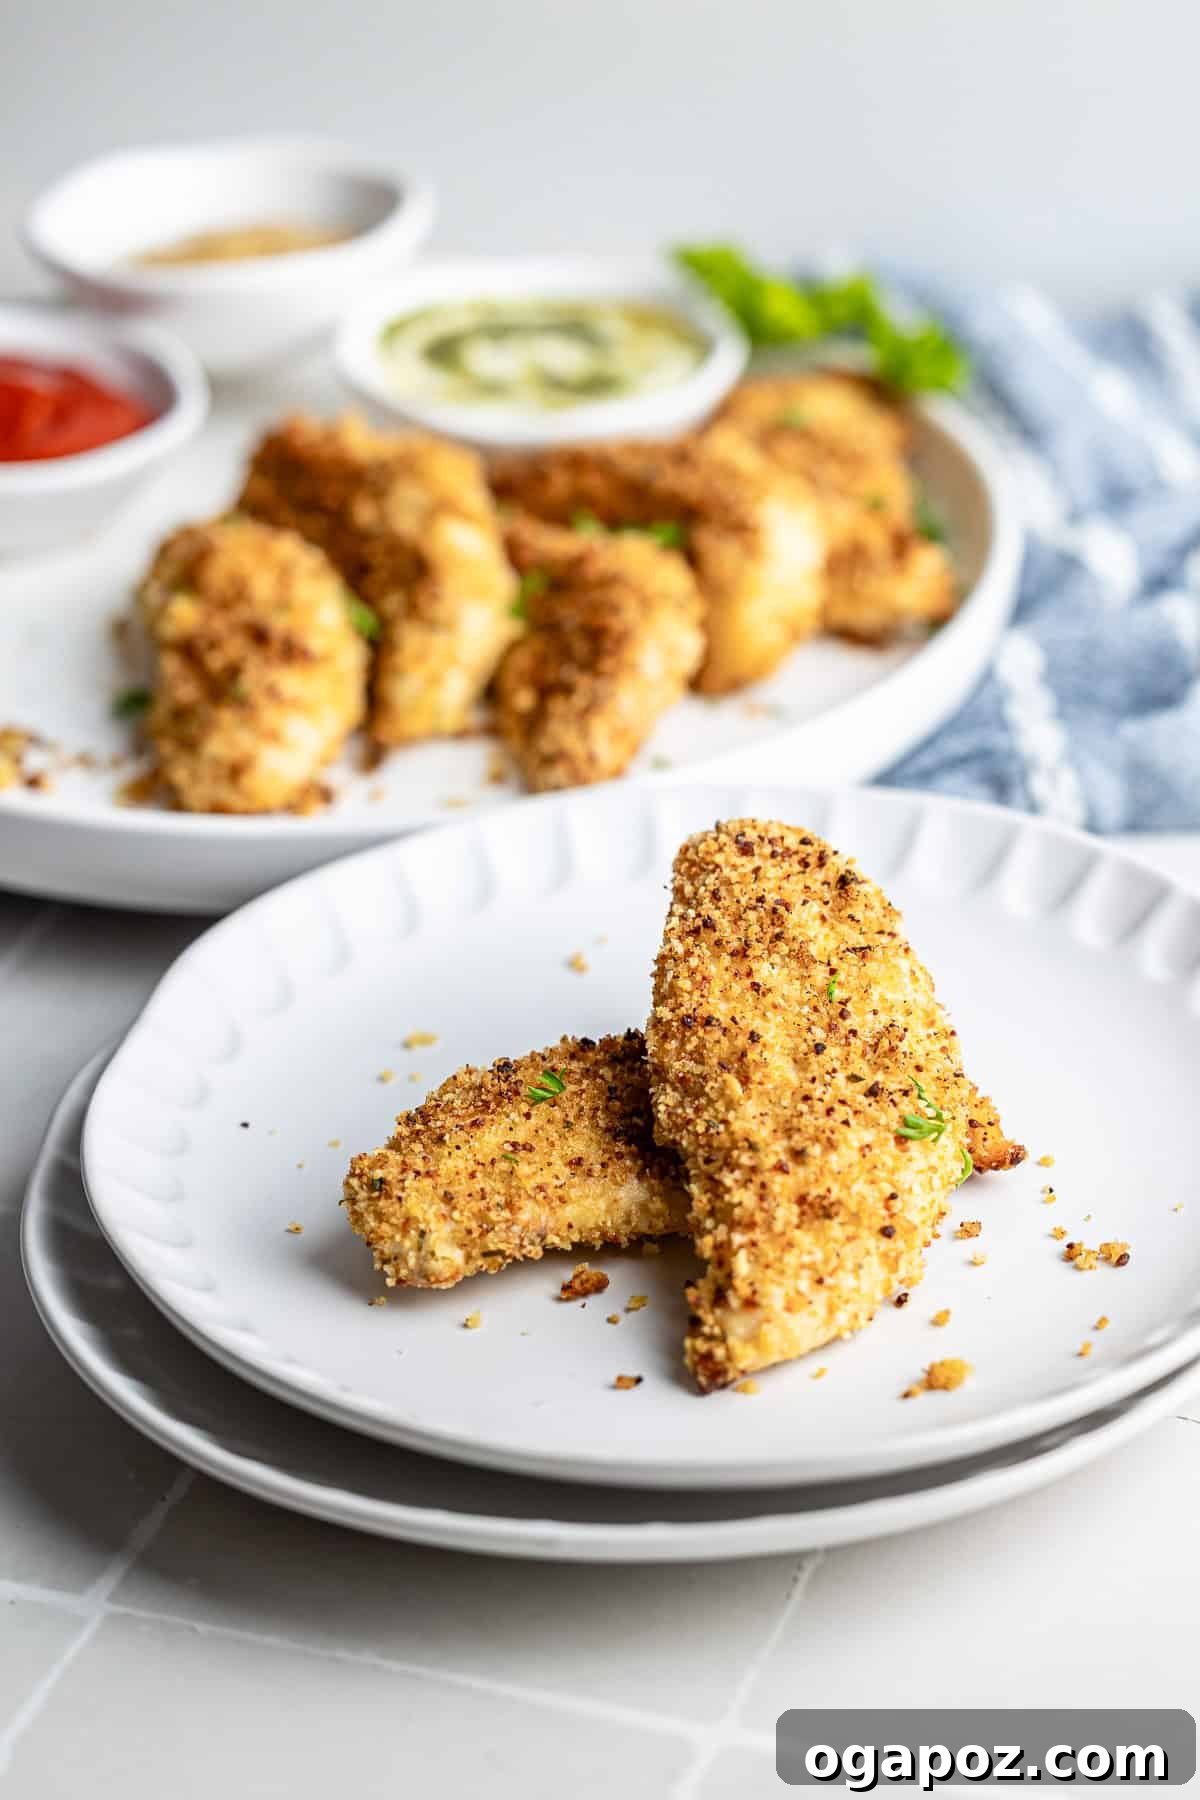
Extra Crispy Tricks for Ultimate Crunch
If you’re truly aiming for **oven-baked chicken tenders** that rival deep-fried perfection in terms of crispiness and golden finish, these advanced tips will guide you. These techniques are born from extensive kitchen testing and valuable reader feedback, designed to troubleshoot common crispiness issues and elevate your tenders to a new level.
- Spray with Oil *Before* Baking (Not After): This is a common misconception! To maximize crispiness, lightly spritz your breaded tenders with olive oil or avocado oil spray *before* they go into the oven. This ensures the oil helps the crumbs toast and brown evenly from the start. Spraying after can often add more fat without significantly improving the crispness, sometimes even making them a bit greasy.
- The Power of the Wire Rack: Reaffirming this crucial tip – a wire rack is non-negotiable for superior crispness. It facilitates 360-degree air circulation around each tender, effectively preventing the accumulation of steam that leads to soggy bottoms. If you absolutely don’t have a wire rack, line your baking sheet with parchment paper and commit to flipping the tenders diligently halfway through cooking to promote even browning.
- Broil at the End for Golden Perfection: For an intensely golden and extra-crisp crust, consider a quick broil during the last 2-3 minutes of cooking. Position your oven rack so the chicken is about 6-8 inches from the broiler element. Keep an extremely close eye on them, as broiler heat can burn very quickly. This step provides a final burst of heat that crisps and darkens the exterior beautifully.
- Pre-Toast Your Panko: For a deeper flavor and even more crunch, try pre-toasting your panko breadcrumbs. Spread them in a dry skillet over medium heat or on a baking sheet in a 400°F (200°C) oven for 3-5 minutes, stirring occasionally, until they turn light golden. Let them cool before mixing with the other dry ingredients. This pre-toasting step gives them a head start on crisping.
- Avoid Overcrowding the Pan: Give each chicken tender its personal space on the baking sheet. Overcrowding traps steam, which is the enemy of crispiness. When tenders are too close together, they steam instead of baking, resulting in a softer, less appealing coating. Bake in batches if necessary, ensuring proper spacing for optimal air circulation.
- Creative Coating Swap-Ins: Don’t limit yourself to just panko! For unique textures and flavors, experiment with crushed cornflakes, pretzels, or Ritz crackers. These alternatives can add an exciting new dimension of crunch and savory goodness to your **homemade chicken tenders**.
- The “Extra Crumbs for Flipping” Reader Tip: Here’s a brilliant tip from a seasoned home cook: save a few tablespoons of your seasoned breadcrumb mixture. After you flip the tenders midway through baking, sprinkle these extra crumbs generously over the tops. This adds another layer of coating that will crisp up beautifully in the remaining bake time, guaranteeing an extra-crunchy exterior.
These simple yet effective tweaks are entirely optional, but if you’re truly dedicated to achieving that exceptional **extra-crispy, golden finish** on your **oven-baked chicken tenders**, these strategies will undoubtedly get you there!
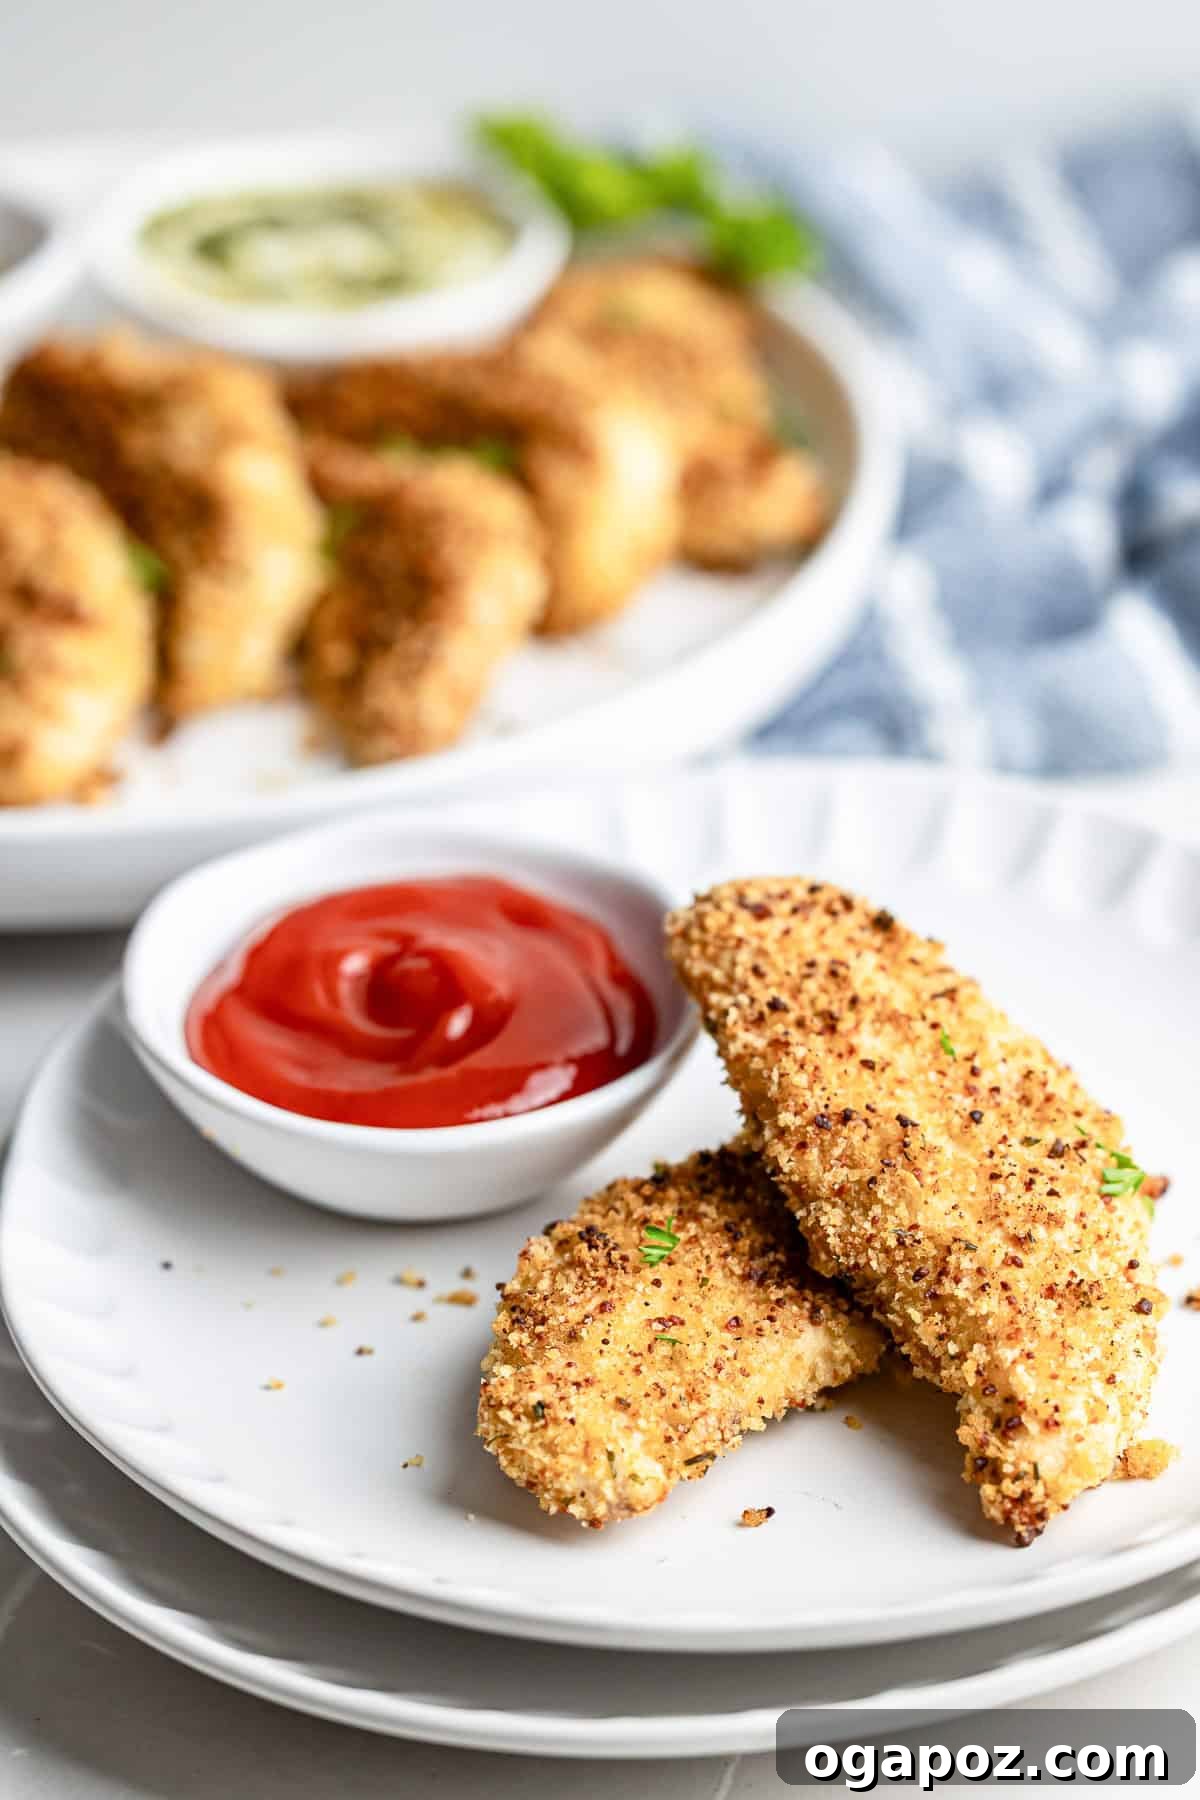
Best Dipping Sauces for Chicken Tenders
No plate of **crispy chicken tenders** is complete without an array of delicious dipping sauces! Here are some classic and creative options to elevate your meal:
- Honey Mustard Sauce: A perennial favorite, offering the perfect balance of sweet and tangy flavors.
- BBQ Sauce: Smoky, robust, and utterly classic. Choose your favorite regional style, from Kansas City sweet to Carolina vinegary.
- Ranch Dressing: Cool, creamy, and herbaceous – an absolute hit with kids and adults alike.
- Creamy Dill Sauce: A fresh and herbaceous option, excellent for adding a bright, zesty counterpoint.
- Tahini Yogurt Dressing: For a Mediterranean twist, this garlic-yogurt dip provides a rich, savory, and slightly tangy flavor.
- Spicy Mayo: A simple mix of mayonnaise and Sriracha or your favorite hot sauce for a gentle kick.
- Ketchup: The ultimate classic, simple yet satisfying.
Creative Ways to Serve Parmesan Chicken Tenders
These versatile **Parmesan chicken tenders** extend far beyond a simple plate with fries. Their tender interior and crispy exterior make them a fantastic addition to various meals, transforming them from a side dish into the star of the show. Go beyond the usual sides and discover exciting new ways to enjoy them!
- In Wraps or Sandwiches: Slice them up and tuck them into warm tortillas or soft bread rolls with crisp lettuce, juicy tomato slices, and a generous swipe of mayo, avocado, or your favorite spread for a satisfying lunch.
- Chopped Over Salads: Add a substantial protein boost to any salad. They’re especially delightful chopped and added to a vibrant Lemon Arugula Salad, providing texture and heartiness.
- Tucked into Tacos or Burritos: Replace traditional meat fillings with these flavorful tenders for a quick and easy taco night. Pair them with fresh salsa, shredded cabbage, and a squeeze of lime.
- Tossed with Pasta and Veggies: Cut into bite-sized pieces and toss with your favorite pasta, a light sauce, and quick-cooked vegetables like cherry tomatoes, spinach, or broccoli for a complete meal.
- Added to a Stir-Fry: Incorporate sliced tenders into a vegetable stir-fry for added protein and a delicious texture contrast.
- Grain Bowls: Arrange them beautifully over a bed of quinoa, rice, or farro, alongside roasted vegetables and a drizzle of a flavorful dressing for a wholesome and trendy meal.
- Lettuce Wraps: For a lighter option, serve them in crisp lettuce cups with a touch of hot honey or a peanut sauce.
- Pita Pockets: Stuff warm pita bread with chopped tenders, hummus, cucumber, and a sprinkle of fresh herbs for a Mediterranean-inspired meal.
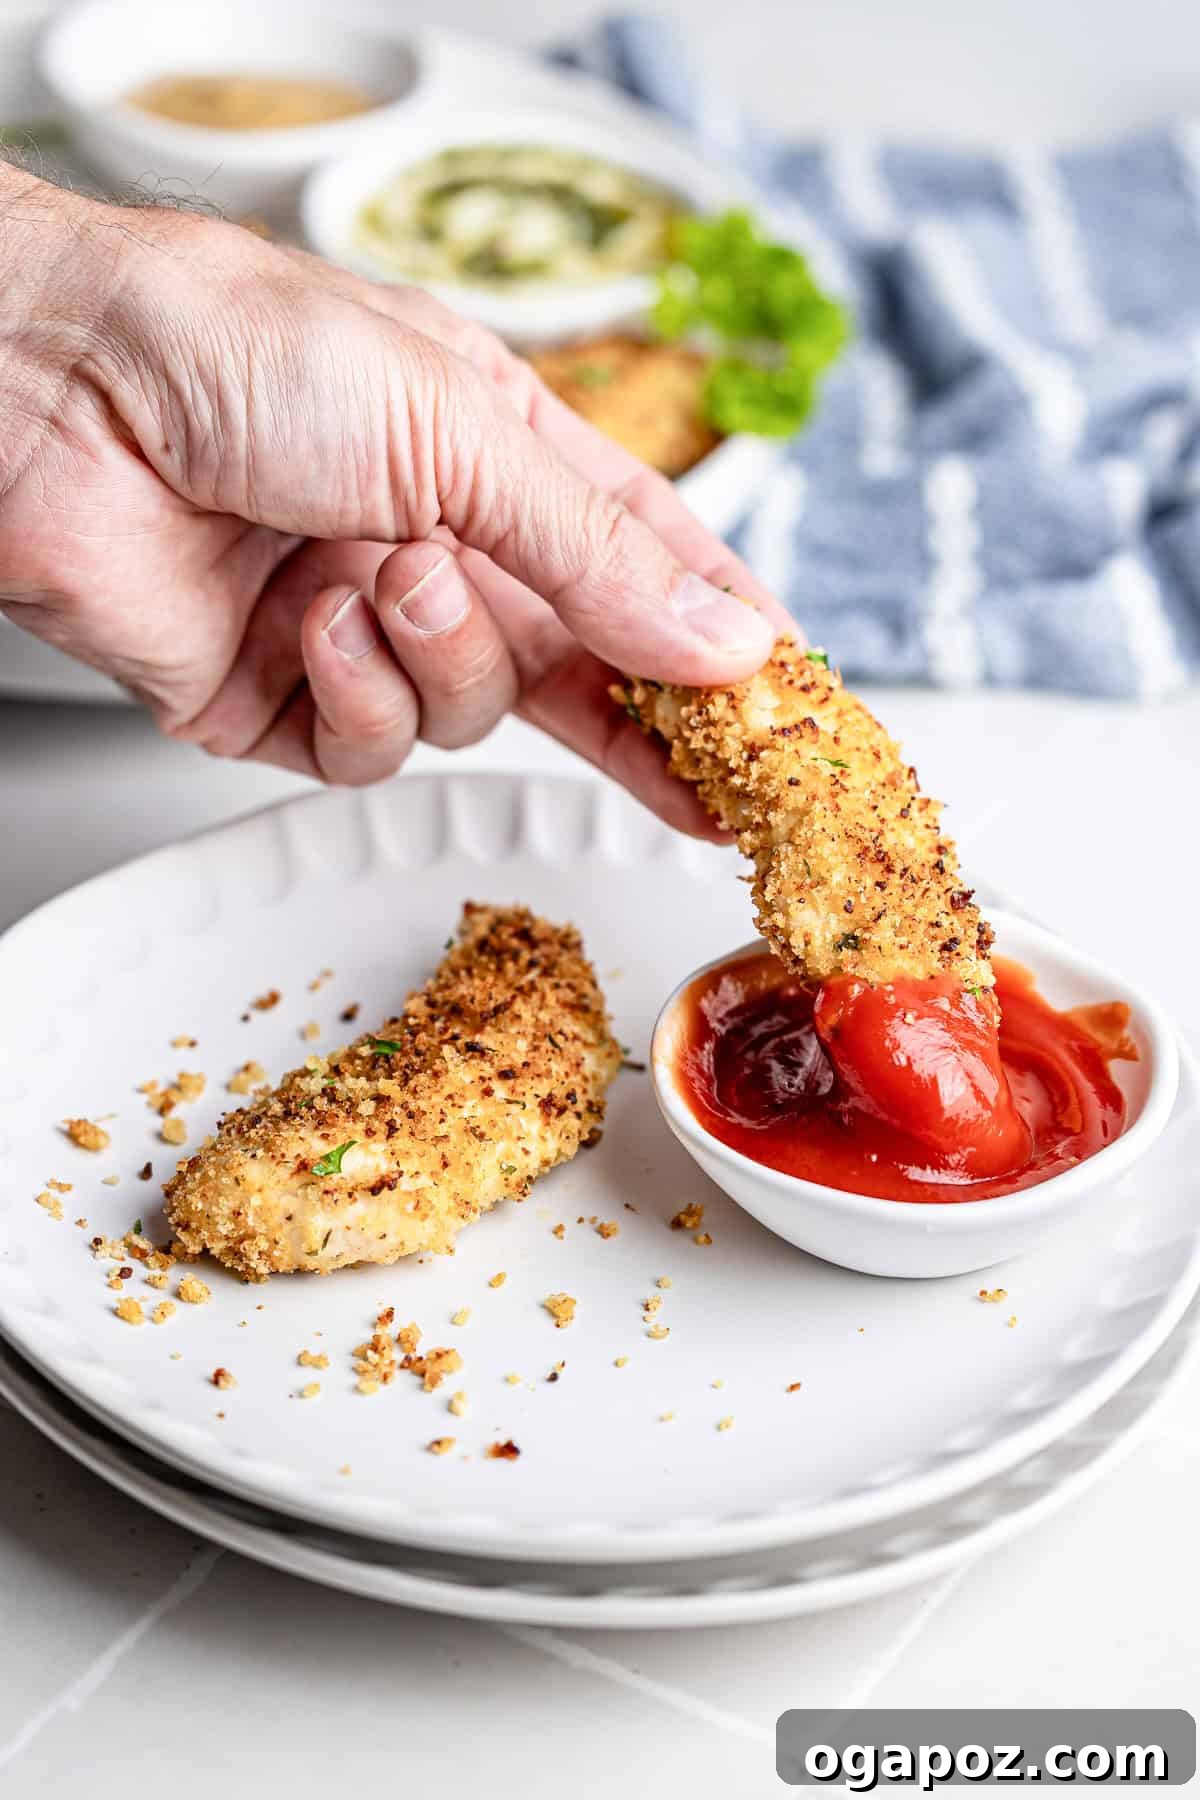
Make-Ahead Tips for Parties and Meal Prep
These **baked chicken tenders** are not only fantastic for weeknight dinners but also shine as an excellent option for feeding a crowd or streamlining your weekly meal prep. Their versatility makes them perfect for party platters, sliders, or even building a customized salad bar.
- Party Platter Perfection: Serve them as finger food with a variety of mini buns, an assortment of dipping sauces, or as part of a DIY salad bar setup. Guests will love customizing their own bites.
- Bake Ahead for Easy Reheating: You can bake the chicken tenders completely earlier in the day or even a day in advance. To reheat and restore their crispness, spread them on a baking sheet and warm them in the oven or air fryer at 300°F (150°C) until heated through and crisp again.
- Restore Crispiness When Reheating: For the best texture, lightly spray the cooled, cooked tenders with olive oil or avocado oil spray before reheating. This helps reactivate the crisping process and prevents them from becoming dry or rubbery. Avoid the microwave for reheating, as it tends to make the coating soggy.
- Freezing Cooked Tenders: Once cooked, allow the tenders to cool completely. You can then wrap them individually in aluminum foil or arrange them in a single layer in a freezer-safe container, separating layers with parchment paper. Freeze for up to 3 months. Reheat from frozen in the oven or air fryer at 375°F (190°C) until crisp and heated through, adding a few extra minutes to the cooking time.
- Freezing Uncooked Tenders (Meal Prep Advantage): For ultimate meal prep convenience, you can freeze the tenders *before* baking. Line a baking tray with parchment paper and place the fully dredged, uncooked tenders on it in a single layer, ensuring they don’t touch. Freeze for at least 2 hours, or until solid. Once frozen, transfer the individual tenders to a freezer-safe bag or container. When ready to cook, bake them directly from frozen at 375°F (190°C) for 25–28 minutes, or until an internal temperature of 165°F (74°C) is reached. This is a game-changer for quick, homemade meals!
Recipe FAQs About Baked Chicken Tenders
The key to **crispy baked chicken tenders** lies in a few crucial techniques: use panko breadcrumbs for a lighter, crunchier coating, bake them on a wire rack to allow for 360-degree air circulation (preventing soggy bottoms), and lightly spray them with olive oil or avocado oil before baking. For even more crispiness, check out the detailed tips under our ‘Extra Crispy Tricks’ section!
Absolutely! This recipe is easily adaptable for gluten-free diets. Simply substitute traditional panko with your favorite brand of gluten-free panko breadcrumbs. Crushed rice cereal can also be used as a gluten-free alternative for a similar satisfying crunch.
These versatile **oven-baked chicken tenders** pair wonderfully with a wide array of dipping sauces. Popular choices include classic honey mustard, tangy BBQ sauce, creamy ranch dressing, and fresh creamy dill sauce. For an adventurous twist, consider a spicy mayo, a vibrant garlic-yogurt tzatziki, or a sweet and savory hot honey sauce.
Yes, you absolutely can! The air fryer is fantastic for achieving extra crispness in less time. For a dedicated guide, refer to my recipe for Air Fryer Chicken Tenders. To adapt this recipe: prepare the chicken tenders as directed, then arrange them in a single layer in your air fryer basket, ensuring not to overcrowd it. Cook at 400°F (200°C) for 10–12 minutes, flipping halfway through, until they are golden, crispy, and cooked to an internal temperature of 165°F (74°C). A light spray of olive oil before air frying can enhance the crispiness further.
Yes, these **easy chicken tenders** are excellent for meal prep! You can bread the chicken tenders and store them uncooked in the refrigerator for up to 24 hours before baking. For longer storage, you can freeze them uncooked (see ‘Make-Ahead Tips’ above). Cooked tenders can also be stored in an airtight container in the fridge for up to 5 days and reheated for quick meals.
Chicken tenderloins are naturally the best choice as they are already portioned and cook quickly. However, boneless, skinless chicken breasts sliced into 1-inch wide strips work perfectly. Ensure all pieces are of similar thickness for even cooking.
These **baked chicken tenderloins** offer a delicious and healthier rendition of a beloved comfort food, consistently delighting even the most discerning palates. Give them a try tonight and discover your new favorite family meal! Don’t forget to share your experience by leaving a review or commenting on how you served them. If you loved this recipe, you might also enjoy my Crispy Coconut Chicken Tenders for another exciting flavor adventure.
Explore More Delicious Chicken Recipes
Chicken
Pretzel Crusted Chicken Recipe
Chicken
Crispy Air Fryer Chicken Legs
Chicken
Sheet Pan Lemon Parmesan Chicken Tenders
Chicken
Easy Chicken Parmesan Sliders
Tried this recipe? Share your thoughts with a star rating and comment below! Stay updated with new recipes by subscribing to my newsletter or following me on
Facebook,
Instagram, or
Pinterest.
Easy Baked Chicken Tenders (Extra Crispy!)
By Julia Jolliff
Golden, crispy, oven-baked chicken tenders that the whole family will love—no deep frying needed.

Prep Time: 10 mins
Cook Time: 25 mins
Total Time: 35 mins
Servings: 4
Pin Recipe | Print Recipe
Ingredients
- 1 1/3 cup panko breadcrumbs {or you can use regular breadcrumbs}
- 1/4 cup grated Parmesan cheese {or use mozzarella cheese}
- 1/2 teaspoon garlic powder
- 1/4 teaspoon thyme
- 1/4 teaspoon dried parsley
- 1/4 teaspoon paprika
- 1/2 teaspoon salt
- 1/8 teaspoon pepper
- 1 1/2 pounds chicken tenderloins
- 1/4 cup extra virgin olive oil {or you can use egg or avocado oil}
Instructions
- Preheat oven to 400°F (200°C). Spray a baking sheet with nonstick cooking spray or line with parchment paper. For extra crispy results, place a wire rack on top of the baking sheet.
- In a shallow bowl, mix the panko breadcrumbs, Parmesan cheese, garlic powder, thyme, parsley, paprika, salt, and pepper. Stir until thoroughly combined. Set aside.
- Pour the 1/4 cup olive oil into another shallow bowl and set aside. (If using egg, beat one egg in a shallow dish.)
- Optional (for best results): Pat the chicken dry with paper towels before dredging. This helps the coating adhere better. If time allows, after coating, let the tenders chill in the fridge for 10–15 minutes before baking to help the breading stick and stay crisp.
- Dredge each chicken tender in the olive oil (or egg) mixture, ensuring it’s well coated. Then, transfer it to the panko breadcrumb mixture, pressing lightly to ensure the coating sticks to all sides.
- Place the coated tenders on the prepared baking sheet or wire rack, ensuring they are spaced evenly.
- Bake for 25 minutes, flipping the tenders halfway through cooking (around 12-13 minutes). Continue baking until the chicken is golden brown and reaches an internal temperature of 165°F (74°C).
- Serve warm with your favorite dipping sauces. Garnish with fresh parsley if desired.
Notes
- Use a wire rack: This allows air to circulate around the chicken and is crucial for preventing soggy bottoms, ensuring an all-over crispy crust.
- Olive oil spray: For added crispness and a beautiful golden color, lightly spritz the breaded tenders with olive oil or avocado oil spray before placing them in the oven.
- Let the breading set: If you have an extra 10–15 minutes, chilling the coated tenders in the refrigerator before baking helps the breading adhere more firmly during cooking, resulting in a more robust crust.
- Storage: Store any leftover cooked chicken strips in an airtight container in the refrigerator for up to 5 days.
- Reheating Leftovers: To best reheat and re-crisp leftovers, bake them in the oven or air fry at 375°F (190°C) until warmed through and crunchy. Avoid using a microwave, as it will make the coating soft and unappetizing.
- To freeze after baking: Allow the cooked tenders to cool completely. Wrap them individually in foil or store them in a single layer in a freezer-safe container, separated by parchment paper. Reheat from frozen in the oven or air fryer at 375°F (190°C) until crisp and heated through.
- To freeze before baking (for meal prep): Line a tray with parchment paper and place the dredged but uncooked tenders on it in a single layer. Freeze for 2 hours, then transfer the solid tenders to a freezer-safe bag or container. Bake from frozen at 375°F (190°C) for 25–28 minutes, or until the internal temperature reaches 165°F (74°C).
Nutrition Information (Approximate per serving)
Carbohydrates: 16g,
Protein: 41g,
Fat: 21g,
Saturated Fat: 4g,
Polyunsaturated Fat: 3g,
Monounsaturated Fat: 12g,
Trans Fat: 0.02g,
Cholesterol: 114mg,
Sodium: 744mg,
Potassium: 689mg,
Fiber: 1g,
Sugar: 1g,
Vitamin A: 173IU,
Vitamin C: 2mg,
Calcium: 102mg,
Iron: 2mg
Nutrition information is automatically calculated and should only be used as an approximation. Individual results may vary based on ingredients and preparation methods.