
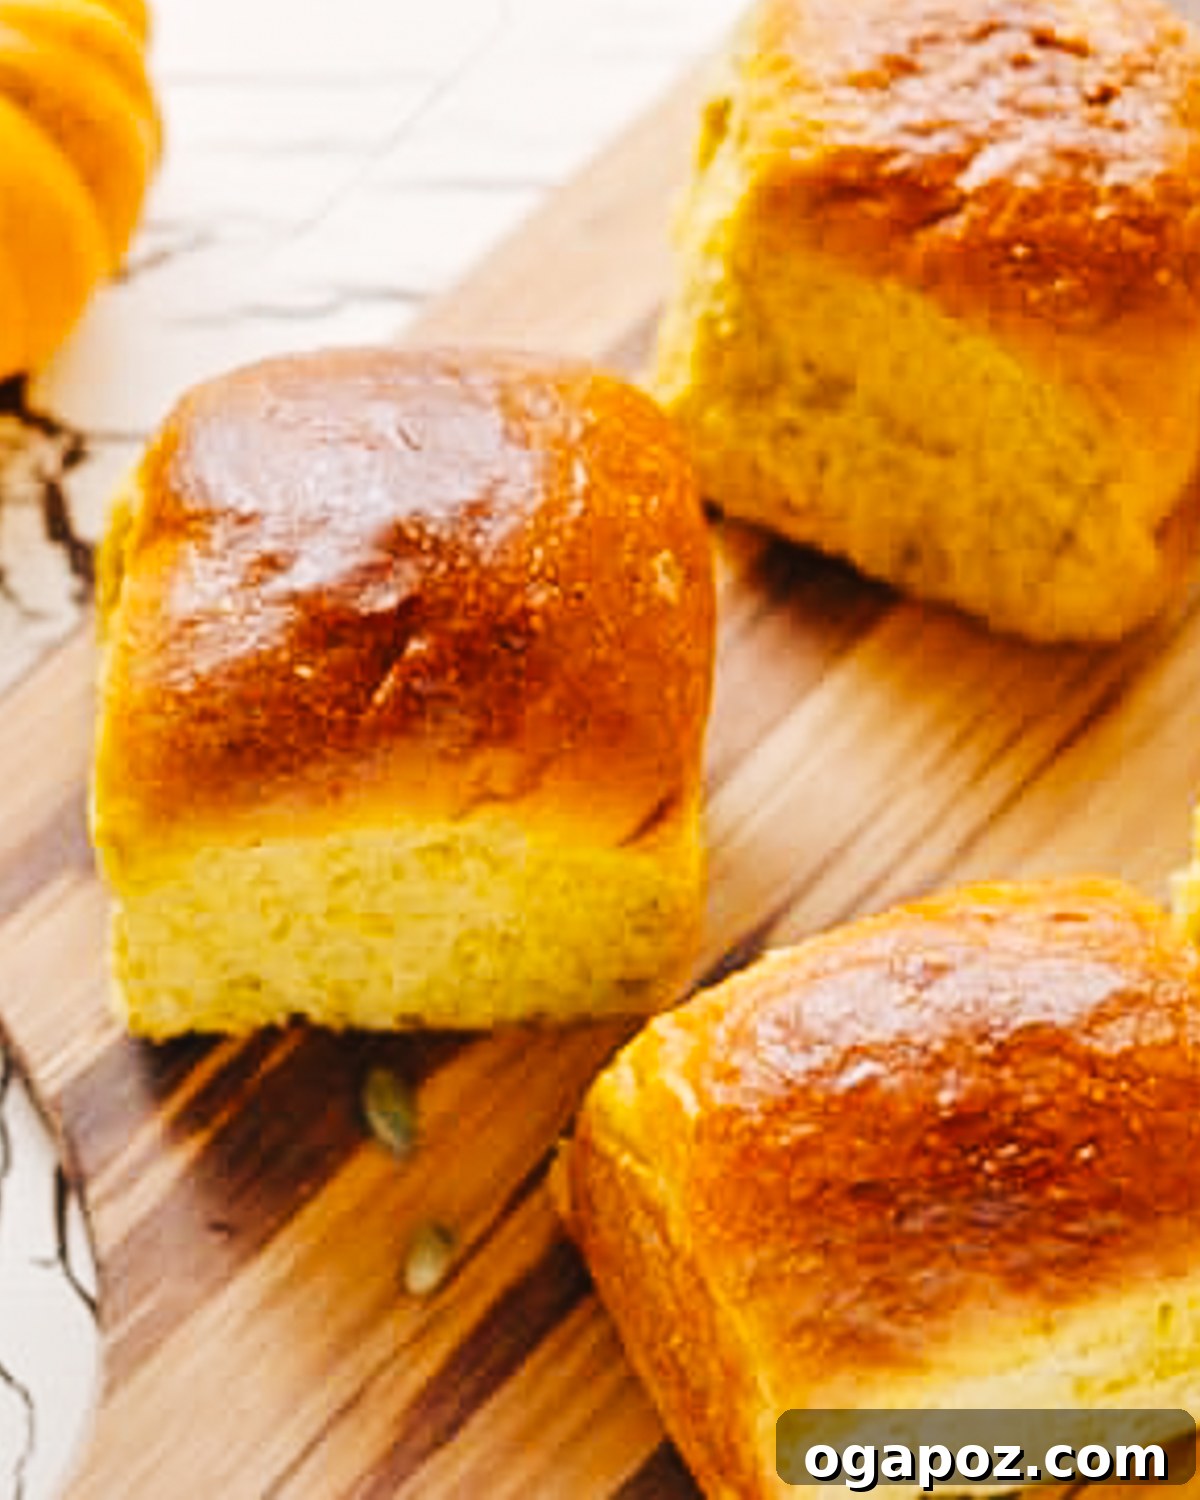
There’s nothing quite like the aroma of freshly baked bread filling your home, especially when it carries the comforting scents of autumn. These incredibly Soft and Fluffy Pumpkin Dinner Rolls are more than just a side dish; they are a celebration of fall, infused with rich pumpkin flavor and a delicate hint of warm spices. Perfect for holiday gatherings like Thanksgiving and Halloween, or simply to elevate any cozy fall meal, these rolls promise to be a delightful addition to your table. Prepare for rave reviews and requests for the recipe!
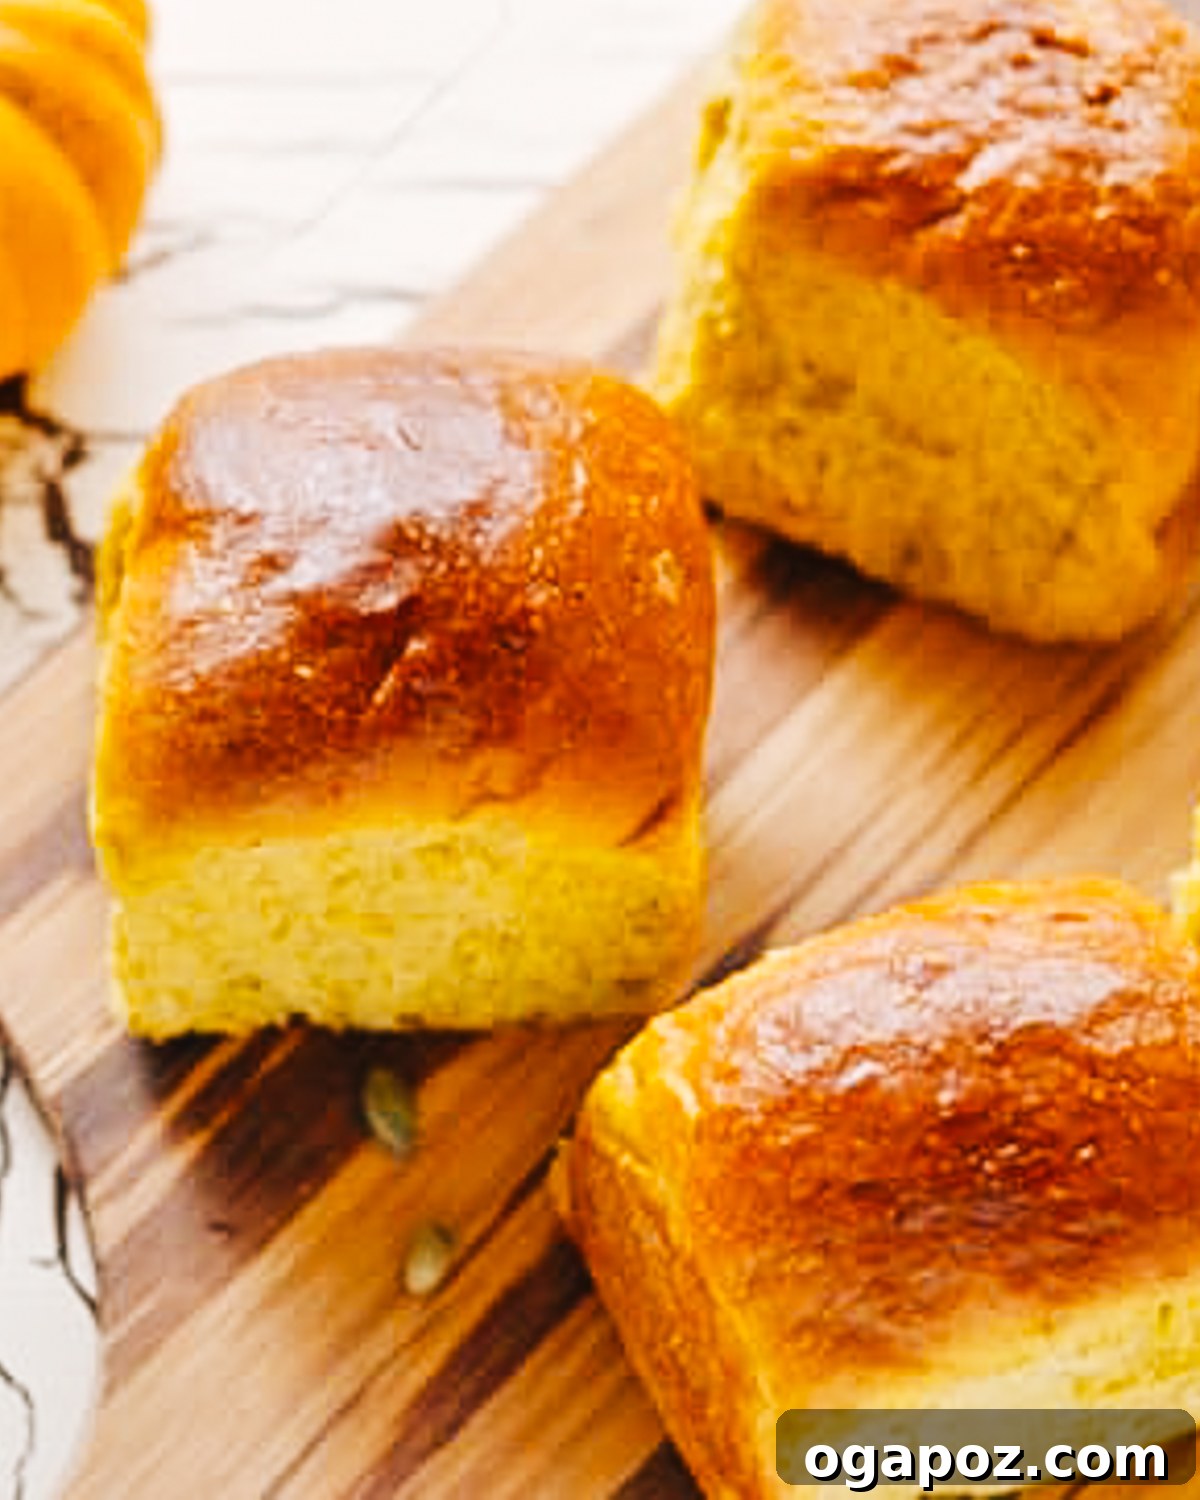
Why You’ll Love These Pumpkin Dinner Rolls
These aren’t just any dinner rolls; they’re an experience. Here’s why this recipe deserves a permanent spot in your fall baking repertoire:
- Holiday-Time Perfection: With their beautiful golden hue and subtle spice, these pumpkin rolls are an absolute must-have for Thanksgiving, Halloween, and every special fall meal in between. They bring a festive touch that store-bought rolls simply can’t match.
- Unbelievably Soft and Fluffy: Our recipe is meticulously crafted to ensure each roll boasts an ultra-soft crumb and a light, airy texture that practically melts in your mouth. The pumpkin puree contributes significantly to this delightful tenderness and moistness.
- Amazing Pumpkin Flavor: These rolls deliver an authentic, inviting pumpkin flavor, perfectly balanced with just a whisper of sweetness and a medley of warm spices. It’s a taste that truly encapsulates the essence of autumn.
- Conveniently Prepare in Advance: Hosting a big dinner? Save yourself some stress! This recipe is ideal for preparing ahead of time, allowing you to focus on other dishes on the big day.
- Freeze Beautifully: Don’t let any leftovers go to waste! These rolls freeze exceptionally well, meaning you can enjoy their deliciousness weeks or even months later. Just thaw, reheat, and savor.
And let’s be honest, they might just be even better the next day, transforming into the ultimate vehicle for leftover turkey sandwiches or dunked into a hearty bowl of turkey soup. Consider making a double batch – you won’t regret it!
Essential Ingredients for Perfect Pumpkin Dinner Rolls
Crafting these delectable rolls starts with a selection of fresh, high-quality ingredients. Each plays a crucial role in achieving the desired flavor and texture:
- Granulated Sugar: A small amount is vital for activating the yeast, helping it thrive and produce a good rise. It also adds a subtle hint of sweetness, complementing the savory notes of the rolls without making them overly sweet like pumpkin bread or muffins.
- Warm Milk: This liquid ingredient provides essential moisture and richness to the dough, contributing to its tender crumb. Crucially, the milk must be warm (around 105-115°F or 40-46°C) to properly activate the yeast without killing it if it’s too hot, or leaving it dormant if it’s too cold.
- Active Dry Yeast: The powerhouse behind the rolls’ light and fluffy texture. Yeast consumes sugar and produces carbon dioxide, causing the dough to rise. Fresh, active yeast is key for a successful bake.
- All-Purpose Flour: The primary structural component of the rolls. All-purpose flour provides the right balance of protein to create a dough that’s strong enough for kneading yet yields a wonderfully soft finished product. Measure carefully, preferably by weight, to avoid adding too much.
- Brown Sugar: Unlike granulated sugar, brown sugar introduces a deeper, more complex sweetness with hints of molasses. This rich flavor profile beautifully harmonizes with the pumpkin and warm spices.
- Ground Spices (Cloves & Nutmeg): These warm, aromatic spices are indispensable for imparting that signature cozy, autumnal flavor to the pumpkin rolls. They add depth and complexity that elevates the overall taste experience. Feel free to adjust quantities to your preference.
- Melted Butter: Butter is a cornerstone of rich, tender baked goods. It adds a luxurious richness, contributes to the moist texture, and imbues the rolls with a delicate, buttery flavor that is simply irresistible.
- Olive Oil: A touch of olive oil helps keep the dough incredibly tender and pliable. It also introduces a subtle savory note that perfectly balances the sweetness from the sugars and pumpkin.
- Egg: Eggs serve multiple functions in this recipe. They act as a binder, helping to hold the dough together, and they enrich the texture, yielding a more tender and flavorful crumb. An egg yolk is also reserved for the shimmering glaze.
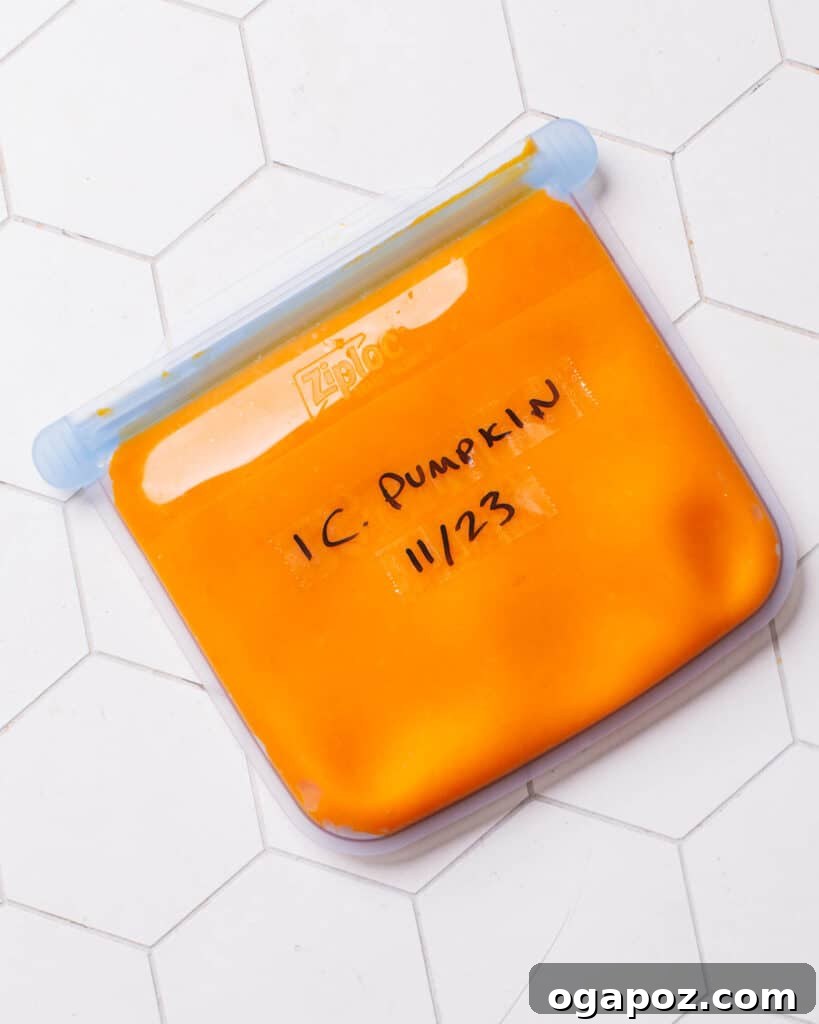
- Pumpkin Puree: The star of the show! Pure pumpkin puree provides natural sweetness, a beautiful golden color, and a significant boost of moisture, resulting in incredibly soft rolls. Always ensure you’re using 100% pure pumpkin puree, not pumpkin pie filling, which contains added sugars and spices that would alter the recipe.
Creative Variations and Smart Substitutions
While the classic pumpkin dinner roll is undoubtedly delicious, don’t hesitate to get creative! These handy swaps and additions can help you tailor the recipe to your taste or dietary needs:
- Whole Wheat Version: For a boost of fiber and a slightly nuttier flavor, swap out up to half of the all-purpose flour for whole wheat flour. Be aware that this will result in a slightly denser roll that isn’t quite as fluffy, but still wonderfully wholesome.
- Pumpkin Alternatives: If pumpkin isn’t readily available or you simply want to try something different, consider using pureed sweet potatoes instead! Instant Pot sweet potatoes are excellent for this. The flavor profile will shift slightly but remain deliciously autumnal. You could even explore my sweet potato cupcakes for another sweet potato treat!
- Sweet Pumpkin Rolls with Maple Glaze: Transform these dinner rolls into a delightful dessert or a sweeter breakfast treat. After the rolls have baked and cooled slightly, drizzle them generously with a simple maple glaze. To make it, whisk together powdered sugar, a couple of tablespoons of maple syrup, and just enough milk to achieve a pourable consistency.
- Herb-Infused Savory Rolls: Introduce a fragrant, savory element by mixing in 1-2 tablespoons of finely chopped fresh herbs like rosemary, thyme, or sage directly into the dough with the dry ingredients. These herb-infused rolls are particularly fantastic when served alongside rich soups or stews.
- Enhanced Spiced Pumpkin Rolls: If you adore warm spices, feel free to elevate the flavor profile. Add an extra teaspoon or two of pumpkin pie spice, ground cinnamon, ginger, or allspice to the dough. You can even add a pinch of freshly ground black pepper for a subtle kick.
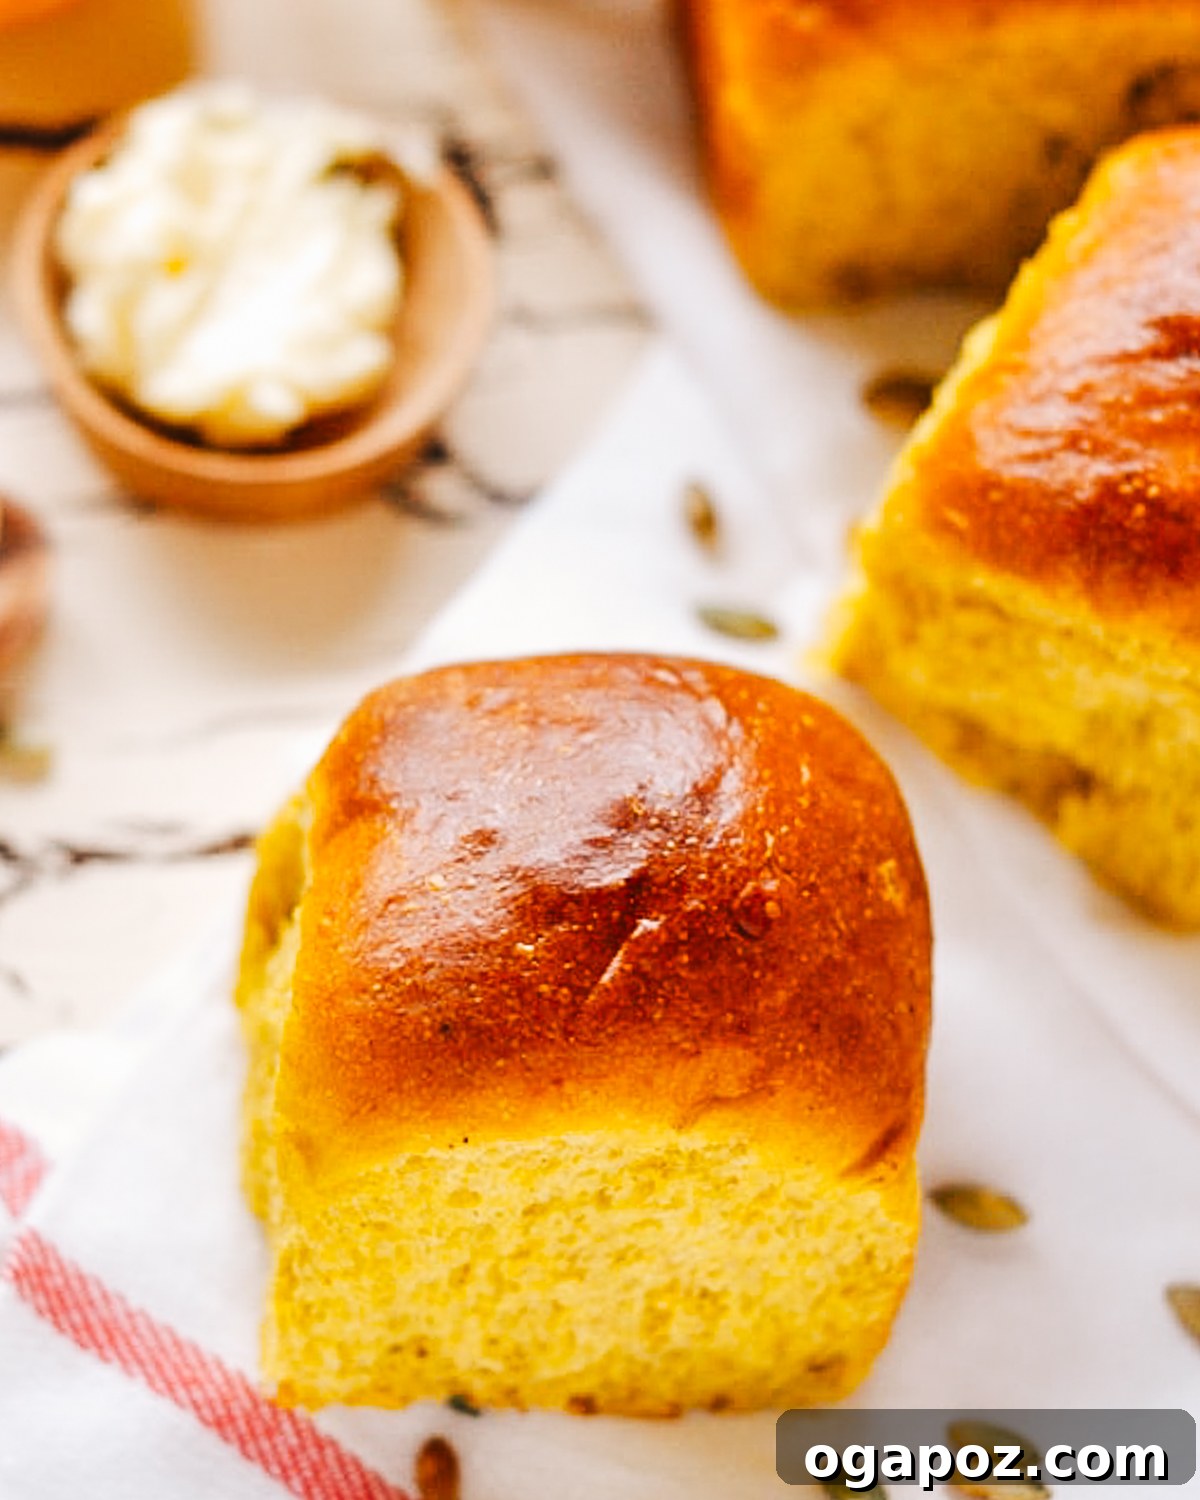
- Seed-Topped Rolls: For added texture and visual appeal, sprinkle a variety of seeds over the tops of the rolls just before baking. Sesame seeds, sunflower seeds, or even pepitas (pumpkin seeds) make excellent choices, adding a delightful crunch and nutty flavor.
- Dairy-Free Option: To make these rolls dairy-free, substitute the warm milk with a plant-based milk (like unsweetened almond or soy milk) and use a high-quality vegan butter substitute for the melted butter.
- Gluten-Free Experiment: While this recipe is not originally gluten-free, adventurous bakers can experiment with a high-quality gluten-free all-purpose flour blend (one that contains xanthan gum for structure). Expect a slightly different texture, as gluten-free doughs tend to be more delicate.
Essential Tools for Baking Pumpkin Dinner Rolls
You don’t need a professional kitchen setup to bake these incredible rolls. Most of the necessary tools are likely already in your kitchen:
- Large Mixing Bowls: You’ll need at least one large bowl for mixing the dough and another well-greased bowl for the dough’s first rise. A stand mixer bowl can double as a mixing bowl if you prefer machine kneading.
- Measuring Cups and Spoons: For accurately measuring all your ingredients. Precision is key in baking!
- Whisk or Wooden Spoon: For combining ingredients. A sturdy wooden spoon works wonderfully for stirring the dough before kneading.
- Baking Pan or Sheet: A 9×13-inch baking pan is ideal for baking the rolls nestled together, creating soft sides. Alternatively, a large baking sheet will produce rolls with crispier edges. Ensure it’s greased to prevent sticking.
- Clean Kitchen Towel or Plastic Wrap: Essential for covering the dough during its rise times, preventing it from drying out.
- Pastry Brush: For applying the egg wash to achieve that beautiful golden sheen.
- Instant-Read Thermometer (Optional but Recommended): For checking the internal temperature of the rolls to ensure they are perfectly cooked through (190°F / 88°C).
Step-by-Step Guide: How to Make Pumpkin Dinner Rolls
Baking homemade yeast rolls might seem daunting, but by taking it one step at a time, you’ll achieve perfectly soft and flavorful pumpkin dinner rolls. Here’s a detailed breakdown:
1. Prepare and Activate the Yeast
The first crucial step is to awaken your yeast. In a small bowl, dissolve 1 teaspoon of granulated sugar into the warm milk. The sugar provides food for the yeast, and the warm milk creates the ideal environment for it to activate. Sprinkle the active dry yeast evenly over the surface of the milk mixture. Do not stir it in immediately. Let this mixture sit undisturbed for about 10 minutes. During this time, the yeast should become frothy and bubbly, forming a creamy layer on top. This indicates that your yeast is active and ready to work its magic. If it doesn’t foam, your yeast might be old or the milk temperature was off, and you should start over with fresh yeast.
2. Mix and Knead the Dough
In a very large mixing bowl, combine the all-purpose flour, brown sugar, salt, ground cloves, and ground nutmeg. Whisk these dry ingredients together thoroughly to ensure even distribution of flavor. Next, add the frothy yeast mixture, pumpkin puree, melted butter, olive oil, and the lightly beaten egg to the dry ingredients. Stir everything together with a sturdy wooden spoon or a dough whisk until a shaggy dough forms and all ingredients are well incorporated. The dough will be quite sticky at this stage.
Lightly flour a clean work surface and transfer the dough to it. Knead the dough for approximately 8-10 minutes. If kneading by hand, push the dough away from you with the heels of your hands, fold it back, rotate, and repeat. Gradually add very small amounts of flour if the dough is excessively sticky, but avoid adding too much, as this can make your rolls tough. Continue kneading until the dough is smooth, elastic, and no longer sticks aggressively to your hands. It should spring back slowly when poked.
3. First Rise: Allowing the Dough to Double
Lightly grease a clean large bowl with a little olive oil or cooking spray. Place the kneaded dough into the oiled bowl, turning it once to ensure the entire surface is lightly coated. This prevents the dough from sticking and drying out. Cover the bowl tightly with a clean kitchen towel or plastic wrap. Place the bowl in a warm, draft-free spot in your kitchen (e.g., a slightly warm oven that’s turned off, or near a sunny window). Let the dough rise until it has visibly doubled in size, which typically takes about 1 to 1.5 hours, depending on the warmth of your environment. This first rise develops flavor and creates the airy structure of the rolls.
4. Shape the Dough into Rolls
Once the dough has completed its first rise, gently punch it down to release the air. Turn the dough out onto a lightly floured surface. Divide the dough into 16 equal pieces. For best results, use a kitchen scale to ensure each piece weighs approximately the same, leading to uniformly sized rolls that bake evenly. Take each piece of dough and roll it into a smooth, round ball. You can achieve this by gently cupping the dough in your hand and rolling it against the countertop in a circular motion, or by pinching the seams together at the bottom. Arrange the shaped dough balls in a greased 9″x13″x2″ baking pan or on a greased baking sheet, leaving a small space between each roll to allow for expansion.
5. Second Rise: The Final Proof
Cover the pan or baking sheet with the shaped rolls loosely with a clean kitchen towel or plastic wrap. Allow them to rise for a second time in a warm, draft-free place for another 45 minutes to 1 hour, or until they have almost doubled in size again and appear noticeably puffy. This second rise is crucial for achieving that light, fluffy texture in the final baked rolls. Don’t rush this step!
6. Prepare the Egg Wash and Preheat Oven
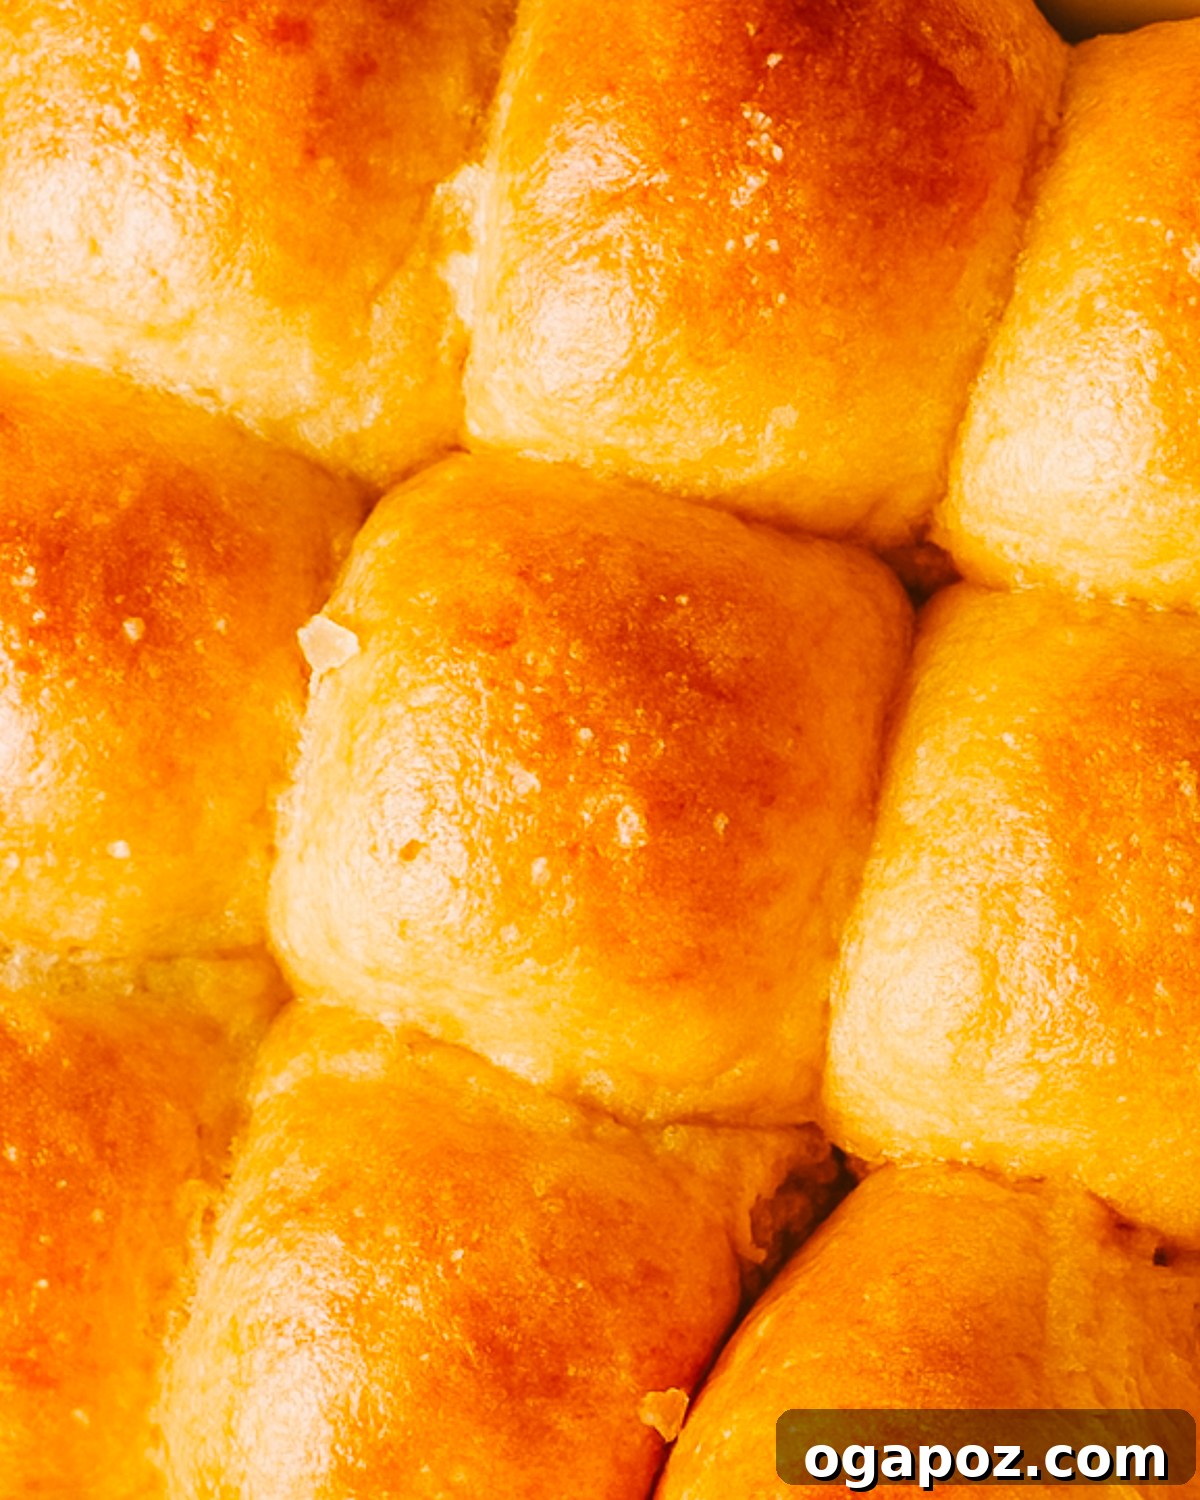
While your rolls are undergoing their final rise, preheat your oven to 350°F (175°C). In a small bowl, whisk together the egg yolk with 1 tablespoon of water. This creates an egg wash that, when brushed over the rolls, will give them a beautiful golden-brown crust and a lovely sheen. Just before baking, gently brush the egg wash over the tops of the risen rolls, being careful not to deflate them.
7. Bake Your Delicious Pumpkin Rolls
Carefully place the pan of rolls into the preheated oven, ideally on the center rack for even baking. Bake for approximately 18-22 minutes, or until the tops are beautifully golden brown and the rolls are cooked through. To confirm doneness, an instant-read thermometer inserted into the center of a roll should register an internal temperature of 190°F (88°C). Alternatively, if you tap the bottom of a baked roll, it should sound hollow. Once baked, remove the rolls from the oven and let them cool slightly on a wire rack before serving warm with your favorite butter or spread.
5 Common Mistakes When Making Pumpkin Dinner Rolls (and How to Avoid Them!)
Even experienced bakers can encounter challenges. As a food scientist, I’m here to illuminate some classic issues often faced when making these rolls and provide simple solutions for a perfect bake every time:
-
Using Milk That’s Too Hot (or Too Cold) for the Yeast: This is perhaps the most common pitfall. If your milk is too hot (above 120°F/49°C), it will kill the delicate yeast organisms, preventing your dough from rising altogether. If it’s too cold (below 100°F/38°C), the yeast won’t activate properly, resulting in a sluggish or non-existent rise. Always aim for a “baby bottle warm” temperature, between 105-115°F (40-46°C). Use a kitchen thermometer for accuracy!
-
Not Allowing the Dough to Rise Long Enough: Patience is a virtue in baking, especially with yeast doughs. Rushing or shortening the rising times (both the first and second rise) will lead to dense, heavy, and brick-like rolls instead of the desired light and airy texture. Ensure the dough truly doubles in size during each rise. This can take longer than the recipe states, especially in cooler environments. Look for visual cues like significant expansion and a puffy appearance.
-
Overloading on Flour (or Not Enough): The amount of flour can vary depending on humidity and how wet your pumpkin puree is. Adding too much flour results in a stiff, dry dough that produces tough, crumbly rolls. Conversely, too little flour makes the dough excessively sticky and difficult to handle, affecting its structure. Always measure flour accurately (preferably by weight, if possible) and add it gradually. The dough should feel tacky but manageable, not stiff or dry. Resist the urge to add cup after cup of flour during kneading.
-
Skipping the Egg Wash: While it might seem like a minor step, forgetting to brush the rolls with an egg wash before baking can significantly impact their final appearance. Without it, your rolls will emerge from the oven looking pale and dull. The egg wash (egg yolk whisked with water) is crucial for giving them that irresistible shiny, golden-brown crust that enhances both visual appeal and a subtle richness in flavor.
-
Overbaking the Rolls: Leaving the rolls in the oven for too long is a surefire way to dry them out, turning them from soft and fluffy to hard and tough. Keep a close eye on your rolls during the final minutes of baking. They are typically done when they achieve a beautiful golden-brown color on top and an instant-read thermometer inserted into the center reads 190°F (88°C). If you don’t have a thermometer, tap the bottom of a roll; it should sound hollow. Remove them promptly from the oven once these indicators are met.
Make-Ahead Magic: Prepare for Convenience
One of the best features of these pumpkin dinner rolls is how wonderfully suited they are for making ahead, especially when planning for a busy holiday meal. This convenience allows you to spread out your baking tasks and reduce stress on the day of your event.
- Overnight Refrigeration: After you have shaped the rolls and arranged them in your greased baking pan, cover them tightly with plastic wrap. Place the pan in the refrigerator overnight, or for up to 24 hours. The cold temperature will slow down the yeast activity, allowing the rolls to undergo a slow, flavorful rise.
- Baking Day Prep: On the day you plan to bake, remove the rolls from the refrigerator. Keep them covered and let them come to room temperature and complete their final rise. This crucial step will take approximately 45 minutes to 1 hour, or until they look visibly puffy again. Once fully risen, proceed with the egg wash and baking instructions as usual. This method ensures you have freshly baked, warm rolls ready exactly when you need them.
Storing Your Delicious Pumpkin Dinner Rolls
Proper storage is key to keeping your homemade pumpkin dinner rolls fresh and delightful for as long as possible. Here’s how to best store them:
- Room Temperature Storage: Once your baked rolls have cooled completely, transfer them to an airtight container or wrap them tightly with plastic wrap. Stored at room temperature, they will remain wonderfully fresh and soft for 2-3 days. Avoid refrigerating baked rolls, as this tends to dry them out and make them stale faster.
- Freezing for Long-Term: For longer storage, freezing is your best friend. After the rolls have cooled completely, place them in a freezer-safe bag or an airtight container. They can be stored in the freezer for up to 2 months without losing their quality. For best results, freeze them on a baking sheet first until solid, then transfer to a bag to prevent sticking.
- Reheating Instructions: To reheat baked rolls, wrap them loosely in aluminum foil to retain moisture. Place them in a preheated oven at 325°F (160°C) for about 10 minutes if they were at room temperature. If reheating from frozen, increase the baking time to approximately 30 minutes, or until warmed through and soft again. You can also lightly toast them or microwave for a few seconds for a quick refresh.
Creative Ways to Serve These Irresistible Dinner Rolls
These pumpkin dinner rolls are incredibly versatile and can elevate almost any meal. Beyond being a delightful accompaniment to your holiday feast, here are some fantastic ways to enjoy them:
- Classic with Butter: The simplest pleasure! Serve them warm with a generous smear of softened butter. For an extra special touch, whip up some honey butter or mix a pinch of pumpkin pie spice into your regular butter.
- Leftover Turkey Sandwiches: This is arguably their finest encore! Slice them open and stuff them with cold roast turkey, a dollop of cranberry sauce, mayo, and a hint of mustard. Pure post-holiday bliss!
- Soup & Stew Companion: Their soft texture and subtle sweetness make them the perfect vehicle for soaking up delicious broths. Pair them with a hearty bowl of my Ground Turkey Soup, Old Fashioned Vegetable Beef Soup recipe, or this comforting Lentil Soup with Ham.
- Perfect with Roasts: Serve these rolls alongside robust main courses for a balanced and satisfying meal. They are fantastic with Pork Loin in Crockpot, my Pork Shoulder Crockpot recipe, tender Eye of Round Roast, Dutch Oven Pot Roast, or Air Fryer Roast Beef for a truly cozy fall dinner.
- Mini Meatloaf Sliders: Use these rolls as the base for gourmet sliders! They work wonderfully for meatloaf sandwich sliders, pulled pork, or mini chicken salad sandwiches.
- Breakfast Treat: Drizzle with maple syrup or a sprinkle of cinnamon sugar for a sweet start to your day.
- With Cheese & Charcuterie: Offer them on a cheese board or charcuterie spread for a unique bread option that complements both sweet and savory components.
Frequently Asked Questions About Pumpkin Dinner Rolls
For those looking for quick answers or troubleshooting tips, here are some common questions about making pumpkin dinner rolls:
Q: Can I use fresh or homemade pumpkin puree instead of canned puree?
A: Absolutely! Freshly made pumpkin puree can be used, and it often adds an even richer flavor. Just be sure to cook and puree your pumpkin until it’s perfectly smooth. The most important tip is to drain any excess water from homemade puree, as it can be thinner than canned versions, potentially leading to a soggy or overly wet dough. Pat it dry with paper towels if needed.
Q: What if I don’t have ground cloves or nutmeg?
A: No problem! You can easily substitute these with other warm, fall-friendly spices. Cinnamon, allspice, ginger, or even a pre-made pumpkin pie spice blend will work beautifully to achieve a similar comforting flavor profile. Adjust quantities to your taste.
Q: How do I know when the dough has risen enough?
A: The most reliable indicator is visual: the dough should roughly double in size. For a more precise check, gently press two fingers into the dough about half an inch deep. If the indentation remains and doesn’t spring back quickly, the dough has adequately risen. If it springs back immediately, it needs more time.
Q: Can I make these rolls gluten-free?
A: While this specific recipe is developed for all-purpose flour, you can certainly experiment with a high-quality gluten-free all-purpose flour blend. Look for blends that contain xanthan gum or a similar binding agent to help with structure. Be prepared for a slightly different texture, as gluten-free doughs can be a bit more fragile and sticky, so handle them with extra care.
Q: Why are my rolls dense and not fluffy?
A: Density usually stems from issues with the yeast or rising process. Ensure your active dry yeast is fresh and hasn’t expired. Also, make sure the milk used to activate it was the correct temperature (105-115°F). Dough needs a warm, draft-free environment to rise properly, so avoid cold spots. Finally, adding too much flour during mixing or kneading can make the dough heavy and prevent it from becoming light and airy.
Q: Can I freeze the dough before baking?
A: Yes, you can! After you’ve shaped the individual rolls, arrange them on a baking sheet and freeze them until they are solid. Once frozen, transfer the solid dough balls to a freezer-safe bag or container. When you’re ready to bake, place the frozen rolls back into a greased baking pan, allow them to thaw completely (this can take several hours at room temperature), and then let them rise until doubled in size before proceeding with the egg wash and baking as usual.
Q: What’s the best way to tell if the rolls are fully baked without a thermometer?
A: Besides checking for a beautiful golden-brown color, gently tap the bottom of a roll. If it sounds hollow, it’s a good indication that the roll is fully cooked through. This method is a tried-and-true trick for many yeast bread recipes.
More Irresistible Pumpkin Recipes You’ll Love
Once you’ve mastered these dinner rolls, dive into some of my other favorite recipes that celebrate the glorious flavors of pumpkin, perfect for when the leaves start to change:
- Super Easy Pumpkin Pie: An absolute classic for any fall gathering. This recipe simplifies a holiday favorite without sacrificing flavor.
- Moist Pumpkin Zucchini Muffins: These delightful muffins stay incredibly moist and flavorful for days, blending the best of fall produce.
- Spiced Pumpkin Cookies (No Butter!): Discover these wonderfully soft and chewy cookies, made without butter, that are seriously the best fall treat.
- Cozy Pumpkin, Ginger and Rice Soup: A warming and comforting soup that makes an easy fall appetizer or a light, satisfying lunch.
- Creamy Pumpkin Pasta Sauce with Crispy Sage: Smother your favorite pasta in this rich, creamy sauce for a decadent and seasonal weeknight meal.
Pin
Pumpkin Dinner Rolls (Soft + Fluffy!)
Jennifer Pallian BSc, RD
30 minutes
20 minutes
2 hours
2 hours
50 minutes
16
Ingredients
-
1
tsp
sugar -
¾
cup
warm milk -
2 ¼
tsp
active dry yeast -
7 –8 cups
all-purpose flour -
⅓
cup
packed brown sugar -
2 ½
tsp
salt -
½
tsp
ground cloves -
1
tsp
ground nutmeg -
½
cup
melted butter -
¼
cup
olive oil -
1
egg
lightly beaten -
2
cups
pumpkin puree
100% pure, not pie filling -
1
egg yolk + 1 tbsp water
for egg wash
Instructions
Activate Yeast
-
Dissolve 1 tsp sugar in the warm milk. Sprinkle yeast over top and let stand 10 minutes, until frothy.
Make Dough
-
In a large bowl, stir together flour, brown sugar, salt, cloves, and nutmeg. Add the yeast mixture, pumpkin puree, melted butter, olive oil, and egg. Stir until combined.
-
Turn onto a lightly floured surface and knead until smooth and elastic, about 10 minutes. Place in an oiled bowl, turning once to coat. Cover with a clean towel and let rise until doubled, about 1 hour.
Shape Rolls
-
Punch down dough. Divide into 16 equal pieces and roll each into a ball. Place in a greased 9×13-inch pan or on a greased baking sheet. Cover and let rise again until doubled, about 45–60 minutes.
Bake
-
Preheat oven to 350ºF. Whisk egg yolk with 1 tbsp water and brush over rolls. Bake 18–22 minutes, until golden brown and an instant-read thermometer reads 190ºF.
-
Cool slightly on a wire rack before serving warm.
Notes
No thermometer? Rolls are done when golden brown and sound hollow when tapped on the bottom.
Store cooled rolls in an airtight container at room temp up to 2 days, or freeze up to 2 months. Do not refrigerate.
Reheat wrapped in foil at 325ºF for 10 minutes (30 minutes if frozen).
Nutrition
Calories:
130
kcal
|
Carbohydrates:
9
g
|
Protein:
2
g
|
Fat:
10
g
|
Saturated Fat:
5
g
|
Polyunsaturated Fat:
1
g
|
Monounsaturated Fat:
4
g
|
Trans Fat:
0.2
g
|
Cholesterol:
39
mg
|
Sodium:
422
mg
|
Potassium:
100
mg
|
Fiber:
1
g
|
Sugar:
6
g
|
Vitamin A:
5065
IU
|
Vitamin C:
1
mg
|
Calcium:
32
mg
|
Iron:
1
mg
Nutrition information is automatically calculated, so should only be used as an approximation.
Tried this recipe? Leave a comment!