
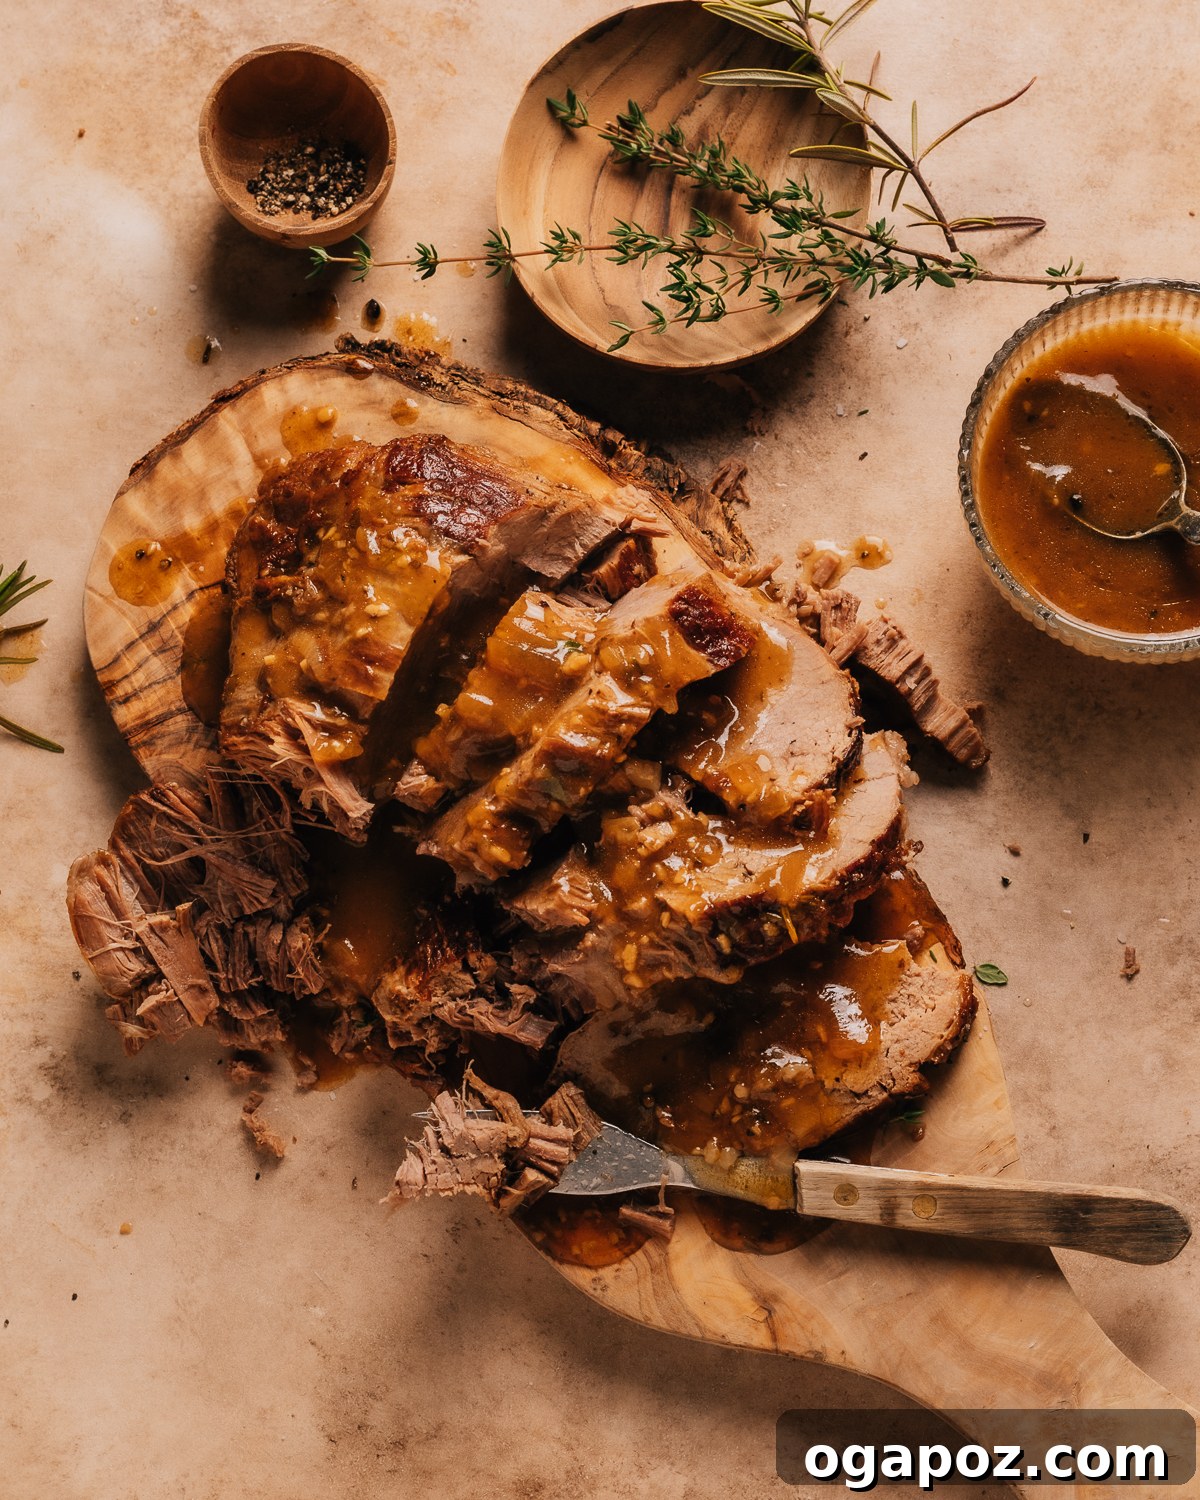
Mastering Instant Pot Roast Beef: A Food Scientist’s Guide to Melt-in-Your-Mouth Tenderness and Rich Gravy
As a Food Scientist, I’ve unlocked the secrets to crafting the absolute best Instant Pot Roast Beef. Prepare yourself for unbelievably melt-in-your-mouth tender meat, complemented by a rich, savory gravy that will have you savoring every last drop. This recipe isn’t just easy; it’s engineered for perfection, bringing restaurant-quality results right to your dinner table. Forget bland, dry roasts – this is the ultimate guide to a truly exceptional Instant Pot pot roast. 👌
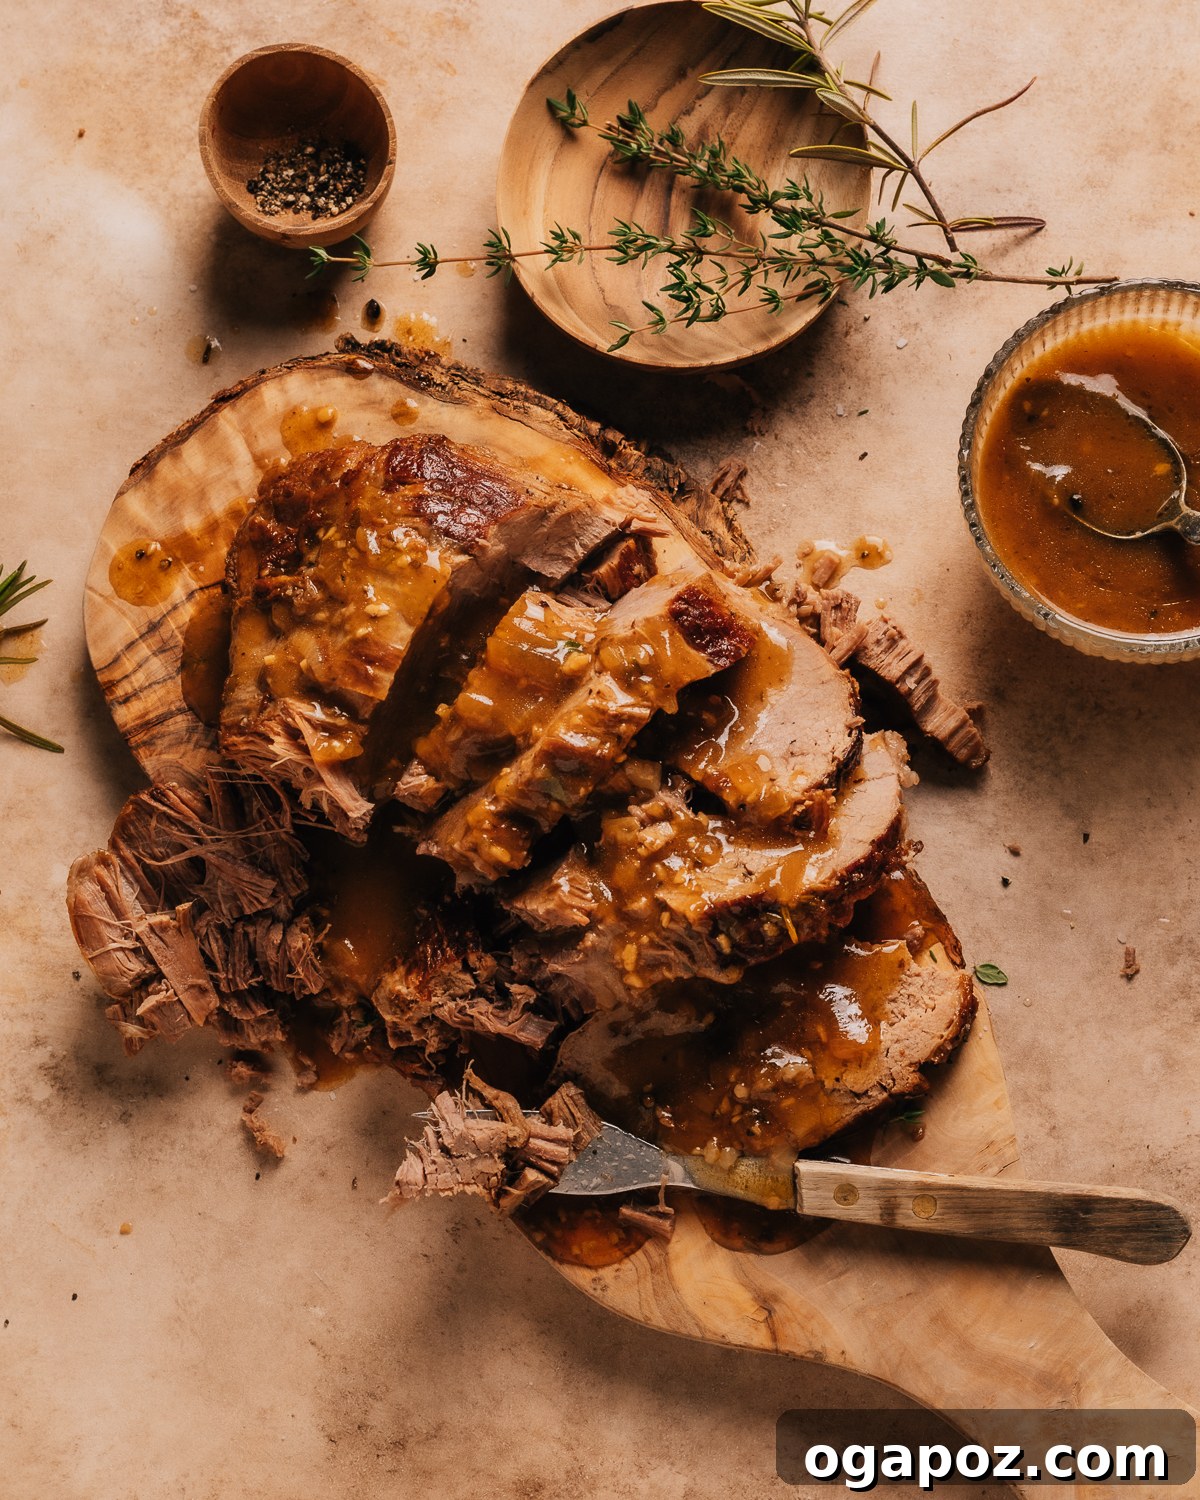
This Instant Pot roast beef recipe delivers that classic, mouthwatering roast beef taste with a buttery-soft texture that practically melts on your fork. The magic lies in the pressure cooking process, which expertly locks in all the vibrant flavors, creating a savory, incredibly juicy pot roast. The concentrated broth left behind is a culinary treasure, easily transformed into a glossy, irresistible gravy that elevates the entire meal.
Pressure cooking dramatically reduces the time needed to transform tough cuts of meat into tender, succulent dishes. It works by raising the boiling point of liquids, allowing food to cook at higher temperatures and consequently much faster. This not only saves time but also deeply infuses the meat with flavor, making it a game-changer for dishes like pot roast. Get ready to impress your family and friends with a Sunday dinner that feels like it simmered all day, but only took a fraction of the time.
A Food Scientist’s Secrets to the Best Instant Pot Roast Beef
I’m thrilled to share the invaluable tips and tricks gleaned from my science degree in food. Understanding the ‘why’ behind each step is crucial for consistent, exceptional results. Let’s delve into the fascinating culinary science that makes this recipe truly stand out!
- Choose the Right Cut for Optimal Tenderness: For the Instant Pot, tough cuts such as beef chuck roast, bottom blade, or brisket are your best friends. These cuts are rich in connective tissue, primarily collagen. Under the high-pressure, high-heat environment of the Instant Pot, this collagen slowly breaks down and converts into gelatin. This gelatin is what gives the meat its incredibly silky-tender texture and juicy mouthfeel, making it fall apart with ease. Using a leaner cut won’t yield the same tender results because it lacks the necessary connective tissue to transform.
- Sear for Deep, Unforgettable Flavor: Never skip this crucial step! Searing the roast at high heat before pressure cooking initiates the Maillard reaction – a complex chemical process between amino acids and reducing sugars. This reaction creates hundreds of new flavor compounds, developing a rich, deeply caramelized crust and imparting complex aromas and umami notes to the meat. This isn’t just about color; it’s about building a foundational layer of savory flavor that will permeate the entire dish and form the base of your rich gravy. It’s also a key step in my highly popular Instant Pot Steak recipe.
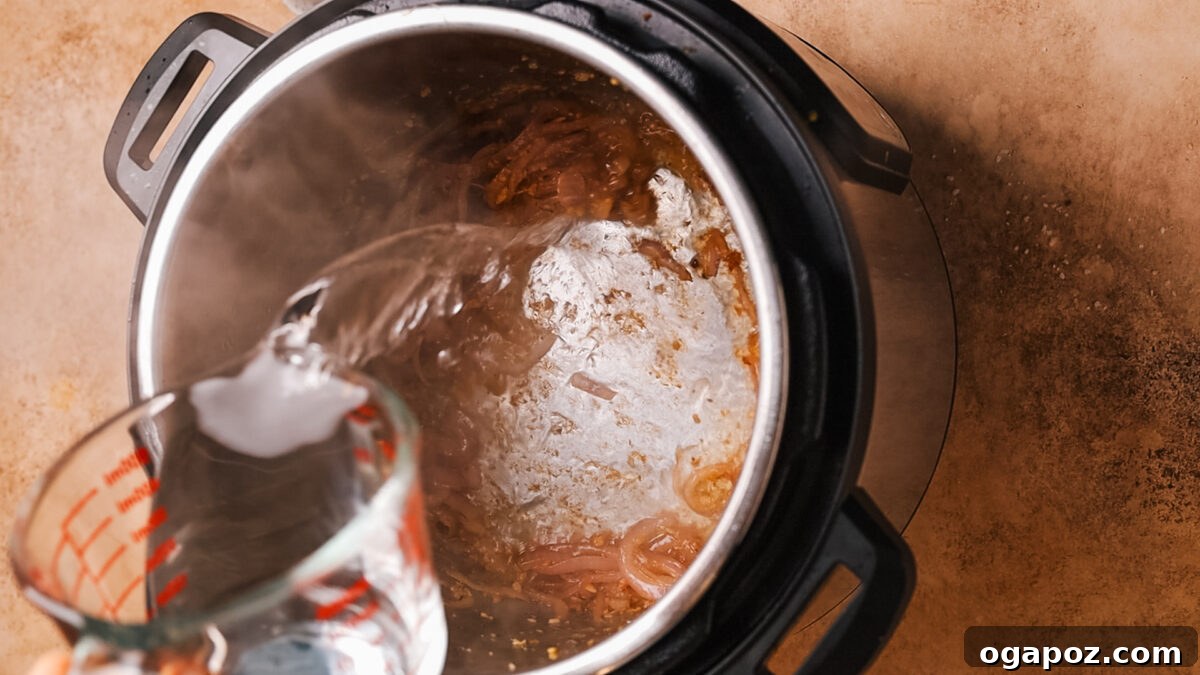
- Deglaze the Pot for Maximum Flavor and Safety: After searing the meat, always deglaze the pot with a liquid like beef broth, wine, or water. This involves scraping up the flavorful browned bits (known as ‘fond’) that stick to the bottom of the pot. Fond is packed with concentrated flavor from the Maillard reaction. By dissolving it into your cooking liquid, you ensure all that deliciousness contributes to your gravy. More importantly, deglazing prevents a “burn” warning on your Instant Pot, which can occur if food particles are left stuck to the bottom.
- Utilize Natural Pressure Release for Succulent Meat: Resist the urge to quick release the pressure immediately after cooking. Allowing the pressure to release naturally for at least 10 minutes (or fully naturally for even better results) is vital. This slow release allows the meat fibers to relax and reabsorb juices, preventing them from seizing up and becoming tough or dry. It creates a more tender, moist, and flavorful roast beef. Think of it as a crucial resting period within the cooking process itself.
- Let the Roast Rest to Retain Juices: Once removed from the Instant Pot, tent the roast loosely with foil and let it rest for a minimum of 10-15 minutes before slicing. This allows the internal temperature to equalize and the muscle fibers to relax, redistributing the precious juices evenly throughout the meat. If you slice it too soon, those juices will run out onto your cutting board, leaving you with a drier, less flavorful roast. Patience truly pays off here.
- Thicken Gravy Without Lumps for a Smooth Finish: A perfectly smooth, glossy gravy is the crowning glory of any pot roast. Using a cornstarch slurry (cornstarch mixed with cold water) is the key. Cornstarch molecules, when hydrated in cold water, can disperse without clumping. When this slurry is added to hot cooking liquid, the starch granules absorb water and swell, thickening the sauce. Always combine cornstarch with a cold liquid first to avoid lumps and ensure a silky, velvety texture. Gradually whisk it in while the liquid simmers on the “Sauté” setting for best results.
Keep on reading to discover the 4 common mistakes to avoid for your best Instant Pot Roast Beef ever! 👇
Here’s What You Need for Your Perfect Pot Roast
Creating this incredible Instant Pot Roast Beef requires just a few staple ingredients, most of which you likely have on hand. No need to even turn on the oven for the main course; all that’s left is to perfect your side dishes, like my famous creamy mashed potatoes! Gather these items, and you’ll be on your way to a comforting and delicious Sunday dinner.
Instant Pot Roast Beef Ingredients
Prepare to assemble these fresh ingredients to bring this sensational Sunday dinner to life. Each component plays a vital role in developing the complex flavor profile of your roast.
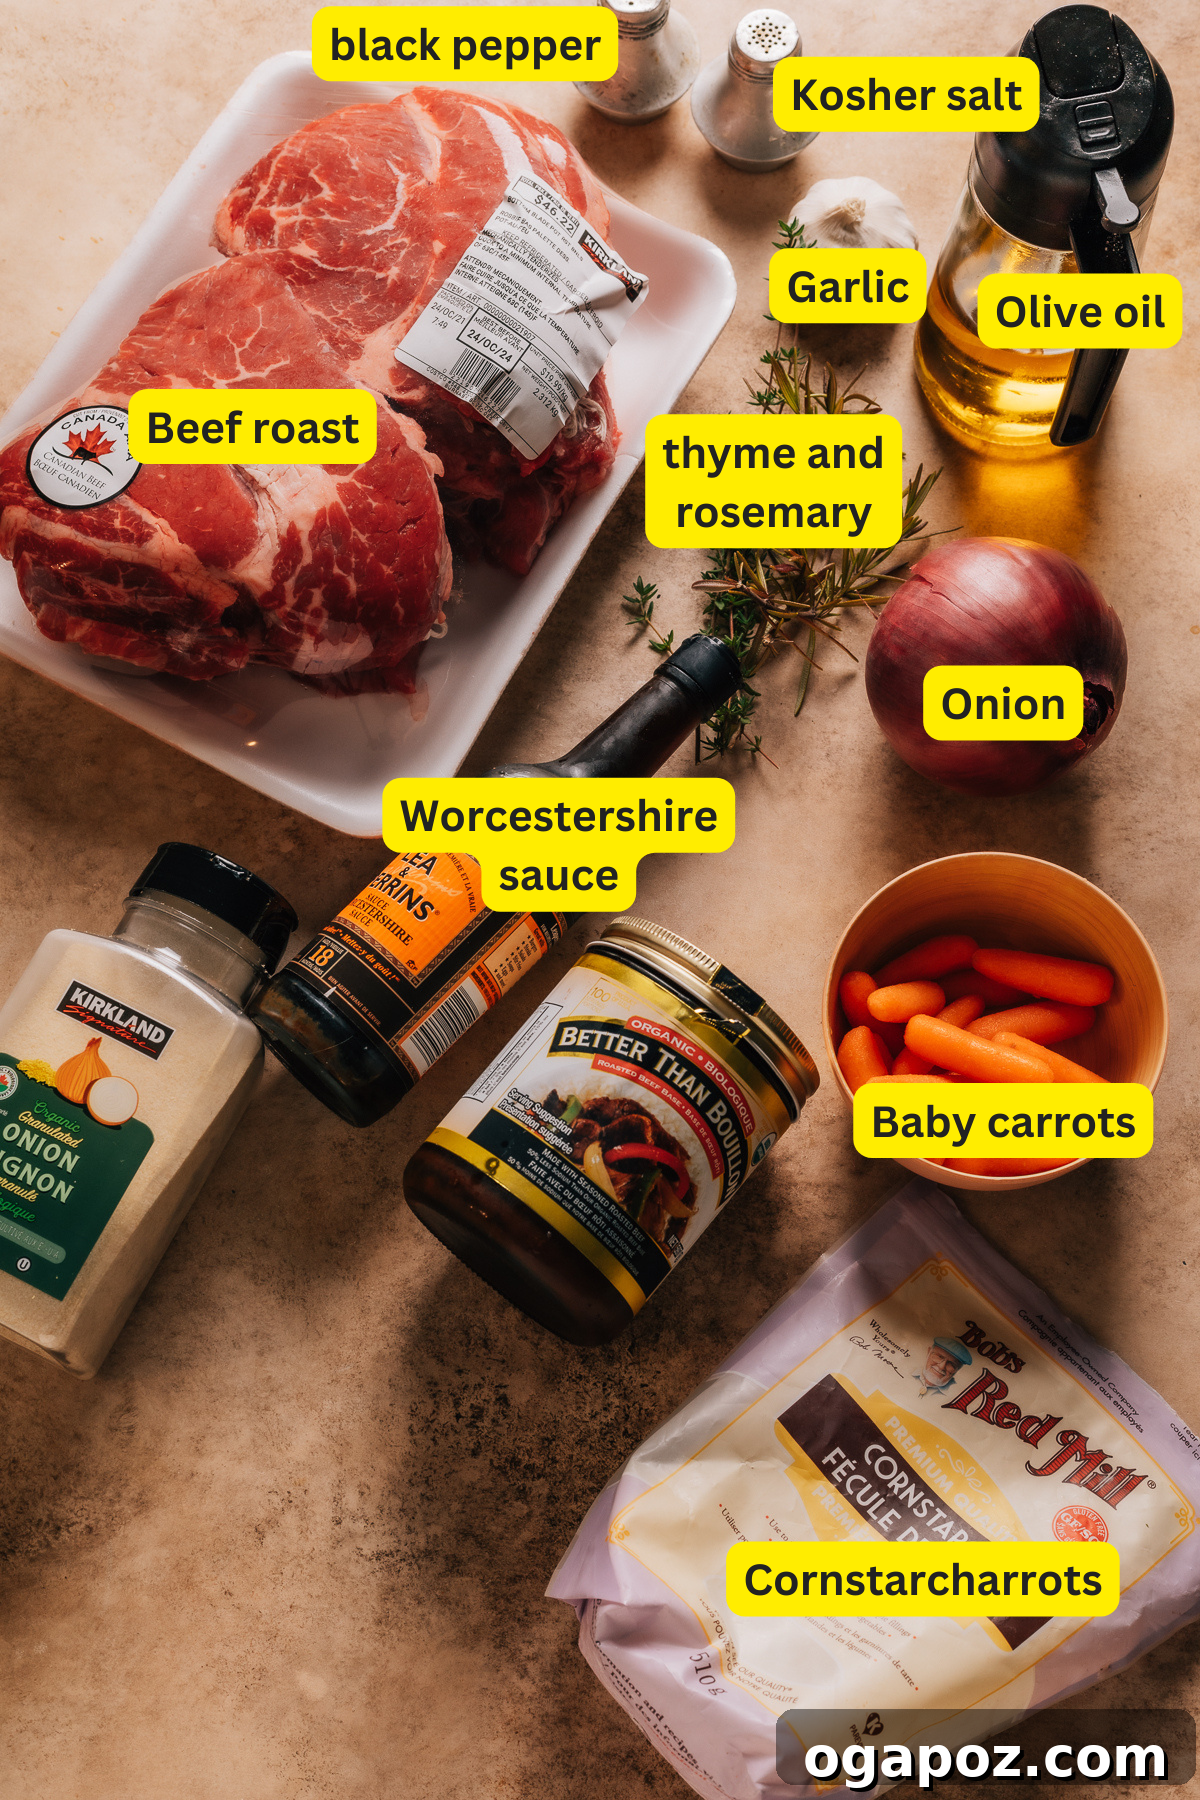
- Beef Roast (Chuck Roast, Bottom Blade, or Brisket): These tough cuts are ideal for pressure cooking. They boast a generous amount of connective tissue that, during the cooking process, slowly breaks down into rich, succulent gelatin, guaranteeing a tender and flavorful result. No matter which of these cuts you choose, you’re set for a deeply savory and juicy roast.
- Olive Oil: Essential for searing the beef, olive oil helps create that beautiful, flavorful crust through the Maillard reaction, which is crucial for depth and texture. It also aids in sautéing the aromatics.
- Kosher Salt and Black Pepper: These fundamental seasonings are critical for enhancing the natural flavors of the beef and vegetables. Don’t hold back; proper seasoning is the difference between a memorable meal and a bland one.
- Onion: When thinly sliced and sautéed, onions caramelize slightly, releasing a sweet and aromatic flavor that perfectly complements the beef. They infuse the cooking broth with a wonderful richness, laying a delicious foundation for the gravy.
- Garlic: A cornerstone of savory cooking, minced garlic adds an indispensable layer of pungent, aromatic depth to the roast and its accompanying gravy. Use fresh garlic for the best flavor.
- Beef Broth: This is the primary cooking liquid that not only tenderizes the meat but also infuses the entire dish with a rich, savory essence. It forms the base for your delicious gravy. Choose a high-quality broth for optimal flavor.
- Worcestershire Sauce: A splash of Worcestershire sauce contributes a complex umami punch and a subtle, tangy depth that beautifully rounds out the beefy flavor profile. It’s a secret weapon for amplifying savory notes.
- Dried Thyme and Rosemary: These classic herbs bring an earthy, aromatic warmth to the pot roast, perfectly complementing the rich beef. They evoke a comforting, traditional flavor that makes this dish feel truly special.
- Baby Carrots: Sweet, vibrant, and tender, baby carrots add a lovely pop of color and a touch of natural sweetness to the dish. They absorb the savory flavors of the broth beautifully.
- Potatoes: Quartered or cubed potatoes are ideal for absorbing the delicious flavors of the broth while retaining their shape and satisfying texture. They add heartiness and a comforting element, making the meal feel complete. Red or Yukon Gold potatoes work particularly well.
- Cornstarch Slurry: This simple mixture of cornstarch and cold water is your secret to a smooth, velvety gravy. It thickens the cooking liquid to the perfect consistency without any lumps, creating a luxurious sauce that clings to the meat and vegetables.
Substitutions and Variations to Customize Your Roast
This Instant Pot Roast Beef recipe is incredibly versatile! Feel free to adapt the ingredients based on what you have on hand or to suit dietary preferences. Here are a few alternative ingredients and exciting variations you can try:
- Beef Roast Alternatives: If you prefer a leaner cut of beef, you can swap the chuck or bottom blade roast with a round roast (such as top round or bottom round). While these cuts will still cook well and become tender in the Instant Pot, they might be slightly less fall-apart tender due to their lower fat and collagen content. For cuts like Top Sirloin and Eye of Round roast, you might find better results using traditional oven methods or my specific air fryer roast beef recipe, as they can become tough under pressure if not handled carefully.
- Cooking Oil Options: For searing the roast, olive oil is a great choice, but you can certainly use other high-smoke-point oils. Avocado oil offers a neutral flavor and high heat tolerance, while vegetable oil or canola oil are also perfectly acceptable alternatives. Butter can also be used for extra richness, but watch carefully to prevent burning during the high-heat searing.
- Vegetable Additions: The baby carrots and potatoes are classic, but this recipe is fantastic for experimenting with other root vegetables. Consider adding parsnips for a subtle sweetness, sweet potatoes for a heartier texture and earthy flavor, or turnips for a slight peppery bite. You can also incorporate celery for added aroma, or mushrooms for an earthy umami boost. Simply cut them into similar-sized pieces for even cooking.
- Broth Choices: Beef broth provides a robust flavor, but if you prefer a lighter profile, chicken or vegetable broth can be used instead. For an even richer, deeper flavor, opt for a high-quality beef stock or a homemade bone broth, which will yield a more gelatinous and flavorful gravy.
- Worcestershire Sauce Substitutes: If you don’t have Worcestershire sauce, or are looking for an alternative, soy sauce can provide a similar umami depth. Balsamic vinegar offers a tangy sweetness that works well, or you can try a splash of red wine for a more complex, savory note. For an added tang, a small amount of apple cider vinegar or a squeeze of lemon juice can brighten the flavors.
- Herb Combinations: Dried thyme and rosemary are a timeless combination for beef, but feel free to explore other herbs. Italian seasoning is a convenient blend, or you can create your own mix with oregano, basil, and marjoram. If using fresh herbs, double the amount listed for dried, and consider tying them into a sachet with kitchen twine for easy removal after cooking.
- Gravy Thickening Agents: If cornstarch is not available, arrowroot powder or tapioca flour can be used as direct substitutes for thickening the gravy, typically in similar quantities. Another classic option is to make a roux by cooking equal parts butter and flour until golden before whisking it into the hot liquid. Ensure it cooks for a minute or two to eliminate any raw flour taste.
-
Dietary Adjustments:
- Gluten-Free: Ensure your Worcestershire sauce is certified gluten-free. For thickening, continue to use cornstarch slurry or arrowroot powder, as wheat flour-based rouxs would contain gluten.
- Paleo-Friendly: Substitute Worcestershire sauce with coconut aminos for a soy-free, paleo-approved umami. Use arrowroot powder or tapioca flour instead of cornstarch for thickening, as cornstarch is often excluded from strict paleo diets.
Tools to Grab for Effortless Cooking
You’ll primarily need your trusty Instant Pot to make this recipe, along with a sturdy wooden spoon or spatula for stirring and deglazing. A pair of tongs will be invaluable for searing and handling the hot roast, and a sharp chef’s knife and cutting board are essential for prepping your ingredients and slicing the cooked beef. With these basic kitchen tools, you’re all set to create a culinary masterpiece!
If you prefer the classic, low-and-slow approach, you can easily adapt this recipe to my delicious Dutch Oven Pot Roast method.
How to Make Instant Pot Roast Beef: An Easy Step-by-Step Guide
Follow these straightforward steps to prepare perfectly tender and flavorful pressure cooker beef with a rich, luscious gravy. Even if you’re new to the Instant Pot, this guide will walk you through each stage with confidence.
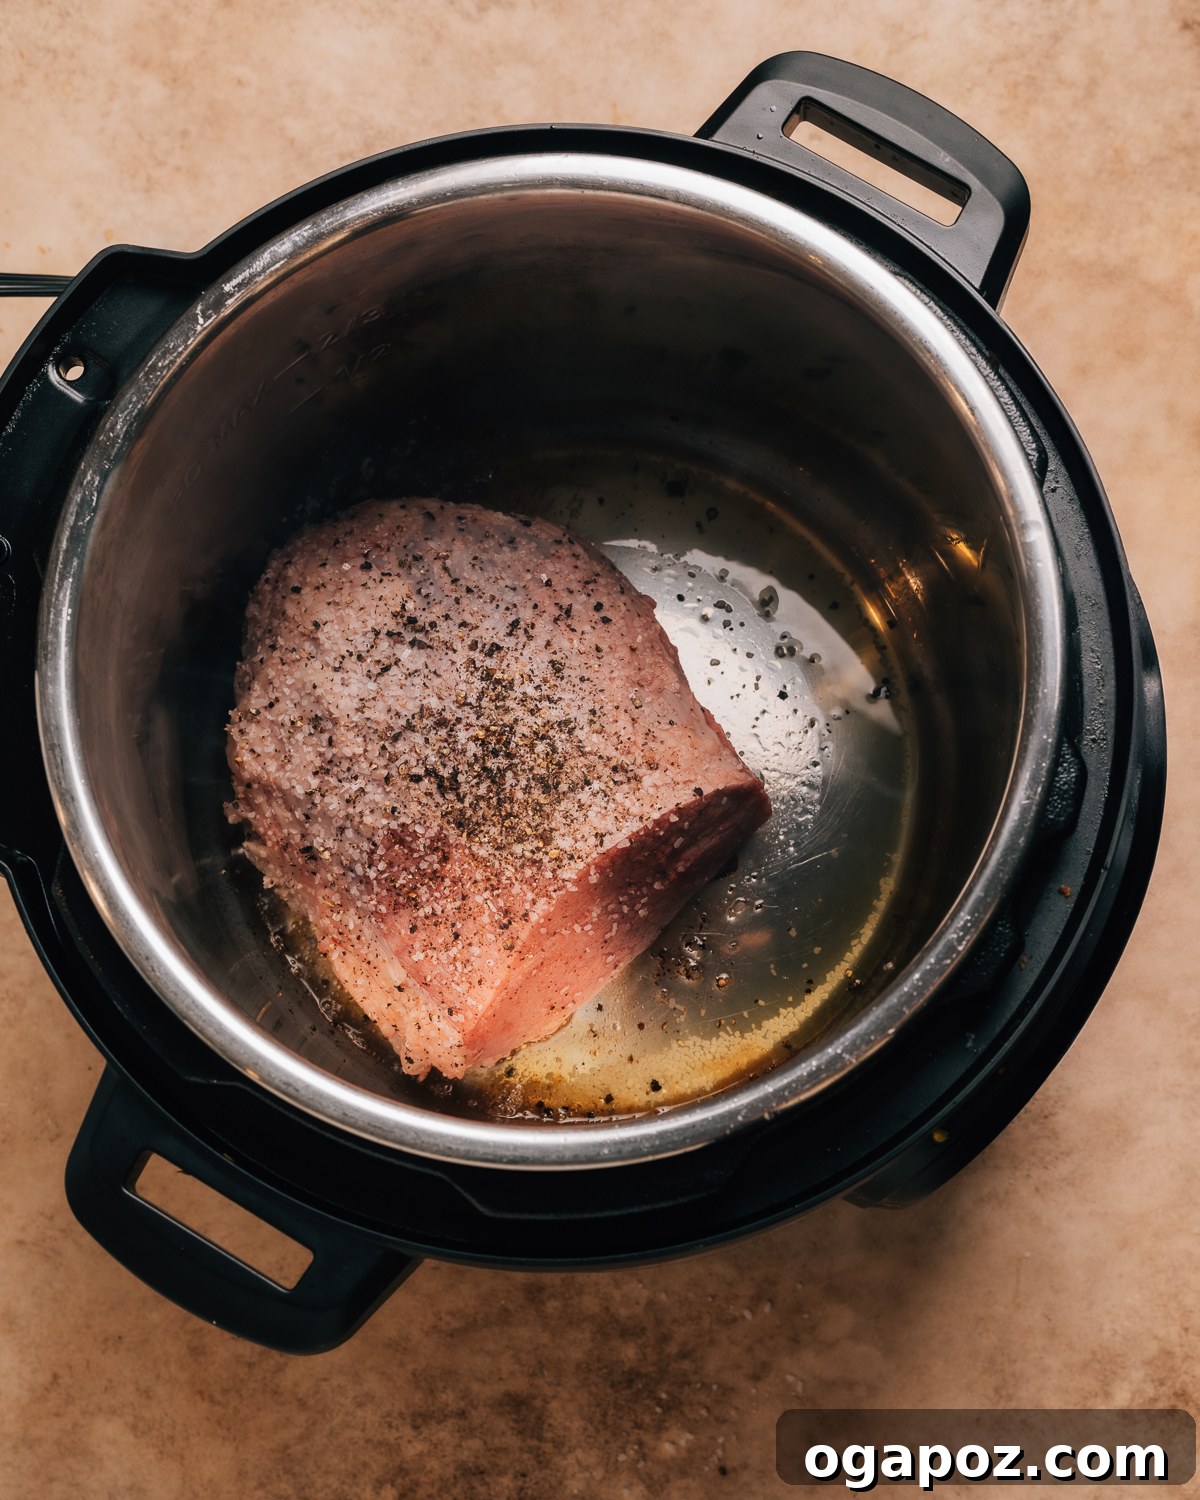
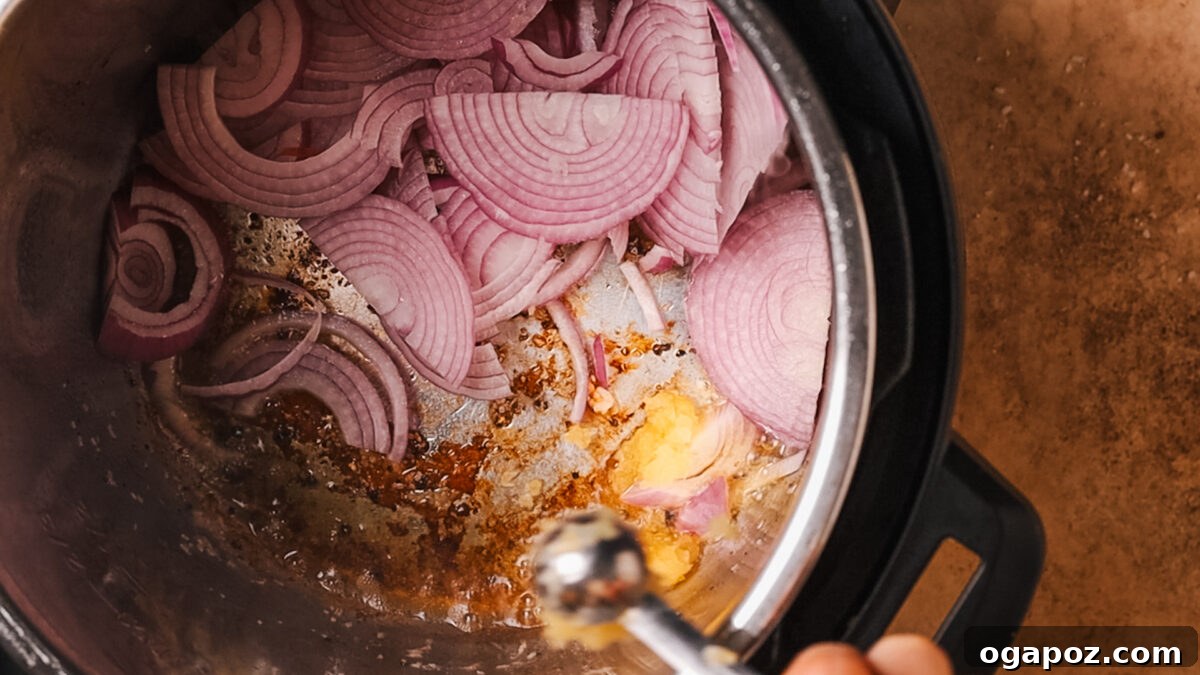
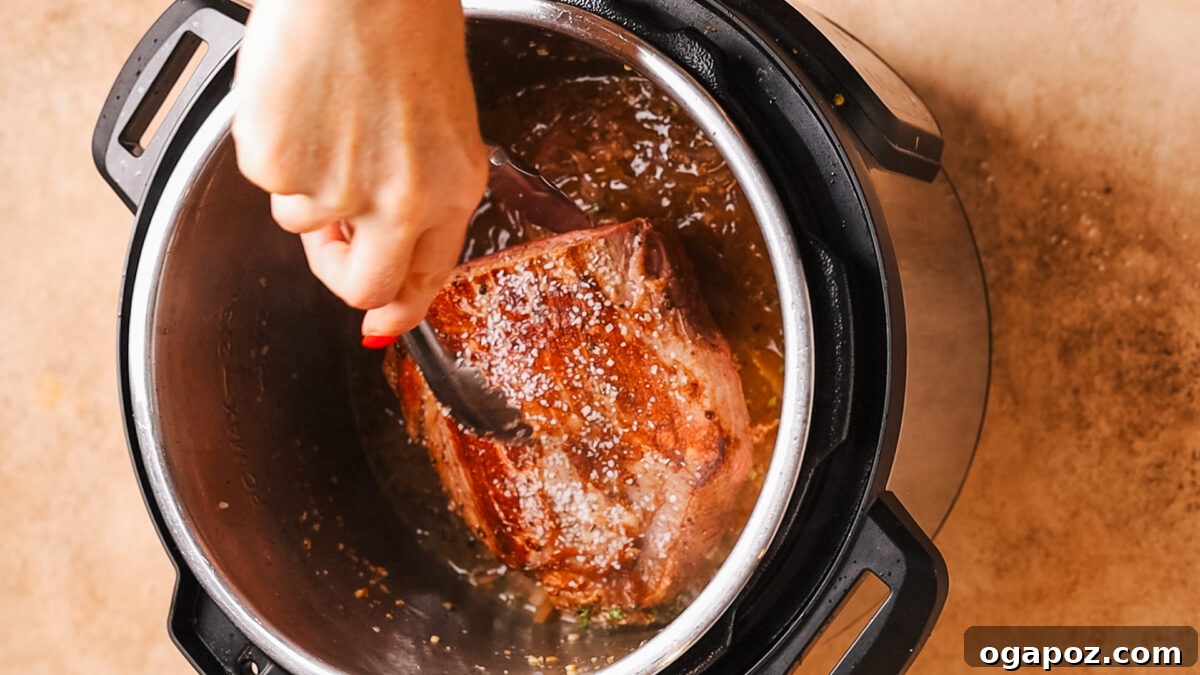
- Brown the Beef Thoroughly: Begin by patting your beef roast dry with paper towels to ensure a good sear. Turn your Instant Pot to the “Sauté” function and allow it to heat up, then add the olive oil. Generously season all sides of your roast with kosher salt and black pepper. Carefully place the seasoned roast into the hot pot and brown each side for approximately 4-5 minutes, until a deep, rich caramelized crust forms. This crucial Maillard reaction layer builds immense flavor. Once thoroughly browned, remove the roast from the pot and set it aside on a clean plate.
- Sauté the Aromatics: With the Instant Pot still on “Sauté” mode, add the thinly sliced onion and minced garlic to the pot. Cook these aromatics for about 3-4 minutes, stirring frequently with a wooden spoon or spatula, until they soften and become wonderfully fragrant. Be careful not to burn the garlic. This step adds a sweet, savory depth to your broth.
- Deglaze the Pot and Add Liquids: Pour in the beef broth and Worcestershire sauce. Immediately use your wooden spoon or spatula to scrape up all the flavorful browned bits (fond) from the bottom of the pot. Ensure no bits remain stuck, as this prevents a “burn” error. Stir in the dried thyme and rosemary, mixing them well into the liquid to release their aromatic essential oils and further enhance the depth of flavor.
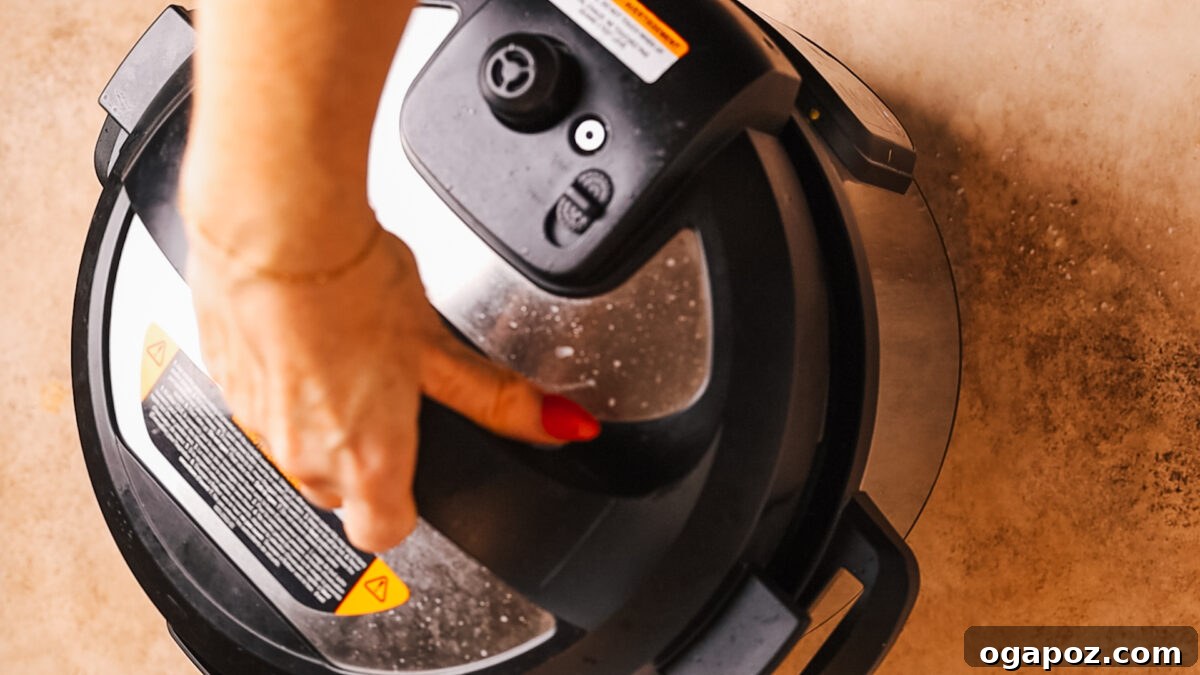
- Pressure Cook the Roast to Perfection: Carefully return the seared beef roast to the Instant Pot, ensuring it’s nestled partially in the liquid. Secure the lid in place, making sure the sealing ring is properly inserted and the vent is in the “Sealing” position. Set the Instant Pot to “Manual” or “Pressure Cook” on high pressure for 60 minutes. Once the cooking cycle is complete, allow the pressure to release naturally for at least 10-15 minutes. This natural release is critical for tender, juicy meat. After this time, carefully switch the valve to “Venting” to quick release any remaining steam, then open the lid away from your face.
-
Rest the Roast: Using tongs, carefully remove the tender roast from the Instant Pot and transfer it to a cutting board. Tent it loosely with aluminum foil to keep it warm. Allow the roast to rest for at least 10-15 minutes. This resting period is essential for the juices to redistribute throughout the meat, ensuring every slice is incredibly moist and flavorful. While the roast rests, you can proceed with cooking the vegetables and making the gravy.
OPTIONAL: Cook Vegetables (if cooking separately): If you prefer to cook your vegetables separately or want them firmer, add the baby carrots and potatoes to the pot with the remaining cooking liquid. Secure the lid, set to high pressure, and cook for 5-8 minutes, depending on your preferred level of tenderness for the vegetables. Use a quick release when done, then carefully remove the cooked vegetables.
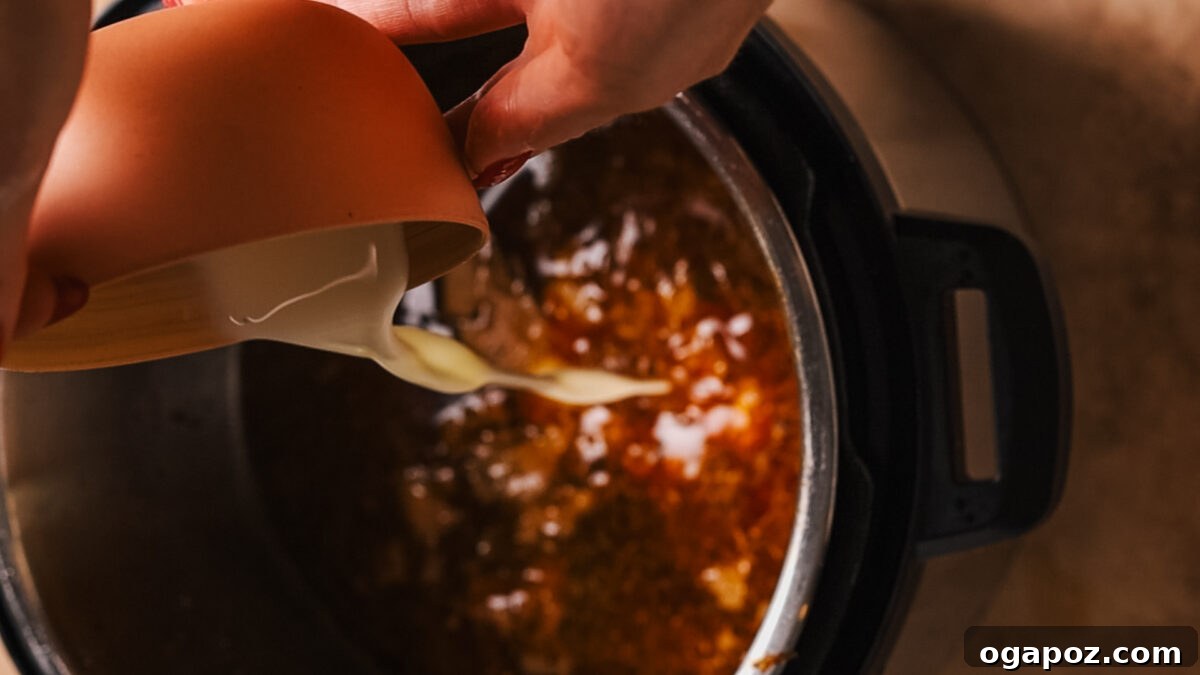
- Prepare the Silky Gravy: Switch the Instant Pot back to the “Sauté” function. In a small bowl, whisk together the cornstarch and cold water to create a smooth slurry. Gradually whisk this cornstarch slurry into the simmering cooking liquid in the Instant Pot. Continue to stir gently and continuously until the gravy thickens to your desired smooth, glossy consistency. Taste and adjust seasoning with salt and black pepper if needed.
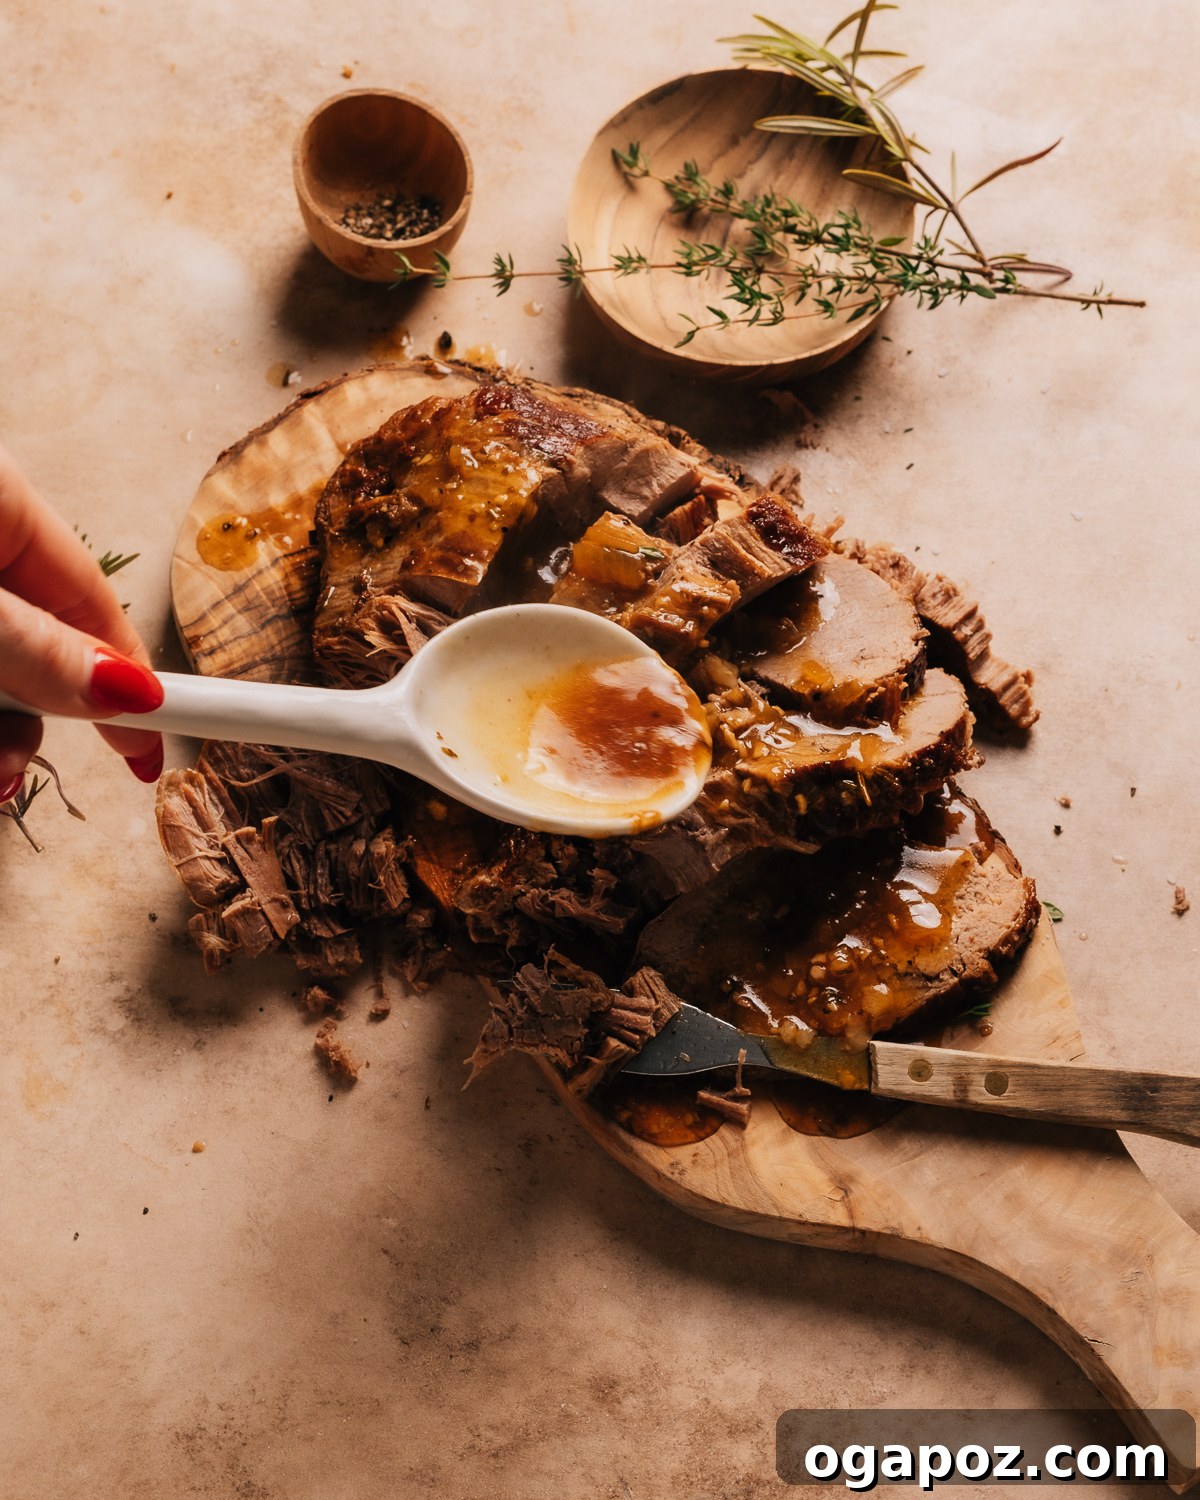
- Slice and Serve with Gusto: Once the roast has rested, slice it against the grain into desired portions. Arrange the sliced roast beef on a serving platter alongside the tender cooked vegetables. Drizzle generously with the rich, homemade gravy. Serve immediately and enjoy your perfectly cooked Instant Pot Roast Beef!
4 Common Mistakes When Making Instant Pot Roast Beef (And How to Avoid Them)
Even with the convenience of an Instant Pot, a few common missteps can prevent your roast beef from reaching its full potential. By understanding and avoiding these pitfalls, you can guarantee a perfect result every time:
-
Skipping the Sear: Rushing through or completely omitting the browning step is one of the biggest flavor mistakes. Without proper searing, your roast will lack the deep, complex flavors developed by the Maillard reaction. The meat won’t have that rich, caramelized crust, and your gravy will be noticeably less flavorful.
**How to Avoid:** Always take the time to brown your roast on all sides in the Instant Pot on “Sauté” mode until a beautiful, dark crust forms. Don’t crowd the pot, as this can steam the meat instead of searing it. -
Overcrowding the Pot: Trying to fit too large a roast or too many ingredients into your Instant Pot can hinder even cooking and prevent proper searing. An overcrowded pot lowers the temperature, leading to steaming rather than browning, and can result in unevenly cooked meat.
**How to Avoid:** Ensure there’s adequate space around your roast for it to sear properly. If you have a very large cut of beef, consider cutting it into smaller, more manageable pieces (e.g., 2-3 lb chunks) to allow for better browning and more consistent pressure cooking. -
Rushing the Pressure Release: Performing a quick pressure release immediately after cooking can shock the meat, causing its muscle fibers to contract rapidly and squeeze out juices. This results in a drier, tougher roast beef that’s disappointing to slice and eat.
**How to Avoid:** Always allow the pressure to naturally release for at least 10-15 minutes after the cooking cycle is complete. For even more tender and juicy results, let it naturally release fully. This gradual depressurization allows the meat to relax and reabsorb its juices, yielding a much more tender outcome. -
Adding Vegetables Too Early: Root vegetables like carrots and potatoes cook much faster than a large, tough beef roast under pressure. If you add them at the beginning of the cooking cycle with the beef, they will become overcooked, mushy, and lose their desirable texture.
**How to Avoid:** The best practice is to add the vegetables during the last 5-10 minutes of pressure cooking. You can do this by opening the Instant Pot after the beef has had its initial natural release (if you prefer two stages), or by cooking them separately on the stovetop while the beef rests and you make the gravy. This ensures they are tender-crisp and not overly soft.
Make Ahead and Storage Tips for Convenience
Planning ahead or managing leftovers is easy with this Instant Pot Roast Beef recipe. Proper storage ensures you can enjoy delicious meals days later without compromising quality.
- Refrigeration: Leftover roast beef, along with its vegetables and gravy, can be stored in separate airtight containers in the refrigerator for up to 3-4 days. Storing the gravy and vegetables separately helps preserve their individual textures and flavors for optimal enjoyment later.
Freezing for Long-Term Enjoyment:
- If you have a substantial amount of leftover pot roast and wish to save it for longer, ensure it cools completely before transferring it to freezer-safe containers or heavy-duty freezer bags. You can freeze the roast beef and gravy for up to 3 months. For the best quality and to prevent the gravy from becoming grainy, it is recommended to store the frozen roast and gravy in separate containers if possible.
Reheating Instructions
- Instant Pot/Stovetop: To reheat, place the sliced roast beef and vegetables into your Instant Pot or a large pot on the stovetop. Add a splash of beef broth or water to help retain moisture. Reheat on a low “Sauté” setting (for Instant Pot) or low heat (stovetop) until warmed through, stirring occasionally to prevent sticking.
- Microwave: For individual portions, you can easily reheat the roast beef, vegetables, and gravy in the microwave. Place them in a microwave-safe dish, cover, and heat in 1-2 minute intervals, stirring in between, until heated through. Be careful not to overheat, which can dry out the beef.
How to Serve This Instant Pot Roast Beef Recipe
Once your melt-in-your-mouth roast beef has rested, thinly slice it against the grain. Serve it elegantly with the tender cooked vegetables and a generous ladle of that rich, homemade gravy. This dish is hearty and satisfying on its own, but pairing it with complementary sides can elevate the meal even further.
- Enhance your table with a vibrant side of crispy roasted Brussels sprouts, elevated with maple syrup and savory bacon for an irresistible crunch and flavor.
- It’s also absolutely delicious alongside a classic green bean casserole with crispy onions, providing a comforting and familiar counterpoint to the rich beef.
- For a unique and flavorful twist, consider serving it with some savory crispy baked butternut fries, offering a slightly sweet and earthy alternative to potatoes.
- My maple five-spice roasted butternut squash is another delicious and aromatic option that pairs beautifully with the savory notes of the roast.
- And, of course, no roast beef dinner is complete without a generous scoop of creamy mashed potatoes or a side of crusty bread to soak up all that incredible gravy!
FAQs About Instant Pot Roast Beef
Got questions while whisking through this recipe? These frequently asked questions and detailed answers might address any queries you have, ensuring your Instant Pot Roast Beef turns out perfectly every time.
Why is my roast beef tough in an Instant Pot?
If your Instant Pot roast beef turns out tough, there are usually two main culprits: insufficient cooking time or improper pressure release. Tough cuts of beef, like chuck or brisket, require significant time under pressure for their connective tissues to break down into tender gelatin. If you cut the cooking time short, the collagen won’t fully render. Additionally, rushing the pressure release (doing a quick release too soon) can cause the meat fibers to contract, forcing out moisture and resulting in a tougher texture. Always ensure adequate cooking time and utilize a natural pressure release for at least 10-15 minutes, or ideally, a full natural release.
How do you tenderize an already-cooked roast?
To tenderize an already cooked roast that turned out tough, your best bet is to slice it very thinly against the grain. Then, you can gently simmer the sliced beef in a flavorful liquid, such as beef broth or the reserved gravy from the Instant Pot, over low heat for another 30-60 minutes. This reintroduces moisture and further helps to break down any remaining tough fibers. Another trick is to shred it and mix it thoroughly with extra gravy, which can make it feel more tender and palatable.
How do I make the gravy thicker?
If your gravy isn’t as thick as you’d like, it’s an easy fix! First, ensure your Instant Pot is on the “Sauté” function to keep the liquid simmering. In a separate small bowl, prepare an additional cornstarch slurry by whisking together 1 tablespoon of cornstarch with 1 tablespoon of cold water until smooth. Gradually whisk this new slurry into the simmering cooking liquid in the Instant Pot. Continue stirring gently for a few minutes until the gravy reaches your desired consistency. Remember, cornstarch thickens as it heats, so give it a little time.
Can I make this recipe in a slow cooker?
Yes, absolutely! This recipe can be adapted for a slow cooker, but the cooking times and liquid requirements will differ significantly. For a slow cooker, you’ll typically cook a similar size roast on low for 6-8 hours or on high for 3-4 hours, or until it’s fall-apart tender. You might also need slightly less liquid as evaporation is minimal in a slow cooker. The searing and deglazing steps are still highly recommended (do them in a separate pan on the stovetop) for optimal flavor development before transferring to the slow cooker.
Can I use frozen beef in this recipe or must it thaw first?
Yes, you can use a frozen beef roast directly in the Instant Pot, which is one of its great conveniences! However, you will need to increase the cooking time significantly. As a general rule, increase the standard cooking time by about 50%. So, if a fresh beef roast takes 60 minutes, a frozen one would typically require around 90 minutes. Please note that you won’t be able to sear a frozen roast effectively, so you will miss out on some of that deep Maillard flavor. Always ensure the internal temperature of the frozen roast reaches at least 145°F (63°C) for medium-rare, or higher for desired doneness, using a meat thermometer.
Other Beef Recipes You’ll Love
If you’ve enjoyed this Instant Pot Roast Beef, you’ll love exploring more of my comforting and flavorful beef recipes. Dive into these family favorites:
- Hearty Beef Pot Pie: This robust and comforting beef pot pie is generously filled with tender beef chunks and a medley of garden vegetables, all encased in a flaky, golden, buttery crust—it’s the epitome of cozy dinners, perfect for a chilly evening.
- For beef and gravy aficionados, my classic Old-Fashioned Salisbury Steak recipe is an absolute must-try. It’s a nostalgic dish that truly satisfies.
- Curried Beef Pot Pie: A delightful and aromatic twist on the traditional, this curried beef pot pie offers a warm, spiced, and deeply satisfying meal that’s both unique and comforting.
- Prepare to be convinced: my Best Meatloaf Ever recipe is so good, it might just become your new go-to. Don’t fight me on this one!
- Wholesome Beef Vegetable Soup: Brimming with tender pieces of beef and a colorful medley of fresh vegetables, this hearty beef vegetable soup is the ultimate bowl of comforting warmth, perfect for a nourishing meal.
Instant Pot Roast Beef (Melt-in-Your-Mouth Tender!)
Jennifer Pallian BSc, RD
15 minutes
1 hour 15 minutes
1 hour 30 minutes
6
Video
A video guide demonstrating the steps for this Instant Pot Roast Beef recipe would typically be placed here.
Ingredients
- 3 lb beef roast like chuck or bottom blade
- 2 tbsp olive oil
- 1 tbsp kosher salt
- 1 tsp black pepper
- 1 onion thinly sliced
- 4 cloves garlic minced
- 1 cup beef broth
- 2 tbsp Worcestershire sauce
- 1 tsp dried thyme
- 1 tsp dried rosemary
- 1 ½ cups baby carrots or 3 carrots cut into chunks
- 1 lb potatoes
- Salt and black pepper to taste
- Cornstarch slurry 2 tbsp cornstarch + 2 tbsp water for gravy
Instructions
-
Sear the Beef: Set the Instant Pot to “Sauté” mode and add olive oil. Season the roast with salt and pepper. Sear for about 4 minutes on each side until browned. Remove the roast and set it aside.
-
Sauté the Vegetables: Add chopped onion and garlic to the Instant Pot and sauté for 3 minutes, stirring occasionally.
-
Deglaze the Pot: Pour in the beef broth and Worcestershire sauce, scraping up any browned bits from the bottom. Add thyme and rosemary.
-
Pressure Cook the Roast: Return the seared roast to the pot, lock the lid, and cook on high pressure for 60 minutes. Let the pressure naturally release for 10 minutes before carefully venting the remaining pressure.
-
Remove the Roast: Take the roast out of the Instant Pot and tent it with foil to rest.
-
Cook Vegetables: Add the carrots and potatoes to the Instant Pot and cook on high pressure for an additional 5-8 minutes, depending on desired tenderness. Quick release the pressure when done.
-
Make the Gravy: Set the Instant Pot to “Sauté” mode and stir in the cornstarch slurry into the cooking liquid to thicken the sauce into gravy. Stir until the gravy reaches your desired consistency.
-
Serve: Slice the rested roast and serve it with the cooked vegetables and gravy.
Nutrition
Carbohydrates: 20g |
Protein: 46g |
Fat: 31g |
Saturated Fat: 12g |
Polyunsaturated Fat: 3g |
Monounsaturated Fat: 17g |
Trans Fat: 2g |
Cholesterol: 156mg |
Sodium: 1602mg |
Potassium: 1256mg |
Fiber: 3g |
Sugar: 4g |
Vitamin A: 4521IU |
Vitamin C: 19mg |
Calcium: 80mg |
Iron: 6mg
Nutrition information is automatically calculated, so should only be used as an approximation.