
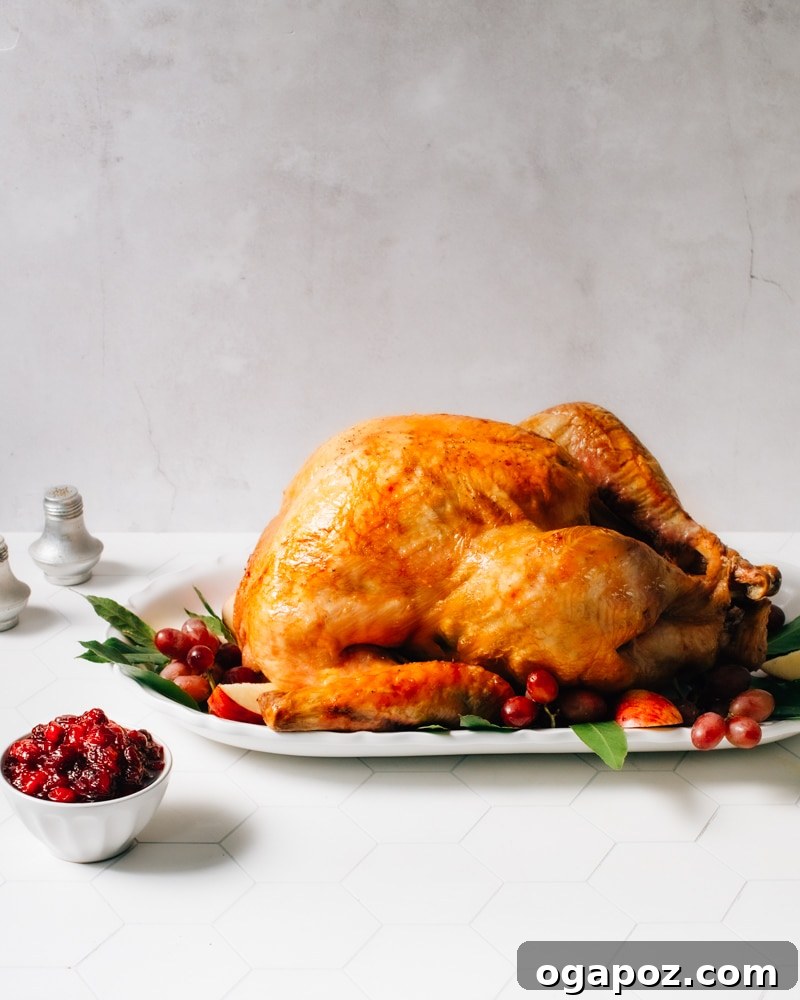
How to Cook a Turkey perfectly with an easy, no-fail recipe that consistently delivers incredibly juicy, moist turkey meat and irresistibly crispy, flavorful skin! This comprehensive guide simplifies the process, making holiday meal preparation a breeze.
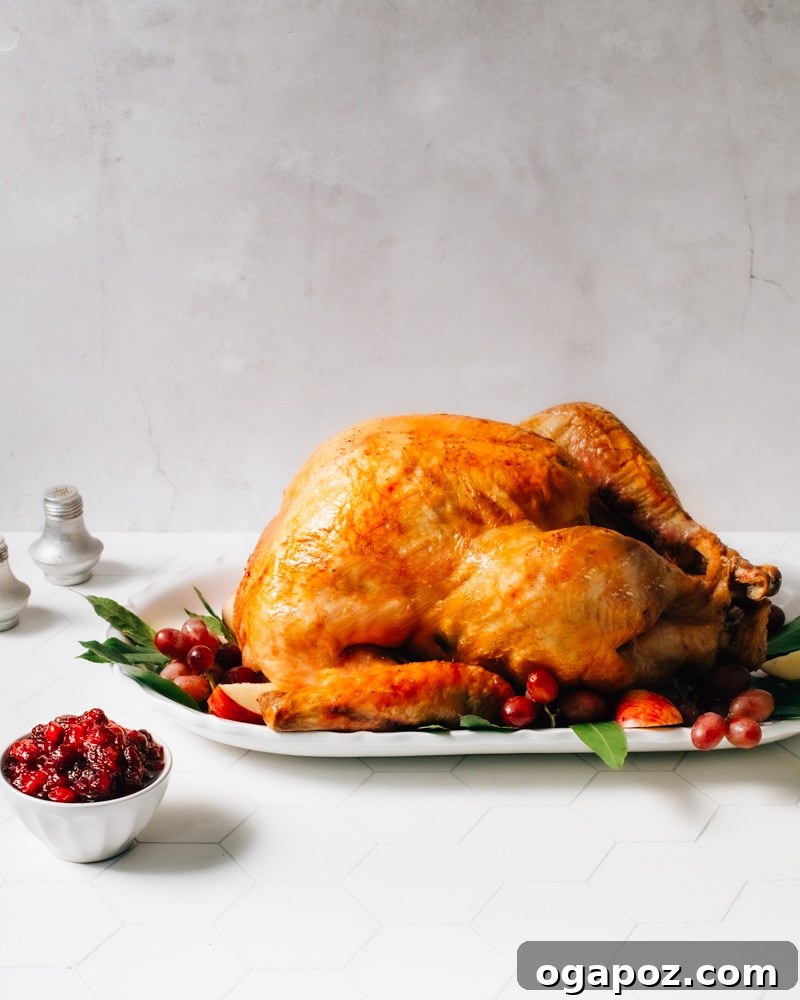
Drawing from years of experience and a strong background in food science, this straightforward method for roasting a turkey eliminates common complexities. Forget about brining, constant basting, or stuffing the bird; our approach is designed for maximum flavor and moisture with minimal stress, ensuring a spectacular centerpiece for your holiday table.
How to Cook a Turkey: Essential Starting Tips
As a seasoned food scientist and former Butterball ambassador for many years, I’ve mastered the art of roasting the perfect turkey. I’m thrilled to share my tried-and-true knowledge, ensuring you can replicate these delicious results in your own kitchen with confidence.
- Invest in a Quality Cooking Thermometer. This cannot be overstated: a reliable instant-read meat thermometer is your absolute best friend in the kitchen, especially when cooking a large bird like a turkey. It’s the only way to accurately gauge doneness and prevent overcooking, which is the primary cause of dry turkey. Even an affordable ten-dollar thermometer can last for years and will be the most crucial tool you own for perfect results.
- Choose Fresh Turkey for Superior Results. While frozen turkeys are widely available, I highly recommend opting for a fresh turkey if possible. Fresh birds tend to yield juicier meat in the end, and they eliminate the extensive thawing time, simplifying your holiday planning significantly. Consider placing an order with your local butcher or grocery store well in advance, as fresh turkeys often sell out quickly during peak seasons.
- Understand Frozen Turkey Thawing Requirements. If a fresh turkey isn’t an option and you purchase a frozen one, ensure it is completely thawed before you even think about putting it in the oven. Thawing a large turkey in the refrigerator can take **several days** (roughly 24 hours for every 4-5 pounds of turkey). An improperly thawed turkey will cook unevenly, leading to an overcooked breast by the time the thicker, still-partially-frozen thigh reaches a safe temperature. Plan your thawing schedule meticulously to avoid this common pitfall.
- Always Roast at a Low Oven Temperature. Many recipes suggest starting a turkey at a very high temperature (like 400°F or hotter) before reducing the heat. While this might appear to speed up the cooking process, it dramatically increases the risk of drying out the more exposed and leaner parts of the turkey, particularly the delicate breast meat. A consistent, lower oven temperature, typically 325°F, ensures a gentler, more even cook from edge to center, allowing the entire bird to cook through without sacrificing moisture.
Cooking Turkey: A Simplified, No-Fuss Approach
When it comes to roasting a turkey, often less is truly more. Many traditional extra steps are not just unnecessary but can actively hinder your efforts to achieve a perfectly moist and flavorful bird. My philosophy centers around simplicity and precision, ensuring excellent results every single time.
- Embrace Simple Seasoning. Forget complex rubs or intricate flavor combinations that often burn before the turkey is fully cooked. The secret to delicious turkey lies in simple, quality ingredients: softened unsalted butter generously applied all over the bird, ample kosher salt, and freshly cracked black pepper. The butter helps the skin crisp up and protects the meat, while the salt penetrates the skin for deep flavor. Delicate dried herbs or garlic/onion powders can scorch quickly at high temperatures, leading to bitter flavors.
- Skip the Basting. This might sound counterintuitive, but basting your turkey is largely ineffective and often detrimental. Each time you open the oven door to baste, you lose valuable heat, which prolongs the cooking time. This extended cooking time directly contributes to a drier turkey, particularly the white meat, negating any perceived benefit of flavoring the skin. The natural fats in the turkey, combined with butter under the skin, provide all the moisture needed.
- Never Stuff the Turkey. While the aroma of stuffing cooked inside the bird is nostalgic, it poses a significant food safety risk and almost guarantees a dry turkey breast. For stuffing to reach a safe internal temperature (165°F), the turkey breast will inevitably be severely overcooked. For optimal results and safety, always cook your stuffing outside the turkey in a separate dish. As an added bonus, unstuffed turkey cooks faster, and stuffing cooked separately tends to be lower in fat and calories, meaning you can enjoy more!
- Don’t Bother Brining. Brining, whether wet or dry, is a popular technique often touted for moistening turkey. However, if you diligently monitor the internal temperature with a reliable thermometer and avoid overcooking, this cumbersome and often messy extra step becomes entirely unnecessary. A properly cooked and rested turkey, seasoned simply, will be wonderfully moist on its own.
- Prioritize Resting the Turkey. This step is arguably as critical as not overcooking the bird itself. Once the turkey reaches its target internal temperature, resist the urge to carve it immediately. Allowing the turkey to rest, tented loosely with foil, for at least 30 minutes to an hour enables the juices, which have migrated to the center of the bird during cooking, to redistribute evenly throughout the meat. Cutting it too soon will result in those precious juices running out onto your cutting board, leaving you with dry meat.
For those seeking an even faster cooking time without compromising flavor, consider trying my Spatchcock Turkey recipe instead!
Effortless Roast Turkey: Essential Ingredients
Creating a perfectly roasted turkey doesn’t require a long list of exotic ingredients. With just a few high-quality staples, you can achieve remarkable flavor and texture.
For the Turkey
- Fresh or Fully Thawed Turkey: The size of your turkey is adaptable to this method. Ensure it’s completely thawed if frozen to guarantee even cooking and food safety.
- Unsalted Butter: Softened to room temperature, unsalted butter is crucial for easy spreading and allows you to control the overall saltiness of your dish. It helps to crisp the skin and infuse moisture and richness into the meat.
- Fresh Sage (Optional): Minced fresh sage adds a wonderful earthy, aromatic flavor that complements turkey beautifully. If fresh isn’t available, a smaller amount of dried sage can be used, but fresh offers a brighter, more nuanced taste.
- Kosher Salt: Coarse kosher salt is preferred for seasoning turkey skin due to its larger crystals, which adhere well and dissolve slowly, providing even seasoning and a beautiful crust. A good guideline is 1/2 to 3/4 teaspoon of kosher salt per pound of turkey, adjusting to your preference.
- Black Pepper: Freshly cracked black pepper provides the best aroma and flavor, adding a subtle peppery bite that enhances the turkey’s natural taste.
You’ll find the precise quantities for this recipe detailed in the comprehensive recipe card located at the bottom of this article.
Are you meticulously planning your Thanksgiving or Christmas meal? Be sure to explore my complete turkey dinner schedule for a truly stress-free and organized preparation experience.
Essential Tools for Roasting Turkey
Having the right equipment at hand can significantly streamline the turkey roasting process, turning a potentially daunting task into an enjoyable culinary endeavor.
- Roasting Pan: Opt for a sturdy, shallow roasting pan with sides at least 2 inches high. This design allows for good air circulation around the turkey, promoting even cooking and crispy skin, while also containing any precious drippings.
- Roasting Rack: An oiled roasting rack is indispensable. It elevates the turkey above the bottom of the pan, ensuring that hot air circulates all around the bird, preventing the bottom from steaming and allowing for perfectly golden-brown, crispy skin on all sides.
- Instant-Read Thermometer: As previously emphasized, this tool is paramount. An accurate instant-read thermometer is the only way to reliably check the internal temperature of your turkey and ensure it is perfectly cooked and safe to eat, without being dry or undercooked.
- Aluminum Foil: Keep a roll of heavy-duty aluminum foil handy. It’s ideal for tenting delicate areas like the wings and neck if they start to brown too quickly during the roasting process, protecting them from burning while the rest of the turkey cooks evenly.
- Large Cutting Board: A substantial, stable cutting board with a juice groove is essential for carving your turkey safely and efficiently. The groove will catch any valuable juices that are released during carving, keeping your counter clean.
- Sharp Carving Knife: A long, sharp carving knife, ideally a Granton edge knife, will make slicing through the turkey meat clean, precise, and effortless, resulting in beautifully presented slices for your guests.
How to Cook a Turkey: A Simple Step-by-Step Guide
Follow these easy, straightforward steps to roast a perfect turkey every single time. There are no complicated techniques or unnecessary fuss involved, just reliable results.
1. Prepare the Turkey and Oven
Begin by preheating your oven to a consistent 325ºF (160°C). Remove the turkey from its packaging and carefully locate and remove the neck and giblets from both the main cavity and the neck cavity. These can be saved for gravy or discarded. Place the turkey, breast-side up, on an oiled roasting rack. This rack should be positioned inside a shallow roasting pan or a large baking dish. Before seasoning, it’s crucial to pat the entire surface of the turkey thoroughly dry with paper towels; this promotes crispy skin.
To prevent pan drippings from burning and to add a touch of moisture to the oven environment, pour approximately one cup of water into the bottom of the roasting pan, beneath the rack.
2. Season the Turkey Generously
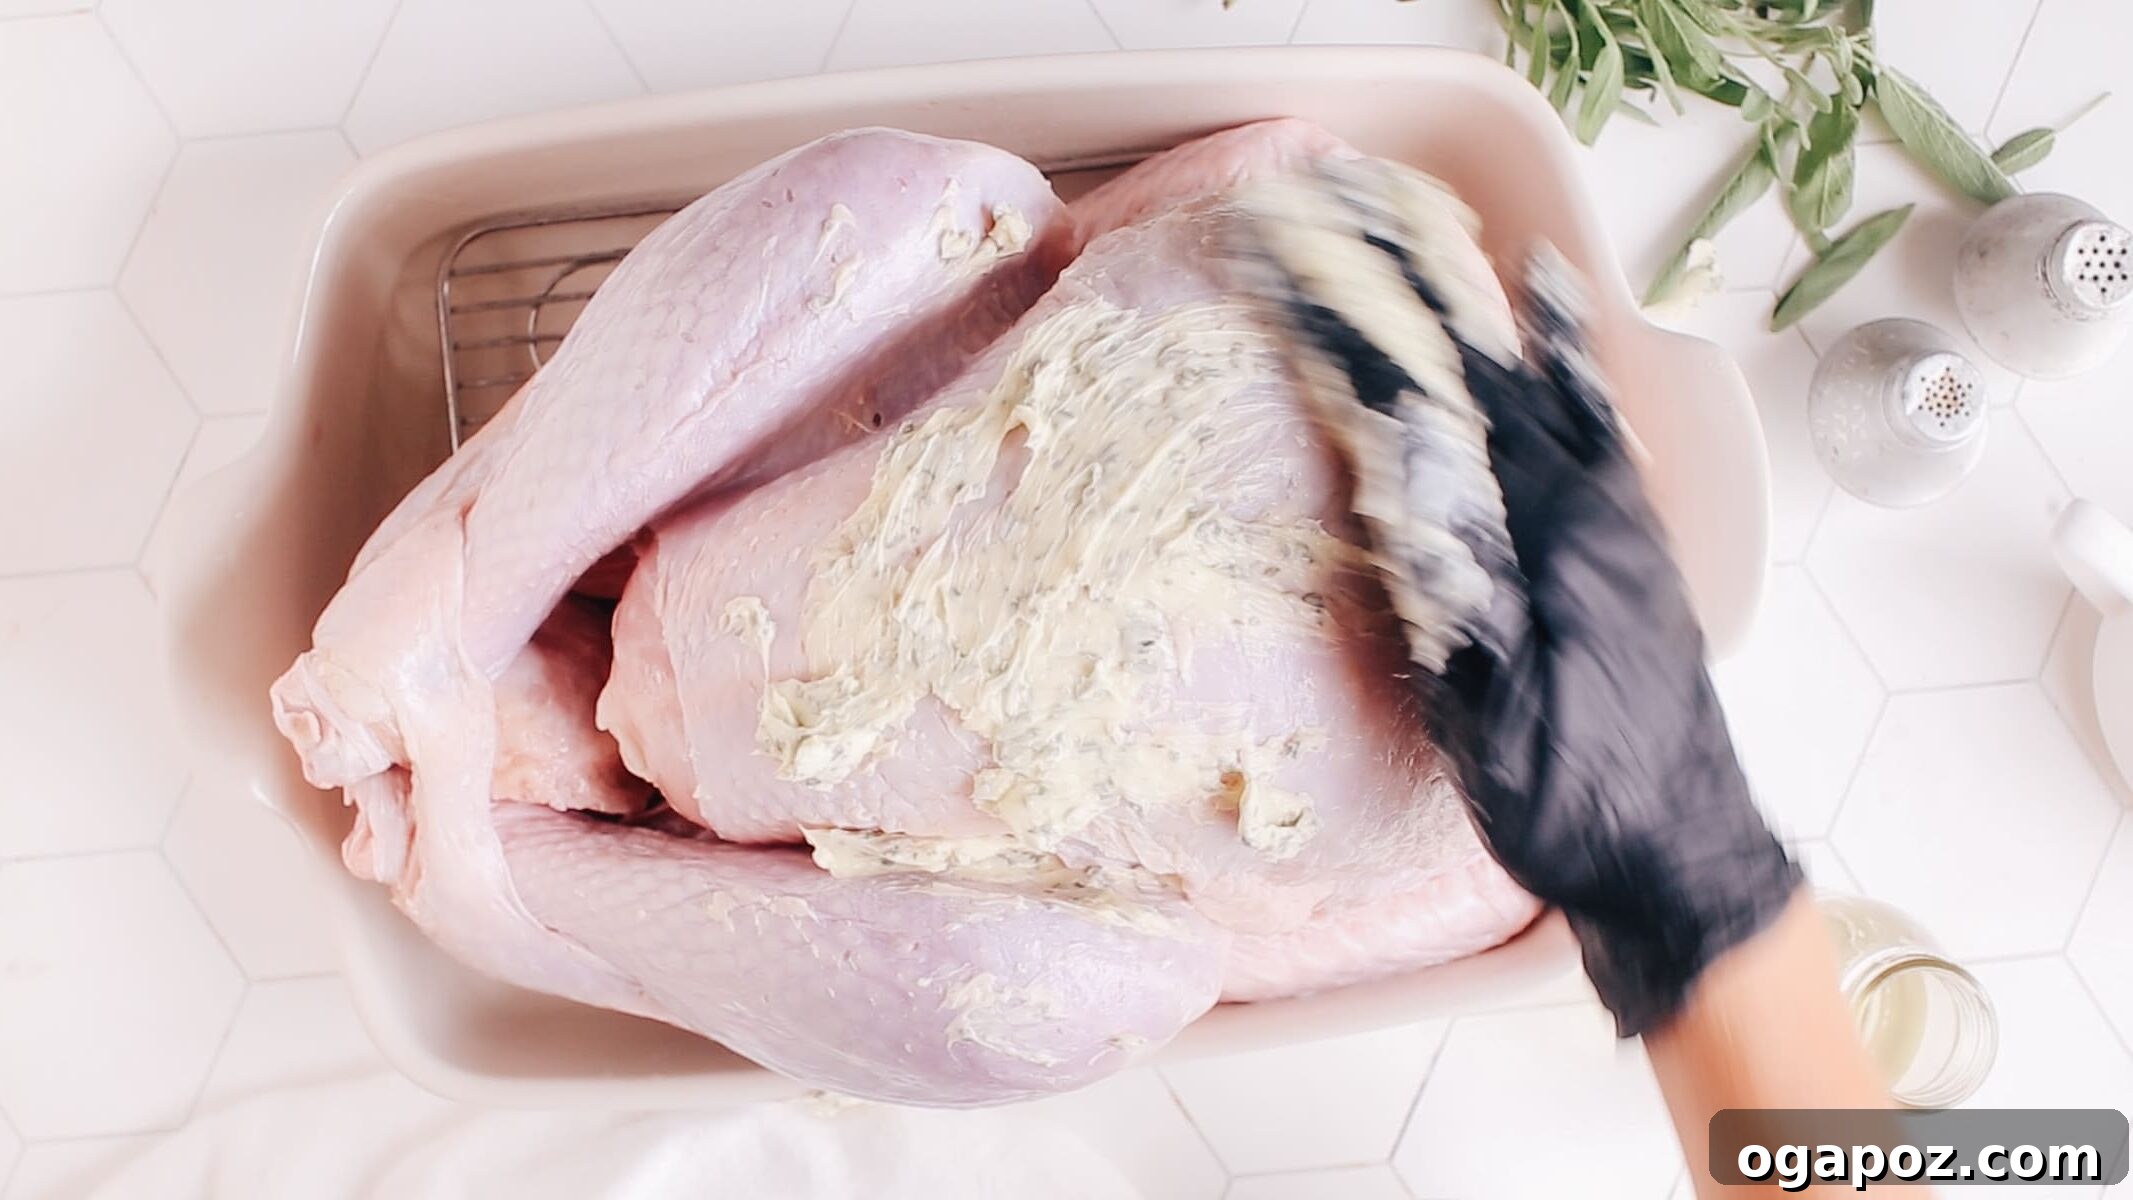
Achieving a flavorful and moist turkey begins with proper seasoning. First, gently use your fingers to carefully lift the skin over the turkey breast, creating a pocket. If you’re using fresh sage, mince it finely and mash it into your softened unsalted butter. Then, generously smear this seasoned butter evenly over the entire turkey, making sure to gently push a good amount of it under the loosened skin of the breast. This not only adds incredible flavor directly to the meat but also helps to keep it extra moist during cooking.
Finally, sprinkle the entire turkey generously with kosher salt and freshly cracked black pepper. Don’t be shy with the seasoning; a good amount is necessary for the best overall flavor, especially on such a large piece of meat.
3. Roast the Turkey to Perfection
Place your seasoned turkey in the preheated oven. A good general rule for roasting turkey at 325°F is approximately 11 minutes per pound. For instance, a 12 to 14-pound bird will typically require about 3 hours and 20 minutes of roasting time. However, these are just estimates; always rely on your meat thermometer for accurate doneness.
- About halfway through the anticipated cooking time, monitor the browning of the turkey. If the delicate neck area or wing tips are browning too quickly, tent them loosely with small pieces of aluminum foil. This prevents them from burning while allowing the rest of the turkey, especially the breast, to cook uncovered for that desirable crispy skin.
Begin checking the turkey’s internal temperature around 45 minutes before you expect it to be done, rather than waiting until the timer goes off. This proactive approach ensures you pull the turkey at precisely the right moment.
4. Check Doneness and Crucial Resting Period
Once your turkey has reached the correct internal temperature (165°F in the thickest part of the thigh, not touching the bone), remove it from the oven. This is where the magic happens: let the turkey rest, tented loosely with foil, at room temperature for a full hour. This resting period is absolutely critical and should never be skipped. It allows all the delicious juices to redistribute throughout the meat, resulting in an incredibly moist and flavorful turkey rather than one that dries out as soon as it’s carved.
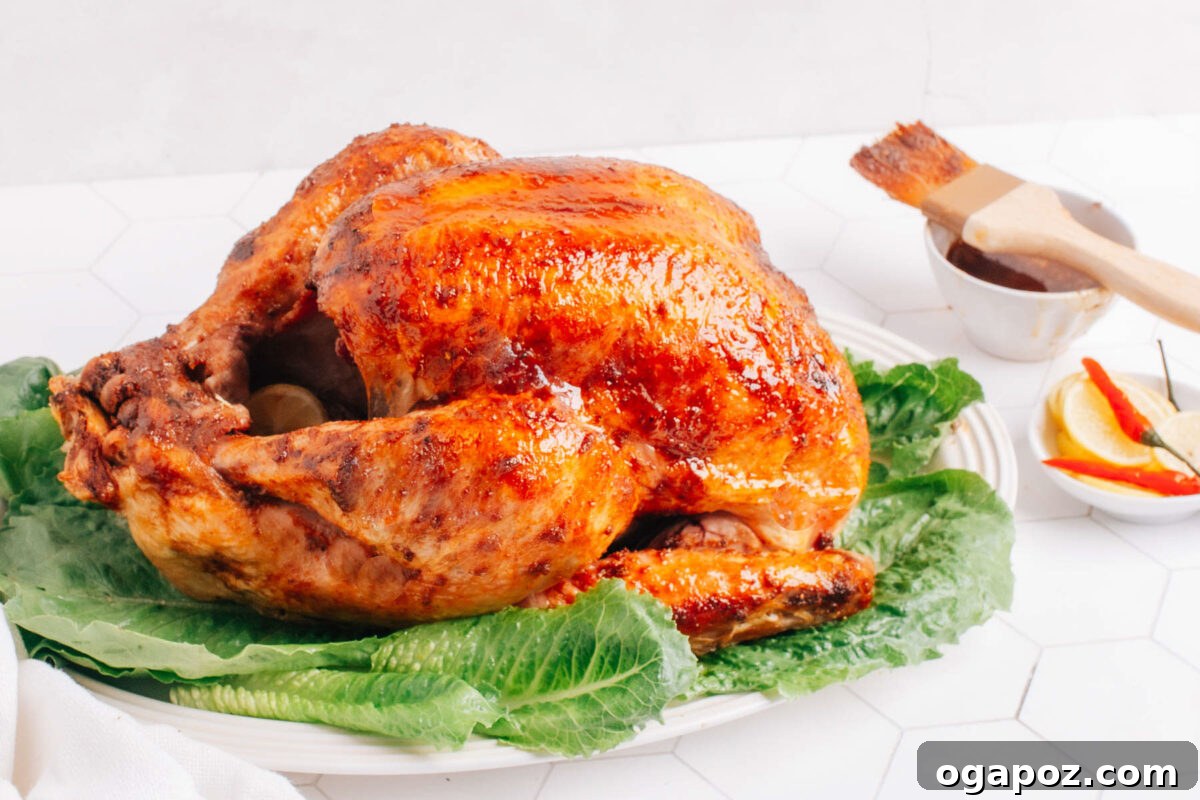
How to Accurately Determine When Your Turkey is Done
Understanding carryover cooking is important for most roasts. For smaller cuts of meat, I often recommend removing them from the oven a few degrees below the target final temperature, as their internal temperature will continue to rise (carryover cook) as they rest. However, this rule requires a slight adjustment when cooking a turkey.
Due to its substantial size and irregular shape, a turkey roast inevitably has varying temperatures throughout. Some parts will cook faster than others. To err on the side of safety and ensure every bite is perfectly cooked (and to protect against any risk of foodborne illness like salmonella), it’s essential to ensure all critical areas reach the full 165°F (74°C) internal temperature.
To confidently cook a turkey without any food safety concerns, you must use your instant-read cooking thermometer frequently and in multiple locations across the bird. I always make sure to test the temperature in several key spots:
- The thickest part of the thigh, making sure the probe does not touch the bone, as bones heat up faster than meat.
- In the bottom of the bird, underneath the leg, where meat is dense and often takes longer to cook.
- In the thickest part of the breast meat, being careful not to push the thermometer through to the cavity.
- Around the wing joint and a few additional spots for good measure, especially if you notice uneven browning.
Remember, the thermometer should read a consistent 165°F (74°C) in all these areas to confirm your turkey is safely and perfectly cooked.
Make Ahead and Storage Tips for Turkey
Efficient planning can significantly reduce stress during holiday cooking, especially when it comes to managing your turkey. Knowing how to properly store and reheat your roast turkey ensures safety and preserves its delicious flavor.
Storing Leftovers Safely
- Refrigerate Promptly: To maintain food safety, carve your cooked turkey and transfer it to airtight containers within two hours of removing it from the oven. Stored correctly, cooked turkey remains fresh and safe to eat for up to four days in the refrigerator, as recommended by the USDA.
- Keep Meat Moist: Turkey, especially white meat, can dry out quickly. To prevent this, store carved turkey pieces with a splash of leftover gravy, chicken broth, or turkey stock. This added liquid helps retain moisture and flavor during refrigeration and reheating.
- Separate Dark and White Meat: Dark meat and white meat have different textures and reheat at varying rates. Storing them in separate containers can be beneficial, allowing you to reheat each type of meat optimally without overcooking one while waiting for the other to warm up.
Freezing Turkey for Longer Preservation
- Freeze in Portions: For convenience, wrap sliced or chopped turkey tightly in plastic wrap, then an additional layer of aluminum foil, or store in freezer-safe bags. Freezing in smaller portions allows for easier thawing and reduces waste. Properly frozen turkey can be stored for up to three months.
- Label and Date: Always label your frozen turkey packages with the contents and the date it was frozen. This practice helps you manage your freezer inventory and ensures you use older turkey first, maintaining optimal quality.
- Freeze with Liquid for Texture: Just as with refrigeration, adding a bit of gravy or broth to freezer bags with turkey before freezing can significantly improve its texture upon thawing and reheating, preventing it from becoming dry.
Reheating Roast Turkey to Perfection
- Oven Method: The oven is often the best method for reheating larger quantities of turkey, as it gently warms the meat through. Place sliced turkey in a baking dish, add a splash of broth or gravy, and cover tightly with foil. Reheat at 325°F (160°C) until thoroughly warmed. The foil and liquid help create a moist environment.
- Microwave Method: For smaller portions or quick reheating, the microwave can be used. Place turkey slices on a microwave-safe plate, add a damp paper towel over them, and microwave in short 30-second intervals until warmed through. The damp paper towel helps trap steam and keeps the turkey moist.
- Avoid Overheating: Remember, the turkey is already cooked. Your goal is simply to warm it to a safe and enjoyable temperature, not to cook it further. Overheating will inevitably lead to dry, rubbery meat.
5 Common Mistakes to Avoid When Roasting Turkey
Many home cooks fall victim to common errors that can turn a potentially magnificent roast turkey into a dry or unevenly cooked disappointment. By being aware of these frequent mix-ups, you can easily avoid them and ensure your turkey is a resounding success:
- Not Thawing Completely: This is perhaps the most critical mistake. A partially frozen turkey will cook incredibly unevenly. The thinner, more exposed parts of the bird will inevitably overcook and dry out, while the denser, still-frozen interior sections remain raw. Always plan well in advance and allow ample time for your turkey to thaw completely in the refrigerator (approximately 24 hours per 4-5 pounds) or using the cold water bath method.
- Stuffing the Bird: While cooking stuffing inside the turkey might be a cherished tradition for some, it is a significant food safety hazard and detrimental to the turkey’s texture. It is virtually impossible for the center of the stuffing to reach a safe internal temperature of 165°F (74°C) without severely overcooking and drying out the delicate breast meat surrounding it. For both safety and quality, always cook your stuffing in a separate baking dish.
- Skipping the Thermometer: Guessing when your turkey is done is a recipe for disaster, leading to either dangerously undercooked meat or, more commonly, dry, overcooked meat. An instant-read meat thermometer is an absolute must-have. Always use it to check the internal temperature in multiple locations (thighs, breast, deepest parts) to confirm the turkey has reached a safe and perfectly cooked 165°F (74°C) throughout.
- Cooking at Too High a Temperature: Blasting your turkey at excessively high temperatures, such as 400°F (200°C) or higher, is a common error. While it might seem like a way to speed up cooking, it dries out the lean breast meat long before the thighs and other denser parts have a chance to finish cooking properly. Stick to a moderate oven temperature of 325°F (160°C) for even, gentle cooking that retains moisture across the entire bird.
- Not Letting It Rest: Impatience is the enemy of a juicy turkey. Cutting into the turkey immediately after it comes out of the oven allows all the precious juices, which have concentrated in the center during cooking, to run out onto the cutting board and be lost forever. For the absolute juiciest turkey you’ve ever tasted, you must allow it to rest, tented loosely with foil, for a minimum of 30 minutes to a full hour before carving. This critical step allows the juices to redistribute evenly throughout the meat.
How to Serve This Perfect Roast Turkey Recipe
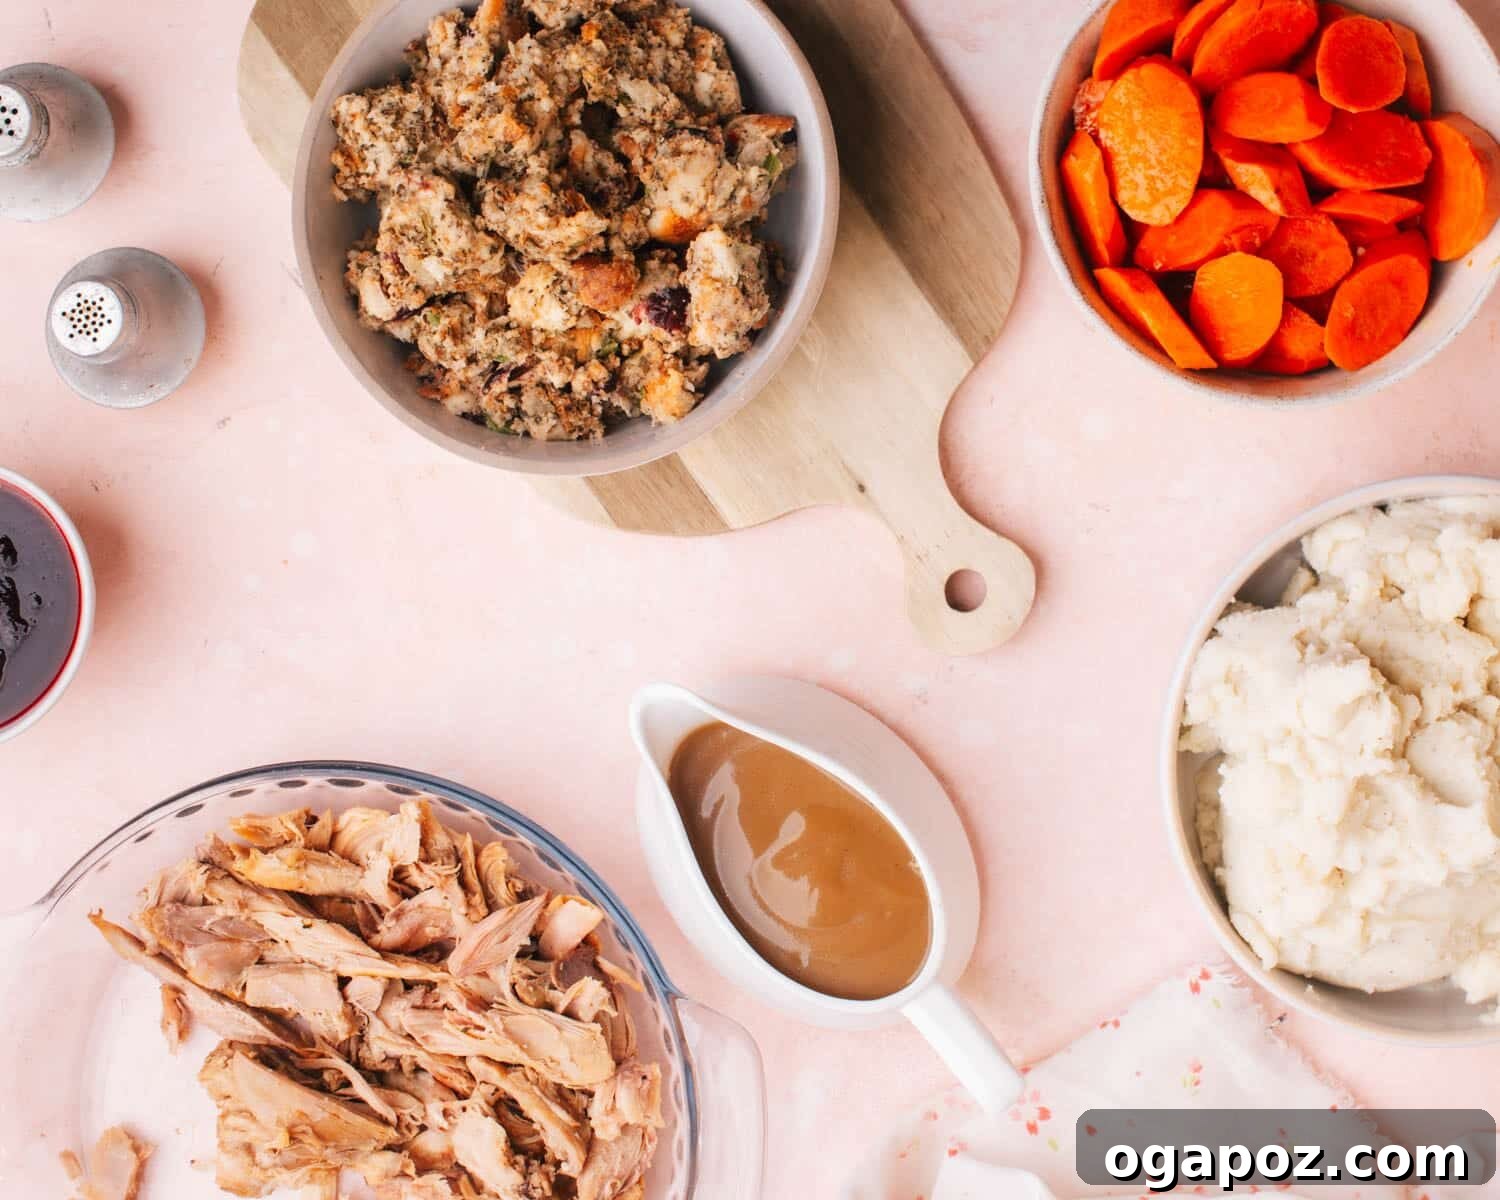
A beautifully roasted turkey is undeniably the star and centerpiece of any holiday feast. To truly complete your celebratory meal, serve it alongside classic, comforting side dishes and, of course, a generous pour of rich, flavorful gravy.
Classic Side Dishes for Roast Turkey
These thoughtfully curated side dishes are designed to complement the savory flavors of your roast turkey, creating a harmonious and unforgettable dinner spread:
- The Best Mashed Potatoes You’ll Ever Try: Creamy, fluffy, and utterly irresistible – a quintessential pairing.
- Unstuffed Herbed Apple Stuffing: All the flavor of traditional stuffing, safely cooked outside the bird.
- Turkey Giblet Gravy (Without Drippings): A rich, savory gravy that elevates every bite, even without pan drippings.
- Crispiest Roasted Brussels Sprouts with Maple and Bacon: A delightful combination of sweet, salty, and earthy flavors with perfect texture.
- Maple Five Spice Roasted Butternut Squash: A fragrant and naturally sweet side that adds vibrant color and warmth.
- Glazed Carrots: Simple yet elegant, offering a touch of sweetness and tender crispness.
- Pumpkin Dinner Rolls: Soft, fluffy rolls with a hint of pumpkin, perfect for soaking up gravy.
And for a Sweet Ending: Decadent Desserts
- Super Easy Pumpkin Pie: The ultimate classic, simplified for a stress-free dessert.
- How to Make Pie Crust: Master the foundation for all your favorite homemade pies.
- Easy Apple Pie: A timeless dessert that’s always a crowd-pleaser.
- Pumpkin Dump Cake: A wonderfully moist and simple dessert featuring fall flavors.
How to Make the Best Roast Turkey: Final Notes & Expert Secrets
Achieving a consistently perfect turkey is entirely within your reach when you adhere to these fundamental, food science-backed principles. These final tips are the true secrets to guaranteeing a succulent, flavorful turkey every single time you roast one.
- Temperature Control is Paramount: The single most critical piece of advice is to invest in, and consistently use, a high-quality instant-read meat thermometer. It is the only truly reliable method to know precisely when your turkey is perfectly cooked to a safe internal temperature of 165°F (74°C) without venturing into the dreaded territory of overcooking and dryness.
- Resist the Urge to Constantly Peek: Every time you open that oven door, even for a quick glance or to baste, a significant amount of heat escapes. This causes the oven temperature to drop and then fluctuate, inevitably extending the overall cooking time and potentially leading to a less even cook. Trust the process, trust your initial setup, and only open the oven when absolutely necessary, such as to check the temperature.
- Butter Under the Skin: This simple technique is a game-changer for moisture and flavor. Gently working softened butter directly under the breast skin creates a protective, basting layer from the inside out. As the butter melts, it bastes the lean breast meat, keeping it incredibly moist and infusing it with rich, savory flavor that would otherwise be difficult to achieve.
- Water in the Roasting Pan: Adding a cup of water to the bottom of your roasting pan serves multiple beneficial purposes. Firstly, it prevents any drippings from smoking and burning onto the bottom of the pan, which can lead to acrid smells and difficult cleanup. Secondly, the evaporating water creates a subtly moist environment within the oven, which can help prevent the turkey’s exterior from drying out prematurely.
- Strategic Foil Tenting for Delicate Areas: The wings and neck area are typically thinner and more exposed, causing them to brown (and potentially burn) much faster than the rest of the turkey. Keep aluminum foil handy to loosely tent these delicate parts partway through the cooking process. This shields them from direct heat, allowing the rest of the turkey to catch up and achieve a beautiful, even golden-brown finish without scorching.
- The Non-Negotiable Rest: We cannot stress this enough – a full hour of resting time after the turkey comes out of the oven is absolutely crucial. While it may feel like a long wait when hunger is setting in, this period allows the internal temperature to stabilize and, most importantly, enables the meat juices to reabsorb and redistribute throughout the entire bird. The result is consistently juicy meat, every single slice, preventing those precious liquids from simply running out onto your cutting board.
- Utilizing a Convection Oven: If you are fortunate enough to have a convection oven, you can leverage its capabilities for faster and more even cooking. When roasting turkey, set your convection oven to 325°F (160°C). Convection cooking circulates hot air more efficiently, which can reduce the total cooking time by up to an hour compared to a conventional oven, so be sure to start checking doneness even earlier.
- The Breast-Side-Down Method for Ultimate Juiciness: For those prioritizing an exceptionally juicy breast meat, consider starting your turkey roast breast-side down for the first 30 to 40 minutes of cooking. This allows the breast to be submerged in its own juices and the pan drippings, protecting it from initial direct heat. After the initial period, carefully flip the turkey breast-side up using sturdy silicone oven mitts and continue roasting. While this might slightly flatten the turkey’s appearance, it significantly maximizes the moisture retention in the breast.
Frequently Asked Questions About Roasting Turkey
For those looking for quick answers or just skimming through, here are some of the most commonly asked questions regarding how to cook a turkey, along with concise, expert responses.
What is the best method to cook turkey?
The best method for cooking a consistently juicy and flavorful turkey involves roasting it at a moderate temperature of 325°F (160°C) with minimal, simple seasoning and the indispensable use of a reliable instant-read thermometer. This gentle, even heat allows the entire bird to cook through without drying out the lean breast meat. My recommended approach simplifies the process by skipping unnecessary steps like basting and brining, yet still guarantees incredibly moist meat and delightfully crispy skin every time.
Is it better to cook a turkey at 325°F or 350°F?
It is generally better to cook a turkey at 325°F (160°C). This slightly lower temperature ensures a more gradual and even cooking process, which is crucial for a large bird. Cooking at 350°F (175°C) can work, but it significantly increases the risk of drying out the turkey’s breast meat before the thicker thigh meat has reached its safe internal temperature of 165°F (74°C).
How many hours does it take to cook a turkey?
As a general guideline, it takes approximately 11 minutes per pound to cook an unstuffed turkey at 325°F (160°C). For example, a 12-pound turkey will typically require about 2 to 2.5 hours, while a larger 20-pound turkey may need around 3.5 to 4 hours. However, these are estimates. The most accurate way to determine doneness is always by using an instant-read thermometer, not solely relying on time.
What is the secret to a moist turkey?
The ultimate secret to a consistently moist turkey lies in two key practices: first, diligently avoiding overcooking it, and second, ensuring it undergoes a proper resting period. Utilize an instant-read thermometer to confirm the thickest part of the thigh (away from the bone) reaches exactly 165°F (74°C). Once achieved, immediately remove the turkey from the oven, tent it loosely with foil, and let it rest undisturbed for a full hour before carving. This critical resting period allows the juices to effectively redistribute throughout the meat, preventing them from escaping when you slice it.
What temperature makes the juiciest turkey?
The optimal oven temperature for achieving the juiciest turkey is 325°F (160°C) for roasting. More importantly, the turkey itself should reach an internal temperature of precisely 165°F (74°C) when it’s done. This moderate oven temperature prevents the exterior from cooking too quickly and drying out while the interior finishes. Pull the turkey from the oven as soon as the thermometer registers 165°F in the thickest parts of the meat.
What is the best way to cook a turkey without drying it out?
The best strategy to prevent a turkey from drying out involves several key steps: roasting at a consistent 325°F (160°C) and using an instant-read thermometer to avoid overcooking. Additionally, generously spreading softened butter under the breast skin adds moisture and flavor. Crucially, do not stuff the turkey, avoid constant basting (which extends cooking time), and allow the turkey to rest for a full hour after roasting. These techniques collectively ensure maximum moisture retention.
How do I make sure my turkey isn’t dry?
To guarantee your turkey isn’t dry, consistently use an instant-read thermometer and remove the bird from the oven as soon as it registers 165°F (74°C) in the thickest part of the thigh. After cooking, let it rest for a full hour before carving; this allows the juices to redistribute throughout the meat. Also, roast at 325°F (160°C), generously apply butter under the skin, and resist the urge to open the oven door repeatedly during the roasting process.
Is it better to cook a turkey covered or uncovered?
It is generally better to cook a turkey uncovered to achieve beautifully crispy, golden-brown skin. If you notice specific areas, such as the wings or neck, browning too quickly before the rest of the meat is cooked, you can loosely tent just those areas with aluminum foil partway through the cooking process. Starting uncovered and only covering parts as needed ensures you get the best of both worlds: perfectly crispy skin and evenly cooked, moist meat.
What to add to turkey for moisture?
To enhance turkey moisture, generously add softened unsalted butter under the skin, particularly over the breast area. This butter melts, basting the meat from within. Additionally, pouring about one cup of water or broth into the bottom of the roasting pan helps prevent drippings from burning and contributes to a slightly more humid oven environment. For added flavor and moisture, you can also place aromatics like chopped onions, carrots, celery, and fresh herbs directly into the roasting pan.
Do you put water in the bottom of a roasting pan for turkey?
Yes, you should definitely put water in the bottom of your roasting pan when cooking turkey. Approximately one cup of water serves two important functions: it prevents the turkey drippings from burning and smoking at the bottom of the pan, which can create bitter flavors and make cleanup difficult. Furthermore, the evaporating water adds a gentle amount of moisture to the oven environment, which can subtly contribute to keeping the turkey moist.
Creative Ideas for Turkey Dinner Leftovers
The joy of a holiday turkey often extends beyond the main meal, with delicious leftovers providing opportunities for new culinary creations. Don’t let those precious remnants go to waste; transform them into exciting new dishes!
- What to Eat with Leftover Mashed Potatoes: Discover innovative ways to repurpose your creamy mashed potatoes beyond just a side dish.
- Turkey Dinner: A No-Stress Schedule from Shopping to Make-Ahead Cooking: Plan your entire holiday meal, including how to efficiently manage leftovers from the start.
- Leftover Turkey Pot Pie: A comforting and hearty classic, perfect for transforming cooked turkey into a brand new family favorite.
- Leftover Turkey Casserole: An easy and versatile dish that combines turkey with other Thanksgiving favorites in a single, delicious bake.
How to Cook a Turkey (Perfectly Juicy Every Time!)
Jennifer Pallian BSc, RD
30 minutes
3 hours
1 hour
12
Video
Learn visually! Watch this quick video for a step-by-step demonstration of our easy turkey roasting method.
(Video unavailable in this static HTML format, typically embedded here from services like YouTube or a media player.)
Ingredients
For Turkey
-
11 to 13
lb
turkey
(fresh or fully thawed if frozen) -
½
cup
unsalted butter
(softened to room temperature) -
3
tbsp
kosher salt -
½
tsp
black pepper
Instructions
-
Preheat your oven to 325ºF (160°C). Prepare the turkey by positioning it breast-side up on an oiled rack placed inside a shallow roasting pan or baking dish. Carefully remove the neck and giblets from both the main and neck cavities of the turkey.
-
Gently lift the skin of the turkey breast using your fingers to create a pocket. Spread the softened butter evenly over the entire turkey, making sure to push some under the breast skin for extra moisture and flavor. Season the entire turkey generously with kosher salt and freshly cracked black pepper, including under the skin of the breast.
-
Pour one cup of water into the bottom of the roasting pan. Place the turkey in the preheated oven and roast for approximately 3 hours and 20 minutes for an 11-13 lb bird. About halfway through cooking, if the neck area or wings are browning too quickly, loosely cover them with aluminum foil to prevent burning.
The turkey is done when a meat thermometer inserted into the thickest part of the thigh (without touching the bone) registers 165ºF (74°C). Check the temperature in several spots to ensure even cooking and food safety.
Once done, remove the turkey from the oven and let it rest, tented loosely with foil, at room temperature for a full hour. This crucial step allows the juices to redistribute throughout the meat, ensuring an incredibly moist and tender turkey.
Notes
- Total Cooking Time: Plan for roughly 11 minutes of cooking time per pound of turkey when roasting at 325ºF (160°C). Begin checking the internal temperature around 45 minutes before the estimated cooking time is complete.
- Convection Oven Adjustment: If you are using a convection oven, you can still roast at 325ºF (160°C), but be aware that it will cook faster, potentially up to an hour sooner than a conventional oven. Adjust your checking time accordingly.
- Breast-Side-Down Option for Juicier Breast: For those prioritizing an extra juicy turkey breast, consider starting the roasting process with the turkey breast-side down. After the initial 40 minutes, carefully flip it breast-side up (using sturdy silicone oven mitts) and continue cooking. While this method helps the breast retain maximum moisture, it might slightly flatten its overall appearance.
- No Basting Necessary: This recipe intentionally omits basting. Frequent opening of the oven door leads to heat loss and extended cooking times, which ultimately contributes to a drier turkey and hinders crispy skin formation.
- Critical Safe Temperature: Always ensure your turkey is cooked fully to an internal temperature of 165ºF (74°C) in multiple thickest parts of the bird. Due to its large and irregular size, turkey can cook unevenly, so thorough temperature checking is vital for food safety.
- Resting is Non-Negotiable: While an hour-long rest may seem lengthy, it is absolutely essential for achieving a moist turkey. This period allows the meat fibers to relax and reabsorb juices, preventing them from flowing out onto your cutting board when carved.
Nutrition
Calories:
148
kcal
|
Carbohydrates:
15
g
|
Protein:
0.4
g
|
Fat:
10
g
|
Saturated Fat:
5
g
|
Polyunsaturated Fat:
1
g
|
Monounsaturated Fat:
4
g
|
Trans Fat:
0.3
g
|
Cholesterol:
21
mg
|
Sodium:
9
mg
|
Potassium:
62
mg
|
Fiber:
1
g
|
Sugar:
12
g
|
Vitamin A:
274
IU
|
Vitamin C:
5
mg
|
Calcium:
16
mg
|
Iron:
0.2
mg
Nutrition information is automatically calculated and should only be used as an approximation.
Tried this recipe? Share your experience in the comments!