

The Ultimate Easy & Crispy Tuna Patties Recipe: Your Pantry-Staple Weeknight Hero!
When the clock is ticking, and dinner seems like an impossible feat, these Tuna Patties are your ultimate culinary savior. Imagine: a golden, irresistibly crispy exterior giving way to a soft, fluffy, and incredibly flavorful interior. Best of all? They’re crafted entirely from simple pantry staples you likely always have on hand. This recipe isn’t just fast and fuss-free; it’s shockingly delicious for something that begins with a humble can of tuna. A true family favorite, my kids consistently devour these!

Why You’ll Absolutely Love These Easy Tuna Patties
These savory tuna cakes have earned their spot as a household staple for countless reasons:
- Unbelievably Quick & Easy to Prepare: Forget complicated recipes! While I adore traditional fish cakes with potato, this tuna patty recipe comes together in a fraction of the time. With minimal ingredients and straightforward steps, you can whip up a delicious meal or snack in minutes, making it ideal for busy weeknights. Plus, the low-mess nature means less cleanup!
- A Kid-Approved Family Favorite: As a dietitian, I’m always thrilled to find creative ways to encourage kids to eat more fish. Tuna is an excellent source of lean protein and essential omega-3 fatty acids, vital for growth and development. These patties are so appealing with their crispy texture and mild flavor that even the pickiest eaters will ask for seconds!
- The Ultimate “Nothing-for-Dinner” Solution: We all have those moments when the fridge seems bare, and takeout is tempting. This recipe is my steadfast go-to when I’m on the brink of ordering in. With ingredients like canned tuna, mayonnaise, and breadcrumbs almost always available, these patties offer a delicious, homemade alternative that’s ready in no time.
- Versatile and Customizable: Whether you’re looking for a quick lunch, a light dinner, or an appetizer, these tuna patties fit the bill. They are incredibly adaptable, allowing for various flavor profiles and serving options to suit any craving or dietary preference.
Essential Ingredients for Perfect Tuna Patties
You’ll be delighted by how few ingredients are required to make these incredibly tasty tuna patties. This recipe also boasts minimal equipment needs, which means less washing up – a win in any kitchen!
The Simple Ingredients You’ll Need
Here’s a detailed look at everything you’ll use to create these satisfying tuna patties. These are true pantry powerhouses that I consistently keep stocked:
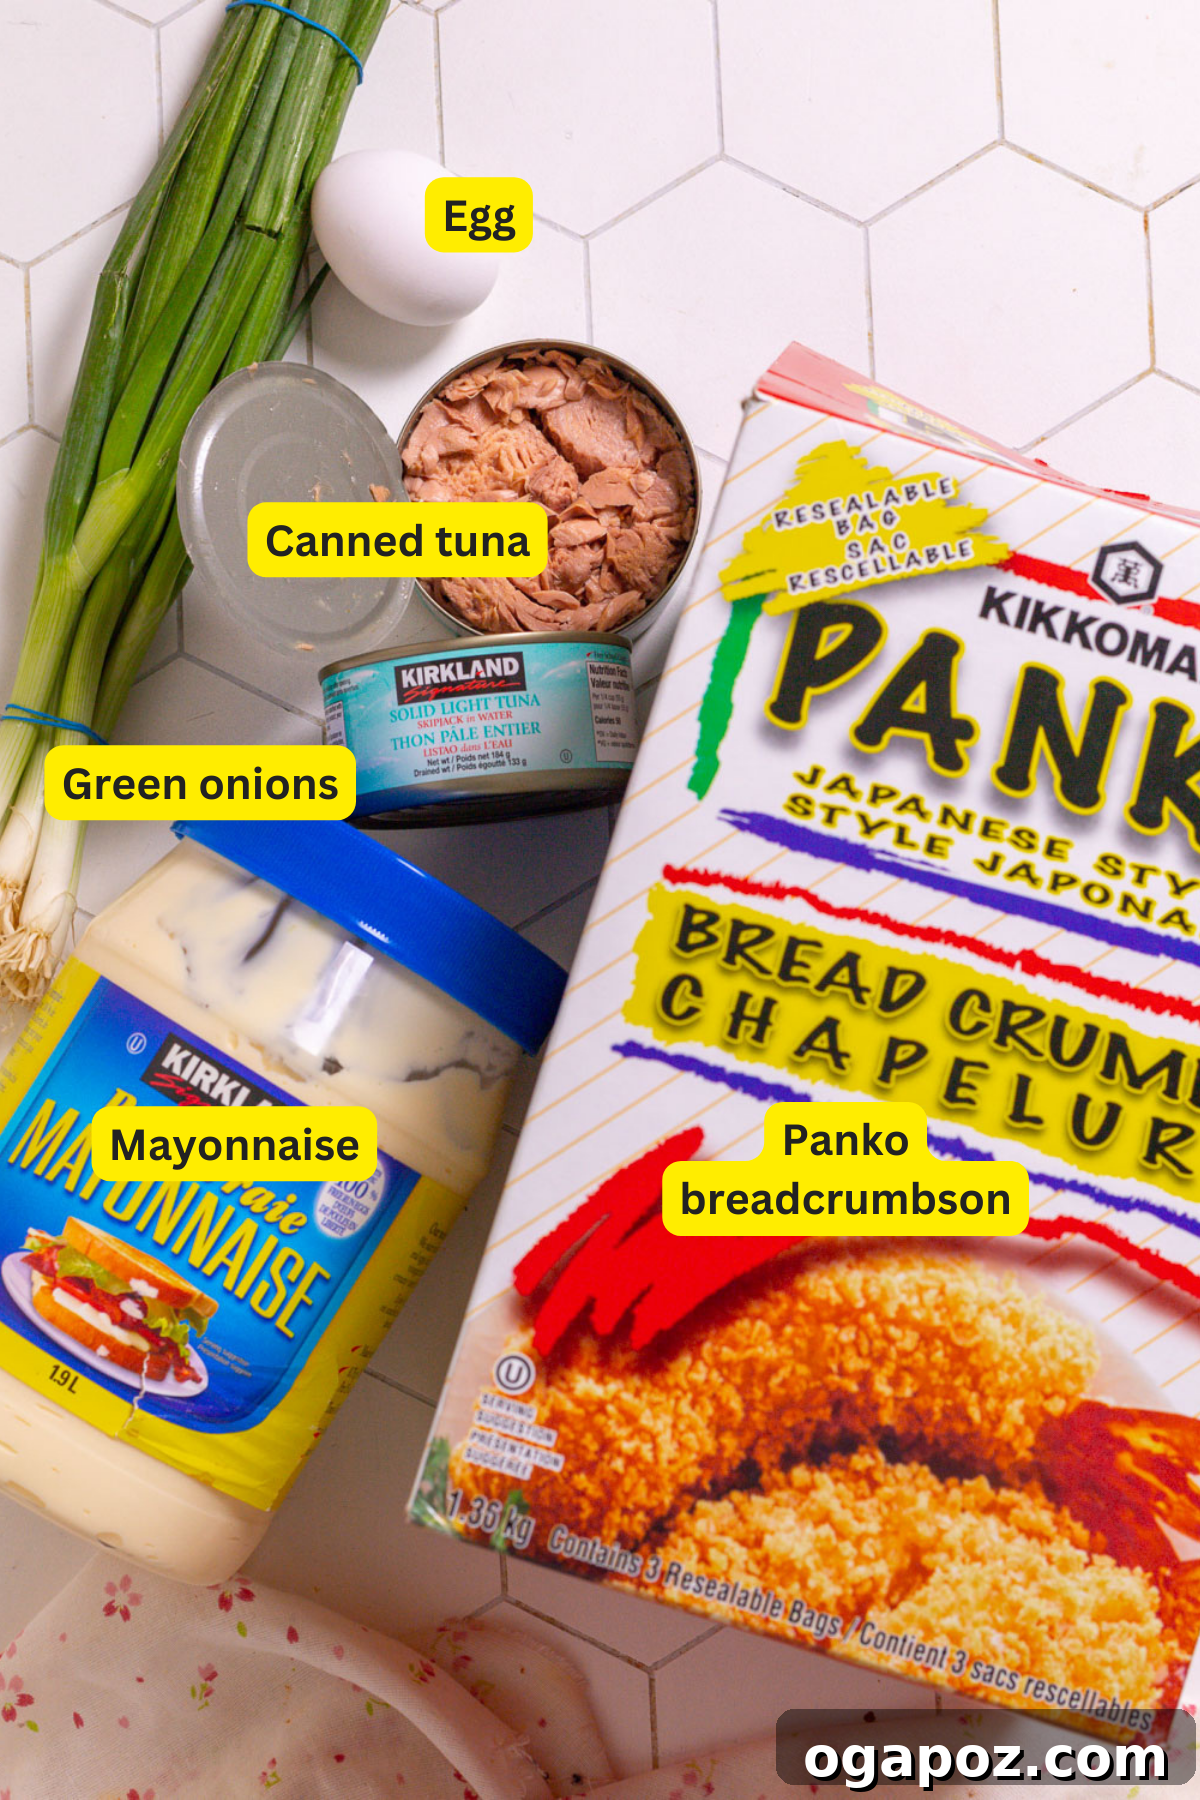
- Canned Tuna (Two 5-ounce cans): This is, of course, the star of our show. The key here is to drain it *thoroughly* to prevent excess moisture, which can lead to soggy patties. Both chunk light and albacore tuna varieties work beautifully; choose your favorite! For a richer flavor, albacore is often preferred, but chunk light is more economical and widely available.
- Panko Breadcrumbs (½ cup): These Japanese-style breadcrumbs are a game-changer! Their larger, flaky texture creates a lighter, crispier coating and helps bind the patties without making them dense. This is crucial for that desirable golden, crunchy exterior. For related recipes, check out my Panko Crusted Cod.
- Large Egg (1): The egg acts as a primary binder, holding all the ingredients together as the patties cook. Without it, your patties might crumble in the pan, so don’t skip this essential element.
- Mayonnaise (2 tbsp): Mayonnaise is more than just a flavor enhancer; it adds crucial moisture and richness, ensuring your tuna patties remain tender and incredibly flavorful on the inside. It also contributes to the binding and gives the patties a lovely golden hue when fried.
- Kosher Salt (½ tsp) and Black Pepper (¼ tsp): Proper seasoning is vital! These basic spices elevate the flavor of the tuna mixture from bland to truly delicious. Feel free to adjust to your taste.
- Chopped Green Onions and/or Fresh Parsley (2 tbsp): Fresh herbs introduce a burst of vibrant flavor and a lovely aromatic note. Green onions offer a mild oniony bite, while parsley provides a fresh, clean taste. If green onions aren’t available, a finely minced regular onion can be used, though the flavor will be stronger. Other fresh herbs like dill or chives also work wonderfully.
For Frying
- Olive Oil (2 tbsp – not extra virgin): Used for pan-frying the patties to achieve that beautiful golden, crispy exterior. Regular olive oil has a higher smoke point than extra virgin olive oil, making it better suited for frying. Alternatively, any other high-heat cooking oil you prefer, such as avocado oil, canola oil, or vegetable oil, will work just as well.
You’ll find precise ingredient quantities in the complete recipe card at the bottom of this article.
Tuna Patty Substitutions and Flavorful Variations
This recipe is incredibly forgiving and adaptable, allowing you to easily swap ingredients or add new flavors. Here are some of my favorite variations I’ve experimented with:
- Breadcrumb Alternatives: For a gluten-free option, use gluten-free panko or finely crushed rice crackers. If you’re looking for a lower-carb alternative, almond flour, crushed pork rinds, or coconut flour can be excellent substitutes. Remember to adjust quantities as these absorb moisture differently – start with less and add as needed. If panko is unavailable, traditional breadcrumbs will work, but they tend to result in a slightly denser patty.
- Spice It Up: Don’t be shy about adding a dash of spice! I often incorporate chilies, turmeric, and cilantro to create Indian-spiced tuna cakes, a personal family favorite. Other delicious additions include a pinch of cayenne pepper, smoked paprika, garlic powder, onion powder, or a blend like Old Bay seasoning or Cajun spice for a different flavor profile.
- Tuna Swaps: While canned tuna is convenient, you can certainly use finely flaked cooked tuna steak or even leftover grilled tuna. For a delightful change, canned or cooked salmon is a perfect swap to make equally delicious salmon patties. Shredded rotisserie chicken also works surprisingly well for a chicken version!
- Fresh Herb Mix-ins: Beyond green onions and parsley, explore other fresh herbs like dill, fresh chives, cilantro, or basil. Each offers a unique aromatic quality that can transform the flavor of your patties. Lemon zest is also a fantastic addition for a bright, fresh note.
- Aromatic Additions: Finely chopped red onion or shallots offer a more pungent flavor than green onions and can add a lovely depth. A minced garlic clove or a teaspoon of garlic powder can also boost the savory notes significantly.
- Oil for Frying: If olive oil isn’t your preference, feel free to use avocado oil, canola oil, or vegetable oil for pan-frying. The key is to choose a neutral-flavored oil with a high smoke point for best results.
- Extra Goodies: For added texture and flavor, consider folding in finely diced bell peppers, shredded zucchini (squeezed dry), capers, or even a tablespoon of Dijon mustard or Worcestershire sauce. A little shredded cheese can also add a creamy, savory element.
Essential Kitchen Tools to Grab
You won’t need an extensive array of gadgets for this recipe. Just gather a few basic kitchen tools:
- Sharp Knife and Cutting Board: For preparing any fresh herbs or onions.
- Large Mixing Bowl: To combine all your patty ingredients.
- Fork: Ideal for flaking the tuna and mixing the ingredients thoroughly.
- Frying Pan or Skillet: A non-stick or cast-iron pan works best for achieving a perfectly crispy crust.
- Spatula: For flipping the patties with ease.
How to Make Perfectly Crispy Tuna Patties: A Step-by-Step Guide
You’ll be amazed at just how simple and straightforward these homemade tuna cakes are to prepare. Follow this easy method for delicious results every time:
Step 1: Prepare the Tuna Patty Mixture
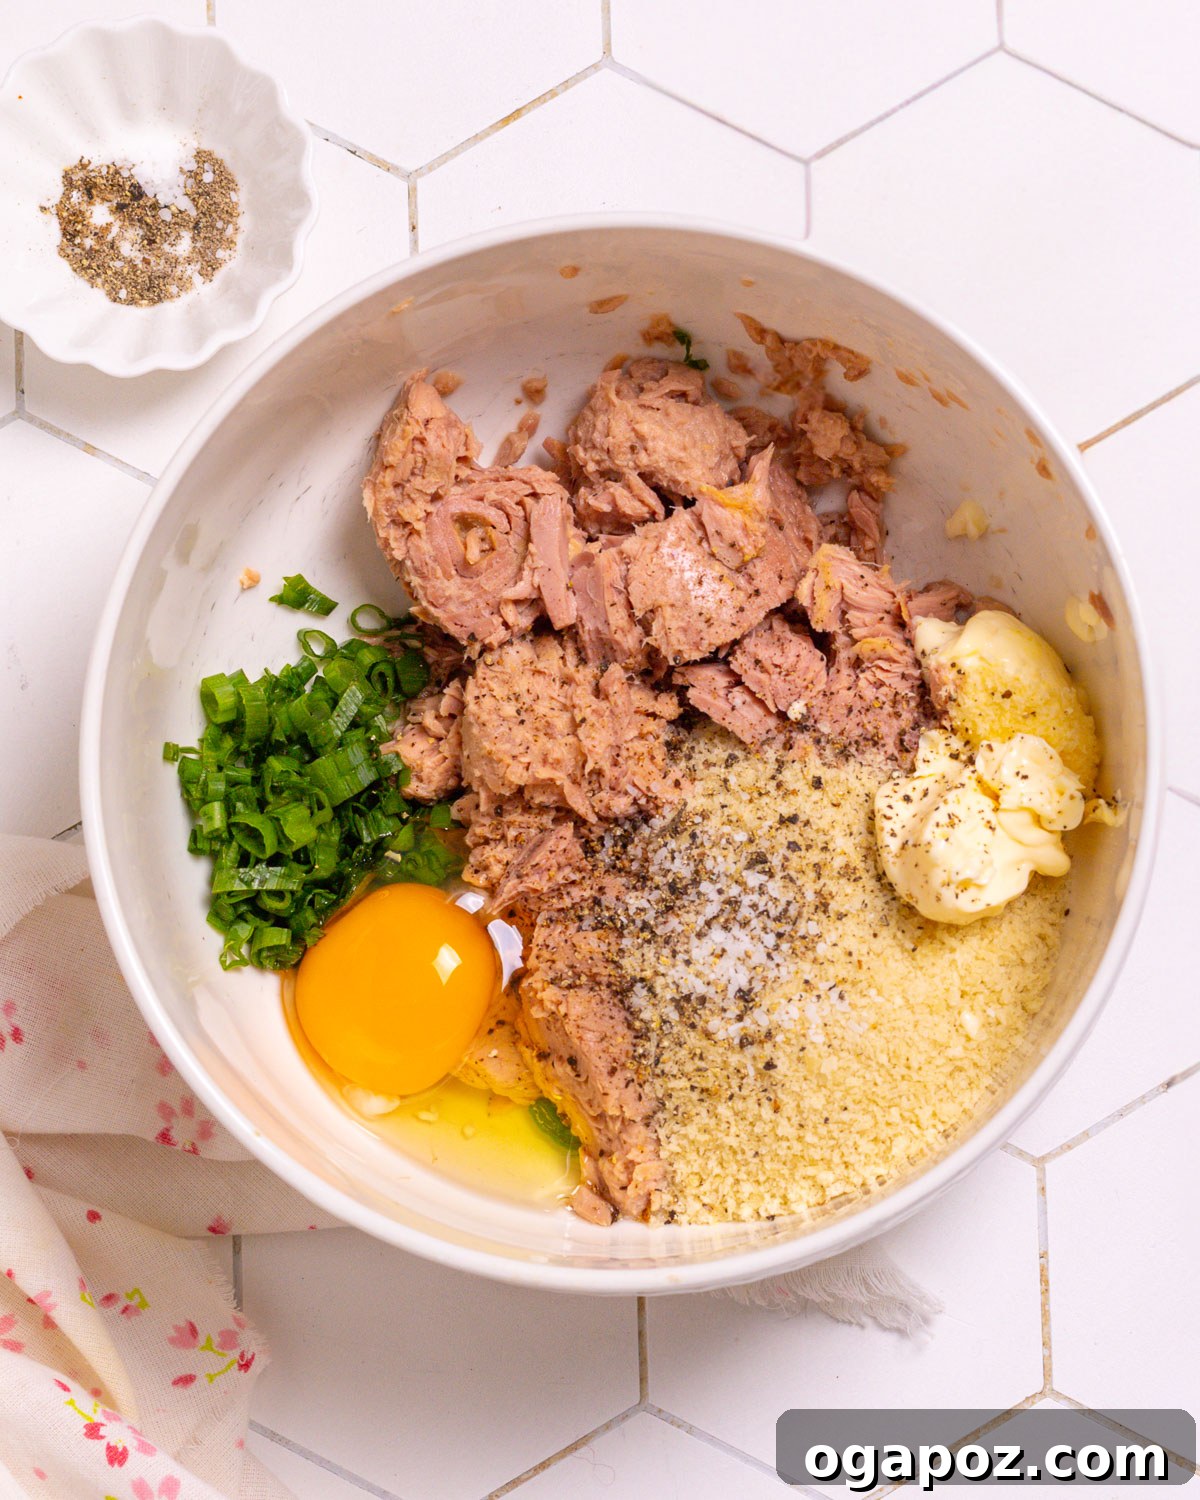
In a large mixing bowl, flake the thoroughly drained canned tuna with a fork. Add the panko breadcrumbs, large egg, mayonnaise, kosher salt, black pepper, and your chosen fresh herbs (green onions and/or parsley). Using a fork or your hands, gently combine all the ingredients until they are well blended. Be careful not to overmix, as this can lead to tougher patties.
Step 2: Shape the Tuna Patties
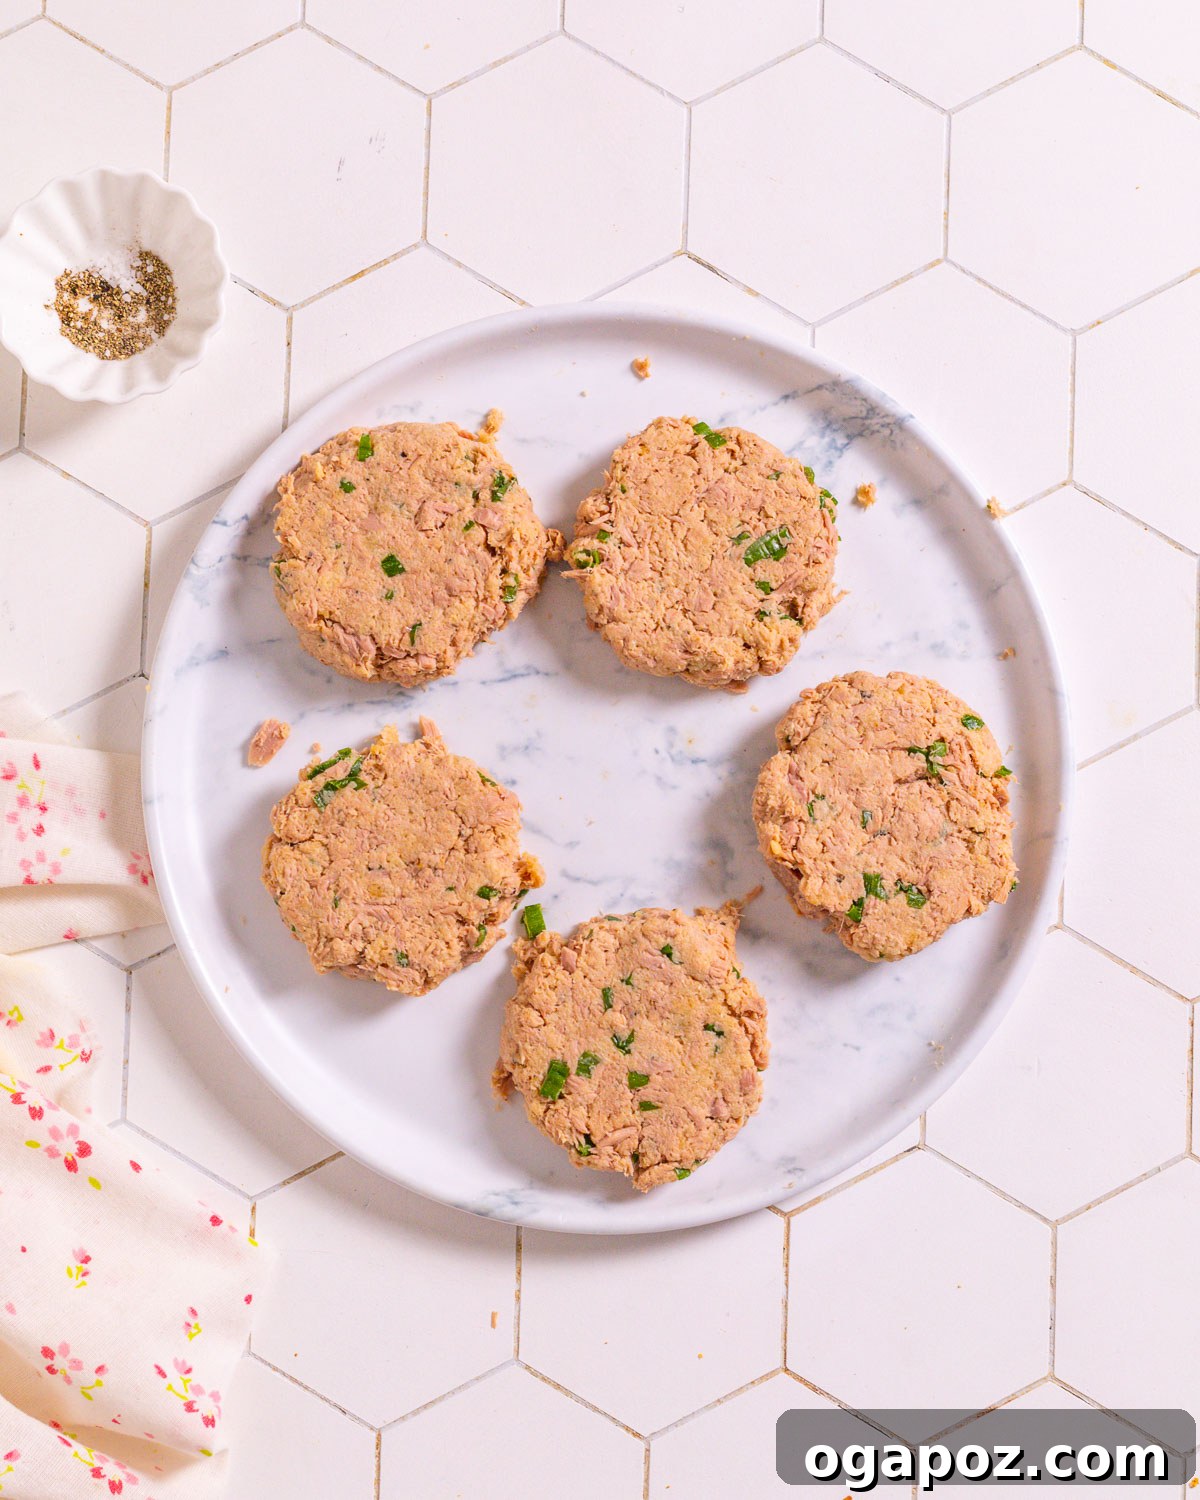
Once the mixture is ready, divide it into 6 evenly sized portions. Gently shape each portion into a flat, round patty, about ½ to ¾ inch thick. Aim for uniform thickness to ensure even cooking. If time allows, refrigerate the shaped patties for at least 15-30 minutes. This chilling step helps them firm up, making them less likely to fall apart during frying and contributing to a better crisp texture.
Step 3: Cook the Tuna Patties to Golden Perfection
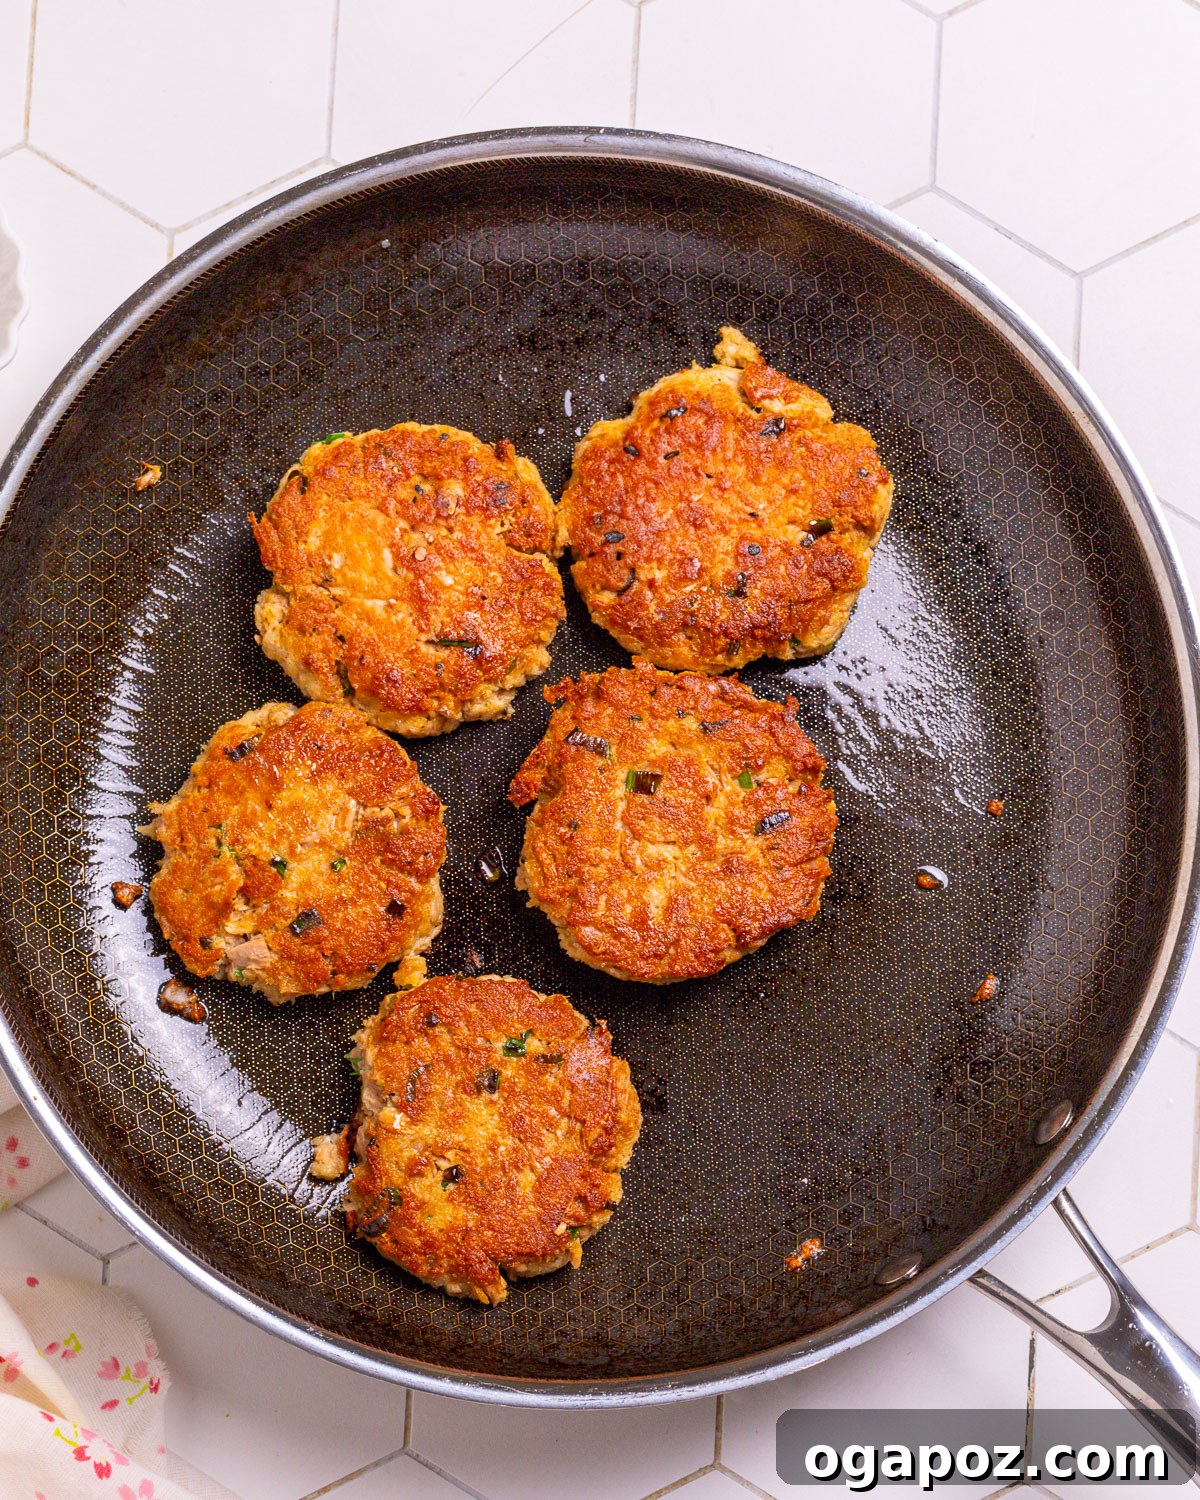
Heat the olive oil (or your preferred cooking oil) in a large skillet or frying pan over medium heat. You want the oil to be hot enough that a drop of water sizzles, but not smoking. Carefully place the shaped tuna patties into the hot skillet, ensuring not to overcrowd the pan. Cook the patties for 3 to 4 minutes on each side, or until they are beautifully golden brown and crispy on both sides. The interior should be heated through and flaky.
Once cooked, remove the patties from the skillet and place them on a plate lined with paper towels to absorb any excess oil, ensuring maximum crispiness. Serve warm and enjoy immediately!
5 Common Mistakes When Making Tuna Patties (And How to Avoid Them)
Even simple recipes can have pitfalls. Here are a few common issues that can arise when making tuna patties, and how to ensure your batch is perfect every time:
1. Not Draining the Tuna Properly: This is perhaps the most critical mistake. If the canned tuna isn’t thoroughly drained, the excess liquid will make your patty mixture too wet and unstable. The result? Soggy patties that struggle to hold their shape and inevitably fall apart during cooking.
Solution: Always drain your canned tuna extremely well. For best results, press the tuna firmly against a sieve or use paper towels to squeeze out as much moisture as possible.
2. Overmixing the Ingredients: While it’s important to combine all the ingredients thoroughly, overworking the mixture can lead to dense and tough patties. You want a light, tender interior.
Solution: Mix just until everything is combined and no dry streaks of breadcrumbs remain. Gentle folding with a fork or your hands is often better than vigorous stirring.
3. Skipping or Skimping on Binding Agents: The egg and breadcrumbs are crucial for holding these patties together. They provide the structure necessary to prevent crumbling. If you use too little of either, your patties won’t bind effectively.
Solution: Ensure you use the specified amounts of egg and breadcrumbs. If your mixture still feels too wet after thorough draining, you can add a tiny bit more breadcrumbs, one tablespoon at a time, until it reaches a manageable consistency.
4. Not Heating the Pan Enough: Cooking patties in a pan that isn’t sufficiently preheated can cause them to stick, absorb too much oil, and cook unevenly, leading to a less crispy result.
Solution: Always preheat your skillet and oil over medium heat until the oil shimmers slightly but isn’t smoking. This ensures an immediate crisping effect when the patties hit the pan.
5. Making Patties Too Thick: If your tuna patties are too thick, they may not cook through properly, leaving a raw or undercooked center, while the outside could burn.
Solution: Aim for a uniform, moderate thickness—about ½ to ¾ inch. This ensures even cooking and a beautiful golden crust throughout. Use a gentle hand to flatten them evenly.
Make-Ahead and Storage Tips for Tuna Patties
These tuna patties are fantastic for meal prep! Their ability to be prepared in advance and stored makes them even more convenient.
Preparing Ahead
- You can prepare the entire tuna patty mixture, shape the patties, and then store them uncooked. Arrange them on a plate or baking sheet lined with parchment paper, cover tightly with plastic wrap, and refrigerate for up to 24 hours before frying. This is a great time-saver for busy days.
Storing Leftovers
- If you have any delicious cooked tuna patties leftover, allow them to cool completely. Store them in an airtight container in the refrigerator for up to 3 days.
Freezing Tuna Patties
- For longer-term storage, freezing is an excellent option. For best results, freeze the patties *before* cooking. Lay the shaped, uncooked patties flat on a baking sheet lined with parchment paper, ensuring they don’t touch. Freeze until they are completely solid, which usually takes about 1-2 hours.
- Once frozen solid, transfer the patties to an airtight freezer bag or container, separating layers with parchment paper if stacking. They can be stored in the freezer for up to 3 months. When ready to cook, thaw them in the refrigerator overnight or cook directly from frozen, adding a few extra minutes to the cooking time.
Reheating Tuna Patties
- Microwave: For a quick reheat, you can microwave the cooked patties until warm. However, this method won’t retain their crispiness.
- Air Fryer or Oven: To restore their crispy finish, reheat cooked patties in an air fryer at 350°F (175°C) for 5-7 minutes, or in an oven at 375°F (190°C) for 10-15 minutes, flipping halfway through, until heated through and crisp.
- Skillet: Reheat in a lightly oiled skillet over medium heat for a few minutes per side until crisp and warm.

How to Serve These Delicious Tuna Patties
These versatile tuna patties can be served in so many exciting ways, making them perfect for any meal or occasion. Here are some of my favorite ideas:
- Tuna Burger Supreme: Transform them into the most incredible tuna burger! Pop a warm patty into a toasted burger bun with a generous dollop of tartar sauce, a squeeze of lemon, and your favorite burger toppings like crisp lettuce, ripe tomatoes, and red onion. This is heavenly with a side of my easy homemade coleslaw or some crispy sweet potato fries.
- Elegant Salad Topper: For a lighter, yet incredibly satisfying meal, serve the crispy fish patties on a bed of mixed greens. Add sliced avocado, crisp cucumbers, cherry tomatoes, and a light lemon vinaigrette dressing to complement the fresh flavors of the patties. It’s like an instant tuna salad elevated to gourmet status!
- Creative Wraps or Tacos: Break away from the ordinary by serving tuna patties in warm tortillas or lettuce wraps. Top with a fresh slaw, a drizzle of hot sauce, sour cream, or a zesty avocado crema for a quick and fun meal. If you have the patties prepped in the fridge, this is virtually zero-prep dinner!
- Hearty Side Dish Pairings: Tuna patties pair beautifully with classic comfort sides. Serve them alongside fluffy basmati rice, quinoa, roasted vegetables (like asparagus or broccoli), or even creamy mashed potatoes. Don’t forget a sprinkle of fresh herbs to brighten everything up!
- Appetizer Style: Cut larger patties into smaller wedges or serve mini patties with a variety of dipping sauces like sriracha mayo, Dijon mustard, or a simple lemon-dill aioli for an easy party appetizer.
Always have lemon wedges on hand—a fresh squeeze of lemon juice truly brightens the flavor of the tuna patties!
Final Notes, Pro Tips & Science-Based Secrets for Perfect Patties
As a food scientist, I love sharing insights that help you achieve culinary perfection. Here are my ultimate tips and tricks for making the best tuna patties:
- Chill for Superior Structure: This is a pro tip I swear by! After you’ve shaped your tuna patties, transfer them to a plate and refrigerate them for at least 15-30 minutes before frying. This chilling time allows the binders (egg and breadcrumbs) to set and the mixture to firm up, significantly reducing the risk of your patties falling apart in the pan and ensuring a beautifully crisp crust.
- Choose the Right Pan: For the crispiest, most evenly browned patties, opt for a non-stick skillet or a well-seasoned cast-iron pan. These types of pans conduct heat efficiently and prevent sticking, allowing a beautiful golden crust to form without damaging the patties. Ensure your pan is adequately preheated with the oil before adding the patties.
- Avoid Overcrowding the Pan: When frying multiple patties, resist the urge to cram them all into one pan. Cooking in batches is key! Overcrowding lowers the temperature of the oil, which causes the patties to steam rather than fry. This results in a soggy, pale exterior instead of the desired golden, crispy crust. Give each patty enough space to breathe and brown properly.
- Don’t Press Down While Cooking: Once the patties are in the pan, resist the urge to press down on them with your spatula. This expels moisture, which can make the patties dry and potentially compromise their delicate structure. Let them cook undisturbed on each side until golden.
- Adjust Moisture Content Carefully: If your mixture feels too wet even after draining, add a tablespoon more of panko. If it feels too dry and crumbly, add an extra teaspoon of mayonnaise or a splash of milk or water. The goal is a mixture that holds its shape easily without being sticky or falling apart.
Frequently Asked Questions About Tuna Patties
Skimming through the recipe? Here are answers to some of the most common questions about making perfect tuna patties:
The key to keeping tuna patties intact lies in proper binding and preparation. Ensure you drain the canned tuna extremely well to remove excess moisture. Use the right amount of breadcrumbs and egg as specified in the recipe, as these are critical binders. Finally, chilling the shaped patties for at least 15-30 minutes before frying significantly helps them firm up and hold their shape during cooking.
To ensure moist and tender patties, avoid overcooking them, as this is the primary cause of dryness. The mayonnaise in the recipe adds crucial moisture and richness. If you find your mixture a little dry, you can add a touch more mayonnaise, a tablespoon of Greek yogurt, or even a little lemon juice or grated zucchini (squeezed dry) for extra moisture and flavor.
Absolutely! Baking is a healthier alternative to frying and still yields delicious results. Preheat your oven to 400°F (200°C). Place the shaped patties on a baking sheet lined with parchment paper. Bake for about 15-20 minutes, flipping them halfway through, until they are golden brown and heated through. For an extra crispy top, you can finish them under the broiler for a minute or two, watching carefully to prevent burning.
Yes, tuna patties can be a very healthy meal option! Tuna is an excellent source of lean protein and rich in beneficial omega-3 fatty acids, which are great for heart health and brain function. By controlling the amount of oil used for frying or opting to bake them, and by serving them with plenty of fresh vegetables or a side salad, you can easily make them a nutritious part of your diet.
Other Fast Fish Recipes You’ll Love
If you enjoyed these quick and easy tuna patties, be sure to explore these other fantastic fish recipes:
- Air Fryer Tuna Steak
- Tuna Poke Bowls with Coconut Rice
- Sushi Muffins with Canned Salmon
- Baked Salmon Mayo Recipe
- Quick & Easy Fish and Vegetable Curry with Coconut
- Yummy Salmon Satay with Peanut Sauce

The BEST Tuna Patties (Quick + Crispy Recipe with Canned Tuna!)
Jennifer Pallian BSc, RD
10 minutes
8 minutes
18 minutes
4
Ingredients
- 2 cans 5 oz each tuna, thoroughly drained
- ½ cup panko breadcrumbs
- 1 large egg
- 2 tbsp mayonnaise
- ½ tsp kosher salt
- ¼ tsp black pepper
- 2 tbsp chopped green onions or fresh parsley
For Frying:
- 2 tbsp olive oil (not extra virgin)
Instructions
-
In a large bowl, combine all ingredients (tuna, panko, egg, mayonnaise, salt, pepper, herbs) except the frying oil. Mix gently with a fork until well blended.
-
Divide the mixture and shape into 6 evenly sized patties, about ½ to ¾ inch thick. For best results, chill the shaped patties in the refrigerator for 15-30 minutes.
-
Heat the olive oil in a skillet over medium heat. Once the oil is shimmering, carefully add the patties (in batches if necessary to avoid overcrowding). Cook for 3-4 minutes per side until golden brown and crispy.
-
Serve warm with your favorite sides and condiments.
Notes
- Drain Tuna Well: Press out as much liquid as possible from the canned tuna to avoid soggy patties. This crucial step helps them hold their shape and crisp up beautifully.
- Panko Substitutes: For a lower-carb option, swap panko with crushed pork rinds, almond flour, or coconut flour. If you’re gluten-free, use gluten-free panko or crushed rice crackers. Adjust quantity slightly—start with less and add as needed.
- Make-Ahead Tip: You can prepare and shape the patties in advance, then refrigerate them (uncooked and covered) for up to 24 hours before frying for ultimate convenience.
- Pan Choice: A nonstick or cast-iron skillet works best for achieving a golden, crisp crust on your patties without sticking.
- Chill for Best Results: If you have time, chilling the shaped patties for 15–30 minutes before cooking truly helps them stay firm and cook evenly, preventing them from falling apart.
- Flavor Variations: Experiment with adding a teaspoon of Dijon mustard, a pinch of lemon zest, or some chili flakes for extra zest. Fresh dill, capers, or a dash of hot sauce are also fantastic additions.
Nutrition
Calories:
161
kcal
|
Carbohydrates:
6
g
|
Protein:
3
g
|
Fat:
14
g
|
Saturated Fat:
2
g
|
Polyunsaturated Fat:
4
g
|
Monounsaturated Fat:
7
g
|
Trans Fat:
0.02
g
|
Cholesterol:
44
mg
|
Sodium:
407
mg
|
Potassium:
44
mg
|
Fiber:
1
g
|
Sugar:
1
g
|
Vitamin A:
95
IU
|
Vitamin C:
1
mg
|
Calcium:
24
mg
|
Iron:
1
mg
Nutrition information is automatically calculated, so should only be used as an approximation.
Tried this recipe? Leave a comment!
Share your experience and ratings – we’d love to hear from you.