
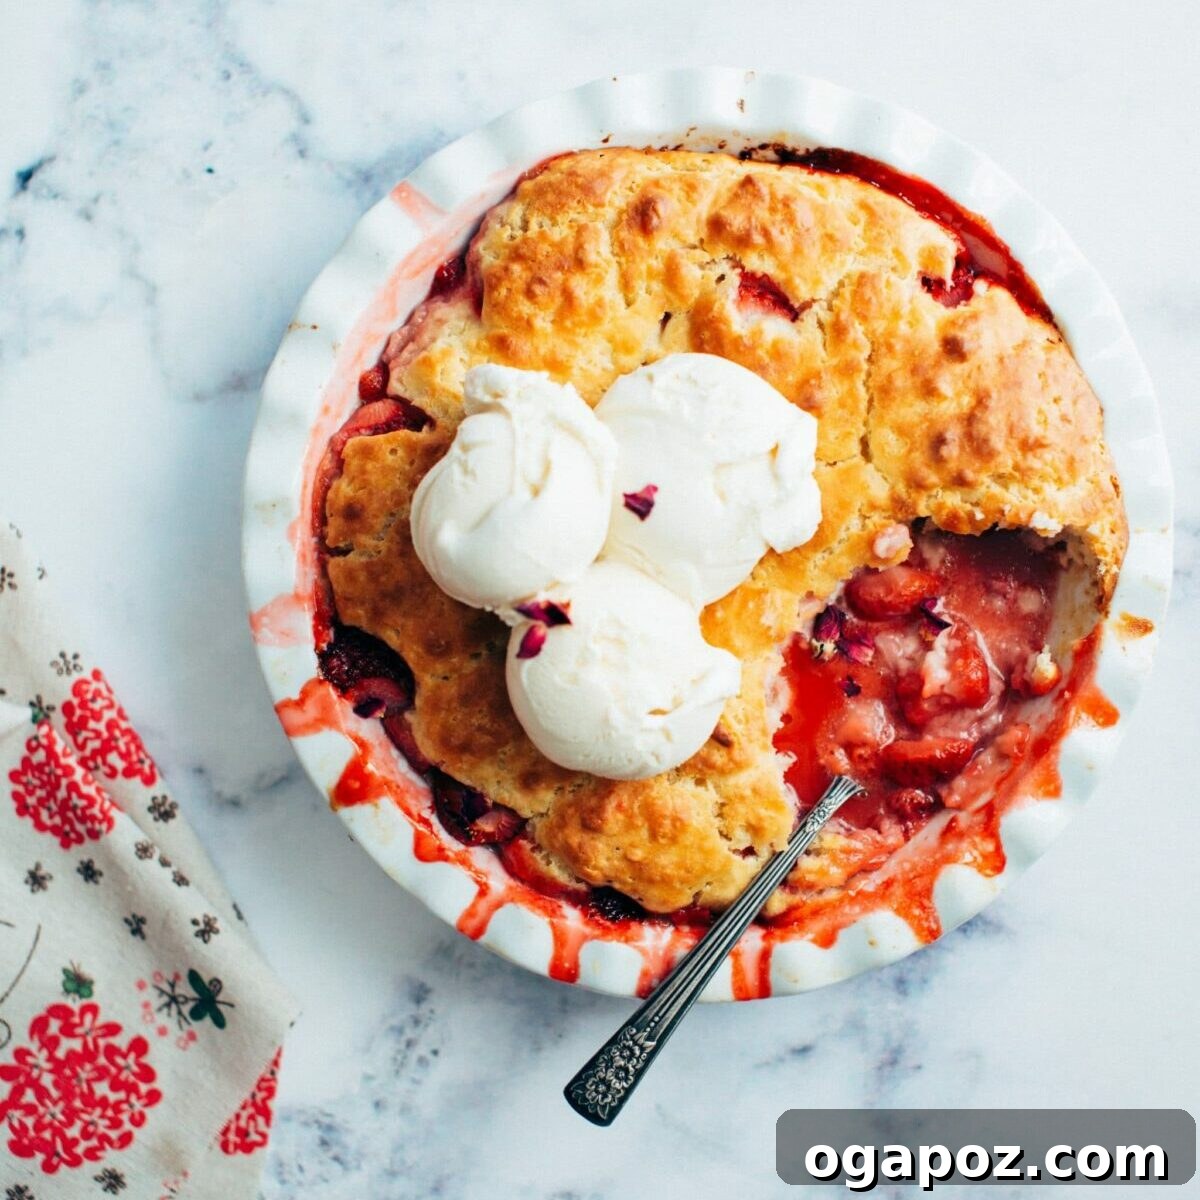
There’s nothing quite like the taste of summer, and for many, that means indulging in the sweet, vibrant flavor of fresh strawberries. Today, we’re diving into a cherished recipe that perfectly encapsulates that seasonal joy: an utterly delightful and **easy strawberry cobbler recipe**. Imagine plump, ripe strawberries, gently sweetened and bubbling into a luscious, syrupy jam, all crowned with a golden, impossibly tender drop-biscuit topping. It’s comfort food at its finest, a rustic dessert that brings warmth and happiness with every spoonful. Forget the fuss of intricate pastry; this cobbler is designed for simplicity without compromising on taste, making it a perfect lazy-day alternative to a traditional strawberry shortcake.
This dessert truly shines with minimal effort. You won’t need to stress over a delicate cake batter or a precise pie crust. Instead, you’ll be treated to a fantastic strawberry mixture that thickens beautifully and a biscuit topping that’s both buttery and light. The aroma alone as it bakes will make your kitchen feel like the happiest place on earth. Serve generous scoops of creamy vanilla ice cream alongside, letting it melt into the warm, fruity goodness for an experience that’s simply irresistible. Whether you’re a seasoned baker or just starting, this strawberry cobbler is a foolproof way to enjoy one of nature’s most beloved fruits.
Beyond being a fantastic homemade treat, this strawberry cobbler is an ideal candidate for gatherings. It’s an easy carry-and-serve dessert that travels wonderfully to picnics, backyard barbecues, or any summer potluck. If you have a soft spot for summer cobbler recipes, you might also enjoy exploring other fruit-filled delights like a classic Peach Cobbler or experimenting with seasonal berries. But first, let’s focus on mastering this incredible strawberry cobbler and bringing a little extra sweetness into your day.
Why You’ll Absolutely LOVE This Easy Strawberry Cobbler Recipe
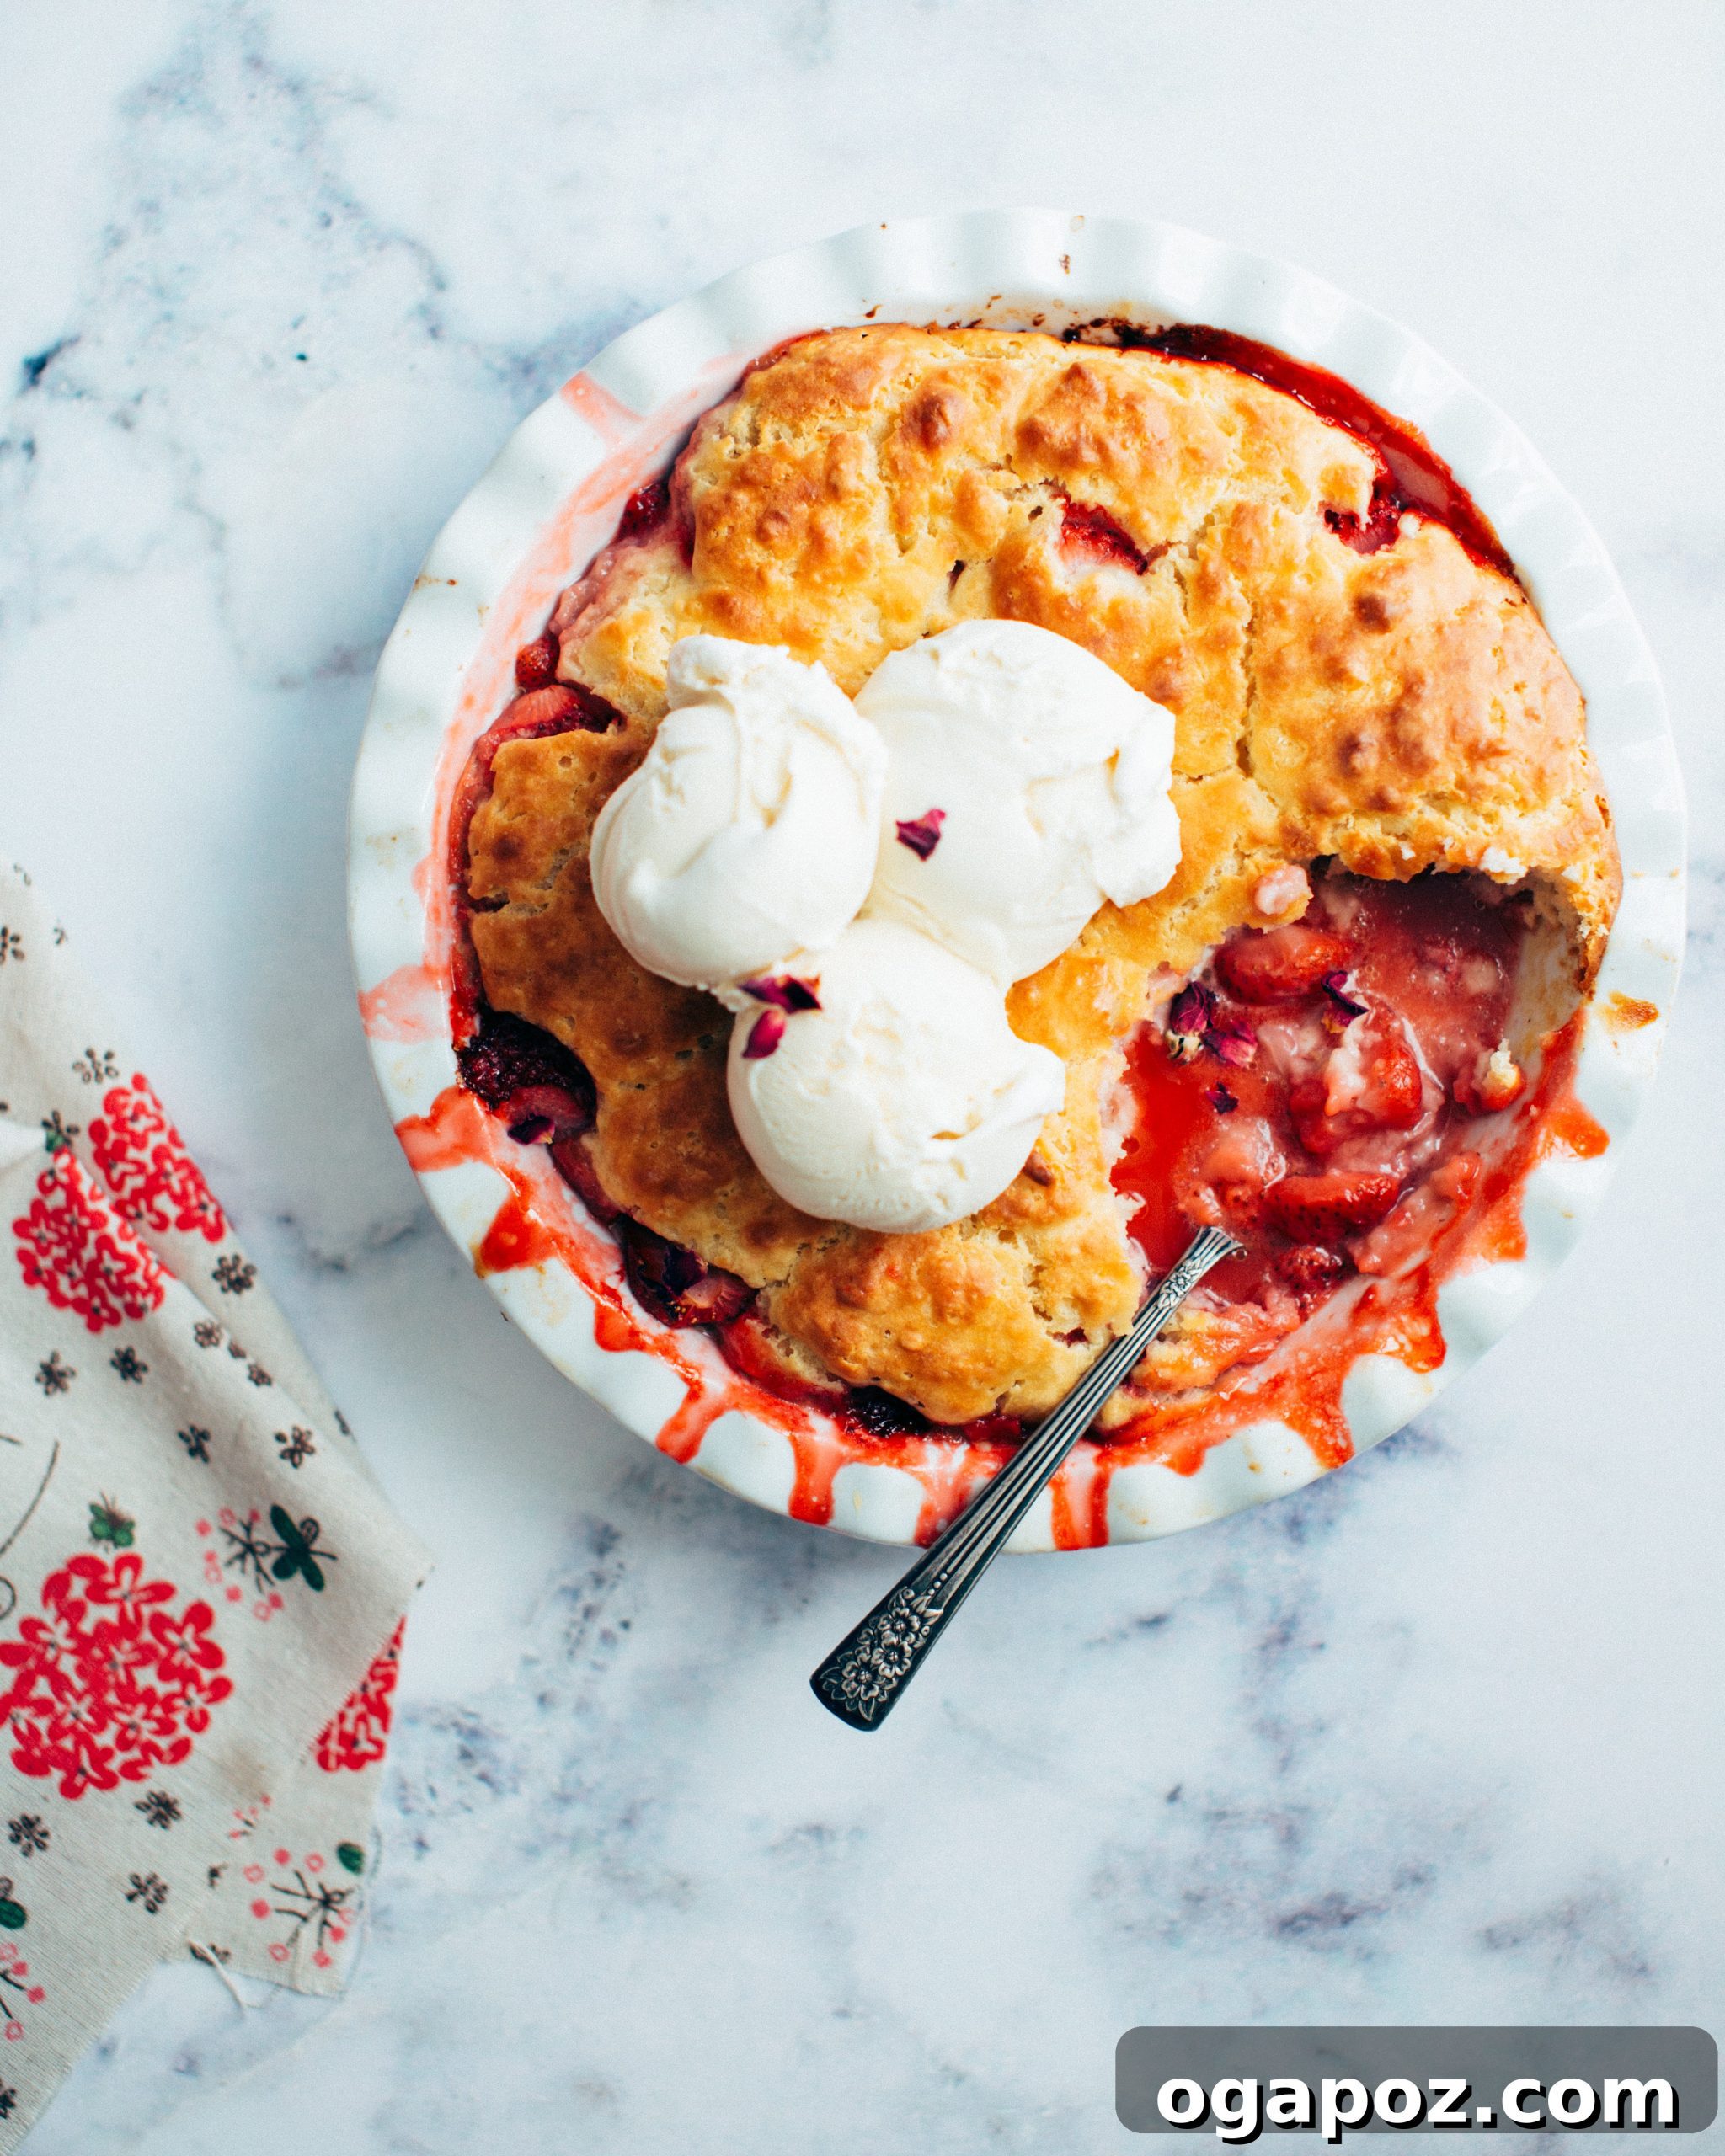
At its core, strawberry cobbler is a classic dessert where fresh or frozen strawberries are baked under a sweet, doughy topping, transforming into a warm, fruity, and deeply comforting treat. But this particular **easy strawberry cobbler recipe** is more than just a standard rendition; it’s a unique culinary gem that promises to stand out from other cobbler recipes you’ve tried. We’ve meticulously balanced the vibrant sweetness and tartness of juicy strawberries with a light, remarkably buttery biscuit-like topping. The result is an irresistible symphony of flavors and textures that will have everyone asking for seconds.
One of the key elements that makes this **homemade strawberry cobbler** truly special is the ingenious use of a small amount of all-purpose flour in the strawberry filling. This simple addition works wonders, gently thickening the fruit juices as they cook, creating a luscious, pie-like consistency without the need for cornstarch. This means a perfectly spoonable, rich fruit base that clings beautifully to the tender biscuit topping. The topping itself is a masterpiece of rustic baking – golden brown, subtly crisp on top, and wonderfully soft underneath, soaking up all the delicious fruit juices.
Whether you consider yourself a cobbler connoisseur or you’re venturing into the delightful world of fruit desserts for the very first time, this **easy strawberry cobbler recipe** is a must-try. Its straightforward preparation, combined with its exceptional taste and comforting appeal, ensures it will not disappoint. It’s the kind of dessert that feels both gourmet and homey, perfect for any occasion from a casual family dinner to a festive celebration. Prepare to fall in love with its simplicity and extraordinary flavor profile.
Unpacking the Charm: What Exactly Makes a Dessert a Cobbler?
The term “cobbler” often evokes images of rustic, homely goodness, and rightly so. A cobbler is a beloved type of baked dessert that characteristically features a delightful fruit filling—think luscious berries, sweet peaches, or crisp apples—generously topped with a tender, doughy crust. This topping can vary, but it’s typically made from biscuits or a simple cake batter, giving the dessert its signature appearance and texture.
Once assembled, the cobbler is baked until the topping turns a beautiful golden brown and the fruit filling underneath becomes wonderfully hot and bubbly, releasing its aromatic juices. The name “cobbler” itself is said to originate from the way the dollops or pieces of biscuit or cake topping resemble uneven “cobblestones” on a quaint old street. This visual charm is part of what makes cobblers so appealing; they are meant to look invitingly rustic, rather than perfectly manicured.
Cobbler vs. Pie: Understanding the Key Differences
While both pie and cobbler are cherished fruit-filled desserts, they possess distinct characteristics that set them apart. Understanding these differences helps appreciate the unique qualities of each.
A **pie** is traditionally constructed with a bottom crust that fully encloses the fruit filling, and often a matching top crust, or a decorative lattice. This pastry shell, usually made from flour, fat (like butter or shortening), and water, is rolled out into thin, flaky layers. Pies are typically baked in a specific pie dish or tin, resulting in a dessert where the filling is completely encased, with a tender yet crisp pastry protecting its contents.
In contrast, a **cobbler** celebrates a more open and less formal structure. It features a rich fruit filling that is topped with a biscuit-like dough or cake batter. Unlike pies, cobblers are rarely fully enclosed. The fruit filling remains visible around the edges of the topping, allowing its vibrant color and bubbling juices to peek through. The topping for a cobbler is generally thicker and more substantial than a pie crust, often dropped by spoonfuls onto the fruit, hence the “cobblestone” appearance. Cobblers are incredibly versatile and can be baked in a variety of dishes, including a traditional baking dish, a cast-iron skillet, or even charming individual ramekins. This difference in crust and construction lends cobblers their signature tender, cake-like topping that beautifully soaks up the sweet, bubbly fruit juices, offering a distinct textural experience from the flakiness of a pie.
Gather Your Ingredients to Make the Best Strawberry Cobbler
To embark on your journey to creating a truly delightful **homemade strawberry cobbler** with its signature tender biscuit topping, ensure you have these fresh and essential ingredients ready. Each component plays a crucial role in building the layers of flavor and texture that make this dessert so special:
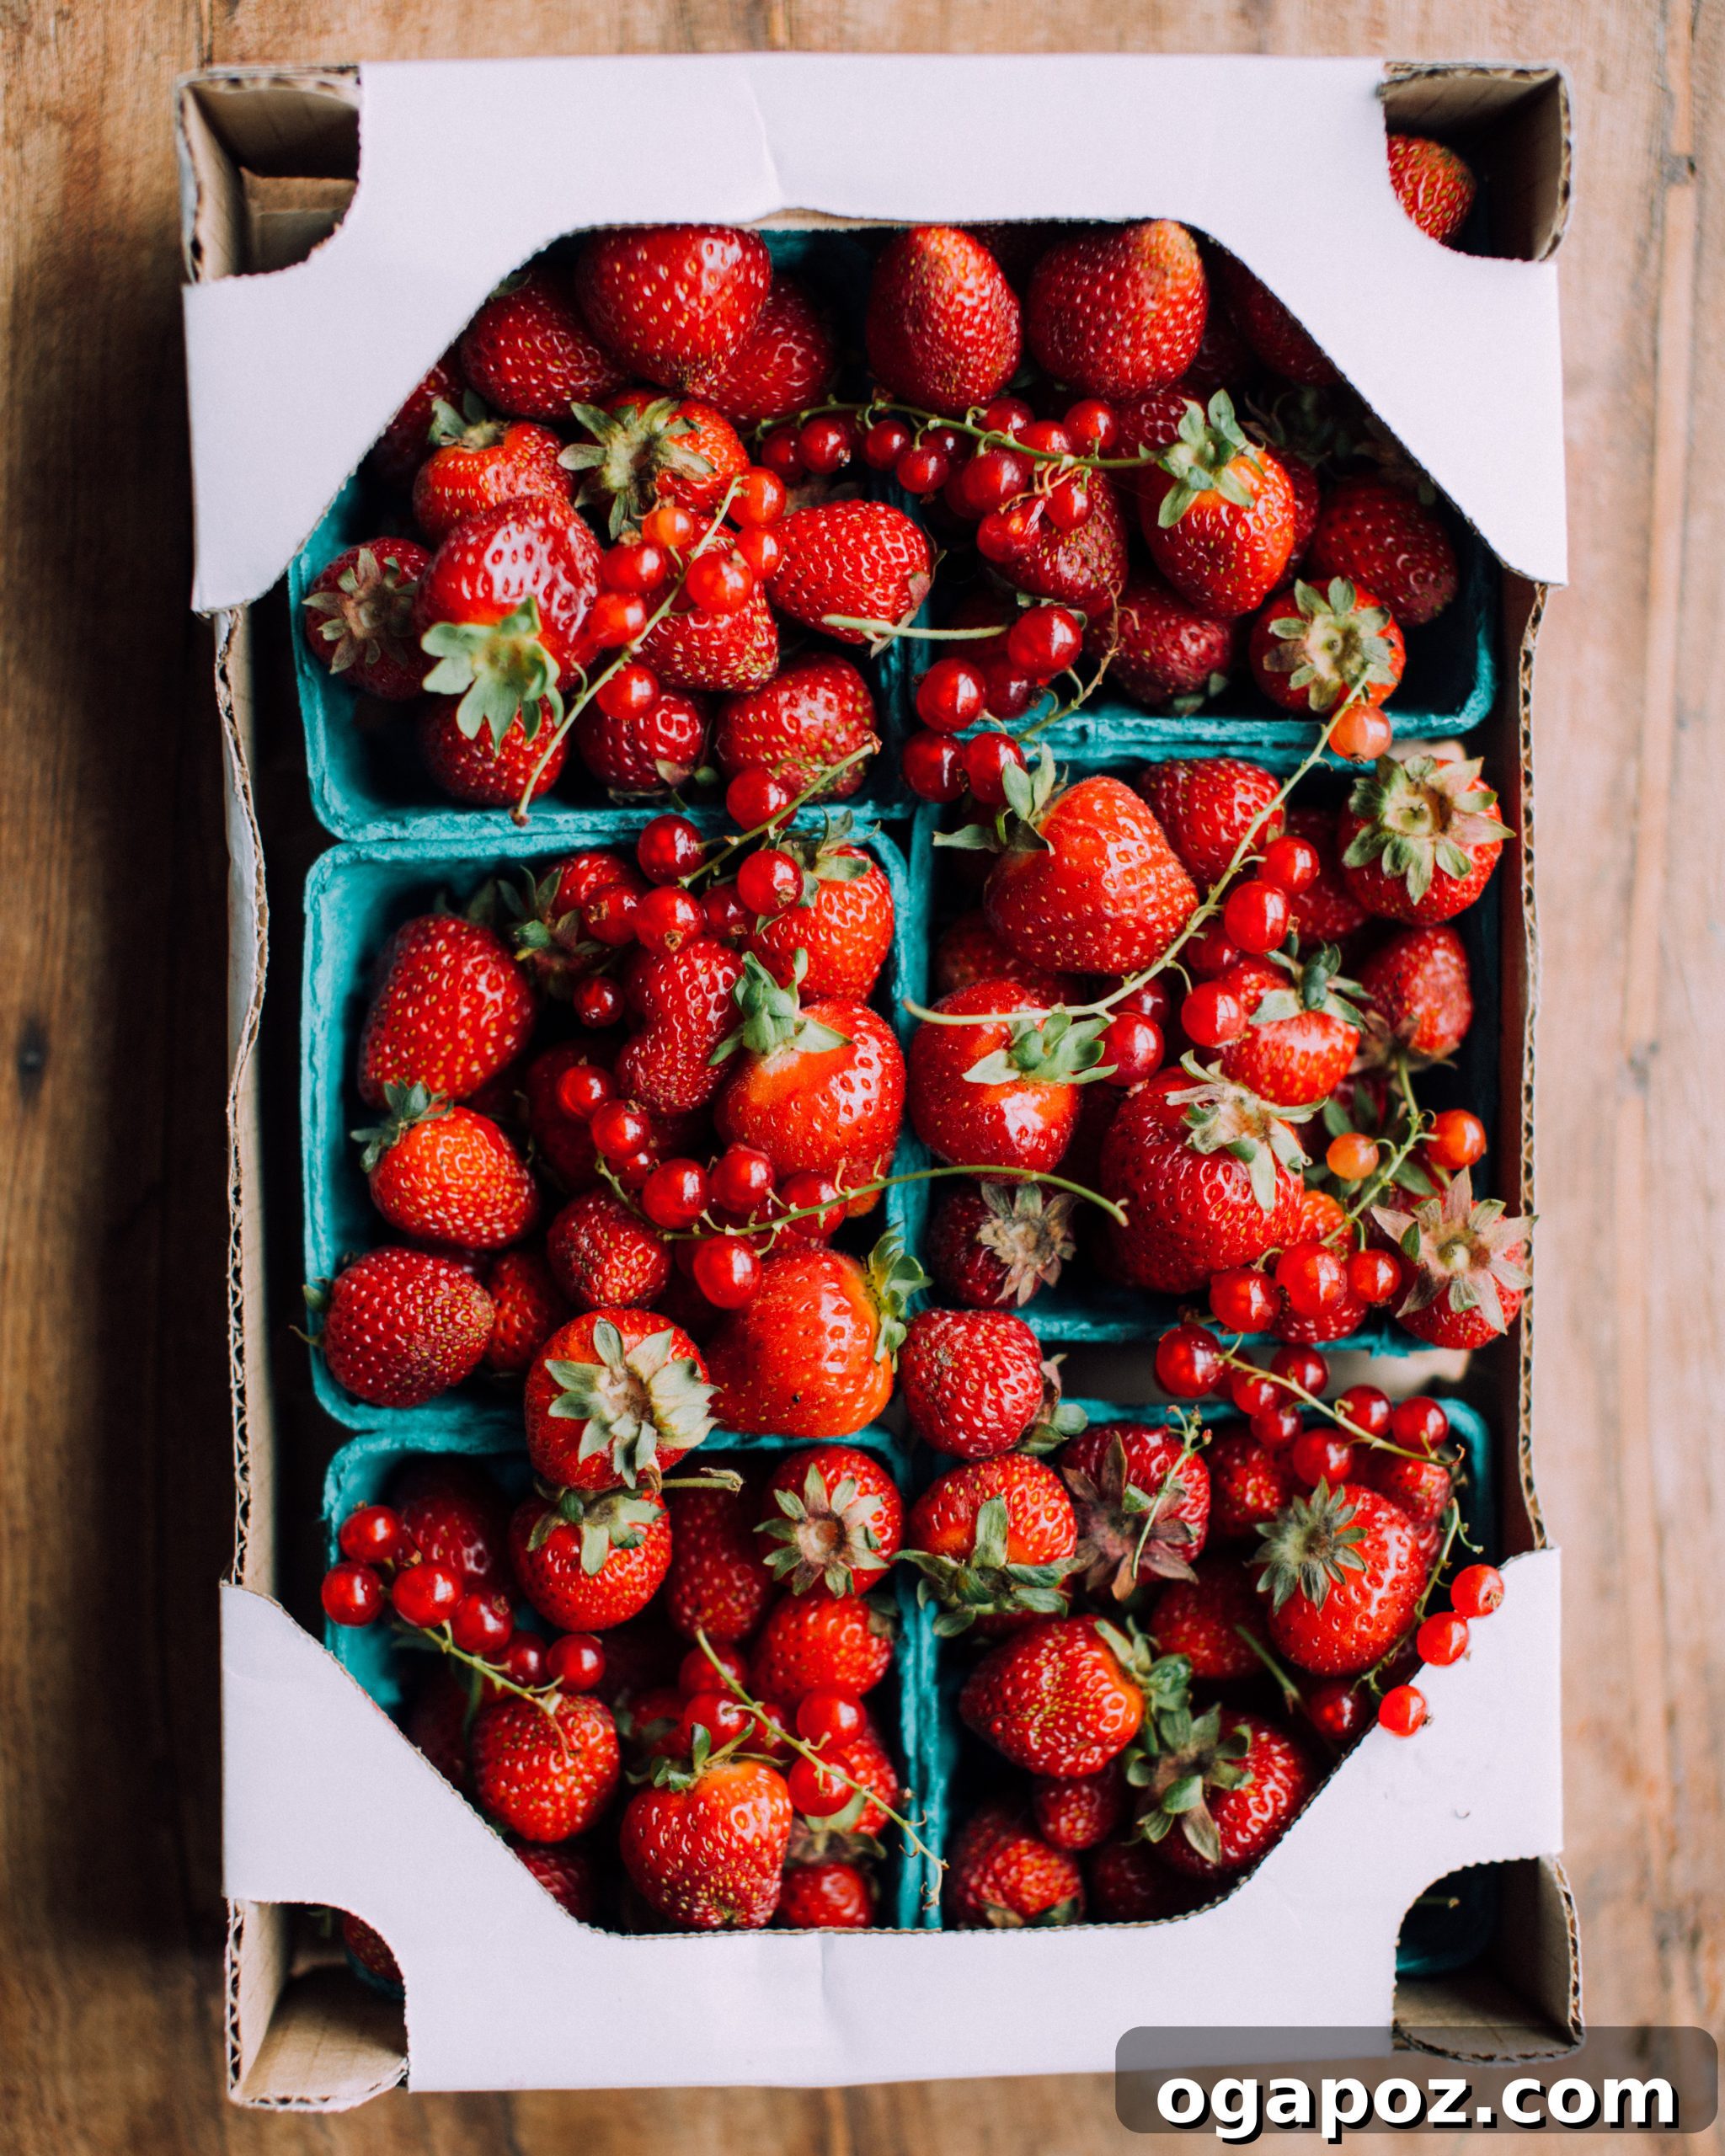
- Fresh Strawberries: The undeniable star of our dish! You’ll need about 1 ½ lbs of plump, ripe strawberries. For best results, choose berries that are vibrant red, firm, and fragrant. They should be hulled (stems removed) and then halved to ensure they release their juices evenly and cook down beautifully into that luscious, syrupy filling. While fresh is ideal, frozen strawberries (thawed and drained) can also be used in a pinch, though you might need a touch more flour to account for extra moisture.
- Granulated Sugar: This sweetens the strawberries, balancing their natural tartness and helping them break down and create that irresistible syrupy jamminess during baking. It also contributes to the golden-brown crust of the topping.
- All-Purpose Flour: A dual-purpose ingredient! In the fruit filling, just a couple of tablespoons of flour act as a natural thickener, ensuring the strawberry juices achieve a perfect, not-too-runny, pie-like consistency without the need for cornstarch. In the topping, flour provides the structural base for our light and fluffy biscuit-like crust.
- Cold Butter: Essential for the biscuit topping. Using **cold butter** is critical! When grated and mixed with the dry ingredients, it creates small pockets of butter that melt during baking, producing a wonderfully tender and crumbly texture. Ensure your butter is well-chilled before grating for the best results.
- Baking Powder: This leavening agent is the secret to a fluffy and well-risen biscuit topping. It reacts during baking to create air bubbles, giving the topping its signature light and airy quality.
- Coarse Salt: A small but mighty ingredient in the topping. Salt enhances the overall flavor profile, balancing the sweetness and bringing out the rich, buttery notes of the biscuit.
- Milk: The liquid component for our biscuit topping. Milk brings the dry ingredients together, forming a light, lumpy dough. Any full-fat or even plant-based milk (like almond or oat) can work well, contributing to the topping’s tender texture.
How to Make Strawberry Cobbler: Step-by-Step Directions for a Perfect Dessert
One of the most appealing aspects of this **easy strawberry cobbler recipe** is its straightforward preparation. You don’t need to be an expert baker to achieve fantastic results. Follow these simple steps, and you’ll be enjoying a warm, fruity, and comforting dessert in no time.
- Prepare Your Oven and Baking Setup: Before you even begin mixing ingredients, it’s crucial to properly preheat your oven to 400ºF (200ºC). This ensures even baking and a perfectly golden topping. Additionally, place a parchment-lined baking sheet on the lowest rack of your oven. This clever trick serves as a safeguard, catching any delicious, bubbling fruit juices that might overflow during baking, saving you from a sticky mess to clean later.
Crafting the Irresistible Cobbler Topping
- Assemble the Buttery Biscuit Topping: In a large mixing bowl, combine the dry ingredients for your topping: the all-purpose flour, baking powder, and coarse salt. Whisk them together thoroughly until they are well combined. Next, using the large holes of a box grater, grate the cold butter directly over this flour mixture. This technique helps distribute the butter evenly and creates tiny pockets that result in a tender, flaky topping. Gently whisk again to incorporate the butter into the flour, making sure it’s coated. Finally, pour in the milk and, with a very light hand, fold it into the dry ingredients. Be careful not to overmix! The mixture should be wonderfully lumpy, resembling a rustic biscuit dough. While lumps are encouraged, ensure no pockets of dry flour remain visible. Overmixing will develop the gluten too much, leading to a tough topping.
Creating the Luscious Strawberry Cobbler Filling
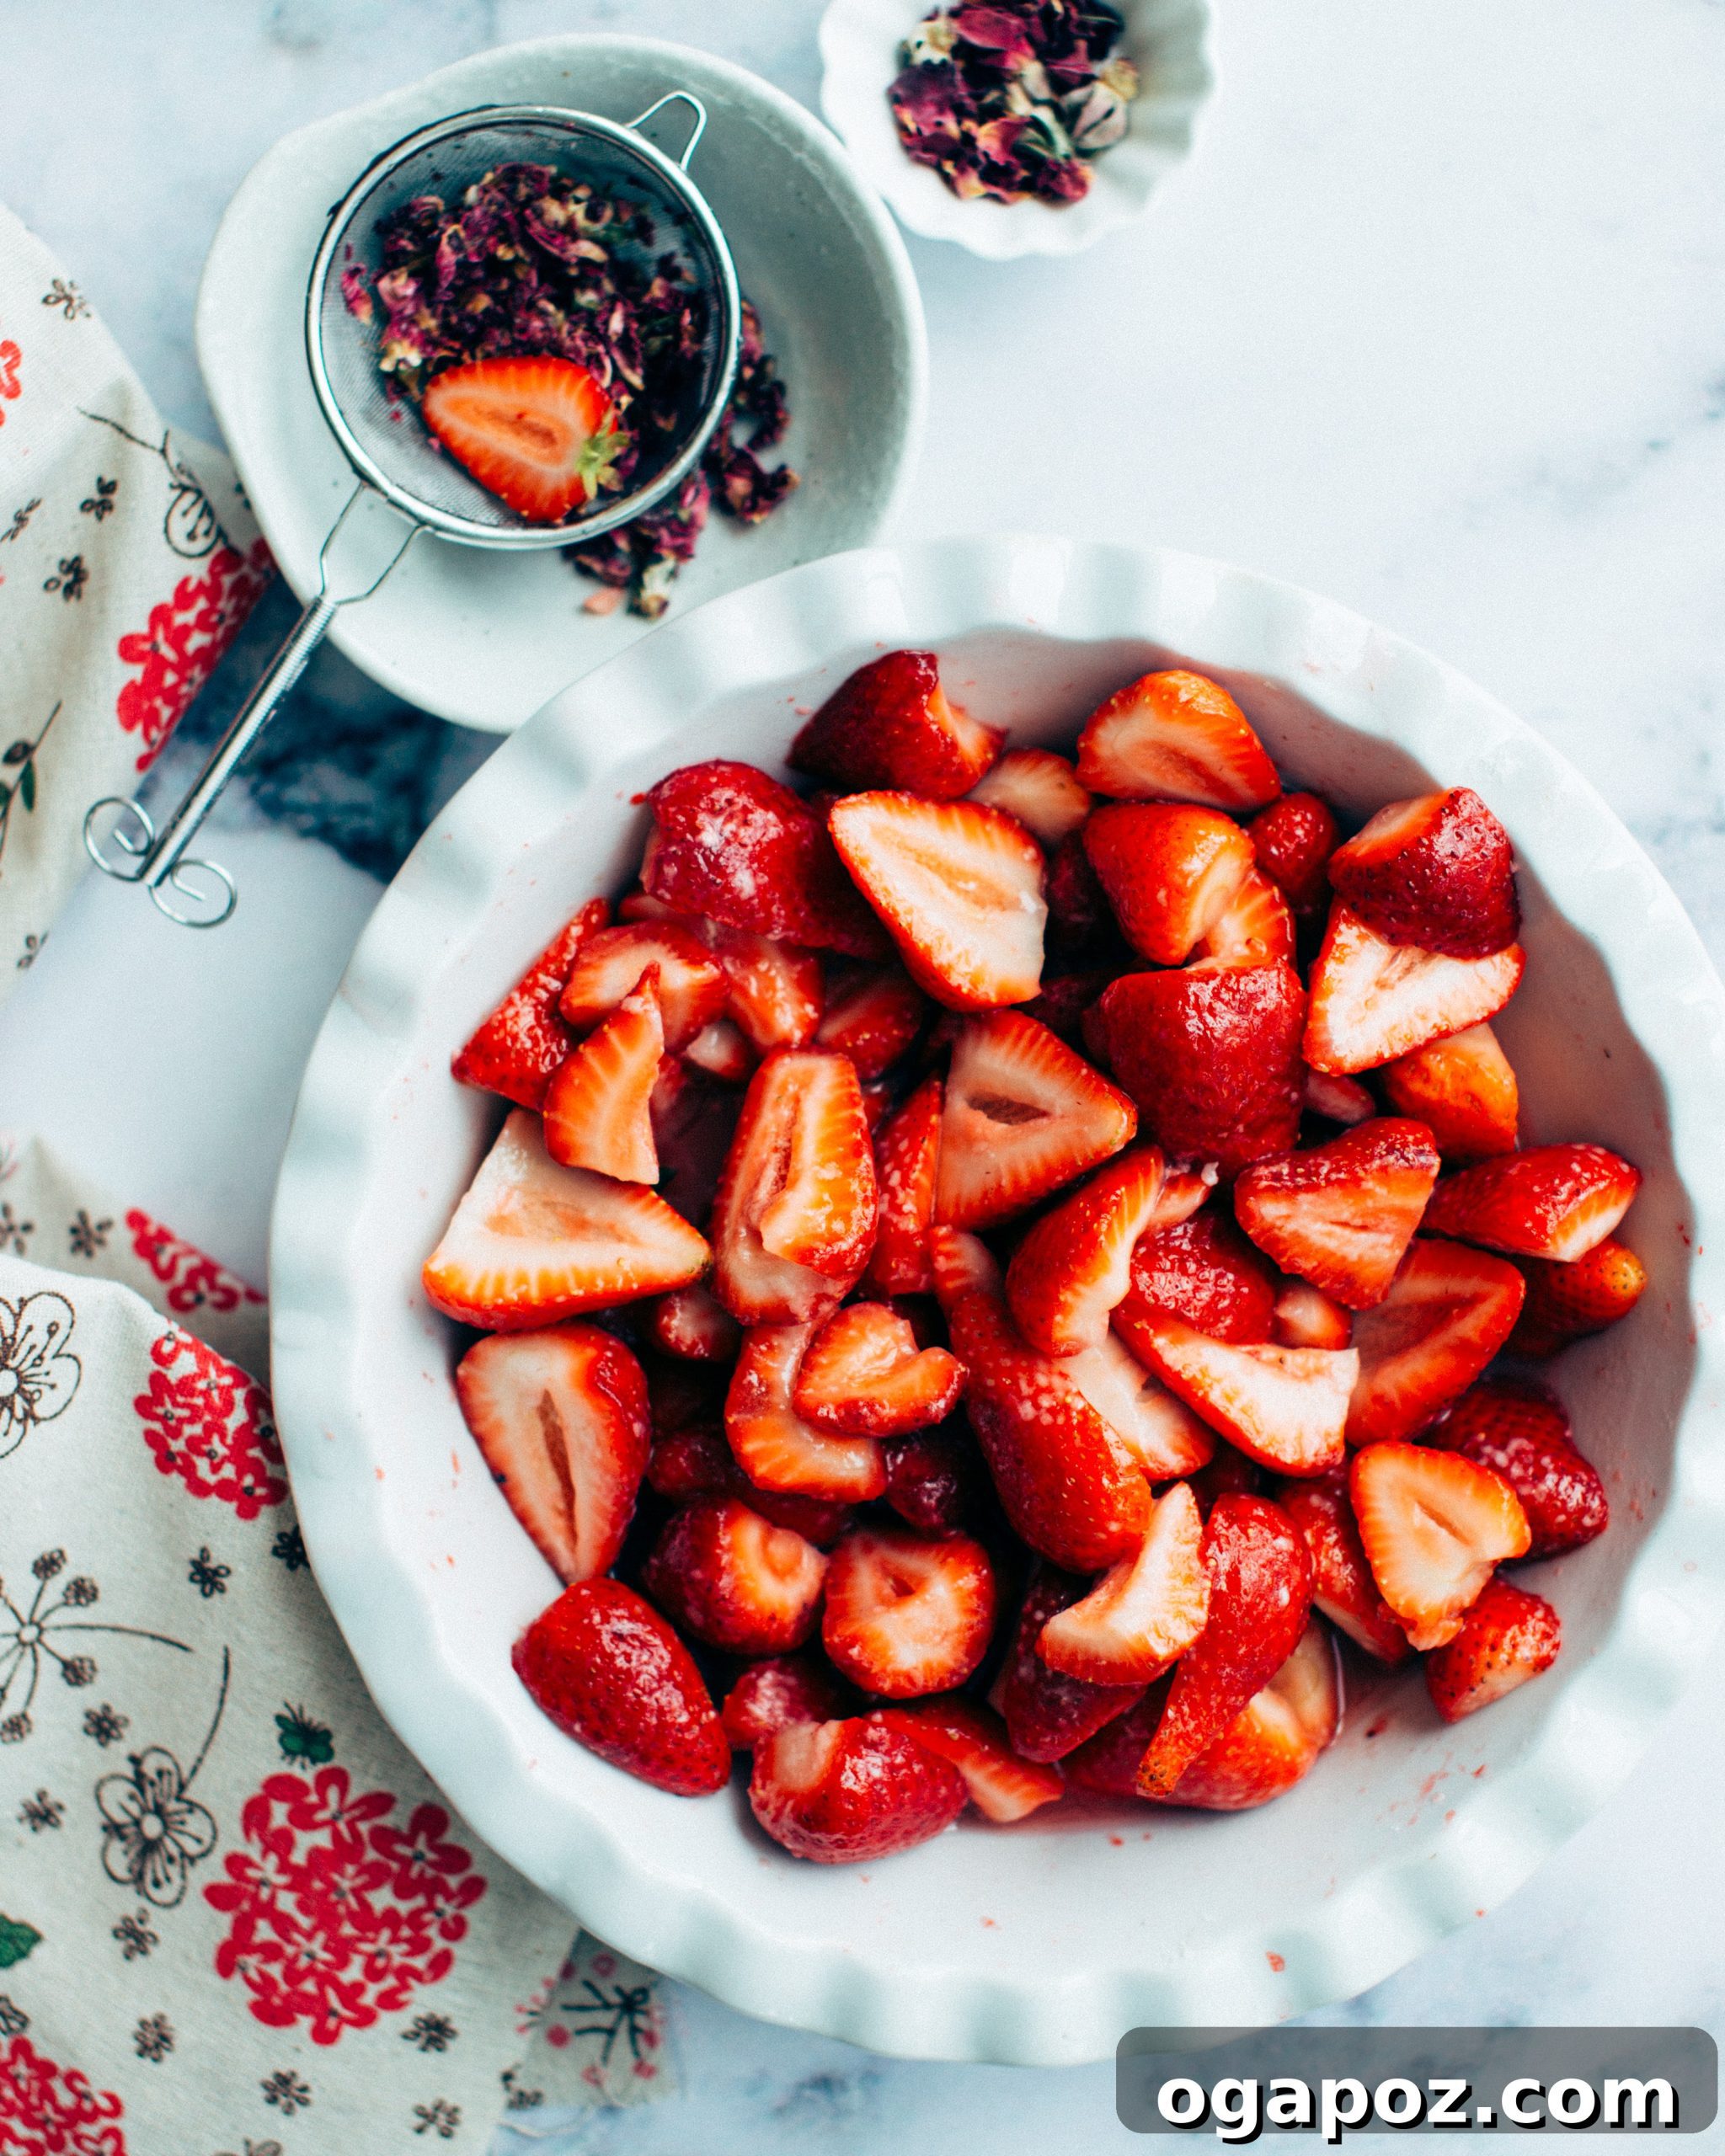
- Prepare the Vibrant Strawberry Filling: Now for the star of the show! In a 1 ½ quart baking dish (a deep pie dish works exceptionally well for this, as it allows plenty of room for the fruit to bubble and the topping to rise), combine your hulled and halved fresh strawberries with the granulated sugar and the specified amount of all-purpose flour. Toss these ingredients gently but thoroughly until the strawberries are evenly coated. The sugar will begin to draw out the natural juices from the berries, and the flour will act as a thickening agent, ensuring a beautifully consistent filling once baked.
Assembling and Baking Your Masterpiece
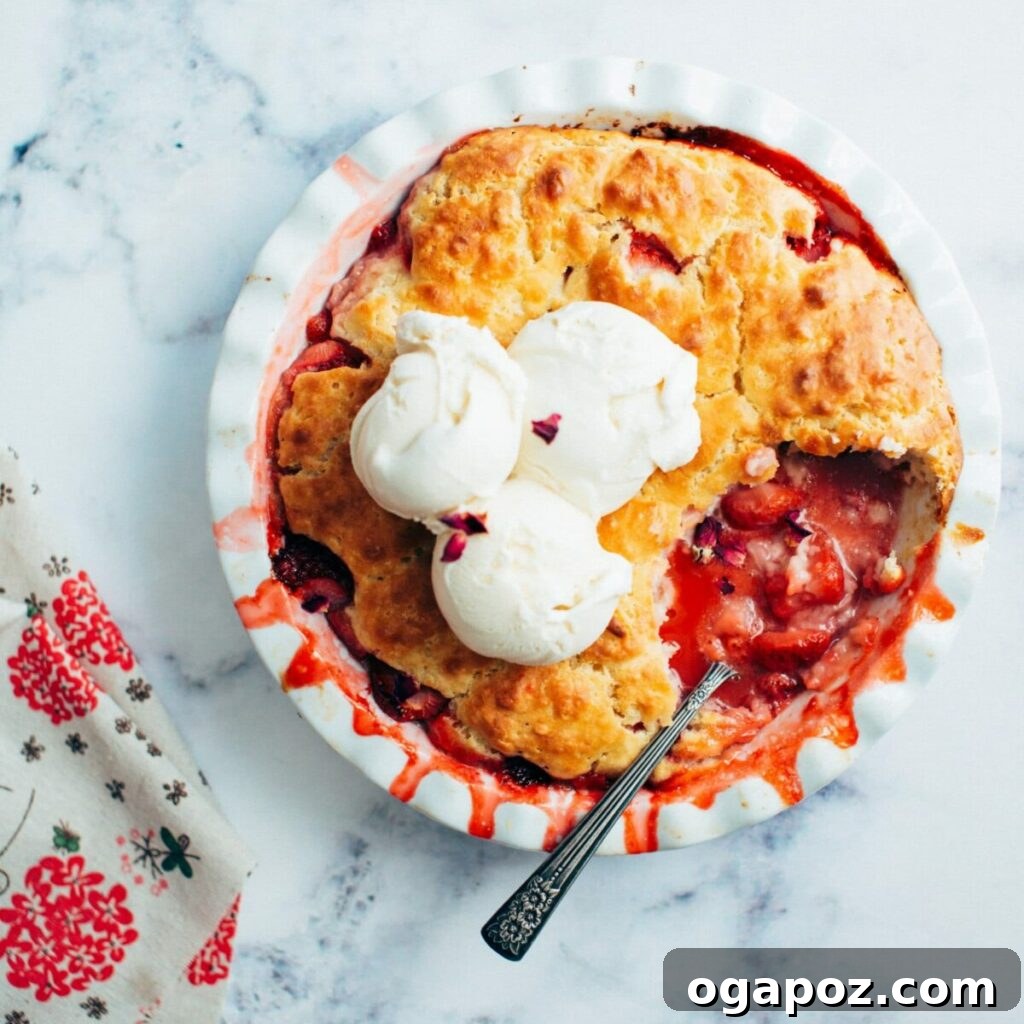
- Layer the Topping and Bake to Perfection: Once your filling and topping are ready, it’s time to bring them together. Generously spoon dollops of your prepared biscuit topping over the strawberry mixture in the baking dish. Don’t worry about spreading it perfectly evenly; the rustic, uneven look is part of cobbler’s charm. Place the baking dish onto your prepared, parchment-lined baking sheet on the lowest oven rack. Bake for approximately 30 minutes. You’ll know it’s done when the filling is vigorously bubbling around the sides of the dish, and the biscuit topping has turned a beautiful golden brown and looks delightfully puffed up. The bubbling indicates that the fruit is cooked through and its juices have thickened beautifully.
- Serve and Savor Your Delicious Creation: The hardest part is waiting! Once your cobbler emerges from the oven, let it cool for a few minutes on a wire rack. While tempting to dig in immediately, this brief cooling period allows the filling to set slightly and intensifies the flavors. Serve your warm **homemade strawberry cobbler** with your favorite accompaniments. A generous scoop of vanilla ice cream is a classic choice, melting into the warm fruit. Alternatively, a dollop of freshly whipped cream or a drizzle of honey makes for a perfect finish. Enjoy every comforting bite!
Essential Tools for This Easy Strawberry Cobbler Recipe
Having the right kitchen tools makes the baking process even more enjoyable and efficient. Here’s the essential equipment you’ll need to effortlessly whip up this delightful **easy strawberry cobbler recipe**:
- A Baking Dish: Choose a sturdy, oven-safe baking dish, ideally a 1 ½ quart size. A deep pie dish works perfectly, allowing ample space for the fruit filling and the rising biscuit topping. If you’re feeling rustic, a cast iron skillet is also an excellent alternative that provides fantastic heat distribution and a charming presentation. Just make sure it’s a dish you love and that’s free from chips or cracks!
- A Large Mixing Bowl: The bigger, the better! A spacious bowl is crucial for comfortably whisking together your dry ingredients and gently folding in the milk for the biscuit topping without making a mess. It gives you plenty of room to work, minimizing spills and making the process a breeze.
- A Whisk: Your trusty companion for aeration and combining. A good whisk ensures your dry ingredients are evenly distributed, leading to a consistent and delicious biscuit topping. Channel your inner superhero and whisk those ingredients into submission!
- A Grater: Specifically, a box grater with large holes. This is the secret weapon for grating cold butter into your biscuit topping. Grating the butter ensures it’s finely and evenly distributed throughout the flour mixture, which is key to achieving that tender, flaky texture.
- Measuring Cups: Precision is important in baking, especially for the dry ingredients. Accurate measuring cups ensure you get the perfect ratio for both your fruit filling and your biscuit topping.
- Measuring Spoons: For those smaller, but equally crucial, quantities like baking powder and salt. Eyeballing it might be fun for a “mystery dish,” but for consistent results, measuring spoons are your best friend.
- Oven Mitts: Safety first, always! Protect your hands from the hot oven and baking dish when retrieving your beautifully baked cobbler.
Now that you’ve gathered your culinary arsenal, you’re perfectly equipped to tackle this **homemade strawberry cobbler** and create a truly memorable dessert!
Elevate Your Dessert: How to Serve Strawberry Cobbler
You’ve baked your scrumptious **easy strawberry cobbler** to golden perfection, and now comes the delightful moment of serving. While it’s utterly delicious on its own, there are countless ways to enhance the experience and make it an even more memorable dessert. Here are some ideas to help you serve your **homemade strawberry cobbler** with flair:
- The Classic Warm with Vanilla Ice Cream: This is arguably the most popular and deeply satisfying way to enjoy strawberry cobbler. Serve it fresh out of the oven, still wonderfully hot and bubbling, topped with a generous scoop of high-quality vanilla ice cream. The cold, creamy ice cream slowly melts into the warm, syrupy fruit filling, creating a luxurious, dreamy sauce that coats every bite. The contrast in temperature and texture is pure bliss.
- Simply Elegant with Whipped Cream or Honey: If you prefer a lighter touch or wish to serve your cobbler at room temperature, a dollop of freshly whipped cream is a perfect accompaniment. Its airy texture and subtle sweetness complement the rich fruit without overwhelming it. For an extra touch of natural sweetness and a beautiful sheen, a light drizzle of golden honey or pure maple syrup works wonders.
- Fancy It Up: Homemade Lemon-Limoncello Whipped Cream: For those special occasions or when you’re feeling a bit fancy, elevate your whipped cream. Make your own at home and infuse it with a hint of bright lemon zest for a fragrant citrus note that beautifully complements strawberries. For an adult twist, add a splash of Limoncello liqueur to the whipped cream for a sophisticated, zesty kick. Top your cobbler with this decadent creation and garnish with fresh mint leaves for a vibrant pop of color and an additional layer of freshness.
- A Delightful Brunch Affair: Who says cobbler is only for dinner? Transform your strawberry cobbler into a fantastic brunch item by serving it alongside a spoonful of plain Greek yogurt. The tanginess of the yogurt provides a wonderful counterpoint to the sweetness of the fruit, making it a more balanced and hearty morning twist on a classic dessert. A sprinkle of granola adds a lovely crunch.
- Pair with Fresh Berries and Herbs: Enhance the natural beauty and flavor by adding a few fresh strawberry slices or whole berries on top of each serving. A sprig of fresh basil or thyme, surprisingly, can add an unexpected and delightful herbal note that pairs wonderfully with strawberries.
However you choose to present it, your **easy strawberry cobbler** is guaranteed to be a hit. Enjoy experimenting with these serving suggestions to find your favorite!
Make Ahead and Storage Tips: Prep Now, Enjoy Later
One of the beauties of this **homemade strawberry cobbler** is its versatility when it comes to preparation and storage. Whether you’re planning a busy week, preparing for a party, or simply want to savor your delicious cobbler over a few days, these tips will help you make the most out of your dessert. Remember, cobblers are wonderfully forgiving and taste fantastic served warm or at room temperature.
- Prep in Advance for Convenience: To save time on baking day, you can prepare certain components ahead of time. Chop your strawberries and keep them stored in an airtight container in the refrigerator for up to 24 hours. Separately, you can also whisk together the dry ingredients for the biscuit topping (flour, baking powder, salt) and even grate the cold butter, storing them in separate airtight containers in the fridge. However, it’s highly recommended to mix the milk into the dry ingredients and butter for the topping just before baking. This ensures the best texture for your biscuits, as the leavening agents start working once wet.
- Smart Storage for Leftovers: If you happen to have any leftover cobbler (a rare but possible occurrence!), proper storage is key to maintaining its quality.
- Room Temperature: For immediate enjoyment within a day, cover the cobbler tightly with plastic wrap and leave it on the counter. The environment of the refrigerator can dry out the delicate biscuit topping much faster than leaving it at room temperature (just think how quickly bread goes stale in the fridge!).
- Refrigeration: If you plan to store it for longer than 24 hours, you’ll need to refrigerate it. Transfer any leftovers to an airtight container or cover the baking dish tightly with plastic wrap. It will keep well in the refrigerator for 4-5 days. Be aware that the biscuit topping might lose some of its crispness and become softer, but the flavors will still be delicious.
- Freeze for Extended Enjoyment: This **easy strawberry cobbler** freezes beautifully, allowing you to enjoy a taste of summer months later.
- To Freeze Baked Cobbler: Allow the baked cobbler to cool completely to room temperature. Cover the dish tightly with several layers of plastic wrap, followed by a layer of aluminum foil. You can also transfer individual portions to freezer-safe containers. It will keep in the freezer for up to three months.
- To Freeze Unbaked Cobbler: You can also prepare the cobbler up to the point of baking. Assemble the fruit filling and topping in a freezer-safe baking dish. Cover tightly as above. When ready to bake, thaw overnight in the refrigerator, then bake as directed, possibly adding 5-10 minutes to the baking time.
- Reheating Your Cobbler:
- Oven Reheating: For the best results and to revive the topping’s crispness, reheat individual servings or the entire cobbler in a preheated oven at 350°F (175°C) for 10-15 minutes, or until thoroughly warmed through. If the topping is browning too much, you can lightly tent it with foil.
- Microwave Reheating: For a quick reheat, individual portions can be gently warmed in the microwave for 30-60 seconds, or until warm. Be mindful that the topping may become softer in the microwave.
With these smart storage and reheating tips, your **homemade strawberry cobbler** can be enjoyed at its peak, whenever the craving strikes!
Creative Twists: Strawberry Cobbler Variations and Substitutions
While our classic **easy strawberry cobbler recipe** is a perfect stand-alone dessert, its simple structure makes it incredibly adaptable to various flavors and dietary needs. Don’t hesitate to get creative and experiment with these delicious variations and substitutions to craft your own unique version of this beloved classic!
- Strawberry Rhubarb Cobbler: A match made in heaven! For a delightful tart-sweet combination, try swapping out half of the strawberries for an equal amount of diced rhubarb in the filling. The rhubarb adds a wonderful tang and unique texture that complements the strawberries beautifully. (If you’re a fan of rhubarb, explore other recipes like Rhubarb Cookies or Rhubarb Muffins for more inspiration.)
- Mixed Berry Cobbler: Embrace the bounty of summer berries! Instead of using only strawberries, create a colorful and complex flavor profile by using a mix of your favorite berries. Combine strawberries with blueberries, raspberries, and blackberries for a truly vibrant and varied fruit filling. Each berry brings its own distinct sweetness and tartness to the party.
- Peach and Strawberry Cobbler: The soft, fragrant sweetness of peaches pairs wonderfully with the bright notes of strawberries. Add an equal amount of sliced fresh peaches along with the strawberries for a delicious, summery combination. You might want to slightly reduce the sugar if your peaches are very ripe.
- Gluten-Free Option: Making this cobbler gluten-free is simple! Substitute the all-purpose flour used in the biscuit topping with your favorite high-quality gluten-free all-purpose flour blend. Look for blends that are designed for baking and often contain a mix of different flours and starches for optimal texture. Ensure your baking powder is also gluten-free.
- Vegan Cobbler: To adapt this recipe for a vegan diet, simply make two key substitutions. Replace the dairy butter in the biscuit topping with a high-quality vegan butter alternative (often made from coconut, cashew, or avocado oil). For the milk, opt for your favorite plant-based milk, such as unsweetened almond milk, soy milk, or oat milk. These substitutions will ensure a delicious and dairy-free cobbler without compromising on taste or texture.
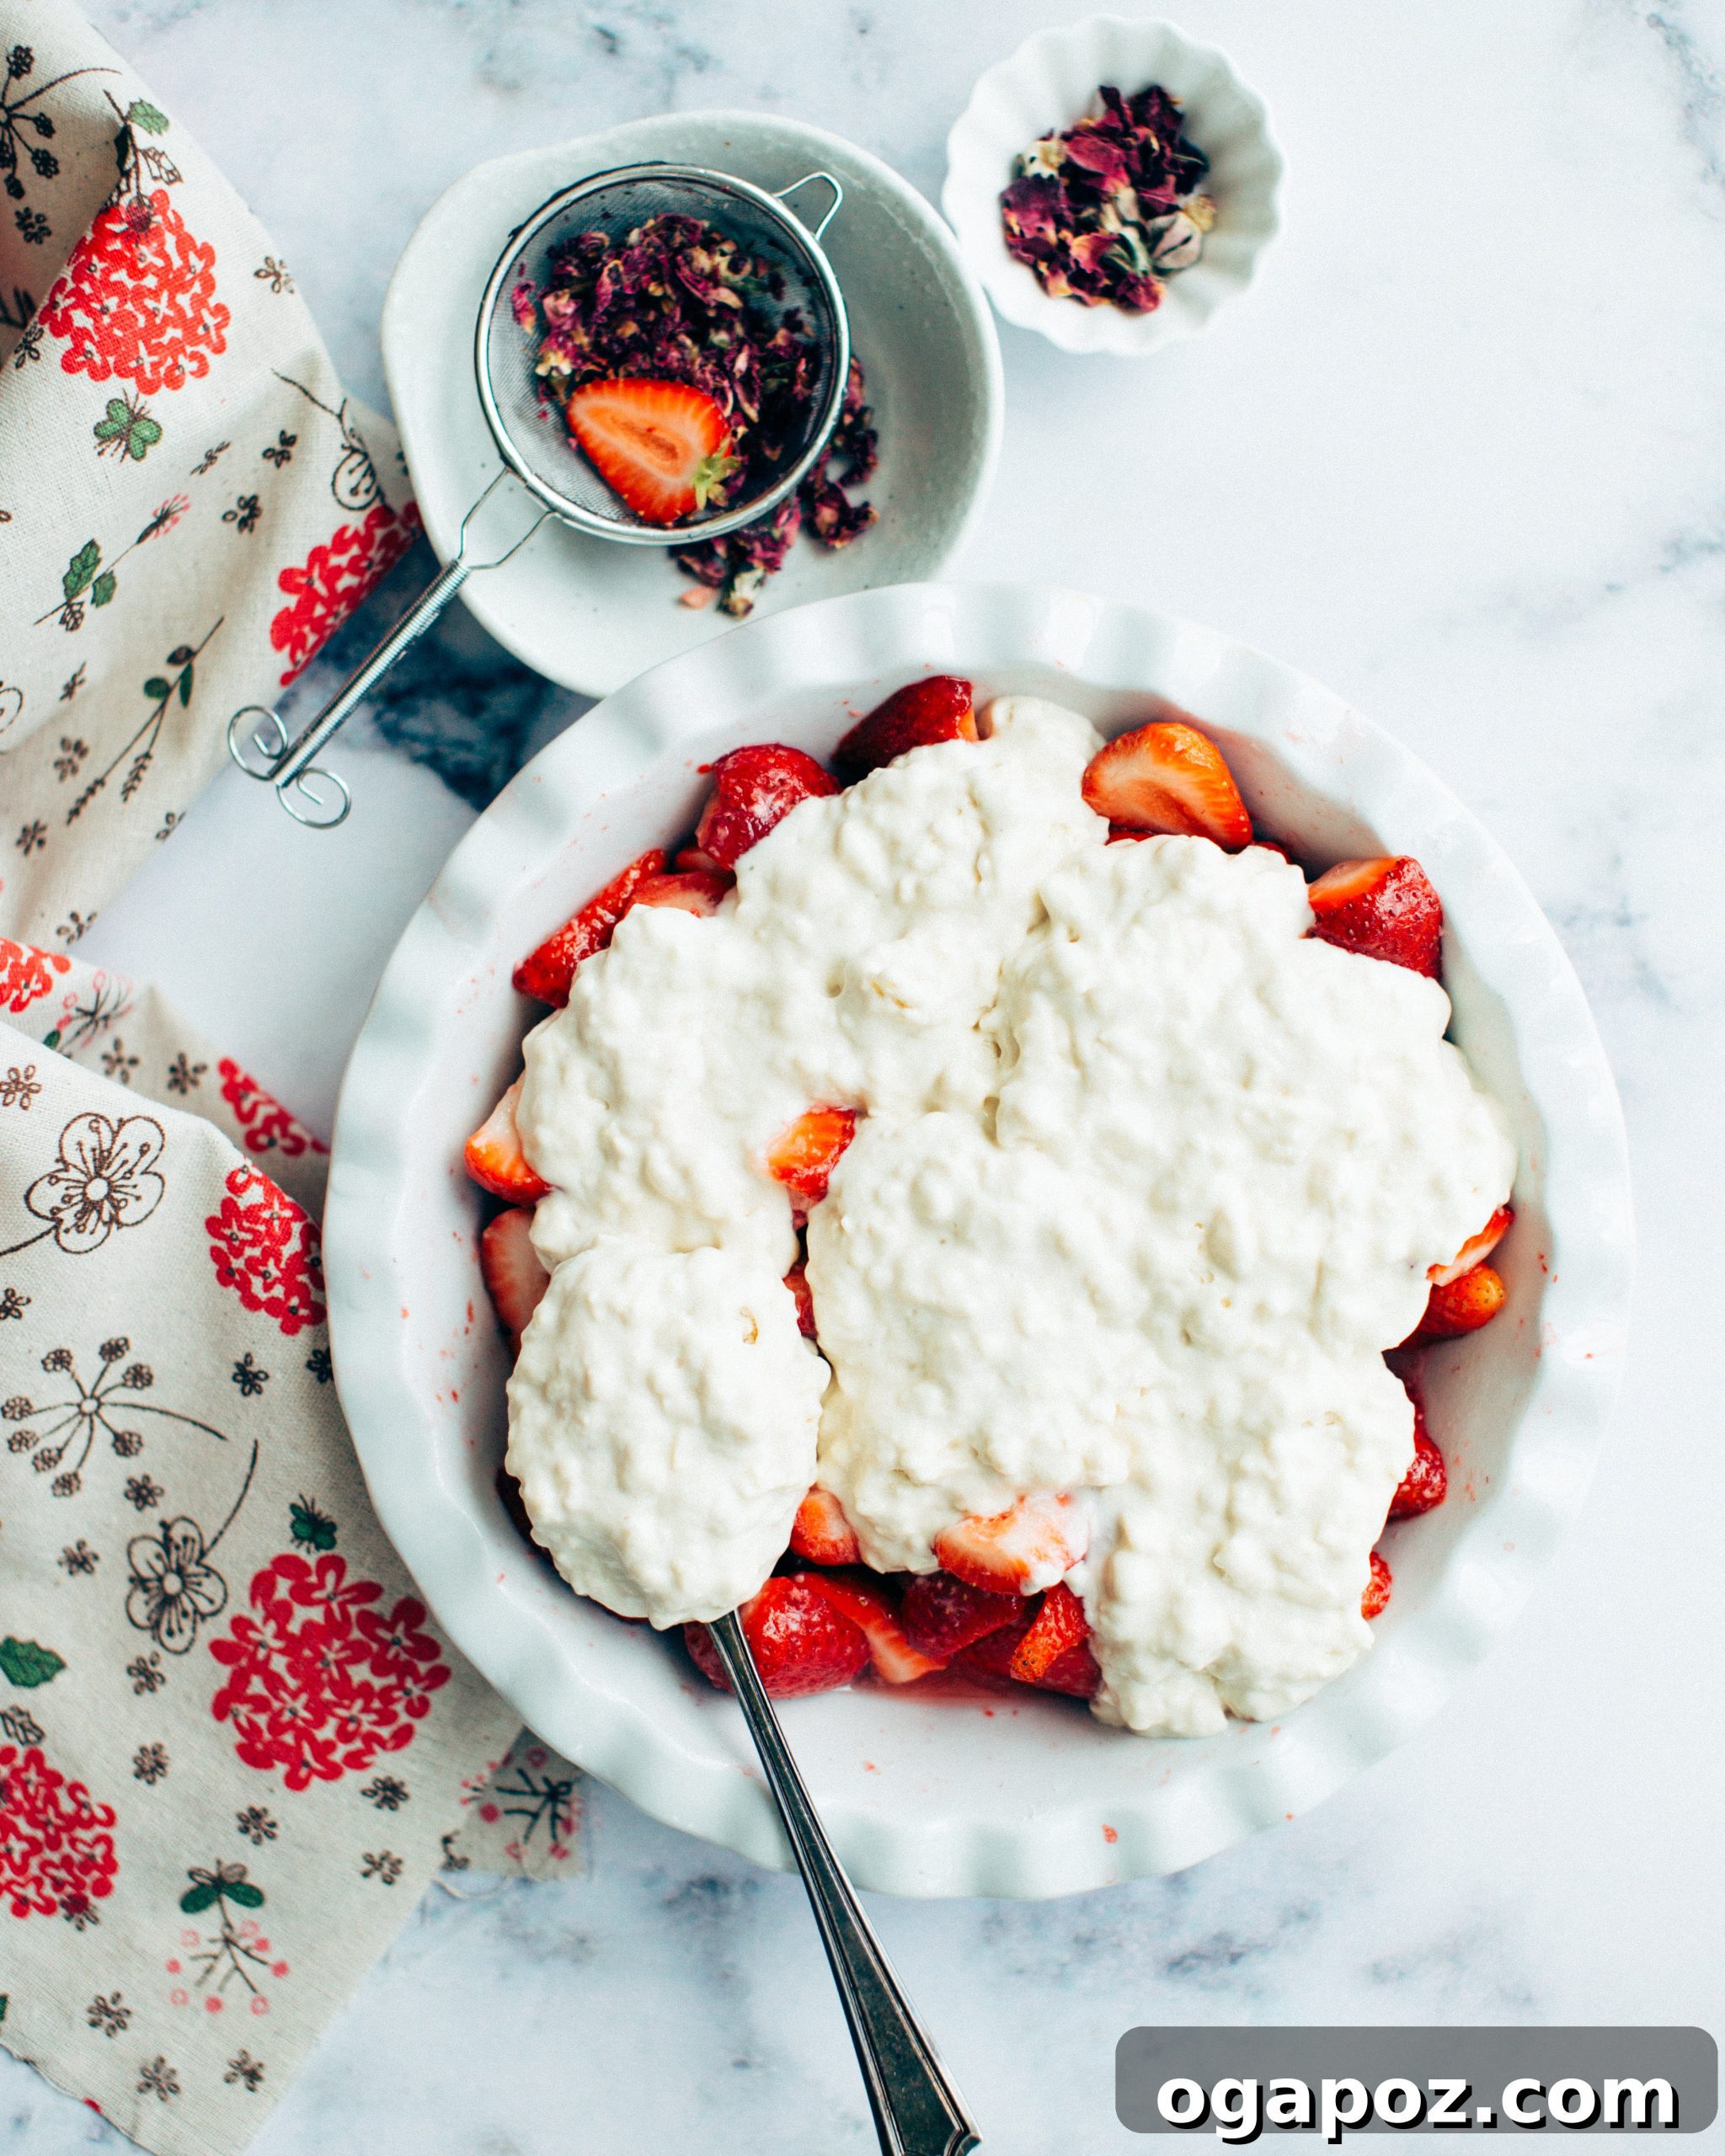
- Rose Cobbler: For an elegant and subtly floral twist, infuse your strawberry cobbler with the delicate essence of rose. Strawberry and rose are a classic flavor pairing that creates a sophisticated dessert.
- To Make a Strawberry Rose Filling: Instead of tossing the strawberries directly with sugar, begin by making a rose-infused syrup. In a small saucepan, dissolve the granulated sugar for the filling in ¼ cup of water over medium heat. Add 2 tablespoons of food-grade dried rose petals to the syrup. Let this mixture infuse gently for a minimum of 1 hour (or longer for a stronger flavor). Once infused, strain the syrup to remove the rose petals, and then pour this fragrant syrup over your flour-tossed strawberries before assembling.
- Spiced Cobbler: A pinch of spice can add warmth and depth. Try adding ¼ teaspoon of cinnamon or a tiny pinch of nutmeg to the strawberry filling, or even to the biscuit topping, for a cozy flavor profile.
- Citrus Zest Boost: Brighten up the flavors with citrus. Add 1-2 teaspoons of fresh lemon or orange zest to the strawberry filling before baking. The zest will enhance the fruit’s natural brightness.
Feel empowered to experiment with these combinations and ingredients. Each small change can lead to a new favorite version of this classic dessert, making it uniquely yours!
Frequently Asked Questions About Strawberry Cobbler
Cobbler crust is typically made from a relatively simple dough, often resembling a biscuit or cake batter. A basic recipe commonly includes all-purpose flour, granulated sugar for sweetness, baking powder for leavening, a touch of salt to enhance flavor, cold butter for richness and tenderness, and milk or buttermilk to bind the ingredients. These components are combined to form a soft dough that is then dropped or spread over the fruit filling before baking. Depending on personal preference or regional variations, some cobbler crusts might also incorporate eggs for a richer texture or additional seasonings like cinnamon or nutmeg for an aromatic boost.
The primary differences between pie crust and cobbler crust lie in their composition, texture, and method of preparation. Pie crust is generally made with flour, a high amount of cold fat (like butter or shortening), and minimal cold water. It is carefully rolled out into thin, flat layers that fully enclose the pie filling, either as a bottom crust, a top crust, or both. The goal of a pie crust is to be flaky, tender, and somewhat crisp. Cobbler crust, on the other hand, is typically more cake-like or biscuit-like in texture. It’s often made from a softer batter or dough that contains flour, sugar, baking powder, milk (or buttermilk), and a smaller proportion of fat than pie crust. This dough is usually spooned or dropped over the fruit filling. When baked, the cobbler topping forms a thicker, more substantial layer that is wonderfully tender and absorbs the juices from the fruit filling, offering a distinct, comforting texture different from a flaky pie.
A cobbler is defined by its distinct structure: a baked fruit dessert that features a luscious fruit filling at the bottom, topped with a rustic, biscuit-like, or cake-like dough. Crucially, unlike a pie, a cobbler does not have a bottom crust. The topping is typically dropped by spoonfuls over the fruit, creating an uneven, “cobbled” appearance, which is where its name originates. Cobblers are celebrated for their homey, less formal aesthetic and their tender, often slightly crumbly topping that soaks up the sweet fruit juices. This combination of juicy fruit and a comforting, soft topping is what makes a cobbler unique and so widely loved.
Yes, you can absolutely use frozen strawberries for this **easy strawberry cobbler recipe**! If using frozen berries, it’s best to thaw them completely first and then drain any excess liquid. This prevents the cobbler from becoming too watery. You might also consider adding an extra tablespoon of flour to the fruit filling to help absorb any lingering moisture, ensuring your cobbler has that perfect thick, syrupy consistency.
You’ll know your **homemade strawberry cobbler** is perfectly baked when the fruit filling is visibly bubbling vigorously around the edges of the baking dish. This indicates that the fruit juices have thickened and are hot throughout. Concurrently, the biscuit topping should be beautifully golden brown on top, looking puffed up and feeling firm to the touch. The aroma filling your kitchen will also be a strong indicator that it’s ready!
You can save this recipe by bookmarking this page in your browser or sharing it to your preferred platform.

Easy Strawberry Cobbler Recipe
Ingredients
- 1 ½ lbs strawberries hulled and halved
- ½ cup granulated sugar
- 2 tbsp all-purpose flour
For Topping
- 2 cups all-purpose flour
- 1 tbsp baking powder
- ¼ tsp coarse salt
- 5 tbsp cold butter
- 1 ⅓ cups milk
Instructions
-
Preheat your oven to 400ºF (200ºC). Place a parchment-lined baking sheet on the lowest oven rack to catch any potential drips from the bubbling fruit filling.
For the Topping
-
In a large bowl, whisk together the 2 cups of all-purpose flour, baking powder, and coarse salt. Using the large holes on a box grater, grate the very cold butter directly over the flour mixture. Whisk gently again to combine, ensuring the butter is coated with flour. Pour in the milk and, with a light hand, fold it into the dry ingredients. Mix until just combined; the mixture should be lumpy, but ensure no pockets of dry flour remain. Do not overmix.
For the Filling and Baking
-
In a 1 ½ quart baking dish (a deep pie dish is ideal), toss the hulled and halved strawberries with the ½ cup granulated sugar and 2 tablespoons of all-purpose flour until the berries are evenly coated.
-
Spoon dollops of the biscuit topping onto the strawberry filling. Place the baking dish on top of your prepared baking sheet (on the lowest oven rack) and bake for approximately 30 minutes, or until the fruit filling is bubbling vigorously around the sides and the biscuit topping is golden brown and puffed up.
-
Remove from oven and let cool for a few minutes before serving. Enjoy warm with a scoop of vanilla ice cream or a dollop of whipped cream.
Notes
- Prep in advance: You can chop the strawberries and combine the dry ingredients for the topping (flour, baking powder, salt) and grate the butter ahead of time. Keep these components stored separately in the refrigerator. Mix the milk into the topping ingredients just before baking for the best texture.
- Store leftovers: For leftovers, cover the cobbler tightly. It can be left at room temperature for up to one day. For longer storage, refrigerate in an airtight container for 4-5 days. Refrigeration can dry out the biscuit topping faster than room temperature.
- Special Diet Variations:
- Gluten-Free Option: Substitute the all-purpose flour in the biscuit topping with a gluten-free all-purpose flour blend for a gluten-free version.
- Vegan Cobbler: To make this recipe vegan, substitute the butter with a vegan butter alternative and use your favorite plant-based milk (e.g., almond, soy, or oat milk).
Nutrition
Nutrition information is automatically calculated, so should only be used as an approximation.
Tried this recipe? Leave a comment!