
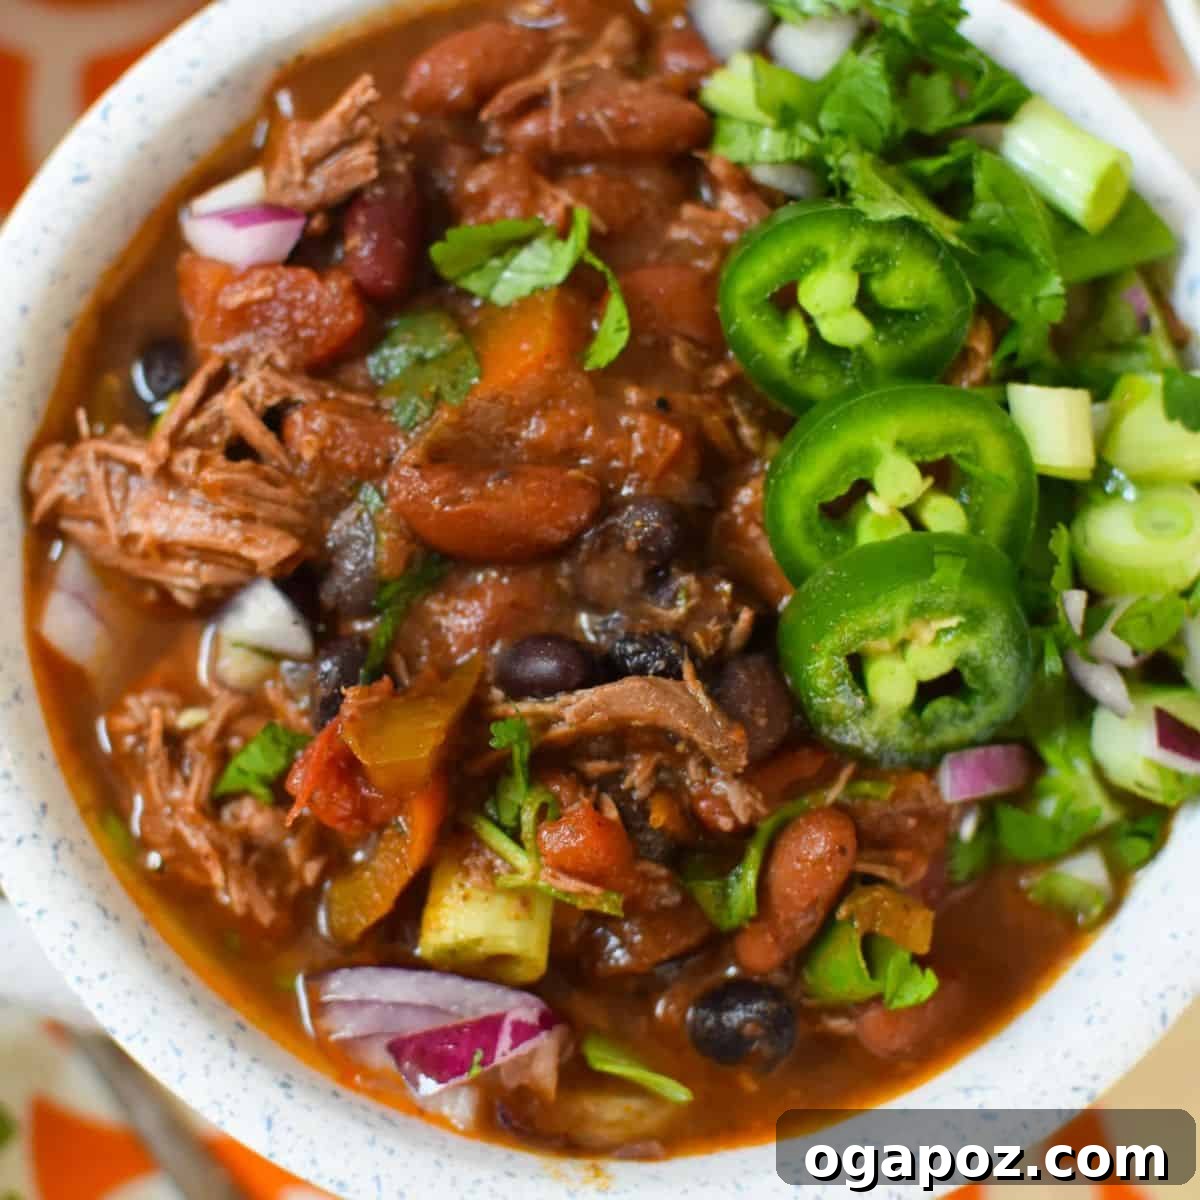
Ultimate Slow Cooker Chili Con Carne: A Hearty & Flavorful Recipe
Chili Con Carne is more than just a meal; it’s a culinary experience, a hearty and protein-packed stew that embodies comfort and robust flavor. Perfect for gatherings, game days, or a cozy evening in, this dish is incredibly versatile. Whether you prefer the set-it-and-forget-it convenience of a slow cooker or the traditional simmer of a Dutch oven on the stove, this recipe delivers tender, fall-apart beef infused with robust spices and rich ingredients. Let’s dive into creating a Chili Con Carne that will become a beloved staple in your recipe collection.

As the leaves begin to change and a crisp coolness fills the air, signaling the arrival of fall, my thoughts invariably turn to warm, comforting dishes. And what could be more fitting than a steaming bowl of homemade chili? This time of year often brings with it the excitement of tailgating season, football games, and outdoor festivities, and a well-made Chili Con Carne is an undeniable MVP for any outdoor celebration or indoor cozy feast. The rich, savory aroma alone is enough to gather everyone around the table, ready to enjoy a deeply satisfying meal that warms you from the inside out.
While today we focus on the classic Chili Con Carne, my kitchen is no stranger to the wonders of chili. If you’re looking to explore other hearty options, I highly recommend checking out my Beef Chili for a traditional take, the quick and convenient Easy Instant Pot Beef Chili for busy weeknights, or the uniquely flavorful Beef Poblano Black Bean Chili which adds a wonderful smoky depth. Each offers a distinct profile, but all share that comforting, robust quality we crave when the temperatures drop and the holidays approach.
What Exactly is Chili Con Carne? Debunking the Classic Dish
The name “Chili Con Carne” literally translates from Spanish as “chili with meat.” At its core, it’s a robust and savory stew traditionally featuring chili peppers, generous cuts of beef, often tomatoes, and commonly beans. While its exact origins are debated, most culinary historians agree it emerged either in northern Mexico or the southern regions of Texas. It’s a dish born from necessity and ingenuity, where cowboys and pioneers needed hearty, portable meals that could sustain them. Over centuries, it evolved, adapting to local ingredients and tastes, becoming the beloved staple it is today. It’s a dish celebrated for its depth of flavor, customizable spice levels, and incredible ability to satisfy even the heartiest appetites, making it a true symbol of comfort food in American cuisine.
I’m thrilled to be celebrating tailgating season and bringing you this incredible recipe in partnership with the Ohio Beef Council. It’s a fantastic opportunity to shine a spotlight on the dedication of over 17,000 Ohio beef farmers who work tirelessly to provide high-quality beef that makes dishes like this so exceptional. Their commitment to sustainable practices and raising delicious beef ensures that every spoonful of this chili is packed with superior taste and quality. Supporting local farmers not only ensures fresh, delicious ingredients but also strengthens our communities and promotes responsible agriculture.

Essential Ingredients for a Perfect Chili Con Carne: Building Layers of Flavor
Crafting a truly exceptional Chili Con Carne begins with selecting the right ingredients. Each component plays a vital role in building the complex layers of flavor that make this dish so universally beloved and comforting. Here’s a closer look at what you’ll need and why these choices matter for achieving the ultimate rich and savory chili:
- Chuck Roast: The Heart of the Chili: The undeniable star of this slow-cooked wonder is a boneless chuck roast. Alternatively, a good quality pot roast can be used. This cut of beef is prized for its marbling and connective tissue, which, when slow-cooked, transforms into incredibly tender, juicy strands that practically melt in your mouth. Its rich fat content provides a depth of flavor that leaner cuts simply cannot achieve, making it ideal for a long, slow simmer. Cubing the beef into manageable pieces ensures even browning and allows it to absorb the chili’s flavors thoroughly.
- Aromatic Foundation: Garlic & Onion:
- Garlic Cloves: Fresh garlic cloves are non-negotiable for the best, most pungent flavor profile. Their sharp, earthy notes provide an essential aromatic foundation that permeates the entire dish, creating a backbone of savory goodness. If fresh garlic isn’t available, high-quality garlic powder can be a substitute, but adjust the quantity carefully as dried spices are more concentrated.
- Sweet Onion: Diced sweet onion cooks down to add a gentle, underlying sweetness that balances the robust spices and acidity of the tomatoes. It also contributes to the chili’s overall aromatic complexity. Red onion can offer a slightly sharper flavor, which some might prefer.
- Vibrant Vegetables: Bell Pepper & Optional Jalapeño:
- Bell Pepper: A diced red bell pepper (or green, yellow, orange – your choice!) adds a mild, sweet pepper flavor and a beautiful splash of color. It also contributes to the chili’s texture, offering a slight bite that complements the tender beef.
- Jalapeño (Optional): For those who enjoy a subtle kick, a diced jalapeño is a perfect addition. Remove the seeds and membranes for less heat, or leave some in for more spice. This pepper adds a fresh, bright heat that enhances the overall flavor profile.
- Beans: The Great Debate (and Delicious Addition): While traditionalists might argue against their inclusion, beans are a common and cherished addition in many Chili Con Carne recipes, adding significant bulk, plant-based protein, and fiber. I prefer a mix of light and dark kidney beans for their creamy texture and their excellent ability to soak up the rich flavors of the chili sauce. However, feel free to experiment with your favorites: black beans for an earthy taste, pinto beans for a milder creaminess, or even chickpeas or white beans for a different textural experience. Always remember to drain and rinse canned beans thoroughly to remove excess sodium and improve digestibility.
- A Symphony of Spices: The Flavor Powerhouse: The true magic of Chili Con Carne lies in its intricate and carefully balanced blend of spices. This combination creates a rich, warm, and deeply aromatic profile. Don’t be shy about adjusting these to your personal preference for heat and complexity. My comprehensive blend includes:
- Chili Powder: The cornerstone, providing that classic, warm chili flavor.
- Chipotle Chili Powder: Infuses a wonderful smoky depth and a nuanced, earthy kick.
- Ground Cumin: Essential for its distinctive warm, earthy, and slightly pungent notes, characteristic of Mexican-inspired dishes.
- Mexican Oregano: Offers a more floral, citrusy, and slightly bitter note compared to its Mediterranean counterpart, adding authentic complexity.
- Thyme: Aromatic and herbaceous, thyme beautifully complements the savory beef and deeper spices.
- Ground Coriander: Adds a bright, lemony, and slightly sweet undertone that lifts the overall flavor.
- Cinnamon: A secret ingredient for many chili masters, just a touch of cinnamon significantly enhances the overall warmth and depth, marrying all the flavors without making the chili taste overtly sweet.
- Paprika: Contributes a beautiful red hue and a mild, sweet pepper flavor, enriching the color and taste.
- Cayenne Red Pepper (Optional): For those who love an extra fiery kick, cayenne pepper provides a clean, intense heat.
This carefully balanced medley ensures a robust and unforgettable chili sauce that is both complex and comforting.
- Beef Broth: The Liquid Gold: Beef broth is crucial for creating the perfect consistency and profoundly enhancing the savory, umami notes of the meat. While store-bought broth works well, using homemade beef bone broth will elevate the flavor to an entirely new level, adding richness, body, and nutritional benefits. If you don’t have beef broth on hand, chicken or vegetable broth can be used in a pinch, though beef broth is highly recommended for an authentic and deep meaty taste.
- Diced Tomatoes & Tomato Paste: The Tangy Base: Diced tomatoes provide a fresh, tangy base and chunky texture, breaking down slightly during cooking to form part of the rich sauce. A touch of tomato paste concentrates the tomato flavor, adding sweetness, depth, and body to the chili, helping to create a truly robust and well-rounded sauce. A little sugar helps balance the acidity of the tomatoes, ensuring a harmonious blend of flavors.

Crafting Your Perfect Slow Cooker Chili Con Carne: A Step-by-Step Guide
Creating this deeply flavorful Chili Con Carne in a slow cooker is remarkably simple, allowing you to build rich, complex flavors with minimal active effort. The slow cooking process is ideal for transforming the humble chuck roast into incredibly tender, fall-apart beef, making this a truly satisfying and fuss-free meal. Follow these detailed steps for an unforgettable chili experience:
Step 1: Browning the Beef for Maximum Flavor Depth
This initial step is absolutely crucial for developing deep, rich, and savory flavors in your chili. Heat 2 tablespoons of olive oil in a large, heavy-bottomed skillet or Dutch oven over medium-high heat until it shimmers and just begins to smoke lightly. Carefully add your cubed boneless chuck roast to the hot oil, ensuring not to overcrowd the pan. Work in batches if necessary to avoid steaming the meat. Brown the beef thoroughly on all sides until a beautiful, dark golden-brown crust forms. This caramelization, scientifically known as the Maillard reaction, locks in precious juices and creates a complex, savory flavor profile that will permeate your entire chili. Once adequately browned, remove the beef from the skillet with a slotted spoon and set aside on a plate, leaving any rendered fat and browned bits in the pan for the next step.
Step 2: Layering Ingredients and Aromatic Sauté (Optional)
You can optionally sauté the diced onion and bell pepper in the same skillet after browning the beef, using the residual fat and browned bits. Cook them for 5-7 minutes until softened, then add the minced garlic and jalapeño (if using) and cook for another minute until fragrant. This extra step enhances the aromatics. Once done (or if skipping the sauté), transfer the browned chuck roast to the slow cooker. Next, add all the remaining ingredients directly into the slow cooker: the optional sautéed vegetables, light and dark kidney beans (thoroughly drained and rinsed), diced tomatoes, beef broth, tomato paste, sugar, and your comprehensive blend of chili powder, chipotle chili powder, ground cumin, ground Mexican oregano, thyme, ground coriander, cinnamon, paprika, and cayenne pepper (if desired). Stir everything gently to combine, ensuring the spices are well distributed and the chuck roast is as submerged as possible in the flavorful liquid. This layering of ingredients ensures a harmonious blend as it cooks.
Step 3: Slow Cooking to Perfection
Place the lid securely on your slow cooker and let the magic happen. This is where patience pays off! Cook the chili on the LOW heat setting for 8 to 10 hours. This extended cooking time at a gentle, consistent temperature is absolutely key to breaking down the tough fibers in the chuck roast, rendering it incredibly tender and allowing all the robust flavors from the spices, vegetables, and beef to meld together beautifully. The low simmer creates a deep, complex flavor that is truly unparalleled. If you’re pressed for time, you can cook it on the HIGH setting for 3 to 4 hours, though the low-and-slow method typically yields a richer, more developed flavor and a more tender, succulent result.
Step 4: Shredding and Serving Your Masterpiece Chili
Once the cooking time is complete, the chuck roast should be so fork-tender that it practically falls apart. Using two sturdy forks, gently shred the beef directly in the slow cooker, allowing it to easily pull apart into succulent, moist pieces. Stir the shredded beef back into the chili, ensuring it’s fully incorporated with the flavorful sauce and beans. Taste and adjust seasonings if necessary, adding a pinch more salt or a dash of hot sauce if desired. Your magnificent Chili Con Carne is now ready to be served!
Serve this magnificent chili warm, encouraging guests to customize their bowls with an array of fresh and savory garnishes. Popular choices include a generous sprinkle of fresh cilantro, a dollop of cool sour cream or Greek yogurt, crunchy corn chips or tortilla chips for dipping, thinly sliced vibrant green onions, and a hearty handful of shredded cheddar cheese. For a truly complete and satisfying meal, consider serving warm flour tortillas or extra tortilla chips on the side, perhaps alongside a side of fluffy Mexican rice and creamy refried beans. These additions elevate the meal, making it an even more festive and satisfying experience for everyone.
Recipe Tip: Stovetop Variation: Don’t have a slow cooker, or prefer the stovetop method? No problem! You can easily make this chili in a large, heavy-bottomed Dutch oven. Simply brown the meat as directed in Step 1. Then, add all the remaining ingredients to the Dutch oven, bring it to a gentle simmer over medium heat, cover tightly, and reduce the heat to low. Cook for at least 2 to 3 hours, or until the beef is fall-apart tender. Stir occasionally to prevent sticking and ensure even cooking. The results will be just as delicious, offering a rich and comforting chili that fills your kitchen with incredible aromas.

Customize Your Chili Con Carne: Endless Modifications & Flavor Boosters
One of the most delightful aspects of Chili Con Carne is its incredible flexibility and adaptability. This recipe provides a fantastic, robust foundation, but don’t hesitate to personalize it to your specific taste preferences, dietary needs, or whatever exciting ingredients you have on hand. Here are some inspiring ideas to spark your culinary creativity and make this chili truly your own:
- Bean Bonanza: Go beyond the kidney bean! Experiment with different types of legumes to alter the texture and flavor profile. White beans, such as cannellini or navy beans, offer a softer, creamier texture. Black beans provide an earthy richness and beautiful dark color. Pinto beans are another classic choice for their mild flavor and smooth consistency. Even chickpeas can be a surprising and delicious addition, providing a firmer bite and nutty flavor.
- Tomato Twist:
- For a Thinner, Tomato-Forward Chili: If you prefer a chili with a thinner, more pronounced tomato base, you can add a small amount of extra plain tomato sauce (about 1/2 cup) during the cooking process.
- For a Thicker, Richer Chili: Conversely, for an even thicker, more concentrated chili, increase the amount of tomato paste to 3 or 4 tablespoons. You can also drain some of the liquid from the canned diced tomatoes before adding them to reduce the overall moisture content.
- Hominy Addition: For a unique texture and a subtly sweet, corn-like flavor, stir in a can of drained hominy during the last hour of cooking. Its chewy, slightly firm texture adds a delightful contrast to the tender beef and soft beans, making the chili more interesting.
- Spice It Up (or Down!): For the true spicy chili lovers, there are numerous ways to elevate the heat. Finely chop and add fresh jalapeños or serrano peppers along with the onions and bell peppers. For an even more intense heat, consider a habanero (use with caution!). A dash of your favorite hot sauce, a pinch of red pepper flakes, or an extra half teaspoon of cayenne pepper at the end can also transform the chili into a fiery delight.
- Pepper Perfection: Expand your pepper palette beyond just bell peppers. Incorporating chopped poblano peppers (roasted first for an extra layer of smoky depth) adds a mild, earthy spice. For a more intense heat and complex flavor, consider dicing and adding hotter peppers like anchos (dried poblano peppers, offering a smoky, fruity flavor), or Fresno peppers (similar to jalapeños but with a fruitier note). Each pepper brings its own unique character to the chili, allowing for endless flavor combinations.
- Veggie Boost: Loading your chili with extra vegetables is a fantastic way to boost nutrition, fiber, and flavor. Diced carrots and celery can be sautéed with the onions to create a classic mirepoix base, slowly breaking down to enrich the sauce. Other fantastic additions include corn (fresh or frozen), diced zucchini, or even finely chopped mushrooms for an umami kick. Leafy greens like spinach or kale can also be stirred in during the last 30 minutes of cooking for a healthier twist.
- The Secret Ingredient: Cocoa Powder: For an unbelievably rich, dark, and complex chili with incredible depth, try adding a tablespoon or two of unsweetened cocoa powder (or a square of high-quality dark chocolate) during the simmering stage. It deepens the color and adds an incredible, subtle earthiness and bitterness that enhances the savory notes without making the chili taste like chocolate. It’s a classic trick used by many chili masters!
- Smoky Enhancements: A dash of liquid smoke or smoked paprika can infuse your chili with an irresistible campfire-like aroma, perfect for evoking a tailgating feel even when cooking indoors.
Storage and Reheating Tips for Chili Con Carne
Chili Con Carne is one of those magical dishes that often tastes even better the next day, as the flavors have more time to meld and deepen, creating a more harmonious and complex profile. Proper storage ensures you can enjoy your delicious creation for days or even months to come, making it a fantastic make-ahead option for meal prep.
- Refrigeration: Always allow the chili to cool completely to room temperature before transferring it to an airtight container. This helps prevent bacterial growth and maintains food safety. It can be safely stored in the refrigerator for up to 4 days. When reheating, simply warm individual portions gently on the stovetop over medium-low heat, stirring occasionally to prevent sticking, or in the microwave until heated through. If it seems too thick, you can add a splash of beef broth or water to reach your desired consistency.
- Freezing: Chili freezes exceptionally well, making it a perfect make-ahead meal for busy times. Once cooled completely, transfer the chili into freezer-safe containers, heavy-duty freezer bags, or even individual portions for quick lunches. Leave a little headspace in containers or bags (about an inch) to allow for expansion during freezing. It can be safely stored in the freezer for up to 6 months without significant loss of quality or flavor. To thaw, transfer the frozen chili to the refrigerator overnight. Once thawed, reheat it on the stovetop or in the microwave. For quicker reheating, you can sometimes gently warm it from a partially frozen state on the stovetop over very low heat, adding a splash of broth if needed, stirring frequently until it thaws and heats through.
Explore More Hearty Chili Recipes
Beef
Beef Chili Recipe
Slow Cooker
Slow Cooker Vegetarian Chili
Soups
Slow Cooker Turkey Chili
Pork
Easy Pork Chili
Chili Con Carne: The Ultimate Slow Cooker Recipe
By Julia Jolliff
This ultimate Chili Con Carne recipe is a hearty, protein-packed chili perfect for tailgating, fall evenings, or any time you crave deep, comforting flavors. It’s an easy make-ahead meal you can prepare in a slow cooker or on the stove, featuring tender chuck roast slow-cooked to perfection with a rich blend of spices and vegetables. This recipe serves 6 people generously.
Prep Time: 15 mins
Cook Time: 8-10 hrs (Slow Cooker) / 2-3 hrs (Stovetop)
Total Time: Approximately 8 hrs 15 mins (Slow Cooker Method)
Yields: 6 servings
Pin Recipe
Ingredients
- Beef: 1 (3 to 4 pound) boneless chuck roast, trimmed of excess fat, cut into 1-2 inch cubes (pot roast also works well)
- Oil: 2 tablespoons olive oil
- Aromatics:
- 1/2 large red onion, diced
- 4 large garlic cloves, minced
- 1 medium jalapeño, seeded and diced (optional, for a moderate kick)
- Vegetables: 1 large red bell pepper (or preferred color), seeds and membranes removed, diced
- Beans:
- 1 (15 ounce) can light red kidney beans, thoroughly drained and rinsed
- 1 (15 ounce) can dark red kidney beans, thoroughly drained and rinsed
- Spices:
- 3 tablespoons high-quality chili powder
- 1 teaspoon chipotle chile powder (adds smokiness)
- 1 1/2 teaspoons ground cumin
- 2 teaspoons ground Mexican oregano
- 1/2 teaspoon dried thyme
- 1/2 teaspoon ground coriander
- 1/4 teaspoon ground cinnamon (enhances depth)
- 1 teaspoon smoked paprika (or sweet paprika)
- 1/2 teaspoon cayenne red pepper (optional, for significant spice)
- Liquids & Base:
- 1 (28 ounce) can diced tomatoes, undrained
- 1 cup beef broth (preferably homemade beef bone broth for best flavor)
- 2 tablespoons tomato paste
- 1 teaspoon granulated sugar (to balance acidity)
- Garnishes (Optional, but highly recommended):
- Fresh cilantro, finely chopped
- Green onions, thinly sliced
- Shredded sharp cheddar cheese (or Monterey Jack, Pepper Jack)
- Cool sour cream or plain Greek yogurt
- Crunchy corn chips or tortilla chips
- Diced avocado
- A squeeze of fresh lime juice
Instructions
- Brown the Chuck Roast: In a large, heavy-bottomed skillet or Dutch oven, heat the olive oil over medium-high heat. Add the cubed chuck roast in batches, ensuring not to overcrowd the pan. Brown the beef thoroughly on all sides until a rich, dark crust forms. This step is essential for developing deep, savory flavors. Remove the browned beef from the skillet and set it aside.
- Sauté Aromatics (Optional but Recommended): In the same skillet with any residual fat, add the diced red onion and bell pepper. Sauté for 5-7 minutes until softened. Add the minced garlic and diced jalapeño (if using) and cook for another minute until fragrant. Transfer these sautéed vegetables to the slow cooker along with the browned beef.
- Combine All Ingredients in Slow Cooker: Add the browned chuck roast and sautéed aromatics (if prepared) to your slow cooker. Then, add all the remaining ingredients: the drained and rinsed kidney beans, diced tomatoes (with their juice), beef broth, tomato paste, sugar, and the full blend of chili powder, chipotle chile powder, ground cumin, ground Mexican oregano, thyme, ground coriander, cinnamon, paprika, and cayenne pepper (if using).
- Stir and Cook: Stir all the ingredients well to ensure everything is evenly combined and the beef is largely submerged in the liquid. Cover the slow cooker with its lid. Cook on the LOW setting for 8 to 10 hours, or on the HIGH setting for 3 to 4 hours. The chili is ready when the beef is incredibly tender and easily shredded with a fork.
- Shred Beef and Serve: Once cooking is complete, use two forks to gently shred the tender beef directly in the slow cooker, allowing it to mix seamlessly with the rich chili sauce and beans. Stir the shredded beef back into the chili. Taste and adjust seasonings as needed (add more salt, pepper, or a pinch of desired spice). Serve your hearty Chili Con Carne warm, topped with your favorite garnishes such as fresh cilantro, green onions, and shredded cheese.
Recipe Notes & Tips for Success
- For a Thicker Chili: If you find the chili is not thick enough for your liking, you have a few options. You can either increase the amount of tomato paste added at the beginning, or, towards the end of cooking, create a slurry by mixing 1-2 tablespoons of cornstarch with an equal amount of cold water. Stir this mixture into the hot chili and continue to cook for another 15-30 minutes until it thickens to your desired consistency. Another trick is to drain some of the liquid from the canned diced tomatoes before adding them.
- Adjusting Spice Level: The beauty of homemade chili is being able to control the heat. For a milder chili, simply omit the jalapeño and cayenne pepper. For those who crave more heat, don’t shy away from adding more jalapeño, a finely chopped serrano pepper, a pinch of red pepper flakes, or a dash of your favorite hot sauce during or after cooking.
- Stovetop Method: To prepare this Chili Con Carne on the stovetop, follow Step 1 for browning the meat in a large Dutch oven. Then, add all other ingredients to the Dutch oven, bring the mixture to a gentle simmer, and cover tightly. Reduce the heat to low and let it simmer for 2-3 hours, or until the beef is incredibly tender. Stir occasionally to prevent any sticking.
- Make Ahead Flavor: Chili Con Carne is famously known for tasting even better the day after it’s made. The flavors have more time to marry and deepen, resulting in a more complex and satisfying meal. Consider making it a day in advance for optimal flavor development, especially if serving for a special event or gathering.
- Vegetarian Option: For a delicious vegetarian chili, omit the beef and beef broth. Replace the beef with extra beans (e.g., black beans, pinto beans), corn, or diced sweet potatoes. Use vegetable broth instead of beef broth.
Nutrition Information (Approximate per serving)
Calories: 231kcal | Carbohydrates: 10g | Protein: 17g | Fat: 14g | Saturated Fat: 5g | Polyunsaturated Fat: 2g | Monounsaturated Fat: 8g | Trans Fat: 1g | Cholesterol: 52mg | Sodium: 369mg | Potassium: 558mg | Fiber: 4g | Sugar: 3g | Vitamin A: 2305IU | Vitamin C: 29mg | Calcium: 62mg | Iron: 4mg
Nutrition information is automatically calculated and should only be used as an approximation. Actual values may vary significantly based on specific brands of ingredients, preparation methods, and serving sizes.
Today’s post is proudly sponsored by the Ohio Beef Council. As always, all opinions and recipe creations expressed here are 100% my own, reflecting my genuine love for quality ingredients and delicious, wholesome food.