
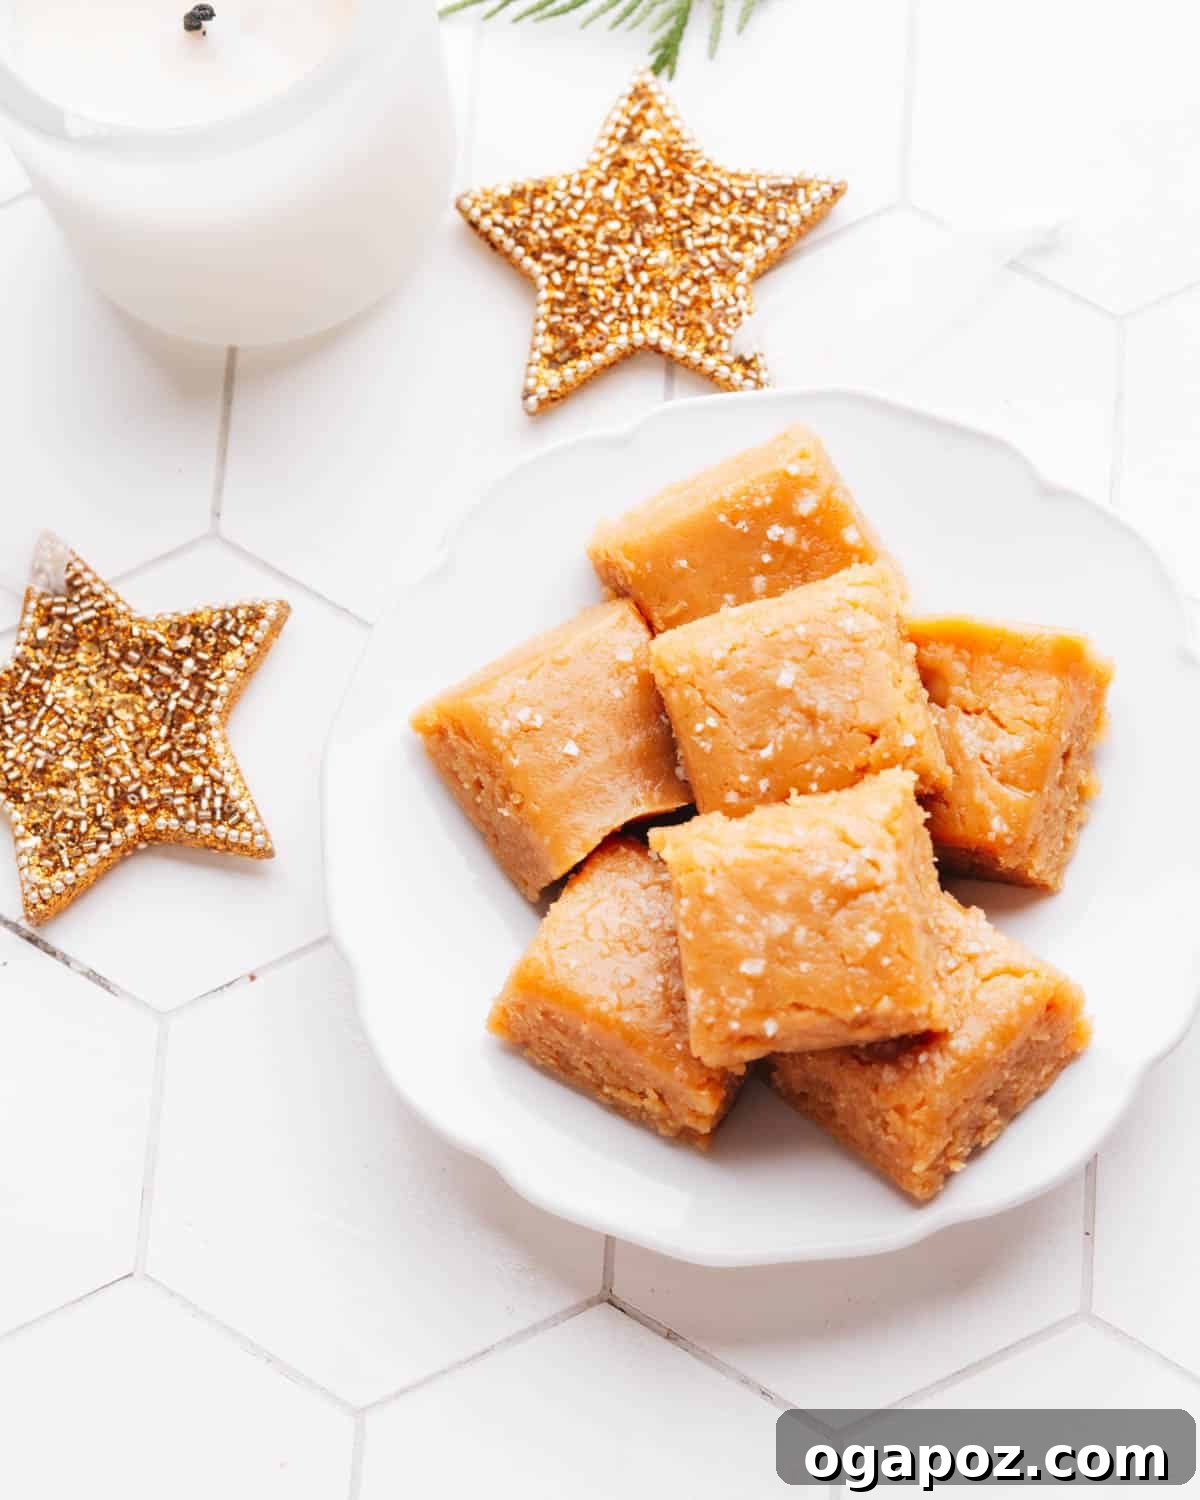
Prepare to amaze your taste buds with this incredibly simple, yet profoundly delicious 2-Ingredient Peanut Butter Fudge. Made effortlessly with just creamy peanut butter and sweetened condensed milk, this no-bake wonder can be whipped up in your microwave or on the stovetop in under 5 minutes. Get ready to enjoy a perfectly rich, soft, and creamy treat!
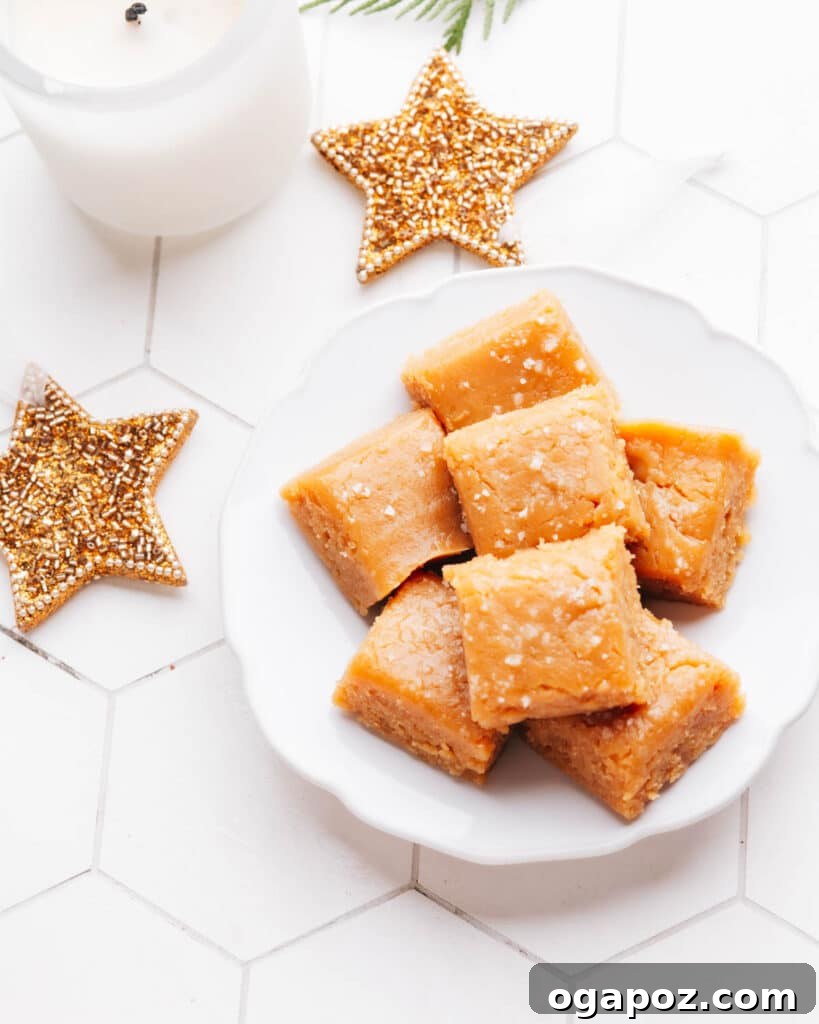
This easy 2-Ingredient Peanut Butter Fudge, featuring sweetened condensed milk, is more than just a recipe; it’s a dessert revelation. It’s the ultimate rich, creamy, and no-bake indulgence, ideal for those hectic days when you need a sweet escape, a thoughtful homemade gift, or an elegant addition to your holiday cookie assortment. The beauty lies in its simplicity – it comes together in mere minutes using either a microwave or a stovetop, completely bypassing the need for a finicky candy thermometer. Say goodbye to complex candy-making techniques and hello to foolproof deliciousness!
Why This 2-Ingredient Fudge Is a Game-Changer
In a world where elaborate desserts often demand extensive time and expertise, this 2-ingredient peanut butter fudge stands out as a true culinary hero. It’s perfect for busy parents, novice bakers, or anyone craving a homemade treat without the fuss. Here’s why this recipe deserves a permanent spot in your rotation:
- Unbeatable Simplicity: Literally two ingredients are all you need. No obscure items, no complex steps.
- Lightning Fast: From prep to pan in less than 5 minutes. The fastest path to homemade fudge!
- No-Bake Bliss: Forget turning on the oven. This recipe keeps your kitchen cool and clean.
- Foolproof Results: Skip the candy thermometer and precise temperatures. If you can stir and heat, you can make this fudge.
- Versatile & Customizable: Easily adapt the flavors and textures to suit any preference or occasion.
- Perfect for Gifting: Homemade fudge makes a delightful and personal present for friends, family, or teachers.
- Crowd-Pleaser: Everyone loves peanut butter, and combined with condensed milk, it’s an irresistible combo.
Whether you’re short on time, ingredients, or baking confidence, this recipe guarantees a decadent dessert that tastes like it took hours, but only took minutes.
Here’s What You Need: The Magic Ingredients and Tools
Whipping up this creamy, delicious peanut butter fudge is incredibly straightforward, requiring only a couple of star ingredients, a few simple variations for personalization, and some basic kitchen tools. Let’s delve into what makes this recipe so special.
The Two Essential Ingredients for Peanut Butter Fudge
The secret to this easy fudge lies in the perfect synergy between just two core components. Let’s explore the role each ingredient plays in creating this delightful treat:
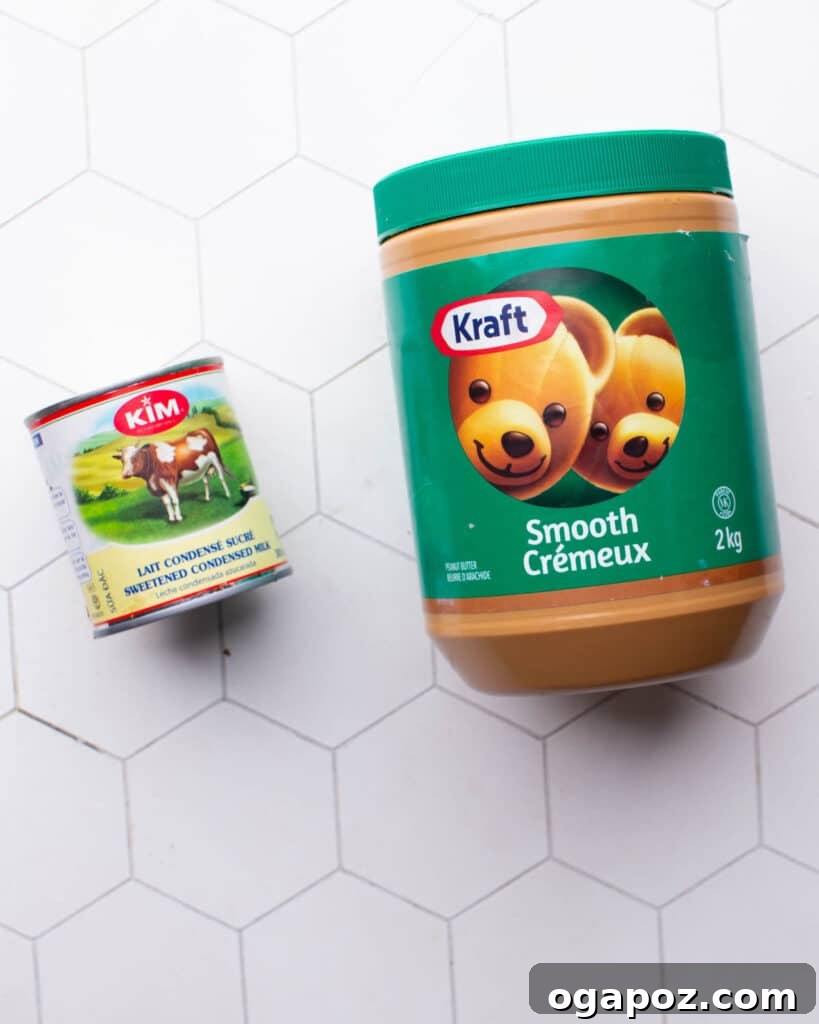
- Creamy Peanut Butter: This forms the foundational base of our fudge, delivering that unmistakable rich, nutty flavor everyone loves. Opt for a good quality, creamy peanut butter that isn’t natural (the kind where oil separates) for the best texture and consistency. Regular creamy peanut butter like Jif or Skippy works wonderfully.
- Sweetened Condensed Milk: This is the true miracle ingredient! It not only provides essential sweetness but also contributes a thick, incredibly creamy texture, allowing us to bypass the complex, temperature-sensitive techniques typically associated with traditional fudge making. It’s already cooked down and sweetened, doing all the hard work for us.
OPTIONAL Ingredient for Firmer Fudge: If you prefer a firmer fudge that holds up better at room temperature, you can melt in 1 bag (10-12 oz) of peanut butter chips or even white chocolate chips alongside the main ingredients. This addition helps create a more robust set.
Personalize Your Treat: Variations and Substitutions
While delicious on its own, this peanut butter fudge recipe is a fantastic canvas for customization. Want to personalize your peanut butter fudge with sweetened condensed milk? Here are a few easy tweaks and additions to make it uniquely yours:
- Crunchy Peanut Butter: For those who love a bit of bite, simply swap creamy peanut butter for crunchy peanut butter. The small peanut pieces will add a delightful textural contrast.
- Chocolate Lover’s Dream: Transform this into a chocolate peanut butter marvel! Mix or melt in 2 cups of your favorite chocolate chips (milk, semi-sweet, or dark) with the peanut butter and condensed milk mixture.
- Extracts for Extra Flavor: A teaspoon of vanilla extract, almond extract, or even a touch of cinnamon can elevate the flavor profile. Add these when you’re combining the main ingredients.
- Delicious Toppings: Before chilling, sprinkle your fudge with a variety of toppings. Consider flaky sea salt (for a sweet-and-salty kick), mini chocolate chips, chopped Reese’s peanut butter cups, chopped nuts (peanuts, pecans, walnuts), or colorful sprinkles for a festive touch.
- Dairy-Free Option: While the texture might vary slightly, you can experiment with dairy-free sweetened condensed milk alternatives (like almond or coconut condensed milk) for a plant-based version.
Grab These Essential Kitchen Tools
One of the many advantages of this recipe is its minimal requirement for specialized equipment. Make sure you have these basic tools on hand for a smooth and enjoyable fudge-making process:
- 8×8 Inch Baking Pan: This is the ideal size for achieving a good thickness for your fudge squares. A 9×5 inch loaf pan can also work for thicker pieces, but will yield fewer servings.
- Parchment Paper: Crucial for lining the pan! It prevents sticking and allows for incredibly easy removal and cutting of the set fudge. Don’t skip this step.
- Microwave-Safe Bowl: If you’re opting for the microwave method, a large, sturdy bowl that’s safe for microwave use is essential.
- Medium Saucepan: For the stovetop method, a non-stick medium saucepan will ensure even heating and easy stirring.
- Spatula or Wooden Spoon: For thoroughly mixing the ingredients and spreading the warm fudge mixture evenly into the pan.
- Sharp Knife: Once the fudge is fully set, a sharp knife will help you achieve clean, neat squares.
How to Make 2-Ingredient Peanut Butter Fudge: An Easy Guide
This 2-Ingredient Peanut Butter Fudge recipe is an absolute breeze to make, promising a deliciously creamy treat that’s perfect for special occasions but so simple, it can satisfy a weekday craving in no time. Follow these straightforward steps for perfect fudge every time.
Step 1: Preparing Your Pan
- Line the Pan: Begin by lining an 8×8 inch (or 9×5 inch loaf pan) square baking pan with parchment paper. Ensure you leave a generous overhang on two sides; this acts as handles, making it incredibly easy to lift the set fudge out of the pan later.
- Pro Tip: Lightly spray the pan with non-stick cooking spray before placing the parchment paper. This helps the paper stick better and prevents it from shifting while you pour the fudge.
Step 2: Combining and Heating the Ingredients
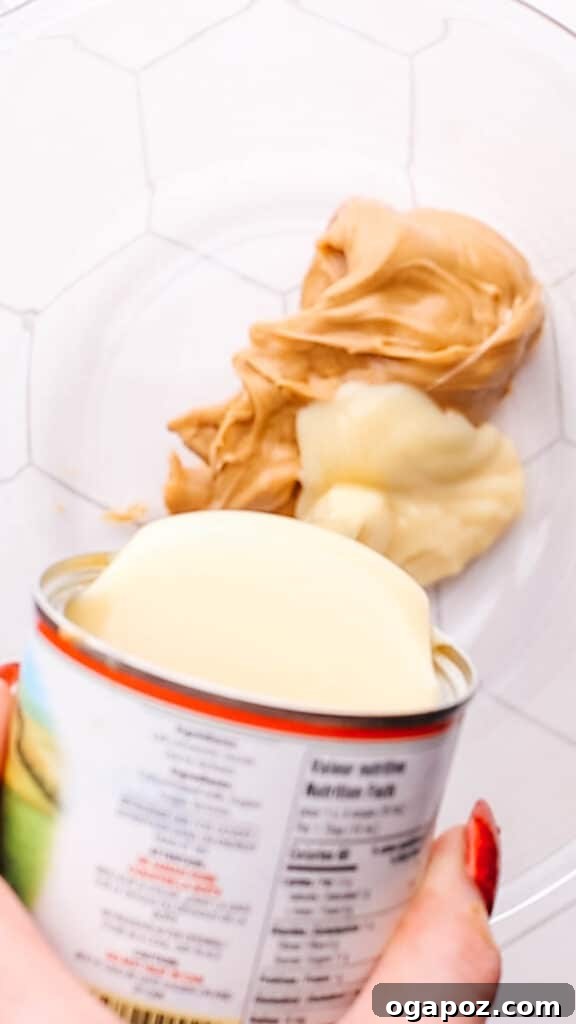
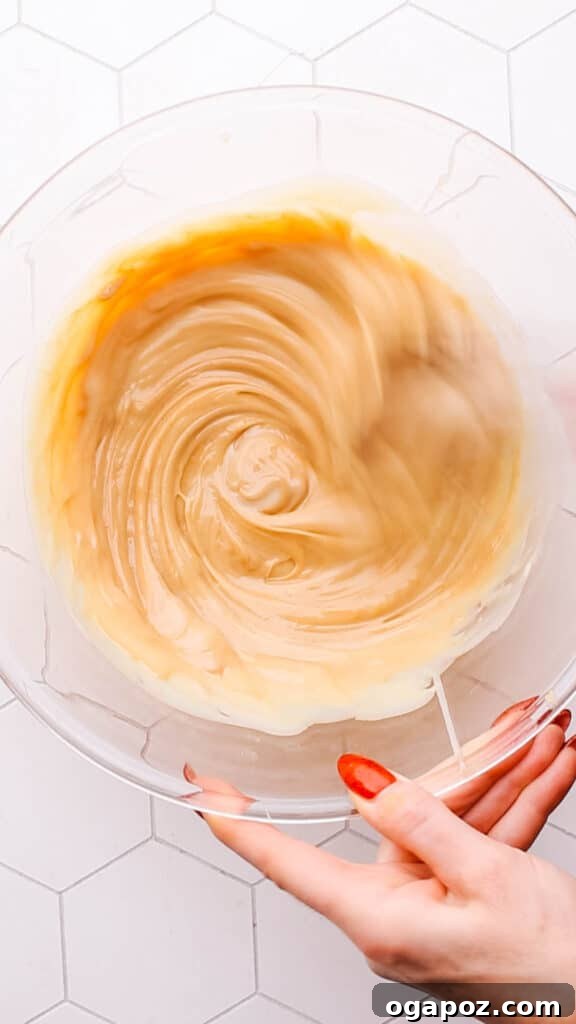
- Microwave Method (Quickest): In a spacious microwave-safe bowl, combine your creamy peanut butter and sweetened condensed milk. Microwave the mixture for 2 minutes at 50% power. After the first round, stir thoroughly with a spatula until the mixture appears smooth and well-combined. It will still be quite fluid at this stage. Return the bowl to the microwave and heat again on high power for 1 minute. Stir vigorously once more. The mixture should now be noticeably thicker and have that delightful fudgy consistency.
- Stovetop Method (Classic Approach): Alternatively, if you prefer the stovetop, combine the peanut butter and sweetened condensed milk in a medium-sized saucepan. Place the saucepan over medium-low heat. Stir constantly and patiently with a wooden spoon or spatula. Continue heating and stirring until the mixture becomes completely smooth, thoroughly combined, and begins to visibly thicken. This usually takes about 3-5 minutes. Be careful not to scorch the bottom.
- Optional Add-ins: If adding peanut butter chips, white chocolate chips, or chocolate chips for a firmer or flavored fudge, stir them in during the final minute of heating for either method until fully melted and incorporated.
Step 3: Setting the Fudge
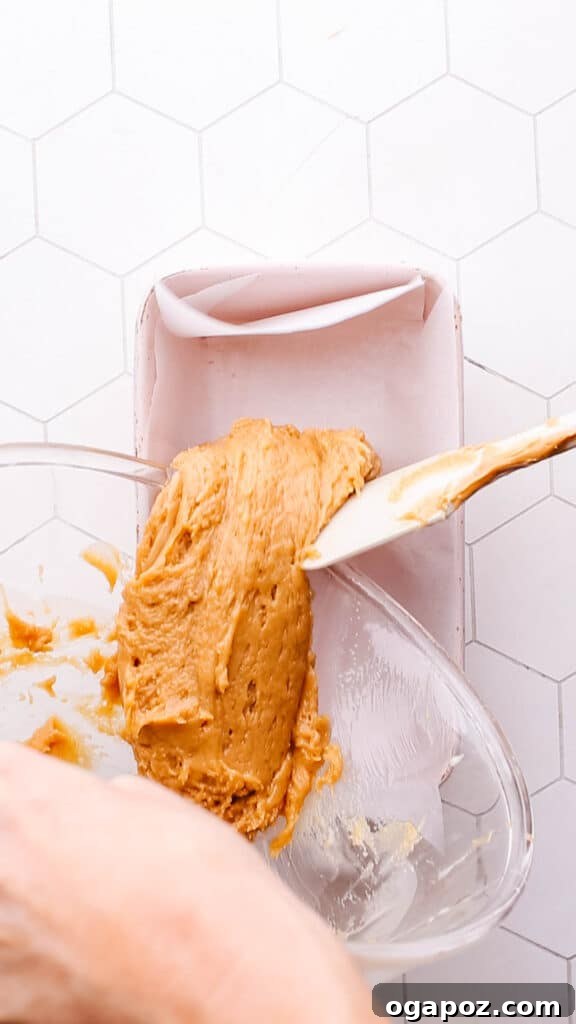
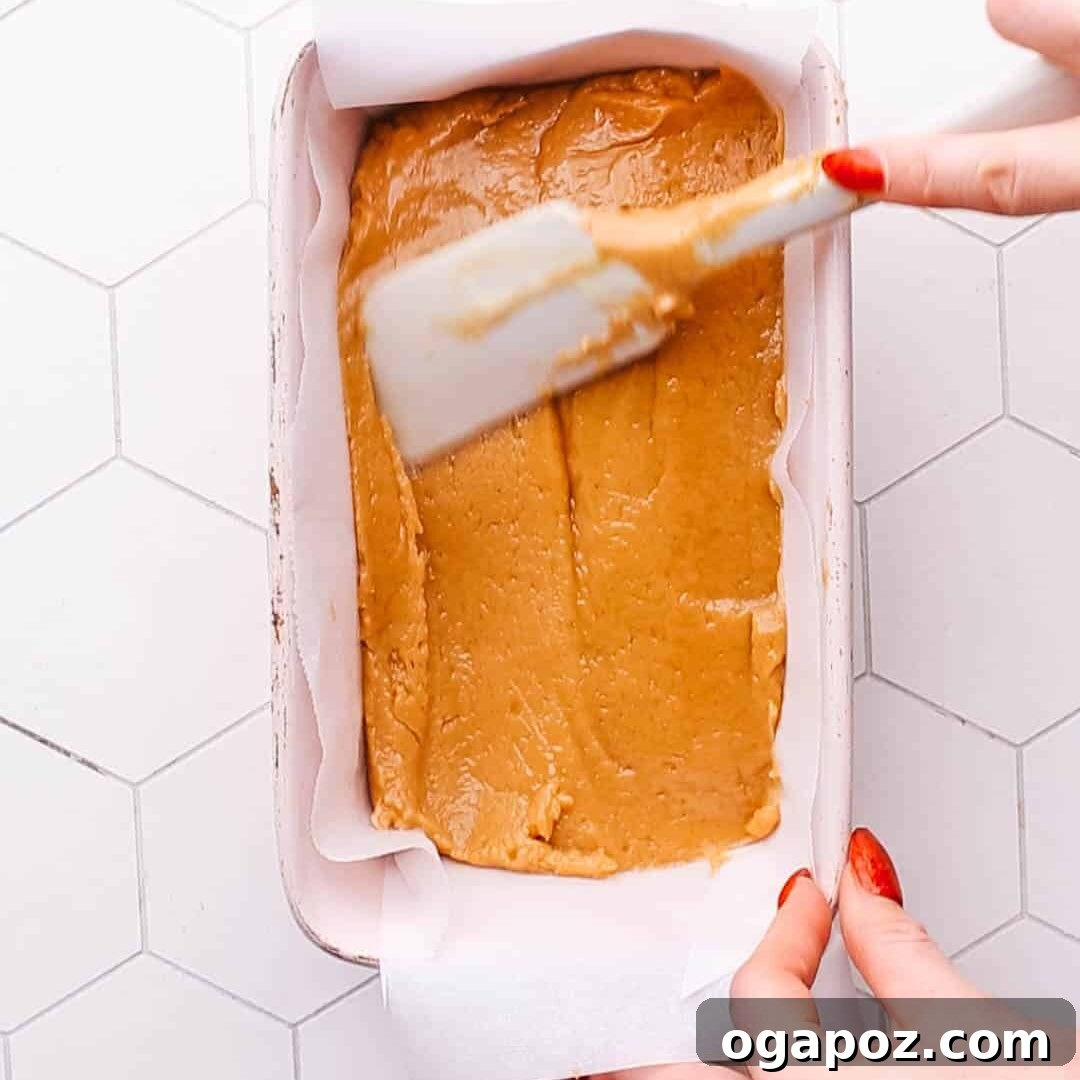
- Transfer to Pan: Once your fudge mixture has reached the desired thick and smooth consistency, quickly scrape it from the bowl or saucepan into your prepared baking pan. Use your spatula to spread it out evenly, ensuring the top is as smooth as possible.
- Add Toppings (Optional): If you plan to add toppings like sprinkles, chopped nuts, or mini chocolate chips, now is the time to sprinkle them over the warm fudge. For sea salt, it’s best to wait until the fudge is mostly set to prevent it from dissolving.
- Chill Thoroughly: Place the pan with the fudge into the refrigerator. Allow it to chill for a minimum of 2 hours, or until it is completely firm to the touch and ready to be sliced. Impatience here can lead to a messy, gooey result!
Step 4: Slicing and Serving Your Delicious Fudge
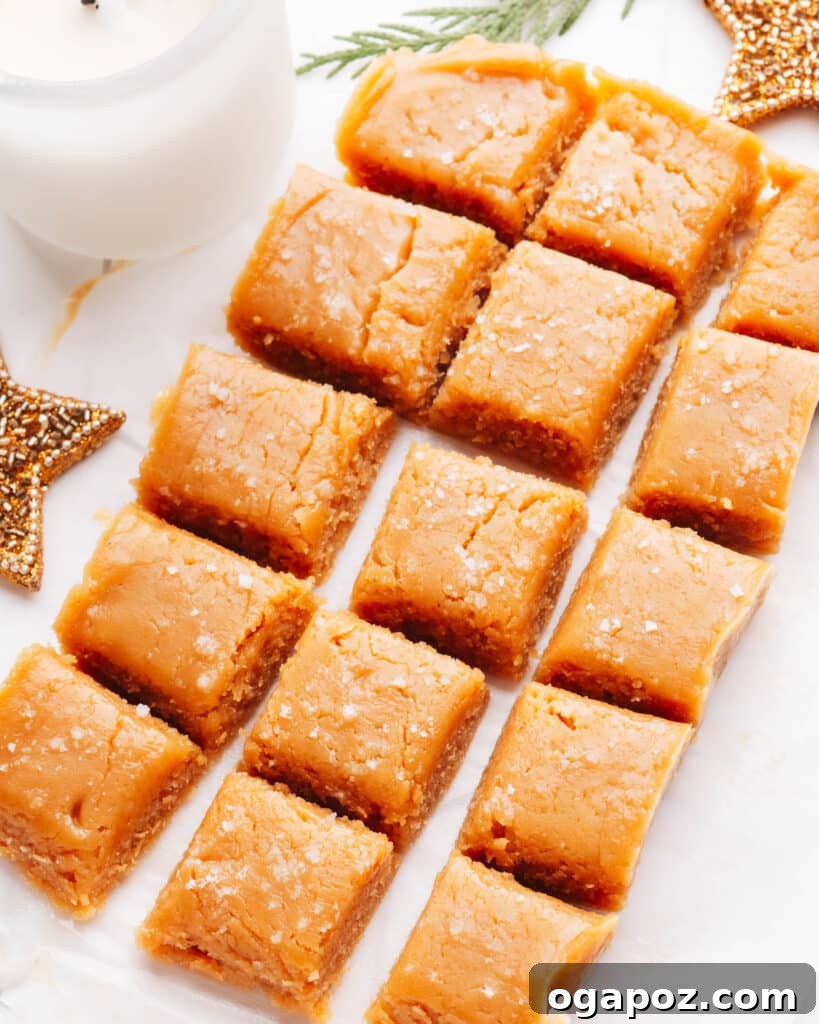
- Lift and Cut: Once the fudge is fully set, use the parchment paper overhang to gently lift the entire block of fudge out of the baking pan and onto a cutting board.
- Slice Evenly: With a sharp knife, cut the fudge into squares of your desired size. For cleaner cuts, you can run your knife under hot water and wipe it clean between slices.
- Serve and Enjoy: This particular 2-ingredient fudge has a wonderfully soft and creamy texture that is best enjoyed straight from the refrigerator. If left at room temperature, it will soften significantly, much like a homemade caramel.
- Storage: Store any leftover fudge in an airtight container in the refrigerator to maintain its ideal texture and freshness.
Troubleshooting Common Fudge Problems
Even with a simple recipe, minor issues can arise. Here are solutions to the most frequent mix-ups you might encounter when making 2-Ingredient Peanut Butter Fudge, ensuring your batch is always a success:
- Fudge Is Grainy or Oily:
- Cause: This usually happens from overheating the mixture or using natural peanut butter which can separate.
- Solution: Ensure you heat gradually, especially in the microwave. Stir thoroughly between heating intervals. If using natural peanut butter, stir it very well in its jar before measuring, and be prepared for a slightly different (possibly softer or oilier) texture. You can try reheating gently and stirring again to re-emulsify any separated oils, then re-chill.
- Fudge Isn’t Setting/Too Soft:
- Cause: The mixture might not have been heated enough, or it wasn’t chilled for a sufficient amount of time.
- Solution: Make sure the mixture thickens visibly during heating. If your fudge is still too soft after chilling for 2-3 hours, place it back in the refrigerator for longer (up to 4-6 hours, or even overnight). If it’s still too soft after extended chilling, you can melt it down again gently, then stir in 1 bag (10-12 oz) of peanut butter chips or white chocolate chips. These chips contain stabilizers that will help the fudge firm up more effectively. Re-pour and re-chill.
- Uneven Texture:
- Cause: Failing to stir the mixture thoroughly during the heating process.
- Solution: Always stir constantly when using the stovetop method, and vigorously between microwave intervals. This ensures both ingredients are fully combined into a homogenous, smooth mixture.
- Flavor Is Lacking or Off:
- Cause: Using low-quality ingredients can significantly impact the final taste, especially since there are only two main components.
- Solution: Invest in a good quality creamy peanut butter and a reputable brand of sweetened condensed milk. These two ingredients are the stars, so their quality directly translates to the deliciousness of your fudge.
- Messy Slices:
- Cause: Trying to cut the fudge before it’s fully set and firm, or using a dull knife.
- Solution: Always allow the fudge ample time to set in the refrigerator until it’s firm to the touch. Use a sharp knife. For extra clean cuts, you can wipe your knife blade with a warm, damp cloth or run it under hot water, then wipe it dry, before each slice.
Make Ahead and Storage Solutions
This 2-Ingredient Peanut Butter Fudge is fantastic for making ahead, offering convenience for parties, gifting, or simply having a sweet treat on hand. Efficiently plan and store your fudge to enjoy it at its absolute best.
- Refrigerator Storage: For the best texture and to keep it firm, always store your fudge in an airtight container in the refrigerator. When stored properly, this delightful treat can last for up to 2 weeks, maintaining its creamy consistency. Remember, this fudge is quite soft at room temperature, so chilling is key for optimal enjoyment.
- Freezing Option (Long-Term): Yes, you can freeze peanut butter fudge! For longer storage, freeze the fudge for up to 3 months. To do this, wrap individual pieces or the entire block tightly in plastic wrap, then place them in an airtight freezer-safe container or a heavy-duty freezer bag. This prevents freezer burn and maintains freshness.
- Thawing Frozen Fudge: When you’re ready to enjoy your frozen fudge, simply remove it from the freezer and let it thaw at room temperature for about 10-15 minutes before serving. It will quickly return to its delicious, creamy state.
- Make Ahead: This fudge is an excellent make-ahead dessert. Prepare it a day or two in advance of when you plan to serve or gift it. This allows ample time for chilling and ensures it’s perfectly set when needed.
How to Serve 2-Ingredient Peanut Butter Fudge for Optimal Enjoyment
Unlike some traditional fudges or chocolate candies that are best served at room temperature, this particular peanut butter fudge boasts a wonderfully soft and melt-in-your-mouth texture that truly shines when served straight from the fridge. Here’s why and how to best enjoy it:
- Chilled for Firmness: When served cold, the fudge retains its shape beautifully and has a satisfyingly firm yet creamy bite. This is its ideal state for handling and enjoyment.
- Room Temperature Softness: If you allow this fudge to sit at room temperature for an extended period, it will become quite soft, resembling the texture of a rich, homemade caramel. While still delicious, it will be much gooier and potentially harder to handle.
- For a Firmer Room Temperature Fudge: If your preference is for a peanut butter fudge that remains firmer even at room temperature, there’s an easy adjustment. During the heating process, melt in 1 bag (10-12 oz, or approximately 1 2/3 to 2 cups) of peanut butter chips or white chocolate chips along with the peanut butter and condensed milk. The added chips introduce stabilizers that help the fudge set much firmer, similar to store-bought fudge.
Whether you prefer it firm and chilled or luxuriously soft and gooey, this fudge promises a delightful experience!
Creative Toppings and Add-Ins for Peanut Butter Fudge
While phenomenal on its own, this 2-ingredient peanut butter fudge serves as a perfect base for a variety of delicious enhancements. Elevate your fudge with these simple additions, turning a great treat into an extraordinary one:
- Classic Chocolate Drizzle: For the ultimate chocolate-peanut butter synergy, melt some chocolate chips (milk, dark, or white) and drizzle generously over the set fudge. Allow the drizzle to set before cutting.
- Crunchy Nut Toppings: Add textural contrast by sprinkling chopped nuts like almonds, pecans, walnuts, or extra peanuts on top of the fudge while it’s still warm and soft, before it sets. Gently press them into the surface.
- Flaky Sea Salt: A light, even sprinkle of flaky sea salt (after the fudge has mostly set) provides a gourmet touch, beautifully balancing the sweetness and enhancing the peanut butter flavor.
- Mini Chocolate Chips: Before the fudge sets, scatter a handful of mini chocolate chips over the surface for extra pockets of chocolate goodness.
- Crushed Candies: For a fun twist, crush some peanut butter cups, toffee bits, or even a different candy bar and sprinkle them on top.
- Sprinkles: For festive occasions or just a pop of color, add your favorite sprinkles to the warm fudge.
- Shredded Coconut: Toasted or untoasted shredded coconut can add a tropical and chewy element.
Don’t be afraid to get creative and experiment with your favorite flavors and textures!
Frequently Asked Questions About 2-Ingredient Peanut Butter Fudge
Got more questions? Here are quick answers to commonly asked questions about making and enjoying this super easy 2-Ingredient Peanut Butter Fudge:
In its simplest form, this peanut butter fudge is made from just two ingredients: creamy peanut butter and sweetened condensed milk. These two combine to create a rich, creamy, and wonderfully sweet treat without any complex steps.
Using natural peanut butter can alter the texture of the fudge. Natural peanut butter is often oilier and can separate more easily, which might result in a softer or slightly greasy fudge. While it can still work, you may need to stir it exceptionally well before use and potentially increase the chilling time to help it set.
Yes, you can absolutely try using almond milk condensed milk or coconut condensed milk for a dairy-free alternative. The texture may vary slightly from the traditional recipe, but it’s a great way to adapt it for dietary needs.
The fudge is ready to cut when it feels firm to the touch throughout. If you gently press a finger into the surface, it should not leave a deep indentation or stick significantly to your finger. It should feel solid and cool.
Absolutely! For a delectable chocolate peanut butter twist, melt 2 cups of chocolate chips (milk, semi-sweet, or dark) directly into the mixture along with the peanut butter and condensed milk. Stir until everything is fully combined and smooth before pouring into the pan to chill.
While not strictly “necessary” if you don’t have it, lining the pan with parchment paper is highly recommended. It makes removing the set fudge incredibly easy and allows for much cleaner, more precise cuts. Alternatively, you could use aluminum foil or generously grease the pan, but parchment paper offers the best results.
If your fudge isn’t setting, it’s usually due to one of two reasons: either the mixture wasn’t heated quite enough during the cooking phase (which helps it thicken), or it hasn’t been chilled for a long enough duration. Ensure it gets at least 2 hours in the refrigerator, or even longer if it’s a warm day or your ingredients were very cold initially.
Don’t despair! If your fudge remains too soft, you can gently reheat the entire mixture (either in the microwave or stovetop) until it’s melted again. This time, as it melts, stir in 1 bag (10-12 oz) of peanut butter chips, white chocolate chips, or even regular chocolate chips. These additions will help stabilize the fudge and ensure a firmer texture, more akin to store-bought varieties. Then, pour it back into your prepared pan and re-chill thoroughly.
Peanut butter fudge can become crumbly if it’s overcooked or if the ingredients weren’t thoroughly and evenly combined. Overheating can cause the mixture to become dry or seize. Make sure to follow the heating instructions carefully and stir continuously to achieve a smooth, uniform consistency.
2-Ingredient Peanut Butter Fudge (with Condensed Milk!) – The Recipe
Indulge in the simplicity of this 2-Ingredient Peanut Butter Fudge. Perfect for a quick sweet treat, it combines creamy peanut butter and sweetened condensed milk for a rich, melt-in-your-mouth fudge that’s ridiculously easy to make.
By: Jennifer Pallian BSc, RD
Prep Time: 2 minutes
Cook Time: 3 minutes
Chill Time: 2 hours
Total Time: 2 hours 13 minutes
Servings: 25 pieces
Ingredients
- 1 ½ cups creamy peanut butter
- 1 (14-oz) can sweetened condensed milk
OPTIONAL
- 1 bag (10-12 oz) peanut butter or white chocolate chips (for a firmer fudge, see notes below instructions)
Instructions
- Prepare the Pan: Line a 9×5 inch loaf pan (or 8×8 inch square pan) with parchment paper, leaving some overhang on two sides for easy removal.
- Combine Ingredients (Microwave Method): In a large microwave-safe bowl, combine creamy peanut butter and sweetened condensed milk. Microwave the mixture for 2 minutes on 50% power. Stir until smooth. It will still be runny. Microwave again on high power for 1 minute and stir vigorously. The mixture should now be thick and fudgy.
- Alternatively (Stovetop Method): In a medium saucepan, combine the peanut butter and sweetened condensed milk. Heat over medium-low heat, stirring constantly until the mixture is smooth and thickens up.
- Transfer and Set: Scrape the warm fudge mixture into the prepared pan and spread it out evenly with a spatula. Refrigerate for at least 2 hours or until completely firm.
- Slice and Serve: Once set, use the overhanging parchment paper to lift the fudge out of the pan and onto a cutting board. Cut into squares and serve cold from the fridge for the best texture. (See notes below on how to make it firmer if desired!)
Notes
- For a Firmer Texture: This recipe produces a soft, creamy fudge with a texture similar to a soft caramel candy. I love this texture, but it’s best served cold from the fridge. It will be very soft at room temperature. To make it a firm fudge that holds up better at room temperature, melt in 1 bag of peanut butter chips (10-12 oz, or 1 2/3 to 2 cups of chips) with the other ingredients during the heating step. White chocolate chips also work well for this!
- Toppings: To add toppings like sprinkles, nuts, or mini chocolate chips, sprinkle them over the fudge while it’s still warm and soft, just after pouring it into the pan and before setting. For sea salt, add it once the fudge is mostly set or firm; otherwise, it may dissolve on top.
- Sweetened Condensed Milk FAQ: In the US, a standard can of sweetened condensed milk is 14 oz by weight. In many other regions, it’s measured by volume, often around 300 mL. These quantities are generally equivalent, so use your local standard 14oz/300mL can.
Nutrition (per piece, approx.)
Calories: 94kcal | Carbohydrates: 4g | Protein: 4g | Fat: 8g | Saturated Fat: 2g | Polyunsaturated Fat: 2g | Monounsaturated Fat: 4g | Cholesterol: 0.01mg | Sodium: 67mg | Potassium: 89mg | Fiber: 1g | Sugar: 2g | Vitamin A: 0.1IU | Vitamin C: 0.001mg | Calcium: 8mg | Iron: 0.3mg
Nutrition information is automatically calculated and should only be used as an approximation.
More Favorite Easy Dessert Recipes You’ll Love
If you enjoyed the simplicity and deliciousness of this 2-Ingredient Peanut Butter Fudge, you’ll surely appreciate these other effortless sweet treats:
- Foolproof 2 Ingredient Fudge
- Irresistible No-Bake Cookie Dough Bites
- Classic Butterscotch Confetti Squares
- The Easiest No-Bake Chocolate Tart
- Decadent 3-Ingredient Chocolate Truffles