
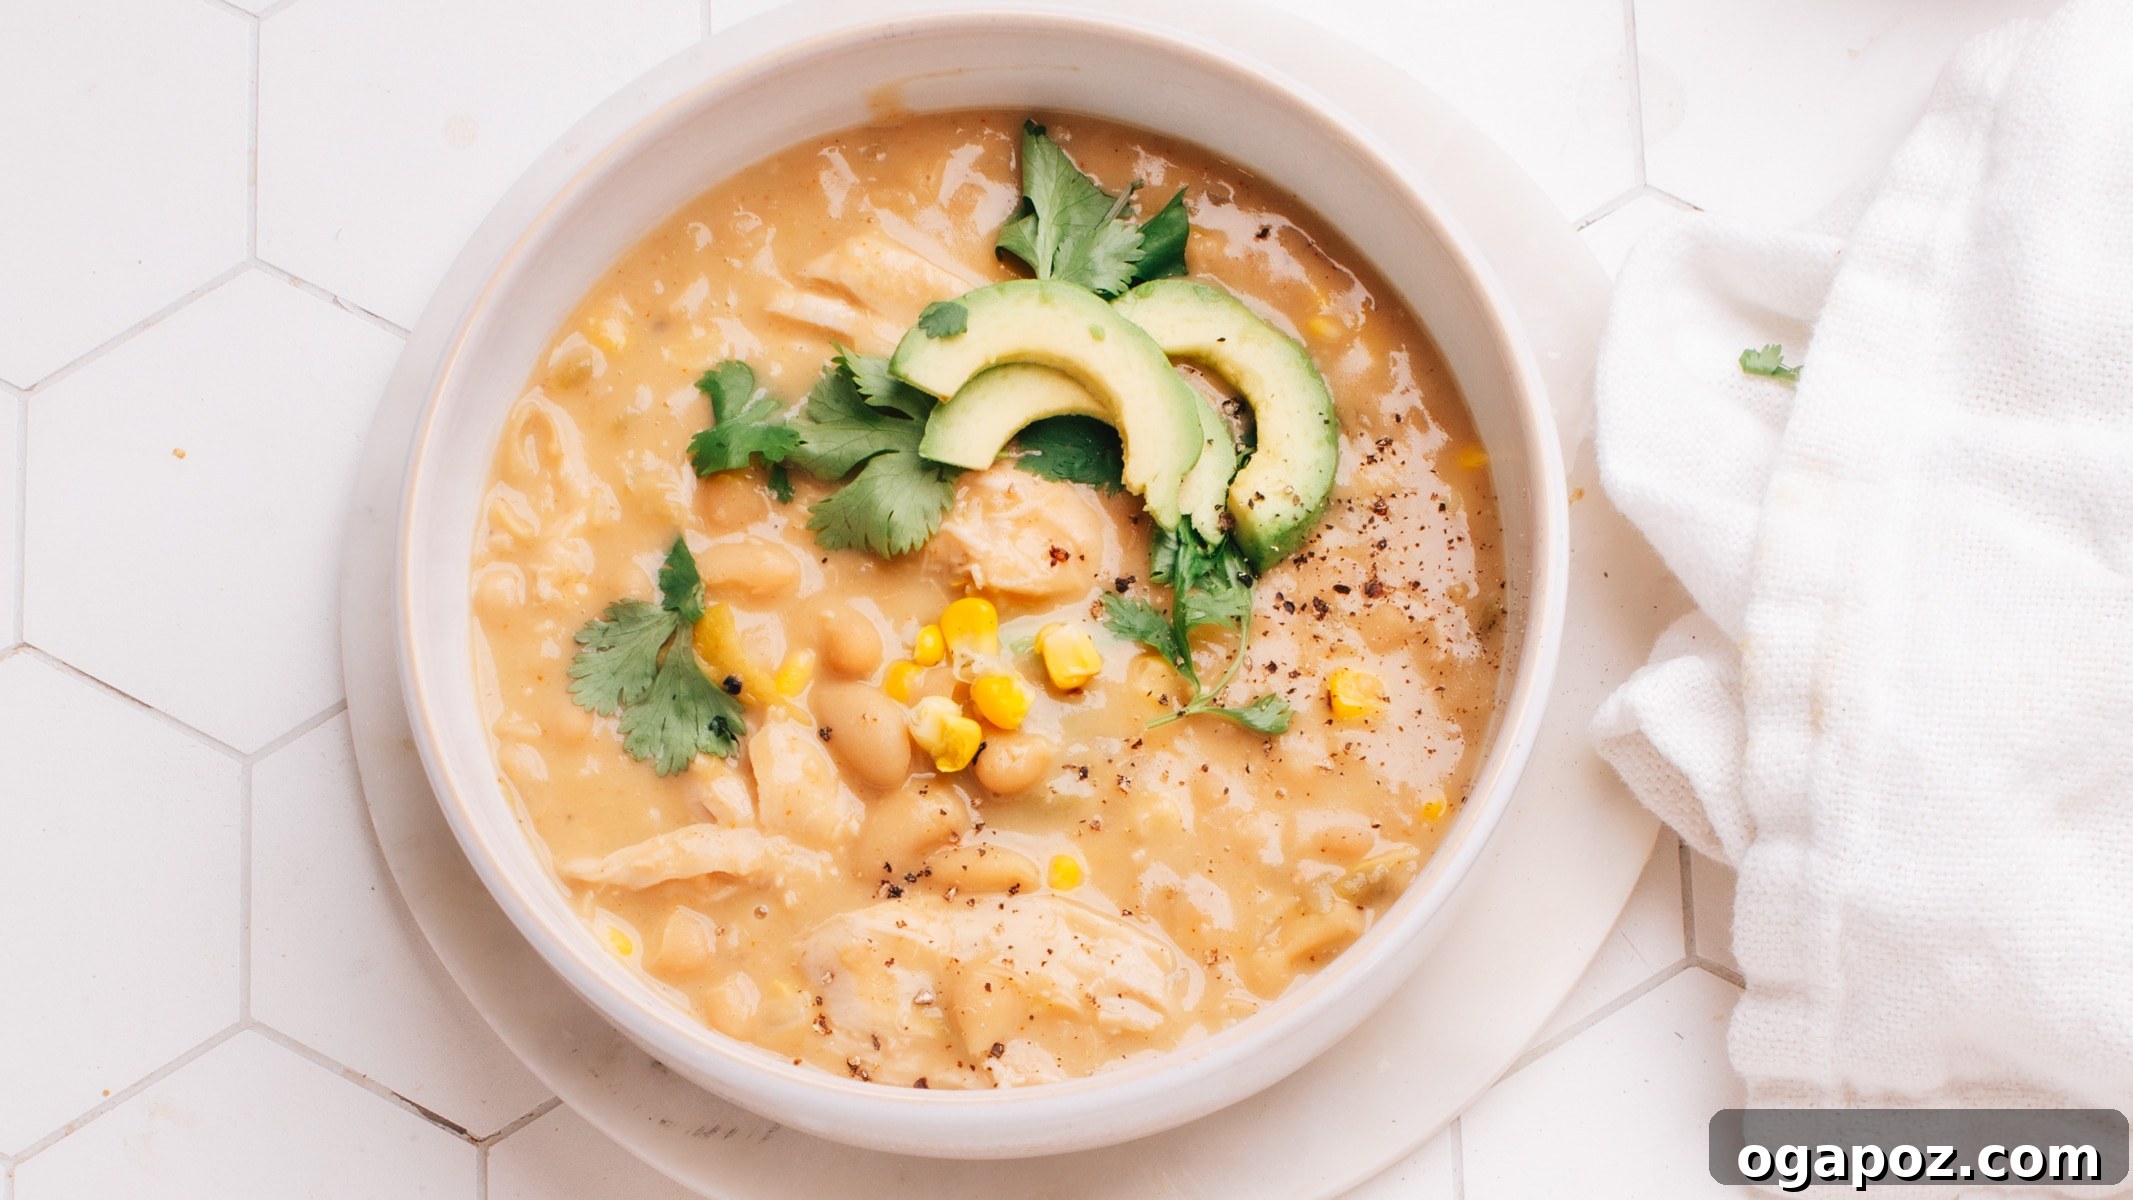
Prepare to savor the ultimate **Healthy White Chicken Chili** that’s incredibly creamy, satisfying, and bursting with flavor. This easy, one-pot recipe is a culinary delight, designed to bring you a deeply rich and comforting meal in less time than you’d expect. Forget bland, watery versions; our secret techniques ensure every spoonful is packed with layered tastes, making it a perfect alternative to traditional beef or pork chili. It’s so good, you won’t believe how light it is!
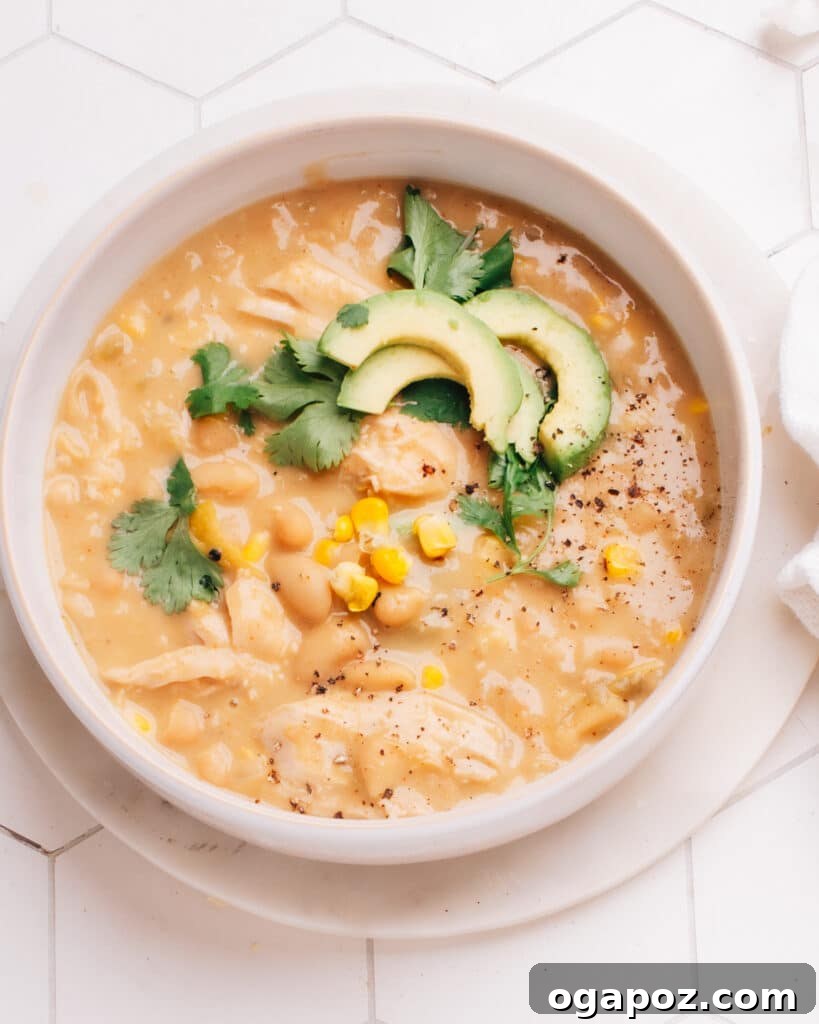
Mastering Flavor: The Science Behind This Healthy White Chicken Chili
Unlock the secrets to crafting a profoundly flavorful and satisfying white chicken chili that tastes incredibly indulgent, yet remains a lighter option. We’re diving into some food science principles to elevate your cooking, ensuring every bite is rich and delicious:
- Thick and Creamy Without Heavy Cream: The magic behind this chili’s luscious texture lies in a simple cornstarch slurry. This clever technique thickens the chili to a luxurious, silky consistency, perfectly mimicking the richness of heavy cream without the added fat or calories. It’s the secret to a comforting, full-bodied mouthfeel that won’t weigh you down.
- Flavor Shortcut with Diced Green Chilies: While many chilies rely on tomatoes and beef broth for their savory depth, our white chicken chili takes an ingenious shortcut. Canned chopped green chilies are a game-changer, infusing the dish with an earthy, slightly tangy, and wonderfully aromatic flavor profile. They deliver a distinct taste, different from classic chili con carne, and provide incredible depth quickly and effortlessly.
- Strategic Salt Layering for Maximum Impact: Achieving truly balanced flavor isn’t just about adding enough salt; it’s about *when* you add it. By employing “salt layering” – seasoning the chicken initially, then the onions as they sauté, and finally adjusting at the end – we enhance and coax out the natural flavors of each ingredient much more effectively. This technique ensures a complex, well-rounded taste throughout the entire dish, rather than a flat, one-dimensional saltiness.
- Ensuring Soft, Tender Chicken: The key to perfectly cooked chicken in chili is to prevent it from drying out, which can often happen with chicken breast. Our method involves cooking boneless, skinless chicken breasts (or thighs) whole within the chili liquid. Once cooked through, they are removed and easily shredded. This allows the chicken to retain its moisture, absorb all the vibrant flavors of the broth and spices, and results in incredibly soft, tender pieces every single time.
For those times you crave an extra rich and decadent experience, you might also enjoy my Cream Cheese Chicken Chili recipe, offering a different take on creamy chili.
Essential Ingredients for Your Healthy White Chicken Chili
Crafting a delicious white chicken chili starts with selecting the right ingredients. Here’s a detailed look at everything you’ll need, along with insights and tips for each component:
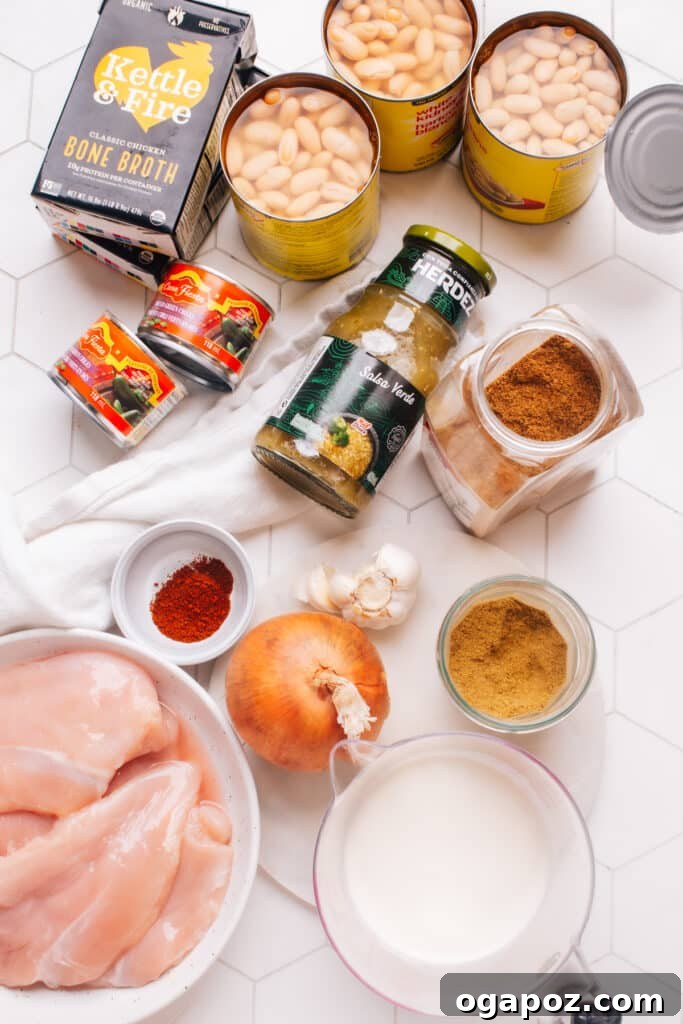
- Boneless, Skinless Chicken Breasts or Thighs: You have a choice here based on preference! Chicken thighs are generally more forgiving, richer in flavor, higher in iron, and tend to stay juicier during cooking. Chicken breasts, however, offer a leaner, lighter protein option. Both will integrate beautifully into this chili, absorbing the savory broth.
Flavorful White Chicken Chili Seasoning & Aromatics
- Yellow Onion: The foundational aromatic, providing a sweet and savory depth. When finely chopped and sautéed, onions create the initial flavor base, becoming translucent and mellow.
- Fresh Garlic Cloves: Minced fresh garlic delivers an indispensable pungent, aromatic kick that elevates almost any savory dish. Always opt for fresh over pre-minced for best flavor.
- Ground Cumin and Coriander: These two spices are cornerstones of many Southwestern and Mexican-inspired cuisines. Cumin provides a warm, earthy, slightly smoky note, while coriander offers a lighter, citrusy, and sweet undertone. Together, they create a wonderfully complex and inviting aroma.
- Chili Powder: This is a versatile spice blend, typically containing ground chili peppers, onion powder, garlic powder, oregano, and other spices. It delivers that signature chili flavor and a gentle, manageable warmth. It’s important not to confuse it with pure cayenne pepper, which is significantly hotter and used differently (for more, see: Cayenne Pepper Vs. Chili Powder).
- Kosher Salt and Black Pepper: Essential for seasoning the chicken and vegetables at various stages. Proper seasoning ensures all the flavors truly pop and harmonize.
The Heart of the Broth: Cooking Liquid and Thickener
- Chicken Broth: This forms the main liquid base for our chili. Using a good quality chicken broth or stock is crucial for building a rich and savory foundation. Opting for low-sodium varieties allows you to control the overall salt content more precisely.
- Diced Green Chiles: Considered a secret weapon for depth, these provide a mild, piquant flavor without overwhelming heat. You’ll typically find them canned near the red salsa in most grocery stores. Be sure to select diced green chilies, not pickled jalapeños, which are much spicier and more acidic. These are also a fantastic addition to my green chicken chili.
- Milk: For the best creamy flavor without excessive richness, whole milk is recommended. If you desire an even more luxurious and decadent chili, evaporated milk is an excellent choice. Of course, you can also swap in half-and-half or heavy cream for a truly indulgent version.
- Cornstarch: This natural thickener is vital for achieving the desirable creamy texture in the chili. When whisked with milk, it forms a smooth, lump-free slurry that transforms the broth into a rich sauce.
Flavorful Add-Ins for Texture and Brightness
- Beans: White beans are traditional for this style of chili and add both substance and creaminess. I particularly enjoy white kidney beans for their robust texture, but cannellini beans, great northern beans, navy beans, or even chickpeas are all fantastic choices. Always remember to drain and rinse canned beans thoroughly to remove excess sodium and improve digestibility.
- Corn Kernels: Whether fresh off the cob or conveniently frozen, corn adds a delightful sweetness and a pleasant textural contrast to the chili, making it even more satisfying and visually appealing.
- Lime: Fresh lime juice is not just a garnish; it’s a critical flavor enhancer. Added at the end or served with wedges for individual squeezing, it brightens the entire dish, cutting through the richness and bringing all the savory and spicy flavors into perfect harmony.
Flexible Variations and Substitutions for Your White Chicken Chili
This healthy white chicken chili recipe is incredibly versatile, allowing you to easily customize it to your taste or dietary needs. Don’t hesitate to make it your own and experiment with these delicious ideas:
- Different Protein Choices: If chicken isn’t your preference, this recipe adapts wonderfully to other proteins. Ground chicken or ground turkey are excellent, lean alternatives that cook quickly. You can draw inspiration from my ground turkey chili or white bean turkey chili recipes. For a completely vegetarian version, simply omit the chicken and use vegetable broth, perhaps adding extra beans or hearty vegetables like mushrooms or bell peppers for more substance.
- Dairy-Free Adaptation: To make this chili dairy-free, simply swap the regular milk for a plant-based alternative. Barista oat milk or almond milk are great choices as they offer a good creamy consistency without dairy. Ensure your broth is also dairy-free.
- No Cornstarch? Alternative Thickeners: If you don’t have cornstarch on hand, all-purpose flour can be used as a substitute. To thicken, mix 2 tablespoons of all-purpose flour with a small amount of cold broth or water until you have a smooth, lump-free paste. Stir this flour mixture into the simmering chili and continue to cook for a few extra minutes (at least 5-7 minutes) to ensure the flour taste is cooked out and the chili reaches your desired thickness. Another natural thickening method is to mash about half a cup of the white beans against the side of the pot; their starch will naturally thicken the chili.
- Boost the Heat: For those who crave a spicier chili, easily dial up the heat. Add a pinch of cayenne pepper with the other spices, finely dice and add a fresh jalapeño (remove seeds for less heat, keep them for more), or stir in a dash of your favorite hot sauce at the end.
- Incorporate More Vegetables: Enhance the nutritional value and texture by adding extra vegetables. Diced bell peppers (especially green or poblano peppers), zucchini, or even a handful of fresh spinach stirred in during the last few minutes of cooking would be delicious and vibrant additions.
Step-by-Step Guide: How To Make Healthy White Chicken Chili
This recipe is designed for simplicity, making it a perfect one-pot, stove-top meal for any night of the week. Follow these straightforward steps to create a truly delicious, healthy white chicken chili that’s bursting with flavor:
Step 1: Prepare and Season the Chicken
- Begin by patting your boneless, skinless chicken breasts or thighs thoroughly dry with paper towels. This helps with even seasoning. Season them generously with 1 teaspoon of the kosher salt and the black pepper. This initial seasoning is crucial as it sets the foundation for flavor absorption as the chicken cooks in the chili broth.
Step 2: Sauté the Aromatics
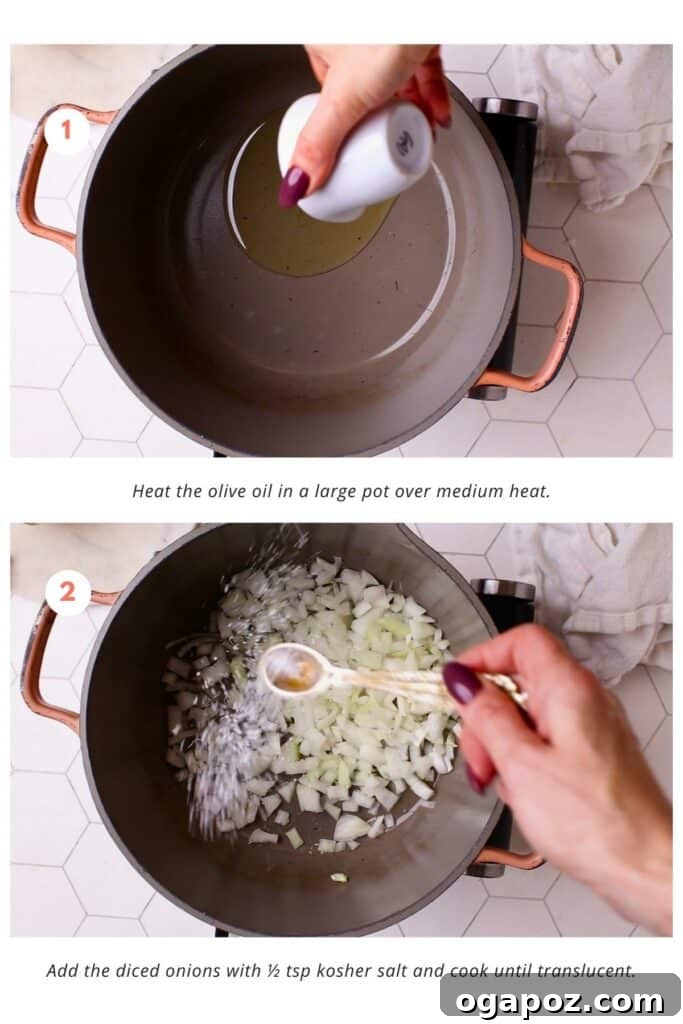
- Heat the olive oil in a large, heavy-bottomed pot or Dutch oven over medium heat. Once the oil is shimmering, add the finely chopped yellow onions along with ½ teaspoon of kosher salt. Cook, stirring occasionally, until the onions become soft, translucent, and wonderfully fragrant, which typically takes about 5-7 minutes. This step creates a crucial aromatic and sweet base for your chili.
Step 3: Bloom the Spices and Add Garlic & Chiles
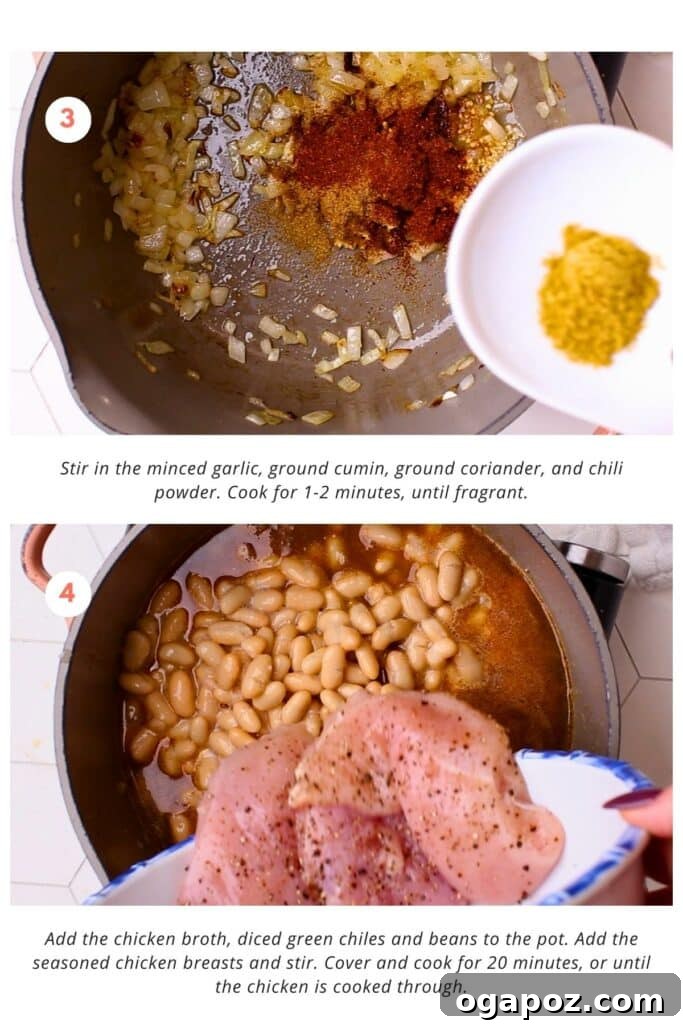
- Stir in the minced garlic, ground cumin, ground coriander, and chili powder into the pot with the softened onions. Cook for just 1-2 minutes, stirring constantly. This brief cooking period, often referred to as “blooming” the spices, gently toasts them in the hot oil, intensifying their flavors and aromas and making them more potent and delicious in the final dish.
Step 4: Cook the Chicken and Build the Broth
- Pour in the chicken broth, then add the diced green chiles and the drained and rinsed white beans to the pot. Gently place your seasoned chicken pieces into the liquid, ensuring they are mostly submerged. Give everything a gentle stir to combine. Cover the pot with a lid and let it simmer for approximately 20 minutes, or until the chicken is cooked through and reaches an internal temperature of 165°F (74°C). This simmering process allows the chicken to cook gently and absorb all the wonderful flavors of the broth and spices.
Step 5: Shred the Chicken
- Carefully remove the cooked chicken from the pot and transfer it to a cutting board or a shallow dish. Using two forks, shred the chicken into bite-sized pieces. Shredding ensures the chicken is tender, easy to eat, and integrates seamlessly into the creamy chili base, allowing it to coat and hold the rich sauce.

Step 6: Finish and Thicken the Chili
- Return the shredded chicken to the pot. Stir in the corn kernels, which will add a delightful touch of sweetness and a pleasant textural contrast to the creamy chili.
- In a separate measuring cup or small bowl, whisk together the cornstarch and milk until you have a smooth, lump-free mixture – this is your cornstarch slurry. Pour this slurry into the simmering chili, stirring continuously to prevent lumps and ensure even thickening.
- Allow the chili to simmer, uncovered, for an additional 5 minutes. During this time, the chili will thicken to a rich, creamy consistency, and all the flavors will meld beautifully together.
- Taste the chili and adjust the seasoning as needed, adding the remaining kosher salt (or more, if desired) and any extra black pepper until it’s perfectly balanced to your palate.
- Serve hot with fresh lime wedges on the side, allowing everyone to squeeze on their own for an optional burst of brightness.
Important Notes for Best Results
- Salt Adjustment for Broth: This recipe was developed and tested using regular chicken broth. If you opt for low-sodium or unsalted chicken broth, you will likely need to increase the amount of kosher salt added, especially during the final taste test, to ensure the chili is adequately seasoned and achieves optimal flavor balance.
- Preventing Dry Chicken: When utilizing leaner chicken breasts, it is crucial to avoid overcooking, which can lead to dry, rubbery chicken. Stop simmering once the chicken reaches an internal temperature of 165°F (74°C). If you are concerned about dryness or prefer a more robust texture, chicken thighs are inherently more forgiving and remain juicy even with slightly longer cooking times.
- The Essential Role of Lime: Do not underestimate the impact of fresh lime wedges! A generous squeeze of fresh lime juice over your individual bowl of chili adds a vibrant, tangy, and citrusy burst. This freshness cuts through the richness of the chili, elevating all the flavors and providing a wonderful refreshing counterpoint.
- Proper Slurry Integration: When adding the cornstarch slurry, ensure the chili is simmering gently. Pour the slurry in slowly while stirring constantly to ensure it disperses evenly throughout the pot. This technique is key to achieving a smooth, creamy texture without any unwanted lumps.

Meal Prep & Storage: Make Ahead White Chicken Chili
This healthy white chicken chili is an excellent candidate for meal prepping, allowing you to enjoy a delicious homemade meal even on your busiest days. Its flavors tend to meld and deepen over time, often tasting even better the next day! Here’s how to manage it:
- Making Ahead for Convenience: You can easily prepare this chili up to 4 days in advance. Once the chili has cooled completely to room temperature, transfer it to an airtight container and store it in the refrigerator. When you’re ready to serve, reheat it gently on the stovetop over low heat, stirring occasionally to prevent sticking, or warm individual portions efficiently in the microwave until heated through.
- Freezing for Long-Term Storage: For longer storage, this white chicken chili freezes beautifully for up to 3 months. Portion the cooled chili into freezer-safe containers or heavy-duty freezer bags, ensuring you leave a little headspace at the top for expansion during freezing. To thaw, simply transfer it to the refrigerator overnight. Reheat thoroughly as described above. The texture should remain largely consistent, though a quick whisk during reheating can help restore its full creaminess.
- Reheating Instructions: When you’re ready to serve your stored chili, reheat it on the stovetop over low to medium heat, stirring frequently to ensure even heating and prevent scorching. Continue heating until it’s bubbling gently and thoroughly warmed through. If the chili appears a bit too thick after refrigeration or freezing, you can easily add a splash of extra chicken broth or milk while reheating to achieve your desired consistency. Individual servings also reheat efficiently in the microwave.
Serving Suggestions: How to Enjoy Your Healthy White Chicken Chili
While this healthy white chicken chili is wonderfully satisfying on its own, the real fun begins with the toppings and sides! These additions allow you to customize each bowl to perfection, adding freshness, texture, and extra layers of flavor. For an immediate boost, I always recommend a generous squeeze of fresh lime juice and a sprinkle of fresh cilantro for unparalleled brightness.
Delicious White Chicken Chili Toppings
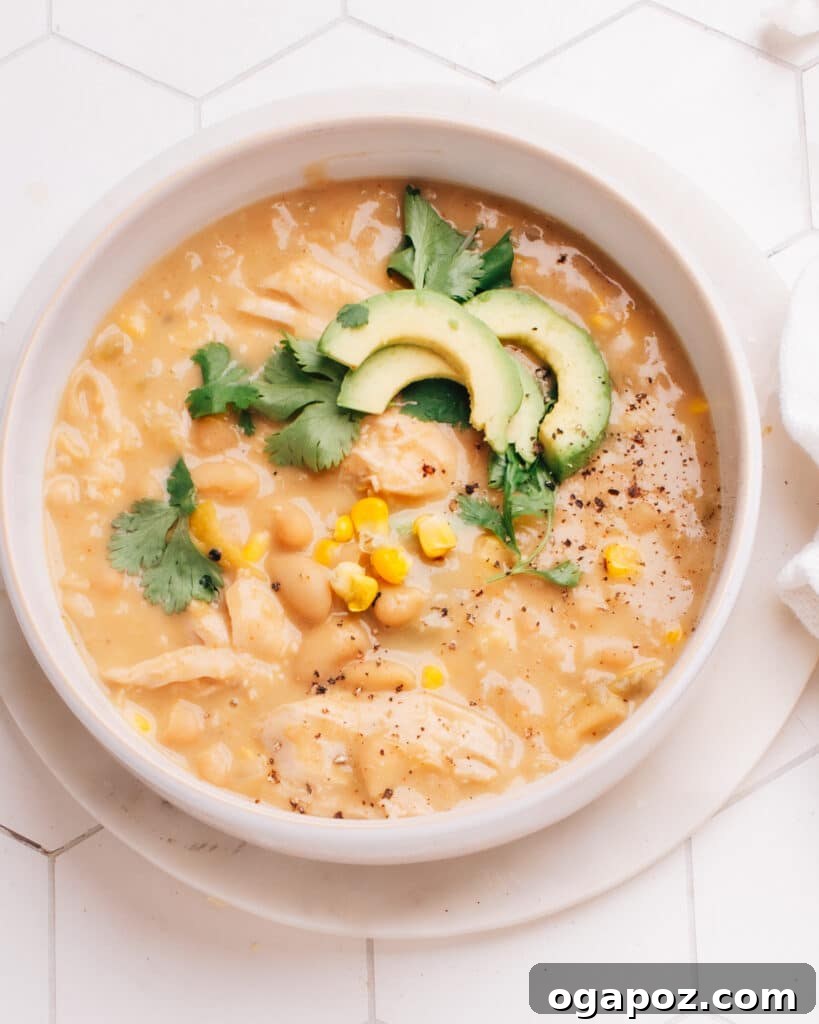
- Creamy Avocado or Guacamole: A few slices of fresh, ripe avocado or a spoonful of homemade guacamole add a rich, buttery texture and healthy fats, beautifully balancing the chili’s spice and warmth.
- Sour Cream or Greek Yogurt: For that ultimate comfort food sensation, a dollop of cool, tangy sour cream or plain Greek yogurt adds a creamy contrast that is simply irresistible. Greek yogurt also offers an added protein boost!
- Shredded Cheese: A classic chili topping! Shredded cheddar, Monterey Jack, or a flavorful Mexican blend are always excellent choices that melt into gooey perfection, adding a savory, salty note.
- Onion Accents: Add a zesty crunch and sharp flavor with pickled red onion or finely diced fresh red onion. The tanginess of pickled onions or the pungent bite of raw red onion provides a fantastic counterpoint.
- Heat Boosters: For those who, like me, enjoy an extra kick, sliced fresh jalapeños (seeded for less heat, or with seeds for more intensity) or a few pickled jalapeño slices will definitely turn up the heat! A dash of your favorite hot sauce also works wonders.
- Fresh Herbs: Don’t forget the power of fresh herbs! A generous sprinkle of chopped fresh cilantro or parsley adds a burst of vibrant flavor and appealing color to each bowl.
- Crispy Tortilla Strips: For a delightful textural contrast, add a sprinkle of crunchy tortilla strips or crushed tortilla chips just before serving.
Perfect Sides to Pair with White Chicken Chili
- Tortilla Chips or Fresh Tortillas: Serve your chili with a side of crispy tortilla chips for dipping, or warm, soft, fresh tortillas (just like you’d enjoy with my Chicken Street Tacos) to scoop up every last drop of that creamy goodness.
- Mexican Rice & Street Corn Salad: Create a complete Tex-Mex inspired meal by complementing your chili with a side of fluffy Mexican Rice and/or a refreshing Mexican Street Corn Salad. These sides perfectly balance the chili’s flavors.
- Cornbread Casserole: A slice of tender, moist Cornbread Casserole is the ideal companion to any chili. This version is truly the best cornbread – soft, tender, and far from dry or crumbly.
- Other Creative Sides: For even more inspiration, explore an array of accompanying dishes by checking out my ultimate guide on What to Eat With Chili.
Frequently Asked Questions About Healthy White Chicken Chili
Just skimming through? Here are quick answers to some of the most commonly asked questions about making and enjoying this delicious healthy white chicken chili.
Can I use chicken breasts instead of chicken thighs?
Absolutely! You can use either boneless, skinless chicken breasts or thighs for this recipe, depending on your preference. Chicken thighs tend to be more forgiving and stay juicier, while chicken breasts offer a leaner protein option. Both types of chicken will yield delicious results when cooked properly.
Can I make this chili vegetarian?
Yes, it’s quite easy to adapt this recipe for a vegetarian diet. Simply omit the chicken entirely and substitute vegetable broth in place of chicken broth. You can also boost the protein and fiber content by adding extra white beans or incorporating other hearty vegetables like diced bell peppers, zucchini, or even sliced mushrooms.
How do I store leftover white chicken chili?
To store leftover white chicken chili, allow it to cool completely to room temperature. Then, transfer it to an airtight container and place it in the refrigerator. It will stay fresh and delicious for up to 4 days, making it an excellent option for meal prepping throughout the week.
Can I freeze white chicken chili?
Yes, white chicken chili freezes very well! Once cooled, portion it into freezer-safe containers or heavy-duty freezer bags, leaving a little space for expansion. It can be stored in the freezer for up to 3 months. When you’re ready to enjoy, thaw it overnight in the refrigerator before reheating gently on the stovetop or in the microwave.
Is this white chicken chili spicy?
The base recipe, as written, is designed to be mild to moderately spicy, offering a pleasant warmth from the chili powder and diced green chiles. It is not overly fiery. The level of spice is easily adjustable to your preference. If you enjoy more heat, consider adding fresh or pickled jalapeños, a pinch of cayenne pepper, or a dash of your favorite hot sauce to your individual serving.
What if my white chicken chili is too runny?
The consistency of white chicken chili can vary. If you find your chili is too runny after following the recipe, you have a few easy options to thicken it. You can simmer it uncovered for a bit longer to allow some of the liquid to evaporate, thereby concentrating the broth. Alternatively, you can create another small cornstarch slurry (mix 1-2 teaspoons of cornstarch with a tablespoon or two of cold milk or water until smooth) and slowly stir it into the simmering chili until it reaches your desired thickness. Another natural method is to mash a portion of the white beans (about ½ cup) against the side of the pot with a fork or potato masher; their starch will naturally thicken the broth.
What can I use to thicken white chicken chili besides cornstarch?
Besides cornstarch, all-purpose flour is an effective alternative thickening agent. To use flour, create a slurry by mixing 1-2 tablespoons of flour with an equal amount of cold liquid (broth or milk) until you have a completely smooth paste. Stir this mixture into the simmering chili and cook for several minutes, stirring frequently, to ensure the raw flour taste is cooked out and the chili thickens to your preference. Additionally, pureeing a portion of the beans (about ½ cup) and stirring them back into the chili is an excellent way to add natural thickness and creaminess without any added flour or cornstarch.

View Full Recipe on Foodess.com
Pin This Recipe
Print Recipe (PDF)
Healthy White Chicken Chili (Quick + Easy)
Jennifer Pallian BSc, RD
10 minutes
50 minutes
6
Ingredients
- 1.5 lbs boneless skinless chicken thighs or breasts
- 2 ½ tsp kosher salt (divided use, or to taste)
- ½ tsp black pepper
- 2 tbsp olive oil
- 2 ½ cups finely chopped yellow onion
- 2 tbsp minced garlic
- 2 tsp ground cumin
- 1 tsp ground coriander
- 1 tsp chili powder
- 2 cups chicken broth
- 2 (4-oz) cans diced green chiles
- 3 (15-oz) cans white beans (like Great Northern, White Kidney or Cannellini), drained and rinsed
- 1 cup milk (whole milk is best for flavor)
- ¼ cup cornstarch
- 1 cup whole corn kernels (fresh or frozen)
- 1 lime, cut in wedges, optional for serving
Instructions
Prepare the Chicken
- Season the chicken with 1 tsp of the kosher salt and the black pepper.
Sauté the Vegetables
- Heat the olive oil in a large pot over medium heat.
- Add the diced onions with ½ tsp kosher salt and cook until translucent and soft.
Add Garlic, Spices, and Chiles
- Stir in the minced garlic, ground cumin, ground coriander, and chili powder. Cook for 1-2 minutes, stirring until fragrant.
Cook the Chicken
- Add the chicken broth, diced green chiles, and drained/rinsed white beans to the pot.
- Add the seasoned chicken pieces and stir to combine. Cover and cook for 20 minutes, or until the chicken is cooked through.
Shred the Chicken
- Remove the cooked chicken from the pot and shred it using two forks.
Final Cooking Steps
- Return the shredded chicken to the pot along with the corn kernels.
Make a Cornstarch Slurry
- Place the cornstarch into a measuring cup and slowly pour in the milk, whisking constantly, to create a smooth, lump-free mixture (this is known as a slurry). Stir this prepared slurry into the chili in the pot.
- Stir well and let the chili simmer, uncovered, for an additional 5 minutes (it will continue to thicken as it simmers). Taste and add the remaining kosher salt, or more if needed, to achieve your desired seasoning.
- Serve your delicious white chicken chili hot with fresh lime wedges on the side for squeezing.
Notes
Nutrition Information (Approximate)
Carbohydrates: 21g |
Protein: 28g |
Fat: 10g |
Saturated Fat: 2g |
Polyunsaturated Fat: 1g |
Monounsaturated Fat: 5g |
Trans Fat: 0.01g |
Cholesterol: 79mg |
Sodium: 1427mg |
Potassium: 714mg |
Fiber: 3g |
Sugar: 7g |
Vitamin A: 267IU |
Vitamin C: 12mg |
Calcium: 96mg |
Iron: 2mg
Nutrition information is automatically calculated, so should only be used as an approximation. Values may vary based on specific ingredients and preparation methods.
Tried this delicious recipe?
We’d love to hear from you! Leave a comment below and let us know how your Healthy White Chicken Chili turned out.